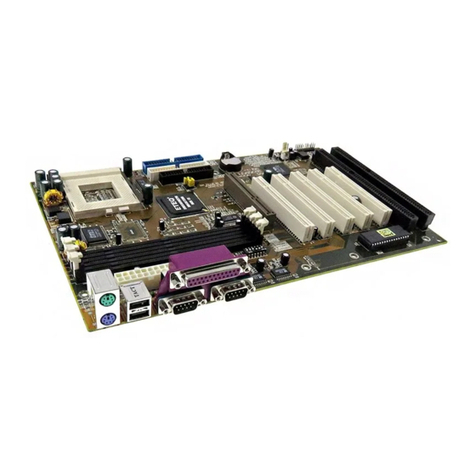
SOYO SY-5SSM User manual

SY-5SSM
Motherboard
Quick Start Guide
FC
CTested To Comply
With FCC Standards
FOR HOME OR OFFICE USE
POST CONSUMER
RECYCLED PAPER
100%
Hardware
Installation
Quick BIOS
Setup
Introduction
SiS VGA Driver
Installation
ESS
™
Audio
Driver
Installation
The SOYO CD

SOYO™
2
SY-5SSM Motherboard
Pentium
®
Class CPU (66&100MHz Host Bus) supported
SiS530 AGP/PCI Motherboard
Micro-ATX Form Factor
Copyright © 1998 by Soyo Computer Inc.
Trademarks:
Soyo is a registered trademark of Soyo Computer Inc. All trademarks are the property of their
owners.
Product Rights:
Product and corporate names mentioned in this publication are used for identification purposes
only and may be registered trademarks or copyrights of their respective companies.
Copyright Notice:
All rights reserved. This manual is copyrighted by Soyo Computer Inc. You may not reproduce,
transmit, transcribe, store in a retrieval system, or translate into any language, in any form or by
any means, electronic, mechanical, magnetic, optical, chemical, manual or otherwise, any part of
this publication without express written permission of Soyo Computer Inc.
Disclaimer:
Soyo Computer Inc. makes no representations or warranties regarding the contents of this
manual. We reserve the right to revise the manual or make changes in the specifications of the
product described within it at any time without notice and without obligation to notify any
person of such revision or change. The information contained in this manual is provided for
general use by our customers. Our customers should be aware that the personal computer field is
the subject of many patents. Our customers should ensure that their use of our products does not
infringe upon any patents. It is the policy of Soyo Computer Inc. to respect the valid patent rights
of third parties and not to infringe upon or assist others to infringe upon such rights.
Restricted Rights Legend:
Use, duplication, or disclosure by the Government is subject to restrictions set forth in
subparagraph (c)(1)(ii) of the Rights in Technical Data and Computer Software clause at
252.277-7013.
About This Guide:
This Quick Start Guide is for assisting system manufacturers and end users in setting up and
installing the Motherboard. Information in this guide has been carefully checked for reliability;
however, no guarantee is given as to the correctness of the contents. The information in this
document is subject to change without notice.
If you need any further information, please visit our Web Site on the Internet. The address is
"http://www.soyo.com.tw".
5SSM Serial - Version 1.0 - Edition: December 1998
*Thesespecificationsaresubjecttochangewithoutnotice

SY-5SSM
Quick Start Guide
3
Introduction
1
1
Introduction
Congratulationsonyourpurchaseofthe
SY-5SSM
Motherboard.ThisQuickStartGuide
describesthestepsforinstallingandsettingupyournewMotherboard.
ThisguideisdesignedforalluserstoprovidethebasicstepsofMotherboardsettingand
operation.Forfurtherinformation, pleasereferto SY-5SSMMotherboardUser'sGuide
andTechnicalReferenceonlinemanualincludedontheCD-ROMpackedwithyour
Motherboard.
Unpacking
*Ifyourboardcomeswithadriverdiscandapapermanual,theQuickStartGuideandtheCD-ROMarenotincludedinthe
package.
WhenunpackingtheMotherboard,checkforthefollowing
items:
u
TheSY-5SSMMotherboard
u
ThisQuickStartGuide
u
TheInstallation CD-ROM
u
OneIDEDeviceFlat Cable
u
OneFloppyDiskDriveFlatCable
u
Oneserialportflatcablewitha9-pinconnector

SY-5SSM Quick Start Guide
4
Introduction
SY-5SSM Motherboard Layout
Key Features
Ø
Integrated3DAGPacceleratorsupports
UMAornon-UMA(option)
Ø
3DPnPPCIAudioonboard
Ø
1MBL2cacheonboard
Ø
SupportsCPUvoltagefrom2.0Vto3.5V
in0.1Vincrement
Ø
PC98,ACPI,UltraDMA33/66
Ø
Power-onbymodemoralarm
Ø
SupportsWake-On-LAN(WOL)
Ø
Supportspower-offbyhot-key
Ø
3x32-bitbusmasteringPCIslots&1x
32-bitbusslavingPCIslot
Ø
2xUSBports
Ø
1xIrDAport
Ø
Supportsmultiple-bootfunction
Ø
SupportsPentium®classCPUwithhost
busclockof66/100MHz
Ø
Supportssystemmemoryupto
768MBytes
COM 1
PRT
USB 1USB 2
PS/2KB
Connector
PS/2 Mouse
Connector
VGA
LINE-IN
LINE-OUT
MIC JACK
JOYSTICK
JP5
13
1
1CPUFAN
CHAFAN
IDE 1
IDE 2
11
FDD
ISA Slot #1
Flash BIOS
PCI Slot #1
PCI Slot #4
PCI Slot #3
PCI Slot #2
3V
Lithium
Battery
SiS 530
Chipset
I/O Chip
®
ITE 8661
ES1938
JP30
JP32
J1
3 5 7 91
2 68104
ATX
Power
COM 2
JP44
31
WOL
Header
1
IR1
LED
Speaker
KEY
LOCK
Power
Reset PWRBT ACPILED HDDLED
_
+
_
+
_ + _
+
SW1
5
6
1
2
3
4
P.B. SRAM
64Kx64
P.B. SRAM
64Kx64
JP9
DIMM 1
DIMM 2
DIMM 3
CD IN1
CD IN2
1
4
1
4
5595
SiS
6
8
4
21
7
5
3

SY-5SSM
Quick Start Guide
5
Hardware
Installation
2
2
Installation
ToavoiddamagetoyourMotherboard,followthesesimpleruleswhilehandling
thisequipment:
l
BeforehandlingtheMotherboard,groundyourselfbygraspinganunpainted
portionofthesystem'smetalchassis.
l
RemovetheMotherboardfromitsanti-staticpackaging.Holditbytheedgesand
avoidtouchingitscomponents.
l
ChecktheMotherboardfordamage.Ifanychipappearsloose,presscarefullyto
seatitfirmlyinitssocket.
Followthedirectionsinthissectiondesignedtoguideyouthroughaquickandcorrect
installationofyournew
SY-5SSM
Motherboard.Fordetailedinformation,pleasereferto
SY-5SSMMotherboardUser'sguideandTechnical Reference onlinemanualincludedon
theCD-ROMpackedwithyourMotherboard.
PREPARATIONS
Gatherandprepareallthenecessaryhardwareequipmenttocompletetheinstallation
successfully:
u
Pentium
®
processorwithcoolingfan
u
DIMMmemory module
u
Computercaseandchassiswithadequatepowersupplyunit
u
Monitor
u
Keyboard
u
PointingDevice(PS/2mouse)
u
Speaker(s)(optional)
u
DiskDrives:HDD,CD-ROM, Floppydrive…
u
ExternalPeripherals:Printer,Plotter,andModem-(optional)
u
InternalPeripherals:ModemandLANcards(optional)
Notice1:
ThisMotherboardfeaturesonebuilt-inVGAportandthreebuilt-inaudio-stereo
ports.ThereforeyoudonotneedtoinstallneitheraVGAcardnorasoundcard.
Notice2:
WhenusingtheonboardVGA,pleaseinstallDRAMmodulesinbank"DIMM1"
inpriority.
Notice3:
Ifyouwanttouseanexternalspeakerconnectedto"Line-out"port,makesure
tousean"amplifiedspeaker"thatcangenerateproperoutputsoundvolume.

SY-5SSM Quick Start Guide
6
Hardware
Installation
Install the Motherboard
Followthestepsbelowinordertoperformtheinstallationofyournew
SY-5SSM
Motherboard.
Step 1. Install the CPU
TomountthePentium
®
classprocessorthatyouhavepurchasedseparately,followthese
instructions.
CPU Mount Procedure
1.
Liftthesockethandleuptoaverticalposition.
2.
AlignthebluntedgeoftheCPUwiththematchingpinholedistinctiveedgeonthe
socket.
3.
Seattheprocessorinthesocketcompletelyandwithoutforcing.
4.
ThenclosethesockethandletosecuretheCPUinplace.
RemembertoconnecttheCPUCoolingFantotheappropriatepower
connector(CPUFAN)ontheMotherboard. Thefanisakeycomponentthat
willensuresystemstability.Thefanpreventsoverheating,therefore
prolongingthelifeofyourCPU.
12
3 4

SY-5SSM
Quick Start Guide
7
Hardware
Installation
Step 2. Set the CPU Voltage ( JP30)
ForCPUsthatcomewithdifferentvoltages,pleaseverifythecorrectvoltagesettingswith
yourdealerbeforeinstallation.UsethefollowingtabletosetJP30totheproper"voltage
value",accordingtothespecificationsmarkedonyourCPU:
Voltage Setting:
JP30
Processor Voltage
1-2 3-4 5-6 7-8 9-10
3.52 V
open
short short short short
AMD K5 PR100
AMD K5 PR133
AMD K5 PR166
The AMD K5 and K6 come in several versions with different voltages.
Please verify the correct voltage settings with your dealer before
installation. The most common K5 runs on 3.52V.
AMD K6 166
AMD K6 200 2.9 V
open
short short
open
short
AMD K6 233 3.2 V
open
short short
open open
AMD K6 266
AMD K6 300
AMD K6-2 266
AMD K6-2 300
AMD K6-2 333
AMD K6-2 350
AMD K6-2 366
AMD K6-2 380
AMD K6-2 400
2.2 V
open open open
short
open
AMD K6-2 450 2.3 V
open open open
short short
Cyrix 6x86(L) PR166+
Cyrix 6x86(L) PR200+
The Cyrix 6X86(L) and M
¢º
come in several versions with different
voltages. Please ask your dealer for the correct voltage.
Cyrix 6x86MX PR166
Cyrix 6x86MX PR200
Cyrix 6x86MX PR233
Cyrix 6x86MX PR266
Cyrix M
¢º
300
Cyrix M
¢º
333
Cyrix M
¢º
350
2.9 V
open
short
open open
short
3.3 V
open
short short
open
short
Intel P54C P100
Intel P54C P133
Intel P54C P166
Intel P54C P200
The P54C (standard Pentium®) comes in several versions with different
voltages. Please ask your dealer for the correct voltage. The most
common P54C runs on 3.3V.
2.8 V
open
short
open open open
Intel P55C P166
Intel P55C P200
Intel P55C P233
The P55C (MMX) processors have the same voltage setting.
IDT WinChip C6/W2-200
IDT WinChip C6/W2-225 3.52 V
open
short short short short

SY-5SSM Quick Start Guide
8
Hardware
Installation
Step 3. Set JP32, SW1 for CPU Frequency
TheDIPswitchSW1enableyoutoassigntheMultiplierandBusClock,asshowninthe
followingtable:
CPU Host Bus Setting: JP32 Frequency
Multiplier: SW1
Processor Bus Clock Multi-
plier 1-2 3-4 5-6 7-8 1-2 3-4 5-6
AMD K5 PR100 66 MHz 1.5 x open
short short short
open open open
AMD K5 PR133 66 MHz 2.0 x open
short short short short
open open
AMD K5 PR166 66 MHz 2.5 x open
short short short short short
open
AMD K6 166 66 MHz 2.5 x open
short short short short short
open
AMD K6 200 66 MHz 3.0 x open
short short short
open
short
open
AMD K6 233 66 MHz 3.5 x open
short short short
open open open
AMD K6 266 66 MHz 4.0 x open
short short short short
open
short
AMD K6 300 66 MHz 4.5 x open
short short short short short short
AMD K6-2 266 66 MHz 4.0 x open
short short short short
open
short
AMD K6-2 300 66 MHz 4.5 x open
short short short short short short
AMD K6-2 300 100 MHz 3.0 x open open
short short
open
short
open
AMD K6-2 333 66MHz 5.0 x open
short short short
open
short short
AMD K6-2 333 95MHz 3.5 x open
short
open open open open open
AMD K6-2 350 100MHz 3.5 x open open
short short
open open open
AMD K6-2 366 66MHz 5.5 x open
short short short
open open
short
AMD K6-2 380 95MHz 4.0 x open
short
open open
short
open
short
AMD K6-2 400 100MHz 4.0 x open open
short short short
open
short
AMD K6-2 450 100MHz 4.5 x open open
short short short short short
Cyrix 6x86 PR166+ 66 MHz 2.0 x open
short short short short
open open
Cyrix 6x86 PR200+ 75 MHz 2.0 x open
short short
open
short
open open
Cyrix 6x86MX PR166 66 MHz 2.0 x open
short short short short
open open
Cyrix 6x86MX PR200 66 MHz 2.5 x open
short short short short short
open
Cyrix 6x86MX PR200 75 MHz 2.0 x open
short short
open
short
open open
Cyrix 6x86MX PR233 75 MHz 2.5 x open
short short
open
short short
open
Cyrix 6x86MX PR266 83 MHz 2.5 x open
short
open
short short short
open
66 MHz 3.5 x open
short short short
open open open
Cyrix M II-300 75 MHz 3.0 x open
short short
open open
short
open
66 MHz 4.0 x open
short short short short
open
short
75 MHz 3.5 x open
short short
open open open open
83MHz 3.0 x open
short
open
short
open
short
open
Cyrix M II-333
100MHz 2.5 x open open
short short short short
open
Intel P54C P100 66 MHz 1.5 x open
short short short
open open open
Intel P54C P133 66 MHz 2.0 x open
short short short short
open open
Intel P54C P166 66 MHz 2.5 x open
short short short short short
open
Intel P54C P200 66 MHz 3.0 x open
short short short
open
short
open
Intel P55C P200 66 MHz 3.0 x open
short short short
open
short
open
Intel P55C P233 66 MHz 3.5 x open
short short short
open open open
IDT WinChip C6/W2-200 66 MHz 3.0 x open
short short short
open
short
open
IDT WinChip C6/W2-225 75 MHz 3.0 x open
short short
open open
short
open
This main board supports various CPU multiplier and host bus frequency settings.
Please select the proper frequency setting based on specifications of the CPU you have purchased. System
stability or components damage, in case of over-specification setting, is not guaranteed.

SY-5SSM
Quick Start Guide
9
Hardware
Installation
Step 4. Make Connections to the Motherboard
ThissectiontellshowtoconnectinternalperipheralsandpowersupplytotheMotherboard.
InternalperipheralsincludeIDEdevices(HDD,CD-ROM),FloppyDiskDrive,FrontPanel
Devices(ACPILED,InternalSpeaker,ResetButton,IDELED,and KeyLockSwitch.),
Wake-On-LANcard,andotherdevices.
FormoredetailsonhowtoconnectinternalandexternalperipheralstoyournewSY-5SSM
Motherboard,pleaserefertoSY-5SSMMotherboardUser'sGuideandTechnicalReference
onlinemanualonCD-ROM.
Note:AnATA/66cable (40-pin,80-conductorcable) mustbeusedtoensureproper
operationoftheUltraATA/66harddrive.
Connectors and Plug-ins
IrDA(Infrared Device Header):IR1 Wake-On-LAN Header: JP44
Pin1 Pin2 Pin3 Pin4 Pin5 Pin1 Pin2 Pin3
VCC None IRRX GND IRTX 5VSB GND MP-Wakeup
CPU Cooling Fan: CPUFAN ChassisFan:CHAFAN
Pin1 Pin2 Pin3 Pin1 Pin2 Pin3
GND 12V SENSOR GND 12V SENSOR
CDLine-in:CDIN1,CDIN2 Pin1 Pin2 Pin3 Pin4
CDIN1 LGGRConnecttheCDLine-incordfromtheCR-ROM
devicetothematchingconnectorCDIN1orCDIN2. CDIN2 GLGR
PowerLED Keylock
Pin1 Pin2 Pin3
Pin1 Pin2
5V NC GND
ControlPin GND
Speaker
Pin1 Pin2 Pin3 Pin4
5V NC NC Speakerout
HDDLED ACPILED PWRBT RESET
Pin1 Pin2 Pin1 Pin2 Pin1 Pin2 Pin1 Pin2
LEDAnode LED
Cathode LEDAnode LED
Cathode Power
On/Off GND Power
Good GND
ATXPowerOn/Off:PWRBT
Connectyourpowerswitchtothisheader(momentaryswitchtype).
Toturn off the system, pleasepress thisswitch and holddown forlonger than4 seconds.
ATXPower Supply: ATXPW
AttachtheATXPowercabletothisconnector.IfyouuseATXpowersupply.
Whenusing thePower-On by PS/2Keyboard function,please makesure theATX power supplycan
takeat least 720mAload on the5V Standby lead(5VSB) tomeetthe standardATXspecifications.
1
1
1
11
11
Power LED
Key Lock
Speaker
Reset
PWRBT
ACPI LED
HDD LED

SY-5SSM Quick Start Guide
10
Hardware
Installation
Step 5. Configure Memory
YourboardcomeswiththreeDIMMsockets,providingsupportforupto768MBofmain
memoryusingDIMMmodulesfrom8MBto256MB.For66/75MHzhostbusCPUsuse
12nsorfasterDIMMmodules.
Memory Configuration Table
DIMM BanksMEMORY
CONFIGURATION DIMM 1 DIMM 2 DIMM 3
RAM Type SDRAM SDRAM SDRAM
Single RAM
Module Size (MB) 8/16/32/64/128/256 8/16/32/64/128/256 8/16/32/64/128/256
Note: If you plan on using the onboard VGA and intend to install only
one DRAM module, then this single DRAM must be installed in
bank DIMM 1.
Step 6. Select the CPU Burst Mode (J1)
TherearetwotypesofCPUburstmodesaccordingtomanufacturerdesign:
Ø
InterleaveBurst (CPU:IntelP54C/P55C,AMDK5/K6/K6-2,IDT
WinChip)
Ø
LinearMode (CPU:Cyrix6x86/L/MX/M
¢º
)
Interleave Linear
CPU Burst Mode Intel®P54C/P55C
AMD™K5/K6/K6-2
IDT WinChip Cyrix™6x86/L/MX/M
¢º
J1 Setting When using Intel
or AMD CPUs. When using
Cyrix type of
CPU.
IfyouareusingaCyrix™6x86/L/MX/MIIseriesCPU,settheburstmodetoLinearby
shortingjumperJ1,andfollowthefollowingstepstoselectthecorrectLinearburstmode
inBIOS:
1.
Duringtheboot-upinitialsequence,pressthe[Delete]keytoentertheBIOSsetup
menu.
2.
Selectthe[CHIPSETFEATURESSETUP]sectioninBIOS.
3.
Inthe[CHIPSETFEATURESSETUP]sub-menu,setthe[LinearMode]fieldto
[Enabled].
4.
Press[Esc]toreturntotheBIOSmainmenu.
5.
Thenchoose[Save&ExitSetup]tore-bootyourcomputer.
2
1
2
1

SY-5SSM
Quick Start Guide
11
Hardware
Installation
Step 7. Enable/Disable the Onboard Sound (JP9)
TheonboardaudiofeaturesofyourMotherboardarecontrolledbyjumpersJP9
Choosetheavailablesoundoptionsamongthefollowingtable:
Sound Settings JP9
Onboard Sound: Enable short
Onboard Sound: Disable open
Step 8. Clear CMOS Data (JP5)
Clearthe CMOSmemoryby momentarilyshortingpin2-3onjumperJP5,andthenby
shortingpin1-2 toretainnewsettings. Thisjumpercanbeeasilyidentifiedbyitswhite
coloredcap.
CMOS Clearing Clear CMOS Data Retain CMOS Data
JP5 Setting Short pin 2-3 for a
few seconds to
clear the CMOS
Short pin 1-2
to retain new
settings
Note: You must unplug the ATX power cable from the ATX power connector when
performing the CMOS Clear operation.
3
2
1
3
2
1

SY-5SSM Quick Start Guide
12
Quick BIOS
Setup
3
3
Quick BIOS Setup
Afterthehardwareinstallationiscomplete,turnthepowerswitchon,thenpressthe
<DEL>
keyduringthesystemdiagnosticcheckstoentertheAwardBIOSSetupprogram.
TheCMOSSETUPUTILITYwilldisplayonscreen.Then,followthesestepstocomplete
thequickBIOSsetup.
Step 1. Select [LOAD SETUP DEFAULT]
Selectthe“LOADSETUPDEFAULT”menuandtype“Y”attheprompttoloadtheBIOS
optimalsetup.
Step 2. Select [STANDARD CMOS SETUP]
Set[Date/Time]and[Floppydrivetype],thenset[HardDiskType]to“Auto”.
Step 3. Select [SAVE & EXIT SETUP]
Press
<Enter>
tosavethenewconfigurationtotheCMOSmemory,andcontinuethe
bootsequence.

SY-5SSM
Quick Start Guide
13
The SOYO CD
4
4
The SOYO CD
YourSY-5SSMMotherboardcomeswithaCD-ROMlabeled"SOYOCD."TheSOYO
CDcontainstheuser'smanualfileforyournewMotherboard,the driverssoftware
availableforinstallation,andadatabaseinHTMLformatwithinformationonSOYO
Motherboardsandotherproducts.
Step 1. Insert the SOYO CD into the CD-ROM drive
TheSOYOCDwillauto-run,andtheSOYOCDStartUpMenuwilldisplayasshown
below.
(SOYOCD Start UpProgram Menu)
TheSOYOCDStart UpProgramautomaticallydetectswhichSOYOMotherboardyou
ownanddisplaysthecorrespondingmodelname.
Step 2. Read SOYO [5SSM] Manual
Clickthe
Read Manual
buttontoopentheuser'smanualfileofyourMotherboard.

SY-5SSM Quick Start Guide
14
The SOYO CD
PleasenotethatiftheStartUpprogramwasunabletodeterminewhichSOYO
Motherboardyouown,themanualselectionmenuwillpopup,asshownbelow.Then
selecttheuser'smanualfilethatcorrespondstoyourMotherboardmodelnameandclick
OK.
(ManualSelection Menu)
Theuser'smanualfilesincludedontheSOYOCDareinPDF(PostscriptDocument)
format.InordertoreadaPDFfile,theappropriateAcrobatReadersoftwaremustbe
installedinyoursystem.
Note:
TheStartUpprogramautomaticallydetectsiftheAcrobatReaderutilityisalready
presentinyoursystem,andotherwisepromptsyouonwhetherornotyouwanttoinstallit.
YoumustinstalltheAcrobatReaderutilitytobeabletoreadtheuser'smanualfile.Follow
theinstructionsonyourscreenduringinstallation,then oncetheinstallationiscompleted,
restartyoursystemandre-runtheSOYOCD.
Step 3. Install Drivers and Utilities
ClicktheInstallDriversbuttontodisplaythelistof driverssoftwarethatcanbeinstalled
withyourMotherboard.TheStartUpprogramdisplaysthedriversavailableforthe
particularmodelofMotherboardyouown.Werecommendthatyouonlyinstallthose
drivers.
Please select your manual In the box below
and click OK.
SOYO CD Manuals
5SSM OK Back

SY-5SSM
Quick Start Guide
15
The SOYO CD
(Driver Installation Menu)
Ashortdescriptionofallavailabledriversfollows:
ØSiS 530 VGA drivers
TheSiSVGAdriverforwindows95/98mustbeinstalledtomakeuseofyouronboard
VGAfunction.(ForWinNTreadtheinstructionsinbackoftheManual)
ØSOYO SpeedPro BusMaster Driver for Windows 95/98
WithoutthebusmasterdriverstheCPUwillneedtobeinvolvedeverytimedataisread
fromor writtentothe Harddisk.ThebusmasterdriversmakeuseofDMA(DirectMemory
Access)torelievetheCPUofthisburden,thusspeedingupthesystem.
TheSOYOSpeedProdrivermakesuseofanadvancedcachingalgorithm,whichgivesit
anadvantageoverother busmasterdrivers.
Note:IfyouinstalltheSOYO SpeedProbusmasterdrivers,youcanNOT install
theSiSbusmasterdrivers.
ØSiS 530 busmaster drivers
TheSiSBusmasterdriversforWindows95/98willspeedupyour harddisk.Onlyinstall
ONEtypeof busmasterdriverandfirstuninstallyour previous busmasterdriversbefore
installinganewversion.(ForWindowsNTreadtheinstructionsinthebackoftheManual)

SY-5SSM Quick Start Guide
16
The SOYO CD
ØESS Windows NT drivers (for PCI)
ThesearetheWindowsNTdriversfortheonboard soundchip.Makesure tofirstinstall
thesedriversbeforeinstallingtheESSSoundtrackProgram.FortheWindows95/98ESS
driverspleasereadtheinstallationstepsinthebackofthismanual.
ØESS Soundtrack Program (for PCI)
Withthisapplicationprogramtheusercanmakeuseoftheonboardsoundchip.Before
installingtheESSSoundtrackProgram,youMUSTfirstinstalltheESSdriversfor
Windows9xorNT.
ØSOYO CD Xpress utility
ThisutilitywillenhanceyourCD-ROMDrivedata-thoughputbyusingspaceonthe
Harddiskascache.Thiswayapplicationprogramscanaccessdatafaster.Thisutilityis
suitableforWindows95/98.
Select which driver you want to install and click
OK,
or click
Cancel
to return to the main
menu. When the installation program of a driver starts running the SOYO-CD will exit.
Afterfinishingtheinstallation,restarttheSOYO-CDandinstallthenextdriver.
Note:Onceyouhaveselectedadriver,thesystemwillautomaticallyexittheSOYOCDtobeginthe
driverinstallationprogram.Whentheinstallationiscomplete,mostdriversrequiretorestartyoursystem
beforethey canbecomeactive.
IfyouwanttoseeallthedriversavailableontheSOYO–CD,clicktheDisplay alldrivers onthe SOYO
CDbutton.DoNOTinstalldriversthatarenotsuitableforyourboard,otherwiseyoursystemmaycrash.
Step 4. Enter the SOYO CD
Clickthe
EnterSOYO CD
buttontoentertheSOYOHTMLdatabase.TheStartUp
programwillactivatethedefaultHTMLbrowserinstalledonyoursystem(forexample,
InternetExplorerorNetscape)tovisualizethecontentsoftheSOYOCD.
TheSOYOCDcontainsusefulinformationaboutyourMotherboardandotherSOYO
productsavailableinasmanyaselevendifferentlanguages.Foryourconvenience,this
informationisavailableinHTMLformat,similartotheformatwidelyusedontheInternet.

SY-5SSM
Quick Start Guide
17
The SOYO CD
(SOYOCD HTMLDatabase in English*)
(*Thelistofmenuoptionsmayvarybetweenlanguages)
Note:
IfnoHTMLbrowserisinstalledonyoursystem,theStartUpprogramwillprompt
youonwhetherornotyouwouldliketoinstalltheInternetExplorer*browser.ClickYESto
installtheHTMLbrowser.Aftertheinstallationiscomplete,pleaserestartyoursystem.
Thenre-runtheSOYOCDandyouwillbeabletobrowsetheSOYOHTMLdatabase.
(*InternetExplorerisaMicrosoftTrademark)

SY-5SSM Quick Start Guide
18
SiS VGA
Driver
Installation
5
5
SiS VGA Driver Installation
Introduction
YourSY-5SSMMotherboardisequippedwith the SiS530chipsetthatoffersextended
graphicsandtextmodescapabilities.Tomakeusetheadvancedfeaturesofthe SiS530
chipset,youwillneedtoinstallsoftwaredriversandapplicationprogramsincludedonthe
CD-ROM.
Thissectiondescribeshowtoperformthe SiSVGAdriverinstallationfor
Microsoft
Windows NT
environment.TheWindows95/98driverscanbeinstalledautomatically
throughtheSOYOCD.Refertopage16.Forotherapplicationprograms,andifyouare
usinganoperatingsystemotherthanWinNT,pleaserefertothe SiSVGADriver
Installationsectionin SY-5SSMMotherboardUser'sGuideandTechnicalReference
onlinemanualincludedontheCD-ROM.
Windows NT Drivers
Driver Files
TheenclosedSiS530WindowsNT driversfilesare:
u
SiS530.INT
u
SiS530P.SYS
u
SiS530V.Dll
Allthe16-color,256-color,32K/64K-color,and16M-colordriversareavailable.
Installation
1.
Click[Start]menuandselect[ControlPane]fromSettingsgroup.
2.
Select[Display]icon.
3.
Select[Settings]indexinthedisplay propertiessheet.
4.
Select[ChangeDisplayType]button.
5.
Select[Change…]buttonin[AdapterType]group.
6.
Select[HaveDisk]button.
7.
PlaceCD-ROMdiskintotheCDdrive.
8.
Whenthe[InstallfromDisk]dialogboxappears,typethedirectorystoringthe
driversandclick[OK].ThedirectoryintheCD-ROMisat
D:\DRIVER\SI530VGA\WINNT40.

SY-5SSM
Quick Start Guide
19
SiS VGA
Driver
Installation
9.
The[SelectDevice]dialogboxwillappear,showingthedriver.Clickon[OK]andthe
driverwillbeinstalled.
10.
Select[Close]or[Apply]buttonfromdisplaypropertiessheet.
11.
AmessagewillappearstatingyoumustrestarttheWindows95system,select[Yes]
torestart.
12.
Afterrestarting,Windows95willrunon640x480x256color,75NI.
Selecting Resolution, Color Depth and Refresh Rate
1.
Click[Start]menuandselectControlPanelfromSettingsgroup.
2.
SelectDisplayicon.
3.
SelectSettings.
4.
SelectColorPalettetochangebetween16colors,256colors,Hicolor,andTrue
color.
5.
Toselectdesktopresolutionsize,gototheDesktopareaandusetheslidebarto
changeresolutionfrom640x480,800x600,1024x768,and1280x1024.
6.
SelectDisplay Modes.
7.
SelectvalueinRefreshratelistboxtochangethescreenrefreshrate.
8.
Click[OK]or[Apply].

SY-5SSM Quick Start Guide
20
ESS
™
Audio
Driver
Installation
6
6
ESS™
Audio Driver Installation
Windows®95/98 Sound-Driver Installation
ThissectiondescribeshowtoperformtheESS™audiodriverinstallation in
Windows
®
95/98
environment.The WindowsNT drivers canbeinstalledautomaticallythroughthe
SOYOCD.Refertopage16.
AfterfirstinstallingWindows
®
95/98,followthesesteps:
1.
Fromthedesktop,click[Start]menuandselect[ControlPanel]from[Settings]
group.
2.
Selectthe[System]icon.
3.
Selectthe[DeviceManager]tab;usethescrollbartolocatethefollowingdevices
and,iftheseentriesexist,removethem:
Other Devices
?
?
PCI Multimedia Audio Driver
Sound, Video and Game controllers
!
!
ESS ES 1688 Audio Driver
.
Note:
Toremoveadevice,highlighttheitemyouwanttotakeoutfromyoursystem
andpressthe[Remove]button.
4.
Then,click[Refresh].
5.
InserttheSOYOCDintotheCD-ROMdrive.
6.
Whenthe“UpdateDriverWizard”appears,click[Next].
7.
Theinstallationwizardwillpromptyouonthelocationofthenewaudiodriveryou
wanttoinstall.Click[OtherLocation].
8.
Clickthe[Browse]button.
9.
Selectthe“D:\DRIVERS\ESS-PCI\Win9x”path,andclick[OK].
10.
NowletWindows
®
95/98automaticallycopythe.infdriverfilesandconfigurethe
ESSsoundchip.
ThiscompletestheWindows
®
95/98installation.Theprogramwillcontinuetoloadand
whenitiscomplete,youshouldheartheWindows
®
95/98 start-up wave file.
Other manuals for SY-5SSM
2
Table of contents
Other SOYO Motherboard manuals

SOYO
SOYO SY-P4ISR User manual

SOYO
SOYO Motherboard SY-6BA+ IV User manual

SOYO
SOYO SY-6IEB User manual

SOYO
SOYO SY-P4X400 DRAGON Lite User manual

SOYO
SOYO SY-P4IS2 User manual

SOYO
SOYO SY-K7VLM-B User manual

SOYO
SOYO 6KB Use and care manual

SOYO
SOYO SY-5EHM Use and care manual

SOYO
SOYO SY-7VMA-B User manual

SOYO
SOYO SY-6ILA User manual

SOYO
SOYO SY-6ICA User manual

SOYO
SOYO SY-K7VTA PRO User manual

SOYO
SOYO SY-P4VSA User manual

SOYO
SOYO SY-6KE User manual

SOYO
SOYO SY-P4S DRAGON Ultra User manual

SOYO
SOYO SY-6IBM User manual

SOYO
SOYO SY-7IZB+N User manual

SOYO
SOYO SC-6TBxE User manual

SOYO
SOYO SY-7IS2 User manual

SOYO
SOYO SY-7IWB User manual