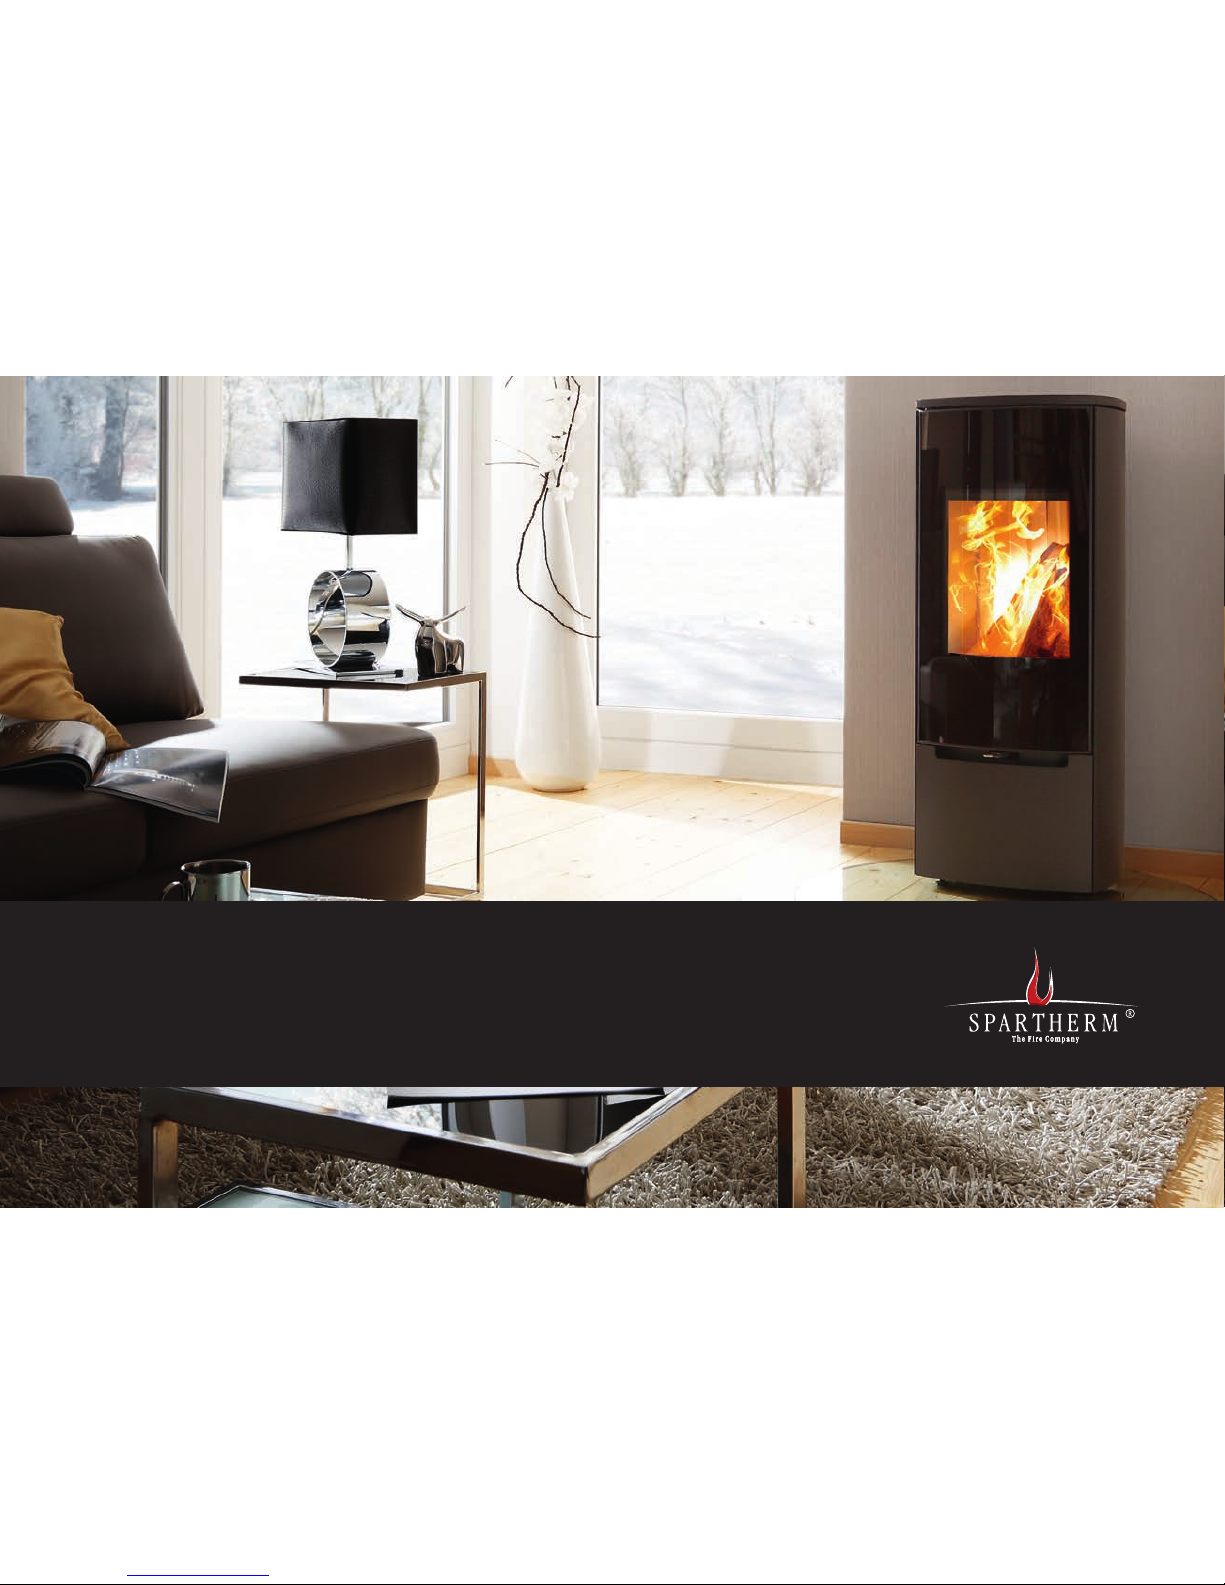
Spartherm Stovo S User manual

Installation and Operating Manual
Stoves selection

PREFACE - QUALITY PHILOSOPHY
You have decided in favour of a SPARTHERM stove - thank you for your con-
fidence in our company. In a world of abundance and mass production, we
connect our name with the credo: "high technical quality combined with a
contemporary style, as well as service for the sake of the customer's satis-
faction and recommendation." We and our trade partners offer you first-class
products that are emotionally moving and also engender feelings of comfort
and security. To ensure this, we encourage you to read the operating manual
carefully so that you can become familiar with your stove and its accessories
quickly and thoroughly. In addition to information on use, these instructions
also include important details on care and operation to guarantee your safety
and to protect the value of your stove as well as useful tips and guidance.
Moreover, we show you how you can operate your stove in an environmen-
tally responsible manner. For further enquiries, please contact your specialist
dealer.
We hope you enjoy your new stove.
The SPARTHERM team
G.M. Rokossa

GB 3
OVERVIEW OF INSTALLATION AND OPERATING MANUAL // STOVE SELECTION
1. General instructions 4
1.1 Certified quality 4
1.1.1 Scope of delivery 4
1.1.2 Damage while in transport 4
2. Installation instructions 5
2.1 Basic installation requirements 5
2.1.1 Installation site 5
2.1.2 Multiple configuration 6
2.2. Transport and alignment aid 6
2.3. Installation/assembly 6
2.3.1 Changing the flue gas connection direction 8
2.3.2 Combustion air supply 9
2.3.2.1 Room-air-dependent 9
2.3.2.2 Separate combustion air supply 10
2.3.2.3 Room-air-independent 13
2.3.3 Fire safety 14
2.3.4 Shut-off device 18
2.3.5 Connecting piece 18
2.3.6 Installing the heat storage stones on top 18
2.3.7 Installation of the water-bearing
components of the SENSO M H2O / PIKO H2O 20
2.3.7.1 Connections of SENSO M H2O / PIKO H2O 20
2.3.7.2 Basic requirements for installation
20
2.3.7.3 Thermal discharge safety device (TAS) 21
2.3.7.4 Thermal pump controller 22
2.3.7.5 Electrical connection 22
2.3.7.6 Integration and heating system 23
2.3.7.7 Return flow temperature boost 25
3. Operating Manual 25
3.1. General information on operation 25
3.2 S-Thermatik Mini 26
3.2.1 Commissioning the S-Thermatik Mini 26
3.2.2 Functional check of S-Thermatik Mini 27
3.3 Function of the rotary-base 28
3.4 Type plate 29
3.5 Operation of the water heat exchanger
Senso H2O / PIKO H2O 29
4. Combustion 29
4.1 Initial commissioning 29
4.1.1 Combustion air regulation 30
4.2 Heating-up / firing 31
4.2.1 Adding wood 31
4.2.2 Hourly wood feed quantity 32
4.3 Controlling heat output 32
4.4 Room heating capacity 32
4.5 Heating in the shoulder seasons/during unfavoura-
ble weather conditions 33
4.6 Chimney fire 33
5. Fuel 33
5.1 C O2Neutrality 33
5.1.1 Wood storage 34
5.2 Your contribution to environmental protection 34
6. Cleaning and care 34
6.1 Cleaning the combustio chamber/cladding parts 34
6.2 Firebox lining 36
6.3 Maintenance 39
6.3.1 Lubrication manual for door latches with
Smartclose 39
6.3.2
Maintenance of the water heat exchanger SENSO M
H2O / PIKO H2O
40
6.3.3
Venting the water heat exchanger SENSO M H2O /
PIKO H2O
40
6.4
Cleaning the water heat exchanger
SENSO M H2O / PIKO H2O
40
6.5 Türmechanik SENSO S RLU 41
7. Troubleshooting 43
7.1 W
ater heat exchanger SENSO M H2O / PIKO H2O
45
8. General warranty conditions 45
8.1 Area of application 45
8.2 General information 46
8.3 Warranty period 46
8.4 Warranty requirements 46
8.5 Exclusions from the warranty 46
8.6 Elimination of defects / repair 47
8.7 Extension to the warranty period 47
8.8 Spare parts 47
8.9 Liability 47
8.10 Closing remarks 47
9. Technical data 47
10. Commissioning protocol 52

GB 4
1.1 CERTIFIED QUALITY
OUR STOVES ARE TESTED IN ACCORDANCE WITH DIN EN 13240. DECLA-
RATION OF PERFORMANCE IS AVAILABLE AND CAN BE VIEWED AT WWW.
SPARTHERM.COM
These stoves are equipped with a self-closing fire door which means the
door is only opened when the fireplace has to be serviced (e.g. to clean
the combustion chamber or add more fuel). For safety reasons, the closing
mechanism must not be tampered with; furthermore, any such action would
render the warranty and operating licence null and void. The guarantee and
operating licence are also rendered invalid if the customer modified the
technology of any other area of the stove.
1.1.1 SCOPE OF DELIVERY
• Fireplace made of Vermiculite / Schamotte
• Primary and secondary air supply
• Pull-out ash pan or ash box and grate (not all models)
• Self-closing fire door with high-temperature-resistant ceramic glass.
• Insulated glove*
• Rating plate („3.4 Type plate“ on page 29)
• Supplied pre-assembled in transport-friendly disposable cardboard
packaging
• Heat storage stones (only on CUBO M, PIKO M, SENSO L (optional), PASSO
M, STOVO M)
• Pump thermostat, thermal discharge safety device ¾", bleeder (only on
SENSO M H2O, PIKO H2O)
• Integrated cleaning system with control lever (only on PIKO H2O)
1.1.2 DAMAGE WHILE IN TRANSPORT
Immediately on arrival, please check the goods delivered (visual inspec-
tion). Note down any possible damage on your delivery note and then please
1. GENERAL INSTRUCTIONS
Please consult your district master chimney sweep before assembling and
installing the stove. He will advise you of building law regulations, the
suitability of your chimney, and will conduct the acceptance procedure for
your stove. The chimney calculation is executed in accordance with DIN EN
13384 with the value triplet specified in this manual („9. Technical data“
on page 46).
Important for small children, elderly or infirm persons: As is the case with
all other heating devices, it is expedient that you attach a protective fixture
for these groups of persons, as the view pane and the cladding parts of the
stove can become extremely hot!
Danger of burn injuries!
Never touch the stove when the fire is burning or has just been extin-
guished! The stove should never be operated for an extended period of time
unattended.
The enclosed heat protection glove is exclusively designed to acti-
vate the operating handle and the “cold hand”. The glove is not
fire-proof!
National and European standards, the respective state-specific and local
directives and regulations, and the respective firing installation ordinance
of the German Federal State, must be complied with for setup and operation
of your stove and for the connection to the chimney.
The stove must always be operated with the door closed. Modification of the
closing device is prohibited!
*Important: The glove provided serves only as thermal protection and is not
fireproof.

GB
GB 5
inform your stove fitter. Protect the visible elements of the stove from soil-
ing and damage during installation. Only permitted and sufficiently strong
transport aids may be used to transport the stove.
The following points must be noted to ensure safe and problem-free
transport:
• It should be shipped in an upright position or slightly tilted on its back!
• Sack trucks used as a transport aid may only carry the stove from the
back.
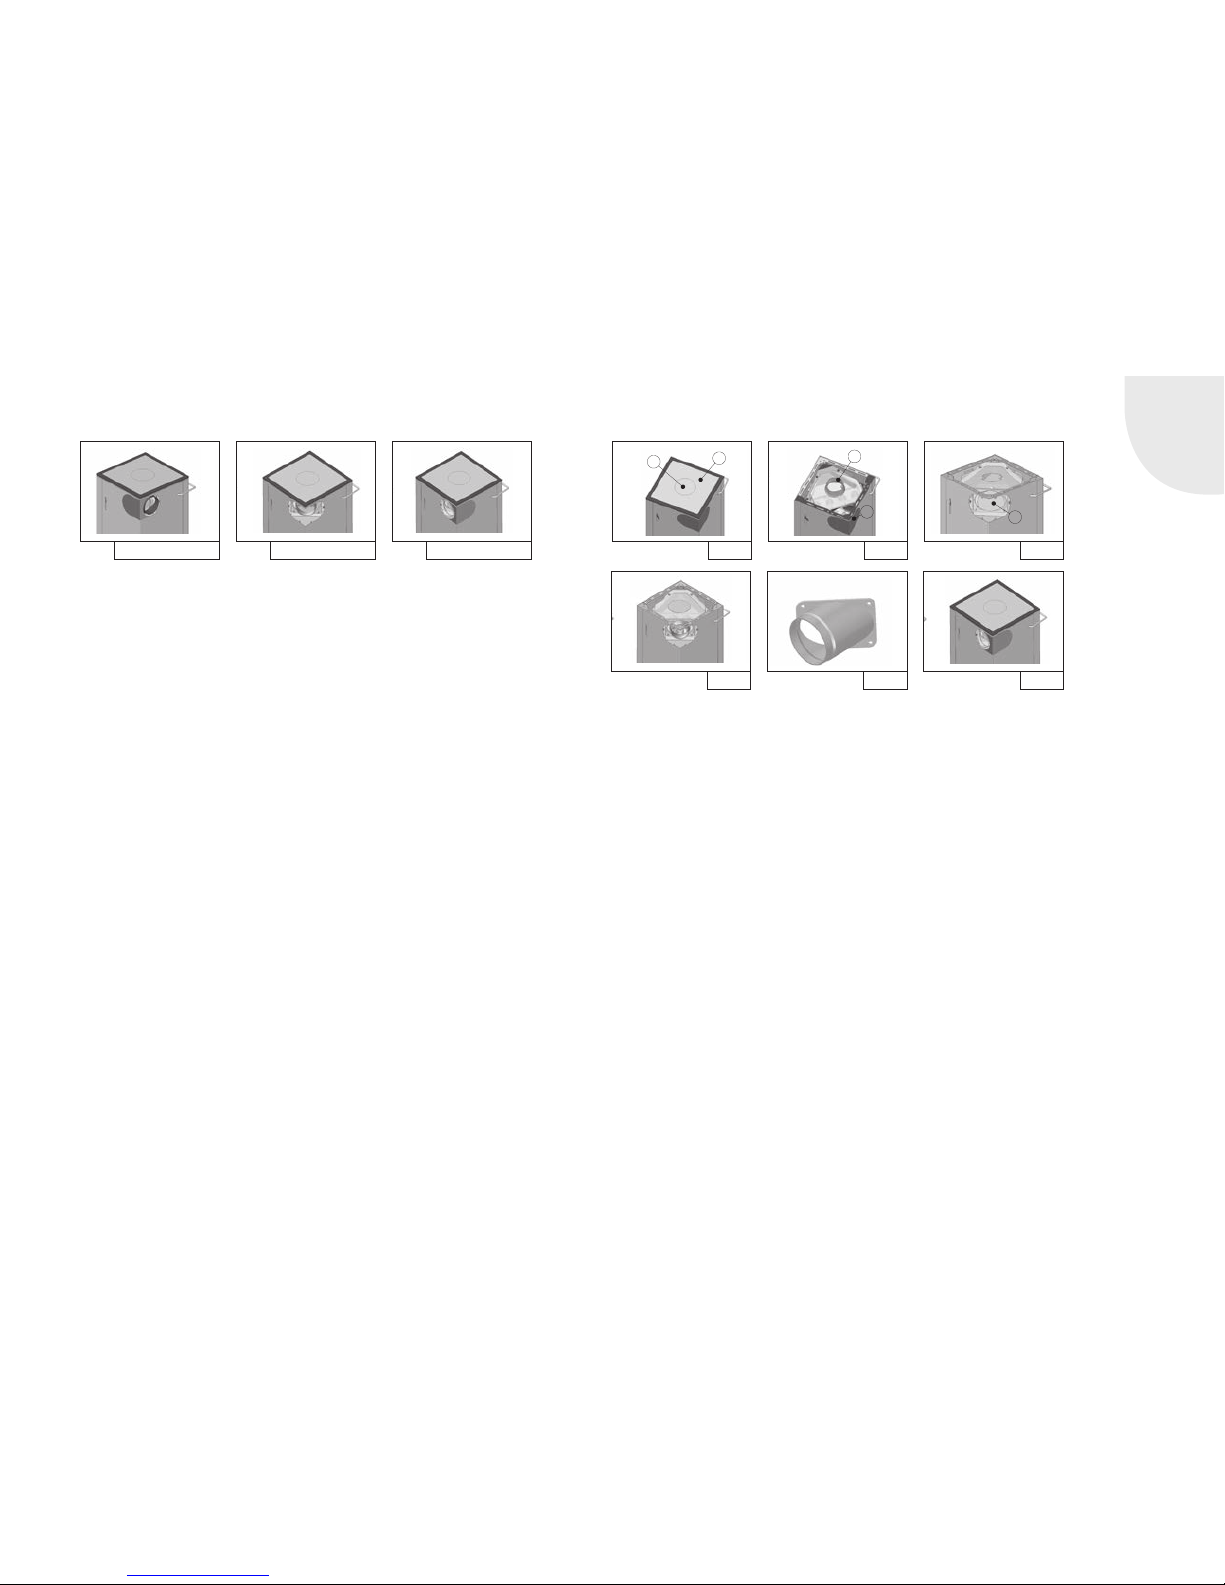
2. ASSEMBLY INSTRUCTIONS
The assembly and installation of your stove must be carried out by a spe-
cialist. Please consult your district master chimney sweep before assem-
bling and installing the stove to clarify the suitability of the chimney system
and the installation site, and also when having any further questions.
2.1 BASIC INSTALLATION REQUIREMENTS
For installation, connection and operation of the stove, all relevant national
and European standards, as well as local regulations (DIN, DIN EN, state
construction ordinances, firing ordinances, etc.) must be complied with and
applied! The list of regulations given below is not exhaustive.
In the UK all stoves must be fitted in accordance with UK local building and
HETAS regulations. Appliances may only be commissioned by HETAS accred-
ited installers. Only appliances registered with DEFRA may be installed in UK
smoke controlled area.
FeuVo: Feuerungsverordnung (Firing Installation Ordinance) of the respec-
tive German Federal State
LBO: Regional building regulations and fire regulations of
VKF: VKF (Switzerland)
LRV: (Switzerland)
1. BlmschV: Erste Verordnung zur Durchführung des Bundes-Immis-
sionsschutzgesetz (First Ordinance on the Implementation of the Federal
Emissions Control Act)
TROL: Technical Rules of Tiled Stoves and
Hot Air Heating System Trade (ZVSHK)
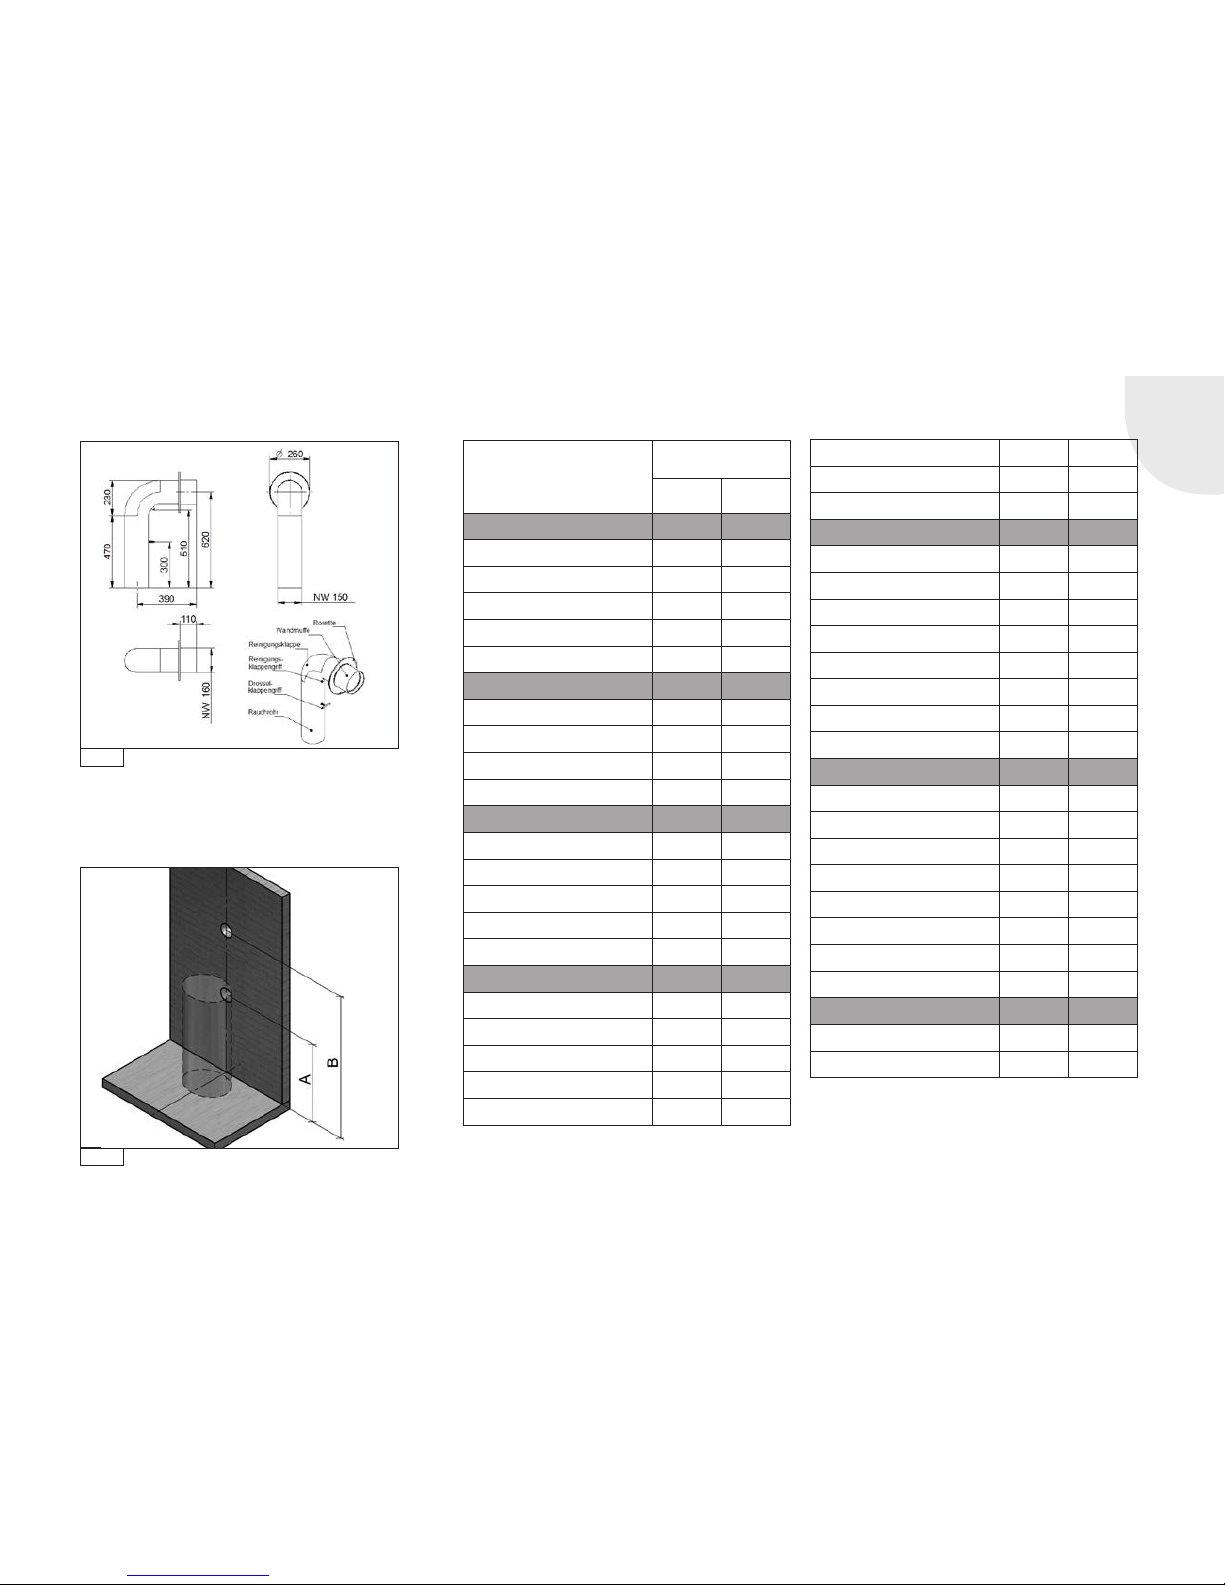
DIN 1298 / EN 1856: Connecting flue pipes for heat generating systems
DIN EN 13240: Roomheaters fired by solid fuel
DIN 18896: Fireplaces fired by solid fuel Technical rules:
for installation and operation
DIN EN 13384 Chimneys: Thermal and fluid dynamic calculation methods
DIN 18160-1/2: Chimneys/house chimneys
DIN 4751 / DIN EN 12828: Heating systems in buildings –
Design for water-based heating systems
VDI 2035: Water treatment for heating systems
Art. 15a: B-VG (Austria)
Fireplaces may only be installed in rooms and places where the location,
construction situation and type of utilisation do not lead to hazards. The
floor area of the installation must be of a design and size so that the fire-
place can be operated properly and as intended.
2.1.1 INSTALLATION SITE
Your stove must not be installed:
1. In stairways, unless they are in residential buildings with two or fewer
flats.
2. In hallways with general access.
3. In garages.
4. In Fireplace systems in rooms or flats that are ventilated through venti-
lation systems or warm air heating through the use of fans, unless the
safe operation of the stove is ensured.
5. In rooms in which highly combustible or potentially explosive substances
or mixtures are processed, stored or manufactured in quantities that

GB 6
Attention! The transport and alignment aids may only be used on a stable
subfloor. Soft, delicate floors can be damaged by the high surface pressure
of the transport casters!
2.3 INSTALLATION/ASSEMBLY
Your stove must be installed on floors with sufficient load-bearing capacity.
Please observe the overall weight („9. Technical data“ on page 46)! The
load-bearing capacity may have to be ensured by a sufficiently thick board
(weight distribution).
Observe the necessary measures for fire protection in the floor area when
choosing the installation location. („2.3.3 Fire safety“ on page 14)
Stability "9. Technical data“ on page 6
Stoves with an upright design and fitted heat storage stones must be
secured against unintentional tilting because of their top-heaviness.
The stove is placed on the floor in compliance with the safety distances
(„2.3.3 Fire safety“ on page 14) and aligned horizontally. The feet are
adjustable in height.
Flue pipe elbow kit
Install the stove with the flue pipe bend set that we offer and refer to the
following for the stove-specific connection height dimensions.
Flue pipe elbow kit, colour version
Order no. Unpainted Black Graphite Terra Pearl
-1017770 1017769 1017772 1017771
would be hazardous in the event of ignition or explosion
Room air independent stoves can be placed in rooms, apartments or uti-
lization units of comparable size from which air can be sucked out using
fans such as ventilation or hot air heating systems. The condition is that the
vacuum-capable equipment cannot create a vacuum > 8 PA.
2.1.2 MULTIPLE CONFIGURATION
Multiple use of the chimney in accordance with DIN 18160 is possible
because the stove has a self-closing fire door (A1). All fireplaces connected
to a chimney must also be approved for multiple use!
The following applies to room-air-independent stoves:
A multiple chimney configuration is prohibited!
2.2 TRANSPORT AND ALIGNMENT AID
The Spartherm stoves Moro and Noto with integrated transport and align-
ment aid give you the possibility to move the stove to the installation loca-
tion with little effort and be able to perform the alignment quickly.
To do this, it is necessary to fully screw in the adjustable feet set into the
lower wood compartment to align the stove.
After screwing in the feet, the entire weight load of the stove is supported
by the transport casters set into the base. Now it is possible to move the
stove back and forth.
Please ensure that the fitted natural stone elements do not move or fall off
the stove! After positioning, unscrew the adjusting feet and ensure the stove
is standing securely.
Moro Noto

GB
GB 7
Fig. 1a
Fig. 1b
Stove Bore
Ø 150 mm
A
in mm
B
in mm
Stovo
Stovo S 990 1682
Stovo S plus 990 1682
Stovo M 990 1682
Stovo L 990 1682
Stovo L plus 990 1682
Sino
Sino L 1091 1837
Sino City 1091 1837
Moro 1070 1844
Noto 924 1665
Senso
Senso S 916 1639
Senso S RLU 916 1639
Senso M H2O 1157 1906
Senso L 1138 1882
Senso L 2015 1172 1916
Passo
Passo XS 958 1719
Passo XS RLU 958 1719
Passo S 1147 2015
Passo M 1248 2215
Passo L 1383 2115
Passo S 2015 1282 1880
Passo M 2015 1247 2215
Passo L 2015 1382 1980
Piko
Piko S 973 1712
Piko M / L 1113 1852
Piko M / L with log storage compartment
1113 1852
Piko S RLU 973 1739
Piko M RLU 1113 1852
Piko M RLU with log storage compartment
** **
Piko L RLU 1253 2019
Piko L RLU with log storage compartment
** **
Cubo
Cubo S 973 1712
Cubo M / L 1113 1852
Cubo M / L with log storage compartment
1113 1852
Cubo S 973 1739
Cubo M RLU 1113 1852
Cubo M RLU with log storage compartment
** **
Cubo L RLU 1253 2019
Cubo L RLU with log storage compartment
** **
Redoro
Redoro S 1253 1992
Redoro M 1253 1992
** Data are not yet available
Dimension A: Flue pipe connection height with dis-
charge to the back
Dimension B: Flue pipe connection height with use of
the flue pipe bend set

GB 8
Make sure that the sealing elements are correctly positioned under the
dummy cover and the flue gas outlet and ensure a tight seal. After screwing
in tight, fit the optional storage elements and convected air gate to prevent
airflow in reverse order and fit the lining elements (Fig. 8).
Note: The installation steps may be different depending on each stove model.
Special notes on the Piko H20 model
The Piko H20 model has gas evacuation to the side and to the top in addition
to the option of connecting the connecting piping around a corner. If the
installation situation of the Piko H2O stove has been decided already during
the planning phase, it is possible to order the stove with preassembled
matching flue gas outlet from the factory.
If the orientation of the flue gas outlet on site has to be changed, please
proceed as follows:
Installation from the top to the back/side
The flue gas outlet can be connected to the back in three different positions:
Carefully remove the top plate (A) (Fig. 9) of the stove and place it in a
protected place. When removing the top plate, ensure that the fitted dummy
cover (B) (Fig. 10) does not fall and get damaged.
A
B
C
D
EC
E
A
BC
D
E
C
E
A
BC
D
EC
E
A
BC
D
EC
E
A
BC
D
EC
E
A
BC
D
EC
E
A
B
C
D
EC
E
A
BC
D
EC
E
Fig. 1
Fig. 5
Fig. 2
Fig. 6
Fig. 3
Fig. 7
Fig. 4
Fig. 8
2.3.1 CHANGING THE FLUE GAS CONNECTION
DIRECTION
The stove is prepared for the flue gas connection at the top when delivered.
Depending on the model, the flue gas connection position can be changed
so that it is aligned to the back, to the side or around corners. Follow these
installation steps when changing the flue gas connection position:
Changing the flue gas connection direction from to the top to the
back using the example of the Senso S
Installation from the top to the back
Remove the top plate (A) (Fig. 1) of the stove carefully and place it in a
protected place. When removing the top plate, ensure that the fitted dummy
cover (B) (Fig. 1) does not fall and gets damaged. Depending on the model,
the top plate of the stove must be removed either upwards in advance or
unlocked by parallel displacement to the front (model Stovo).
In stoves with fitted heat storage stones (for example, Cubo / Piko M (Fig.
2)) or convected air regulation (Fig. 3), these components must be removed
(„2.3.6 Installing the heat storage stones on top“ on page 18).
After removing the top plate, the flue gas connection piece (C) (Fig. 4)
bolted onto the stove body is visible. Remove these by loosening the internal
hexagonal bolts (SW 13). Now remove the dummy cover (D) (Fig. 5) on the
back of the covering panel for feed-through of the flue gas pipe. Depending
on the model, the perforation for this must be broken through or 2 fixing
screws loosened.
The only visible dummy cover (E) (Fig. 6) must be unscrewed using the
internal screws (SW13) and replaced with the previously removed flue gas
outlet (C) (Fig. 4). Fit the removed dummy cover (PE) onto the upper flue gas
outlet in order to close this (Fig. 7) (screw connection SW13).

GB
GB 9
After removing the top plate, the flue gas connection piece (C) (Fig. 10)
bolted onto the stove body is visible. Remove it by loosening the internal
hexagonal bolts (SW 13). Then, remove the back cover plate (Fig. 10) using
the screw connection. A blanking plug for the flue gas outlet to the back/
side is visible (E) (Fig. 11) behind the cover plate. Unscrew this.
Now fit the flue gas connection pipe depending on the desired orientation to
the right/left side or straight back. For the right/left side connection type, a
separate connecting piece is supplied with the Piko H20 stove (Fig. 13). The
top connecting piece is used for the back connection type. Ensure that the
underlying caulking strip is placed correctly and seals tightly.
The removed dummy cover (E) is screwed in place as shown in (Fig. 12) and
seals the flue gas outlet at the top.
Finally, close the open cladding openings at the back of the stove with the
enclosed cover plates and fit the top plate (Fig. 14).
2.3.2 COMBUSTION AIR SUPPLY
The combustion air can be supplied in accordance with „2.3.2.1
Room-air-dependent“ and „2.3.2.3 Room-air-independent“ in different
ways
.
2.3.2.1 ROOM-AIR-DEPENDENT
Your stove draws the combustion air from the installation area (room air depend-
ent operation). Ensure that the installation area is adequately supplied with
fresh air (more details in the country-specific FeuVO, DIN 18896, the technical
regulations, etc.). The fresh air supply must be checked by the installer and the
operator. When operating several fireplaces in a single room or linked space,
ensure that sufficient air is available for complete combustion! It is possible that
there is not a sufficient supply of fresh air if the windows and doors are sealed
(e.g., in combination with energy saving measures). As a result, the ventilation
of the tiled stove can be affected. This can adversely affect your well-being
and, potentially, your safety. If necessary, an air valve must be installed near
the pellet stove for the additional supply of fresh air, or a combustion air line
must be routed outwards („2.3.2.2 Separate combustion air supply“) or in a
well-ventilated room (except for the heating room). In particular, ensure that the
Outlet on the left side
A
BC
DE
Outlet to the centre
A
BC
DE
Outlet on the right side
A
BC
DE
A
B
C
DE
Fig. 9
A
B
C
D
E
Fig. 10
A
BC
D
E
Fig. 11
A
BC
DE
Fig. 12
A
BC
DE
Fig. 13
A
BC
DE
Fig. 14

GB 10
necessary combustion air pipes are open during the operation of the fireplace
insert. Simultaneous operation with a ventilation system (e.g. extractor hood,
bathroom fan, etc.) in the same room or connected space can adversely affect
the function of the stove (to the point of smoke or flue gas accumulating in the
living room, despite the firebox door being closed). It is therefore prohibited
to operate appliances of this kind simultaneously with a fireplace without first
taking appropriate precautionary measures („2.3.2.3 Room-air-independent“).
2.3.2.2 SEPARATE COMBUSTION AIR SUPPLY
The stove can be supplied with combustion air separately. The separate com-
bustion air connection can be connected to the rear side or from below. The
connecting piece is preassembled and the cladding must be opened accord-
ingly. When connecting a pipe connection to the combustion air neck, the
combustion air can be supplied to the stove from the outside or from other
rooms such as the cellar. When connecting the stove to a combustion air line,
the TROL instructions (technical rules), the DIN 18896, etc. must be observed
and applied.
In particular, ensure that the dimensions of the pipes are adequate!
When using the rotary base, the connection must be designed as
durable and flexible! The ability for it to rotate must not be affected.
The combustion air openings and lines must not be closed or blocked other than
if it has been ensured that the fireplace can only be operated with opened fas-
tening by special safety equipment. The cross-section must not be narrowed by a
fastening or a grille. This measure is not necessary with LAS chimneys. A shut-off
valve must be installed, where the combustion air feed line runs outside the build-
ing. In doing so, it must be possible to easily determine the shut-off valve setting
from outside of the connecting line. In this version, the pipe should be insulated
to prevent condensation. The pipe should be positioned, so that any condensation
formed can run out of the pipe and any water or other foreign substances from
outside cannot get into the stove. In accordance with regulations, combustion
air piping crossing a fire wall in buildings with more than two storeys must be
established in such a manner that smoke or fire cannot be transmitted to other
floors or fire compartments. Country-specific and local fire safety regulations
must be observed!
SPARTHERM QUICK COUPLING - SQC COUPLING
Compatible with the following stoves:
• Senso S
• Piko / Cubo S/M/L
• Passo XS
• Passo S/M/L
• Redoro S/M
The installation location of the stove must be determined according to the
specified technical data for the supply channel / hole. For direct wall mount-
ing, the combustion air and flue gas connection must be prepared on one
level. The stove is delivered with the fitted SQC coupling and the adjustable
feet extended. In this condition, the connecting piece is in the air, and there
is no contact to base unit. Therefore, the stove can be transported as usual
with the normal tools (e.g. sack truck).

GB
GB 11
Assembly sequence
1. Position the stove with the extended adjustable feet in its final
position.
2. Screw in the adjustable feet to adjust the stove to its nominal height.
When lowering it, the SQC connecting piece makes contact with the
base unit and encloses the supply opening on the site side.
Transport position with SQL coupling Fig. 15
Example of Senso S:

GB 12
Companion dimensions of a stove with SQL coupling
For dimension A and dimension B, see point „2.3 Installation/assembly“
on page 6.
Dimension C:
Distance from the mounting wall to the centre air supply hole. Ensure the
clearances of the flue pipe connection to the chimney are complied with!
Stove
Date of
construc-
tion
Order no.
C in mm
Bore Ø 100 mm
for a combus-
tible mounting
wall
for a mounting
wall that is not
to be protected
Senso S from
11/2014 1033724 308 258
Passo XS 1033726 286 286
Passo S
from
07/2015
1033727 340 290
Passo M 1034352 340 290
Passo L 1035352 340 290
Cubo S
from
11/2014
1033728 303 252
Piko S 1033728 302 252
Cubo M 1033726 309 259
Piko M 1033726 309 259
Cubo L 1033726 309 259
Piko L 1033726 309 259
Redoro S 1037704 302 252
Redoro M 1037704 302 252
Fig. 16
B
A
C

GB
GB 13
Note on Redoro S and M
The separate combustion air connection can be connected from below and
comes out to the back or to the side. The connecting piece is preassembled
and the cladding must be removed accordingly.
1. Open the stove door and remove the four countersunk screws at the
bottom.
2. Remove the lower cover part by grabbing it at the side and pulling it
towards to the front.
3. Connect the connecting pipe shown here in blue with the receiving
unit for the SVS connecting piece.
4. After connecting the combustion air connection, push the lower cover
part onto the receiving unit as shown in green here and fix it with the
four countersunk screws.
2.3.2.3 ROOM-AIR-INDEPENDENT
The RLU stoves have been developed for use with residential ventilation systems
for a vacuum range of up to 8 Pa in the installation area and can be operated
without additional safety equipment. The combustion air must be supplied in
airtight lines from the outside or via an LAS system to the device for room-air-in-
dependent operation without fail. To do this, the combustion air duct must be
permanently sealed to the combustion air neck (connection type back/side or
bottom) of the stove.
When connecting the RLU stove to a combustion air line, the TROL instruc-
tions (technical rules), the DIN 18896, etc. must be observed and applied.
In particular, ensure that the dimensions are adequate!
Country-specific and local fire safety regulations must be observed! Make
sure that the pipes are always airtight.

GB 14
2.3.3 FIRE SAFETY
The handover inspection of your stove before commissioning is performed
by the chimney sweep responsible. You can also advise the chimney sweep
prior to installation about installation conditions on site, and can provide
advice on how to install your stove properly.
General Information on fire prevention
Stoves are heat generators and are subject to regulations and necessary
measures for fire protection. The fire regulations and the recommended
minimum clearances of the device must be observed even when selecting
the installation site. Basically, a minimum wall clearance of 5 cm to
the back wall must be adhered to. For reasons of safety and fire
protection, larger clearances must be ensured to protected walls or
combustible materials.
In the following table on page 17, the permissible clearances are docu-
mented according to the type of the stove and the type of on-site mounting
wall. Using the diagrams (Fig. 19-23), match the mounting situation, taking
into account the specified distances that need to be complied with.
Follow the instructions for fire protection during installation and
ask your local chimney sweeper.
• Mounting walls that are non-combustible or not to be protected are
suitable to withstand permanent exposure to temperatures > 85°C thanks
to their structure and their material type.
• Mounting walls that are combustible or to be protected (e.g. timber frame
construction) must be protected from temperatures > 85°C.
Before installing the stove, it is necessary to evaluate the mounting walls. If
the type of mounting wall cannot be clearly assigned, a specialist (chimney
sweep) must be consulted.
• Wallpaper as wall coverings in accordance with DIN 4102-1 are
non-combustible components and do not require special precautions
for fire protection. Ensure here that the underlying structure of the wall-
paper (e.g. timber frame construction) is very easily ignited or must be
protected and appropriate precautions must be taken!
• Ensure that the specified minimum clearances to the back and side wall
must be adjusted for the rotary devices.
• Ensure that the minimum clearances from chimney connecting piece to
combustible components are adhered to (see „2.3.5 Connecting piece“
on page 18).
• Combustible objects must not be located at a distance of 50 cm above
the fireplace!
Floor coverings near the stove
Floors in front of the combustion chamber opening have to be protected
from combustible materials by a board made of non-combustible materials.
The board must extend over at least 50 cm to the front and at least 30 cm
to the side (Fig. 19-23 C + D) (measured from the combustion chamber
opening or viewing window)!
No combustible components, furniture, curtains or decorations may be
placed in the area of direct radiant heat of the fire door or inspection glass.
This distance may be reduced to 400 mm if radiation protection plates are
installed between the fireplace and combustible structures on both sides.

GB
GB 15
Minimum distances to adjacent components
Depending on the view pane arrangement (see the following graphics) of
your stove and the type of mounting walls, the distances from the table are
to be adhered to.
The following describes
• Distance A as the minimum distance of the stove sidewall to the mount-
ing wall
• Distance B as the minimum distance of stove back wall to the mounting
wall
• Distance C as the area of direct radiant heat in front of the view pane
(n) of the stove
Special note on minimum side distance
Minimum side distance (Fig. 17 (A)) describes the minimum distance from
the stove to the side mounting wall and is valid from the back mounting wall
to the beginning of the area of direct radiant heat (E) of the front panel.
In stoves with curved front pane or a wide area of direct radiant heat, the
minimum wall distance (A) must be adjusted to the extending area of direct
radiant heat.
Determining the area of radiant heat
To layout the area of direct radiant heat of the stove, put a measuring
instrument (ruler or measuring tape) on the surface of the view pane and
determine the centre of the fireplace past the side door pillar (Fig. 18). In
the resulting angle and the distance A1, there must be no combustible or
components to be protected on the sides.
brennbar
(z.B.Sessel)
A1
CMeterstab
Bodenbelag D
Strahlungsbereich
Fig. 18
brennbar
(z.B.Sessel)
E
A
Strahlungsbereich
Bodenbelag D
Fig. 17
Radiant area
Flooring
Combus-
tible
e.g.
(armchair)
Radiant area
Flooring
Combus-
tible
e.g.
(armchair)
Folding rule

GB 16
Fig. 21
Bodenbelag
brennbar
(z.B.Sessel)
Strahlungsbereich
C
B
AD
Wide area of direct radiant heat
Bodenbelag
Strahlungsbereich
Strahlungs-
bereich
A
B
C
D
brennbar
(z.B.Sessel)
Fig. 22Front and side pane Fig. 23
C
Strahlungsbereich
ABodenbelag
C
D
brennbar
(z.B.Sessel)
Front pane, rotatable
Bodenbelag
C
Strahlungsbereich
A
D
B
brennbar
(z.B.Sessel)
Fig. 19Front pane, flat
Strahlungsbereich
A
B
C
Bodenbelag D
brennbar
(z.B.Sessel)
Fig. 20
Corner pane
Radiant area
Flooring
Com-
bustible
e.g.
(armchair)
Radiant area
Com-
bustible
e.g.
(armchair)
Flooring
Radiant area
Flooring
Combus-
tible
e.g.
(armchair) Radiant area
Flooring
Combus-
tible
e.g.
(armchair)
Radiant area
Radiant area
Flooring
Combus-
tible
e.g.
(armchair)

GB
GB 17
* The distance is only valid in conjunction with a radiation protection plate on the top plate, which is fitted behind the vertical flue gas pipe.
Stoves Distance to side wall Distance to theback wall Distance in the area of direct radiant heat of
the pane(s).
Dimensions of the fire protection floor
covering
A (cm) B (cm) C (cm) D (cm)
combustible No protection
required
combustible No protection
required
combustible No protection required Length x width Radius (with round floor
covering)
Piko S / Piko S RLU 10 10 10 580 80 50 x 30 50
Piko M / Piko M RLU 10 10 10 580 80 50 x 30 50
Piko L / Piko L RLU 10 10 10 580 80 50 x 30 50
Piko H2O10 10 10 580 80 50 x 30 50
Cubo S / Cubo S RLU 10 10 10 580 80 50 x 30 50
Cubo M / Cubo M RLU 10 10 10 580 80 50 x 30 50
Cubo L / Cubo L RLU 10 10 10 580 80 50 x 30 50
Redoro S / M 10 10 10 580 80 50 x 30 50
Stovo S 31 20 16 580 80 50 x 30 50
Stovo S plus 31 20 16 580 80 50 x 30 50
Stovo M 31 20 16 580 80 50 x 30 50
Stovo L 56 25 13 580 80 50 x 30 50
Stovo L plus 64 25 13 580 80 50 x 30 50
Senso S / Senso S RLU 47 20 10 * 580 80 50 x 30 50
Senso M H2O10 10 10 580 80 50 x 30 50
Senso L / Senso L RLU 45 10 15 580 80 50 x 30 50
Sino L 10 10 8 5 80 80 50 x 30 50
Sino City / Sino City RLU 36 10 7 5 80 80 50 x 30 50
Moro / Moro RLU 35 20 20 580 80 50 x 30 50
Noto 15 15 20 580 80 50 x 30 50
Passo XS / Passo XS RLU 15 15 5 5 80 80 50 x 30 50
Passo S / Passo S RLU 5 5 10 580 80 50 x 30 50
Passo M / Passo M RLU 5 5 10 580 80 50 x 30 50
Passo L / Passo L RLU 5 5 10 580 80 50 x 30 50

GB 18
2.3.4 CUT-OFF DEVICE
Exhaust systems must be created in accordance with the Technical Rules
of Tiled Stoves and Hot Air Heating System Trade (TROL). Stoves should
have a shut-off device in the exhaust gas flue. These devices must not be
self-closing and must not be positioned such as to prevent or hinder the
inspection and cleaning of connecting pipework. The position of the shut-off
device must be visible from the outside, e.g., from the position of the oper-
ating handle. Shut-off devices may only be installed in the exhaust manifold
or collecting pipe, the flue gas pipe stub or the pipeline connecting piece.
2.3.5 CONNECTING PIECE
Your stove is connected to the chimney with Ø 150 mm/Ø 160 mm connecting
pieces made of steel plate which is at least 2 mm thick. These connect-
ing pieces must satisfy the requirements specified in DIN 1298 and DIN EN
1856-2, and must be connected to the chimney system in accordance with
the requirements specified in DIN 18160 or the country-specific regulations.
It must be ensured that the flue gas pipe is installed in the shortest pos-
sible route upwards towards the chimney. To achieve this, ensure that the
flow of flue gas is redirected as few times as possible. Ensure that the flue
pipe is stable; where appropriate, the flue pipe may need to be secured with
brackets. If the flue leads through a combustible wall or is located close to
any combustible components, the flue is to be insulated according to the
respective regulations. The connecting line must always be mounted in such
a manner that it is possible to clean the connecting line at any time.This must
be ensured through a sufficient number of cleaning openings. If the stove is
rotatably mounted, the connecting pipe must be installed so that no negative
effects occur on the fixing. The flue pipe must not also turn. The minimum dis-
tance from the chimney connecting piece to any combustible components can
increase the distance from the stove to combustible components, in accord-
ance with the manufacturer specifications for the flue pipe. The specified
minimum distances to combustible components as stated in these instructions
refer to the fireplace and must be adjusted if necessary („2.3.3 Fire safety“
on page 14).
Ensure that a cleaning opening is located above the flue pipe connection with
gas evacuation to the top.
2.3.6 INSTALLING THE HEAT STORAGE STONES ON
TOP
The heat storage stones delivered with your stove are packed separately
due to their heavy weight. After the stove has been assigned its location in
the installation space, you can begin with the installation of separate heat
storage stones.
Insert the heat storage stones from the outside to the inside. When the stove
is connected with flue gas connection at the back, the heat storage stone
must be placed in the centre. If you connect the stove at the top, the central
heat stone is not required.
To insert the heat storage stones, remove the cover and the plate to control
the supply of heat. Then insert the heat storage stones as shown.
A=remove
B=insert
C=fit
Passo M:

GB
GB 19
Stovo M:
A= Remove (pull top plate for-
ward and remove upwards)
B=insert
C=insert
D=fit
Senso L*/Senso L RLU*:
* Heat storage stones optional
A = open
B = insert
C = close
Redoro M:
AB
C
A = remove
B = insert
C = fit

GB 20
2.3.7
INSTALLATION OF THE WATER-BEARING
COMPONENTS OF THE SENSO M H2O / PIKO H2O
Assembly of the water-bearing components, the necessary safety devices,
temperature sensors and similar components must always be carried out by
a specialised company. The Mellino H2O / Piko H2O must be installed with all
water-bearing components accessible and inspectable at all times!
The stove as well as all associated immersion sleeves, connectors, moulded
components and pipes must be have the pressure checked prior to commis-
sioning and checked for airtightness.
2.3.7.1 CONNECTIONS OF SENSO M H2O / PIKO H2O
The connections on the Senso M H2O are located on the back and can be
guided from the inside downwards using the flexible attachment kit. The Piko
H2O has its connections on the bottom which can be routed to the back and
the side with the flexible attachment kit.
The connections have transport caps and brass stops for transport purposes.
This must be removed prior to installation. The connections are clearly labelled
and must not be used other than for the specified purpose! In particular, the
integrated safety device (safety heat exchanger) must not be used to heat
water.
For easy installation of the pipes, etc. when during connection through
the floor, there is an installation template that can be downloaded on our
website www.spartherm.com in dealer login. The installation tem-
plate is valid only in conjunction with the flex attachment kit.
Alternatively, an installation template in the scale of 1: 1 can be requested in
print format from us. The flex attachment kit can be ordered for easy and quick
connection of pipes in the floor and the internal connections.
A=remove
B=Insert front stones
C=insert inner stone
D=insert cover stone (with
handle)
E=fit
Cubo M / Piko M:
E
Other manuals for Stovo S
1
This manual suits for next models
36
Table of contents
Other Spartherm Stove manuals
Popular Stove manuals by other brands

Cadel
Cadel VENUS Installation, use and maintenance

Costway
Costway NP10722 user manual

Westfire
Westfire WF18 Installation manual and operating instructions

Capital
Capital SIRIUS Installation and operating instructions

Comfort Glow
Comfort Glow SL30NT Series OWNER'S OPERATION AND INSTALLATION MANUAL

Super Ego
Super Ego SEGO-Camp manual