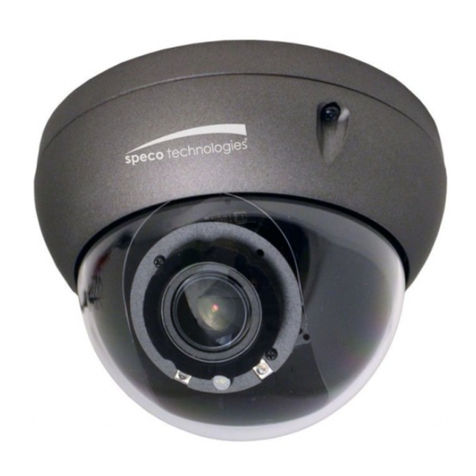
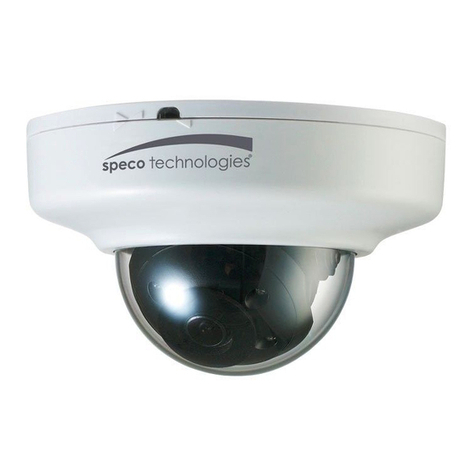
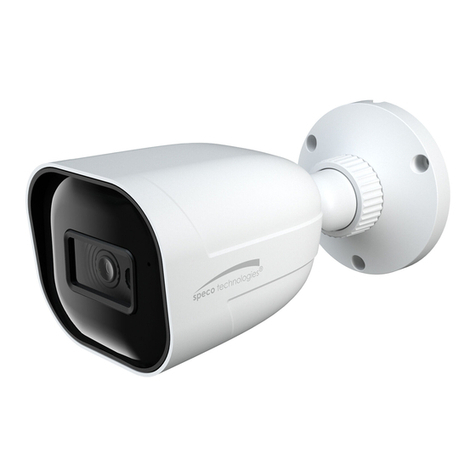
Speco HT770PH User manual

INSTRUCTION
MANUAL
700TVL Miniature Camera
4QFDP5FDIOPMPHJFTJTDPOTUBOUMZEFWFMPQJOHQSPEVDUJNQSPWFNFOUT
8FSFTFSWFUIFSJHIUUPNPEJGZQSPEVDUEFTJHOBOETQFDJGJDBUJPOTXJUIPVUOPUJDFBOEXJUIPVUJODVSSJOHBOZPCMJHBUJPO 3FW
HT770PH
(Miniature Board Camera)
CVC130H
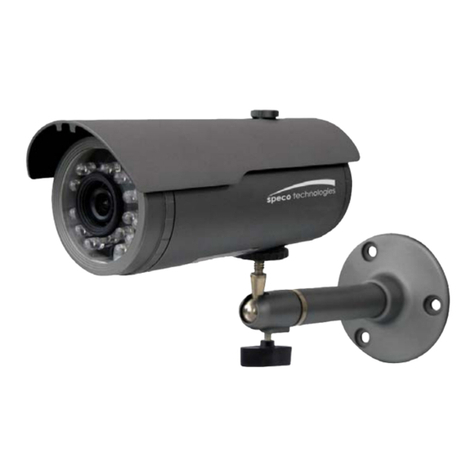
(Miniature Weather Resistant Bullet Camera)

Contents
- 1 -
Ł
Contents...................................................... 1
Ł
Precautions ................................................. 2, 3
Ł
Safety Instructions ...................................... 4
Ł
Package Contents....................................... 5
Ł
Camera Installation ..................................... 6-12
Ł
.............................................. 13-16
Ł
Camera Dimension ..................................... 17-18
Ł
Features...................................................... 19
Ł
OSD Menu Details ...................................... 20- 34
Ł
Trouble Shooting......................................... 35

- 2 -
Precautions
Do not install the camera in
extreme temperature conditions.
Do not touch the front lens of the
camera.
Never keep the camera pointed
directly at strong light.
Do not expose the camera to
radioactivity.
Do not install the camera under
unstable lighting conditions.
Do not drop the camera or subject
it to physical shocks.
Only use the camera under conditions
where temperatures are between
-4°F and +140°F. Be especially careful to
provide ventilation when operating under
high temperatures.
This is one of the most important parts of
the camera. Be careful not to leave
fingerprints on the lens cover.
It can cause malfunctions to occur. If exposed to radioactivity the CCD
will fail.
Severe lighting change or flicker can
cause the camera to work improperly.
Housing damage can compromise
weatherproof ratings.
NOTE
* If the camera is exposed to spotlight or object reflecting strong light,
smear or blooming may occur.
* please check that the power satisfies the normal specification before
connecting the camera.

- 3 -
CAUTION
RISK OF ELECTRIC SHOCK
DO NOT OPEN
CAUTION:TO REDUCE THE RISK OF ELECTRIC SHOCK
DO NOT REMOVE COVER(OR BACK).
NO USER-SERVICEABLE PARTS INSIDE.
REFER SERVICING TO QUALIFIED SERVICE PERSONNEL.
ISO14001
The lightning flash with an arrowhead symbol, within an equilateral
triangle is intended to alert the user to the presence of uninsulated
dangerous voltage within the product's enclosure that may be of
sufficient magnitude to constitute a risk of electric shock to persons.
The exclamation point within an equilateral triangle is intended to alert
the user to the presence of important operating and maintenance
(servicing) instructions in the literature accompanying the appliance.
INFORMATION - This equipment has been tested and found to comply with
limits for a Class A digital device, pursuant to part 15 of the FCC Rules & CE Rules.
These limits are designed to provide reasonable protection against harmful
interference when the equipment is operated in a commercial environment.
This equipment generates, uses, and can radiate radio frequency energy and, if
not installed and used in accordance with the instruction manual, may cause
harmful interference to radio communications.
Operation of this equipment in a residential area is likely to cause harmful
interference in which case the user will be required to correct the interference at
their own expense.
WARNING - Changes or modifications not expressly approved by the
manufacturer could void the user’s authority to operate the equipment.
CAUTION : To prevent electric shock and risk of fire hazards:
ōDo NOT use power sources other than those specified.
In USA and Canada, Use Class 2 Power Supply Only
- 4 -
Safety Instructions
1SFDBVUJPOTGPSVTF
1MFBTFIBOEMFUIJTDBNFSBDBSFGVMMZ
Ł
ŁThere are no user serviceable parts inside
ŁDo not disassemble this camera other than to make initial adjustments
ŁUse a UL approved regulated 24 volt AC or 12 volt DC power supply
Ł
Ł
Please insure that your installation area can support the weight of the camera
ŁDo not use a strong or abrasive detergent when cleaning the camera
ŁDo not install near cooling or heating device

- 5 -
Package Contents
Please make sure that the following items are included in the Package:
1) HT770PH
- 2 Tapping Screws M3x10
- 2 Machine Screws M2x3
2) CVC130H
- 2 Tapping Screws M3x10
CAMERA INSTALLATION
CONNECT POWER CABLE
1. WHEN USING 12 VOLTS DC (constant voltage 500 mA)
2. CONNECT VIDEO CABLE
- CONNECT BNC CABLE TO THE BNC JACK.
G
kjGXY}GwGz
wGpGaylk
jGaGORP

- 6 -
SPECIFICATIONS
+73+
02'(/ HT770PH
1/3” Inch Color 960H CCD
976 (H) X 494 (V) approx. 480K pixels (NTSC)
976 (H) X 582 (V) approx. 570K pixels (PAL)
1020 (H) X 508 (V) approx. 520K pixels (NTSC)
1020 (H) X 596 (V) approx. 610K pixels (PAL)
700TV Lines
2:1 Interlace
0.00001Lux(Sens-up*256)
1.0Vp-p Composite. 75 Ohms
52dB
Low / Middle / High
OFF/AUTO (X2 ~ X256)
OFF/BLC/HLC
OFF/INDOOR/OUTDOOR
4 Zone
8 Zone
OFF/ON
Auto(AGC)/Day/Night/Ext
ATW/AWB/AWC->SET/Manual(1,800K ~ 11,000K)
1 ~ 200 Level Selectable
H-Rev / V-Rev / ROTATE
X32
OFF/ON
OFF/MANUAL/AUTO
Auto(512POINT)
DC 12V
120mA
3.7mm Fixed Cone Lens
-4ºF ~ 140ºF RH 95% Max
1.34"(W) * 1.34"(H) * 0.75"(D)
0.66 Ibs
Sensor type
Effective pixels
Total pixels
Resolution
Scanning system
Min. illumination
Video Output
S/N Ratio
AGC
Sens-UP
Backlight Compensation
D-WDR
Motion Detection
Privacy Masking
DIS(Digital Image Stabilizer)
Day & Night
White Balance
3DNR(2D or 3D)
Mirror
D-ZOOM
SMART DZOOM
DEFOG
Blemish Compensation
Power Source
Power Consumption
Lens
Storage Temperature
Operating Temperature
Dimension(W x H x D)
Weight
Speco Technologies
(Miniature Board Camera)
3.7mm Fixed Board Lens

- 7 -
SPECIFICATIONS
&9&+
02'(/ CVC130H
1/3” Inch Color 960H CCD
976 (H) X 494 (V) approx. 480K pixels (NTSC)
976 (H) X 582 (V) approx. 570K pixels (PAL)
1020 (H) X 508 (V) approx. 520K pixels (NTSC)
1020 (H) X 596 (V) approx. 610K pixels (PAL)
700TV Lines
2:1 Interlace
0.00001Lux(Sens-up*256)
1.0Vp-p Composite. 75 Ohms
52dB
Low / Middle / High
OFF/AUTO (X2 ~ X256)
OFF/BLC/HLC
OFF/INDOOR/OUTDOOR
4 Zone
8 Zone
OFF/ON
Auto(AGC)/Day/Night/Ext
ATW/AWB/AWC->SET/Manual(1,800K ~ 11,000K)
1 ~ 200 Level Selectable
H-Rev / V-Rev / ROTATE/PIP
X32
OFF/ON
OFF/MANUAL/AUTO
Auto(512POINT)
DC 12V
120mA
3.6mm Fixed Board Lens
-4ºF ~ 140ºF RH 95% Max
0.83"Dia * 2.87"(D)
0.13Ibs
Sensor type
Effective pixels
Total pixels
Resolution
Scanning system
Min. illumination
Video Output
S/N Ratio
AGC
Sens-UP
Backlight Compensation
D-WDR
Motion Detection
Privacy Masking
DIS(Digital Image Stabilizer)
Day & Night
White Balance
3DNR(2D or 3D)
Mirror
D-ZOOM
SMART DZOOM
DEFOG
Blemish Compensation
Power Source
Power Consumption
Lens
Storage Temperature
Operating Temperature
Dimension(W x H x D)
Weight
Speco Technologies
(Miniature Weather Resistant Bullet Camera)
3.6mm Fixed Board Lens

- 8 -
CAMERA DIMENSION
0.75”1.34”
1.34”
2.87”
0.83”Dia
0.83”Dia
1. HT770PH
2. CVC130H

- 9 -
(FOFSBM'FBUVSFT
Ǹ
700TV Lines
The combination of a 960H CCD image sensor and SPECO DSP provides an excellent resolution
of 700TV Lines.
Ǹ
3D-DNR
Smart 3DNR prevents the image blurring of moving object and activates only if moving objects
are appearing on the scene.
Ǹ
DIS(Digital Image Stabilizer) Function
Makes a stabilizing clearer and the highest picture quality when out of focus by the wind or
climate changing.
Ǹ
Smart-IR
No saturation image, vivid image in darkness. "SPECO 960H" camera makes very sharp
video image in darkness. This technology eliminates saturation of video image of the closer
object in darkness by control of the IR sensitivity. Saturation never happens in our "SPECO
960H"cameras, you can enjoy vivid image in any dark condition.
Ǹ
Sens-Up
Despite a limited & low light condition, Sens-Up - Max. x256 helps the viewer to get visible and
clear images.
Ǹ
Defog
Defog
function improve the clarity of images taken in poor conditions such as fog, smoke, rain
or snow.

- 10 -
Menu setting can be selected by the button inside the camera.
1. Press and hold the set button.
* The Set Up menu will be displayed on the monitor.
2. Move and select the required function using the Up and Down button.
0HQX6HW8S
SPECO
SPECO
LENS
EXPOSURE
WHITE BAL
DAY&NIGHT
3DNR
SPECIAL
ADJUST
RESET
EXIT
LENS
EXPOSURE
WHITE BAL
DAY&NIGHT
3DNR
SPECIAL
ADJUST
RESET
EXIT
DCAUTO
ATW
COLOR
ON
DCAUTO
ATW
COLOR
ON
3. Change menu settings using the Left or Right button.
* Available values or Status are displayed by pressing the Left or Right buttons.
Press the button until desired value / status is displayed.
4. After Changing the setting move the arrow indicator to EXIT and press the
SET button to EXIT.

- 11 -
This function is to adjust the brightness of the monitor.
1. Move the triangular indicator to LENS using the Up and Down buttons on the Set Up menu screen.
2. Select the desired lens type by pressing the Left of Right button.
NOTE
* Move to the available submenu by moving arrow to desired feature.
* Submenu is not available when this symbol is displayed “---“.
/HQV
SPECO
LENS
EXPOSURE
WHITE BAL
DAY&NIGHT
3DNR
SPECIAL
ADJUST
RESET
EXIT
DCAUTO
ATW
COLOR
ON
NOTE
* When DC is selected, the brightness control range is 1~100.
* When you select the mode setup, you can select INDOOR or OUTDOOR depending on the
installation environment.
DC LENS
BRIGHTNESS
MODE
RETURN
50
INDOOR
RET
IIIIIIIIII IIIIIIIIII|

- 12 -
1. On the Set Up menu, Select EXPOSURE by using the Up or Down button.
([SRVXUH
SPECO
LENS
EXPOSURE
WHITE BAL
DAY&NIGHT
3DNR
SPECIAL
ADJUST
RESET
EXIT
DC
ATW
COLOR
ON
2. Select the desired shutter mode by pressing the Left or Right button.
EXPOSURE
SHUTTER
AGC
SENSE-UP
BLC
D-WDR
RETURN
AUTO
MID
AUTO
OFF
OFF
RET
ೠElectronic Shutter : DC lens is launched with the setting of 1/60 and the manual lens is launched
with the setting of Auto shutter, but the shutter speed can be adjusted from 1/60 to 1/100,000.
ȥDIS (Digital Image Stabilizer) : Select the DIS mode when a shaken image appeared due to the
discrepancy of frequency with ambient light condition near the installation spot. Sense Up mode does
not work while in DIS mode.
ೠAGC (Auto Gain Control) : The higher the AGC level is, the more noise will appear.
ȥOff : Deactivated.
ȥLow : 28dB Gain is applied.
ȥMid : 32dB Gain is applied.
ȥHigh : 36dB Gain is applied.

- 13 -
ೠSense-Up : The bright screen can be displayed by sensing the degree of the darkness automatically under
the circumstance of low light condition or at night.
ȥOff : Deactivated status.
ȥAuto : Sense-Up auto mode status, The brightness degree is decided by the Sense Up setting value in
the low light condition.
SENSE-UP
SENSE-UP
RETURN
x32
RET
NOTE
*Sense Up mode does not work while the AGC mode is off.
NOTE
*Sense Up mode does not work while the Electronic shutter is set to Manual or DIS.
BLC
VALUE
AREA
DEFAULT
RETURN
MIDDLE
RET
ೠBLC (Back Light Compensation) : The camera with 3D-DNR provides the intelligent light level control to
overcome strong backlight conditions.
ȥOff : Deactivated status
ȥBLC : The set up area can be seen vividly by the user who sets up the desired area to compensate for
the back light directly according to the installation environment.

- 14 -
ȥHSBLC (Highlight Suppression Back Light Compensation) : When there is a car head light turned on
at the entrance of the gas station or in some place in the parking lot, the numbers of the car plate
can be recognized by blocking only the light from the car headlight. The area is set up specifically so
you can recognize the car plate numbers by blocking out the strong light.
Normal
HSBLC
GAIN
MODE
DEFAULT
RETURN
8
ALL DAY
RET
IIIIIIIIII IIIIIIIIII|
HSBLC
ೠD-WDR : This camera which is using 3D-DNR DSP provides intelligent light level control to overcome
even strong backlight conditions.
ȥOff : Deactivated status.
ȥIndoor compensation : To be used when the camera is installed in the indoor circumstances.
ȥOutdoor compensation : To be used when the camera is installed in the outdoor circumstances.
WDR OFF WDR ON
ೠReturn : Saves the changes and returns you to the previous menu.

- 15 -
:KLWH%DODQFH
SPECO
LENS
EXPOSURE
WHITE BAL
DAY&NIGHT
3DNR
SPECIAL
ADJUST
RESET
EXIT
DC
ATW
COLOR
ON
Use this function when the color adjustment of a screen is needed.
1. Move the triangular indicator to WHITE BAL on the SETUP menu screen using the Up and Down button.
2. Select the desired mode by using the left or Right button.
Use the appropriate mode according to your purposes among these three modes.
ೠATW : Use this mode when the color temperature is from 1,800K to 10,500K.
ೠAWB : The function to search for the color which is matched well with the ambient environment. This
should be used when the color temperature is from 3,000K to 7,000K.
ೠAWCȥSET : After letting the camera focus on the blank white paper to the best condition of current
lighting environment, press the SET button. If the lighting condition is changed, Re-adjustment is
recommended.
ೠMANUAL : Manual setting allows for a more detailed color control. First, after adjusting the
white balance using the ATW or AWB mode, change the mode into the manual compensation mode
and then press Set button.
MANUAL WB
BLUE
RED
RETURN
31
20
RET
IIIIIIIIII IIIIIIIIII|
IIIIIIII IIIIIIIIIIII|

- 16 -
NOTE
The White Balance may not be working properly in the following conditions.
When there is a very high color temperature in the circumstances of the subject.
( for example, clear sky, Sunset)
!#!$!!$$
change, The operation of White balance may become unstable.
* In these conditions, AWB mode is recommended.
'D\1LJKW
SPECO
LENS
EXPOSURE
WHITE BAL
DAY&NIGHT
3DNR
SPECIAL
ADJUST
RESET
EXIT
DC
ATW
COLOR
ON
You can change the color mode of color or black / white by setting up the mode.
1. Select Day&Night using the Up or Down button on the Set Up menu screen.
2. Select the desired mode using the Left or Right buttons.
ೠCOLOR : Makes the video output in color, at all times.
ೠB / W : Makes the video output in Black and White, at all times.
DAY&NIGHT B/W
BURST
IR SMART
RETURN
OFF
ON
RET
ȥBurst : Remove the color signal to make the video output in Black and White.
ȥSmart IR : Eliminate saturation of video image of the closer object in darkness by control of the IR
sensitivity.

- 17 -
ೠAuto : Automatically, It shifts into the color mode in the bright environment and the B/W mode in the
low light condition. It can adjust the delay time, starting brightness and end brightness according to the
ambient conditions by pressing the Set button.
DAY&NIGHT AUTO
DELAY
!"#$%
!"#$%
RETURN
5
60
20
RET
IIIIIIIIII IIIIIIIIII|
IIIIIIII IIIIIIIIIIII|
IIII IIIIIIIIIIIIIIII|
ೠEXT : It can change the color or B/W mode automatically by connecting external signal.
'15
This function decreases the noise in the low light background.
1. Move the triangular indicator to 3DNR by using the Up or Down button.
2. Select the mode to use by pressing the Right or Left button.
SPECO
LENS
EXPOSURE
WHITE BAL
DAY&NIGHT
3DNR
SPECIAL
ADJUST
RESET
EXIT
DC
ATW
COLOR
ON
3. Adjust the most available proportion of compensation with the ambient environment by changing the
3DNR mode into On and pressing the Set button.
ೠOff : Deactivated status.
ೠOn : The compensation proportion is from 0 to 200.
The excellent effect of noise decrease in the low light condition.

- 18 -
3DNR
LEVEL
RETURN
200
RET
IIIIIIIIII IIIIIIIIII|
NOTE
* If 3DNR function is used, the cancellation effect of noise is excellent. The higher the
compensation proportion raise, the better the effect of noise cancellation is, but the ghost
effect may occur.
6SHFLDO
SPECO
LENS
EXPOSURE
WHITE BAL
DAY&NIGHT
3DNR
SPECIAL
ADJUST
RESET
EXIT
DC
ATW
COLOR
ON
This can be used when you want to select the additional function control.
1.When the SETUP menu is displayed, select SPECIAL using the Up and Down button.
2. Select one of the mode using the Up and Down button.
SPECIAL
CAM TITLE
D-EFFECT
MOTION
PRIVACY
DEFECT
DEFOG
RETURN
OFF
OFF
OFF
OFF
RET

- 19 -
CAM TITLE
0 1 2 3 4 5 6 7 8 9
A B C D E F G H I J K
L M N O P Q R S T U V
W X Y Z ȥȣȤȦ
ſBȿ
ȣȥ&/5326(1'
&$0(5$
BBBBBBBBBBBBBBB
ೠCAM (Camera) TITLE : It can be adjusted when you get into the Cam Title menu. This function is to
display the letters of the camera on the monitor. The 15 characters can be displayed and the location
of the camera title on the screen can be adjusted. Move the triangular indicator to CAMERA ID using the
Up and Down button on the Setup menu and then Set to On using the Left or Right button. After the
letters you want to display on the monitor set up, press set button on the “END” and complete the set up.
NOTE
* If you want to erase the letter, move the cursor on the empty space in front of the number
0, and then letters will be erased by pressing the Set button one by one. Selecting the CLR
option will erase all of the characters.
ೠD-EFFECT : This function affects the video image.
D-EFFECT
FREEZE
MIRROR
D-ZOOM
SMART DZOOM
DIS
NEG.IMAGE
RETURN
OFF
OFF
- - -
OFF
- - -
OFF
RET
ȥFREEZE : The image of the monitor is paused temporarily by this function
ȥMIRROR : The image of the monitor is reversed vertically or horizontally.
This manual suits for next models
1
Table of contents
Other Speco Security Camera manuals

Speco
Speco O4P25X2 User manual

Speco
Speco HT-7247IHR User manual

Speco
Speco O2VD2 User manual

Speco
Speco VL-10 User manual

Speco
Speco CVC5845DNV User manual

Speco
Speco ONSIP O2D4 User manual

Speco
Speco HTSD12X User manual

Speco
Speco VIP2B3 User manual

Speco
Speco 960H Series User manual

Speco
Speco IP-SD10X User manual

Speco
Speco Flexible Intensifier O8FD4M User manual

Speco
Speco Deterrent O4TDD1M User manual

Speco
Speco O6MDP3N User manual

Speco
Speco Intensifier O2iD8M User manual

Speco
Speco HT-7715DNV User manual

Speco
Speco HT - INTB8/9/10 User manual

Speco
Speco WDR-R3 User manual

Speco
Speco CVC-1724 User manual

Speco
Speco O5P2 User manual

Speco
Speco CVC6146SCFF User manual