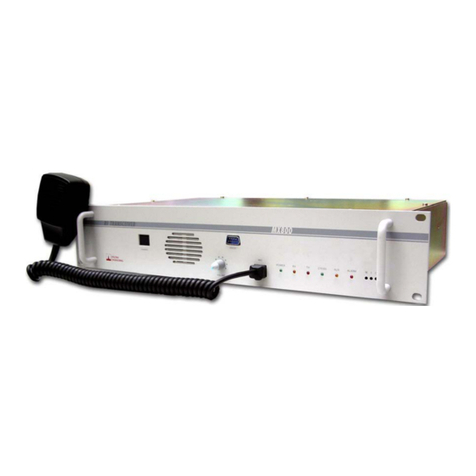
Spectra Engineering MX921 User manual

Application Note AN-MX921-003
© 2004 Spectra Engineering Pty Ltd Ver1.0 Page
1 of 4
MX921 Option T46
INTRODUCTION
The MX921 has been design around low power
consumption, to maximize operation time when used
in conjunction with battery(s) powered sites. To insure
maximum efficiency of the radio and to insure
maximum efficiency from your Battery system, we
have developed option T46, Low Loss Solar
Regulator and intelligent Battery Manager.
Typical other types of battery managers have high volt
drop due to there design or the necessity of a diode on
the solar panel. With the T46 option we have removed
all the unnecessary volt drop caused by diodes and
employing an efficient Switching mode regulator
system to achieves 99% charging efficiency. This
technique is virtually lossless and disconnects the
Solar Panel from the Battery when the end float
voltage has been reached. It has the added advantage
of not generating any electrical noise.
The intelligent Battery Manager automatically stops
the solar panels, wind generator or other power source
from charging the battery when the battery is fully
charged.
Special features
•Plug and Play installation with MX921.
•MX921 Front panel power on\off control.
•LED readout to show the status of the
solar charging system and batteries.
•User Adjustable Control Settings for
different types of batteries systems.
•Very low voltage loss. Using extremely low
resistance FETs, the voltage drop across the
controller from the Solar Panel to Battery and
from Battery to MX921 is much lower than
other third party controllers
•Over Volts protection.
•Over Charge protection.
•Deep discharge protection
•Reverse Polarity protection
Operation information
To maintain a long battery life, it is desirable to use
only a small part of the total battery(s) capacity before
recharging. Each time the batteries are run down and
charged up, the batteries undergo a charge/discharge
cycle. If more than half the battery's stored energy is
discharged before it is recharged, this is called 'deep
cycling'. Solar systems normally do one shallow cycle
per day, but during 'low sun' periods may undergo
much deeper discharges (system dependent). For
maintaining a long battery life, the shallow cycle
should be less than 20 per cent of battery capacity and
the deep cycle less than 80 per cent.So when
choosing your battery(s) insure you take this into
account.
It is possible to damage batteries by overcharging
them. Some solar panels have an output voltage which
is claimed to be low enough to stop charging above 15
volts and to be 'self regulating'. However, because
their open circuit voltage is still +18 volts or so, they
will actually continue to charge with a much reduced
current. Most conventional panels will deliver full
power up to about 18 volts and therefore an external
Low Loss Solar Regulator and intelligent Battery
Manager (option T46) is required.
The Loss Solar Regulator and intelligent Battery
Manager continuously monitors the battery voltage
and will disconnect the load if the voltage is higher
than 15V in the factory default position. This is Over
Volts protection. Like wise when the voltage reaches
higher than 13.8V in the factory default position the
solar panel is disconnected. This provides over
charging protection.
When the battery is below 11V in the factory default
position the battery manager will hold the battery
system disconnected for a period of 2:30min. This is
done to prevent oscillations in the circuit due to
battery(s) voltage recovery.
When the Battery’s voltage is below the set voltage
point, the Solar Panel is connected to the Battery via
the low loss switching FETs. During the charge
process the terminal voltage will slowly rise until the
voltage rises above the switch point, at which time the
Solar Panel is disconnected.
In normal operation, the Batteries terminal voltage
will hence cycle between the hysteresis points of the
controller. The default setting is to stop charging
when the Battery terminal voltage reaches 13.8 Volts
and charge below 13.3 Volts.

AN001
Page
2 of 4 © 2000 Spectra Engineering Pty Ltd
This method has the advantage not requiring any lossy
voltage conversion and transfers the maximum power
from the Solar Panels during the charge process.
Charge limitations and precautions
For correct operation, the Solar Panels output current
capability should not exceed the charge current rating
of the battery. This is because the charge current is not
monitored or controlled. If the Battery used is too
small or the available Solar Panel current is too big,
the Battery’s terminal voltage will be forced to rise to
fast resulting in early disconnection. A continual
cycling may result when the Battery has not actually
finished charging.
As a guide, if a 100Ahr Battery is used, the optimum
charge current is one tenth that of the Amp Hour
rating. ie. 10Amps. Use a Solar Panel with less than
10Amps output. Generally a standard Polycrystalline
180 Watt Panel array outputs 18Volts at 10 Amps.
Some Batteries may have a higher or lower charge
current capability, so please check your Battery
manufactures specifications. The correct system
operation is the responsibility of the person setting up
and installing the system.
LED Indicators
LED indicators have been fitted to the T46, Low Loss
Solar Regulator and intelligent Battery Manager to
provide indication of the current status of battery and
solar panel. Please see Table 1 below.
Table 1
Led Colour Function
Blue
(LED8) Lights when Load is connected to
Battery
Blue
(LED3) Lights when power source is connected
Aqua
(LED2) Lights when Solar panel volts
connected
RED
(LED1) Lights when a Solar panel is connected
reverse polarity
RED
(LED7) Lights when the power source is
connected reverse polarity.
Green
(LED4) Lights when Battery charging
Yellow
(LED5) Lights when battery volts is Over Volts
Amber
(LED6) Lights when battery flat

AN001
© 2000 Spectra Engineering Pty Ltd Page
3 of 4
Intelligent Battery Manager Setup
The T46 comes from the factory preset. The preset
settings are set via Jumpers.
JMP Function Connect Disconnect
2 Battery Flat Volts 12V 11V
3 Over Volts 15V 16V
4 Charge Volts 13.3V 13.8V
Table 2
The battery manager has the facility provides the
ability to set user define protection levels. This is done
by removing the factory preset jumpers and adjusting
the corresponding potentiometer.
See Table 3 Below.
Note the potentiometers will only set the function
Voltage connects points only. The voltage difference
between connect and disconnect will remain the same
ratio as seen in Table 2.
Potentiometer
Function
RV1 Battery Flat Volts
RV2 Over Volts
RV3 Charge Volts
Table 3
Installation
The option board provides ease of installation within
the MX921 Radio. Follow the following simply steps.
1. Remove the top cover from the MX921.
2. Locate in the front right hand corner four
mounting standoff.
3. Now overlay PCB and fasten 4X M3 screws.
4. Remove Power supply cable from PA and
chassis Power Socket.
5. Remove the PA Connector plug from power
wiring and connect the wiring to the T46
PCB connector marked Input . (Make note of
polarity before removing as reconnection is
required in next step)
6. Connect the figure8 cable supplied to PA
connector plug and also the thinner radio
supply wires. Attach the other end to T46
PCB connector marked TO PA.
Insure correct polarity.
7. Connect the smaller length of figure8 cable.
Connect (+Ve) RED & (-Ve) Red with black
strip to T45 PCB connector marked Solar and
the other end to CN5 pin1 (+Ve), CN5 pin2
(–Ve). See section below on CN5 DC Power
Input)
8. Refit power socket to radio chassis.
9. Solar Panel Ground maybe connected to –ve
of battery or pin 2 of supply Plug.
10. Fit SKH jumper cable between radio and
option board. This provides front panel
switch ON/OFF function.
CN5 DC Power Input
DC power is connected to the transceiver through this
connector. The transceiver is fitted with a 3-pin male
connector. For 50W transceivers pins 2 and 3 are used
for the 12V DC pin 1 is unused. Connect Solar panel
(+) positive wire to this unused pin. The power lead to
the transceiver should be made from a gauge of wire
suitable to ensure less than 0.5V drop at 10A for the
required length of the lead.
Table 4 CN5 DC Power Input Connections
PIN No Function
1 Unused \Solar Panel input
used in conjunction with
T46 Option
2 Ground
3 + 13.8VDC

AN001
Page
4 of 4 © 2000 Spectra Engineering Pty Ltd
Spectra Engineering Pty Ltd
ABN 65 057 696 438
9 Trade Road
Malaga
Western Australia 6090
Tel: +61-8-92482755 Fax: +61-8-92482756
Email: info@spectraeng.com.au
Web: www.spectraeng.com.au
Revision 1.0 Thursday, 16 March 2006
In order to continually improve our products, Spectra Engineering Pty Ltd reserves the right to alter,
without notice and at any time, the equipment and specifications described in this document.
All performance figures quoted are typical and are subject to normal manufacturing and service
tolerances.
The purchaser is warned that statements made in this document may be inaccurate due to typographical
or other errors or subsequent modifications of the product. While every care has been taken in the
creation of this document, no warranty of accuracy or reliability is given, in any advice or information
contained in this document. The responsibility for any loss or damage whatsoever arising in any way or
any representation, act or omission whether express or implied (including responsibility to any person
by reason of negligence) is not accepted by Spectra Engineering Pty Ltd or any director, officer, agent
or employee of Spectra Engineering Pty Ltd.
Copyright © Spectra Engineering Pty Ltd 1997-2010.
This work is copyright. Other than as permitted by Law, no part of it may be reproduced, stored in a
retrieval system or transmitted in any form or by any process without prior written permission.
FCC Interference Warning
Note: The equipment has been tested and found to comply with the limits for a class B digital device,
pursuant to Part 15 of the FCC Rules. These limits are designed to provide reasonable protection against
harmful interference when the equipment is operated in a commercial or residential environment. This
equipment generates, uses and can radiate radio frequency energy. If not installed and used in
accordance with this instruction manual, may cause harmful interference to radio communication.
Other Spectra Engineering Computer Hardware manuals
