Spectrum Techniques ICS-PCI User manual

ICS-PCI
Integrated Computer Spectrometer
PCI Card Version for Windows
®
User’s Manual
Spectrum Techniques, Inc.
106 Union Valley Road
Oak Ridge, TN 37830
Tel. (865) 482-9937
Fax (865) 483-0473
web http://www.spectrumtechniques.com
February, 2005

2
Table of Contents
CONTENTS.............................................................................................................................................................................4
Introduction..............................................................................................................................................................................5
Installation ...............................................................................................................................................................................6
Software Installation ............................................................................................................................................................6
Card Installation...................................................................................................................................................................6
Connecting Detector............................................................................................................................................................7
Analysis Modes .......................................................................................................................................................................8
Pulse Height Analysis (PHA Pre Amp In)............................................................................................................................8
Pulse Height Analysis (PHA) - Amp In ................................................................................................................................8
Pulse Height Analysis (PHA) - Direct In ..............................................................................................................................9
Multichannel Scaling (MCS Internal) ...................................................................................................................................9
Multichannel Scaling (MCS) - External................................................................................................................................9
Start Up .................................................................................................................................................................................10
Starting the Application......................................................................................................................................................10
High Voltage and Amplifier Gain .......................................................................................................................................12
ADC Conversion Gain Adjustment .................................................................................................................................... 13
Lower (LLD) and Upper (ULD) Level Discriminator Adjustments......................................................................................13
Operation...............................................................................................................................................................................15
Preset Time Adjustments ..................................................................................................................................................15
Integrals and Preset Counts..............................................................................................................................................15
Start ...................................................................................................................................................................................16
Stop ...................................................................................................................................................................................17
Erase .................................................................................................................................................................................17
Regions of Interest (ROI)...................................................................................................................................................17
Functions...............................................................................................................................................................................19
Energy Calibration .............................................................................................................................................................19
Temperature Compensation..............................................................................................................................................20
IsoMatch ............................................................................................................................................................................21
Background Subtraction ....................................................................................................................................................22
Smoothing..........................................................................................................................................................................22
Overlay ..............................................................................................................................................................................22
Auto Calibration ................................................................................................................................................................. 23
Menu Bar...............................................................................................................................................................................24
File .....................................................................................................................................................................................24
Edit.....................................................................................................................................................................................25
Mode..................................................................................................................................................................................26
Calculate............................................................................................................................................................................27
Display...............................................................................................................................................................................27
Settings..............................................................................................................................................................................28
Window..............................................................................................................................................................................33
Help ...................................................................................................................................................................................34
Tool Bar.................................................................................................................................................................................35
Open..................................................................................................................................................................................35
Save...................................................................................................................................................................................35
Print ...................................................................................................................................................................................35
Copy ..................................................................................................................................................................................35
Amp/HV .............................................................................................................................................................................36
Preset ................................................................................................................................................................................36
Spectrum ...........................................................................................................................................................................36
Peak Report.......................................................................................................................................................................36
Data Report .......................................................................................................................................................................37
Contents ............................................................................................................................................................................37
Display Window.....................................................................................................................................................................38
Start Button........................................................................................................................................................................38
Stop Button........................................................................................................................................................................38
Erase Button......................................................................................................................................................................38
Zoom Buttons ....................................................................................................................................................................38
Dead Time ......................................................................................................................................................................... 39
High Voltage ......................................................................................................................................................................39

3
Live and Real Time............................................................................................................................................................39
Calibration Status ..............................................................................................................................................................39
Temperature ...................................................................................................................................................................... 39
Technical Reference .............................................................................................................................................................40
Specifications ........................................................................................................................................................................41
Hardware ...........................................................................................................................................................................41
Software.............................................................................................................................................................................42
Warranty and Repair .............................................................................................................................................................43

4
CONTENTS
This version of ICS-PCI software program is written in C++ language. It is designed for Microsoft Windows
®
98 or higher.
Most functions may be accessed by more than one method. All the functions can be accessed from the Pull Down Menu,
some from the Tool Bar Buttons, or by the mouse. If the function has a Tool Bar Button, its symbol will be shown on the
left hand side of the description.
Introduction
Installation
Analysis Modes
Start Up
Operation
Functions
Menu Bar
Tool Bar
Display Window
Technical Reference
Specifications
Warranty and Repair
Spectrum Techniques, Inc.
106 Union Valley Road
Oak Ridge, TN 37830
Tel. (865) 482-9937
Fax (865) 483-0473
e-mail spectech@esper.com
web http://www.spectrumtechniques.com

5
Introduction
The ICS-PCI is designed for spectroscopy applications, the Integrated Computer Spectrometer offers complete support
for standard scintillation detectors together with multichannel scaling for decay and time related studies.
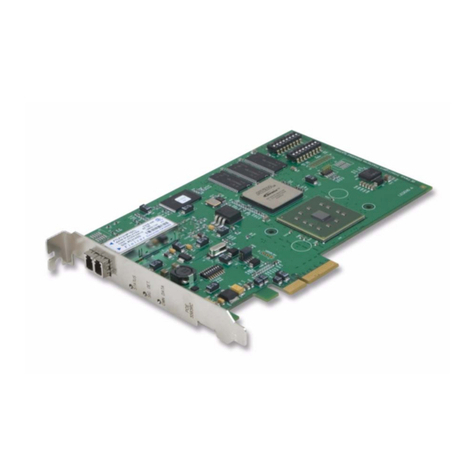
Constructed on a single PC compatible plug-in card, the multichannel analyzer contains many advanced features
including computer controlled amplifier and high voltage for PM tubes, upper and lower level discriminators, on-card data
memory, and a comprehensive software package for use under Windows.
The ICS-PCI requires only a single PCI card slot and is designed for installation in most types of IBM compatible
computers with a minimum of 512K of memory and EGA or VGA graphics. For stability and low noise operation, critical
power is regenerated on the card from the computer power using high efficiency converters. An on-board microprocessor
acts as the master controller and data storage device, as well as the communication link directly to the PC bus.
The integrated amplifier and high voltage are fully compatible with most standard scintillation detectors eliminating the
need for special tube bases and external modules. For ease of setup and calibration, coarse gain, fine gain, high voltage,
and lower and upper level discriminator settings are controlled directly from the PC. For operation with other types of
detector systems such as alpha spectrometers or single photon counting, a selector is provided to bypass the scintillation
amplifier and allow direct access to the ADC.
A 1024 to 4096 channel ADC, depending on the card model, with derandomizing buffer offers excellent data throughput at
high counting rates with minimal dead-time losses. Conversion gain may be changed from 4096, 2048, 1024, to 512, or
256 channels via the software. Data from the ADC is stored directly in on-board memory for autonomy and high speed
operation, freeing the host PC for other tasks.

6
Installation
Before installing a ICS-PCI Card for the first time, the software should be installed.
Your ICS-PCI card has been factory configured to operate internally in most IBM ® compatible PC's. System
requirements; 486 or Pentium processor, 8 meg RAM, 640 x 480 VGA or SVGA graphics, Microsoft Windows® version 98
or higher, compatible mouse, and an available PCI slot. The software requires 3.0 meg available disk space. If problems
occur and the ICS-PCI card does not respond correctly to the software commands, refer to the Technical Reference
section of this help file. If problem persists, contact the factory.
The ICS-PCI software is defaulted to enable the internal amplifier on the card. This configuration requires the use of a
simple high voltage divider type photomultiplier tube base. The signal (anode) from the base may be connected directly to
the ICS-PCI bottom Input (BNC) connector and the HV (high voltage) connected directly to the top HV (MHV) connector.
The BNC and MHV connectors have a similar appearance, exercise care when making these connections.
Software Installation
Place ICS-PCI software disk into the appropriate disk drive on the computer that will be using the ICS-PCI card.
Using the Windows Explorer, locate the drive and folder containing the ICS-PCI Software. Launch the Setup program by
double-clicking the Setup program icon. Continue to follow the instructions on the screen. In most cases, the default
responses will be adequate.
Card Installation
The intended computer for use of the ICS-PCI card must have at least one available PCI slot.
Remove the case cover and install the ICS-PCI circuit card into the PCI bus of the computer.
Ensure that the card is seated firmly into the slot. Secure the card to the chassis of the computer with screw.
After the card has been installed, connect the detector signal to the card BNC connection and the high voltage
MHV to the detector HV connection. If the optional temperature sensor has been purchased, connect it to the
T/COMP connector.
WARNING - DO NOT connect a telephone to the T/COMP connection. It is not compatible with modem or network
devices. Connection of unsupported devices to any of the connections may damage the ICS-PCI card or the external
device and could result in a voided warranty.

7
Connecting Detector
The ICS-PCI software is defaulted to enable the internal amplifier on the card. This configuration requires the use of a
simple high voltage divider type photomultiplier tube base. The signal (anode) from the base may be connected directly to
the ICS-PCI bottom Input (BNC) connector and the HV (high voltage) connected directly to the top HV (MHV) connector.
An optional temperature sensor can be connected to the T/COMP connector on the ICS-PCI.
The BNC and MHV connectors have a similar appearance, exercise care when making these connections.
WARNING - DO NOT connect a telephone to the T/COMP connection. It is not compatible with modem or network
devices.
Connection of unsupported devices to any of the connections may damage the ICS-PCI card or the external device and
could result in a voided warranty.

8
Analysis Modes
Pulse Height Analysis (PHA Pre Amp In)
PHA Amp In
PHA Direct In
Multichannel Scaling (MCS Internal)
MCS External
Pulse Height Analysis (PHA Pre Amp In)
Pulse Height Analysis - The normal operating mode for collecting sample emission spectra.
The incoming signal is routed through the card's internal Pre-Amplifier and Amplifier stages.
The amplitude of each detector pulse is then measured by the ADC and is stored as an amplitude (energy) spectrum.
Pulse Height Analysis (PHA) - Amp In
PHA Amp In - Similar to the 'PHA PreAmp In' operating mode except that the incoming signal bypasses the card's
internal Pre-Amplifier.
The amplitude of each detector pulse is measured by the ADC and stored as an amplitude (energy) spectrum.

9
Pulse Height Analysis (PHA) - Direct In
PHA Direct In - Similar to the 'PHA PreAmp In' operating mode except that the incoming signal bypasses both the
card's internal Pre-Amplifier and Amplifier stages.
The amplitude of each detector pulse is measured by the ADC and stored as an amplitude (energy) spectrum.
Multichannel Scaling (MCS Internal)
Multichannel Scaling - This mode is used for measuring time related phenomena such as half-life decay or single photon
counting. Incoming events are counted for specific predetermined times (dwell time) and stored in sequential memory
locations. The card is factory set with the internal preamplifier/amplifier enabled for counting events directly from a NaI(Tl)
detector. In the 'MCS Internal' mode, the signal is routed through the card's amplifiers.
Multichannel Scaling (MCS) - External
MCS External - This mode is used for measuring time related phenomena such as half-life decay or single photon
counting. Incoming events are counted for specific predetermined times (dwell time) and stored in sequential memory
locations. In the 'MCS External' mode, the internal preamplifier and amplifier is bypassed and the signal is routed directly
to the counter.

10
Start Up
Starting the Application
Instrument Selection
To run the ICS-PCI software, select from the Start Menu or double-click the icon for the application. If two or more
supported cards are installed and recognized, a selection window will be displayed showing details of all supported cards.
Using the mouse, select and highlight the desired card from the instruments not 'In Use'. Click the OK button to accept.
If only one card is available, that card will be automatically selected for you and the main window will be opened .
If no card is detected or none are available (already in use by another instance of ICS-PCI software already running), a
warning will be displayed advising that only 'File Mode' activity will be functional. Choosing CANCEL in the selection
window will result in running in File Mode.
The application may be started for a specific serial number card by using a shortcut icon created using Windows standard
methods. A quick way to create a shortcut is to copy the existing standard icon created during software installation and
edit it to suit your needs.
To directly start the software and connect to a specific card, you may add a command line switch -s followed by the
known serial number of the desired card. By this means, you may have multiple icons on the windows desktop that each
open and control a dedicated device.
The example properties window below demonstrates the entries to be made. If the software is placed in different
directories, the path must be appropriately entered.
If the program is started by way of a shortcut or command line and the specified serial number is not available (either
already in use or no longer installed in the computer) you will be notified and taken into File Mode operation.
Shortcut
Any shortcuts created manually will not be automatically removed when uninstalling the software.

11
Normal Program Window

12
High Voltage and Amplifier Gain
Once the program is running it will be necessary to configure the system parameters for correct operation and calibration.
Connect a working compatible detector to the card and place a gamma emitting check source near the detector face.
Cesium-137 (Cs-137) is a good choice. It has major peak at 662 keV.
Click on Settings, then click on AMP/HV. Set the high voltage to the voltage as listed by the detector manufacturer.
As an example, set the high voltage to 600 volts, click ON.
DO NOT exceed the maximum high voltage rating of the detector, usually 1200 volts.
Set the amplifier COARSE GAIN to 2, and set the FINE GAIN to 1 as a starting position.
Click on OK, to set adjustments and exit the menu.
Start the data acquisition and adjust the amplifier gain up or down until the 662 keV peak is approximately mid-scale.
Once the acquisition is started, you may enter the AMP/HV menu, make adjustments while viewing the spectrum.
This will allow you to position the peak in the desired channels.

13
ADC Conversion Gain Adjustment
The conversion gain default and maximum setting is 1024 to 4096 channels depending on the card model.
For most scintillation detector applications a conversion gain of 1024 is used. For certain applications such as
alpha spectroscopy, it may be necessary to change this parameter to either 256 or 512 channels.
Click on Settings, click on AMP/HV.
Select the desired conversion gain from the list. Click on OK, to set adjustment and exit menu.
Lower (LLD) and Upper (ULD) Level Discriminator Adjustments
The discriminators permit restricting counts to user selected energy regions. Low energy noise may be rejected by raising
the LLD. Detected
counts may be limited to a range of energies by adjusting both LLD and ULD near the region boundaries.
Two methods are available for adjusting the lower and upper level discriminators.
One is available from the Menu Bar and the other along the lower graphic X-Axis.
Click on Settings, click on AMP/HV.
Enter the number in the lower and upper level boxes or drag the slider controls to the desired setting.
Click on OK, to set adjustment and exit the menu.
The discriminators may be adjusted graphically by moving the triangles for the lower and upper level setting located
on the energy line (lower X-Axis) of the spectrum display to the desired settings by clicking on the appropriate control and
dragging with the mouse.

14

15
Operation
Preset Time Adjustments
Preset Real Time sets the counting timer to run for actual clocktime and makes no correction for losses due to deadtime
effects. Subsequent acquisition will be automatically stopped by the card at the set time.
Preset Live Time provides automatic correction for counting losses caused by the system deadtime. Events which occur
during the pulse processing cycle are lost to the system so the timer is automatically updated to compensate for these
losses. When operating at excessively high count-rates the deadtime meter will indicate a high value and the real counting
time may be greatly increased. Increasing the LLD setting can help reduce some high deadtime effects.
Click on Settings, click on Presets
Enter the REAL or LIVE time in the correct box. Click on OK, to set adjustment and exit menu.
Both the REAL TIME and LIVE TIME values of a measurement are displayed on the ICS-PCI display screen and updated
during acquisition. The values are saved with the file during data storage.
Related Topics:
Integrals and Preset Counts
Integrals and Preset Counts
When the marker is positioned in a region of interest (ROI), the ICS-PCI software automatically calculates the Gross and
Net area of the region. In order to minimize statistical effects at the ROI endpoints, a 3-point averaging technique is
applied. The contents of channels (n-1), (n), and (n+1) are summed and averaged to derive the content of the endpoint
channel for the net area computation. A linear interpolation is performed between these averaged endpoint values and
counts below this interpolation are subtracted to arrive at the Net area of the peak. Gross counts is the sum of all
channels in the ROI.
Position the marker in the peak of interest. The Gross and Net areas are automatically computed and displayed on the
spectrum screen.

16
Set Peak
Counting will terminate when the content of any channel in the entire spectrum reaches the preset value.
Set Integral
To set an integral count it is necessary to first establish a ROI and then position the marker within the region. Counting
terminates when the desired counts is collected in the ROI.
To set Peak or Integral, click on Settings, click on Presets, enter the preset number in the correct box.
Click on OK, to set the adjustment and exit menu.
Peak and Integral presets can also be entered by moving the pointer into the ROI and pressing the right mouse button.
Follow the same procedure as listed above.
Start
Start...allows the user to start the acquire mode of a spectrum...
This can be accomplished by two means - by selecting Start from the Mode Menu or clicking on the green start icon on
the display screen.

17
Stop
Stop...allows the user to stop the acquire mode of a spectrum...
This can be accomplished by two means - by selecting Stop from the Mode Menu or clicking on the red stop icon on the
display screen.
Erase
Erase...allows the user to erase the spectrum when in stop mode...
This can be accomplished by selecting Erase from the Edit Menu or by clicking the Erase Button on the display screen.
Data in the active displayed and card buffers is reset to zero as well as the Live Time and Real Time counters.
This action cannot be undone.
Regions of Interest (ROI)
Region of interest (ROI) selection is an advanced feature which provides instantaneous computation of peak gross and
net counts. These values may be used along with isotope decay tables and detection efficiency to calculate absolute or
relative isotopic activities. ROI's must not overlap and need to be separated by at least one channel for correct area
calculation. Up to 14 different ROI's are possible using the color selector from the pull down Settings menu. Normally,
peaks from a single isotope are marked in one color and separate colors used to differentiate different isotopes.
Set ROI
To set an ROI around a peak, click the right mouse button, click on ROI, click on Set ROI, move the marker to either side
of the peak. Hold down the left mouse button and drag the marker to the other side of the peak, release mouse button.

18
Clear all ROIs
Click the right mouse button, click on ROI, click on Clear All ROIs.
Clear Individual ROI
Move marker to the ROI to be cleared, click the right mouse button, Click on ROI, click on Clear ROI.

19
Functions
Energy Calibration
Energy Calibrate...The energy calibration feature allows the marker to read directly in energy units.
Two calibration functions are possible, a 2-point linear, or a 3-point quadratic fit.
In order to perform a manual energy calibration, it is first necessary to acquire a spectrum using known isotopes.
Cs-137 together with Co-60 works well for many applications, producing gamma lines at 32 keV, 662 keV, 1173 keV and
1332 keV.
Select 2-point or 3-point mode and enter the calibration units to be used, (keV or MeV). Position the marker at the highest
channel of the first peak and enter the peak energy value. Move the marker to the high point on the second peak to be
used for the calibration, enter energy number. If a 3-point calibration is required, continue by moving the marker to the
peak channel of the third peak, enter its energy and click OK. The system will now be calibrated and the marker position
will read directly in energy.
If ROI's are set around each peak used in the calibration, it is necessary only to place the marker in the ROI for the peak.
The software automatically calculates the peak centroid and uses this value for the peak position in the calibration routine.
To return to the channel number mode, click on Settings, click on Uncalibrate.
Energy Calibration may also be selected from a menu using the right mouse button.

20
Temperature Compensation
Temperature Compensation...The temperature compensation feature is used to correct for peak drifting due to changes
in temperature experienced by the detector. When temperature correction is enabled and the proper values have been
entered into the correction parameters, the ICS-PCI card will correct for the peak drift as the detector temperature
changes.
Parameters...This dialog allows entering the temperature correction values if they are known. If a temperature correction
calibration has been performed, the values will be displayed in this dialog box.
Setup...The interval time, the time between measurements, can be set from 5 to 60 minutes. The total time of the
temperature compensation calibration can be set from 4 to 24 hours.
Calibrate...Starts the temperature compensation calibration measurements. After the measurement has been completed,
the software will store the determined parameters and automatically enable the temperature compensation.
Table of contents
