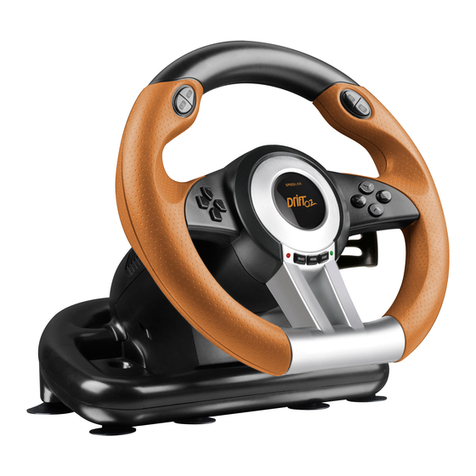
Speed Link DRIFT O.Z. User manual

1
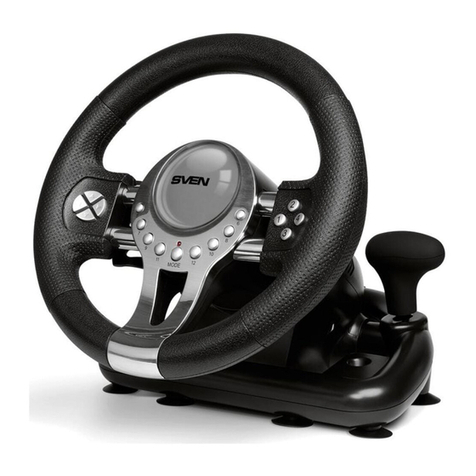
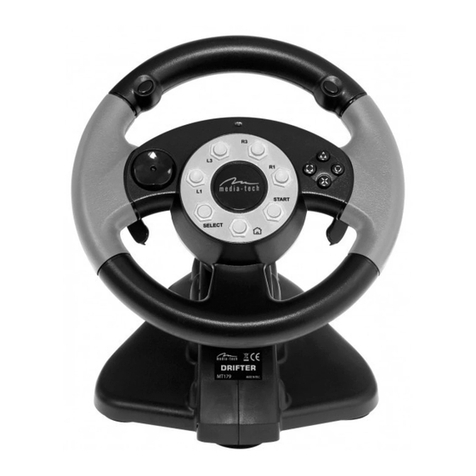
DRIFT O.Z. Racing Wheel PC
Thank you for purchasing our DRIFT O.Z. Racing Wheel.
Control is everything – especially on the race track. The DRIFT O.Z. Racing Wheel gives you
perfect control of any vehicle: ith a rubberised racing- heel rim for ultimate grip and strong
suction cups for the best possible hold even hen making extreme manoeuvres. It also
features a professional gear stick and precise pedals so you can secure those critical tenths
of a second. What’s more, you can freely adjust the vibration intensity. Control any vehicle –
and dominate every track.
Specifications
Support Windo s 8/10/11;
With X-input/D-input function, be default to D-input mode hen connecting, and press
and hold on for 3s to change the mode;
With four buttons 8 direction analog D-pad: up, do n, left, right, and four 45 degree
angles;
With 12 buttons: 1/X,2/Y,3/A,4/B,5/LB,6/RB,7/LT,8/RT,9/BACK,10/START,
11/LS, 12/RS;
Six buttons ith relocation feature: R- ing(2), L- ing(1), brake pedal, accelerator pedal,
Gear Stick (1/2);
180 turning angles;
Sensitivity adjustable ith three sections to adapt to different driving racing game;
Spring loaded accelerating pedals provide a more realistic racing experience;

2
Buttons Layout
1 Front buttons layout
2:Gear Stick layout
D-Pad
Programming LED indicator
2
1
Manual Gear
R-Wing/Accelerator
L-wing/brake
ABXY button
Mode LED indicator

3
Funs Type
PC(D-INPUT)
Analog mode
PC(D-INPUT)
Digital Model
PC(X-INPUT)
3 3 A
2 2 Y
4 4 B
Action Key 1 1 X
6 6 RB
5 5 LB
8 8 RT
7 7 LT
11 11 LS
12 12 RS
D-Pad
UP Y+ UP
DOWN Y- DOWN
LEFT ← LEFT
RIGHT → RIGHT
Function
Key
10 10 START
9 9 BACK
Direction LX ←/→ LX
L- ing 1 1 LB
R- ing 2 2 RB
Gear Shift 1 1 LB
2 2 RB
L-pedal Y- Y- LT
R-pedal Y+ Y+ RT
Mode Key MODE MODE X-Guide

4
4.Function Int oduction
P og am Functions(With memo y)
Int oduction
1、Program source button: 1/X,2/Y,3/A,4/B,5/LB,6/RB,7/LT,8/RT;
2、Programmable button: L-Wing(1), R-Wing(2), Accelerator(Y+), Brake (Y-), Gear Stick
(1/2)
P og am setup
1、Press 9/BACK+10/START, Hold for 3 seconds until the green LED flashing quickly.
2、Press the programmable button, and the green LED flashing slo ly.
3、Press program source button. The green LED is off. Program is set.
Clea single p og am
1、Press 9/BACK+10/START,Hold for 3 seconds until the green LED flashing quickly
2、Press programmed button and the green LED flashing slo ly.
3、Press programmed button again and the green LED is off. Single programmed button
is cleared.
Clea all p og ams
1、Press 9/BACK+10/START, Hold for 3 seconds until the green LED flashing quickly.
2、Press 10/START and hold for 4 seconds. The green LED is off. All of the programmed
buttons are cleared.
Noted: In program mode, if no action in 10s then ill quit the setting.
3 levels wheel sensitivity adjustment
1、Press 9/BACK+10/START at the same time. Hold for 3 seconds until green LED
flashing quickly.
2、Press UP of D-Pad to set higher sensitivity, the green LED is off sho s setting
succeeded
3、Press DOWN of D-Pad to set lo er sensitivity, the green LED is off sho s setting

5
succeeded
4、Press LEFT OR RIGHT of D-Pad to set middle sensitivity, the green LED is off sho s
setting succeeded
Note: Default is lo er sensitivity. Sensitivity setting ill be cleared hen the heel is
po er off
D-INPUT
Be default to D-input mode on PC platform, press and hold on MODE button for 3s to
change to X-input mode, the LED flahing 3 times slo ly.
Please install d ive f om ou website.
1) Start Windo s and put the CD into CD-ROM. Double click SETUP and follo on-
screen instructions to complete the driver installation.
2) Connect the heel to your PC Start Control Panel Device and
Printer right click the device and printer Game controller
Properties.
Wheel Test
Enter Test interface to test buttons and axis functions
Enter Calibration interface to calibrate the axis
Enter Vibration interface to test axis and pedals

6
T ouble Shooting
1、;If the connection LED is not on, please connect to the controller again and check and
controller is orking.
2、If the racing heel do not have an reaction, and the console is stuck, please po er off the
console and po er on again
3 Please re-connect the racing heel after incorrect operation during the game
IMPORTANT
This is an additional instruction to our userguide, hich comes ith the product and can also be
do nloaded from our ebsite.

7
DRIFT O.Z. Lenk ad PC
Danke für den Kauf unseres DRIFT O.Z. Lenkrades.
Kontrolle ist alles – vor allem auf der Rennstrecke. Das DRIFT O.Z. Racing Wheel gibt sie dir, die
perfekte Kontrolle über jedes Fahrzeug: mit einem gummierten Lenkkranz für Griffigkeit und
starken Saugnäpfen für besten Halt auch bei extremen Fahrmanövern. Mit einem
professionellen Schaltknauf und fein dosierbaren Pedalen für die entscheidenden
Zehntelsekunden. Die Vibrationsstärke ist einstellbar. Kontrolliere jedes Fahrzeug – und
beherrsche jede Strecke.
Spezifikationen
Unterstützt Windo s 8/10/11;
Mit X-input/D-input, voreingestellt ist D-input mode. Zum Ändern des Modus beim
Verbinden den die Modus-Taste 3 Sekunden gedrückt halten.
Analoges 8-Wege 4D-pad: rauf, runter, links, rechts und 4 Funktionen im 45 Grad Winkel;
12 Tasten: 1/X,2/Y,3/A,4/B,5/LB,6/RB,7/LT,8/RT,9/BACK,10/START, 11/LS,
12/RS;
6 konfigurierbare Tasten: R- ing(2), L- ing(1), Bremspedal, Gaspedal, Schaltung (1/2);
Lenkbereich von 180°
In 3 Schritten einstellbare Sensitivität
Fein dosierbare Pedale für Gas und Bremse

8
Tasten Ano dnung
1 Tasten auf dem Lenkradkranz
2 Schaltung
D-Pad
Programming LED indicator
2
1
Manual Gear
R-Wing/Accelerator
L-wing/brake
ABXY button
Mode LED indicator

9
Funs Type
PC(D-INPUT)
Analog mode
PC(D-INPUT)
Digital Model
PC(X-INPUT)
3 3 A
2 2 Y
4 4 B
Action Key 1 1 X
6 6 RB
5 5 LB
8 8 RT
7 7 LT
11 11 LS
12 12 RS
D-Pad
UP Y+ UP
DOWN Y- DOWN
LEFT ← LEFT
RIGHT → RIGHT
Function
Key
10 10 START
9 9 BACK
Direction LX ←/→ LX
L- ing 1 1 LB
R- ing 2 2 RB
Gear Shift 1 1 LB
2 2 RB
L-pedal Y- Y- LT
R-pedal Y+ Y+ RT
Mode Key MODE MODE X-Guide

10
4.Funktion
1、Festgelegte Tasten: 1/X,2/Y,3/A,4/B,5/LB,6/RB,7/LT,8/RT;
2、Konfigurierbare Tasten: L-Wing(1), R-Wing(2), Accelerator(Y+), Brake (Y-), Gear Stick
(1/2)
P og ammie un (wi d gespeiche t)
1、9/BACK+10/START drücken und für 3 Sekunden halten bis die grüne LED schnell
blinkt
2、Die zu belegende Tasten drücken bis die grüne LED langsam blinkt.
3、Die ge ünschte Taste drücken und die grüne LED geht aus, die Taste is nun
konfiguriert.
P og ammie ung eine Taste löschen
1、9/BACK+10/STAR drücken und 3 Sekunden halten bis die grüne LED schnell blinkt
2、Die belegte Taste drücken, bis die grüne LED langsam blinkt.
3、Press programmed button again and the green LED is off. Single programmed button
is cleared.
Zu ücksetzen
1、9/BACK+10/START drücken und für 3 Sekunden halten bis die grüne LED schnell
blinkt.
2、10/START drücken und 4 Sekunden halten. Die grüne LED ist aus. Die
Programmierung der konfigurierten Tasten ist gelöscht.
ACHTUNG: Falls ährend der Programmierung keine Taste gedrückt ird für 10 Sekunden,
ir der Modus beendet. .
3-stufige Sensitivitäts-Anpassung
1、9/BACK+10/START gleichzeitig drücken und für 3 Sekunden halten bis die grüne
LED schnell blinkt
2、Die Rauf-Taste des D-Pads drücken um eine höhere Sensitivität einzustellen, die grüne
LED geht aus.
3、Die Runter-Taste des D-Pads drücken um eine niedrigere Sensitivität einzustellen, die
grüne LED geht aus.

11
4、Die Rechts- oder Links-Tasten des D-Pads drücken für die mittlere Sensitivtätdie
grüne LED geht aus
Voreingestellt ist die geringe Sensitivität, die Einstellung der Sensitivität geht verloren,
enn das Lenkrad ausgeschaltet ird.
D-INPUT
Voreingestellt ist der D-input Modus, zum Ändern auf X-Input die MODE Taste drücken
und 3 Sekunden halten die LED blinkt 3 Mal langsam.
Bitte den T eibe von unse e website installie en.
Lenk ad-Test
Im Test-Interface kann die Funktion der Tasten und Achsen getestet erden.
Im Kalibrierungs-Interface können die Achsen kalibriert erden.
Im Vibrations-Intercase können die Achsen und Tasten getestet erden.

12
Mögliche Fehle u sachen
1、;Falls die Verbindungs-LED nicht an ist, bitte den Controller auf Funktion prüfen und
nochmals neu verbinden.
2、Falls das Lenkrad keine Funktion hat, bitte das Gerät an- und ausschalten.
Danach das Lenkrad nochmals neu verbinden.
ACHTUNG
Dies ist eine ergänze Anleitung zu unserem Userguide, elcher dem Produkt beiliegt und auf
unserer Homepage zum Do nload zur Verfügung steht.
Other manuals for DRIFT O.Z.
2
Table of contents
Languages:
Other Speed Link Video Gaming Accessories manuals
Popular Video Gaming Accessories manuals by other brands
Next Level Racing
Next Level Racing ERS2 instruction manual
All In 1 Gaming
All In 1 Gaming Pro Series Assembly instructions
Thrustmaster
Thrustmaster T-x3 Battery Grip user manual
Wasabi
Wasabi 360 Ultra installation guide

ILLUMINATI MAGIC
ILLUMINATI MAGIC Unifi Dice user guide

AllSportSystems
AllSportSystems HANGING MINIBAY Setup guide
