© 2013 SpinetiX S.A. All rights reserved.
14
Using iCalendar Schedule
Requirement: an iCalendar schedule describing the Pull mode action as described in the
iCalendar section.
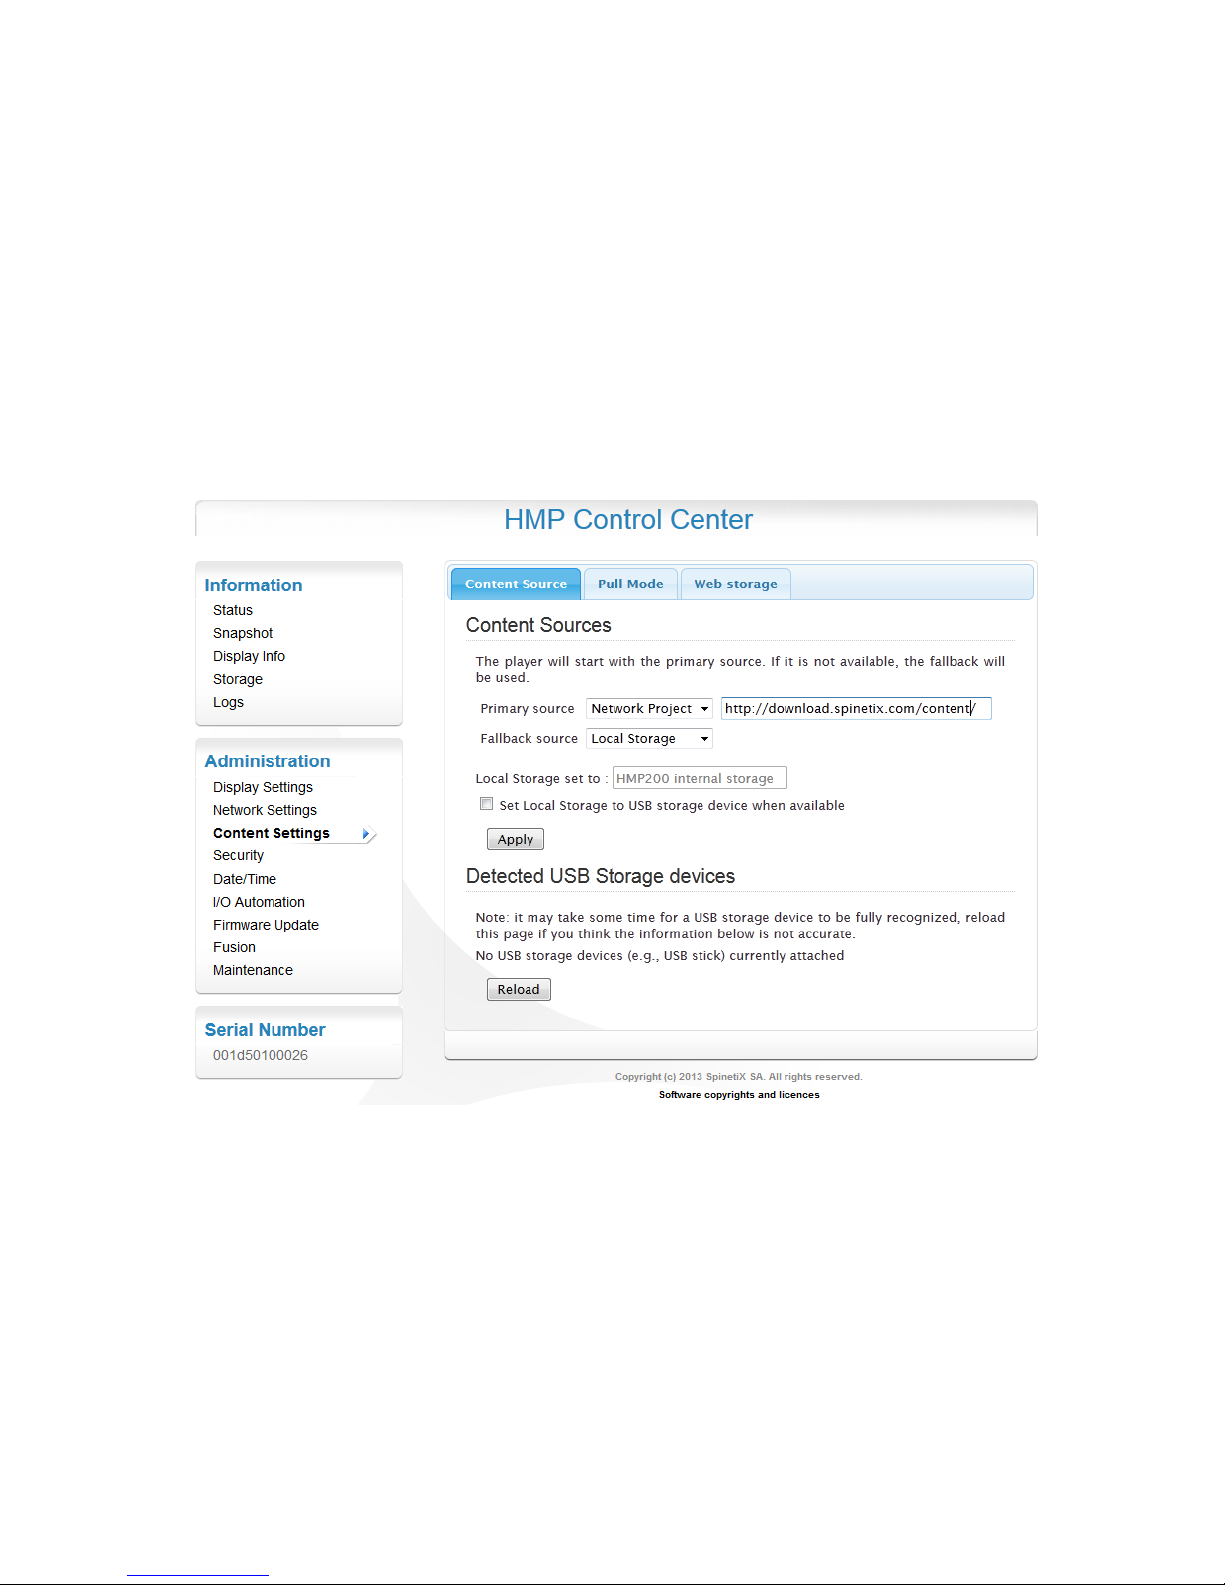
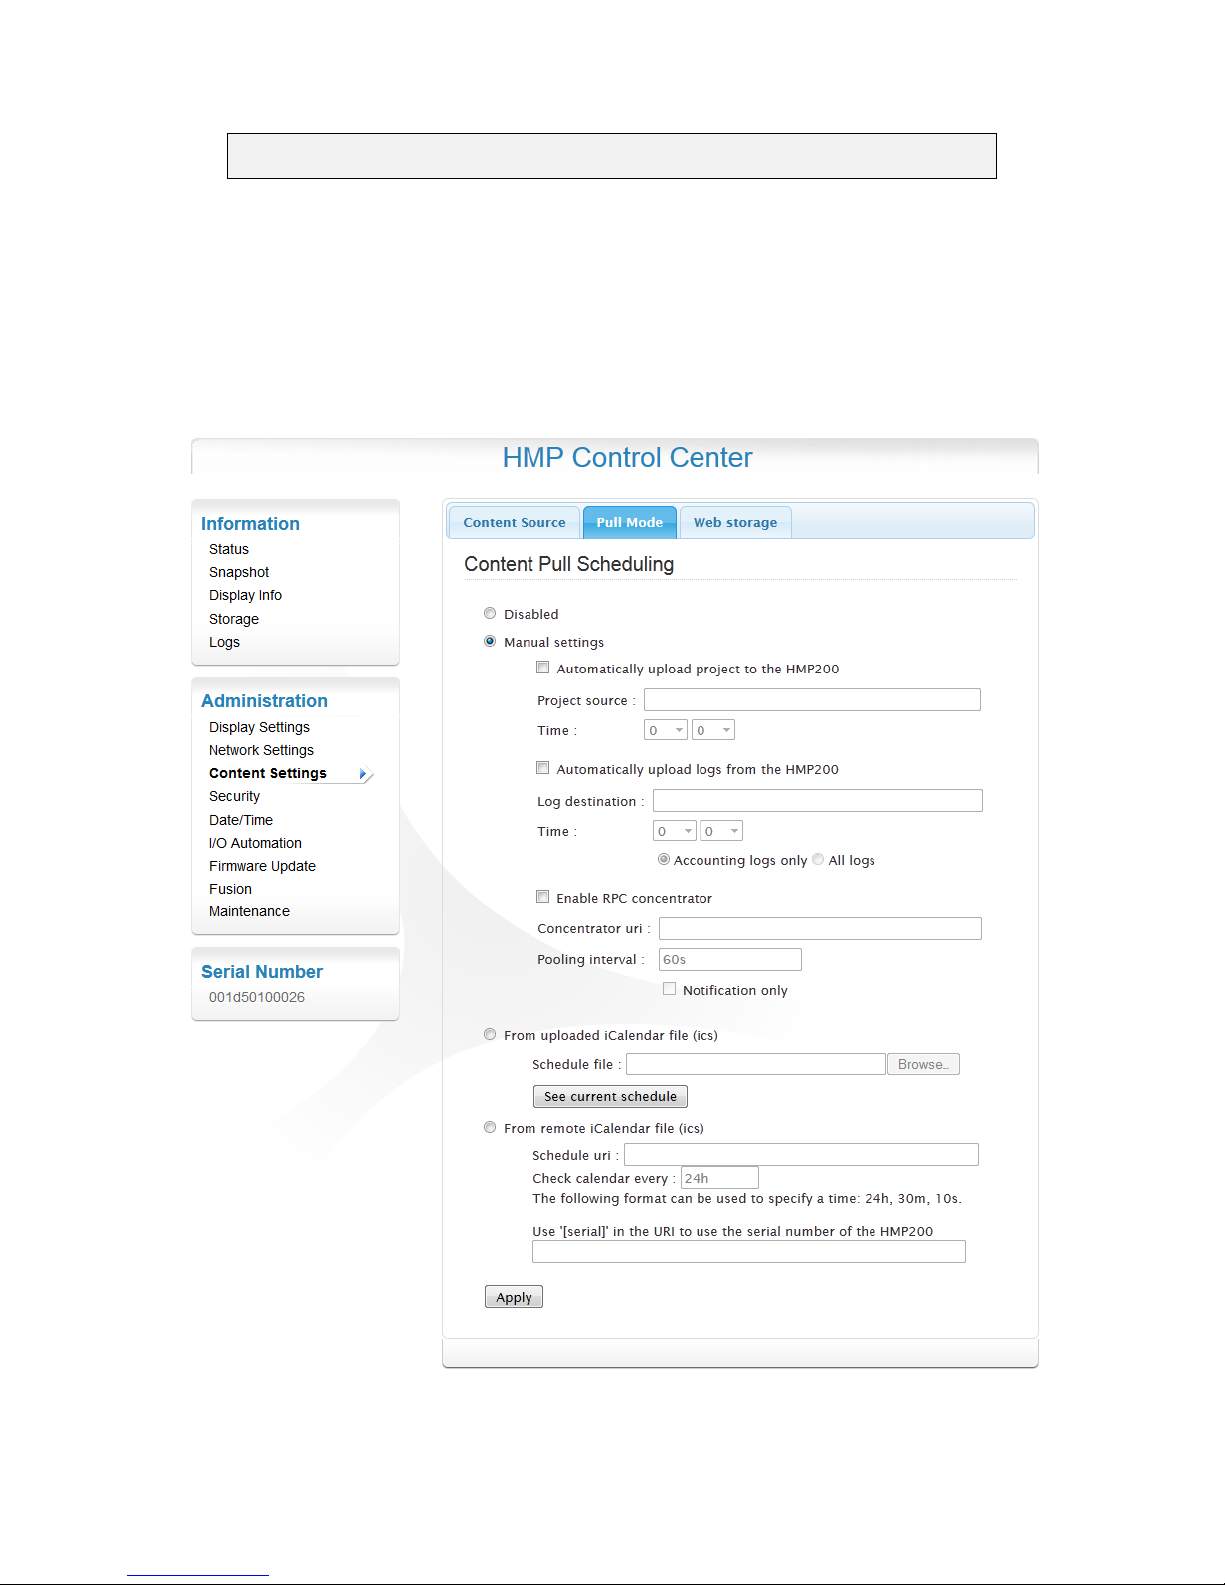
To upload the iCalendar file to the HMP:
1. Select "From uploaded iCalendar file (ics)"
2. Press the Browse button to select your ics file
3. Press apply to save your changes
If you want the HMP to use a schedule from a remote server:
1. Select " From remote iCalendar file (ics)"
2. Enter the URI of the iCalendar file. You can use the string "[serial]" in the URI. It
will be replaced by the serial number of the HMP when connecting to your server.
3. Press apply to save your changes
The final URI of the iCalendar file is indicated in the gray text area at the bottom of the
page.
The iCalendar file will be checked periodically for modifications. The check will occur each
time a publish or an upload task is performed, or at least every 24 hours (configurable).
Custom iCalendar files
The HMP Pull mode can use an iCalendar file to control more accurately the actions
performed by the HMP.
Using iCalendar lets you:
Use complex recurring rule for scheduling the publishing of a project
Publish project from two or more different locations.
Update your HMP more (or less) than once per day.
Upload the HMP snapshot image to a server
Enable RPC server mode
... and many more features
iCalendar files can be either saved on the HMP or retrieved from a remote server as
explained in Settings.
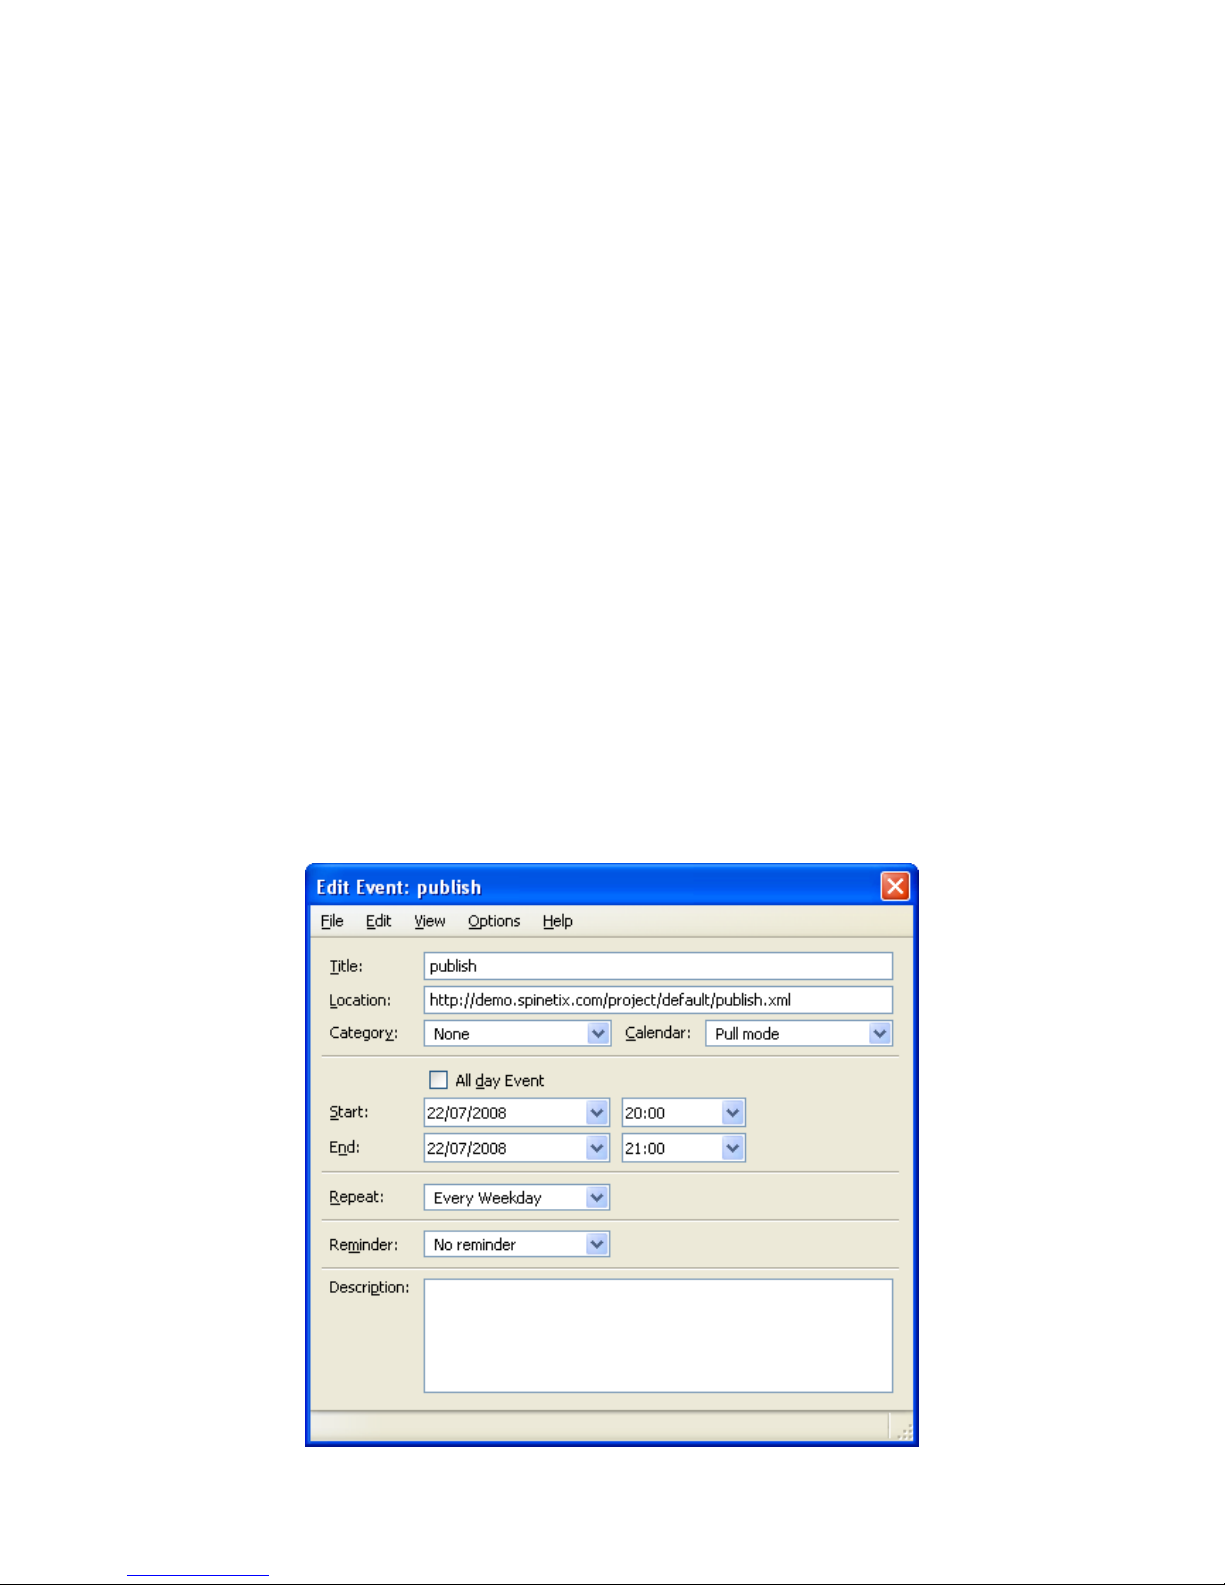
Configuring iCalendar files
Each action of Pull mode is described by a item (meeting) in your iCalendar file (ICS file).
The following iCalendar fields are used to control the action:
Title (or subject or summary): describes the type of action to be performed.
Currently the following actions are possible:
opublish: to publish a project to the HMP
oupload: to upload files from the HMP to your WebDAV server
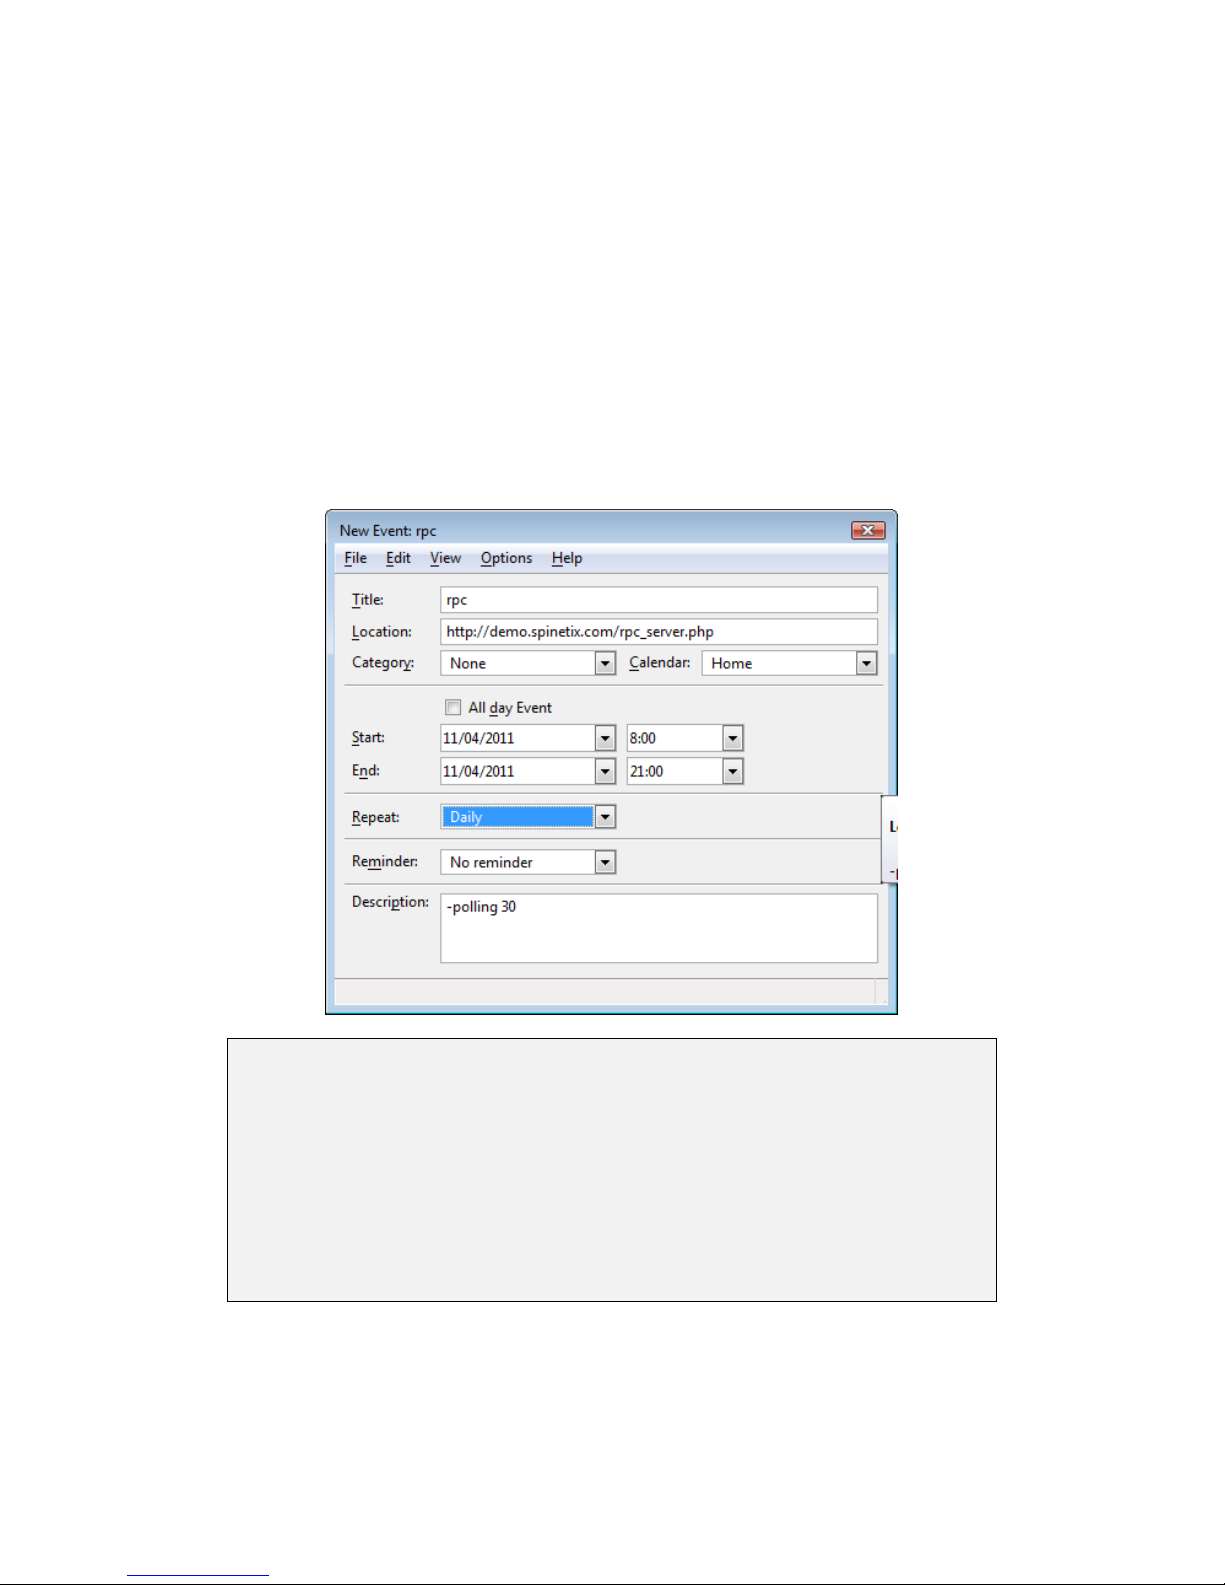
orpc: to enable sending RPS status to a remote server. See the complete
RPC documentation for more information.
Location (or URL): describe the URI to be used by the action
Description: Can be used to specify additional parameters for the action
Standards fields such as the starting and ending dates, recurring rules, and time zones
are also used to determine when the action should take place.
Publish action
The publish action controls when the content of the device should be modified by pull
mode. During the publish action, all files from the server are copied to the device. Files
that were already present on the server last time the upload was done, and that have not