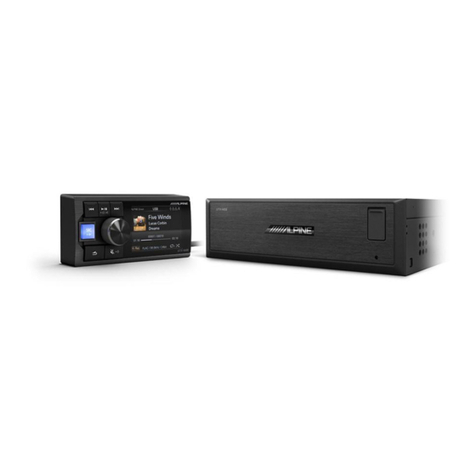
Alpine UTX-M06 User manual

UTX-M06
High Sound Quality DSP Media Player
For iPhone users, please search "UTX-M06 Tuning APP" in APP Store
to download and install it; for Android users, please scan the QR code
on the right to download and install it directly.
Tuning APP

Table of Contents
Operating Instructions
Type of precautions ..................................1
Copyright notice
Copyright notice .......................................1
About the use of USB storage
Use of USB storage ..................................2
Protected USB connector..........................2
Repair tools
Tools that may be required (depending on
the vehicle) ...............................................3
Accessory list
Accessory list............................................3
Device description
Diagram of controller ...............................4
Diagram of host machine..........................5
Diagram of complex line connection........6
Diagram of steering wheel controller
connection.................................................7
About
MP3/WMA/WAV/FLAC/APE
About MP3/WMA/WAV/FLAC/APE .....8
Function setting of wire controller
Sound setting ..........................................10
General setting........................................12
Bluetooth setting.....................................14
Description of APP
Description of mobile APP - Homepage 15
Description of mobile APP - Preset EQ. 16
Description of mobile APP - Music....... 17
Description of mobile APP - Delay ....... 18
Description of mobile APP - Channel.... 19
Description of mobile APP - EQ............ 20
Description of mobile APP - Sound
Mixing.................................................... 21
Description of mobile APP - Setting...... 22
Description of PC softwar
e
Interface of PC software ........................ 23
Description of PC software.................... 24
Technical parameters
Specifications......................................... 25
Functional parameters............................ 25
Performance parameters......................... 26
Installation and other precautions
Operating instructions for installation.... 27
Precautions for installation..................... 28
When a problem occurs.......................... 29
Radio law on Bluetooth.......................... 30
Information
Hazardous substances ............................ 31
Information of maintenance stations...... 31

1
Operating Instructions
Type of precautions
Prohibition
Indicates a prohibited action (must not be
performed).
Prohibition
Indicates that disassembly is prohibited.
Mandatory
Indicates a mandatory operation (must be
performed).
Indicates that it should draw your close
attention.
Warning
In case of problems, please stop using
the device immediately.
Otherwise, it may result in personal injury or damaged
product. Please return the product to the authorized Alpine
dealer or nearby Alpine service center to repair.
The product is only suitable for 12V
negative-grounded vehicles.
Otherwise, it may lead to an accident like fire, etc.
Please call the professionals to wire
and install.
It needs professional expertise and experiences to wire and
install the product. Please contact the dealer from whom
you bought the product to install it for safety.
Please do not disassemble or refit.
Otherwise, it may result in an accident, fire or electric
shock.
Small items like bolts or screws
should be kept out of the reach of
child.
If ingested, it may result in severe damage. Once ingested,
please seek medical attention immediately.
Please do not use any function that
may distract you during driving.
Any function that may influence your attention should be
used only when the vehicle is stopped completely. To use
these functions, please first stop your vehicle in a safe area.
Otherwise, it may result in an accident.
During driving, you must maintain
the volume at a level such that the
noise outside can still be heard.
It is very dangerous not to clearly hear an emergency
vehicle alarm and road warning signal (such as a railway
crossing) and may result in an accident. Moreover, a too
large volume may damage your hearing.
Caution
Product cleaning
Please clean the product regularly with a soft dry cloth. For
any dirt difficult to clean, only water can be used to soak
the cloth. Any other solvents may lead to dissolution.
Temperature
Before starting the device, please ensure that the
temperature inside the
vehicle is between +60 °C and
-
20°C.
Repair
In case of problems, please do not repair them by yourself.
Please return the product to the authorized Alpine dealer or
nearby Alpine service center to repair.
Installation site
The device cannot be installed at the following locations:
·
Under direct sunlight and near a hot source.
·
With high humidity and near a water source.
·
Dusty sites.
· Environments with violent vibration.
Copyright notice
The text mark and logo of Bluetooth® are the registered trademarks that Bluetooth SIG, Inc. Alpine Electronics has been
authorized to use these text marks and logos. Other trademarks and names all belong to their holders.
Products with a High-Resolution mark conform to the standards defined by the Acoustical Society of Japan. Alpine Electronics
has been authorized by the Acoustical Society of Japan to use the High-Resolution mark.
* Electronic products should be discarded via an appropriate recycling channel to reduce electronic waste pollution.

2
Use of USB storage
Under no circumstances shall Alpine be liable for any loss of data, even if those occur during the use of this product.
· To prevent failure or damage, please pay attention to the points below. Please read through the user manual of the
USB storage.
Please don’t touch the terminal with your hand or metal.
Please prevent the USB storage from violent vibration.
Please don’t bend, drop, dismantle, or modify the device or immerse it in water.
· Avoid use or storage in the following places.
In a vehicle under direct sunlight or exposed to the sun at high temperature.
Places where high humidity or corrosive objects may be present.
· Install the USB storage in such a place that the operation by the driver would not be hindered.
· The·USB storage may not operate correctly in places at excessively high or low temperatures.
· Only approved USB storage can be used. Please note that even an approved USB storage may be unable to operate
correctly due to different types or states.
· Functions of the USB storage cannot be guaranteed. Please use the USB storage in accordance with the terms of the
agreement.
· Depending on the type and state of the USB storage or settings of the encoding software, this device may not play
or display normally.
· The device cannot play copy protected (copyright protected) files.
· It may take a while to start playing files in the·USB storage. If there are special files other than audio files in the
USB storage, it may take longer to play or search files.
· This device can play files with extensions of “mp3”, “wma”, “wav”, “flac”, and “ape”.
· Please do not add the above extensions to non-audio data. Such non-audio data would be unrecognizable. Play of
such non-audio data may damage the speaker or noise from the amplifier.
· It is recommended to back up important data on a PC.
· Never remove the USB device while it is playing. Switch the SOURCE to other options than USB before removing
the USB device to prevent damage to the storage.
Protected USB connector
· The device provides a USB port on the front and a MICRO SD port on the rear and supports the connection and use
of USB storage.
· Only USB storage can be connected to the USB ports of this device, and normal use of other USB products cannot
be guaranteed when connected.
· If a USB connector is used, make sure you use the USB extension cable (accompanied with the product).
· Depending on the USB storage device connected, this device may be unable to operate or unable to execute some
functions.
· This device supports FAT16/32 file system.
· Please make sure that the number of songs in the connected USB storage is no more than 5000 (maximum total
number of playable songs). Otherwise, they cannot be played normally.
· This device can play audio files in the format of MP3/WMA/WAV/FLAC/APE.
· This device can display the performer’s name/song title/song album etc. Some special characters may not be
displayed correctly.
3
Tools that may be required (depending on the vehicle)
Panel removing tool
Socket
Electric drill
Torx screwdriver
Phillips screwdriver
Sleeve wrench
Wrench
Wire cutter
Wire crimper
Wire stripper
Spectrum analyzer
Oscilloscope
Accessory list
Power cord
High level input line
USB extension cable (1.5 m)
Controller extension cable (2.5 m)
Complex line
Mounting bracket × 2
Self-tapping screws (M4×20)
Machine tooth screws (M5×8)

4
Diagram of controller
1button
Short press the button to select the master audio source: USB, Bluetooth music,
high level or AUX (USB by default); press and hold the button for more than 2
seconds to turn on/off the mixing mode.
2button
USB: short press the button to select the previous track; press and hold the button
for more than 2 seconds to fast backward.
Bluetooth music: select the previous track.
3button
Short press the button to switch between Pause/Play: press and hold the button for
more than 2 seconds to switch between Shuffle Play/Single Cycle.
4button
USB: short press the button to select the next track; press and hold the button for
more than 2 seconds to fast forward.
Bluetooth music: select the next track.
5
button
Go back to the previous level.
6button
Short press the button to mute the device; press and hold the button for more than
2 seconds to turn off the device.
* The device can be turned on by pressing any button.
7Rotating knob
Main interface: rotate the knob to the left or right to adjust the volume; short press
the kno
b to enter the track list; press the knob for more than 2 seconds to enter the
Setting interface.
Setting interface or track list: short press the knob to confirm the selected item.
8
Remote control sensing
window
A window for remote control sensing

5
Diagram of host machine
1
USB interface
Used to connect USB flash disk or USB HUB.
2
Reset button
Press and hold the button for 3 seconds to restart the host machine.
3
MICRO SD interface
Used to connect MICRO SD card.
4
Controller interface
It can be connected to the controller for tuning.
5
Power lamp interface
Power lamp.
6
Complex line interface
Complex connection mode integrated with 8 types of input and output interfaces
7
High level input
interface
Connected to the power output of an on-vehicle CD/DVD player.
8
Input select switch
interface
If the switch is put to “ACC”, the device will be started by ACC; if put to “HOST”,
the device will be started by the high voltage level input signal H1-/H1+.
9
Power output interface
Connect the external power amplifier
10 Complex line
including 1 group of 3.5 mm socket audio input interface, 3 groups of RCA audio
output interface, USB 2.0 interface, steering wheel controller interface, and
Alpine system matching interface (for connection with DSP product).
11
Vehicle battery
Connect the vehicle battery.
12
On-vehicle CD/DVD
player
Provide high level input signal.
13 Controller
By connecting the controller, play control, volume adjustment and audio source
selection can be performed.
Vehicle battery

6
Diagram of complex line connection
1
AUX-IN
Low level input, can be connected to an on-vehicle CD/DVD player.
2
SUBW-OUT
Subwoofer output, can be connected to an active subwoofer.
3
REAR-OUT
Rear sound field RCA output, can be connected to an external power amplifier.
4
FRONT-OUT
Front sound field RCA output, can be connected to an external power amplifier.
5ADC
ADC steering wheel controller interface, supports resistive control of the steering
wheel.
6DECODING SWC
Decoding type steering wheel controller interface (not supported for now, will be
updated in the near future).
7ALPINE SYSTEM
It can be connected to Alpine on-vehicle DSP and only supports products with
matching controller interfaces.
8
USB 2.0
USB 2.0 interface, can be connected to a PC for tuning operation.
Steering wheel
controller box
External
power
amplifier
Active
subwoofer
On-vehicle
CD/DVD player

7
Diagram of steering wheel controller connection
1
Type of steering wheel
controller
Adjust the pull-up strength according to the various types of steering wheel
controllers to adapt to the steering wheel controller of different vehicle models.
2
Play/Pause
Select "Play/Pause", short press it to complete learning.
3
Previous track
Select "Previous track", short press it to complete learning.
4
Next track
Select "Next track", short press it to complete learning.
5
Volume+
Select "Volume+", short press it to complete learning.
6
Volume-
Select "Volume-", short press it to complete learning.
7
Mute
Select "Mute", short press it to complete learning.
8
Audio source
Select "Audio source", short press it to complete learning.
*Connect the green and white wires with the button wires of the steering wheel and connect the black wire
with the grounding wire. Please connect the wires based on the actual vehicle model. For details, please
contact your Alpine dealer.
Button wire
Button wire
Grounding
wire
Green
White
Black

8
About MP3/WMA/WAV/FLAC/APE
Except for personal use, it is strictly forbidden by copyright laws and international conventions to copy,
distribute, or transmit any audio data (including MP3/WMA/WAV/FLAC/APE data), whether for free or for a
charge, without the consent of the copyright owner.
1MP3
MP3, with the formal name of “MPEG Audio Layer 3”, is a compression standard defined by
MPEG, a joint executing agency under ISO
(Organization for Standardization) and IEC. An MP3
file contains compressed audio data. MP3 encoding can compress audio data at an extremely
high ratio, thus reducing the music file's size to one tenth of the original size. At the same time,
the sound qual
ity remains close to that of CD. MP3 achieves such a high compression rate by
removing sounds that cannot be heard by humans or that are drowned by other sounds.
2WMA
WMA, or “Windows Media™ Audio”, is compressed audio data. WMA is similar to MP3 audio
data.
3WAV
WAV is an audio file format developed by Microsoft. It conforms to the file specifications of
RIFF (Resource Interchange File Format) and is used to save audio information and resources
on the Windows platform. It is widely supported by the
Windows platform and its applications.
This format also supports several compression algorithms such as MSADPCM and CCITT A
LAW, and supports multiple audio digital sampling frequencies and sound channels. A WAV
file of standard format has the same 44.1 kH
z sampling frequency and 16 digitalizing bits as CD
format, and thus have nearly the same sound quality as CD! It is the audio format that is the
closest to lossless music, and therefore the file size is large.
4FLAC
FLAC can be explained as lossless audio compression and coding. FLAC is a well-known free
audio compression and coding technology characterized by lossless compression. Different from
lossy compression and coding such as MP3 and AAC, it will not destroy any original audio
information.
5APE
APE is one of the popular lossless compression formats for digital audio. Different from lossy
compression formats such as MP3 that removes data (to which the human ear is not sensitive)
irreversibly to reduce the size of the original file, lossless co
mpression formats such as APE
reduce the file size by a more refined recording method, so that the restored data is the same as
the original file. The integrity of the file is ensured.
Create MP3/WMA/WAV/FLAC/APE files
Use software with MP3/WMA/WAV/FLAC/APE coding and decoding for compression of audio data. For details
about the creating of MP3/WMA/WAV/FLAC/APE files, please refer to the user manual of the software. The
MP3/WMA/WAV/FLAC/APE files that can be played by this device have the following extensions.
MP3: “ mp3 ”
WMA: “wma”
WAV: “wav”
FLAC: “flac”
APE: “ape”

9
Supported play sampling frequency and bit rate:
1MP3
Sampling frequency: 48kHz 、44.1kHz 、32kHz 、24kHz 、22.05kHz 、16kHz 、12kHz 、
11.025kHz、8kHz
Bit rate: 8-320kbps
2WMA
Sampling frequency: 48kHz、44.1kHz、32kHz、22.05kHz、16kHz、11.025kHz、8kHz
Bit rate: 12-192 kbps (stereo)
0-128 kbps (mono channel)
3WAV
Sampling frequency: 192kHz、176.4kHz、96kHz、88.2kHz、48kHz、44.1kHz、32kHz、
24kHz、22.05kHz、16kHz
Digitalizing bit: 8bit、16bit、24bit
4FLAC
Sampling frequency: 192kHz、176.4kHz、96kHz、88.2kHz、48kHz、44.1kHz、32kHz、
24kHz、22.05kHz、16kHz、12kHz、11.025kHz、8kHz
Digitalizing bit: 8bit、16bit、24bit
5APE
Sampling frequency: 192kHz、176.4kHz、96kHz、88.2kHz、48kHz、44.1kHz、32kHz、
24kHz、22.05kHz、16kHz、12kHz、11.025kHz、8kHz
Digitalizing bit: 16bit、24bit
Depending on the sampling frequency, this device may not play correctly.
When playing a VBR (variable bit rate) encoded file in the USB mode, the play time may not be displayed
correctly.
10
Sound setting
You can set this device flexibly based on your preference and purpose. You can change audio settings in the
sound setting menu. Use steps 1 to 5 to choose any setting mode to change the setting.
1
Press and hold the knob for at least 2 seconds to enter the settings interface.
2
Turn the knob to select “Sound Effect Setting” and then short press the knob:
Preset Equalizer ↔ Sound Effect Setting ↔ General ↔ Bluetooth
3
Turn the knob to select the “Sound Effect Setting” menu and then short press the knob:
Treble*1 ↔Bass*1 ↔Mega Bass ↔Channel Balance ↔Fader*2 ↔Parametric Equalizer ↔Input Source
Volume ↔Time Correction ↔Divider Settings*3↔Sound Setting Storage ↔Sound Effect Clear
Setting*4
*1 Any change made to the
“Preset Equalizer” or “Parametric Equalizer” will be reflected in the settings
of the other.
*2 When the “Divider Settings” is set to “Active Divide by 3”, adjustment cannot be made.
*3 Depending on the “Divider Settings”, the setting items may be different.
*4 When “Sound Effect Clear Setting” is enabled, adjustments cannot be made to the preset sound effect.
4
Turn the knob to change the setting or enter the next level, and then short press the knob.
5Press to deactivate setting mode.
Press to return to the previous sound menu mode
.
Knob

11
For a detailed description of the selected setting items, please refer to the applicable sections below.
1Preset equalizer
A total of 10 typical equalizer settings will be preset in the factory for a variety of audio
source materials.
Standard (initial setting) ↔ Popular ↔ Rock ↔ News ↔ Jazz ↔ Electronic ↔ Hip-
hop
↔ Light music ↔ Country ↔ Classic ↔ Custom
Caution: The "Custom" item will be displayed when an adjustme
nt is made to the
Bass/Treble or Parametric Equalizer settings, and the “Custom” item will be displayed.
2Treble/Bass level
You can select Treble or Bass and adjust the level based on your own preference. The
adjustable range is: -7 ~ +7 (initial value: 0)
3Bass setting
When the subwoofer is turned on, you can adjust the subwoofer's phase output level,
phase setting and bass level.
4Balance setting
Channel balance, adjustable range: L15~0~R15 (initial value: 0)
Fader, adjustable range: F15~0~R15 (initial value: 0)
5Parametric Equalizer
You can modify the equalizer settings to better fit the response curve to your preference,
including 10 sections of EQ adjustable frequency range, Q value and gain.
6Input source volume
Select input source volume adjustment in the sound effect setting mode. The adjustable
range is: -60dB~0dB (initial value: 0dB)
7Time correction
Select “Adjust time correction” in the sound effect setting mode, and turn the knob to
select the speaker or time correction unit for adjustment.
8Frequency divider
setting
In the Setting interface, press and hold , , and
for more than 2 seconds each in
sequence, turn the knob to select "Divide-by-3" or "Divide-by-2" mode, and press
to
confirm the selection of divider system.
9Sound storage setting
Dealer setting: can be called by short pressing the knob; in the setting interface, press and
hold , knob, and for more than 2 seconds each in sequence
to call the electrical test
mode so that the storage can be used;
Custom setting: short press the kno
b to use the custom setting; press and hold the knob
for more than 2 seconds to store the tuned sound parameters.
10 Sound effect clear
setting
When this setting is enabled, the settings on sound effects such as preset equalizer will
become invalid. Disab
le this setting and the previous sound effect settings will be
restored.

12
General setting
You can set this device flexibly based on your preference and purpose. In the general setting menu, you can
change the general settings, display settings and so on. Use steps 1 to 6 to choose any setting mode to change
the setting.
1
Press and hold the knob for at least 2 seconds to enter the settings interface.
2
Turn the knob to select the desired item and then press the knob:
Preset Equalizer ↔ Sound Effect Setting ↔ General ↔ Bluetooth
3
Turn the knob to select General, and then press the knob:
Auxiliary audio source ↔Built-in power amplifier ↔Steering wheel controller learning ↔
Alpine system
matching ↔Dimmer control ↔Language setting ↔Restore factory settings ↔About
4In the setting interface, press and hold , knob, and
for more than 2 seconds each in sequence to call the
electrical test mode:
Firmware update ↔ Dealer setting ↔ Serial number
5
Turn the knob to change the setting and then press the knob.
6Press to deactivate setting mode.
Caution: Press to return to the previous sound menu mode.
Knob

13
For a detailed description of the selected setting items, please refer to the applicable sections below.
1Auxiliary audio
source
Auxiliary audio source options: Bluetooth ↔ High level ↔ AUX ↔ Off
Primary source attenuation: it is used to set the amount of attenuation needed for the
primary source when mixed sources are input, and the adjustable range is 0~100%.
2Built-in power
amplifier
When connected to an external amplifier, sound quality can be improved by stopping
the power supply to the built-in amplifier.
Caution: When the “built-
in amplifier” is set to “Off”, the system will not output any
sound.
3Steering wheel
controller learning
Wire the steering wheel controller depending on the actual vehicle model. After
connecting the host machine, allow the device to learn the steering wheel through the
controller. Short press “Play/Pause”, “Previous”, “Next”, “Volume +”, “Volume -
”,
“Mute” and "Audio source" and wa
it for the buttons on the steering wheel to be pressed
down to finish the learning and achieve control of the steering wheel with the controller.
4
Alpine system
matching
It can be connected to Alpine on-vehicle DSP and only supports products with matching
controller interfaces. For details, please contact your Alpine dealer.
5Dimmer control
Dimmer control: when dimmer control is set to “Manual”, the light level can be adjusted;
when dimmer control is set to “Auto”, the illuminating brightness of the
host controller
will be reduced when the headlights of the vehicle are ON.
Black screen setting: the screen will turn off after 30 seconds of no operation. Press any
button and the screen will turn on.
6Language setting
You can choose the interface display in Chinese or English based on your personal
preference.
7
Restore factory
settings
After restoring factory settings, except for the tuned “Dealer Settings”, all setting items
will be restored to the factory default value.
8About
Select the About interface and you can check information about the device, such as
Software version/Device version/Device name.

14
Bluetooth function
Bluetooth is a wireless technology used for short distance communication between mobile devices and PCs. It
can realize data transmission between Bluetooth-compatible devices If the distance between two devices is less
than 10 meters, they can transmit data with Bluetooth within the approved 2.4 GHz frequency spectrum.
1
Connect via
Bluetooth
When the host machine is powered on for the first time and is not connected to any device
via Bluetooth, you need to wait for the mobile phone to pair and connect it. Search “UTX-
M06-XXXXXX” directly on the mobile phone background and connect to it. “” is a 6-d
igit
random code, for example: UTX-M06-
A00414. For detailed operation, please refer to the
below:
1. Enable Bluetooth on the mobile phone;
2. Search pairable devices on the mobile phone background, and select “UTX-M06-
XXXXXX” to pair.
3. After pairing succ
essfully, press and hold the knob for a while to enter the Setting interface
→ General → Bluetooth, press “Bluetooth” to enter the interface, which shows
“Connected”.
4. If you need to disconnect the Bluetooth device, short press the knob and it will promp
t the
user to “Confirm to disconnect the Bluetooth device”. Short press it again to confirm
disconnection. After disconnection, it will show “Disconnected”. After disconnection, if
you need to connect the Bluetooth again, perform step 2.
Caution: This devi
ce can only pair with one Bluetooth compatible device at a time and
cannot be connected to two Bluetooth compatible devices at the same time.
2Bluetooth
music
1. Press to choose Bluetooth music.
2. Press to select the previous track.
3. Press to select the next track.
4. Press to switch between pause and play.
Caution: 1. This operation varies depending on the device connected.
2. This device has separate memory for volume settings of
Bluetooth audio
sources.
3About
Bluetooth
Depending on the Bluetooth version, Bluetooth compatible devices may be unable to
communicate with this device.
1. It is not guaranteed that this device can be used normally in conjunction with all
Bluetooth
compatible devices. For the operation of Bluetooth compatible devices, please consult your
Alpine dealer or visit Alpine’s website.
2. Depending on the environment, Bluetooth wireless connection may be unstable.
3. Depending on the Bluetooth comp
atible device connected, this function may vary. Please
also refer to the user manual of the device connected.
4. When searching for this device on the mobile phone, the name of this device is “UTX-
M06-XXXXXX”.
Knob

15
Description of mobile APP - Homepage
1
Mute button
Mute the master volume
2
Master volume
Pull the fader up and down to adjust the master volume.
3
Master audio source
Select the master audio source (USB, Bluetooth, High level and AUX).
4Connection indicator
When the Bluetooth icon is red, the mobile phone Bluetooth is not connected; when it is
green, the mobile phone Bluetooth is connected.
5Menu bar
You can select Data encryption, EQ gain step size, Switch-off delay, Share sound effect,
Save sound effect, and Local sound effect.
6Auxiliary audio
source
Select the auxiliary audio source (Bluetooth music, High level, AUX and OFF), and adjust
the master source attenuation. The higher the attenuation of the master audio source, the
lower the master volume. The attenuation range: 0%~100%.
7Pre-set sound effect
Save and call at most 6 preset sound effect settings. Slide left and right to select different
preset sound effect data.
8Interface selection
There are 5 different functional interfaces, Homepage, Preset EQ, Music, Tuning, and
Setting, and the Homepage interface is the default interface.
4
5
3
6
2
1
7
8

16
Description of mobile APP - Preset EQ
1Preset EQ
You can select the preset EQ based on your personal preference. There are 10 options to
choose from.
1

17
Description of mobile APP - Music
1
Previous track button
Switch to and play the previous track.
2
Play button
Switch between Pause and Play.
3
Track information
display
Display information about the track being played.
4
Track album
Display the album of the track being played.
5
Audio source display
Display the master audio source and auxiliary audio source selected.
6
Play mode button
Switch play modes in cycle.
7
Play progress display
Display the play time and progress.
8
Next track button
Switch to and play the next track.
4
3
2
1
5
6
7
8

18
Description of mobile APP - Delay
1Speaker
Select the corresponding speaker, push the fader left and right on the pop-up window to
adjust the delay, or click "+" and "-" to adjust the delay.
2
Delay group
There are 3 delay groups to choose from for each channel.
3
Unit of delay
Units of delay to choose from include ms, cm, and inch.
1
2
3
Table of contents
Other Alpine Media Player manuals

Alpine
Alpine IVA-D106E User manual

Alpine
Alpine INA-W910R User manual

Alpine
Alpine IVE-W535BT User manual

Alpine
Alpine HDS-990 User manual

Alpine
Alpine UTX-A09 User manual

Alpine
Alpine iXA-W404R User manual

Alpine
Alpine IVE-W530BT User manual

Alpine
Alpine UTX-M08S User manual

Alpine
Alpine HDS-990 User manual

Alpine
Alpine UTX-M08 User manual