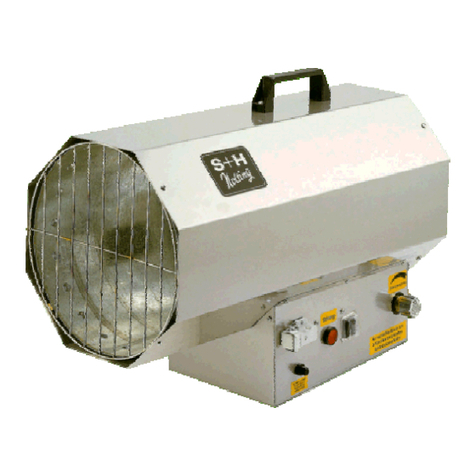
S+H Nolting NG-L-30 User manual

- 0 -
Betriebsanleitung
Operating manuel
Mode d′utilisation
Manual de instrucciones
NG-L 30 – 100
Gustav Nolting GmbH
Neuzeitliche Heiztechnik

- 1 -
INHALTSVERZEICHNIS
1. Technische Daten.................................................... Seite 2
2. Allgemeines.............................................................. Seite 3
3. Sicherheitseinrichtungen.......................................... Seite 3
4. Aufstellung / Montage.............................................. Seite 3
5. Inbetriebnahme........................................................ Seite 4
6. Ausserbetriebnahme................................................ Seite 4
7. Wartungsarbeiten..................................................... Seite 4
8. Umstellanleitung....................................................... Seite 4
9. Mögliche Störungen und deren Ursachen................ Seite 5
10. Ersatzteilliste............................................................ Seite 6
11. Elektrischer Schaltplan.............................................. Seite 7
12. Bauteileübersicht...................................................... Seite 29 - 31
ENGLISH....................….............................................Pages 8 - 14
FRANÇAIS....................….......................................... Pages 15 - 21
ESPAÑOL................................................................ Página 22 - 28
13.07.11
NG_L_EN_FR_ES_13.doc

- 2 -
WICHTIG! UNBEDINGT LESEN!
Lesen Sie die Anleitung vor der Inbetriebnahme des Gerätes sorgfältig durch. Bei Nichtbeachtung
erlischt der Gewährleistungsanspruch. Für Schäden und Folgeschäden, die daraus entstehen,
übernimmt der Hersteller keine Haftung.
1. TECHNISCHE DATEN
Typ
NG - L - 30 NG - L - 50 NG - L - 80 NG - L - 100
Nennwärmebelastung
kW 30,0 50,0 80,0 100,0
Gasart / Kategorie Erd- und Flüssiggas II 2 E LL 3B / P
Anschlußdruck
Erdgas / Flüssiggas mbar 20 / 50 20 / 50 20 / 50 20 / 50
Anschlußwert kg/h 2,33 3,89 6,23 7,78
Luftleistung m³/h 1.600 2.300 4.100 7.500
Elektroanschluß V/Hz 230 / 50 230 / 50 230 / 50 230 / 50
Nennstrom A 0,85 1,0 2,9 2,7
Wurfweite m 30 40 50 60
Länge mm 990 990 1.150 1.250
Breite mm 445 510 560 640
Höhe mm 312 365 410 510
Gewicht kg 35 41 45 56
Produkt-ID Nr. CE-
0085
BN 0001
CE-0085
BN 0001
CE-0085
BN 0001
CE-0085
BN 0001
Technische und maßliche Änderungen vorbehalten.

- 3 -
2. ALLGEMEINES
Vollautomatischer gasbefeuerter Warmlufterzeuger
der Baureihe NG-L zur Stallbeheizung –
ausgestattet mit Infrarot-Flammüberwachung,
elektrischer Zündung, unterstützendem Luftge-
bläse und offener Verbrennungskammer zum
Betrieb ohne Abgasanlage.
Das Gerät kann durch Düsenwechsel und
Druckeinstellung auf die jeweils andere Gasart
umgestellt werden.
3. SICHERHEITSEINRICHTUNGEN
Als Sicherheitseinrichtung gegen eine Über-
hitzung wurde der WLE mit einem Sicher-
heitstemperaturbegrenzer (STB) ausgestattet.
Der STB schaltet den WLE beim Überschreiten
der fest eingestellten Temperatur aus.
Die integrierte Wiedereinschaltsperre verhindert
einen erneuten Start des WLE.
Nach der Auskühlung des WLE muß zuerst die
Ursache behoben und der STB von Hand
entriegelt werden. Der Entriegelungstaster
befindet sich am Schaltkasten unter der
schwarzen Schraubkappe (Pos. 13).
Danach den Entstörknopf des Gasfeuerungs-
automaten an der Seite des Schaltkastens
drücken (Pos. 15).
Der eingebaute Infrarot-Flackerdetektor dient als
Flammenüberwachungseinrichtung und ist an
einen Gasfeuerungsautomaten angeschlossen,
der die Gesamtfunktionen des WLE steuert und
überwacht.
4. AUFSTELLUNG / MONTAGE
Um Personen- und Sachschäden zu
vermeiden, sind die jeweiligen örtlichen Bau-,
Brandschutz- und Berufsgenossenschafts-
vorschriften unbedingt zu beachten.
Vor der Aufstellung ist sicherzustellen, daß
die örtlichen Versorgungsbedingungen
(Gasart, Druck) und die gegenwärtige
Einstellung des WLE übereinstimmen.
Der WLE darf nur in gut belüfteten Räumen,
nicht in Wohnräumen oder gleichartigen
Aufenthaltsräumen, betrieben werden.
Um die MAK Grenzwerte im Aufstellungsort
einzuhalten, muß pro KW Geräteleistung eine
Frischluftmenge von mindestens 25 m³/h
gewährleistet sein.
Der Betrieb in feuer- und explosionsgefährdeter
Umgebung ist unzulässig.
Der WLE wird mittels geeigneter Ketten an den
dafür vorgesehenen drei Ösen waagerecht frei
im Raum aufgehängt.
Das Anbringen von Rohren, Schläuchen o.ä.
sowie Veränderungen des Querschnittes ist
ausblas- und ansaugseitig nicht zulässig.
Ein ausreichender Abstand zu brennbaren
Gegenständen und Bauteilen, besonders in
Ausblasrichtung, ist unbedingt einzuhalten und
bei der Inbetriebnahme zu überprüfen.
Als oberer, unterer, seitlicher und hinterer
Sicherheitsabstand sollten 1,5 m nicht
unterschritten werden. In Ausblasrichtung sollen
10,0 m nicht unterschritten werden.
Achtung !!!
Elektro- und Gasanschluß des WLE nur vom
Fachmann nach den geltenden örtlichen
Vorschriften durchführen lassen! (In
Deutschland z.B. TRGI und TRF)
Elektroanschluß:
Der Elektroanschluß erfolgt über ein angebautes
Netzkabel mit Schutzkontaktstecker an ein
230V/50 Hz-Wechselstromnetz.
Gasanschluß:
Der WLE ist werkseitig mit einem Gasanschluß
G ¾ “-Innengewinde ausgestattet. Bei NG-L-30
G ½ “ Innengewinde.
Die Verbindung an eine Gasleitung hat mit
geeigneten Übergangsstücken zu erfolgen.
Da es ggf. regionale Unterschiede in der
Gaszusammensetzung gibt, ist bei der
Inbetriebnahme vor Ort das einwandfreie Zünden
zu kontrollieren.
Bei nicht einwandfreier Zündung ist die Position
der Zündelektrode anzupassen.
In angemessenen Abständen sollte diese
Kontrolle wiederholt werden.
Thermostatanschluß:
Die Leitung eines Raumthermostaten bzw. des
potentialfreien Kontaktes einer Lüftungssteue-
rung kann an die vorhandene Thermostat-
steckdose mittels entsprechendem Stecker
angeschlossen werden.

- 4 -
5. INBETRIEBNAHME
Nach dem Öffnen des Gasventils den
Hauptschalter auf ‚Heizen‘ stellen.
Beim Betrieb mit Raumthermostat muß der
Thermostat über Umgebungstemperatur einge-
stellt werden.
Gleichzeitig mit dem Ventilator wird die Zündung
eingeschaltet und nach einer kurzen Vorspülzeit
das Magnetventil geöffnet.
Nach der Flammenbildung wird die Zündung
abgeschaltet. Der WLE hat seine Betriebsstellung
erreicht.
Sollte sich die Flamme nach Ablauf der Zündzeit
nicht gebildet haben, wird der o.g. Zündvorgang
bis zu viermal wiederholt. Hat sich danach immer
noch keine Flamme gebildet, schließt das
Magnetventil automatisch die Gaszufuhr.
Erlischt die Flamme während des Betriebes,
schließt ebenfalls das Magnetventil sofort die
Gaszufuhr.
Der Gasfeuerungsautomat hat eine Stör-
abschaltung und Verriegelung durchgeführt. Die
rote Störlampe am Schaltkasten leuchtet.
Sobald die eventuelle Störung behoben ist, kann
der WLE durch Drücken des Entstörtasters am
Schaltkasten wieder in Betrieb genommen werden.
Die rote Störlampe erlischt und der oben
beschriebene Einschaltvorgang wiederholt sich.
6. AUSSERBETRIEBNAHME
Hauptschalter auf ‚0‘ stellen und die Gaszufuhr
schließen.
Achtung !!!
Vor dem Transport muß der WLE vollständig
ausgekühlt sein.
7. WARTUNGSARBEITEN
Um die Betriebssicherheit zu gewährleisten und
eine optimale Wirtschaftlichkeit zu erzielen, muß
der WLE in angemessenen Abständen gewartet
und gereinigt werden.
Hierbei ist folgendes unbedingt zu beachten:
•Bei Wartungsarbeiten den Netzstecker ziehen
und die Gaszufuhr schließen.
•Der WLE, besonders der Infrarot-
Flackerdetektor, Brenner, die Zündelektrode
und der Ventilator, sind in angemessenen
Zeitabständen auf Verschmutzung zu
überprüfen und ggf. zu reinigen.
•Zur Reinigung kein Wasser verwenden!
•Nur Originalersatzteile verwenden!
•Reparaturarbeiten an strom- und
gasführenden Komponenten nur von Fach-
leuten durchführen lassen!
•Nach erfolgten Wartungsarbeiten ist das
Inbetriebnahmeverfahren mit Funktions-
kontrolle erneut durchzuführen.
8. UMSTELLANLEITUNG
Der WLE ist entsprechend seiner Kennzeichnung auf eine bestimmte Gasart eingestellt und mit
entsprechenden Düsen bestückt. Sollte der WLE mit einer von der Kennzeichnung abweichenden Gasart
betrieben werden, sind die Düsendrücke entsprechend der unten aufgeführten Tabelle einzustellen und evtl die
Düsen zu wechseln.
Typ NG-L-30 NG-L-50 NG-L-80 NG-L-100
Düse
(mm)
P Düse
(mbar)
Düse
(mm)
P Düse
(mbar)
Düse
(mm)
P Düse
(mbar)
Düse
(mm)
P Düse
(mbar)
Flüssiggas P/B 3,2 21,0 4,2 21,5 5,2 18,0 6,0 24,0
Erdgas LL 5,0 17,0 6,5 16,4 8,5 16,2 10,0 12,0
Erdgas E 5,0 13,0 6,5 11,0 8,5 11,0 10,0 9,0
Erdgas E + 4,2 18,3 5,5 18,6 7,2 17,0 8,0 16,1
Tabelle 1
Der Anschlußdruck beträgt bei Flüssiggas 50 mbar, für Erdgas 20 mbar.

- 5 -
9. MÖGLICHE STÖRUNGEN UND DEREN URSACHEN:
Störung: Ursache: Abhilfe:
WLE startet nicht
Kein Raumthermostat
angeschlossen
Raumthermostat falsch
eingestellt
Elektroversorgung
Kein Gas
Blindstecker auf die Thermo-
statsteckdose aufstecken
Einstellung überprüfen
Netzstecker und Spannungs-
versorgung überprüfen
Gasanschlußdruck prüfen
WLE läuft an, Zündung ist vor-
handen, aber Magnetventil öffnet
nicht..........Störabschaltung
Sicherheitstemperaturbegrenzer
hat ausgelöst oder ist defekt
(Pos. 13)
Gasfeuerungsautomat defekt
(Pos. 14)
Infrarot-Flackerdetektor defekt
(Pos. 9) oder Fremdlicht
ausgesetzt
Infrarot-Flackerdetektor gibt
während der Vorlaufzeit ein
Flammensignal (rote Leucht-
diode), obwohl sich noch keine
Flamme gebildet hat.
Differenzdruckwächter hat nicht
geschaltet
Entriegeln bzw. austauschen
Austauschen
Austauschen bzw. Fremdlicht-
einfall verhindern
Überprüfen
WLE läuft an, keine Zündung,
Magnetventil öffnet, Gas strömt
ein.......... Störabschaltung
Zündelektrode defekt (Pos. 7)
Zündspalt zu groß
Zündkabel defekt (Pos. 20)
Gasfeuerungsautomat defekt
(Pos. 14)
Austauschen
Verkleinern
Austauschen
Austauschen
WLE läuft an, Zündung ist vor-
handen,Magnetventil öffnet, Gas
strömt ein, wird entzündet..........
nach wenigen Sekunden erfolgt
die Störabschaltung
Infrarot-Flackerdetektor
verschmutzt oder defekt
Magnethalter defekt (Pos. 11)
Reinigen bzw. austauschen
Austauschen
WLE läuft an, Zündung ist vor-
handen, Magnetventil öffnet,
kein Gas strömt ein..........
Störabschaltung
Gasarmatur defekt (Pos. 2)
Gasdruck
Düse verschmutzt
Austauschen
Überprüfen
Reinigen, austauschen
WLE geht gelegentlich auf
Störung
Infrarot-Flackerdetektor
Zündung
Schaltkasten
Gasdruck
Überprüfen
Überprüfen
Auf lose Klemmen überprüfen
Überprüfen

- 6 -
10. ERSATZTEILLISTE
Pos. Bezeichnung NG-L-30
Art.-Nr. NG-L-50
Art.-Nr. NG-L-80
Art.-Nr. NG-L-100
Art.-Nr.
1 Schutzgitter ----- ----- ----- 100984
2 Gasarmatur 101299 103417 103417 103417
3 Ventilatorflügel ----- ----- ----- 101002
4 Thermostatsteckdose 100423 100423 100423 100423
5 Hauptschalter Lüften – 0 – Heizen 100818 100818 100818 100818
6 Motor / Ventilator 102390 101152 1-02240 103552
7 Zündelektrode 100756 100756 100756 100756
8 Schaltkasten 100294 100294 100294 100294
9 Infrarot-Flackerdetektor IRD 1020 100217 100217 100217 100217
10 Fühlerkabel für IRD 1020 100720 100720 100720 100720
11 Magnethalter für IRD 1020 100719 100719 100719 100719
12 Differenzdruckwächter 101300 101300 101300 101300
13 Sicherheitstemperaturbegrenzer (STB) 100219 100219 100219 100219
14 Gasfeuerungsautomat DVI 980 103946 103946 103946 103946
15 Entriegelungsknopf 103718 103718 103718 103718
16 Relais 100728 100728 100728 100728
17 Sicherung 101132 101132 101132 101132
18 Entstörkondensator 103569 103569 103569 103569
19 Düse lt. Tabelle 1 lt. Tabelle 1 lt. Tabelle 1 lt. Tabelle 1
20 Zündkabel 1-00153 1-00153 1-00153 1-00153
21 Brennkammer
22 Brennerkopf 3-00346 3-00795 3-00795 3-00269
Zur Reparatur nur Originalteile des Herstellers verwenden!

- 7 -
11. ELEKTRISCHER SCHALTPLAN Gerätetyp : NG-L - 30-100

- 8 -
TABLE OF CONTENTS
1. Technical Data................................…….................. Page 9
2. General..................................................................... Page 10
3. Safety Features........................................................ Page 10
4. Installation / Assembly.............................................. Page 10
5. Initial operation and further start-ups........................ Page 11
6. Placing out of service............................................... Page 11
7. Maintenance……...................................................... Page 11
8. Conversion Instructions…............................….......... Page 11
9. Possible malfunctions and their causes…................ Page 12
10. Spare Parts List.................................... ................... Page 13
11. Electrical circuit diagrams......................................... Page 14
12. Components Overview............................................. Page 29 - 31
DEUTSCH.................................................................
Seite 1 - 7
FRANÇAIS....................…......................................... Pages 15 - 21
ESPAÑOL................................................................ página 22 - 28

- 9 -
IMPORTANT! READ CAREFULLY!
Please read the introduction carefully before starting up the equipment. In the event of non-
compliance, any warranty claim becomes null and void. The manufacturer is not responsible for
damages or consequential damages that may arise therefrom.
1. TECHNICAL DATA
Typ
NG - L - 30 NG - L - 50 NG - L - 80 NG - L - 100
Nominal heat loading
capacity kW 30.0 50.0 80.0 100.0
Gas type / Category Natural gas and LPG II 2 E LL 3B / P
Connection pressure
Natural gas / LPG mbar 20 / 50 20 / 50 20 / 50 20 / 50
Connected load kg/h 2.33 3.89 6.23 7.78
Air output m³/h 1,600 2,300 4,100 7,500
Electrical hook-up V/Hz 230 / 50 230 / 50 230 / 50 230 / 50
Rated current A 0.85 1.0 2.9 2.7
Blow m 30 40 50 60
Length mm 990 990 1,150 1,250
Width mm 445 510 560 640
Height mm 312 365 410 510
Weight kg 35 41 45 56
Product ID N° CE-
0085
BN 0001
CE-0085
BN 0001
CE-
0085
BN 0001
CE-0085
BN 0001
We reserve the right to make technical and dimensional changes.

- 10 -
2. GENERAL
Fully automatic NG-L gas-fired warm air heater for
stable heating - equipped with infrared flame
monitoring, electrical ignition, supporting air
blower, and open combustion chamber for
operation without an flue gas system.
The unit can be converted to another gas type by
means of nozzle change and pressure adjustment.
3. SAFETY FEATURES
The WAH is equipped with a safety temperature
controller (STC) as a safety feature to prevent
overheating.
The STC shuts down the WAH upon exceeding
the definitively set temperature.
The integrated restart lock prevents restarting the
WAH.
After cooling the WAH, the cause must be
eliminated and the STC must be manually
released. The reset button is located on the
switching unit under the black screw cap
(Pos. 13).
Then press reset button on the side of the
switching unit (Pos. 15).
The built-in infrared flicker sensor serves as a
flame monitoring device and is connected to the
automatic gas firing unit that controls and
monitors the overall function of the WAH.
4. INSTALLATION/ ASSEMBLY
In order to prevent personal injury and
property damage, the relevant local building,
fire-prevention and professional organization
regulations must be unconditionally
observed.
Before setting up it must be ensured that the
local supply conditions (gas type, pressure)
and the current setting of the WAH
correspond.
The WAH should be operated only in well-
ventilated spaces and must not be used in
residential or similar premises.
To comply with the MAC limit values at the set-up
location, for each KW of device output a fresh air
exchange rate of at least 25 m
3
/h must be
ensured.
Operation in environments at risk of fire or
explosion is prohibited.
The WAH is freely horizontally suspended in the
room using suitable chains connected to the
three lugs provided for this purpose.
Attachment of pipes, hoses or the like as well as
changes to the cross-section is prohibited on
the inlet and outlet side.
It must be absolutely assured that there is
adequate distance from inflammable objects and
structural parts, especially on the exhaust side
and this must be verified at the time of initial
operation and further start-ups of the equipment.
The top, bottom, side and rear safety margins
must not be less than 1.5 m. On the exhaust
side, it must not be less than 10.0 m.
Caution!!!
WAH electrical and gas hook-ups must be
done only by a specialist and in accordance
with local standards.
Electrical Hook-up:
The electrical hook-up is made using a built-in
power cable with three-wire grounded plug to a
230 V / 50 Hz a.c. power line.
Gas Hook-up:
The WAH is factory – equipped with a G ¾“ inside
thread gas hook-up. With NG-L-30 G ½ “ inside
thread.
The hook-up to the gas main line must be made
using appropriate connectors.
Since there may be regional differences in gas
composition, proper igniting must be checked on
site at the time of initial operation and further
start-ups.
In the event of imperfect ignition, the position of
the ignition electrode must be adjusted.
These inspections should be repeated at regular
intervals.
Thermostat Connection:
The wiring of a room thermostat or of the floating
contact of a ventilation control can connected to
the existing thermostat plug-box using the
appropriate plug.

- 11 -
5. INITIAL OPERATION AND
FURTHER START-UPS
After opening the gas valve, set the main switch to
HEAT.
With operation using a room thermostat, the
thermostat must be set using room temperature.
Ignition is switched on at the same time as the
blower and, after a brief pre-purge time, the
solenoid valve is opened.
After establishing the flame, ignition is shut off. The
WAH has reached its operating setting.
If the flame has not formed by the time the ignition
time lapses, the ignition procedure described
above can be repeated up to 4 times. If, after this
time, there is still no flame, the solenoid valve
automatically shuts off the gas supply.
If the flame extinguishes during operation, the
solenoid valve will immediately shut off the gas
supply.
The automatic gas firing unit has executed a fault
shut-down and block. The red fault light on the
switching unit lights up.
Once the malfunction has been corrected, the
WAH can be restarted by pressing the reset button
on the control box. The red malfunction lamp goes
out, the switch-on routine described above
repeats.
6. PLACING OUT OF SERVICE
Place the main switch in the 0position and close
the gas supply.
Caution!!!
The WAH must be completely cooled prior to
transport.
7. MAINTENANCE
For assuring operational reliability and to achieve
optimum cost-effectiveness, the WAH must be
serviced and cleaned at appropriate intervals.
When this is done, the following must be observed:
•When performing maintenance, disconnect the
power cord and close the gas supply.
•The WAH, especially the infrared flicker
sensor, burner and the blower must be
checked at regular intervals for fouling and, if
necessary, cleaned.
•Do not use water for cleaning!
•Use only original equipment manufacturer's
replacement parts.
•Repairs to electrical and gas conducting
components must be done only by specialist
personnel!
•On completion of service work, initial start-up
together with function check must be re-done.
8. INSTRUCTIONS ON CONVERSION
The WAH is set up for a specific type of gas per its designation and is equipped with the corresponding nozzles.
Should the WAH be operated using a gas type different from that of the designation, the nozzle pressures must
be adjusted in accordance with the information in the table below and the nozzles changed, if required.
Type NG-L-30 NG-L-50 NG-L-80 NG-L-100
Nozzle
(mm)
P Nozzle
(mbar)
Nozzle
(mm)
P Nozzle
(mbar)
Nozzle
(mm)
P Nozzle
(mbar)
Nozzle
(mm)
P Nozzle
(mbar)
LPG P/B 3,2 21,0 4,2 21,5 5,2 18,0 6,0 24,0
Natural gas LL 5,0 17,0 6,5 16,4 8,5 16,2 10,0 12,0
Natural gas E 5,0 13,0 6,5 11,0 8,5 11,0 10,0 9,0
Natural gas E+ 4,2 18,3 5,5 18,6 7,2 17,0 8,0 16,1
Table 1
The connection pressure in the case of LPG is 50 mbar; for natural gas 20 mbar.

- 12 -
9. POSSIBLE MALFUNCTIONS AND THEIR CAUSES:
Malfunction: Cause: Remedy:
WAH does not start
No room thermostat is connected
Room thermostat is incorrectly
set
Electrical power supply
No gas
Plug in a dummy plug on the
thermostat socket.
Check setting
Check the power plug and the
power supply
Check gas hook-up pressure
CAH starts, there is ignition but the
solenoid valve does not
open….malfunction shutdown
Safety temperature controller
triggered or is defective
(Pos. 13 )
Automatic gas firing unit
defective (Pos. 14 )
Infrared flicker sensor defective
(Pos. 9) or is exposed to outside
light
Infrared flicker sensor gives a
flame signal during the lead-in
time (red LED), although no
flame has been established.
Differential pressure monitor did
not trigger
Reset or replace
Replace
Exchange or prevent
impingement of external light.
Check
WAH starts up, no ignition, solenoid
valve opens, gas flows
in…...malfunction shutdown
Ignition electrode defective
(Pos. 7)
Ignition gap to large
Ignition cable defective (Pos. 20)
Automatic gas firing unit
defective (Pos. 14 )
Replace
Reduce
Replace
Replace
WAH starts up, ignition present,
solenoid valve opens, gas flows in
and is ignited…after several seconds
malfunction shutdown occurs
Infrared flicker sensor fouled
or defective
Magnet mounting defective
(Pos. 11)
Clean or replace
Replace
WAH starts up, ignition present,
solenoid valve opens, no gas flows
In..…..malfunction shut-down
Gas fitting defective (Pos. 2)
Gas pressure
Nozzle fouled
Replace
Inspect
Clean, replace
WAH occasionally goes to malfunction
Infrared flicker sensor
Ignition
Switching unit
Gas pressure
Inspect
Inspect
Check for loose contacts
Inspect

- 13 -
10. SPARE PARTS LISTS
Pos. Name NG-L-30
Item No. NG-L-50
Item No. NG-L-80
Item No. NG-L-100
Item No.
1 Protective grating ----- ----- ----- 100984
2 Gas fitting 101299 103417 103417 103417
3 Fan blade ----- ----- ----- 101002
4 Thermostat socket 100423 100423 100423 100423
5 Main switch Ventilate – 0 – Heat 100818 100818 100818 100818
6 Motor / Fan 102390 101152 1-02240 103552
7 Ignition electrode 100756 100756 100756 100756
8 Switching unit 100294 100294 100294 100294
9 Infrared flicker sensor IRD 1020 100217 100217 100217 100217
10 Sensor cable for IRD 1020 100720 100720 100720 100720
11 Magnet holder for IRD 1020 100719 100719 100719 100719
12 Differential pressure monitor 101300 101300 101300 101300
13 Safety temperature controller (STC) 100219 100219 100219 100219
14 Automatic gas firing unit DVI 980 103946 103946 103946 103946
15 Release button 103718 103718 103718 103718
16 Relay 100728 100728 100728 100728
17 Fuse 101132 101132 101132 101132
18 Reset capacitor 103569 103569 103569 103569
19 Nozzle per table 1 per table 1 per table 1 per table 1
20 Ignition cable 1-00153 1-00153 1-00153 1-00153
21 Combustion chamber
22 Burner head 3-00346 3-00795 3-00795 3-00269
Use only OEM parts for repairs.

- 14 -
11. ELECTRICAL CIRCUIT DIAGRAM Device Type: NG-L 30-100

- 15 -
TABLE DES MATIERES
1. Spécifications techniques......................................... Page 16
2. Généralités............................................................... Page 17
3. Dispositifs de sécurité.............................................. Page 17
4. Installation / Assemblage.......................................... Page 17
5. Mise en service........................................................ Page 17
6. Mise hors service..................................................... Page 18
7. Maintenance............................................................. Page 18
8. Instructions pour la commutation.............................. Page 18
9. Les dysfonctionnements possibles et leurs causes.. Page 19
10. Liste de pièces de rechange..................................... Page 20
11. Schéma des connexions électriques..........…........... Page 21
12. Aperçu des composants........................................... Page 29 - 31
DEUTSCH.................................................................
Seite 1 - 7
ENGLISH....................….............................................Pages 8 – 14
ESPAÑOL................................................................ página 22 - 28

- 16 -
IMPORTANT! A LIRE IMPERATIVEMENT !
Veuillez lire attentivement le manuel d’instruction avant la mise en service de l’appareil. Le non-
respect des consignes résulte en l’annulation de la garantie. Le producteur n’assume aucune
responsabilité pour les dommages et conséquences d’une panne découlant du non-respect des
consignes.
1. SPECIFICATIONS TECHNIQUES
Version
NG - L - 30 NG - L - 50 NG - L - 80 NG - L - 100
Charge thermique
nominale kW 30,0 50,0 80,0 100,0
Type / catégorie de gaz
Gaz naturel et liquide II 2 E LL 3B / P
Pression du gaz à
l’entrée
Gaz naturel et liquide
mbar 20 / 50 20 / 50 20 / 50 20 / 50
Puissance connectée kg/h 2,33 3,89 6,23 7,78
Volume d’air débité m³/h 1.600 2.300 4.100 7.500
Raccordement
au secteur V/Hz 230 / 50 230 / 50 230 / 50 230 / 50
Courant nominal A 0,85 1,0 2,9 2,7
Longueur du jet m 30 40 50 60
Longueur mm 990 990 1.150 1.250
Largeur mm 445 510 560 640
Hauteur mm 312 365 410 510
Poids kg 35 41 45 56
Nº d’identification
du produit CE-
0085
BN 0001
CE-0085
BN 0001
CE-
0085
BN 0001
CE-0085
BN 0001
Les modifications techniques et dimensionnelles sont conservées.

- 17 -
2. GENERALITES
Générateur d’air chaud entièrement automatique
chauffé au gaz de la série de construction
NG-L pour le chauffage de porcheries et poulaillers
– équipé d’un dispositif infrarouge pour surveiller
les flammes, allumage électrique, soufflets d’air
supplémentaires et chambre de combustion
directe pour fonctionner sans évacuation des
fumées.
L’appa
reil peut être commuté sur un autre type de gaz
par changement des buses et réglage de la
pression.
3. DISPOSITIFS DE SECURITE
Le GAC est équipé d’un limiteur de sécurité de
température (LST), dispositif de sécurité contre la
surchauffe.
Le LST met le GAC hors service lorsque la
température réglée est dépassée.
Le blocage d’enclenchement intégré prévient,
que le GAC démarre à nouveau.
Après le refroidissement, il faudra d’abord trouver
et réparer la cause de la surchauffe du GAC
avant de débloquer le LST manuellement. Le
bouton-poussoir de déblocage se trouve sur le
coffret de commande, sous le bouchon à visser
noir. (Pos. 13).
Appuyez ensuite sur la touche de déverrouillage
sur la face latérale du coffret de commande
(Pos. 15).
Le détecteur de scintillement infrarouge intégré
sert comme dispositif de surveillance de flammes.
Il est connecté à un brûleur à gaz automatique,
dispositif de contrôle et de surveillance de toutes
les fonctions du GAC.
4. INSTALLATION / ASSEMBLAGE
Afin de prévenir les dommages personnels et
matériels, les régulations en vigueur relatives
à la construction, la protection contre les
incendies ainsi que les stipulations des
associations professionnelles sont à
respecter impérativement.
Avant d’installer le GAC, il convient de
vérifier que les conditions locales
d’alimentation (type de gaz, pression)
correspondent à son réglage actuel.
Le GAC est prévu pour un fonctionnement dans
les locaux bien aérés exclusivement et ne doit
pas être utilisé dans les pièces d’habitation ni
dans des locaux semblables.
Un volume d’air frais d’au moins 25 m³/h doit être
garanti par KW de puissance de l’appareil, afin
de respecter la valeur limite de concentration
maximale sur le poste de travail à l’endroit de
son emplacement.
Le fonctionnement dans les environnements à
risque d’incendie ou d’explosion n’est pas
autorisé.
Le GAC est suspendu librement et
horizontalement dans le local au moyen de
chaînes adéquates attachées aux anneaux
prévus à cet effet.
Il n’est pas autorisé de raccorder des tuyaux,
tubes, etc. ni d’apporter des modifications au
diamètre, que ce soit du côté de l’air soufflé ou
aspiré.
Une distance suffisante des matériaux et
éléments de construction combustibles est à
prévoir impérativement pour l’installation des
conduites de sortie, cette distance doit être
contrôlée lors de la mise en service.
La distance au-dessus, en dessous et à côté de
l’appareil doit être de 1,5 m minimum. En
direction de l’air soufflé, respecter une distance
de 10,0 m au moins.
Attention !!!
Les raccordements électriques et du gaz du
GAC doivent être effectués par des
spécialistes et conformément aux normes en
vigueur sur le lieu d’installation!
Raccordement au secteur:
Le raccordement électrique est effectué
moyennant le câble de réseau attaché muni d’une
fiche de protection au réseau de courant alternatif
230V/50 Hz.
Raccordement du gaz:
Le GAC a été équipé à l’usine d’un raccordement
de gaz avec un filetage intérieur G ¾ “. Pour NG-
L-30 un filetage intérieur G ½ “.
Pour le raccordement à une conduite de gaz,
choisir les raccords adéquats.
Comme il existe éventuellement des disparités
régionales dans la composition de gaz,
l’allumage correct est à contrôler avant la mise
en service sur le site.
En cas d’un allumage non correct, il faudra
ajuster la position de l’électrode d’allumage.
Cette inspection est à répéter à des intervalles
réguliers.
Raccordement du thermostat:
La conduite d’un thermostat du local,
respectivement du contact sans potentiel d’une
commande d’aération peut être raccordée à la
prise du thermostat présente au moyen d’une
fiche mâle adéquate.

- 18 -
5. MISE EN SERVICE
Réglez l’interrupteur principal sur ‘Chauffage’
après avoir ouvert la vanne de gaz.
Pour le fonctionnement avec le thermostat du
local, le thermostat doit être réglé par la
température ambiante.
L’allumage est enclenché en même temps que le
ventilateur, et après une brève phase de pré-
purge, la vanne électromagnétique s’ouvre.
L’allumage est désactivé lorsque les flammes sont
allumées. Le GAC est alors en état de
fonctionnement.
Si, après écoulement de la durée d’allumage,
aucune flamme n’est allumée, la procédure
d’allumage se répète quatre fois au maximum. Si
aucune flamme n’est allumée après les cinq
essais, l’alimentation de gaz est fermée
automatiquement par la vanne électromagnétique.
L’alimentation de gaz est également fermée
automatiquement lorsque la flamme s’éteint durant
le fonctionnement.
Dans ce cas, le brûleur à gaz automatique a
effectué un arrêt de panne et a verrouillé
l’alimentation. Le témoin indicateur rouge du
coffret de commande s’allume.
Après le dépannage, le GAC peut de nouveau
être mis en service en appuyant sur le bouton de
dépannage sur le coffret de commande. Le
témoin indicateur rouge s’éteint et la procédure
d’allumage décrite ci-dessus est répétée.
6. MISE HORS SERVICE
Positionner l’interrupteur principal sur ‚0‘ et fermer
l’alimentation de gaz.
Attention !!!
Le GAC doit être complètement refroidi avant
le transport.
7. MAINTENANCE
Afin de garantir une sécurité et une efficacité de
fonctionnement optimales du GAC, il est
indispensable d’effectuer régulièrement les travaux
de maintenance et de nettoyage.
Veuillez impérativement observer les consignes
suivantes:
•Retirer la fiche mâle de la prise et fermer
l’alimentation de gaz avant d’effectuer les
activités de maintenance et de nettoyage.
•Le GAC, en particulier le détecteur infrarouge
de scintillement, le brûleur, l’électrode
d’allumage et le ventilateur doivent être
inspectés régulièrement et sont à nettoyer en
cas d’encrassement.
•N’utilisez pas d’eau pour le nettoyage!
•Veuillez utiliser uniquement les pièces
d’origine!
•Les réparations des composants électriques
et des éléments de conduites de gaz doivent
être effectuées par des spécialistes!
•Dès les travaux de maintenance terminés, il
convient d’effectuer la remise en route ainsi
qu’un contrôle fonctionnel.
8. INSTRUCTIONS POUR LA COMMUTATION
Le GAC est réglé sur un type de gaz spécifique et équipé des buses correspondantes conformément à sa
caractérisation. Pour que le GAC puisse fonctionner avec un type de gaz autre que celui spécifié, la pression
des buses est à régler conformément au tableau ci-dessous. Le cas échéant, il faudra remplacer les buses.
Version NG-L-30 NG-L-50 NG-L-80 NG-L-100
Buse
(mm)
P Buse
(mbar)
Buse
(mm)
P Buse
(mbar)
Buse
(mm)
P Buse
(mbar)
Buse
(mm)
P Buse
(mbar)
Gaz liquide P/B 3,2 21,0 4,2 21,5 5,2 18,0 6,0 24,0
Gaz naturel LL 5,0 17,0 6,5 16,4 8,5 16,2 10,0 12,0
Gaz naturel E 5,0 13,0 6,5 11,0 8,5 11,0 10,0 9,0
Gaz naturel E+ 4,2 18,3 5,5 18,6 7,2 17,0 8,0 16,1
Tableau 1
La pression de raccordement est 50 mbars pour gaz liqude, 20 mbars pour gaz naturel.

- 19 -
9. LES DYSFONCTIONNEMENTS POSSIBLES ET LEURS CAUSES:
Dysfonctionnement: Cause: Dépannage:
Le GAC ne démarre pas Le thermostat du local n’est pas
raccordé
Mauvais réglage du thermostat
du local
Alimentation de courant
Manque de gaz
Insérer la fiche isolante dans
la prise du thermostat
Contrôler le réglage
Contrôler la fiche du réseau et
l’alimentation du courant
Contrôler la pression de
raccordement du gaz
Le GAC démarre, l’allumage
s’enclenche, mais la vanne
électromagnétique ne s’ouvre
pas............arrêt de panne
Le limiteur de sécurité de
température s’est déclenché ou
est défectueux (Pos. 13)
Le brûleur à gaz automatique est
défectueux (Pos. 14)
Le détecteur infrarouge de
scintillement est défectueux
(Pos. 9) ou est exposé à une
lueur externe
Le détecteur infrarouge de
scintillement donne un signal de
flamme durant la temps de
passage dans la canalisation
montante (diode lumineuse
rouge), alors que la flamme n’est
pas encore allumée.
l'avertisseur à pression
différentielle ne s'est pas mis en
marche
Déverrouiller, respectivement
remplacer
Remplacer
Remplacer, respectivement
éviter l’exposition à une lueur
externe
Contrôler
Le GAC démarre, aucun allumage,
la vanne électromagnétique s’ouvre,
le gaz entre.............. arrêt de panne
Electrode d’allumage
défectueuse (Pos. 7)
Ecart d’allumage trop grand
Câble d’allumage défectueux
(Pos. 20)
Le brûleur à gaz automatique est
défectueux (Pos. 14)
Remplacer
Réduire
Remplacer
Remplacer
Le GAC démarre, l’allumage
s’enclenche, la vanne
électromagnétique s’ouvre, le gaz
entre, est allumé.... après quelques
secondes l’arrêt de panne survient
Détecteur infrarouge de
scintillement encrassé ou
défectueux
Support à aimant défectueux
(Pos. 11)
Nettoyer, respectivement
remplacer
Remplacer
Le GAC démarre, l’allumage
s’enclenche, la vanne
électromagnétique s’ouvre....le gaz
n’entre pas.......arrêt de panne
Fourniture de gaz défectueuse
(Pos. 2)
Pression de gaz
Buse encrassée
Remplacer
Contrôler
Nettoyer, remplacer
Le GAC a des pannes
occasionnelles
Détecteur infrarouge de
scintillement
Allumage
Coffret de commande
Pression de gaz
Contrôler
Contrôler
Contrôler s’il y a des bornes
détachées
Contrôler
This manual suits for next models
3
Table of contents
Languages:
Other S+H Nolting Heater manuals
Popular Heater manuals by other brands
Radialight
Radialight WINDY Installation and operating manual

American Standard
American Standard Trane BAYCCHT301 Installer's guide

KRHÜNER
KRHÜNER 50469 instruction manual

IVIGO
IVIGO EPK4550P05 user manual
DeLonghi
DeLonghi DCH5090ER Instructions for use
L.B. White
L.B. White CV100 Owner's manual and instructions

United States Stove
United States Stove LOGWOOD 2421 owner's manual

Bestron
Bestron AFH100 instruction manual
Kermi
Kermi Fedon Instruction and installation manual

THERMEx
THERMEx WASTEMINATOR II Mounting instruction
Paramount Fitness
Paramount Fitness PH-F-121-BK MO Use and care guide

Coldair
Coldair GFP215 operating instructions
