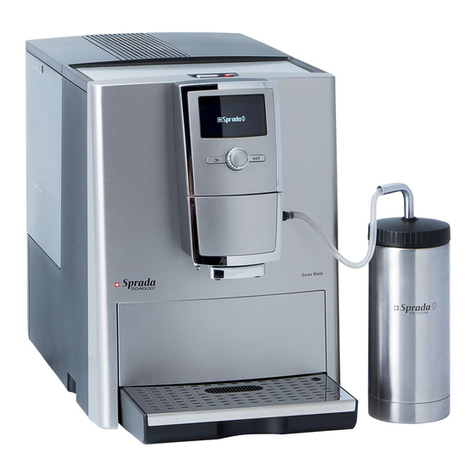
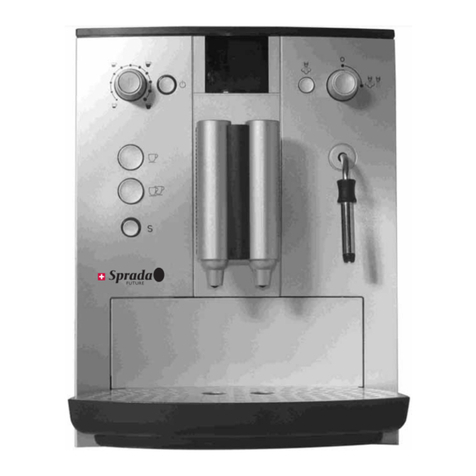
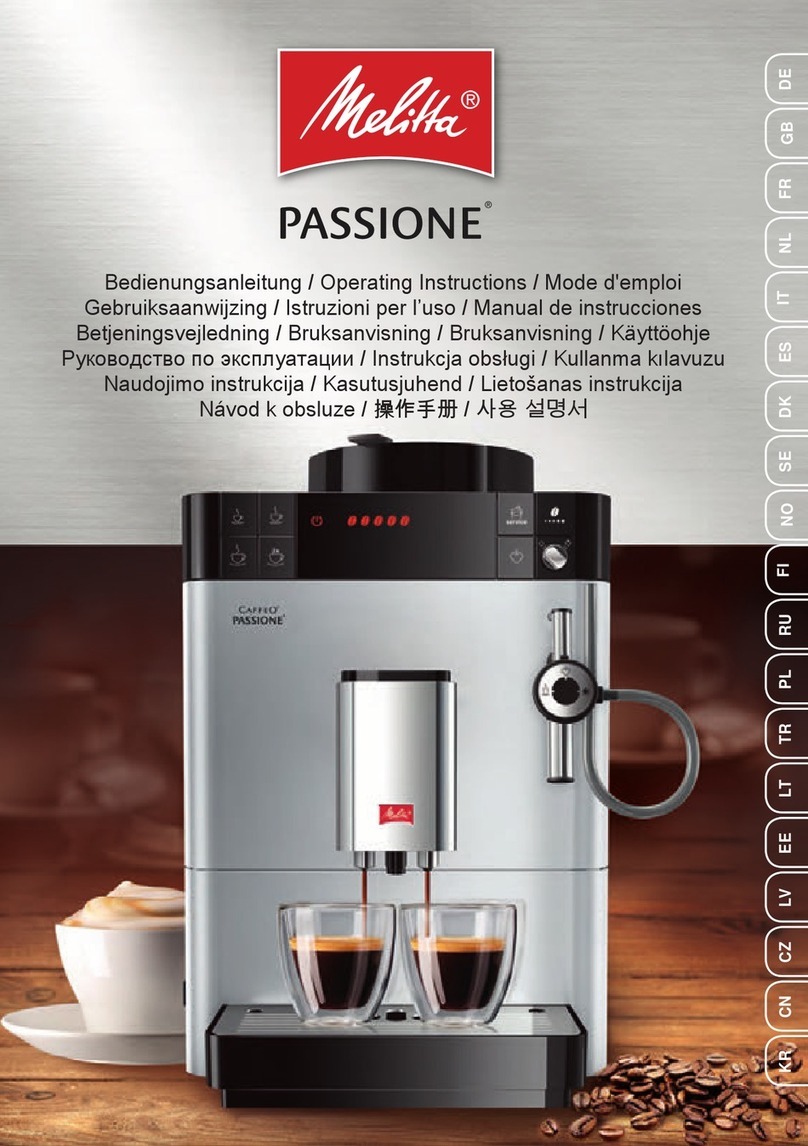
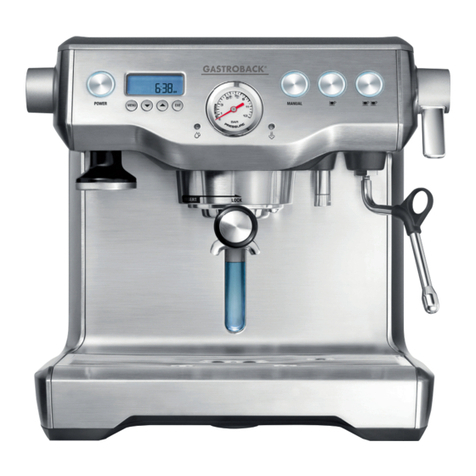
Sprada TX5 Operating instructions

i
SPRADA 508
MANUAL
(FRONT COVER)
OPERATINGINSTRUCTIONS AND USEFUL TIPS
THE ADVANTAGE OF SWISS PRECISION
ONE TOUCH COFFEE ENJOYMENT
Imported & Distributed by
FOGHOUND INTERACTIVE
24 Richards Drive Midrand South Africa
Tel #: +27 11 541 0000 | +27 87 943 7177
www.sprada.ch
FUTURE
C
M
Y
CM
MY
CY
CMY
K
SPRADA_MANUAL PRINT.pdf 1 6/5/15 2:05 PM

Welcome

i
Dear Customer,
Congratulations on purchasing a high-quality SPRADA coee machine.
To get the most out of your SPRADA machine, please read this manual
carefully before use.
Please start by reading the safety notes. Keep this manual in a safe place
as a reference guide or to give to any other users of your machine.
The SPRADA team is here to support you as we are dedicated to your
enjoyment of great coee from this high-quality SPRADA product.
WELCOME
Retailer:
Date & Place of Purchase:

ii
L. Drip tray
M. Coee grounds container
(inside machine)
N. Cover plate
O. Castors
P. Frothing device components
(inside machine)
Q. Identication plate/sticker
(inside height-adjustable spout)
R. Power cord storage compartment
A. Display
B. Left Rotary Knob
C. Right Rotary Knob
D. Bean symbol on left rotary knob
E. Height-adjustable coee spout
F. Water tank cover
G. Lid of bean container (inside machine)
H. On/O switch
I. Cup warmer/ holding plate
J. Service door
K. Pre-ground coee chute
FAMILIARISING YOURSELF WITH YOUR TX5
J
R
A
Q
P
O
F
H
E
D
G
B
I
N
K
C
S
L
M
FIGURE 1

iii
FAMILIARISING YOURSELF WITH YOUR TX5
23 4
567
8
11
9
11
10
Water tank Bean container Inserting the lter
One cup dispensing Two cup dispensing Height-adjustable spout
Milk container Grinder setting control Connector to drip tray
Milk frothing device Brewing unit release
a
b
12

iv
1. SAFETY INSTRUCTIONS 1
2. GETTING STARTED 3
2.1 Preparation 3
2.2 Controls 3
2.3 Filling the water container and bean container 7
2.4 Switching on and using the machine for the rst time 7
2.5 Preparing coee for the rst time 10
2.6 Switching on after the machine has been used 10
2.7 Cup pre-warming function 10
3. SELECTING/ALTERING BASIC SETTINGS 11
3.1 Setting the machine for lter or non-lter operation 11
3.2 Setting the water hardness 12
3.3 Setting the temperature 13
3.4 Setting the language 14
3.5 Setting the rinsing function (o-rinse) 14
3.6 Setting ECO-Mode operation 14
3.7 Setting Automatic Shut O (ASO) 15
3.8 Calling up operating statistics 16
3.9 Resetting to factory settings 16
4. PREPARING SPECIALITY COFFEES 17
4.1 Preparing an Espresso 18
4.2 Preparing a Coee 21
4.3 Preparing a Cappuccino 23
4.4 Preparing a Latte Macchiato 26
4.5 Preparing warm milk (e.g. for hot chocolate) 29
4.6 Preparing “my coee” 32
4.7 Preparing hot water (e.g. for tea) 34
4.8 Setting the coee grinder 34
4.9 Using pre-ground coee 35
5. CARE AND MAINTENANCE 36
5.1 Rinsing the frothing device 36
5.2 Rinsing the spout 36
5.3 Cleaning the frothing device 37
5.4 Cleaning the system 38
5.5 Descaling the system 39
5.6 Regular manual cleaning 40
5.7 Cleaning the brewing unit 41
5.8 Changing the water lter 41
6. SYSTEM MESSAGES 43
7. TROUBLESHOOTING 44
8. COFFEE AND ACCESSORIES 45
9.
CUSTOMER SERVICE 46
10. WARRANTY 46
11. TECHNICAL DATA 46
INDEX

1
1. SAFETY INSTRUCTIONS
• This machine is only intended for domestic use. It is not designed
for commercial use (see warranty conditions). Warranty will be
compromised when the machine has been used in any way other
than intended.
• Mains supply voltage must comply with the recommended
machine operating voltage. Please refer to the identication
plate/sticker attached to the machine (Fig 1/Q).
• Do not attempt to use the machine if the power cord or machine
housing show any signs of damage. Do not allow the power cord
to come into contact with hot surfaces.
• Carefully follow cleaning and descaling instructions! Warranty
will be compromised when operating and safety instructions
have been ignored.
• Prior to manual cleaning and maintenance, ensure that the
machine has been switched o and disconnected from the mains
supply.
• Prior to operating, make sure the machine is placed on a rm,
level surface. Never attempt to use the machine outdoors.
• Never place the machine on a hot surface or in the vicinity of an
open ame.
• Keep out of reach of children and ensure that they do not play
with the machine.
• When leaving the machine unattended for periods of several
days or longer, disconnect it from the mains supply.
• Do not leave the machine switched on unnecessarily.
• Never immerse the machine in water.
• Do not attempt to clean the machine or any of its components in
a dishwasher. Warranty will be compromised when operating and
safety instructions have been ignored.
• Unplug the machine immediately if any malfunction is detected
(never attempt to unplug the machine by pulling on the power
cord or on the machine itself).
• No liability will be accepted for any damage resulting from
incorrect operation, improper use or repairs carried out by
unqualied persons. Warranty will be compromised in any of the
above cases.
1. SAFETY INSTRUCTIONS

2
1. SAFETY INSTRUCTIONS
!
!
• Do not use the internal coffee grinder to grind any foods other
than roasted, untreated coffee beans. Check for the presence of
foreign bodies when filling the bean container. No warranty claim
will be accepted for damage caused to the machine under such
circumstances.
• This machine must not be used by children, persons known to be
suffering from any mental, physical, sensory disability, or persons
not possessing sufficient knowledge or experience, unless such
persons have been instructed in its use and have successfully
operated the machine under supervision.
• Where repair work is necessary (including power cord
replacement), please contact the retailer from whom you
purchased the machine for repair or send the machine to a
SPRADA customer service centre.
• The power cord of this machine must be replaced if damaged.
To avoid risk to persons and property, power cord replacement
must only be carried out by the manufacturer, the manufacturer’s
customer services or by a similarly qualified specialist.
!
WARNING! Repairs to electrical machinery must ONLY be carried
out by suitably qualied specialists. Repairs carried out by non-
qualied persons can result in danger to the user. No liability can
be accepted for any damage caused by incorrect or improper
usage.
WARNING! Operating the on/o switch (Fig 1/H) during the
brewing process can result in damage to the machine. Only
switch the machine o after it has fully completed its operation
cycle.
WARNING! Danger of scalding! Hot water and steam can splash
from the spout of this machine. Do not attempt to touch the
adjustable spout (Fig 1/E) until the machine has cooled down.
CE - This machine complies with all current EU guidelines.

3
2. GETTING STARTED
(Please read carefully before using the machine to prepare coee
for the rst time.)
2.1 Preparation
Carefully remove the machine and all accompanying parts from
the packaging.
Your package should contain the following:
• User manual
• Measuring spoon with assembly tool for lter
• 1 testing strip for water hardness
• Milk container
Note: In the event that your machine needs to be returned to us,
dispatch the machine using the full original packaging. Please
keep all packaging and protective foam for this purpose.
Place the machine on a suitable, level, dry working surface.
Connect the machine to the mains supply by plugging into a
properly installed mains socket.
Your machine is tted with a power cord compartment. If
your machine is located close to the power socket, push any
unwanted cord back into the power cord compartment (Fig 1/R).
2.2 Controls
Your SPRADA machine oers a wide range of speciality coees to suit
individual tastes. However, most of the basic functions and controls
are common to all the various speciality coees:
• The turn/press selector knob on the left-hand side (left rotary
knob) (Fig 1/B): the left rotary knob is used to control the strength
and amount of your coffee. Turning the left rotary knob alters
the amount of coffee served in ml. Pressing the left rotary knob
alters the strength of your coffee (bean symbol, Fig 1/D). The
more beans shown on the display, the stronger the coffee.
• The turn/press selector knob on the right-hand side (right rotary
knob) (Fig 1/C): turning the right rotary knob allows you to select
a drink or menu item on the display. Pressing the right rotary
knob tells the machine to begin preparing the drink shown on the
display, or if a menu item is shown on the display, takes you to
the sub-menu of the menu item selected. Pressing the left rotary
knob will take you back to the previous level.
• Adjustable spout (Fig 1/E): the spout can be adjusted vertically to
suit the height of your cups or glasses.
2. GETTING STARTED
DOWN
UP
i

4
2. GETTING STARTED
The following is a description of the “Setting” menu structure. Please
use the menu structure to give yourself an overview of the functions.
The menu structure will help you re-orientate yourself, if you make an
incorrect menu selection.
Recipes
Recipe Espresso
Start live Prog.
Aroma
Coee
Temperature
Exit
Recipe Coffee
Start live Prog.
Aroma
Coee
Temperature
Exit
Recipe Cappuccino
Start live Prog.
Aroma
Coee
Foam
Temperature
Exit
Recipe Latte Macchiato
Start live Prog.
Aroma
Coee
Milk
Foam
Temperature
Exit
Recipe Milk
Start live Prog.
Milk
Foam
Exit
The Setting Menu Structure

5
Recipe My Coffee
Espresso, cappuccino...
Start live Prog.
Aroma
Coee
Milk (display depends on selected drink)
Foam (display depends on selected drink)
Temperature
Exit
Recipe Water
Start live Prog.
Water
Exit
Recipe exit
Care
Care Rinse
Rinse frother
Rinse spout
Rinse exit
Care Clean
Clean frother
Clean system
Exit
Care descale
Care evaporation
Care exit
Filter
Filter No
Filter Yes
Filter Exit
Water hardness
Water hardness levels 1-4
Water hardness Exit
Temperature
Temperature: Normal, High, Maximum, Individual
Temperature Exit
2. GETTING STARTED2. GETTING STARTED

6
2. GETTING STARTED
Language
Language German, English...
Language Exit
Off-rinse
No, yes
O-rinse Exit
ECO Mode
ECO Mode: 3 minutes, 5 minutes, 15 minutes, deactivated
ECO Mode exit
ASO Mode (Automatic Shut Off)
ASO Mode: 5 min... 12 hours, deactivated
ASO Mode Exit
Statistic
Espresso
Coee
Cappuccino
Latte Macchiato
Milk
Rinse
Clean
Descale
Filter
Statistic Exit
Reset to factory settings

7
2.3 Filling the water container and the bean container
Open the cover on the top left-hand side of the machine (Fig 1/F)
and remove the water container (Fig 2). Rinse out the container
using clean, cold tap water.
Fill the container with water to the “maximum” level marker and
put it back into the machine. Check that the container clicks
properly into place.
WARNING! Only use clean, cold water when lling the water
container. Do not ll with carbonated water or any other liquid.
Warranty will be compromised where operating and safety
instructions have been ignored.
Open the cover on the right-hand side of the machine (Fig 1/G)
and then open the lid of the bean container (Fig 3). Only ll the
container with untreated, roasted coee beans. Close the lid and
cover.
WARNING! Do not use beans which have been treated during
or after roasting (e.g. by the addition of sugar or any other
ingredient). This can result in damage to the coee grinder and
any resulting repair costs will not be covered by our warranty.
2.4 Switching-on and using the machine for the rst time
Switch on the machine by means of the on/o switch
(Fig 1/H). Please select the following settings prior to making
your rst cup of coee:
Language setting
Turn the right rotary knob (Fig 1/C) to select your language.
Press the right rotary knob (Fig 1/C) to conrm your selection.
The “Setting Filter” message will appear on the display.
2.4.1 Setting the machine for lter or for non-lter
Using the machine with a lter
Filters reduce water hardness, so you will need to descale your
machine less often if you use a lter. Your machine has been pre-set
for non-lter operation (“Filter No”).
Turn the right rotary knob to “Filter Yes”. This tells the machine
that the lter is now in use.
Now press the right rotary knob. The “Screw in lter” message
now appears on the display.
Empty the water container (Fig 2) and carefully screw the lter
into its holder inside the water container using the tool on the
end of the measuring spoon (Fig 4).
WARNING! Do not bend or over-tighten the lter.
!
!
!
2. GETTING STARTED

8
Fill the container with fresh water to the “maximum” level marker
and put it back into the machine.
Place a suciently large vessel (with a capacity of at least 0.5
litres) under the spout (Fig 1/E) and then press the right rotary
knob.
The machine will now rinse the system. The “Filter is rinsed” message
will appear on the display.
Wait a few moments until water is no longer dispensing.
The “Please rinse” message now appears on the display.
Press the right rotary knob.
The machine will rinse and will then be ready for use.
Note: Once the machine has been programmed for operation with
a lter (“Filter Yes”), the water hardness settings can no longer be
selected. Inside the machine, water hardness will automatically
be set to level 1. When operating in lter mode, you will need to
descale your machine less frequently. Descaling must ALWAYS
be carried out according to the instructions and ONLY after rst
REMOVING THE FILTER. Filters should be replaced after using
approx. 50 litres of water (for details on lter replacement, see
Point 3.1.1).
WARNING! Even when the machine is not in regular use, lters
should be replaced at least every 2 months (see Point 3.1.1).
Do not wait for the “Change Filter” message to appear on the
display.
Using the machine without a lter
If the machine is to be operated without a lter, it must be reset to
the “Filter No” mode. This is important because, depending on local
water hardness, operating without a lter will require the machine to
be descaled more frequently (the machine is pre-set in the factory for
“Filter No” operation).
Turn the right rotary knob to “Filter No”.
Press the right rotary knob to conrm your selection.
The “Setting Water Hardness” message will appear on the display.
Note: When using the machine for the rst time, the water circuit
may still be empty. In this case, the “Fill System” message will
appear on the display when the machine is rst activated by
means of the on/o switch (Fig 1/H).
i
i
!
2. GETTING STARTED

9
Place a suciently large vessel (with a capacity of at least 0.5
litres) centrally under the spout.
Press the right rotary knob.
The machine will now fill the system.
The “Please rinse” message will appear on the display, once the
system has reached its operating temperature.
Press the right rotary knob.
2.4.2 Setting water hardness
Sooner or later (depending on local water hardness conditions),
your machine will require descaling. In order for the machine to tell
you when descaling is necessary, you must select the correct water
hardness setting before using the machine for the first time.
When using a filter, provided the correct settings have been made (see
above), water hardness will automatically be set inside the machine
to level 1. Before leaving the factory, water hardness is set to level 3.
Start by testing the quality of the water to be used in your machine
with the test strip provided.
Dip the test strip briey into your water sample and then shake
o any excess water.
Wait for approximately one minute and then take your reading by
counting the red dots on the test strip.
The level settings are indicated as follows:
Test Strip / Degree of Hardness = Display
1 red dot/1–7° = LEVEL 1
2 red dots/8–14° = LEVEL 2
3 red dots/15–21° = LEVEL 3
4 red dots/>21° = LEVEL 4
Note: If there are no red dots on the strip, set your machine to
level 1.
Set your machine for water hardness as follows:
Turn right rotary knob to select settings.
Press right rotary knob to enter settings.
Turn the right rotary knob to select the water hardness level.
Press the right rotary knob to confirm your selection.
The “Please rinse” message now appears on the display.
Now press the right rotary knob.
The system is now filled with water.
Once the machine has reached its operating temperature, the display
will automatically return to the first menu level. The machine is now
ready for use.
i
2. GETTING STARTED

10
2.5 Preparing coffee for the first time
When preparing your first coffee, the coffee grinding chamber will still
be empty. The “Fill beans” message may appear on the display after
the first grinding, indicating that no coffee has been prepared by the
machine.
In this case, comply with the on-screen instructions and press
the right rotary knob a second time.
The machine will then repeat the process.
2.6 Switching on after the machine has been used
The procedures outlined in Point 2.4 must be carried out before
using the machine for the first time. When using the machine on all
subsequent occasions, proceed as follows:
Switch on the machine by means of the on/o switch (Fig 1/H).
The “System is heating” message will appear on the display.
Once the machine has reached its operating temperature, the “Please
rinse” message will appear on the display.
Press the right rotary knob.
The machine will now rinse the system. The machine is now ready for
use. The name of the last drink prepared will appear on the display.
When the machine is to be left unused for long periods (e.g.
during a holiday), switch the machine o using the on/o switch
(Fig 1/H) and disconnect it from the mains supply.
2.7 Cup pre-warming function
Your machine is fitted with a cup pre-warming function. Prior to
preparing your coffee, place your cup on the cup warmer/ holding
plate (Fig 1/I). The machine needs to be turned on for the cup pre-
warming function to operate.
The heat generated is lower in ECO mode.
i
2. GETTING STARTED

11
i
3. SELECTING/ALTERING BASIC SETTINGS
Note: The settings for each speciality coffee are pre-programmed
before your machine leaves the factory. Your machine is therefore
ready to produce coffee immediately (see Point 4). We recommend,
however, that you take the time to explore and alter the settings to
suit your particular taste. If this is the first time the machine is being
used (see Point 2.4), start by following the instructions outlined in
Points 3.1 to 3.8 below.
3.1 Setting the machine for filter and non-filter operation
3.1.1 Operating with a filter
Filters reduce water hardness, so you will need to descale your
machine less often, provided you install and use this filter properly.
Your machine has been pre-set for non-filter operation (“Filter No”).
Turn the right rotary knob to “Setting”. Now press the right rotary
knob.
Turn the right rotary knob to “Setting Filter”. Now press the right
rotary knob.
Turn the right rotary knob to “Filter Yes”. This tells the machine
that the lter is now in use.
Press the right rotary knob. The “Screw in lter” message
appears on the display.
Empty the water container (Fig. 1/F and Fig. 2) and carefully
screw the lter into its holder inside the water container using
the tool on the end of the measuring spoon (Fig 4).
WARNING! Do not bend or over-tighten the lter.
Fill the container with fresh water to the “maximum” level marker
and put it back into the machine.
Place a suciently large vessel (with a capacity of at least 0.5
litres) under the spout (Fig 1/E) and then press the right rotary
knob.
The machine will now rinse the system. The “Filter is rinsed” message
appears on the display.
Wait a few moments until water is no longer being dispensed
from the spout.
The system will then go through a short heating cycle. The “Setting”
message will appear on the display. The machine is now ready for
use.
Note: Once the machine has been programmed for operation with a
filter, the water hardness settings can no longer be selected. Inside
the machine, water hardness will automatically be set to level 1.
When operating in filter mode, you will need to descale your machine
less frequently. Descaling must ALWAYS be carried out according to
the instructions and ONLY after first REMOVING THE FILTER. The
filter should be replaced after using approx. 50 litres of water.
!
i
3. SELECTING/ALTERING BASIC SETTINGS

12
WARNING! Even when the machine is not in regular use, filters should
be replaced at least every 2 months. Do not wait for the “Change
Filter” message to appear on the display!
3.1.2 Operating without a lter
If the machine is to be operated without a filter, it must be set to
the “Filter No” mode. This is important because operating without a
filter will require the machine to be descaled more frequently as the
machine is pre-set in the factory for operation without a filter (“Filter
No”).
Turn the right rotary knob to “Setting”. Now press the right rotary
knob.
Turn the right rotary knob to “Filter”. Now press the right rotary
knob.
Turn the right rotary knob to “Filter No”.
Press the right rotary knob to conrm your selection.
The “Setting Filter” message will appear on the display.
Turn the right rotary knob to “Setting Exit”. Now press the right
rotary knob.
The first menu level will appear on the display. The machine is now
ready for use.
WARNING! Please do not forget to select a water hardness setting
if you intend to operate without a filter (see Point 3.2).
3.2 Setting the water hardness
Sooner or later (depending on local water hardness conditions),
your machine will require descaling. In order for the machine to tell
you when descaling is necessary, you must select the correct water
hardness setting before using the machine for the first time.
When using a filter, and provided the correct settings have been made
(see Point 3.1 above), water hardness will automatically be set inside
the machine to level 1. Before leaving the factory, water hardness is
set to LEVEL 3.
Start by testing the quality of the water to be used in your machine
with the test strip provided:
Dip the test strip briey into your water sample and then shake
o any excess water.
Wait for approximately 1 minute and then take your reading by
counting the red dots on the test strip.
The level settings are indicated as follows:
Test Strip/Degree of Hardness = Display
1 red dot/1–7° = LEVEL 1
2 red dots/8–14° = LEVEL 2
3 red dots/15–21° = LEVEL 3
4 red dots/>21° = LEVEL 4
!
!
3. SELECTING/ALTERING BASIC SETTINGS

13
Note: If there are no red dots on the strip, set your machine to
level 1.
Set your machine for water hardness as follows:
Turn the right rotary knob to “Setting”. Now press the right rotary
knob.
Turn the right rotary knob to “Setting Water Hardness”. Now
press the right rotary knob.
The current water hardness setting will appear on the display.
Now press the right rotary knob.
The machine’s current water hardness setting will ash intermittently
on the display screen.
Turn the right rotary knob to select the required water hardness
level. Now press the right rotary knob.
Turn the right rotary knob to “Water Hardness Exit”. Now press
the right rotary knob.
The “Setting Water Hardness” message will appear on the display.
Turn the right rotary knob to “Setting Exit”. Now press the right
rotary knob.
The first menu level will appear on the display. The machine is now
ready for use.
3.3 Setting the temperature
Coffee temperature can be set to “normal”, “high”, “maximum” or
“individual”, to suit your personal requirements. The standard factory
setting is “high”. Once you have set the temperature, as described
below, this will be the setting used for all speciality coffees.
Alternatively, you can use the “individual” setting to allow you to
select a different temperature for each speciality coffee (see Point 4).
Choose the “individual” setting in this menu as follows:
Turn the right rotary knob to “Setting”. Now press the right rotary
knob.
Turn the right rotary knob to “Setting Temperature”. Now press
the right rotary knob.
The current temperature setting will appear on the display.
Now press the right rotary knob.
The current temperature setting will flash intermittently on the display
screen.
Turn the right rotary knob to select the required temperature
setting. Now press the right rotary knob.
Turn the right rotary knob to “Temperature Exit”. Now press
the right rotary knob. The “Setting Temperature” message will
appear on the display.
Turn the right rotary knob to “Setting Exit”. Now press the right
rotary knob.
The first menu level will appear on the display. The machine is now
ready for use.
3. SELECTING/ALTERING BASIC SETTINGS
i

14
3.4 Setting the language
Turn the right rotary knob to “Setting”. Now press the right rotary
knob.
Turn the right rotary knob to “Setting Language”. Now press the
right rotary knob.
The current language setting will appear on the display.
Now press the right rotary knob.
The current language setting will flash intermittently on the display
screen.
Turn the right rotary knob to select the required language. Now
press the right rotary knob.
Turn the right rotary knob to “Language Exit”. Now press the
right rotary knob.
The “Setting Language” message will appear on the display.
Turn the right rotary knob to “Setting Exit”. Now press the right
rotary knob.
The first menu level will appear on the display. The machine is now
ready for use.
3.5 Setting the rinsing function (Off-rinse)
You have the option of selecting an automatic rinse function, which is
activated when the machine is switched off.
Turn the right rotary knob to “Setting”. Now press the right rotary
knob.
Turn the right rotary knob to “O-rinse”. Now press the right
rotary knob.
Turn the right rotary knob to “O-rinse Yes”. This will activate
the rinse out function once the machine has been switched o.
Press the right rotary knob to conrm your selection.
Turn the right rotary knob to “O-rinse Exit”. Now press the right
rotary knob.
The “Setting Off-rinse” message will appear on the display.
Turn the right rotary knob to “Setting Exit”. Now press the right
rotary knob.
The first menu level will appear on the display. The machine is now
ready for use.
3.6 Setting ECO-Mode operation
Your machine is fitted with a power-saving function (ECO-Mode). The
function is activated before the machine leaves the factory and is
designed to switch the machine to minimum heating mode 3 minutes
(factory setting) after its last use. This allows the machine to remain
in operation on reduced power. If you start making coffee after the
machine has been in ECO-Mode, you will have to wait a few seconds
longer for the machine to heat up.
The ECO-Mode function can be deactivated or altered. If the function
is deactivated, your machine will remain in operation at all times on
full power.
3. SELECTING/ALTERING BASIC SETTINGS
Table of contents
Other Sprada Coffee Maker manuals
