Spring Well SMARTFLUSH SF4M User manual

Technical Support
If you have any further technical queries, please contact technical support on 01924-420029.
PLEASE DO NOT RETURN ANY ITEM WITHOUT AUTHORISATION
PLEASE LEAVE THESE INSTRUCTIONS WITH CUSTOMER
-------------------------------------------------------------------------------------------------------------------------------------
Guarantee
This product is guaranteed from date of purchase to e free from manufacturing defects for a period of 3
years if registered, with the following conditions :-
1) The product has een properly installed as per instructions.
2) Damage due to water ingress to controller, de ris from water supply, hard water erosion (see (2) on
front page), vandalism or misuse are not included. Statutory rights are not affected.
Service : Springwell Microelectronics Ltd, 197 Raikes Lane, Birstall, Batley WF17 9QF
_______________________________________________________________________________
Environmental information
This product may contain su stances that can e hazardous to the environment if not disposed of
properly. Electrical and electronic equipment should not e dumped with general household waste ut
must e separately collected for proper treatment and recovery. The crossed-out in sym ol is a
reminder of the need to dispose of the product properly at end of life; in this way you will assist in the
recovery, recycling and re-use of many of the materials in this product and help to reduce the amount of
electrical and electronic waste ending up in landfill and to improve quality of life y preventing the release
of potentially hazardous su stances into the environment. Please contact us for information on disposal
arrangements or take to a local recycling facility. Where possi le please recycle your packaging.
Producer registration num er WEE/DB0002ZR
_________________________________________________________________________________
Carefully designed and distri uted y:
SPRINGWELL MICROELECTRONICS LTD, 197 Raikes Lane, Birstall, Batley, West Yorkshire WF17 9QF
The manufacturer reserves the right due to continuous development to change specifications without notice
Tel: 01924 420029 Fax: 0870 7062353 e-mail: sales@springwellmicro.co.uk
www.springwellmicro.co.uk
Producer registration num er WEE/DB0002ZR
sf4minsv1.2.odt
SPRINGWELL SMARTFLUSH SF M FITTING INSTRUCTIONS
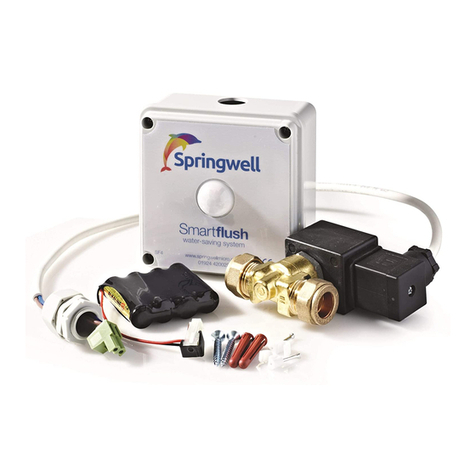
Pack contains: sensing/control unit for 230V power; low-voltage latching valve (as supplied could e
open or closed), assem led valve ca le with gland and connector; clips, screws, wallplugs.
How Smartflush works
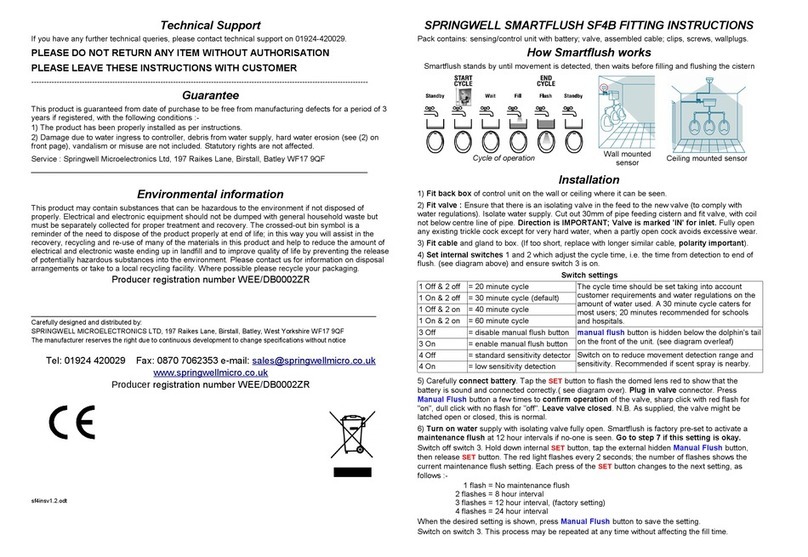
Smartflush stands y until movement is detected, then waits efore filling and flushing the cistern
Installation
THIS UNIT MUST BE FITTED ONLY BY A COMPETENT ELECTRICIAN
1) Fit back box of control unit on the wall or ceiling where it can e seen.
2) Fit valv : Ensure that there is an isolating valve in the feed to the new valve (to comply with
water regulations). Isolate water supply. Cut out 30mm of pipe feeding cistern and fit valve, with coil
not elow centre line of pipe. Dir ction is IMPORTANT; Valv is mark d 'IN' for inl t. Fully open
any existing trickle cock except for very hard wat r, when a partly open cock avoids excessive wear.
3) Fit cabl and gland to ox. (If too short, replace with longer similar ca le, polarity important).
4) S t internal switch s 1 and 2 which adjust the cycle time, i.e. the time from detection to end of
flush. (see diagram a ove) and ensure switch 3 is on.
Switch s ttings
1 Off & 2 off = 20 minute cycle
1 On & 2 off = 30 minute cycle (default)
1 Off & 2 on = 40 minute cycle
1 On & 2 on = 60 minute cycle
The cycle time should e set taking into account
customer requirements and water regulations on the
amount of water used. A 30 minute cycle caters for
most users; 20 minutes recommended for schools
and hospitals.
3 Off = disa le manual flush utton
3 On = ena le manual flush utton
4 Off = standard sensitivity detector
4 On = low sensitivity detector
manual flush utton is hidden elow the dolphin's tail
on the front of the unit. (see diagram overleaf)
Switch on to reduce movement detection range and
sensitivity. Recommended if scent spray is near y.
5) Use 3-core flex to conn ct via a 1A fus d spur to connections marked N (neutral), E (earth) and
L (live). Seal entry hole with a ca le gland so that the unit is watertight. Plug in valv . Pow r on;
the red light on the power oard should light. Press manual flush utton a few times to confirm
operation of the valve, sharp click with red flash in the lens for "on", dull click with no flash for "off".
L av valv clos d. N.B. As supplied, the valve might e latched open or closed, this is normal.
6) Turn on wat r with isolating valve fully open. Smartflush is factory pre-set to activate a
maint nanc flush at 12 hour intervals if no-one is seen. Go to st p 7 if this s tting is okay.
Switch off switch 3. Hold down internal SET utton, tap the external hidden Manual Flush utton,
then release SET utton. The red light flashes every 2 seconds; the num er of flashes shows the
maintenance flush setting. Each press of the SET utton changes to the next setting, as follows :-
1 flash = No maintenance flush
2 flashes = 8 hour interval
3 flashes = 12 hour interval, (factory setting)
4 flashes = 24 hour interval
When desired setting is shown, press Manual Flush utton to save setting. Switch on switch 3.
Cycle of operation Ceiling mounted sensor
Wall mounted
sensor

7) Empty th cist rn r ady to s t th fill tim : Hold the SET utton, tap Manual Flush to start filling,
release the SET utton. When flushing starts, tap Manual Flush to close the valve. While filling, check
for a good flow of water and adjust with trickle cock on pipe end if required. If flow noise is a pro lem,
e.g. next to sleeping quarters or classrooms, reduce the flow y means of a trickle cock.
8) S t th fill tim : Each time the valve opens, it should stay open long enough to fill and flush, hence it
should start and end empty, so this is where we tell it how long to stay open. Hold the SET utton, tap
Manual Flush to start filling, release the SET utton. The light in the domed lens flashes every 2
seconds to show setting in progress. Wait until the cistern is part way through flushing th n tap the
Manual Flush utton to close the valve. The cistern fill time is now memorised and will e used every
time a flush is started whether automatically or manually. Maximum fill time is 31 minutes.
9) S t switch 3 as required (see 4 overleaf). Check all screws, gland and connections for security.
Screw controller unit lid onto ox.
10) Fill in your part of the registration sheet and leave it with these instructions with the owner/manager.
Please explain section 4 (switch settings) to the person in charge of uilding maintenance.
SWITCHES / CONNECTIONS / INDICATOR
Multipl cist rns
2 or 3 cisterns with a common feed may e controlled y a single controller and valve. In this case,
adjust outlet cocks feeding each cistern so that they have roughly equal fill times (during step 7), then set
up the fill time using the slowest cistern (step 8). Contact technical support if further advice is required.
R gular Maint nanc
Every 3 years in very hard water areas, dismantle and if necessary clean the valve and internal strainer
(lemon juice is effective at clearing scale), then reassem le and operate Manual Flush to confirm
correct operation. Ensure that the view from the controller is not o structed. Test PIR detector as elow.
Smartflush Installation Troubleshooting Guide
All units are fully tested prior to despatch. If there is an apparent fault please check the following :-
PROBLEM - UNIT WORKS ON MANUAL FLUSH BUT DOES NOT APPEAR TO SEE ANYONE
T st th infra-r d d t ctor (PIR) as follows :-
1) Ensure valve is closed. (If necessary, use Manual Flush utton with switch 3 on).
2) Pr ss and hold SET button, watching the domed lens. It should flash once to confirm that the power
is good, then again a second later to show that test mode has een entered. Release utton.
3) Watch the light, which flashes when slow movement is detected. (Can take up to 1 second ).
4) Exit test mode y a short press of the SET utton or the Manual Flush utton if ena led. (If left in test
mode, the unit automatically reverts to normal operation after 16 minutes to avoid call- acks).
5) After testing, return switch 3 to the desired position to leave Manual Flush utton ena led or not.
6) To avoid false triggering, e.g. y scent sprays, switch on switch 4 for lower sensitivity.
N.B. If the a ove test works and Manual Flush also works and fills for the correct time, then the unit will
work correctly in normal use. The controller normally giv s no indication that it has seen anyone,
except that the red light flashes just once at the start of each timing cycle. The unit can e reset ready for
a new cycle y opening and closing the valve using Manual Flush, then waiting for 10 seconds.
PROBLEM - VALVE WILL NOT CLOSE
N.B. The valve has a magnetic latch so it may e left open or closed when disconnected.
a) T st pow r and connections:- Press and hold the Manual Flush utton; after the first flash, it will
then flash once or more to confirm that power is present. With switch 3 on, Manual Flush should
alternately open and close the valve. If there is no response, check that wires and connector are
correctly connected and have not een damaged, ensuring oth pins on the white plug are
connected and that red wire goes to "+". Power oard light should always e on.
) Pr ss th Manual Flush utton (see facing page). It opens or closes the valve on each press.
Ensure that switch 3 is switched ON (Away from edge of ox) otherwise Manual Flush is disa led.
The red light flashes each time the unit tries to open the valve using Manual Flush, to test for
reversed wires. If the red light flashes as the valve closes, the lue and rown wires are reversed.
c) Is th valv fitt d th corr ct way round ? On the Asco valve, the inlet end is stamped with the
word 'IN'. A reversed valve will usually allow water to flow all the time mains pressure is applied.
d) Remove the coil retaining clip. Slid off th coil ass mbly. If the valve stays open, the pro lem
is inside the valve ody. Dismantle and inspect as per (e) elow.
e) If the valve was previously working or it appears to e trying to close, d bris or scal insid th
valv is a likely cause. Dismantle the valve, taking careful note of order of assem ly and orientation
of the spring. Clean moving parts and strainer (soaking in lemon juice removes scale well). The
plunger should move freely against the spring pressure. Inspect the orifice and seal for dirt or
damage. The orifice should e a smooth circle; in areas with very hard, a rasive water, the orifice
may ecome pitted, causing leakage through the valve. If so, the valve will need to e replaced. To
reduce future wear in this case, use a trickle cock on the pipe end to reduce the flow, then reset the
fill time.
f) Wiring fault ? Check valve and controller connectors for loose or shorting wires. Check connector
polarity :- Brown +2 goes to pin 2 on the Asco valve.
PROBLEM - VALVE WILL NOT OPEN
a) Slack n compr ssion nuts on each side of the valve to test that there is water pressure on the
Inlet side and that there is no lockage after the valve (e.g. a stuck washer on a cistern cock.)
) See a, ,e and f of previous pro lem.
PROBLEM - CISTERN ALWAYS SEEMS TO BE EMPTY / UNIT NOT WORKING
The cistern should e empty etween flushes. When a fill cycle occurs, the cistern should fill and
flush and the valve should turn off during the flush, hence the cistern will usually remain empty. With
a typical fill time of 3 minutes and a cycle time of 30 minutes the unit will appear to e 'not working'
for 27 out of every 30 minutes even at usy times, so the chance of seeing any activity on a spot
check is small. If in dou t see first pro lem (facing page).
PROBLEM - FILLING TIME TOO SHORT / LONG
S t th filling tim again, carefully following the fitting instructions. Remem er to start the self-
timed fill with the cistern empty, i.e. having just flushed. The fill time is accurate to 1 second or so
due to the quartz crystal used for timing. Any fill time up to 30 minutes may e set. If a 20 minute
cycle is selected and fill time is longer than 20 minutes, the valve will open immediately on detection
and stay open for the set fill time. If a fill time longer than 30 minutes is needed, then either there is
a restriction to the flow or the water pressure is too low. As supplied Springwell Smartflush can work
with a 20 litre cistern fed with as little as a 1 metre head. A low pressure valve is availa le for more
extreme conditions.
Fluctuations in mains water pressure may cause the fill time to e a little too short or too long, ut
this will only result in a missed or dou le flush occasionally. Minor fluctuations are compensated for
ecause the unit will remain "in step" as long as the valve turns off during the emptying of the
cistern, ecause the cistern always empties to the same level.
Other Spring Well Plumbing Product manuals
Popular Plumbing Product manuals by other brands
Grundfos
Grundfos DN 10 Installation and operating instructions
Dornbracht
Dornbracht 25 943 360-FF installation instructions
Hansa
Hansa POLO 5140 2373 Mounting and operating instructions
Schell
Schell EDITION 02 800 06 99 Assembly and installation instructions
Hans Grohe
Hans Grohe Axor Citterio 39443 Series manual
Tylo
Tylo SAUNA REFLECTION WIDE GF manual
