manuals.online logo
Brands
  1. Home
  2. •
  3. Brands
  4. •
  5. Felton
  6. •
  7. Plumbing Product
  8. •
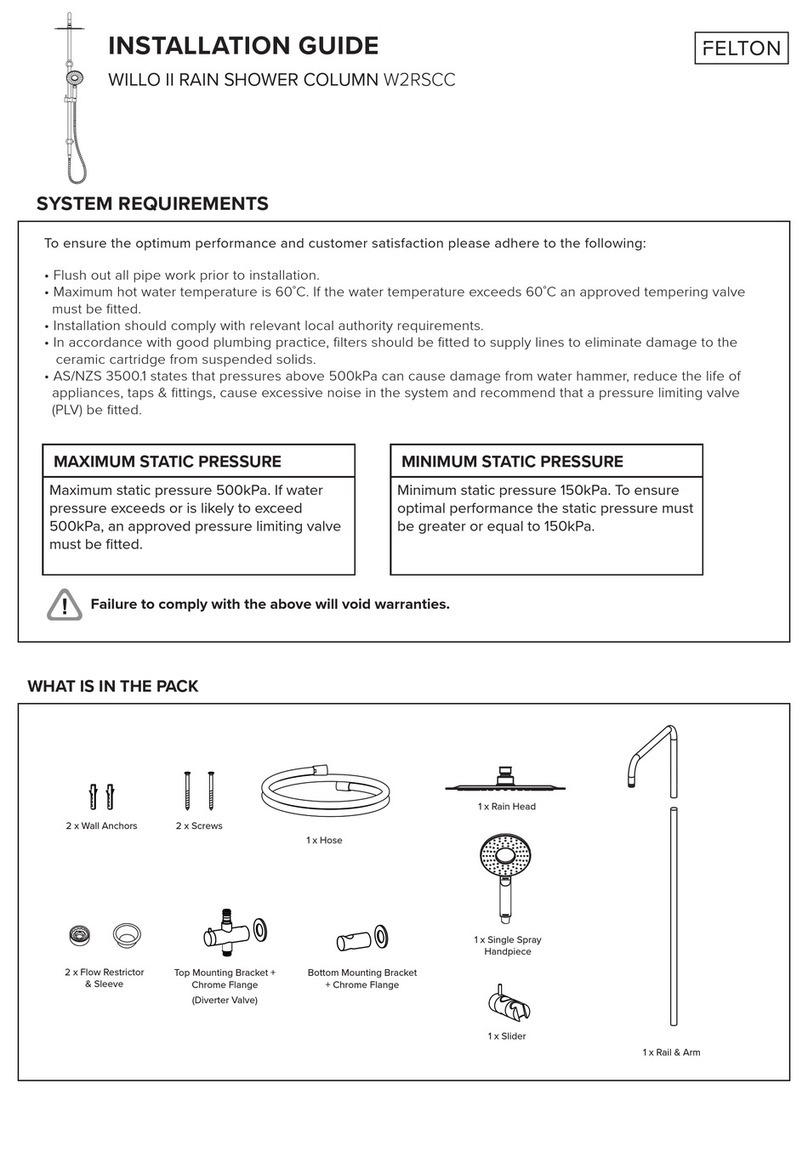
  9. Felton WILLO II W2RSCBN User manual

Felton WILLO II W2RSCBN User manual

INSTALLATION GUIDE
WILLO II RAIN SHOWER COLUMN BRUSHED NICKEL
W2RSCBN
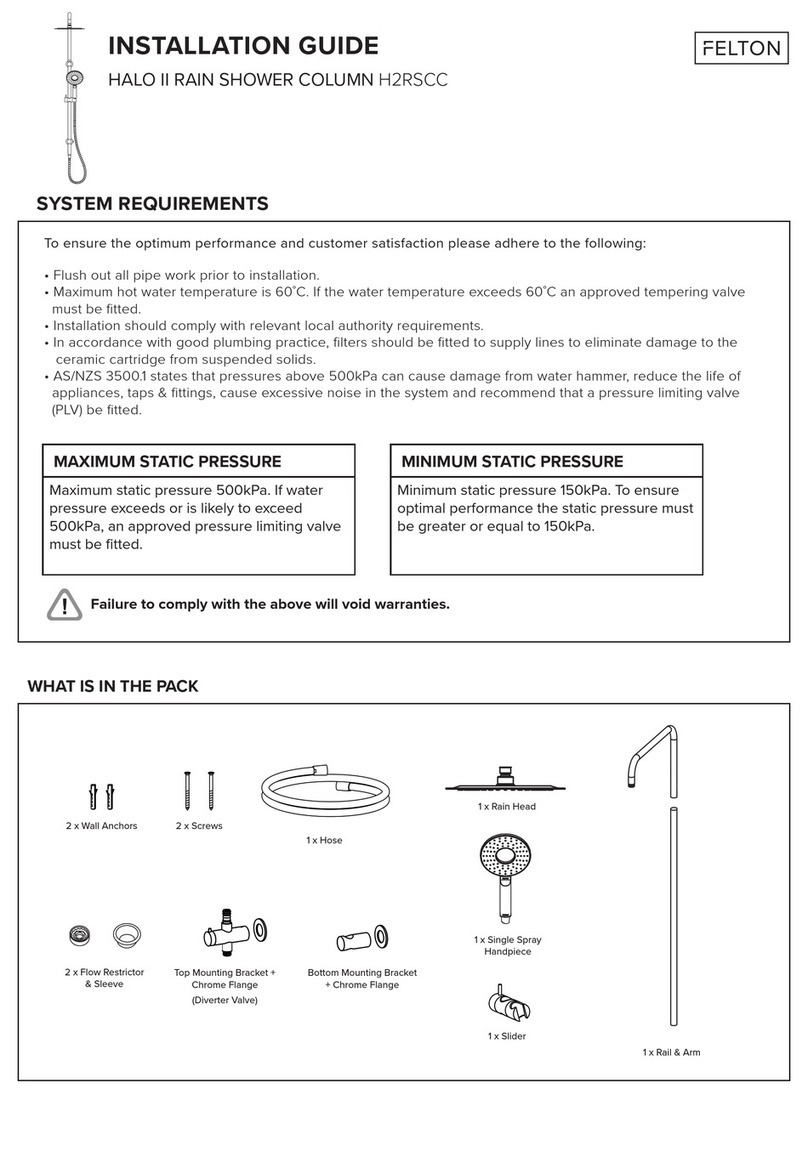
1 x Single Spray
Handpiece
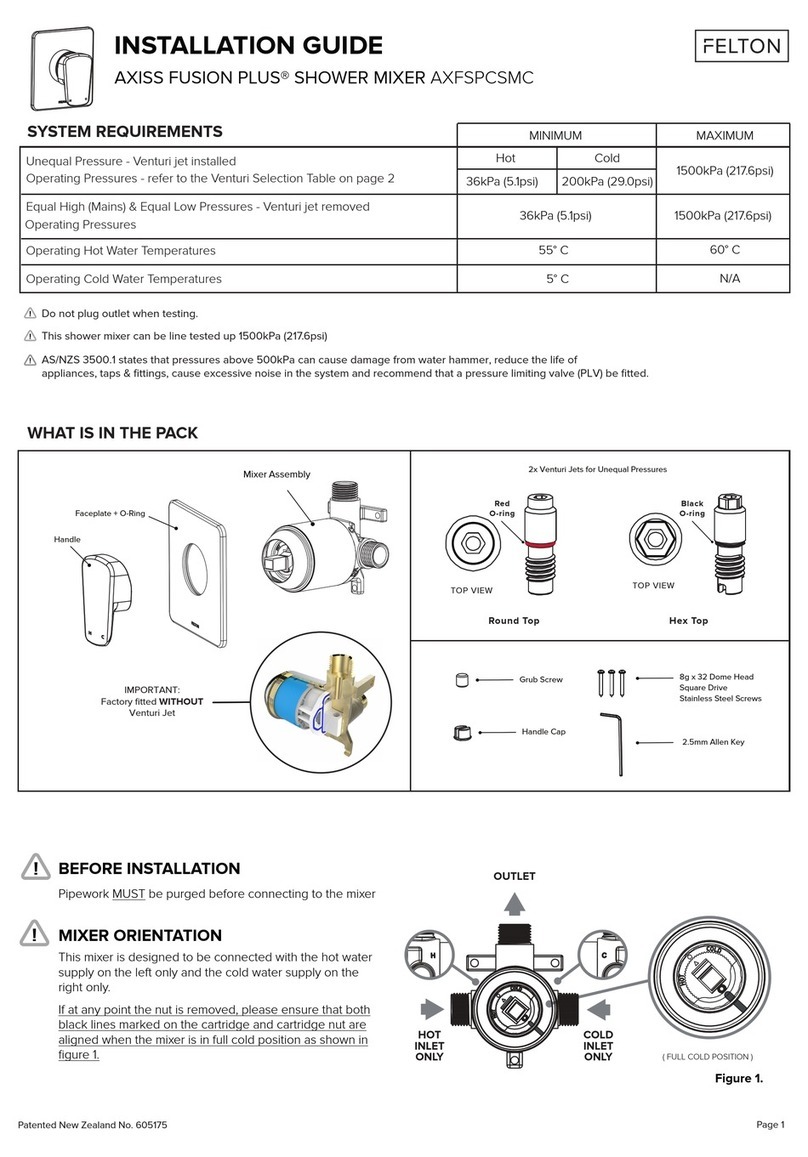
SYSTEM REQUIREMENTS
WHAT IS IN THE PACK
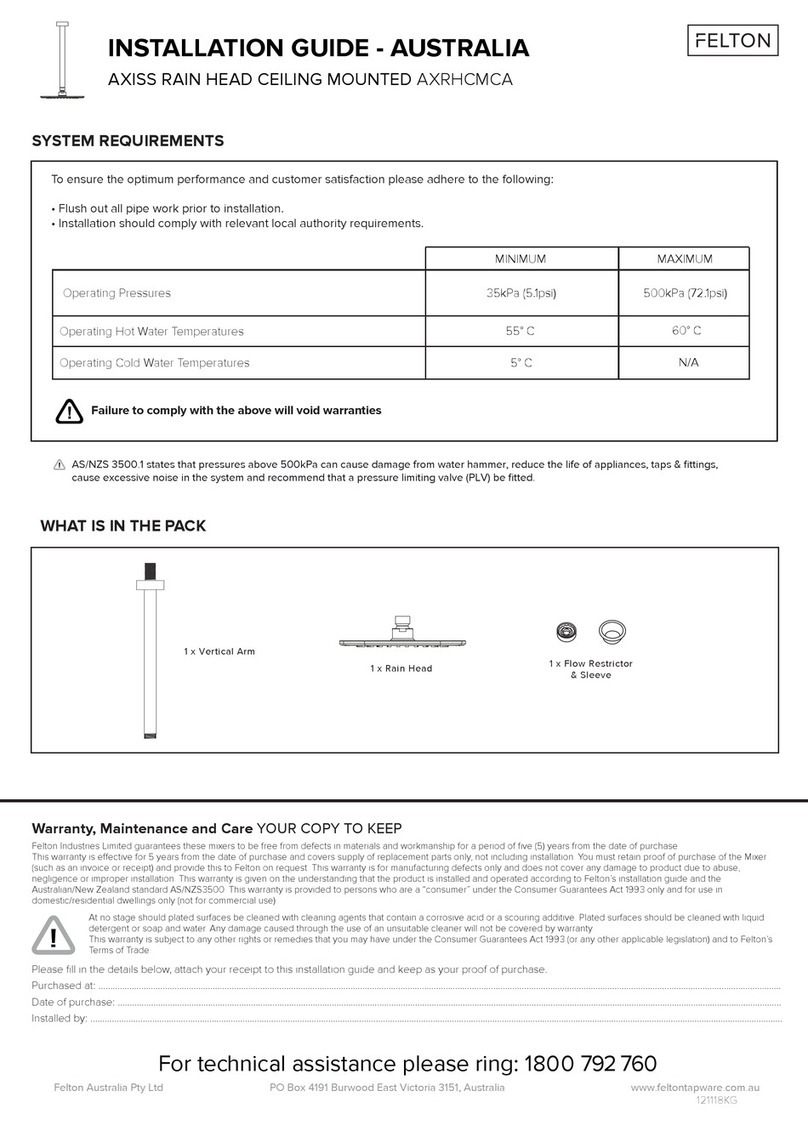
1 x Rain Head
1 x Rail & Arm
1 x Slider
Top Mounting Bracket +
Chrome Flange
(Diverter Valve)
Bottom Mounting Bracket
+ Chrome Flange
1 x Hose
2 x Screws2 x Wall Anchors
To ensure the optimum performance and customer satisfaction please adhere to the following:
• Flush out all pipe work prior to installation.
• Maximum hot water temperature is 60˚C. If the water temperature exceeds 60˚C an approved tempering valve
must be fitted.
• Installation should comply with relevant local authority requirements.
• In accordance with good plumbing practice, filters should be fitted to supply lines to eliminate damage to the
ceramic cartridge from suspended solids.
• AS/NZS 3500.1 states that pressures above 500kPa can cause damage from water hammer, reduce the life of
appliances, taps & fittings, cause excessive noise in the system and recommend that a pressure limiting valve
(PLV) be fitted.
MAXIMUM STATIC PRESSURE
Maximum static pressure 500kPa. If water
pressure exceeds or is likely to exceed
500kPa, an approved pressure limiting valve
must be fitted.
Failure to comply with the above will void warranties.
MINIMUM STATIC PRESSURE
Minimum static pressure 150kPa. To ensure
optimal performance the static pressure must
be greater or equal to 150kPa.
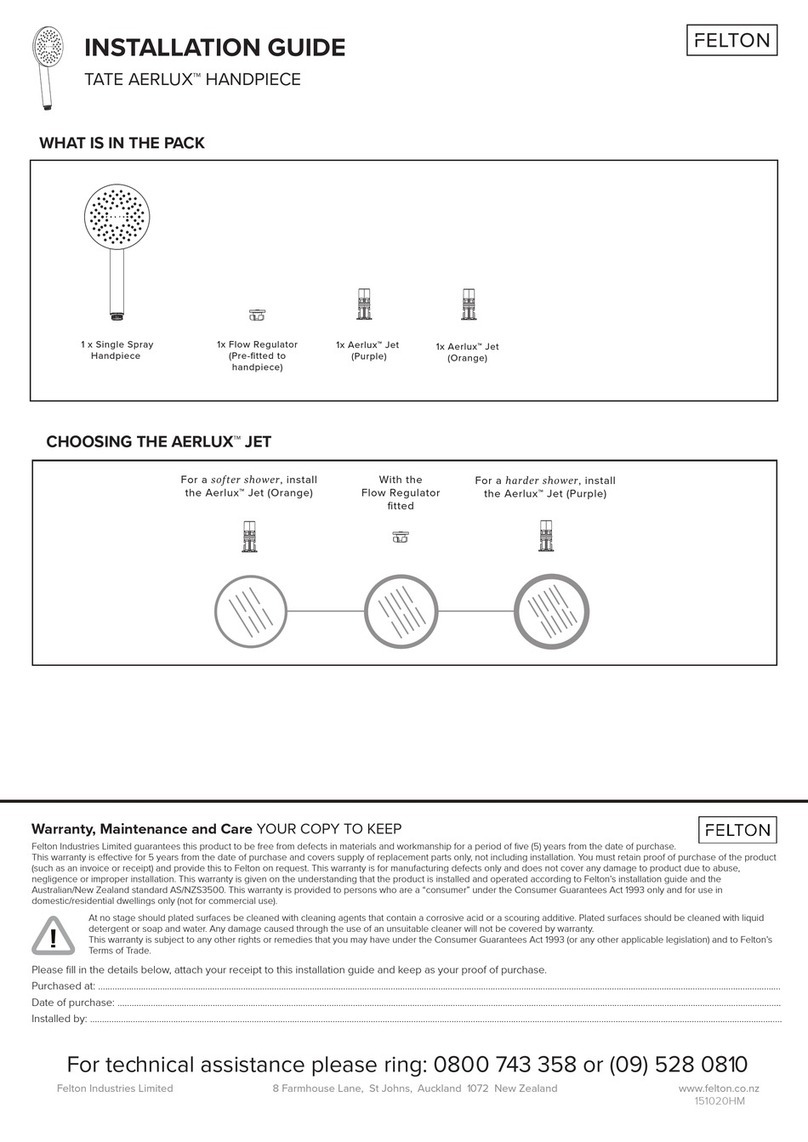
2 x Flow Regulators
1x prefitted on handpiece
1x separate for the rain head
HOW TO INSTALL
Fit overhead shower arm onto diverter
valve and secure grub screw on
shower arm into the white bushing
using the 2.5mm allen key.
1. 2. 3.
4. 5. 6.
Mark down vertical between 550mm
and 750mm from centre of water outlet.
Warning: Ensure no water pipe or power
cable in wall at this location.
IMPORTANT: The threaded water outlet must
not protrude more than 10mm from wall face.
Apply thread seal tape to water outlet.
TOP BOTTOM
Loosen grub screws on body of
diverter valve using a 2.5mm allen key.
Withdraw the brass easy fit. Screw
easy fit onto water outlet till it is flush
against the wall face; slide chrome
flange over the easy fit.
DIVERTER
VALVE
REMOVE REMOVE
Brass
easy fit
Loosen grub screws from the lower mounting
bracket using a 2.5mm allen key and remove the
easy fit. Mark and use screws to fasten easy fit
into place, then slide chrome flange over.
(If installing into concrete, use wall anchors
provided. Squeeze to close each toggle and push
in until flush with the wall).
550mm to 750mm c-c
Screw bottom rail section onto diverter
valve.
Fit slider first onto the rail and lock it halfway up.
Then fit bottom mounting bracket onto the rail.
7. Fit the entire assembly onto wall by tightening the grub screws on the
bottom and top mounting bracket using the 2.5mm allen key.
For technical assistance please ring: 0800 743 358 or (09) 528 0810
Felton Industries Limited 8 Farmhouse Lane, St Johns, Auckland 1072 New Zealand www.felton.co.nz
Warranty, Maintenance and Care YOUR COPY TO KEEP
Felton Industries Limited guarantees these products to be free from defects in materials and workmanship for a period of five (5) years from the date of purchase. Fair wear and tear
is expressly excluded. This warranty is eective for 5 years from the date of purchase for the supply of replacement parts only, not including installation. You must retain proof of
purchase of the product (such as an invoice or receipt) and provide this to Felton on request. This warranty is for manufacturing defects only and does not cover any damage to the
product due to abuse, negligence or improper installation. This warranty is given on the understanding that the product is installed and operated according to Felton’s installation
guide and the Australian/New Zealand standard AS/NZS3500. This warranty is provided to persons who are a “consumer” under the Consumer Guarantees Act 1993 only and for
use in domestic/residential dwellings only (not for commercial use).
At no stage should any surface coatings be cleaned with cleaning agents that contain a corrosive acid or a scouring additive. Surface coatings should be cleaned with
liquid detergent or soap and water. Any damage caused through the use of an unsuitable cleaner will not be covered by this warranty. This warranty is subject to any
other rights or remedies that you may have under the Consumer Guarantees Act 1993 (or any other applicable legislation) and to Felton’s Terms of Trade.
Please fill in the details below, attach your receipt to this installation guide and keep as your proof of purchase.
Purchased at:
Date of purchase:
Installed by:
010421HM
8. A. Screw the hose onto the bottom of the rail.
B. Check the rubbber mesh filter and flow
regulator are fitted onto the rain head and
screw the rain head onto the thread on the
end of the arm.
C. Check the flow restrictor is fitted onto the
handpiece. Screw the hose onto the diverter
and handpiece and attach the handpiece to
the slider on the rail.
HOW TO INSTALL (CONTINUED)
A.
B.
RUBBER MESH FILTER
FLOW REGULATOR
C.

Other Felton Plumbing Product manuals

Felton ODYSSEY II O2HSKC User manual

Felton

Felton ODYSSEY II O2HSKC User manual

Felton AXISS FUSION PLUS AXFSPCSMC User manual

Felton

Felton AXISS FUSION PLUS AXFSPCSMC User manual

Felton Halo User manual

Felton

Felton Halo User manual

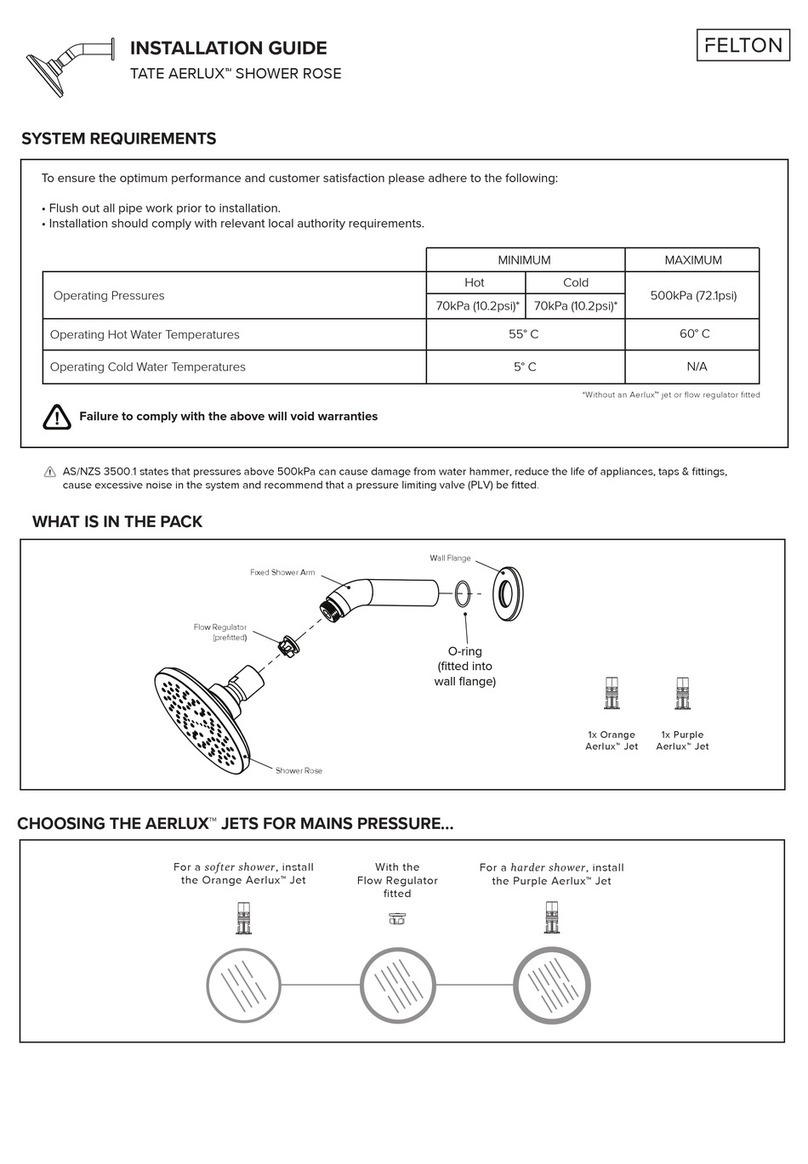
Felton TATE AERLUX User manual

Felton

Felton TATE AERLUX User manual
Felton DESIGNER III D3SHCGDA User manual

Felton

Felton DESIGNER III D3SHCGDA User manual

Felton AXISS AXRHCMCA User manual

Felton

Felton AXISS AXRHCMCA User manual

Felton QUE QRHCMSC User manual

Felton

Felton QUE QRHCMSC User manual

Felton AERLUX TATE User manual

Felton

Felton AERLUX TATE User manual

Felton REFLEX FUSION PLUS RFSPCSMCL User manual

Felton

Felton REFLEX FUSION PLUS RFSPCSMCL User manual

Felton AXISS AXBMBA User manual

Felton

Felton AXISS AXBMBA User manual

Felton QUE QRHCMCA User manual

Felton

Felton QUE QRHCMCA User manual

Felton QUE Q2RSCC User manual

Felton

Felton QUE Q2RSCC User manual

Felton RW User manual

Felton

Felton RW User manual

Felton mix U User manual

Felton

Felton mix U User manual

Felton AXISS FUSION PLUS AXFSPCSMB User manual

Felton

Felton AXISS FUSION PLUS AXFSPCSMB User manual

Felton REFLEX SINK MIXER RSMCA User manual

Felton

Felton REFLEX SINK MIXER RSMCA User manual

Felton W2RSCC User manual

Felton

Felton W2RSCC User manual

Felton Axiss Smartview FD-SVCSMC User manual

Felton

Felton Axiss Smartview FD-SVCSMC User manual

Felton TATE SMARTFLOW User manual

Felton

Felton TATE SMARTFLOW User manual

Felton WILLO II W2HSKCSRBN User manual

Felton

Felton WILLO II W2HSKCSRBN User manual

Felton HALO HRHWMC User manual

Felton

Felton HALO HRHWMC User manual

Felton DESIGNER III User manual

Felton

Felton DESIGNER III User manual

Felton AXISS Smartflow AXISS FD-SFCSMC User manual

Felton

Felton AXISS Smartflow AXISS FD-SFCSMC User manual

Felton USMC User manual

Felton

Felton USMC User manual

Popular Plumbing Product manuals by other brands

KWC DIVO 20.064.250 Installation and service instructions

KWC

KWC DIVO 20.064.250 Installation and service instructions

VIGO VG02021ST manual

VIGO

VIGO VG02021ST manual

Coway BA08-AR user guide

Coway

Coway BA08-AR user guide

Armitage Shanks Sensorflow 21 Series installation instructions

Armitage Shanks

Armitage Shanks Sensorflow 21 Series installation instructions

IB RUBINETTERIE MagicTouch 385 Fitting instructions

IB RUBINETTERIE

IB RUBINETTERIE MagicTouch 385 Fitting instructions

Jacuzzi sasha Instructions for preinstallation

Jacuzzi

Jacuzzi sasha Instructions for preinstallation

Hans Grohe Vernis Blend 71502000 Instructions for use

Hans Grohe

Hans Grohe Vernis Blend 71502000 Instructions for use

Jacuzzi Shower Base Bonaire 4848 Specifications

Jacuzzi

Jacuzzi Shower Base Bonaire 4848 Specifications

Hans Grohe Metropol Instructions for use/assembly instructions

Hans Grohe

Hans Grohe Metropol Instructions for use/assembly instructions

KWC Deco 10.031.033 Specifications

KWC

KWC Deco 10.031.033 Specifications

Bradley Express MG Series installation instructions

Bradley

Bradley Express MG Series installation instructions

newform X-SENSE Series instructions

newform

newform X-SENSE Series instructions

Kohler K-168 installation guide

Kohler

Kohler K-168 installation guide

Brizo 65036 installation instructions

Brizo

Brizo 65036 installation instructions

DeZurik KGC-BD instructions

DeZurik

DeZurik KGC-BD instructions

Symmons Unity Trim Series Installation & operation instructions

Symmons

Symmons Unity Trim Series Installation & operation instructions

Signature Hardware SHSK85 manual

Signature Hardware

Signature Hardware SHSK85 manual

DXV Victorian D35402001 installation instructions

DXV

DXV Victorian D35402001 installation instructions

manuals.online logo
manuals.online logoBrands
  • About & Mission
  • Contact us
  • Privacy Policy
  • Terms and Conditions

Copyright 2025 Manuals.Online. All Rights Reserved.