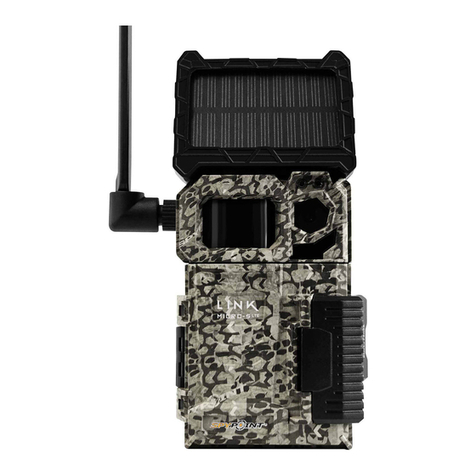
Spypoint LINK-MICRO-S-LTE User manual

QUICKSTART GUIDE
v.1.3
LINK-MICRO-S-LTE

ENGLISH
2
In the box
NOTE: MicroSD memory card is sold separately.
1x LINK-MICRO-S-LTE camera
1x Antenna holder
1x Installation strap
1x Quick start guide
1x SIM card that is preactivated and inserted in the camera
1x USB Micro USB cable
1x LIT-10 lithium battery pack
User manual, latest rmware, and FAQ available at:
SPYPOINT.COM/SUPPORT
Components
"STATUS" light
SIM card slot
Battery compartment
Slot for installation strap
Locking latch
Cable lock hole
12V jack
Standard ¼"-20 tripod mount
Solar panel
Antenna
Detection lens
MicroSD card slot
Light sensor
Delay light
Photo lens
LED
ON/OFF switch
1
2
3
4
5
6
7
8
9
10
12
13
15
16
11
17
14

ENGLISH
3
13
14
15
16
17
3
4
6
7
1
2
5
8
9
10
11
12

ENGLISH
4
CHARGING THE LITHIUM BATTERY
• Remove the lithium battery pack from the camera.
• Using the Micro USB cable, recharge the battery pack for about 12 hours.
• Once the lithium pack is fully charged, the red light will turn green.
HOWYOUR CAMERA USES SEVERAL POWER SOURCES
1. The main power source of your camera is the lithium battery
pack (#LIT-10 included), which provides a long charge time,
more than double that of AA batteries.
• The solar panel is designed to maintain the battery
pack’s charge. The camera will be energy self-sucient
under ideal conditions (an adequate conguration, i.e.
low power consumption and a sunny environment).
• When the battery pack charge level becomes insu-
cient, the camera will turn o.
• The solar panel will continue to power the battery pack.
However, for quick and complete recharging, connect
the battery pack to a wall outlet using the supplied USB
cable and a USB power adapter.
• When you restart your camera, after recharging the battery
pack, it will return to the settings you previously selected.
2. Moreover, the camera was designed to recognize and use a
primary power source other than the lithium battery pack:
• As soon as you plug an external 12V battery (#BATT-12V,
sold separately) into your camera, it becomes your cam-
era’s new primary power source. The lithium battery pack
will only be used once the 12V battery is depleted.
• Simply plug the 12V cable into the 12V jack of the
camera and connect the other end to the 12V battery.
Getting started
Do not insert AA batteries into the lithium battery
compartment, as this could damage the camera.

ENGLISH
5
USING AN EXTERNAL 12V BATTERY
• Using an external 12V battery source does not recharge the
lithium battery pack.
• The solar panel will not recharge an external 12V battery.
FORMATTING YOUR M
icro
SD CARD
Before inserting the MicroSD card into your camera, it must be
reformatted via a computer to ensure proper functionality.
Memory card is sold separately.Whether you choose to use a Mi-
croSD card you previously used in another device or a brand new
one you've just bought, its capacity must not exceed 32 GB and it
must be reformatted. Do not use the‘’Quick format’’ option.
INSERTING A M
icro
SD CARD
• Ensure the camera is turned o.
• Insert a MicroSD memory card (up to 32 GB capacity) into
the MicroSD card slot with the label facing up.
• The card is inserted correctly when a click is heard.
Getting started
LIT-10 BATTERY SPECIFICATIONS
Charging time ≈ 12 hours (with USB cable)
Operating temperature
(
-30 °C to+50 °C) (-22 °F to+122 °F)
Storage temperature
(-40 °C to+60 °C) (-40 °F to+140 °F)
Voltage 3.7 Volts
Capacity 10200mAh
This lithium battery is compatible with all SPYPOINT
LINK-MICRO cameras and the CELL-LINK.

ENGLISH
6
SPYPOINT APP
Follow these steps:
1. On Google Play
TM
or the App Store
TM
, search for "SPYPOINT app".
2. Download and install the app on your smartphone or tablet.
3. S
tart the app. Select "ACTIVATE A DEVICE". In the list, select
"LINK-MICRO-S-LTE"
then follow the steps.
4. When complete, a conrmation email with instructions on how to
nalize the creation of your account will be sent to you.
5. Log in to the SPYPOINT app using your email and password.
ACTIVATING YOUR CAMERA
You must activate your camera through the free SPYPOINT
app or the SPYPOINT.COM website.
FINDING THE ACTIVATION CODE
The activation code is located inside the battery compartment.
You will need this unique code to activate the LINK-MICRO-S-LTE.

ENGLISH
7
SPYPOINT.COM website
Follow these steps:
1. On the SPYPOINT.COM website, select "LOGIN" in the top navigation
menu. On the displayed page, select "Register," ll out the required
elds, then log in.
2. Select the + sign on the far right of the page; in the list,
select "LINK-MICRO-S-LTE" then follow the steps.
3. When complete, a conrmation email with instructions on how
to nalize the creation of your account will be sent to you.
4. On the website, log in to your account using
your email and password.
ACTIVATING YOUR CAMERA
NOTE: You can activate additional cameras
and switch between them in the
SPYPOINT app or website.
CHOOSING A PHOTO TRANSMISSION
PLAN FOR YOUR CAMERA
Go to
https://www.spypoint.com/en/spypoint-experience/plans
to read the latest offers and choose the plan that suits you.

ENGLISH
8
Both the SPYPOINT app and website let you congure all the camera set-
tings remotely. They also provide basic information on your camera – such
as: cellular signal strength, battery level, and MicroSD card space used. This
information is based upon the latest connection with your camera.
New settings take eect every time the camera connects with app or website.
BASIC PHOTO SETTINGS
Delay: Allows you to set the time interval between each detection
before the camera records the next photo or video.
Multishot: Allows you to set the number of photos per detection
(up to 3) with a 5-second delay between each photo.
Sensitivity: Allows you to set the detection sensitivity of the camera.
Camera name: Allows you to name each owned camera.
CELLULAR SETUP
First transfer time: Allows you to choose the time
when the camera makes its rst transfer of the day.
Transfer frequency: Allows you to choose the number of daily transfers.
ADVANCED OPTIONS/CONFIGURATION
Schedule: Allows you to set the period of operation for each
day of the week. For a 24-hour operation mode, both the start
and stop times must be 12 AM
CONFIGURING YOUR CAMERA
NOTE:
Camera transfers are set by default to every 4
hours from midnight.

ENGLISH
9
FIRST TIME SETUP
1. Turn on the camera.
2. The green "STATUS" light will ash while searching for a signal (can
take a few minutes).
3. The "STATUS" light will light up in one of the following 3 colors:
-
Red: Insucient signal.
-
Orange: Acceptable signal.
-
Green: Optimal signal.
4. When the top right light ashes red, 30 seconds remain before
the photo mode is turned on. This allows you to leave the area
without being photographed.
5. The camera is ready for use when all the lights turn o.
6. If the light is red during step 3, you should:
• Turn your camera o and then back on.
• Retry while pointing the antenna at dierent angles.
• Try moving it to a spot with better signal.
• Try our #CA-01 long-range cellular antenna (sold separately),
which could help improve signal strength.
STARTING YOUR CAMERA
1. Mount the camera using the installation strap.
2. The camera should be at the same height as the animal’s mid-body.
3. The targeted animal should be at 25 feet/7.5 meters away from the camera.
4. For brighter pictures at night, ensure you have elements in the
background to reect the IR ash.
INSTALLING YOUR CAMERA

ENGLISH
10
ONLY USE ORIGINAL SPARE PARTS AND ACCESSORIES.
If one day your camera has been used so intensively that it has to be replaced, or if you
no longer have any use for it, you are obliged to dispose of it at a recycling center.
Information on return points for your electrical appliance can be obtained from your
local waste disposal company or from your local administrative offices.
Electrical appliances not only contain valuable recyclable raw materials, but also
substances which, if disposed of improperly, can affect public health and the environ-
ment. Help ensure that valuable raw materials are recycled when you return your old
appliance to a central collection point.
The WEEE (Waste Electrical and Electronic Equipment Directive ) symbol represents
the obligation that the labeled camera to be sent to a separate center for the proper
recycling of electrical and electronic equipment.
FREQUENCY RANGE:
800/ 850/ 900/ 1900/ 2100MHz
MAXIMUM TRANSMISSION POWER:
FREQUENCY
GSM850
EGSM900
DCS1800
PCS1900
GSM850 (8-PSK)
EGSM900 (8-PSK)
DCS1800 (8-PSK)
PCS1900 (8-PSK)
UMTS 2100
UMTS 1900
UMTS 900
UMTS 850
UMTS 800
DISPOSAL
FREQUENCY
MAX.
33DBM±2DB
33DBM±2DB
30DBM±2DB
30DBM±2DB
27DBM±3DB
27DBM±3DB
26DBM±3DB
26DBM±3DB
24DBM+1.7/3.7DB
24DBM+1.7/3.7DB
24DBM+1.7/3.7DB
24DBM+1.7/3.7DB
24DBM+1.7/3.7DB

ENGLISH
11
THIS DEVICE COMPLIES WITH PART 15 OF THE FCC RULES.
Operation is subject to the following two conditions:
1. This device must not cause harmful interference.
2. This device must accept any interference received,
including interference that may cause undesired operation.
FCC
THANK YOU FOR CHOOSING
FAQ, user manual & latest
rmware available at:
SPYPOINT.COM/SUPPORT
Live chat support at
Join the community
Sit back and relax as this device is covered by the “Know you’re
covered” 2-year warranty.We strive to provide our customers
with a positive experience and an outstanding service.
www.spypoint.com service@spypoint.com
For a complete list of specifications, features,
and settings, visit our LINK-MICRO-S-LTE page at
www.spypoint.com.


GUIDE DE DÉMARRAGE RAPIDE
v.1.3
LINK-MICRO-S-LTE

FRANÇAIS
14
DANS LA BOÎTE
NOTE:
La carte mémoire MicroSD est vendue séparément.
1x caméra LINK-MICRO-S-LTE
1x support pour antenne
1x courroie d’installation
1x Guide de démarrage rapide
1x câble USB Micro USB
1x carte SIM (préactivée et insérée dans la caméra)
1x bloc-pile au lithium LIT-10
Nos manuels d’utilisation et mises à jour
logicielles ainsi que notre FAQ sont disponibles au:
SPYPOINT.COM/SUPPORT
Composantes
Lumière STATUS
Fente pour carte SIM
Compartiment à piles
Fente pour courroie d’installation
Loquet de verrouillage
Ouverture pour câble cadenas
Prise 12 V
Support pour trépied
standard ¼"-20
Panneau solaire
Antenne
Lentille de détection
Fente pour carte MicroSD
Capteur de lumière
Lumière de délai
Lentille photo
DEL
Bouton ON/OFF
1
2
3
4
5
6
7
8
9
10
12
13
15
16
11
17
14

FRANÇAIS
15
Lumière STATUS
Fente pour carte SIM
Compartiment à piles
Fente pour courroie d’installation
Loquet de verrouillage
Ouverture pour câble cadenas
Prise 12 V
Support pour trépied
standard ¼"-20
13
14
15
16
17
3
4
6
7
1
2
5
8
9
10
11
12

FRANÇAIS
16
RECHARGER LE BLOCPILE AU LITHIUM
• Retirez le bloc-pile au lithium de la caméra.
• En utilisant le câble Micro USB, rechargez le bloc-pile
pendant environ 12 heures.
• Une fois le bloc-pile au lithium rechargé, la lumière rouge
passera au vert.
COMMENTVOTRE CAMÉRA UTILISE PLUSIEURS
SOURCES D’ALIMENTATION
1. La principale source d’alimentation de votre caméra est le bloc-pile
au lithium (#LIT-10, inclus), qui ore une durée de charge importante,
soit plus du double de celle des piles AA.
• Le panneau solaire a pour fonction de maintenir la charge du
bloc-pile. La caméra sera autonome au niveau énergétique dans
des conditions idéales (une conguration adéquate, c’est-à-dire
peu gourmande et un milieu ensoleillé).
• Lorsque le niveau de charge du bloc-pile devient insusant, la
caméra s’éteint.
• Le panneau solaire continuera d’alimenter le bloc-pile. Cependant,
pour une recharge rapide et complète, branchez le bloc-pile à
une prise électrique murale au moyen du câble USB fourni et d'un
adaptateur d’alimentation USB.
• Lorsque vous redémarrez votre caméra, après une recharge
du bloc-pile, elle reprendra les paramètres que vous aviez
précédemment choisis.
2. De plus, votre caméra a été conçue pour reconnaître et utiliser une
source d’alimentation principale autre que le bloc-pile au lithium :
• Aussitôt que vous branchez une pile externe 12 V (#BATT-12V,
vendu séparément) dans votre caméra, elle en devient sa source
d’alimentation principale.
Le bloc-pile au lithium ne sera utilisé
que lorsque la pile 12 V sera épuisée.
• Vous n’avez qu’à brancher le câble 12V dans la prise 12 V de la
caméra et à connecter l’autre extrémité à la pile 12 V.
PRÉPARATION
N’insérez pas de piles AA dans le compartiment de bloc-
pile au lithium, car cela pourrait endommager la caméra.

FRANÇAIS
17
UTILISER UNE PILE 12V EXTERNE
• L’utilisation d’une pile 12 V comme source d’alimentation
externe ne rechargera pas le bloc-pile au lithium.
• Le panneau solaire ne rechargera pas une pile externe 12 V.
FORMATER VOTRE CARTE M
icro
SD
Avant d’insérer la carte MicroSD dans votre caméra, elle doit être refor-
matée à l’aide d’un ordinateur pour en assurer le bon fonctionnement.
La carte mémoire est vendue séparément. Que vous utilisiez une carte
usagée ou neuve, assurez-vous que sa capacité ne dépasse les 32 Go et
qu’elle soit reformatée. Ne choisissez pas l’option « Formatage rapide ».
INSÉRER VOTRE CARTE M
icro
SD
• Assurez-vous que la caméra soit hors tension (OFF).
• Insérez une carte MicroSD (jusqu’à 32 Go) dans la fente pour
carte MicroSD, le côté de l’étiquette vers le haut.
• La carte est correctement insérée lorsqu’un clic se fait entendre.
Ce bloc-pile au lithium est compatible avec toutes les caméras
de la série LINK-MICRO ainsi que le CELL-LINK de SPYPOINT.
PRÉPARATION
CARACTÉRISTIQUES DU BLOC-PILE AU LITHIUM
Durée de recharge ≈ 12 heures (avec câble USB)
Température de
(-30 °C à +50 °C) (-22 °F à +122 °F)
fonctionnement
Température de remisage
(-40 °C à +60 °C) (-40 °F à +140 °F)
Tension 3,7 volts
Capacité 10200mAh

FRANÇAIS
18
APPLICATION SPYPOINT
Suivez ces étapes :
1. Dans Google PlayTM ou le App StoreTM,
recherchez « SPYPOINT ».
2. Téléchargez et installez cette application sur
votre téléphone intelligent ou votre tablette.
3. Démarrez l’application. Sélectionnez « ACTIVER UN
APPAREIL ». Dans la liste, sélectionnez « LINK-MICRO-LTE »,
puis suivez les étapes.
4. Une fois ces étapes terminées, vous recevrez un courriel
de conrmation qui contiendra les instructions vous
permettant de naliser la création de votre compte.
5. Ouvrez une session dans l’application SPYPOINT
en utilisant votre courriel et votre mot de passe.
ACTIVER VOTRE CAMÉRA
OÙ TROUVER LE CODE D’ACTIVATION
Le code d’activation se trouve à l’intérieur du compartiment à piles.
Vous aurez besoin de ce code pour activer la LINK-MICRO-S-LTE.
Vous devez activer votre caméra au moyen de
l’application SPYPOINT gratuite ou en utilisant la
section OUVRIR UNE SESSION du site SPYPOINT.

FRANÇAIS
19
Site SPYPOINT.COM
Suivez ces étapes :
1. Sur le site SPYPOINT.COM, sélectionnez, dans la barre de navigation
« OUVRIR UNE SESSION ». Sur la page « SPYPOINT » qui s’ache,
sélectionnez
« Inscription », remplissez les champs demandés, puis
ouvrez une session.
2. Sélectionnez le signe + situé complètement à droite; dans la
liste, sélectionnez « LINK-MICRO-S-LTE », puis suivez les étapes
.
3. Une fois ces étapes terminées, vous recevrez un courriel de conrmation
qui contiendra les instructions vous permettant de naliser la
création de votre compte.
4. Ouvrez une session sur le site SPYPOINT.COM
en utilisant votre courriel et votre mot de passe.
ACTIVER VOTRE CAMÉRA
NOTE :
Vous pouvez activer des caméras additionnelles
et passer d’une caméra à l’autre soit dans
l’application ou le site SPYPOINT.
CHOISIR UN FORFAIT DE TRANSMISSION
DE PHOTOS POUR VOTRE CAMÉRA
Rendez-vous au
https://www.spypoint.com/fr/experience-spypoint/plans
pour prendre connaissance des dernières ores et choisir le plan
qui vous convient.

FRANÇAIS
20
MISE EN ROUTE
Tant l’application SPYPOINT LINK que le site SPYPOINT.COM vous permet-
tent, à distance, de congurer tous les paramètres de la caméra et d’obtenir
l’état de ses principaux éléments, dont la force du signal cellulaire, le niveau
de charge des piles et l’espace utilisé sur la carte SD.
Vos nouveaux paramètres s’appliqueront la prochaine fois que votre caméra
communiquera avec l’application SPYPOINT ou le site SPYPOINT.
PRINCIPAUX PARAMÈTRES PHOTO
Délai : Vous permet de choisir l’intervalle de temps entre chaque
détection avant que la caméra n’enregistre la prochaine photo.
Multiphotos : Vous permet d’établir le nombre de photos par détec-
tion (jusqu’à 2) avec un délai de 5 secondes entre chaque photo.
Sensibilité : Vous permet de choisir la sensibilité de détection de la caméra.
Nom de la caméra : Vous permet de donner un nom à chacune des
caméras que vous possédez.
CONFIGURATION CELLULAIRE
Heure du premier transfert : Vous permet de choisir l’heure à
laquelle la caméra réalisera son premier transfert de la journée.
Fréquence des transferts : Vous permet de choisir le nombre
de transferts réalisés chaque jour.
OPTIONS / CONFIGURATION AVANCÉE(S)
Période de fonctionnement : Vous permet de programmer
la période de fonctionnement de la caméra pour chaque jour de
la semaine. Pour un
fonctionnement
continu, l’heure de début et
celle d’arrêt doivent toutes deux être 12 AM.
NOTE :
Les transferts de la caméra sont congurés par défaut
à intervalles de quatre heures à partir de minuit.
Other manuals for LINK-MICRO-S-LTE
3
Table of contents
Languages:
Other Spypoint Digital Camera manuals

Spypoint
Spypoint TINY-3 User manual

Spypoint
Spypoint FL-A User manual

Spypoint
Spypoint XCEL HD User manual

Spypoint
Spypoint FLEX User manual

Spypoint
Spypoint LINK-MICRO-S-LTE User manual

Spypoint
Spypoint LINK-DARK User manual

Spypoint
Spypoint IR-B User manual

Spypoint
Spypoint LINK-MICRO-LTE User manual

Spypoint
Spypoint LIVE User manual

Spypoint
Spypoint LINK-S User manual