Square KeyKeep2 User manual

Fitting the TM
KeyKeep2
Outer weather protective cover
Cubierta de protección contra la
exposición al clima
Couvercle extérieur de protection
contre les intempéries
Buitenste beschermkap
Außenwetterschutzabdeckung
Zewnętrzna osłona chroniąca przed
warunkami pogodowymi
Tampa exterior impermeável
Внешняя защитная крышка
Sportello protettivo esterno anti-
intemperie
Consignes d’installation
Instrucciones de colocación
Fitting instructions
Einbauanleitung
Inner cover
Cubierta interior
Couvercle intérieur
Binnenkap
Innenabdeckung
Wewnętrzna osłona
Tampa interior
Внутренняя крышка
Sportello interno
Registered in England No. 88907
Tel: 01902 308050 Fax: 01902 308051 E-Mail: info@henry-squire.co.uk Website: www.squirelocks.co.uk
Henry Squire & Sons Limited
Hilton Cross Business Park, Cannock Road, Featherstone, Wolverhampton, WV10 7QZ
Montageinstructies
Instrukcje montażu
Instruções de Montagem
Инструкции по установке
Istruzioni di montaggio

Cómo abrir la KeyKeep2™ por
primera vez
Tire hacia abajo la cubierta de protección contra
la exposición al clima para ver los botones.
Presione el botón marcado en la parte inferior del
teclado.
Presione el botón marcado con la flecha hacia
abajo; este es el botón de apertura.
Ahora puede abrir la cubierta interior.
Cómo montar su KeyKeep2™ en una
pared
NOTA: deberá utilizar un destornillador de
cruz/Pozi, un lápiz, un nivel de burbuja, una broca,
un taladro y un martillo.
1. Abra la cubierta exterior e interior de la
KeyKeep2™, tal como se muestra en las
instrucciones a la izquierda.
2. Decida dónde colocará la KeyKeep2™ en la
superficie de montaje deseada. Es preferible
colocar las cajas fuertes para llaves fuera de la
vista para evitar asaltos.
3. Sostenga la KeyKeep2™ abierta contra la
pared en el lugar deseado. Asegúrese de que esté
en posición vertical.
4. Marque la posición de las perforaciones de los
tornillos en la superficie deseada.
5. Retire la KeyKeep2™.
6. Perfore los cuatro orificios en las posiciones
marcadas.
7. Utilice un martillo para insertar tarugos (si es
necesario).
8. Posicione la KeyKeep2™, inserte los tornillos y
ajústelos.
9. Cierre el compartimiento de almacenamiento.
10. Siga las instrucciones de uso incluidas en el
envase para configurar su propio código.
NOTA
1. Se recomienda que coloque su Key Keep™ en
un lugar discreto, fuera de la vista, como porches,
garajes, o lugares fuera del alcance de la línea
visual directa.
2. Mantenga la cubierta obturadora cerrada para
aumentar la resistencia a las inclemencias del
clima y ocultar los botones de la vista.
Ouverture Première ouverture du
TM
boîtier Key Keep
Abaissez le couvercle extérieur de protection contre
les intempéries de façon à révéler les boutons.
Appuyez sur le bouton repéré en bas du clavier.
Appuyez sur le bouton repéré de la flèche vers le
bas. Il s’agit du bouton d’ouverture.
Vous pouvez maintenant ouvrir le couvercle
intérieur.
Montage au mur de votre boîtier Key
Keep™
REMARQUE: vous aurez besoin d’un tournevis
cruciforme, d’un crayon, d’un niveau à bulle, d’une
mèche, d’une perceuse et d’un marteau.
1. Ouvrez les couvercles extérieur et intérieur du
boîtier Key Keep™, comme indiqué dans les
consignes à gauche.
2. Choisissez l’endroit où installer le boîtier Key
Keep™ sur la surface de montage souhaitée. Il est
préférable de dissimuler les boîtiers antivol pour clés
de façon à ne pas encourager les attaques.
3. Maintenez le boîtier Key Keep™ ouvert à la
verticale contre le mur, à l’endroit souhaité. Assurez-
vous qu’il se trouve bien à la verticale.
4. Marquez l’emplacement des trous de vis sur la
surface souhaitée.
5. Retirez le boîtier Key Keep™.
6. Percez les 4trous aux emplacements repérés.
7. Utilisez un marteau pour placer les chevilles (le cas
échéant).
8. Placez le boîtier Key Keep™, insérez les vis, puis
serrez-les.
9. Fermez le compartiment de stockage.
10. Pour définir votre propre code, consultez le
mode d’emploi fourni dans l’emballage
REMARQUE
1. Nous vous recommandons d’installer votre boîtier
Key Keep™ dans un endroit discret à l’abri de la vue
de tous, tel qu’un porche ou un garage, hors de la
portée directe du regard.
2. Conservez le volet obturateur fermé afin
d’optimiser la résistance aux intempéries et de
dissimuler les boutons.
TM
Opening KeyKeep2 opening for the
first time
Pull down the outer weather protective cover to
reveal the buttons.
Press the button marked at the bottom of the key
pad.
Press the button marked with the down arrow, this
is the release button.
You can now open the inner cover.
Wall Mounting your KeyKeep2™
NOTE: you will require an X-head/Pozi screwdriver,
a pencil, a spirit level, a drill bit, a drill and a
hammer.
1. Open the KeyKeep2™ outer and inner covers, as
shown in the instructions to the left.
2. Decide where to position the KeyKeep2™ on the
desired mounting surface. It is better to position
key safes out of view so as not to invite attack.
3. Hold the opened KeyKeep2™ up against the wall
in the required location. Make sure that it is
vertical.
4. Mark the position of the screw holes on the
desired surface.
5. Remove the KeyKeep2™.
6. Drill 4 holes at the positions marked
7. Use a hammer to fit wall plugs (if necessary).
8. Position KeyKeep2™, insert and tighten screws.
9. Close the storage compartment.
10. Follow the operating instructions enclosed in
the packaging to set your own code.
NOTE
1. We suggest that you mount your Key Keep™ in a
discrete location away from direct view, such as
porches, garages, out of direct eye line.
2. Keep shutter hatch closed to increase weather
resistance and to conceal the buttons from view.
ES
GB FR
1 2 3 4
Registered in England No. 88907
Tel: 01902 308050 Fax: 01902 308051 E-Mail: info@henry-squire.co.uk Website: www.squirelocks.co.uk
Henry Squire & Sons Limited
Hilton Cross Business Park, Cannock Road, Featherstone, Wolverhampton, WV10 7QZ

TM
Otwieranie Key Keep po raz pierwszy
Pociągnąć zewnętrzną osłonę chroniącą przed warunkami
pogodowymi, tak aby odkryć przyciski.
Nacisnąć oznaczony przycisk znajdujący się na dolnej
części klawiatury.
Nacisnąć przycisk oznaczony strzałką w dół. Jest to przycisk
zwalniania.
Teraz możesz otworzyć wewnętrzną pokrywę.
Montaż ścienny KeyKeep2™
UWAGA: będzie potrzebny śrubokręt
krzyżakowy/Pozi, ołówek, poziomica, wiertło,
wiertarka i młotek.
1. Otworzyć zewnętrzną i wewnętrzną osłonę
KeyKeep2™, co pokazano na instrukcji po lewej
stronie.
2. KeyKeep2™Należy zdecydować, gdzie ustawić na
pożądanej powierzchni montażowej. Klucze najlepiej
jest ustawić w miejscu, w którym nie będą narażone
na ataki.
3. KeyKeep2™ Przytrzymać otwarty na ścianie w
pożądanej lokalizacji. Należy upewnić się, że
ustawienie jest pionowe.
4. Na pożądanej powierzchni zaznaczyć pozycję
otworów na śruby.
5. KeyKeep2™. Zdjąć
6. Wywiercić 4otwory w wyznaczonych miejscach.
7. Użyć młotka do wbicia kołków rozporowych (jeśli
to konieczne).
8. KeyKeep2™Ustawić , włożyć i dokręcić śruby.
9. Zamknąć przedział urządzenia.
10. Postępować zgodnie z instrukcjami załączonymi
na opakowaniu, aby ustawić swój kod.
UWAGA
1. KeyKeep™ Zalecamy mocowanie w dyskretnym
miejscu, aby nie był od razu widoczny. Takie miejsca
to ganki, garaże, a nie w widoczne miejsce.
2. Pokrywę należy zamykać, aby zwiększyć ochronę
przed warunkami atmosferycznymi izakryć przyciski.
TM
De opening van de KeyKeep2 voor de
eerste keer openen
Trek de buitenste weerbeschermkap naar beneden
om de knoppen te onthullen.
Druk op de knop die onder aan het toetsenblok is
gemarkeerd.
Druk op de knop met de pijl naar beneden, dit is de
ontgrendelingsknop.
U kunt nu de binnenste kap openen.
Wandmontage van uw KeyKeep2™
OPMERKING: u hebt een X-
kop/Pozischroevendraaier, een potlood, een
waterpas, een boor, een boormachine en een hamer
nodig.
1. Open de buiten -en binnenkappen van de
KeyKeep2™ zoals in de instructies aan de
linkerkant wordt getoond.
2. KeyKeep2™Bepaal waar u de op het gewenste
montagevlak wilt plaatsen. Het is beter om
sleutelkluizen uit het zicht te plaatsen om geen
aanval uit te lokken.
3. KeyKeep2™ Houd de geopende op de gewenste
plaats tegen de muur. Zorg ervoor dat het verticaal
is.
4. Markeer de positie van de schroefgaten op het
gewenste oppervlak.
5. KeyKeep2™ Verwijder de .
6. Boor 4 gaten in de gemarkeerde posities
7. Gebruik een hamer om pluggen te monteren
(indien nodig).
8. KeyKeep2™ Plaats de , bevestig en draai de
schroeven vast.
9. Sluit het opbergvak.
10. Volg de in de verpakking bijgesloten
gebruiksaanwijzing om uw eigen code in te stellen.
OPMERKING
1. Key Keep™ We raden u aan om uw te monteren
op een discrete plaats, uit het direct zicht, zoals
veranda's, garages...
2. Houd het luik gesloten om de weerbestendigheid
te verhogen en de knoppen aan het zicht te
onttrekken. "
DE
NL PL
1 2 3 4
Registered in England No. 88907
Tel: 01902 308050 Fax: 01902 308051 E-Mail: info@henry-squire.co.uk Website: www.squirelocks.co.uk
Henry Squire & Sons Limited
Hilton Cross Business Park, Cannock Road, Featherstone, Wolverhampton, WV10 7QZ
TM
Erstmaliges Öffnen des KeyKeep2
Ziehen Sie die äußere Wetterschutzabdeckung
herunter, um die Knöpfe freizulegen.
Drücken Sie den Knopf, der auf der Unterseite
der Tastatur markiert ist.
Drücken Sie die mit dem Pfeil nach unten
gekennzeichnete Taste, dies ist die
Freigabetaste.
Sie können jetzt die innere Abdeckung öffnen.
Wandmontage Ihres KeyKeep2™
HINWEIS: Sie werden einen X-head/Pozi-
Schraubendreher, einen Bleistift, eine
Wasserwaage, einen Bohrer, einen Bohrer und
einen Hammer benötigen.
1. Öffnen Sie die äußere und innere Abdeckung
des KeyKeep2™, wie in der Anleitung auf der
linken Seite gezeigt.
2. Entscheiden Sie, wo der KeyKeep2™ auf der
gewünschten Montagefläche befestigt werden
soll. Es ist besser, Schlüsselschränke unsichtbar
zu positionieren, um keine Einbrecher
einzuladen.
3. Halten Sie den geöffneten KeyKeep2™ am
gewünschten Ort gegen die Wand. Stellen Sie
sicher, dass er senkrecht steht.
4. Markieren Sie auf der gewünschten
Oberfläche die Position der Schraubenlöcher.
5. Entfernen Sie den KeyKeep2™.
6. Bohren Sie 4 Löcher an den markierten
Stellen.
7. Verwenden Sie einen Hammer, um die Dübel
einzupassen (falls erforderlich).
8. Positionieren Sie den KeyKeep2™, setzen Sie
die Schrauben ein und ziehen Sie sie an.
9. Schließen Sie das Ablagefach.
10. Befolgen Sie die Bedienungsanleitung in der
Verpackung, um Ihren eigenen Code
einzustellen.
HINWEIS
1. Wir empfehlen Ihnen, Ihren Key Keep™ an
einem diskreten Ort, vor neugierigen Blicken
geschützt zu montieren, wie Terrassen, Garagen.
2. Halten Sie die Verschlussklappe geschlossen,
um die Wetterbeständigkeit zu erhöhen und die
Tasten vor Blicken zu verbergen.

Открытие KeyKeep2™ в первый
раз
Потяните вниз внешнюю защитную крышку,
чтобы получить доступ к кнопкам.
Нажмите на кнопку с маркировкой в нижней
части клавиатуры.
Нажмите на кнопку, на которой изображена
стрелка, направленная вниз.
Это кнопка разблокировки.Теперь можно
открыть внутреннюю крышку.
Установка KeyKeep2™ на стену
ПРИМЕЧАНИЕ: вам понадобится крестовая
отвертка, карандаш, спиртовой уровень,
сверло, дрель и молоток.
1. Откройте внешнюю и внутреннюю крышки
KeyKeep2™, как показано в инструкции слева.
2. Выберите место для установки KeyKeep2™.
Рекомендуется устанавливать сейф для
ключей в незаметном месте, чтобы он не
привлекал внимание.
3. Приложите открытый KeyKeep2™ к стене в
выбранном месте. Убедитесь в том, что он
расположен вертикально.
4. Отметьте расположение отверстий для
шурупов на поверхности.
5. Уберите KeyKeep2™.
6. Просверлите 4 отверстия в отмеченных
точках.
7. С помощью молотка установите дюбели
(если необходимо).
8. Установите KeyKeep2™, вставьте и затяните
шурупы.
9. Закройте отсек для хранения.
10. Чтобы установить свой код, следуйте
инструкциям по эксплуатации, входящим в
комплект.
ПРИМЕЧАНИЕ
1. Рекомендуем установить KeyKeep™ не на
видном месте, например, на веранде или в
гараже.
2. Защитную крышку рекомендуется держать
закрытой, чтобы защитить сейф от
воздействия погоды и скрыть кнопки.
Abrir a abertura do KeyKeep2™ pela
primeira vez
Puxe a tampa exterior impermeável para baixo para
revelar os botões.
Pressione o botão marcado na parte inferior do
teclado.
Pressione o botão marcado com a seta para baixo.
Este é o botão de desbloqueio.Poderá agora abrir a
tampa interior.
Montagem do seu KeyKeep2™ na
Parede
ATENÇÃO: precisará de uma chave de fendas de
cabeça X/Pozi, um lápis, um medidor de nível, uma
broca, um berbequim e um martelo.
1. Abra as tampas exterior e interior do
KeyKeep2™ conforme mostrado nas instruções à
esquerda.
2. KeyKeep2™ Decida onde posicionar o na
superfície de montagem desejada. Sugere-se
posicionar os cofres para chaves num local seguro e
fora de vista, de forma a não convidar qualquer
intervenção abusiva.
3. KeyKeep2™ Coloque e segure o aberto contra a
parede no local desejado. Certifique-se de que o
dispositivo se encontra na vertical.
4. Marque a posição dos orifícios dos parafusos na
superfície desejada.
5. KeyKeep2™.Remova o
6. Faça 4 furos nas posições marcadas.
7. Utilize um martelo para encaixar as buchas (caso
seja necessário).
8. KeyKeep2™ Posicione o , insira os parafusos e
aperte-os.
9. Feche o compartimento de armazenamento.
10. Siga as instruções de utilização que
acompanham a embalagem para definição do seu
código personalizado.
ATENÇÃO
1. Key Keep™ Sugerimos que monte o seu num
local discreto e longe da vista direta, como uma
varanda ou garagem (afastado do contacto visual
direto).
2. Mantenha a tampa da comporta fechada de
forma a melhorar a resistência às intempéries e
para ocultação dos botões.
RU
PT IT
1 2 3 4
Registered in England No. 88907
Tel: 01902 308050 Fax: 01902 308051 E-Mail: info@henry-squire.co.uk Website: www.squirelocks.co.uk
Henry Squire & Sons Limited
Hilton Cross Business Park, Cannock Road, Featherstone, Wolverhampton, WV10 7QZ
Aprire per la prima volta.KeyKeep2™
Abbassare lo sportello protettivo esterno anti-
intemperie per rivelare i pulsanti.
Premere l'apposito pulsante in basso sul tastierino.
Premere il pulsante con la freccia verso il basso:
questo è il pulsante di rilascio.Ora è possibile aprire
lo sportello interno.
Installare KeyKeep2™ a parete
NOTA: è necessario procurarsi un cacciavite a taglio/a
stella, una matita, una livella a bolla, una punta da
trapano, un trapano e un martello.
1. Aprire gli sportelli esterno e interno di
KeyKeep2™, come mostrato nelle istruzioni a
sinistra.
2. Decidere dove posizionare KeyKeep2™ sulla
superficie di montaggio. È preferibile posizionare le
cassette delle chiavi lontano dalla vista, per
prevenire eventuali attacchi.
3. Tenere KeyKeep2™ aperto contro il muro, nella
posizione desiderata. Assicurarsi che sia in posizione
verticale.
4. Segnare la posizione dei fori per le viti sulla
superficie di installazione.
5. Rimuovere KeyKeep2™.
6. Praticare 4 fori in corrispondenza dei segni
effettuati in precedenza.
7. Utilizzare un martello per fissare i tasselli nel muro
(se necessario).
8. Posizionare KeyKeep2™, inserire e stringere le
viti.
9. Chiudere il vano.
10. Attenersi alle istruzioni per l'uso incluse nella
confezione per impostare il codice personale."
NOTA
1. Si raccomanda di montare KeyKeep™ lontano
dalla vista diretta, ad esempio sotto un porticato o in
garage, non a vista.
2. Tenere lo sportello chiuso per aumentare la
resistenza agli agenti atmosferici e nascondere i
pulsanti alla vista."
Popular Lock manuals by other brands
Precision
Precision AM60PV installation guide
Sentrilock
Sentrilock REALTOR NXT/NXT quick start guide
Schlage
Schlage L9000 Series installation instructions
Coopers of Stortford
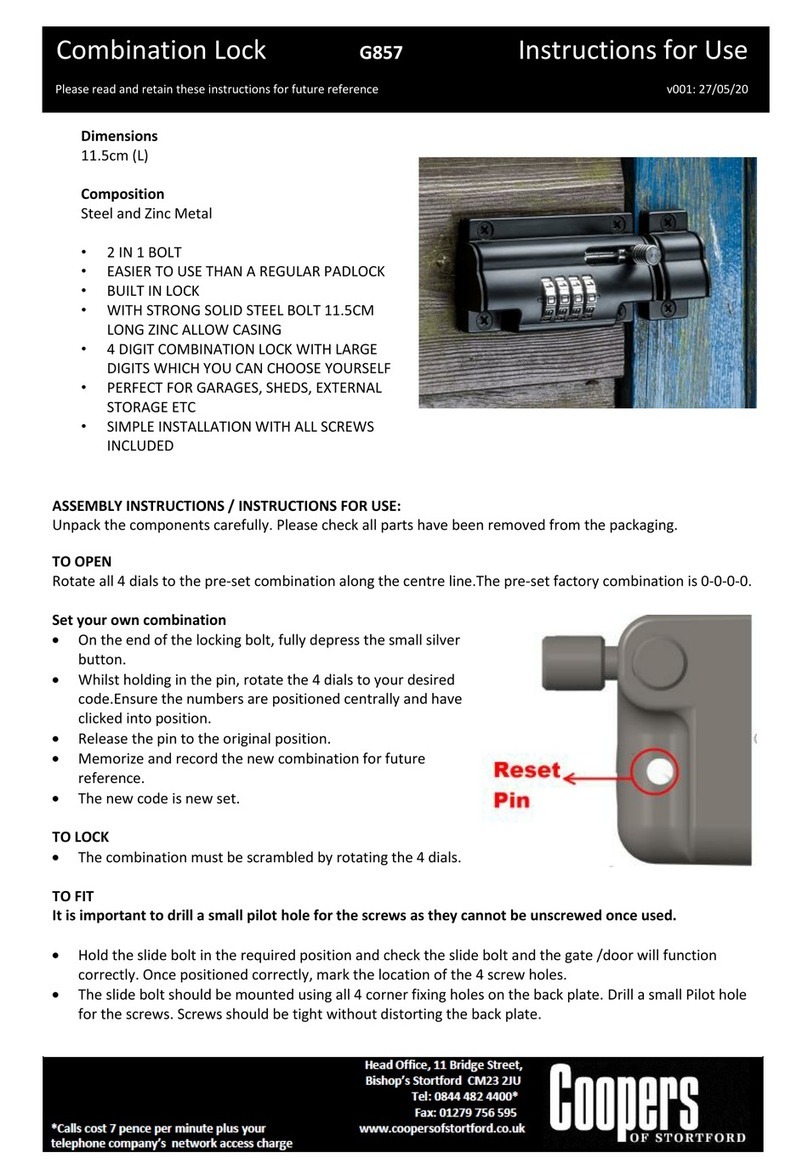
Coopers of Stortford G857 Instructions for use

Lock4Safe
Lock4Safe MiniTech Technical manual

CAPITOL
CAPITOL CE731 operating instructions
