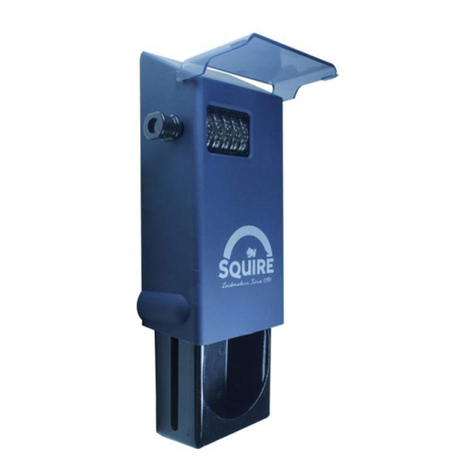
Squire Stronghold User manual

Fitting the Stronghold® Keysafe
4.
70mm
TOP 5.5mm
00000
1 2 3 4
5 6
00000
00000
scramble
78
910 11 12
13 14
Configuración de la caja fuerte Stronghold®
Installation du boîtier antivol pour clés
Stronghold®
Montage van de Stronghold® Keysafe
Montage des Stronghold® Schlüsseltresors
Montaż Stronghold® Keysafe
Colocação do Cofre para Chaves
Stronghold®
Установка сейфа для ключей Stronghold®
Installare la cassetta per le chiavi
Stronghold®

Installation du boîtier antivol pour clés
Stronghold®
Squire vous recommande de définir votre propre
code pour la première fois avant d'installer le
boîtier antivol pour clés Stronghold®
1. Choisissez l’endroit où installer le boîtier antivol
pour clés Stronghold® (en prévoyant 70mm pour
ouvrir le tiroir sans accrocher les objets fixés).Placez le
boîtier antivol pour clés Stronghold® dans un endroit
discret. Les boîtiers antivol pour clés ne doivent pas
être placés à la vue de tous.
2. Utilisez l’entretoise comme modèle pour le perçage.
Fixez l’entretoise à l’endroit souhaité en vous servant
de ruban-cache adhésif, puis percez les trous de
fixation comme indiqué sur le modèle. Utilisez une
mèche de 5mm. Les trous doivent faire 50mm de
profondeur.
3. Placez l’entretoise sur le mur, avec la mention
«TOP» (DESSUS) sur le dessus, en insérant deux des
vis fournies dans les trous du haut. Les têtes de vis
doivent dépasser de 5,5mm de l’entretoise, comme
illustré sur le schéma. Les vis fournies sont conçues
pour un usage avec un support solide adapté, comme
de la brique ou des blocs de béton.
4. Le boîtier antivol pour clés Stronghold® est réglé en
usine sur 00000. En utilisant cette combinaison, tirez
sur la tirette située sur le côté gauche pour faire
coulisser le tiroir vers l’extérieur.
5. En vous servant de la petite clé Allen fournie, ôtez la
vis de retenue de la tirette, puis conservez ces deux
éléments en toute sécurité. Après avoir ôté la tirette,
poussez la broche à laquelle était fixée la tirette vers le
boîtier antivol pour clés Stronghold®.
6. Ôtez le couvercle de protection contre les
intempéries du boîtier antivol pour clés. Vous verrez
alors apparaître deux vis sur les côtés du boîtier antivol
pour clés Stronghold®, permettant de maintenir le
tiroir en place. Retirez ces vis et rangez-les avec les
autres éléments.Retirez le tiroir.”
7. Placez le boîtier antivol pour clés Stronghold® au-
dessus des deux vis fixées au mur précédemment, puis
faites glisser le boîtier antivol pour clés vers le bas,
jusqu’à ce que les quatre trous de fixation
supplémentaires soient alignés sur les quatre trous
percés dans le mur.
8. En vous servant des vis de fixation et de la clé Torx
fournies, fixez fermement le boîtier antivol pour clés
Stronghold® au mur. Veillez à ce que les vis soient
bien serrées. Autrement, vous ne pourrez pas
remonter le tiroir.
9. Placez le tiroir dans sa position ouverte et refixer les
vis de fixation.
10. Maintenez le couvercle de protection contre les
intempéries à sa place, puis poussez-le fermement sur
le boîtier antivol pour clés Stronghold® en position
maintenue.
11. Refixez la tirette et sa vis de retenue.
12. Testez le fonctionnement du boîtier antivol pour
clés Stronghold® en vous assurant que le code est
réglé sur 00000. Tirez la tirette en position ouverte,
puis fermez le tiroir. Poussez la tirette vers le boîtier
antivol pour clés, tout en maintenant le tiroir fermé.
13. test2
Vous pouvez maintenant mélanger les chiffres pour
verrouiller le tiroir. Continuez à tester le
fonctionnement du boîtier antivol pour clés
Stronghold® en replaçant les chiffres sur 00000 et en
tirant la tirette du boîtier antivol pour clés
Stronghold® pour ouvrir le tiroir.
14. Si le fonctionnement vous convient, fixez la petite
moulure en caoutchouc fournie à l’extrémité de la
tirette afin de cacher la tête de vis.
Consultez les consignes de changement de code pour
définir votre propre code
FR
Fitting the Stronghold® Keysafe
Squire recommend that you set your own code for
the first time before fitting the Stronghold®
Keysafe
1. Decide where to position the Stronghold®
Keysafe (allowing 70mm for the drawer to open
without fouling any fixed objects). Position
Stronghold® Keysafe, in a discreet place.
Keysafes should not be sited in full view.
2. Use the spacer as a template for drilling. Affix
the spacer using masking tape in the desired
position and drill the fixing holes as indicated on
the template. Use a 5mm drill bit, the holes
should be 50mm deep."
3. Position the Spacer on the wall with the text
“TOP” uppermost using two of the provided
screws in the upper holes. The screw heads should
protrude 5.5mm from the spacer as shown in the
diagram. The supplied screws are intended for use
with a good solid substrate such as brick or
concrete blocks.
4. The Stronghold® Keysafe is factory set at
00000. With the dials at this setting pull the knob
located on the left hand side to allow the drawer
to slide out.
5. Using the small Allen key provided remove the
knob retention screw and store them both safely.
With the Pull knob removed push the spindle that
the knob was attached to, towards the
Stronghold® Keysafe.
6. Pull the weatherproof cover away from the Key
Safe which will now reveal two screws on the
sides of the Stronghold® Keysafe that hold the
drawer in place. Remove these screws and stow
with the previous items.Remove the drawer.
7. Position the Stronghold® Keysafe over the two
screws previously affixed to the wall, and slide the
Key Safe down until the four additional fixing
holes line up with the four holes drilled in the
wall.
8. Using the security screws and Torx wrench
supplied affix the Stronghold® Keysafe securely
to the wall. Ensure that the screws are fully
tightened as otherwise the draw will not
reassemble.
9. Position the drawer in its open position and
reattach the retaining screws.
10. Hold the weatherproof cover in situ and push
it firmly over the Stronghold® Keysafe to its
retained position.
11. Reattach the Pull knob with its retaining
screw.
12. Test the operation of the Stronghold®
Keysafe by ensuring that the code is set to 00000,
pull the knob to its open position and close the
drawer. Push the knob towards the Key Safe
whilst holding the drawer closed.
13. test 2
The wheels can now be scrambled to lock the
drawer in place. Further test the operation of the
Stronghold® Keysafe by resetting the wheels to
00000 and pulling the knob away from the
Stronghold® Keysafe to open the drawer.
14. If the operation is satisfactory affix the small
rubber moulding supplied into the end of the Pull
knob to cover the screw head.
Refer to the recoding instructions to set your own
code
GB
Configuración de la caja fuerte
Stronghold®
Squire recomienda que establezca su propio
código por primera vez antes de instalar la caja
fuerte Stronghold®
1. Decida dónde colocará la caja fuerte Stronghold®
(deje un espacio de70mm para que el cajón se abra
sin obstruir objetos fijos).Coloque la caja fuerte
Stronghold® en un lugar discreto. Las cajas fuertes
no deben estar a la vista.
2. Utilice el espaciador como una plantilla para
taladrar. Coloque el espaciador en la posición
deseada utilizando cinta adhesiva y perfore los
agujeros de fijación como se indica en la plantilla.
Utilice una broca de5mm, los orificios deben tener
una profundidad de50mm.
3. Coloque el espaciador en la pared con el texto
“TOP” hacia arriba utilizando dos de los tornillos
suministrados en los orificios superiores. Las cabezas
de los tornillos deben sobresalir 5,5mm del
espaciador, tal como se muestra en el diagrama. Los
tornillos suministrados están diseñados para su uso
con un buen sustrato sólido, como bloques de ladrillo
u hormigón.
4. La caja fuerte Stronghold® está configurada de
fábrica en00000. Con esta configuración de los
diales, tire de la perilla ubicada en el lado izquierdo
para permitir que el cajón se deslice hacia afuera.
5. Utilice la pequeña llave Allen suministrada para
retirar el tornillo de retención de la perilla, y guarde
ambos en un lugar seguro. Después de retirar la
perilla, empuje el cabezal al que estaba conectada
hacia la caja fuerte Stronghold®.
6. Retire la cubierta impermeable de la caja fuerte
Stronghold® y verá dos tornillos a los lados de la
caja fuerte que sostienen el cajón en su lugar. Retire
estos tornillos y guárdelos con los elementos
anteriores.Retire el cajón.
7. Coloque la caja fuerte Stronghold® sobre los dos
tornillos previamente fijados a la pared, y deslice la
caja fuerte hasta que los cuatro agujeros de fijación
adicionales estén alineados con los cuatro orificios
perforados en la pared.
8. Con los tornillos de seguridad y la llave Torx
suministrada fije la caja fuerte de seguridad
Stronghold® a la pared con firmeza. Asegúrese de
que los tornillos estén debidamente ajustados, de lo
contrario el cajón no se volverá a montar.
9. Deje el cajón en posición abierta y vuelva a colocar
los tornillos de sujeción.
10. Sostenga la cubierta impermeable en el lugar y
presiónela firmemente sobre la caja de seguridad
Stronghold® llevándola a la posición en que
quedará retenida.
11. Vuelva a colocar la perilla tirador con el tornillo
de sujeción.
12. Pruebe el funcionamiento de la caja fuerte
Stronghold® asegurándose de que el código esté
configurado en00000, tire de la perilla hasta su
posición de apertura y cierre el cajón. Empuje la
perilla hacia la caja fuerte mientras mantiene el cajón
cerrado.
13. Prueba 2
Ahora se pueden codificar las ruedas para asegurar el
cajón en su lugar.Continúe probando el
funcionamiento de la caja fuerte Stronghold®
restableciendo las ruedas a00000 y tirando de la
perilla de la caja fuerte para abrir el cajón.
14. Si la operación es satisfactoria, coloque el
pequeño moldeado de goma suministrado en el
extremo de la perilla tirador para cubrir la cabeza del
tornillo.
Consulte las instrucciones de recodificación para c
ES
Registered in England No. 88907
Tel: 01902 308050 Fax: 01902 308051 E-Mail: [email protected] Website: www.squirelocks.co.uk
Henry Squire & Sons Limited
Hilton Cross Business Park, Cannock Road, Featherstone, Wolverhampton, WV10 7QZ

Registered in England No. 88907
Tel: 01902 308050 Fax: 01902 308051 E-Mail: [email protected] Website: www.squirelocks.co.uk
Henry Squire & Sons Limited
Hilton Cross Business Park, Cannock Road, Featherstone, Wolverhampton, WV10 7QZ
PL
NL DE
Montage des Stronghold® Schlüsseltresors
Squire empfiehlt, dass Sie zum ersten Mal Ihren
eigenen Code festlegen, bevor Sie die
Stronghold® Schlüsseltresoren montieren
1. Entscheiden Sie, wo der Stronghold®
Schlüsseltresor aufzustellen ist (so dass für das
Öffnen der Schublade 70mm vorhanden sind, ohne
dass sie gegen einen festen Gegenstand stößt).Stellen
Sie den Stronghold® Schlüsseltresor an einem
diskreten Ort auf. Schlüsseltresore sollten nicht
vollkommen sichtbar aufgestellt werden.
2. Benutzen Sie das Distanzstück als Schablone zum
Bohren. Befestigen Sie den Abstandhalter mit
Klebeband in der gewünschten Position und bohren
Sie die Befestigungslöcher wie auf der Schablone
angegeben. Verwenden Sie einen 5mm-Bohrer. Die
Löcher sollten 50mm tief sein.
3. Platzieren Sie den Abstandhalter an der Wand mit
dem nach oben zeigenden Text „TOP“ unter
Verwendung von zwei der mitgelieferten Schrauben
in den oberen Bohrungen. Die Schraubenköpfe sollten
5,5mm vom Abstandshalter vorstehen, wie imm
Diagramm gezeigt. Die mitgelieferten Schrauben sind
für den Einsatz in einem festen Träger wie Backsteine
oder Betonblöcke vorgesehen.
4. Der Stronghold® Schlüsseltresor ist werkseitig auf
00000 eingestellt. Stehen die Drehknöpfe in dieser
Stellung, ziehen Sie den Knopf auf der linken Seite,
damit die Schublade herausgleiten kann.
5. Mit dem kleinen mitgelieferten Inbusschlüssel
entfernen Sie die Halteschraube des Knopfs und
bewahren Sie beide sicher auf. Ist der Ziehknopf
entfernt, schieben Sie die Spindel, an die der Knopf
befestigt war, in Richtung des Stronghold®
Schlüsseltresors.
6. Entfernen Sie die Wetterschutzabdeckung vom
Schlüsseltresor, wodurch zwei Schrauben an den
Seiten des Stronghold® Schlüsseltresors sichtbar
werden, die die Schublade in ihrer Position halten.
Entfernen Sie diese Schrauben und bewahren Sie
diese mit den vorherigen Artikeln auf.Entfernen Sie
die Schublade."
7. Positionieren Sie den Stronghold® Schlüsseltresor
über die beiden oben an der Wand befestigten
Schrauben, und schieben Sie den Schlüsseltresor nach
unten, bis die vier zusätzlichen
Befestigungsbohrungen mit den vier in die Wand
gebohrten Löchern übereinstimmen.
8. Befestigen Sie den Stronghold® Schlüsseltresor
mit den mitgelieferten Sicherheitsschrauben und dem
Torx-Schraubenschlüssel sicher an der Wand. Stellen
Sie sicher, dass die Schrauben fest angezogen sind, da
sonst die Anziehungskraft nicht nicht ausreichen wird.
9. Positionieren Sie die Schublade in ihrer offenen
Position und befestigen Sie die
Befestigungsschrauben.
10. Halten Sie die Wetterschutzabdeckung an Ort und
Stelle und drücken Sie sie fest über den Stronghold®
Schlüsseltresor in ihre Halteposition.
11. Bringen Sie die Ziehknopf mit seiner
Befestigungsschraube wieder an.
12. Testen Sie den Betrieb des Stronghold®
Schlüsseltresors, indem sichergestellt wird, dass der
Code auf 00000 eingestellt ist. Ziehen Sie den Knopf
in seine Öffnungsposition und schließen Sie die
Schublade. Drücken Sie den Knopf in Richtung des
Schlüsseltresors, während die Schublade geschlossen
ist.
13. Test 2
Die Räder können nun beliebig gedreht werden, um
die Schublade zu arretieren.Testen Sie auch die
Funktion des Stronghold® Schlüsseltresors durch
Zurücksetzen der Räder auf 00000 und ziehen Sie den
Knopf vom Stronghold® Schlüsseltresor weg, um die
Schublade zu öffnen.
14. Wenn dies zufriedenstellend funktioniert, bringen
Sie die kleine mitgelieferte Gummileiste am Ende des
Ziehknopfes an, um den Schraubenkopf abzudecken.
Beachten Sie die Anweisungen zur Umkodierung, um
Ihren eigenen Code einzustellen.
Montage van de Stronghold® Keysafe
Squire raadt u aan om voor de eerste keer uw
eigen code in te stellen voordat u de
Stronghold® Keysafe monteert
1. Bepaal waar de Stronghold® Keysafe moet
worden geplaatst (zodat de lade 70 mm kan
openen zonder andere geplaatste voorwerpen te
raken). Plaats de Stronghold® Keysafe op een
discrete plaats. Sleutelkasten mogen zich niet in
het volle zicht bevinden.
2. Gebruik de afstandhouder als sjabloon voor het
boren. Bevestig de afstandhouder met afplaktape
in de gewenste positie en boor de
bevestigingsgaten zoals aangegeven op het
sjabloon. Gebruik een boor van 5 mm, de gaten
moeten 50 mm diep zijn.
3. Plaats de afstandhouder tegen de wand met de
tekst ""TOP"" bovenaan met behulp van twee van
de bijgeleverde schroeven in de bovenste gaten.
De schroefkoppen moeten 5,5 mm van de
afstandhouder uitsteken zoals aangegeven in het
schema. De bijgeleverde schroeven zijn bedoeld
voor gebruik in combinatie met een goede vaste
ondergrond zoals bakstenen of betonblokken.
4. De Stronghold® Keysafe is op 00000 ingesteld
in de fabriek. Met de draaiknoppen bij deze
instelling trekt u aan de knop aan de linkerkant
om de lade naar buiten te laten glijden.
5. Verwijder met behulp van de bijgeleverde
kleine inbussleutel de knopbevestigingschroef en
berg ze allebei veilig op. Druk de spindel waaraan
de knop is bevestigd, met de trekknop verwijderd,
in de richting van de Stronghold® Keysafe.
6. Trek de weerbestendige kap van de Key Safe
weg, waardoor twee schroeven aan de zijkanten
van de Stronghold® Keysafe zichtbaar worden
die de trekker op zijn plaats houden. Verwijder
deze schroeven en berg ze op met de vorige
items. Verwijder de lade.
7. Plaats de Stronghold® Keysafe over de twee
schroeven die eerder aan de wand zijn bevestigd
en schuif de Key Safe naar beneden totdat de vier
extra bevestigingsgaten op één lijn liggen met de
vier gaten die in de wand zijn geboord.
8. Bevestig de Stronghold® Keysafe met de
meegeleverde veiligheidsschroeven en Torx-
sleutel stevig aan de wand. Zorg ervoor dat de
schroeven volledig zijn aangedraaid, want anders
zal de lade niet opnieuw gemonteerd kunnen
worden.
9. Plaats de lade in de geopende stand en
bevestig de bevestigingsschroeven weer.
10. Houd de weerbestendige kap op zijn plaats en
duw ze stevig over de Stronghold® Keysafe in de
behouden positie.
11. Bevestig de trekknop opnieuw met de
bevestigingsschroef.
12. Test de werking van de Stronghold® Keysafe
door ervoor te zorgen dat de code op 00000
staat, trek de knop in de open stand en sluit de
lade. Druk de knop in de richting van de Key Safe
terwijl u de lade gesloten houdt.
13. test 2
De wielen kunnen nu door elkaar worden
gedraaid om de lade op zijn plaats te houden. Test
de werking van de Stronghold® Keysafe verder
door de wielen op 00000 te zetten en de knop van
de Stronghold® Keysafe weg te trekken om de
lade te openen.
14. Als de operatie naar tevredenheid verloopt,
breng dan het bijgeleverde rubberen vormpje aan
in het uiteinde van de Trekknop om de schroefkop
af te dekken.
Raadpleeg de hercoderingsinstructies om uw
eigen code in te stellen."
Montaż Stronghold® Keysafe
Squire zaleca ustawienie własnego kodu po raz
pierwszy przed zamontowaniem Stronghold®
Keysafe
1. Należy zdecydować o umiejscowieniu Stronghold®
Keysafe (pozostawiając 70mm na otwarcie szuflady
bez zakleszczenia na innych przedmiotach). Ustawić
Stronghold® Keysafe w dyskretnym miejscu. Keysafes
nie powinny znajdować się na widoku.
2. Użyć podkładki dystansowej jako szablonu do
wiercenia. Zamocować podkładkę dystansową w
pożądanym miejscu, używając taśmy maskującej
iwywiercić otwory mocujące jak wskazano na
szablonie. Użyć 5mm wiertła. Otwory powinny mieć
głębokość 50mm.
3. Ustawić podkładkę dystansową na ścienia z napisem
„TOP” (GÓRA) w najwyżej położonym miejscu i użyć
dwóch śrub w górnych otworach. Łeb śruby powinny
wystawać około 5,5mm z podkładki, co pokazano na
schemacie. Dostarczone śruby są przeznaczone do
użytku na twardych powierzchniach, takich jak cegła
lub bloki betonowe.
4. Stronghold® Keysafe jest fabrycznie ustawiony na
00000. Zachowując dyski z cyframi w tym ustawieniu,
pociągnąć pokrętło znajdujące się po lewej stronie,
aby wysunąć szufladę.
5. Używając małego klucza imbusowego, który
znajduje się w zestawie, zdemontuj śruby
zabezpieczające pokrętło i odłóż je bezpiecznie na
miejsce. Po zdemontowania wyciąganego pokrętła,
popchnąć trzpień, na którym zamocowano pokrętło, w
stronę Stronghold® Keysafe.
6. Odciągnąć wodoodporną pokrywę z dala od Key
Safe, co spowoduje odkrycie dwóch śrub po bokach
Stronghold® Keysafe, które utrzymują szufladę na
miejscu. Odkręcić te śruby ipołożyć je z poprzednimi
elementami. Zdemontować szufladę.
7. Ustawić Stronghold® Keysafe nad dwoma śrubami,
które zostały wcześniej przymocowane do ściany,
wsunąć Key Safe do momentu ustawienia otworów na
pozostałe cztery śruby z otworami wywierconymi w
ścianie.
8. Używając śrub zabezpieczających i klucza Torx z
zestawu, zamocować Stronghold® Keysafe
bezpiecznie na ścianie. Upewnić się, że śruby są dobrze
dokręcone, ponieważ w innym przypadku nie będzie
można domknąć szuflady.
9. Ustawić szufladę w pozycji otwartej iponownie
zamontować śruby ustalające.
10. Przytrzymać wodoodporną pokrywę na miejscu
izdecydowanie nasunąć na Stronghold® Keysafe do
ustalonej pozycji.
11. Ponownie zamontować pokrętło wraz ze śrubami
ustalającymi.
12. Sprawdzić działanie Stronghold® Keysafe.
Upewniając się, że kod jest ustawiony na 00000
pociągnąć pokrętło do pozycji otwartej i zamknąć
szufladę. Popchnąć pokrętło w stronę Key Safe
jednocześnie przytrzymując szufladę zamkniętą.
13. Test 2
Dyski można teraz pomieszać, aby zablokować
szufladę na miejscu. Należy również sprawdzić
działanie Stronghold® Keysafe po przez zresetowanie
dysków do kodu 00000 i pociągnięcie pokrętła od
Stronghold® Keysafe w celu otwarcia szuflady.
14. Jeśli działanie jest prawidłowe, zamocować małą
gumową foremkę na końcu pokrętła, aby zakryć łeb
śruby.
Zapoznać się z informacjami na temat ponownego
kodowania, aby ustawić własny kod."

Установка сейфа для ключей
Stronghold®
Squire рекомендует вам впервые установить
собственный код перед установкой сейфа для
ключей Stronghold®.
1. Выберите место для установки сейфа для
ключей Stronghold® (оставьте 70мм
пространства, чтобы иметь возможность
открыть выдвижное отделение, не задевая
зафиксированные предметы). Устанавливайте
сейф для ключей Stronghold® в незаметном
месте. Сейфы для ключей не должны быть у
всех на виду.
2. Используйте шаблон для сверления
отверстий. Закрепите шаблон с помощью
малярной ленты в выбранном месте и
просверлите отверстия согласно разметке.
Используйте сверло диаметром 5 мм. Глубина
отверстий должна составлять 50мм.
3. Установите шаблон на стене так, чтобы
надпись «TOP» (верх) была сверху, вставив в
верхние отверстия два шурупа из набора.
Шляпки шурупов должны выступать над
поверхностью шаблона на 5,5мм, как показано
на схеме. Шурупы, которые входят в комплект,
предназначены для использования на твердых
поверхностях, таких как кирпич или бетон.
4. Заводской код сейфа для ключей Stronghold®
— 00000. Установите на поворотных дисках этот
код и потяните ручку, расположенную слева,
чтобы открыть выдвижной отсек.
5. С помощью малого шестигранного ключа из
набора открутите крепежный винт и ручку и
уберите их в надежное место. После снятия
ручки, нажмите на вал, на котором была
установлена ручка, в направлении сейфа для
ключей Stronghold®.
6. Откиньте защитную крышку, и вы увидите по
бокам сейфа два шурупа, которые удерживают
на месте выдвижной отсек. Снимите эти шурупы
и положите к остальным деталям. Снимите
выдвижной отсек.
7. Установите сейф для ключей Stronghold® на
два шурупа, вкрученные ранее в стену, и
потяните его немного вниз, чтобы четыре
дополнительных отверстия для фиксации
совпали с отверстиями, просверленными в
стене.
8. С помощью фиксирующих шурупов и ключа-
звездочки из набора закрепите сейф для
ключей Stronghold® на стене. Убедитесь в том,
что шурупы полностью затянуты, иначе вы не
сможете установить обратно выдвижной отсек.
9. Установите выдвижной отсек в открытом
положении и затяните крепежные винты.
10. Удерживая защитную крышку на месте,
крепко прижмите ее к сейфу для ключей
Stronghold®, чтобы она встала на место.
11. С помощью крепежного винта заново
установите отжимную ручку.
12. Проверьте исправность сейфа для ключей
Stronghold®. Для этого убедитесь в том, что
установлен код 00000, потяните ручку, чтобы
перевести ее в положение «открыто», и
закройте выдвижной отсек. Нажмите на ручку по
направлению к сейфу, удерживая выдвижной
отсек в закрытом положении.
13. Проверка 2.
Теперь диски можно провернуть, чтобы
заблокировать выдвижной отсек. Проверьте
исправность сейфа для ключей Stronghold®
еще раз — установите все диски в положение
00000 и потяните ручку по направлению от
сейфа, чтобы открыть выдвижной отсек.
14. Если все работает исправно, установите
небольшую резиновую заглушку из набора на
конец ручки, чтобы скрыть шляпку винта.
Чтобы установить свой код, см. инструкции по
записи кода.
Registered in England No. 88907
Tel: 01902 308050 Fax: 01902 308051 E-Mail: [email protected] Website: www.squirelocks.co.uk
Henry Squire & Sons Limited
Hilton Cross Business Park, Cannock Road, Featherstone, Wolverhampton, WV10 7QZ
IT
PT RU
Colocação do Cofre para Chaves
Stronghold®
Squire recomenda que você defina seu próprio
código pela primeira vez antes de instalar o Cofre
para Chaves Stronghold®
1. Decida onde posicionar o Cofre para Chaves
Stronghold® (permitindo uma distância de 70
mm para que a gaveta abra sem danificar outros
objetos por perto). Posicione o Cofre para Chaves
Stronghold® num local discreto. Os cofres para
chaves não devem ser colocados à vista de todos.
2. Utilize o espaçador como modelo para a
perfuração da parede. Prenda o espaçador na
posição desejada usando fita adesiva e faça os
furos de fixação de acordo com o modelo. Utilize
uma broca de 5 mm. Os furos deverão ter uma
profundidade de 50 mm.
3. Posicione o espaçador na parede com o texto
""TOP"" (superior) na parte superior, utilizando
dois dos parafusos fornecidos para os furos
superiores. As cabeças dos parafusos deverão
sobressair 5,5 mm do espaçador, conforme
mostrado no diagrama. Os parafusos fornecidos
destinam-se a ser utilizados com substratos
robustos e sólidos, como blocos de tijolo ou de
betão.
4. O Cofre para Chaves Stronghold® vem
predefinido de fábrica com o código 00000. Com
os indicadores definidos para este valor, puxe o
botão localizado no lado esquerdo para permitir
que a gaveta deslize para fora.
5. Utilizando a pequena chave Allen fornecida,
remova o parafuso de retenção do botão e guarde
ambos num local seguro. Com o puxador (Pull)
removido, empurre o fuso, ao qual o botão foi
fixado, em direção ao Cofre para Chaves
Stronghold®.
6. Puxe a tampa impermeável, afastando-a do
cofre para chaves. Isto revelará dois parafusos nos
lados do Cofre para Chaves Stronghold® que
mantêm a gaveta no seu lugar. Retire estes
parafusos e guarde-os juntamente com os artigos
anteriores. Retire a gaveta.
7. Posicione o Cofre para Chaves Stronghold®
sobre os dois parafusos anteriormente afixados
na parede e deslize o cofre para chaves para baixo
até que os quatro furos de fixação adicionais se
alinhem com os quatro furos feitos na parede.
8. Utilizando os parafusos de segurança e a chave
Torx fornecida, prenda o Cofre para Chaves
Stronghold® na parede com firmeza. Certifique-
se de que os parafusos estão totalmente
apertados, caso contrário a gaveta não poderá
voltar a ser montada.
9. Posicione a gaveta na sua posição de abertura e
volte a apertar os parafusos de retenção.
10. Segure a tampa impermeável localmente e
empurre-a com firmeza sobre o Cofre para Chaves
Stronghold® até à sua posição de retenção.
11. Volte a colocar o puxador (Pull) com o seu
respetivo parafuso de retenção.
12. Teste o funcionamento do Cofre para Chaves
Stronghold® da seguinte forma: certifique-se de
que o código está definido como 00000, coloque o
puxador na sua posição de abertura e feche a
gaveta. Empurre o puxador na direção do cofre
para chaves enquanto mantém a gaveta fechada.
13. Teste 2
As rodas numéricas podem agora ser
embaralhadas de forma a trancar a gaveta no
sítio. Verifique o funcionamento do Cofre para
Chaves Stronghold® ao repor o código das rodas
numéricas para 00000 e depois movendo o
puxador no sentido oposto ao do Cofre para
Chaves Stronghold® para abrir a gaveta.
14. Se a operação for adequada, coloque o
pequeno tampão de borracha fornecido na
extremidade do puxador (Pull) para tapar a
cabeça do parafuso.
Consulte as instruções de recodificação para
definir o seu código personalizado
Installare la cassetta per le chiavi
Stronghold®
Squire consiglia di impostare per la prima volta il
proprio codice prima di inserire la cassetta per le chiavi
Stronghold®
1. Decidere dove posizionare la cassetta per le chiavi
Stronghold® (lasciare 70 mm per consentire
l'apertura del cassettino senza urtare altri oggetti).
Posizionare la cassetta per le chiavi Stronghold® in
un posto poco visibile. Le cassette per le chiavi non
devono essere facilmente individuabili.
2. Utilizzare la base come modello per praticare i fori
nella parete. Bloccare la base nella posizione di
montaggio prescelta con nastro adesivo e praticare i
fori per il fissaggio, come indicato sul modello.
Utilizzare una punta da trapano da 5 mm; i fori devono
essere profondi 50 mm.
3. Posizionare il distanziatore sulla parete, con la
scritta ""TOP"" rivolta verso l'alto, inserendo due delle
viti fornite nei fori superiori. Le teste delle viti devono
sporgere di 5,5 mm dal distanziatore, come mostrato
in figura. Le viti fornite sono adatte a una parete dura
ad esempio una parete in mattoni o blocchi di
cemento.
4. L'impostazione di fabbrica della combinazione della
cassetta per le chiavi Stronghold® è impostata su
00000. Con le rotelle su questa posizione, tirare la
manopola collocata sul lato sinistro per permettere al
cassettino di scorrere.
5. Utilizzando la brugola piccola in dotazione,
rimuovere la vite di bloccaggio della manopola e
conservare entrambi i pezzi in un posto sicuro. Con la
manopola rimossa, spingere il mandrino a cui era
collegata la manopola verso la cassetta per le chiavi
Stronghold®.
6. Rimuovere il coperchio resistente all'acqua dalla
cassetta per le chiavi Stronghold®: si noteranno sui
lati due viti per tenere il cassettino in posizione.
Rimuovere queste viti e riporle al sicuro insieme ai
pezzi rimossi in precedenza. Rimuovere il cassettino.
7. Posizionare la cassetta per le chiavi Stronghold®
sulle due viti precedentemente inserite nel muro e far
scivolare la cassetta per le chiavi fino a quando i
quattro ulteriori fori di fissaggio non saranno allineati
con i fori praticati nella parete.
8. Utilizzando le viti di sicurezza e la brugola a stella
fornite in dotazione, fissare saldamente la cassetta per
le chiavi Stronghold® alla parete. Assicurarsi che le
viti siano ben strette, altrimenti non sarà possibile
rimontare il cassettino.
9. Posizionare il cassettino in posizione aperta e
reinserire le viti di bloccaggio.
10.Tenere lo sportello resistente all'acqua in posizione
e spingerlo con decisione sulla cassetta per le chiavi
Stronghold®, nella sua posizione bloccata.
11. Fissare nuovamente la manopola con le viti di
bloccaggio."
12. Testare il funzionamento della cassetta per le
chiavi Stronghold®, assicurandosi che il codice sia
impostato su 00000. Tirare la manopola in posizione di
apertura e chiudere il cassettino. Spingere la
manopola verso la cassetta per le chiavi, tenendo
sempre il cassettino chiuso.
13. Test2
Ora le rotelle possono essere girate in posizione
casuale per bloccare il cassettino in posizione chiusa.
Effettuare un altro test sulla cassetta per le chiavi
Stronghold® impostando nuovamente le rotelle su
00000 e tirando la manopola nella direzione opposta
rispetto alla cassetta per le chiavi Stronghold® per
aprire il cassettino.
14. Se funziona tutto correttamente, fissare il tappino
in gomma fornito in dotazione all'estremità della
manopola, per nascondere la testa della vite.
Consultare le istruzioni di ricodifica per impostare il
codice personale.
Other Squire Safe manuals
Popular Safe manuals by other brands

Bunker Hill Security
Bunker Hill Security 61724 Owner's manual & safety instructions

Phoenix
Phoenix FS1650E Operating Instructions & Guarantee Registration

SecureLine
SecureLine SL02710 user manual

SnapSafe
SnapSafe Super Titan XL owner's manual

HARTMANN TRESORE
HARTMANN TRESORE HES manual

Liberty
Liberty Safe Owner's use and care manual