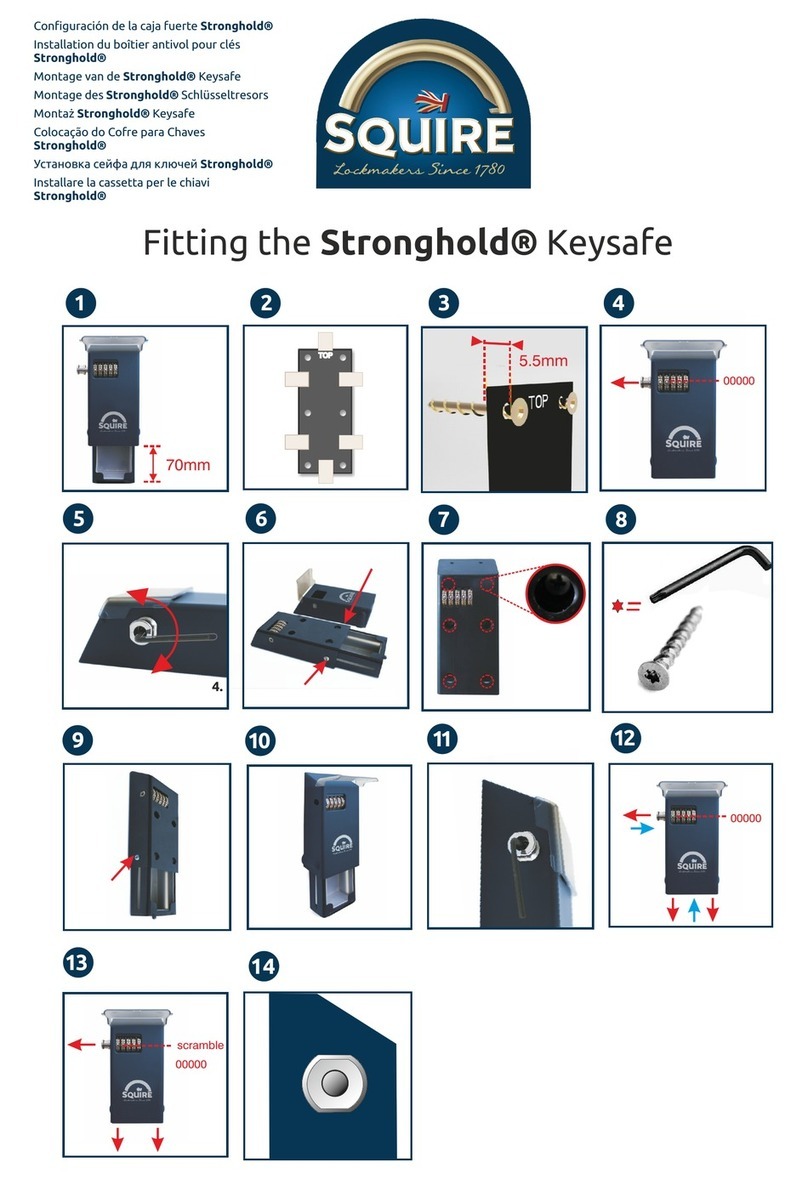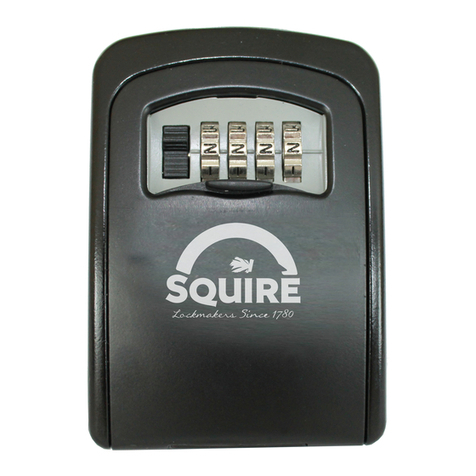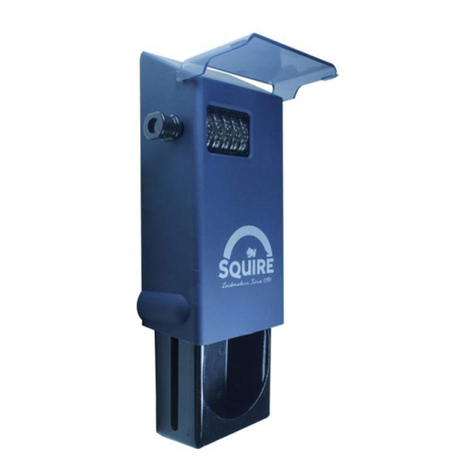
Fitting the Stronghold® Keysafe
4.
70mm
TOPTOP 5.5mm
00000
1 2 3 4 5 6
Fitting the Stronghold®
Keysafe
1. Decide where to position the
Stronghold® Keysafe (allowing 70mm
for the drawer to open without fouling
any fixed objects). Position
Stronghold® Keysafe, in a discreet
place. Keysafes should not be sited in
full view.
2. Use the spacer as a template for
drilling. Affix the spacer using masking
tape in the desired position and drill the
fixing holes as indicated on the
template. Use a 5mm drill bit, the holes
should be 50mm deep."
3. Position the Spacer on the wall with
the text “TOP” uppermost using two of
the provided screws in the upper holes.
The screw heads should protrude
5.5mm from the spacer as shown in the
diagram. The supplied screws are
intended for use with a good solid
substrate such as brick or concrete
blocks.
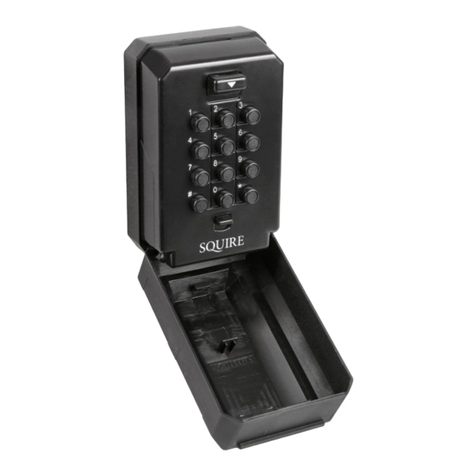
4. The Stronghold® Keysafe is factory
set at 00000. With the dials at this
setting pull the knob located on the left
hand side to allow the drawer to slide
out.
5. Using the small Allen key provided
remove the knob retention screw and
store them both safely. With the Pull
knob removed push the spindle that the
knob was attached to, towards the
Stronghold® Keysafe.
6. Pull the weatherproof cover away
from the Key Safe which will now reveal
two screws on the sides of the
Stronghold® Keysafe that hold the
drawer in place. Remove these screws
and stow with the previous
items.Remove the drawer.
continued overleaf
Montage des Stronghold®
Schlüsseltresors
1. Entscheiden Sie, wo der Stronghold®
Schlüsseltresor aufzustellen ist (so dass
für das Öffnen der Schublade 70mm
vorhanden sind, ohne dass sie gegen
einen festen Gegenstand stößt).Stellen
Sie den Stronghold® Schlüsseltresor an
einem diskreten Ort auf.
Schlüsseltresore sollten nicht
vollkommen sichtbar aufgestellt werden.
2. Benutzen Sie das Distanzstück als
Schablone zum Bohren. Befestigen Sie
den Abstandhalter mit Klebeband in der
gewünschten Position und bohren Sie
die Befestigungslöcher wie auf der
Schablone angegeben. Verwenden Sie
einen 5mm-Bohrer. Die Löcher sollten
50mm tief sein.
3. Platzieren Sie den Abstandhalter an
der Wand mit dem nach oben zeigenden
Text „TOP“ unter Verwendung von zwei
der mitgelieferten Schrauben in den
oberen Bohrungen. Die Schraubenköpfe
sollten 5,5mm vom Abstandshalter
vorstehen, wie imm Diagramm gezeigt.
Die mitgelieferten Schrauben sind für
den Einsatz in einem festen Träger wie
Backsteine oder Betonblöcke
vorgesehen.
4. Der Stronghold® Schlüsseltresor ist
werkseitig auf 00000 eingestellt. Stehen
die Drehknöpfe in dieser Stellung, ziehen
Sie den Knopf auf der linken Seite, damit
die Schublade herausgleiten kann.
5. Mit dem kleinen mitgelieferten
Inbusschlüssel entfernen Sie die
Halteschraube des Knopfs und bewahren
Sie beide sicher auf. Ist der Ziehknopf
entfernt, schieben Sie die Spindel, an die
der Knopf befestigt war, in Richtung des
Stronghold® Schlüsseltresors.
6. Entfernen Sie die
Wetterschutzabdeckung vom
Schlüsseltresor, wodurch zwei Schrauben
an den Seiten des Stronghold®
Schlüsseltresors sichtbar werden, die die
Schublade in ihrer Position halten.
Entfernen Sie diese Schrauben und
bewahren Sie diese mit den vorherigen
Artikeln auf.Entfernen Sie die
Schublade."
Fortsetzung umseitig
Installation du boîtier antivol
pour clés Stronghold®
1. Choisissez l’endroit où installer le
boîtier antivol pour clés Stronghold®
(en prévoyant 70mm pour ouvrir le
tiroir sans accrocher les objets
fixés).Placez le boîtier antivol pour clés
Stronghold® dans un endroit discret.
Les boîtiers antivol pour clés ne doivent
pas être placés à la vue de tous.
2. Utilisez l’entretoise comme modèle
pour le perçage. Fixez l’entretoise à
l’endroit souhaité en vous servant de
ruban-cache adhésif, puis percez les
trous de fixation comme indiqué sur le
modèle. Utilisez une mèche de 5mm.
Les trous doivent faire 50mm de
profondeur.
3. Placez l’entretoise sur le mur, avec la
mention «TOP» (DESSUS) sur le dessus,
en insérant deux des vis fournies dans
les trous du haut. Les têtes de vis
doivent dépasser de 5,5mm de
l’entretoise, comme illustré sur le
schéma. Les vis fournies sont conçues
pour un usage avec un support solide
adapté, comme de la brique ou des
blocs de béton.
4. Le boîtier antivol pour clés
Stronghold® est réglé en usine sur
00000. En utilisant cette combinaison,
tirez sur la tirette située sur le côté
gauche pour faire coulisser le tiroir vers
l’extérieur.
5. En vous servant de la petite clé Allen
fournie, ôtez la vis de retenue de la
tirette, puis conservez ces deux
éléments en toute sécurité. Après avoir
ôté la tirette, poussez la broche à
laquelle était fixée la tirette vers le
boîtier antivol pour clés Stronghold®.
6. Ôtez le couvercle de protection
contre les intempéries du boîtier antivol
pour clés. Vous verrez alors apparaître
deux vis sur les côtés du boîtier antivol
pour clés Stronghold®, permettant de
maintenir le tiroir en place. Retirez ces
vis et rangez-les avec les autres
éléments.Retirez le tiroir."
suite au verso
Configuración de la caja fuerte
Stronghold®
1. Decida dónde colocará la caja fuerte
Stronghold® (deje un espacio
de70mm para que el cajón se abra sin
obstruir objetos fijos).Coloque la caja
fuerte Stronghold® en un lugar
discreto. Las cajas fuertes no deben
estar a la vista.
2. Utilice el espaciador como una
plantilla para taladrar. Coloque el
espaciador en la posición deseada
utilizando cinta adhesiva y perfore los
agujeros de fijación como se indica en
la plantilla. Utilice una broca de5mm,
los orificios deben tener una
profundidad de50mm.
3. Coloque el espaciador en la pared
con el texto “TOP” hacia arriba
utilizando dos de los tornillos
suministrados en los orificios
superiores. Las cabezas de los tornillos
deben sobresalir 5,5mm del
espaciador, tal como se muestra en el
diagrama. Los tornillos suministrados
están diseñados para su uso con un
buen sustrato sólido, como bloques de
ladrillo u hormigón.
4. La caja fuerte Stronghold® está
configurada de fábrica en00000. Con
esta configuración de los diales, tire de
la perilla ubicada en el lado izquierdo
para permitir que el cajón se deslice
hacia afuera.
5. Utilice la pequeña llave Allen
suministrada para retirar el tornillo de
retención de la perilla, y guarde ambos
en un lugar seguro. Después de retirar
la perilla, empuje el cabezal al que
estaba conectada hacia la caja fuerte
Stronghold®.
6. Retire la cubierta impermeable de la
caja fuerte Stronghold® y verá dos
tornillos a los lados de la caja fuerte
que sostienen el cajón en su lugar.
Retire estos tornillos y guárdelos con
los elementos anteriores.Retire el
cajón.
(Continúa al dorso)
ES
GB DE FR


