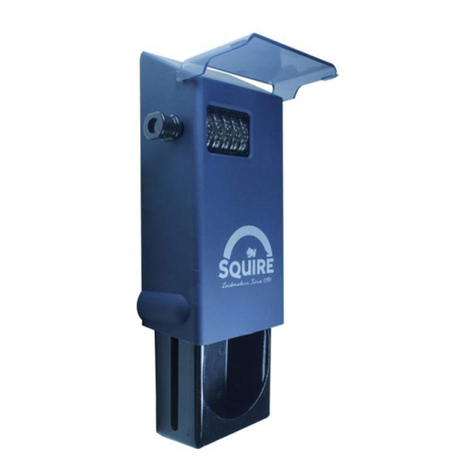
Squire KeyKeep1 User manual

TM
Fitting Instructions - KeyKeep1
Fitting the TM
KeyKeep1
TM
Opening your KeyKeep1
1. Open shutter hatch to reveal the dial and the
opening lever.
2. Dial existing combination, otherwise factory
default 0.0.0.0.
3. Press down on the opening lever.
Setting a new combination
" TM
1. Open the KeyKeep1 door to reveal the
setting mechanism.
2. Push the reset lever left and towards you and
the reset lever will stay in position.
3. Rotate dials to your preferred combination.
4. Push the reset lever up and away from you to
return to original position. Double check your
combination before closing the storage
compartment door.
5. Close the storage compartment.
6. Scramble the combination dials to lock the
TM
KeyKeep1 and conceal your combination.
7. Close the shutter hatch.
TM
Wall Mounting your KeyKeep1
NOTE: you will require an X-head/Pozi
screwdriver, a pencil, a spirit level, a drill bit, a
drill and a hammer.
TM
1. Open the KeyKeep1 door, as above.
TM
2. Position the KeyKeep1 on the desired
mounting surface (see note 1).
3. Use a spirit level to check that the
TM
KeyKeep1 is vertical.
ES
GB FR
TM
Ouverture de votre boîtier KeyKeep1
1. Ouvrez le volet obturateur pour révéler les
molettes et le levier d’ouverture.
2. Composez la combinaison existante ou la
combinaison par défaut définie en usine 0.0.0.0.
3. Abaissez le levier d’ouverture.
Définition d’une nouvelle
combinaison
TM
1. Ouvrez la trappe du boîtier KeyKeep1 pour
révéler le mécanisme de réglage.
2. Poussez le levier de réenclenchement à gauche
et vers vous. Le levier restera dans cette position.
3. Tournez les molettes de façon à composer la
combinaison souhaitée.
4. Poussez le levier de réenclenchement vers le
haut et éloignez-le de vous pour le ramener à sa
position d’origine. Vérifiez à nouveau votre
combinaison avant de fermer la porte du
compartiment de stockage.
5. Fermez le compartiment de stockage.
6. Mélangez les molettes de combinaison pour
TM
verrouiller le boîtier KeyKeep1 et dissimuler
votre combinaison.
7. Fermez le volet obturateur.
Cómo abrir su KeyKeep1™
1. Abra la cubierta obturadora para ver el dial y
la palanca de apertura.
2. Marque la combinación existente, de lo
contrario utilice la configuración de fábrica
0.0.0.0.
3. Presione la palanca de apertura hacia abajo.
Cómo configurar una nueva
combinación
TM
1. Abra la puerta de la KeyKeep1 para ver el
mecanismo de configuración.
2. Presione la palanca de reinicio hacia la
izquierda y hacia usted y la palanca de reinicio se
mantendrá en su posición.
3. Gire los diales a su combinación preferida.
4. Empuje la palanca de reinicio hacia arriba y en
dirección contraria a usted para volverla a la
posición original. Revise su combinación antes
de cerrar la puerta del compartimiento de
almacenamiento.
5. Cierre el compartimiento de almacenamiento.
6. Gire los diales de combinación aleatoriamente
TM
para bloquear la KeyKeep1 y ocultar su
combinación.
7. Cierre la cubierta obturadora."
Opening lever
Palanca de apertura
Levier d’ouverture
Openingshendel
Öffnungshebel
Dźwignia otwierająca
Alavanca de abertura
Открывающий рычаг
Leva di apertura
Shutter hatch
Cubierta obturadora
Verschlussklappe
Pokrywa opadowa
Tampa da comporta
Rotelle
Sportello
Volet obturateur
Luik
Dials
Diales
Wahltasten
Dyski z cyframi
Indicadores
Поворотные диски
Rotelle
Molettes
Draaiknoppen
TM
Montageanleitung für den KeyKeep1
TM
Consignes d’installation du boîtier KeyKeep1
TM
Instrucciones de colocación de la KeyKeep1
Registered in England No. 88907
Tel: 01902 308050 Fax: 01902 308051 E-Mail: [email protected] Website: www.squirelocks.co.uk
Henry Squire & Sons Limited
Hilton Cross Business Park, Cannock Road, Featherstone, Wolverhampton, WV10 7QZ
TM
Montageinstructies Keykeep1
TM
Instrukcje montażu KeyKeep1
TM
Instruções de Montagem do Keykeep1
TM
Инструкции по установке Keykeep1
TM
Istruzioni per l'installazione di KeyKeep1

Montage au mur de votre boîtier
TM
KeyKeep1
REMARQUE: vous aurez besoin d’un tournevis
cruciforme, d’un crayon, d’un niveau à bulle, d’une
mèche,d’une perceuse et d’un marteau.
TM
1. Ouvrez la trappe du boîtier KeyKeep1 , comme
expliqué ci-dessus.
TM
2. Placez le boîtier KeyKeep1 sur la surface de
montage souhaitée (voir la remarque1).
3. Utilisez un niveau à bulle pour vérifier que le
TM
boîtier KeyKeep1 se trouve bien à la verticale.
4. Marquez l’emplacement des trous de vis sur la
surface souhaitée.
TM
5. Retirez le boîtier KeyKeep1 .
6. Percez les trous.
7. Utilisez un marteau pour placer les chevilles (le cas
échéant).
TM
8. Placez le boîtier KeyKeep1 .
9. Insérez les vis et serrez-les.
10. Fermez le compartiment de stockage.
11. Mélangez les molettes de combinaison pour
TM
verrouiller la porte du boîtier KeyKeep1 et
dissimuler votre combinaison, puis fermez le volet
obturateur.
REMARQUES:
1. Nous vous recommandons d’installer votre boîtier
TM
KeyKeep1 dans un endroit discret à l’abri de la vue
de tous, tel qu’un porche ou un garage, hors de la
portée directe du regard.
2. Conservez le volet obturateur fermé afin
d’optimiser la résistance aux intempéries et de
dissimuler les molettes. Le levier d’ouverture
TM
permettra d’ouvrir le boîtier KeyKeep1 tant que
vous n’avez pas mélangé les molettes.
TM
Cómo montar su KeyKeep1 a la
pared
NOTA: deberá utilizar un destornillador de
cruz/Pozi, un lápiz, un nivel de burbuja, una broca,
un taladro y un martillo.
TM
1. Abra la puerta de la KeyKeep1 , tal como se
indica arriba.
2. Posicione la Key Keep™ en la superficie de
montaje deseada (ver la nota 1).
3. Utilice un nivel de burbuja para comprobar que
TM
la KeyKeep1 esté en posición vertical.
4. Marque la posición de las perforaciones de los
tornillos en la superficie deseada.
5. Retire la .
TM
KeyKeep1
6. Perfore los orificios.
7. Utilice un martillo para insertar tarugos (si es
necesario).
8. Posicione la .
TM
KeyKeep1
9. Inserte los tornillos y ajústelos.
10. Cierre el compartimiento de almacenamiento.
11. Gire los diales de combinación aleatoriamente
para bloquear la puerta de la y
TM
KeyKeep1
ocultar su combinación, luego cierre la cubierta
obturadora.
NOTAS:
1. Se recomienda que monte su en un
TM
KeyKeep1
lugar discreto fuera de la vista, como porches,
garajes, o lugares fuera del alcance de la línea
visual directa.
2. Mantenga la cubierta obturadora cerrada para
aumentar la resistencia a las inclemencias del
clima y ocultar los diales de la vista. La palanca de
apertura abrirá la hasta que usted
TM
KeyKeep1
gire los diales.
4. Mark the position of the screw holes on the
desired surface.
TM
5. Remove the KeyKeep1
6. Drill holes.
7. Use a hammer to fit wall plugs (if necessary).
TM
8. Position KeyKeep1
9. Insert and tighten screws.
10. Close the storage compartment.
11. Scramble the combination dials to lock the
TM
KeyKeep1 door and conceal your combination,
then close the shutter hatch.
NOTES:
1. We suggest that you mount your in
TM
KeyKeep1
a discrete location away from direct view, such as
porches, garages, out of direct eye line.
2. Keep shutter hatch closed to increase weather
resistance and to conceal the dials from view. The
release lever will open the until you
TM
KeyKeep1
scramble the dials.
ES
GB FR
NL
TM
Öffnen Sie Ihren KeyKeep1
1. Öffnen Sie die Verschlussklappe, um die
Wahltasten und den Öffnungshebel freizulegen.
2. Wählen Sie die bestehende Kombination,
ansonsten die Werkseinstellung 0.0.0.0.
3. Drücken Sie auf den Öffnungshebel.
Einstellen einer neuen Kombination
TM
1. Öffnen Sie die Tür des KeyKeep1 , um den
Einstellungsmechanismus freizulegen.
2. Drücken Sie den Rückstellhebel nach links und
in ihre Richtung. Der Rückstellhebel wird in
seiner Position bleiben.
3. Drehen Sie die Wahltasten, um Ihre
bevorzugte Kombination einzustellen.
4. Drücken Sie den Rückstellhebel nach oben
und von Ihnen weg, um ihn in seine
Ausgangsposition zurückzubringen. Überprüfen
Sie Ihre Kombination vor dem Schließen der Türe
des Ablagefachs mehrfach.
5. Schließen Sie das Ablagefach.
6. Drehen Sie die Wahltasten der Kombination,
TM
um den KeyKeep1 zu verriegeln und Ihre
Kombination zu verbergen.
7. Schließen Sie die Verschlussklappe.
DE PL
TM
Uw KeyKeep1 openen
1. Open het luik om de draaiknop en de
openingshendel te onthullen.
2. Kies een bestaande combinatie, anders is de
standaardinstelling 0.0.0.0.0.
3. Druk de openingshendel naar beneden.
Een nieuwe combinatie instellen
1. Open de deur van de om het
TM
KeyKeep1
instelmechanisme te onthullen.
2. Duw de reset-hendel naar links en naar u toe en
de reset-hendel zal in positie blijven.
3. Draai de draaiknoppen naar de door u
gewenste combinatie.
4. Duw de reset-hendel omhoog en van u af om
terug te keren naar de oorspronkelijke positie.
Controleer uw combinatie dubbel voordat u de
deur van het opbergvak sluit.
5. Sluit het opbergvak.
6. Beweeg de combinatiedraaiknoppen om de
TM
KeyKeep1 te vergrendelen en uw combinatie te
verbergen.
7. Sluit het luik.
TM
Otwieranie KeyKeep1
1. Otworzyć pokrywę opadową, aby odsłonić
przyciski idźwignię otwierającą.
2. Wybrać istniejącą kombinację - domyślna
fabryczna kombinacja to 0.0.0.0.
3. Nacisnąć dźwignię otwierającą.
Ustawianie nowej kombinacji
TM
1. Otworzyć pokrywę KeyKeep1 , aby odsłonić
mechanizm ustawiania.
2. Pociągnąć dźwignię resetującą w lewo i do
siebie. Dźwignia resetująca pozostanie w tej
pozycji.
3. Obrócić dyski z cyframi, aby wybrać
kombinację.
4. Przeciągnąć dźwignię resetującą do góry i od
siebie, aby powróciła do pierwotnej pozycji. Przed
zamknięciem pokrywy należy sprawdzić
kombinację.
5. Zamknąć przedział urządzenia.
6. Pomieszać cyfry kombinacji, aby zamknąć
TM
KeyKeep1 inie ujawniać swoje kombinacji.
7. Zamknąć pokrywę opadową.

NL DE PL
TM
Wandmontage Ihres KeyKeep1
HINWEIS: Sie werden einen X-head/Pozi-
Schraubendreher, einen Bleistift, eine
Wasserwaage, einen Bohrer, einen Bohrer und
einen Hammer benötigen.einen Bohrer und einen
Hammer benötigen.
TM
1. Öffnen Sie die Türe des KeyKeep1 , wie oben
beschrieben.
TM
2. Positionieren Sie den KeyKeep1 auf die
gewünschte Montagefläche (siehe Hinweis 1).
3. Verwenden Sie eine Wasserwaage, um zu
TM
überprüfen, dass der KeyKeep1 senkrecht ist.
4. Markieren Sie auf der gewünschten Oberfläche
die Position der Schraubenlöcher.
TM
5. Entfernen Sie den KeyKeep1
6. Bohren Sie die Löcher.
7. Verwenden Sie einen Hammer, um die Dübel
einzupassen (falls erforderlich).
TM
8. Positionieren Sie den Key KeyKeep1 .
9. Setzen Sie die Schrauben ein und ziehen Sie sie
an.
10. Schließen Sie das Ablagefach.
11. Drehen Sie die Wahltasten der Kombination,
TM
um die Türe des KeyKeep1 zu verriegeln und Ihre
Kombination zu verbergen, dann schließen Sie die
Verschlusskappe.
HINWEISE:
TM
1. Wir empfehlen Ihnen, Ihren KeyKeep1 an
einem diskreten Ort, vor neugierigen Blicken
geschützt zu montieren, wie Terrassen, Garagen.
2. Halten Sie die Verschlussklappe geschlossen, um
die Wetterbeständigkeit zu erhöhen und die
Wählskala vor Blicken zu verbergen. Der
TM
Auslösehebel wird den KeyKeep1 so lange
öffnen, bis Sie die Wahltasten drehen.
PT RU IT
TM
Wandmontage van uw KeyKeep1
OPMERKING: u hebt een X-
kop/Pozischroevendraaier, een potlood, een
waterpas, een boor, een boormachine en een
hamer nodig.
TM
1. Open de deur van de KeyKeep1 , zoals
hierboven.
TM
2. Plaats de KeyKeep1 op het gewenste
montagevlak (zie opmerking 1).
3. Gebruik een waterpas om te controleren of de
TM
KeyKeep1 verticaal is.
4. Markeer de positie van de schroefgaten op het
gewenste oppervlak.
TM
5. Verwijder de KeyKeep1
6. Boorgaten.
7. Gebruik een hamer om pluggen te monteren
(indien nodig).
TM
8. Plaats de KeyKeep1
9. Plaats de schroeven en draai ze vast.
10. Sluit het opbergvak.
11. Beweeg de combinatiedraaiknoppen om de
TM
KeyKeep1 te vergrendelen en uw combinatie te
verbergen, en sluit vervolgens het luik.
OPMERKINGEN:
1. We raden u aan om uw Key Keep™ te monteren
op een discrete plaats, uit het direct zicht, zoals
veranda's, garages...
2. Houd het luik gesloten om de
weerbestendigheid te verhogen en de
draaiknoppen aan het zicht te onttrekken. De
TM
ontgrendelingshendel opent de KeyKeep1 tot u
de draaiknoppen door elkaar haalt.
TM
Montaż ścienny KeyKeep1
UWAGA: będzie potrzebny śrubokręt
krzyżakowy/Pozi, ołówek, poziomica, wiertło,
wiertarka i młotek.
TM
1. Otworzyć pokrywę KeyKeep1 jak powyżej.
TM
2. Ustawić KeyKeep1 na pożądanej powierzchni
montażowej (patrz uwaga 1).
3. Użyć poziomicy, aby sprawdzić pionowe
TM
ustawienie KeyKeep1 .
4. Na pożądanej powierzchni zaznaczyć pozycję
otworów na śruby.
TM
5. Zdjąć KeyKeep1 .
6. Wywiercić otwory.
7. Użyć młotka do wbicia kołków rozporowych (jeśli
to konieczne).
TM
8. Ustawić KeyKeep1 .
9. Włożyć i dokręcić śruby.
10. Zamknąć przedział urządzenia.
11. Pomieszać cyfry na dyskach, aby zablokować
TM
drzwiczki KeyKeep1 iukryć swoją kombinację, a
następnie zamknąć pokrywę opadową.
UWAGI:
TM
1. Zalecamy mocowanie KeyKeep1 w dyskretnym
miejscu, aby nie był od razu widoczny. Takie miejsca
to ganki, garaże, a nie w widocznym miejscu.
2. Pokrywę należy zamykać, aby zwiększyć ochronę
przed warunkami atmosferycznymi izakryć dyski z
cyframi. Dźwignia zwalniająca spowoduje otwarcie
TM
KeyKeep1 do momentu zmieszania cyfr.
TM
Abrir o seu KeyKeep1
1. Abra a tampa da comporta para revelar o
mostrador e a alavanca de abertura.
2. Marque o código existente. Caso contrário, a
predefinição de fábrica é 0.0.0.0.
3. Pressione para baixo na alavanca de abertura.
Definir uma nova combinação
TM
1. Abra a porta KeyKeep1 para revelar o
mecanismo de ajuste.
2. Empurre a alavanca de redefinição para a
esquerda e na sua direção para que esta alavanca
se mantenha em posição.
3. Rode os indicadores até obter a sua
combinação pretendida.
4. Empurre a alavanca de redefinição para cima e
na direção oposta a si para voltar à posição
original. Verifique duas vezes a sua combinação
antes de fechar a porta do compartimento de
armazenamento.
5. Feche o compartimento de armazenamento.
6. Embaralhe aleatoriamente os indicadores para
TM
bloquear o KeyKeep1 e ocultar a sua
combinação.
7. Feche a tampa da comporta.
Открытие KeyKeep1TM
1. Откройте защитную крышку, чтобы
получить доступ к поворотным дискам и
рычагу.
2. Наберите установленную комбинацию. Если
она не задана — стандартную заводскую
комбинацию (0.0.0.0).
3. Потяните рычаг вниз.
Установка новой комбинации
1. Откройте дверцу KeyKeep1 , чтобы
TM
получить доступ к механизму настройки.
2. Потяните рычаг сброса влево и на себя,
после чего он зафиксируется в этом
положении.
3. Поверните диски, чтобы установить
желаемую комбинацию.
4. Потяните рычаг сброса вверх и от себя,
чтобы вернуть его в первоначальное
положение. Дважды проверьте свою
комбинацию перед тем, как закрывать дверцу
отсека для хранения.
5. Закройте отсек для хранения.
6. Прокрутите поворотные диски, чтобы
заблокировать KeyKeep1 и скрыть свою
TM
комбинацию.
7. Закройте защитную крышку."
Aprire KeyKeep1TM
1. Aprire lo sportello per scoprire le rotelle e la
leva di apertura.
2. Inserire la combinazione esistente oppure
quella di fabbrica, cioé 0.0.0.0.
3. Spingere la leva di apertura verso il basso
Impostare una nuova combinazione
1. Aprire lo sportello di KeyKeep1 per rivelare il
TM
meccanismo delle impostazioni.
2. Spingere la levetta di reset verso sinistra e
verso di sé: in questo modo la leva di reset
resterà in posizione.
3. Girare le rotelle fino a impostare la
combinazione personale.
4. Spingere la levetta di reset verso l'alto, in
direzione opposta rispetto a sé, per riportala
nella posizione originale. Verificare nuovamente
la combinazione, quindi chiudere lo sportello.
5. Chiudere il vano.
6. Girare le rotelle della combinazione in
posizione casuale per bloccare KeyKeep1 e
TM
nascondere la combinazione personale.
7. Chiudere lo sportello.

PT RU IT
Registered in England No. 88907
Tel: 01902 308050 Fax: 01902 308051 E-Mail: [email protected] Website: www.squirelocks.co.uk
Henry Squire & Sons Limited
Hilton Cross Business Park, Cannock Road, Featherstone, Wolverhampton, WV10 7QZ
Montagem do seu KeyKeep1 na
TM
Parede
ATENÇÃO: precisará de uma chave de fendas de
cabeça X/Pozi, um lápis, um medidor de nível,
uma broca, um berbequim e um martelo.
TM
1. KeyKeep1 Abra a porta do , conforme
indicado acima.
TM
2. KeyKeep1 Posicione o sobre a superfície de
montagem pretendida (ver nota nº 1).
3. Utilize um medidor de nível para verificar que
o está na vertical.
TM
KeyKeep1
4. Marque a posição dos orifícios dos parafusos
na superfície pretendida.
TM
5. KeyKeep1 Retire o .
6. Faça os respetivos furos na parede.
7. Utilize um martelo para encaixar as buchas
(caso seja necessário).
TM
8. KeyKeep1 Posicione o
9. Insira os parafusos e aperte-os.
10. Feche o compartimento de armazenamento.
11. Embaralhe aleatoriamente os indicadores
para bloquear o e ocultar a sua
TM
KeyKeep1
combinação. Feche a tampa da comporta de
seguida.
NOTAS:
TM
1. KeyKeep1Sugerimos que monte o seu num
local discreto e longe da vista direta, como uma
varanda ou garagem (afastado do contacto
visual direto).
2. Mantenha a tampa da comporta fechada de
forma a melhorar a resistência às intempéries e
para ocultação dos botões. A alavanca de
desbloqueio manterá o aberto até
TM
KeyKeep1
que embaralhe aleatoriamente os indicadores."
Установка KeyKeep1 на стену
TM
ПРИМЕЧАНИЕ: вам понадобится крестовая
отвертка, карандаш, спиртовой уровень,
сверло, дрель и молоток.
1. Откройте дверцу , как описано
TM
KeyKeep1
выше.
2. Приложите на выбранную
TM
KeyKeep1
поверхность (см. примечание 1).
3. С помощью спиртового уровня проверьте,
чтобы был установлен
TM
KeyKeep1
вертикально.
4. Отметьте расположение отверстий для
шурупов на поверхности.
5. Уберите .
TM
KeyKeep1
6. Просверлите отверстия.
7. С помощью молотка установите дюбели
(если необходимо).
8. Установите .
TM
KeyKeep1
9. Вставьте и затяните шурупы.
10. Закройте отсек для хранения.
11. Проверните поворотные диски, чтобы
заблокировать дверцу KeyKeep1TM и скрыть
свою комбинацию, после чего закройте
защитную крышку.
ПРИМЕЧАНИЯ:
1. Рекомендуем установить не на
TM
KeyKeep1
заметном месте, например, на веранде или в
гараже.
2. Защитную крышку рекомендуется держать
закрытой, чтобы защитить сейф от погоды и
скрыть поворотные диски.
TM
KeyKeep1
можно открыть рычагом, пока вы не
провернули диски."
Installare KeyKeep1 a parete
TM
NOTA: è necessario procurarsi un cacciavite a
taglio/a stella, una matita, una livella a bolla, una
punta da trapano, un trapano e un martello.
TM
1. KeyKeep1Aprire lo sportello di , come
illustrato nell'immagine qui sopra.
TM
2. KeyKeep1 Posizionare sulla superficie di
montaggio desiderata (vedere nota 1).
3. Utilizzare una livella a bolla per verificare che
TM
KeyKeep1 sia in posizione verticale.
4. Segnare la posizione dei fori per le viti sulla
superficie di installazione.
TM
5. KeyKeep1Rimuovere .
6. Praticare i fori.
7. Utilizzare un martello per fissare i tasselli nel
muro (se necessario).
TM
8. KeyKeep1 Posizionare .
9. Inserire e stringere le viti.
10. Chiudere il vano.
11. Girare le rotelle della combinazione per
bloccare e nascondere la
TM
KeyKeep1
combinazione personale, quindi chiudere lo
sportello.
NOTE:
TM
1. KeyKeep1Si consiglia di montare il in una
posizione riservata, lontana dalla vista diretta, ad
esempio sotto un porticato o in garage, comunque
non a vista.
2. Tenere lo sportello chiuso per aumentare la
resistenza agli agenti atmosferici e per nascondere
le rotelle alla vista. La leva di rilascio aprirà
TM
KeyKeep1 fino a quando le rotelle non saranno
girate in posizione casuale."
Other Squire Safe manuals