SS Telecoms SS-T98 User manual

-1-
User Manual
SS-T98 Cordless Telecoms
1. INTRODUCTION
The SS-T98 User Manual aims to guide you to understand the main features and operational procedures
of this phone.
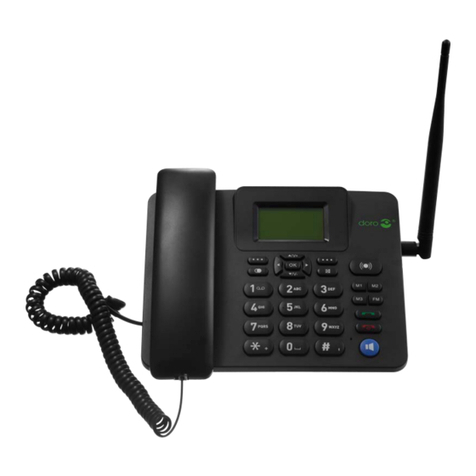
The SS-T98 is designed for GSM (2G) Networks. Besides basic voice calls, text messaging, it also
provides various practical functions such as a Phonebook Function, FM Radio, Alarm, Calendar,
Calculator and Speed dial key, to make your work and life more convenient.

-2-
2. FUNCTIONS
2.1 Keys
2.2 Function of keys
(1) Top Left Soft Key
(2) Top Right Soft key
Perform the function indicated by text displayed on the screen.
(3) SEND
Press the send button after you have entered or selected the
telephone number you want to dial to initiate an outgoing call;
Press it to answer an incoming call;
Press it in standby state to view the latest call records.
(4) END
Press it to reject an incoming call, cancel an ongoing call, or end the
current active call;
Press it to exit the menu and return to the standby state;
Press and hold it for a while to power on / off the phone.
(5) UP
(6) DOWN
(11) RIGHT
(12) LEFT
In list mode, press UP/DOWN to view available options or functions.
In edit state, press UP/DOWN/RIGHT/LEFT to navigate.
In standby state, press UP/DOWN/RIGHT/LEFT to enter a specified
function page.
(7) OK
Press it to confirm the current selection or configuration.
(8) [#] and [*] key functions
Press [#] (repeatedly) to enter numbers or characters, from
uppercase to lowercase or to numbers in edit state;
Press [*] key repeatedly to enter *, +, pand wwhen dialing;
Press *key to enter symbols in edit state; Press [#] key to switch
input methods in edit state;
Hold [#] key to switch between silent and current mode in standby
state.
In standby state, press the [left soft key] and then [*] key to lock /
unlock the keypad.
(9) FM
In standby state, press [bottom left radio] key to enter the FM
interface, hold [bottom left radio] key to turn off FM.
Press [OK] to turn Radio On or Off
(10) SD
Speed Dial
In standby state, press [SD] key to dial a number preset in the
Speed dial submenu.

-3-
2.3 Battery
It is recommended that you fully charge the battery of your phone before first use.
2.4 Charging the battery
Battery power levels are indicated by the battery level icon at the upper right corner of the display.
When the battery power level is insufficient, "Battery low" will be displayed on the display.
If you have set an alert tone, an alert tone will be triggered when the battery power level is too
low.
A charging animation appears when the battery is being charged.
When the charging is completed, the animation disappears.
2.5 Installing the SIM Card
Lift the back cover at the top of the battery from the bottom gap and remove it.
Lift the battery buckle outwards from the upside gap and remove it.
Insert the SIM card into the SIM card slot with the corner cutting of the card aligning with the icon
and the gold plate of the card facing download.
With the metallic contacts of the battery facing the metallic contacts in the battery compartment,
press the battery down until it locks into place.
2.6 Unlocking the SIM card when PIN Lock is set to [On]
Press and hold the END key to power on the phone.
You will now be prompted to enter your PIN code.
Enter PIN code by pressing the corresponding number on the phone keypad.
Use the Right Function Key to clear the incorrect entries.
If you enter a wrong PIN code three consecutive times, your SIM card will be locked by service
provider and the phone will ask for a PUK code.
If you don’t know the PUK code, do not enter random codes as this will permanently disable your
SIM card.
Please contact your Service Provider to request your PIN or PUK numbers if unsure.
Note: By enabling PIN (personal identification number) code of SIM card and or the handset lock
code, you can protect your SIM card and phone from illegal usage.
When this function is enabled, you have to enter your PIN code each time you power on your
phone.
2.7 By following the below easy steps you can set PIN Lock [On] or [Off]
In the standby state of your phone, press the [top left soft key] / [MENU],
Scroll up or down and select [Settings] by pressing the left soft key [OK] or the [OK] key in the
centre of the navigation keys,
Scroll up or down to [11 Security] and press [OK],
Select [1 SIM] and press [OK],
Select [1 PIN Lock] and press [OK],
At this stage, if your PIN code is disabled, your device will provide you with the option to enable it.
If the PIN code is enabled, you can now disable it.
To return to the standby screen of your phone, you can simply press the right [top right soft key],
or the [END] key.
2.8 Making calls
In the standby state, press number keys to input the area code and the telephone number, and
then press the [SEND] key to initiate a call.
To dial a number from the phone book, in the standby state, Press the [top right soft key] /
[Contacts],
To select the specific contact, use the up or down arrows to move to the name and number you
want to dial.
Under [Contacts] you can use the search function to find the name and number your want to dial
by simple using the keypad by typing in the name of contact you are looking to call.
Once you have located the relevant contact, press the [Send] key to initiate the call.
To end an active call, press the [END] key.

-4-
3. MENUS
3.1 Messages
When receiving a new text message, your phone will alert you (if notification alerts are activated)
to inform you a new message is received.
The new message alert will be indicated on the screen. The view the new text message, press on
view.
This phone can store up to 100 SMS entries.
The number of SMS that an SIM card can store depends on the storage capacity of the SIM card.
3.1.1 Write Message
In the standby state of the phone, press the [top left soft key] / [MENU],
Scroll up or down and select [Messages] and press [OK],
Select [1 Write message] and press [OK].
Now enter the message by pressing the corresponding keys on the phone keypad. Once entered,
press [OK].
You can now either enter the number of the recipient manually by selecting [Enter number] or
select the number for your contacts by scrolling down and selecting [Add from Phonebook]
When selecting the recipient from the phonebook, you can either scroll up or down to the specific
contact, or alternative type in the name of the required contact to search for it.
When you have selected the contact or manually entered the number, you need to press [OK] and
[OK] again to send the message.
3.1.2 Read Messages
In the standby state of the phone, press the [top left soft key] / [MENU],
Scroll up or down and select [Messages] and press [OK],
Select [2 Inbox] and press [OK].
All your new and read messages will be displayed here.
To read your message, scroll to the specific message and press [OK].
Press the [top right soft key] to return to the previous menu function or the [END] key to return to
standby state.
3.1.3 Viewing Draft Messages
In the standby state of the phone, press the [top left soft key] / [MENU],
Scroll up or down and select [Messages] and press [OK],
Select [3 Drafts] and press [OK].
Select the draft message by pressing the up or down keys and then press [OK].
You can now either edit the message if needed or just enter the number of the recipient manually
by selecting [Enter number] or select the number for your contacts by scrolling down and
selecting [Add from Phonebook]
When selecting the recipient from the phonebook, you can either scroll up or down to the specific
contact, or alternative type in the name of the required contact to search for it.
When you have selected the contact or manually entered the number, you need to press [OK] and
[OK] again to send the message.
Press the [top right soft key] to return to the previous menu function or the [END] key to return to
standby state.
3.1.4 Outbox messages
In the event where a message fails to send, for example when you are out of coverage or you do
not have a positive airtime balance, the failed messages sent out will be stored in the
Messages Outbox.
In the standby state of the phone, press the [top left soft key] / [MENU],
Scroll up or down and select [Messages] and press [OK],
Select [4 Outbox] and press [OK].
Select the saved message by pressing the up or down keys and then press [OK].

-5-
To View, Resend, Edit or Delete, Delete All or display message Outbox messages details by
selecting the specific function and press [OK].
Press the [top right soft key] to return to the previous menu function or the [END] key to return to
standby state.
3.1.5 Sent Messages
To view the history of text messages sent, select [5 Sent messages] under [Messages].
To view the message details, scroll to the message you want to view and press the [top left soft
key] for the following functions:
1. View: This will show you the body of the text message sent.
Whilst the text message body is being displayed, press the [top left soft key] for the following
functions:
1. Forward: Forward the message to a new recipient
2. Delete: Delete the selected message
3. Advanced:
1) Use Number: If there is a number in the text message, you can now select to reuse
the number for SMS or a new outgoing call.
2) Use USSD: If there is a USSD string, such as *101# for example in the text
message, you can now select to reuse the USSD string.
3) Copy to phone: Copy the text message to the Phone memory –The original
message will still be on the SIM card as well.
4) Move to phone: Move the message from the SIM card to the Phone memory –The
original message will be removed from the SIM card.
4. Details: The following details about the text message sent are displayed here: Number
sent to, Type of message, Creation date and time and Storage location (SIM or Phone)
Press the [top right soft key] to return to the previous menu function or the [END] key to return to
standby state.
3.1.6 Settings
To view the access text messaging settings, select [6 Settings] under [Messages].
You have the following functions available under [Settings]:
SIM:
oSMSC address: The SMSC number is set by the Network Operator –Do not change the
number as it will result in failed attempts when sending text messages.
oDelivery Report [On] or [Off]: You can select [ON] to get notification of when a SMS is
successfully delivered to the recipient. Alternatively set this to [OFF].
oReply Path [On] or [Off]: Reply path refers to the message centre number that is used
when a recipient replies to a text message that they have received from you. If reply path is
ticked, the recipient will only be able to send their reply back to you using the same
message centre number that it was received through. If this message centre is too busy at
any time, you may have trouble receiving the text message.
Memory Status
oView the memory status of the SIM card and Phone here. This indicates available storage
space for SMS’s stored on the device.
Save sent messages [On] or [Off]
oYou can manually select here if you want to keep a copy of all sent messages by selecting
[On], or alternatively set this to [No] to automatically delete sent messages from the SIM
card and / or Phone storage location.
Preferred Storage (SIM / Phone)
oSelect here which memory should be used by default when storing messages. You can
select from [SIM] or [Phone] respectively.
Press the [top right soft key] to return to the previous menu function or the [END] key to return to
standby state.
3.1.7 Voicemail
To set your voicemail number, select [7 Voicemail] under [Messages].
Your Voicemail Setting should display [empty] if not previously set up.
Select [Edit] by pressing the [left top soft key], enter [Name], for example, Voicemail and then
scroll down to [Number] and enter your Voice Mail Number, for Example 181 for Telkom.
When completed, press the [top left soft key] to [Save] your entry.

-6-
Note: Once your Voicemail Number is stored under this menu, in idle mode to can simply press
[1] and hold it in to quick dial the saved voicemail number.
3.2 Phonebook / Names
You can store the names and mobile phone numbers in your phonebook.
The SS-T98 phone can store up to 300 names and telephone numbers.
The number of telephone numbers that an SIM card can store depends on the storage capacity of
the SIM card.
Press the [top right soft key] to return to the previous menu function or the [END] key to return to
standby state.
3.2.1 Add new contact
In the standby state of the phone, press the [top left soft key] / [MENU],
Scroll up or down and select [Phonebook] and press [OK],
Press the up key and highlight [Add new contact] and press [OK],
Select [1 To SIM] or [2 To Phone] for desired storage location and press [OK],
Enter the name of the contact under the [Name] section,
Scroll down to [Number] and capture the number of the contact.
Press [OK] to save the new entry
Press the [top right soft key] to return to the previous menu function or the [END] key to return to
standby state.
3.2.2 To view a contact / Search for a contact
In the standby state of the phone, press the [top right soft key] / [Contacts] and select the contact,
alternatively follow these steps:
In the standby state of the phone, press the [top left soft key] / [MENU],
Scroll up or down and select [Phonebook] and press [OK],
Use the Up or Down keys to navigate to the required contact,
Alternatively, start typing the name of the contact under the search field.
When the desired contact is highlighted, press the [top left soft key] for the following options:
1. View: View the name and number of the selected Contact
2. Send SMS: Send a text message to the selected contact.
3. Call: Initiate a voice call to the selected contact.
4. Edit: Edit the Name or the Number for the selected contact.
5. Delete: Delete the selected contact.
6. Copy: Copy the selected contact to Phone or SIM card Memory.
7. Move: Move the selected contact from Phone Memory to SIM Memory, or from SIM
Memory to Phone Memory.
8. Add to speed dial key: The bottom right [SD] key can be used to act as an emergency /
panic bottom for quick dialing. When adding a number to this setting, the number can be
dialed by simply pressing [bottom right SD] key. Only one emergency / frequently dialed
number can be stored under this key. Also refer to 3.5 Settings
9. Add to blacklist: Select this feature to block all incoming calls from this contact / number.
10.Settings: See list of Settings Options listed below:
1. Memory Status
Here you can view the total number of contacts stored on your SIM Card and
your Phone memory.
SIM Capacity: Dependent on the size SIM card in your phone. Check this with
your Network Operator.
Phone Capacity: 300 Names and Numbers
Press the [top right soft key] to return to the previous menu function or the [END]
key to return to standby state.
2. Speed Dial
You can select Speed dial [On] or [Off]. When set to [Off], you will not be able to

-7-
press and hold in a key to initiate a speed dial call.
Select numbers from phonebook and assign to numbers [2] to [9] for speed
dialing.
3. Copy contacts
By selecting [Copy contacts] you duplicate the names on your SIM card to your
Phone or from your Phone to your SIM card.
When selecting [To phone] > [OK], the numbers on your SIM Card will
automatically be copied to the Phone memory.
When selecting [To SIM] > [OK], the numbers on your Phone will automatically
be copied to the SIM Card memory.
Press the [top right soft key] to return to the previous menu function or the [END]
key to return to standby state.
4. Move Contacts
By selecting [Move contacts] names stored on the Phone or the SIM card is
removed from its current storage location and moved to the new location.
When selecting [To phone] > [OK], the numbers on your SIM Card will
automatically be deleted from the SIM card and moved to the Phone memory.
When selecting [To SIM] > [OK], the numbers on your Phone will automatically
be deleted from the Phone and moved to the SIM Card memory.
Press the [top right soft key] to return to the previous menu function or the [END]
key to return to standby state.
5. Delete all
[Delete all contacts] provides you with the option to either delete all contacts
[From SIM] or [From Phone].
Please note that this cannot be undone or reversed, if you delete your entire
phonebook by accident, your numbers will be lost, unless backed up elsewhere.
Steps to [Delete all contacts]: [Menu] > [Phonebook] > [top left soft key] >
[Settings] > [Delete all contacts] > Select either [From SIM] or [From Phone] >
[OK]
Press the [top right soft key] to return to the previous menu function or the [END]
key to return to standby state.
3.3 Profiles
Multiple user profiles allow you to customize alert settings to adapt to your specific requirements.
Customize the user profiles according to your preference and then activate the user profiles.
In the standby state of the phone, press the [top left soft key] / [MENU], Scroll up or down and
select [Profiles] and press [OK].
You have three (4) four options to select from here:
1. General, Silent or Outdoor
To select, highlight desired Profile and press [OK]
For advanced features, when highlighted, press the [top left soft key] from where
you will be able to access the following options:
1) Activate
By pressing [OK], you will activate the Profile selected.
Press the [top right soft key] to return to the previous menu
function or the [END] key to return to standby state.
2) Customize
Here you can change the [Ring type] from [Repeat] to [Beep once],
Change the [Ringtone]
You can select from 6 default [Ringtones] recorded on the device
by pressing [OK] on the selected tone for the current profile.

-8-
When scrolling down to [Ringtone volume], you need to navigate
[Left] to reduce the [Ringtone volume] and right to increase the ring
volume. To save press the [OK] key.
You also have the option to change the [Message] Tone. Select
from 6 prerecorded message alert tones by scrolling up and down
to the desirable tone best suited for the selected profile, then press
[OK] to save.
To adjust the [Message volume], you need to navigate [Left] to
reduce the [Message volume] and right to increase the [Message
volume]. To save press the [OK] key.
The [Keypad] sound can also be set between [Tone], [Silent] or
[Click] or [Human Voice], based on your preferences. To select,
navigate left of right and press [OK] to save.
The [Keytone volume] can also be adjusted louder or softer by
simply navigating left to reduce the sound levels and right to
increase the volume, press [OK] to save.
Set [System alert] to [On] to enable warning tone alerts, such as
[Low Battery]. Switch to [Off] to disable. Once you selection has
been made, press [OK] to save.
Press the [top right soft key] to return to the previous menu
function or the [END] key to return to standby state.
Note: The [Silent] Profile can only be [Activated], you cannot edit
this Profile.
3) Reset
When selecting [Reset] > [OK], your Profile settings will default
back to the standard factory settings.
3.4 Calls
3.4.1 Missed, Dialed, Received and All calls
The SS-T98 stores logs of Missed calls, Dialed calls and Received calls - Up to 20 entries each.
To view [Call History], in standby mode select [Menu] and scroll up or down to find [Call History],
then press [OK].
When viewing the calls under [Missed calls], [Dialled calls], [ Received calls] or [All calls], you
have the following actions you can perform when you press the [top left soft key]:
1. View: View the number the call was made to or received from, as well as the date, time
and duration thereof.
2. Call: Initiate a phone call to the entry you are viewing by pressing [OK].
3. Send SMS: Compose a text message and send it to the entry being viewed by pressing
[OK], typing your message and send by pressing [OK] again
4. Save to phonebook: If the number dialed or received is not stored in your phonebook, you
can select [Save to phonebook] > [OK] > select storage location [To SIM] or [To Phone],
Type in a name for the contact, and then press [OK] to save the new entry.
5. Add to blacklist: To block specific numbers for calling you, you can from here press [OK]
on [Add to blacklist] to block all future incoming calls from that number. To confirm your
entry, press [OK] when prompted “Add to blacklist?”
Press the [top right soft key] to return to the previous menu function or the [END] key to
return to standby state.
6. Delete: Delete the call entry from your Call History logs by selecting [OK] when the
[Delete] is highlighted.
3.4.2 Clear all
When pressing [OK] [Clear all], you can choose to Delete [Dialled calls], [Missed calls],
[Received calls] or [All calls].
To confirm the action to be taken, the phone will display [Delete all?] on the screen, if you are
certain, press the [OK] to proceed. If uncertain, press the [top right soft key] to return to the
previous menu.
Press the [top right soft key] to return to the previous menu function or the [END] key to return to

-9-
standby state.
3.4.3 Call Timers
To view [Call timers], in standby mode select [Menu] and scroll up or down to find [Call History].
Scroll down to [Call timers] then press [OK]
Here you will be able to view the call durations for your Last dialed Call, All Dialed Calls as well as
All Received Calls.
You can clear the [Call timers] by pressing the [top left soft key] whilst viewing the call timers and
select [Reset all] followed by [OK].
Press the [top right soft key] to return to the previous menu function or the [END] key to return to
standby state.
3.5Settings
Here you can set different parameters of the SS-T98 according to your preferences.
To view your phone [Settings], in standby mode select [Menu] and scroll up or down to find
[Setting], then press [OK]
Here you will be able to select and change the following options.
1. Date and Time: When selected, you have the following options:
1) Home city: Press [OK] and select you home city, for example
Johannesburg. Press [OK] to save your new settings.
2) Time & date: Press [OK] to set [Time}, Scroll down to enter [Date]. Press
[OK] to save your new settings.
3) Format: Press [OK] to change the [Time] format from 12 to 24 or from 24
to 12 hours. Scroll down to [Date] and select from 3 variables on based
on your preferences on how the date must be displayed when viewed.
Press [OK] to save your new settings.
2. Speed Dial Key:
1) For quick access and emergency calling, you can assign one number for
the SD (Speed Dial) key located at the bottom right hand corner of your
device.
2) When highlighted select [Speed Dial Key] by pressing [OK].
3) Press [OK] again and enter the [User name], scroll down and enter the
[Phone] number, followed by pressing the [top left soft key] followed by
the [top left soft key] again to save the entry.
3. Display: 1) When you select [Display] you can change your [Wallpaper] by selecting
from 3 preloaded images, stored on the device.
2) Under [Wallpaper], select [System] > [OK] and then scroll up or down to
view your available options, then press [OK] to save your selection.
3) Below you will find [Brightness] which enables you to set the brightness of
your phone screen by navigating left or right.
4) You can also adjust the time limits controlling how long the backlight
would stay on by selecting [Backlight] and then navigating up or down to
the desired time limit. To save your settings, press [OK].
4. Language: 1) The Only available Language on this device is [English].
2) No alternative language options available.
5. Pref. (preferred) input method:
1) By pressing [OK] on the [Pref. input method] option, you can set the
default method, i.e. Smart ABC, Smart abc, Smart Abc, ABC, abc, Abc, or
Numeric for when composing messages or adding a new contact.
2) By scrolling up or down to the preferred input method, make selection by
pressing [OK] to save setting.
3) When composing a messages or entering a new contact name, you can
also simply press the [#] key to change your input method manually.

-10-
6. Flight Mode:
1) When pressing [OK] on [Flight mode], you have the option to set your
phone to [Normal mode] or to [Flight mode]. When the desired setting is
highlighted, press [OK] to select and save option.
2) Please note, when selecting [Flight mode] your device’s GSM radio
receiver is deactivated and you will not be able to receive or make calls,
nor will you be able to send or receive and SMS’s.
7. Keypad lock:
1) You can set your keypad lock to lock your keypad automatically after 15s,
30s, 1m or 5m according to your preferences.
2) Use your up or down navigation keys to select the relevant time and press
[OK] to make selection and save.
3) To unlock the keypad, press the [top left soft key] and the [*].
4) To manually lock the keypad, press and the [top left soft key] followed by
[*] to lock your keypad.
8. Shortcuts: 1) For easy access to menus and features you regularly use faster, you can
select from [Alarm], [Calculator], [Calendar], [Dialled calls], [Missed calls],
[Received calls], [FM radio], [Phonebook], [Settings], [Add new contact],
[Profiles], [Messaging], [Write message], [Inbox] or [Sent messages] and
same them in order of importance from 1 to 10 on your [Shortcut key].
2) To set up or edit your [Shortcuts], press the [top left soft key] and select
[Add], then select the place where the menu should be, for example slot 5
by navigating left or right. Followed by [OK] to save.
3) You can change the order of the menus under the shortcut keys by
pressing the [top left soft key] and then [Edit]. Scroll up or down to the
menu you want to move up or down and press [OK]. Now scroll up or
down again to the desired location and to swap the two menu locations
around and press [OK] to confirm and save.
4) You can also permanently remove a menu from your [Shortcuts] by
selecting [Delete] or alternatively [Delete all], followed by [OK].
5) Lastly you can also select to [Change order], meaning you can move one
menu from slot 9 to slot 2 for example. To do this, view your [Shortcuts]
and on the menu your wish to move up or down, press the [top left soft
key] and select [Change order]. By navigating left or right you can now set
the priority and positioning in your Shortcuts menu, when set, press [OK]
to confirm and save.
9. Call:
1) Call Waiting:
Activate: When highlighted, press [OK] to get notified of
incoming calls whilst busy in another call.
Deactivate: When highlighted, press [OK] to cancel [Call
Waiting].
Query Status: When highlighted, press [OK] to see the [Call
waiting] status.
Please Note: This feature is Network dependent and may not
work on all Networks.
2) Call Divert:
Located under this feature, you have the option to [Divert all
voice calls], [Divert if unreachable], [Divert if no answer],
[Divert if busy], [Divert all data calls] and also [Cancel all
diverts].
Select the desired [Call divert] option for your specific
requirement by scrolling up or down and once highlighted,
press the [OK] key for the following options:
i. Activate: When highlighted, press [OK] > [New number]
> [OK] > Enter alternative number > [OK] and [OK] again

-11-
to return to [Call divert] menu;
Or
When highlighted, press [OK] > [To Voicemail > [OK] >
and [OK] again to return to [Call divert] menu.
ii. Deactivate: When highlighted, press [OK] to deactivate
active diverts.
iii. Query status: When highlighted, press [OK] to view the
status of the specific divert function viewed.
To [Cancel all diverts], select [Cancel all diverts] under the [Call
divert] menu and press [OK].
Please Note: This feature is Network dependent and may not
work on all Networks.
3) Call barring:
[Outgoing calls]: Under [Call barring] select [Outgoing calls] >
[OK] and select from [All voice calls], [International calls] or
[International calls except home] > [OK]. From here you have
three options namely [Activate], [Deactivate] and [Query
Status].
i. Activate: To [Activate] Call barring, you need to press
[OK] and then enter your [Call barring password].
ii. Deactivate: To [Deactivate] Call barring, select [OK] and
enter your [Call barring password] and [OK].
iii. Query Status: When highlighted, press [OK] to see the
[Call barring] status.
[Incoming calls]: Under [Call barring] select [Incoming calls] >
[OK] and select from [All voice calls] or [Voice calls when
roaming] > [OK]. From here you have three options namely
[Activate], [Deactivate] and [Query Status].
iv. Activate: To [Activate] Call barring, you need to press
[OK] and then enter your [Call barring password].
v. Deactivate: To [Deactivate] Call barring, select [OK] and
enter your [Call barring password] and [OK].
vi. Query Status: When highlighted, press [OK] to see the
[Call barring] status.
To [Cancel all] barring, select by pressing [OK] on [ Cancel all],
enter [Call barring password] and press [OK]. To return to the
previous menu, press [OK] again.
To [Change barring password], scroll down to [Change barring
password] and press [OK] > Enter [Old password] > Enter [New
password] and [Confirm New password]
Please Note: This feature is Network dependent and may not
work on all Networks.
4) Blacklist:To create a [Blacklist group], to block selected numbers from
calling you, set [Reject numbers in blacklist] to [ON] and press
[OK].
Scroll down to [Blacklist numbers] and select an open slot and
press [OK] > enter telephone number and press [OK] to save.
To edit a number press the [top left soft key] > [top right soft
key] to clear the number > enter new number > [OK] to save.
5) Call time reminder: Set [Call time reminders] to alert you when you
reach a specific time limit on a call to control your spend. Scroll down to
[Call time reminder] > press [OK] > select [Single] to receive a reminder
once between [1 –3000 seconds] or [Periodic] reminders for every 30 or
60 seconds.
You can switch off this function by selecting [Off] > [OK].

-12-
6) Auto redial: Select [ON] > [OK] to automatically redial a number if the call
did not connect with your first attempt. Select [NO] > [OK] to deactivate
this function.
10.Network:
1) To change Network settings, select [Network selection] > [OK] >
[Automatic] > [OK] to register on home network.
2) To change Network settings, select [Network settings] > [OK] > [Manual]
to search for available Networks and manually select preferred Network
and pressing [OK] to register on Network.
11.Security:
1) SIM security:
i. PIN Lock: Select [PIN lock] > Enter PIN code and press
[OK] to activate.
ii. Change PIN: Once PIN lock has been activated, you
can change the PIN number to a code of your choice by
selecting [Change PIN] > [OK] > [Input old PIN] > [Input
New PIN] > [Confirm New PIN] > [OK] to save.
iii. Change PIN2: You can change the PIN2 number to a
code of your choice by selecting [Change PIN2] > [OK] >
[Input old PIN2] > [Input New PIN2] > [Confirm New
PIN2] > [OK] to save.
2) Phone security:
The Default Phone Lock Code is 1122
i. Phone Lock: Select Phone Lock by pressing [OK] and
enter the default password [1122] > [OK] to activate
Phone Lock.
The Phone Lock code is only required when the phone is
Powered On. This is to prevent someone access from
your phone content, even if they remove your SIM card.
ii. Change Password: It is recommended that should you
use this feature, that you change the password to a new
and unique one only you will remember.
iii. To change the Phone Lock Password, select [Change
password] > [OK] > [Input old password] > [Input new
password] > [Confirm new password] > [OK] to save
changes.
12.Restore: i. When selected you will be required to enter your [Phone
lock code] > [OK] > [OK].
ii. Your device will restart and all previous settings and
memory will be cleared.
iii. This action cannot be reversed, so be sure when to
access this feature that you want to clear all old data.
3.6Tools
This menu provides you with some basic tools such as [Calendar], [Alarm], [Calculator], and [FM
radio].
To access these options, in standby mode select [Menu] and scroll up or down to find [Tools],
then press [OK].
Here you will be able to select and change the following options:
1) Calendar:
To view [Calendar], press [OK] when highlighted. You have the following
options when pressing the [top left soft key]:

-13-
i. View: Only is an event has been entered to the calendar,
you will be able to see the entries for the current day
here by pressing [OK] on [View]. To view the details of
the entry, press the [top left soft key] to [View], [Add]
content, [Edit] or [Delete] the entry.
ii. View all: You can view all your entries here by pressing
[OK] on [View all]. To view the details of a specific entry,
select it by highlighting it and then press [OK], then press
the [top left soft key] to [View], [Add] content, [Edit] or
[Delete] the entry.
iii. Add event: Select and press [OK] to create new entry /
reminder. Enter [Subject], [Start] [date] and [time], [End]
[date] and [time], set [Reminder], Set [Alarm] to [ON], [5,
10, 15 or 30 minutes before],
iv. Delete event: This option lets you delete [All], [Overdue],
or [Specific period].
By selecting [All], you calendar will be wiped out
completely. This cannot be undone.
If you select [Overdue], all entries dated back will be
removed from your calendar.
Selecting a [Specific period], allows you to set the
[Start] [date] and [time], [End] [date] and [time].
v. Jump to date: Here you will be able to enter a date
manually to view entries or general calendar details. To
view the entries for the days, press [OK] to view.
vi. Go to today: [Go to today] takes you back to the current
date.
vii. Go to weekly view: Change to the calendar display to
show weekly view. To navigate here, use the cursor keys
to move up or down. To view the entries for a specific
week, press [OK] to view.
2) Alarm:
i. Set up to 3 Alarms under this function.
ii. Select [Alarm] to edit by pressing [OK] > [Edit], set
[Status] to [On], set [Time], select [Snooze] duration (off,
1, 3, 5 or 10 minutes), [Repeat] options [Once],
[Everyday] or [Custom] by manually selecting the days
when the Alarm should be [On] or [Off].
iii. You can also select from 8 default ringtone for your
alarm sound. When the desirable tone has been
identified, press [OK] to select.
3) Calculator:
i. Perform basic calculator functions here.
[+] = [up navigation key]
[-] = [down navigation key]
[x] = [left navigation key]
[÷] = [right navigation key]
[=] = [OK]
[Clear] = [top right soft key]
[#] = [full stop]
4) FM Radio:
i. When selected, press the [top left soft key] to access the
following functions:
Channel list: All saved radio channels will be saved
under your [Channel list]. You have the following
options here when you have highlighted the desired
radio channel: [Play], [Delete], [Edit] Channel Name
or Frequency band. Once completed, press the [top

-14-
left soft key] to [Save] or [Cancel].
Manual input: To clear the screen, press the [top right
soft key], punch in the frequency of the radio station
you are looking for and press [OK].
Auto search: To perform [Auto search] for available
stations, highlight option and press [OK] and [OK]
again to confirm. All available stations will
automatically be saved under the [Channel list].
To adjust the [Volume], press the Up on Down
Navigation Keys to adjust volume up or down
respectively.
Use the [*] and [#] keys to toggle between stored
radio channels on the phone.
To manually adjust the radio channel, you can press
the [Right] or [Left] Navigation keys to move Up or
Down respectively.
To switch [On] or [Off], simply press the [OK] key
when in the FM Radio menu.
You can select to play the radio in the background by
pressing the [top right soft key] and then confirm
[Background Play] by pressing the [top left soft key].
For quick access to the radio, press the [bottom left]
key with the FM radio icon on.
4. SAFETY WARNING
4.1 General Precautions
Please use your phone in accordance with rules of the area. Do not use the phone when driving.
Do not put the battery, phone, or the charger into a microwave oven;
Do not put the phone in areas with high temperatures or high humidity.
Do not use near fuel or chemicals.
Do not use the phone in areas with a potentially explosive atmosphere.
Keep out of reach of children. This is not a toy.
Do not attempt to open the phone.
Unauthorized repairs or tampering will void the warranty.
4.2 Battery Precautions
Do not dispose your battery or phone in an open fire as this may lead to an explosion.
Avoid humid areas as excessive heat and corrosion may occur.
If the battery shows signs of heating up, discoloration or distortion during use, charging or in
storage, replace the battery immediately.
The battery life is between 12 and 24 months. If it doesn’t work after several cycles of charging, it
indicates the end of its life and you will be required to replace it.
Always use the battery and battery charger authorized by the manufacturer. Generic products
cause leakage, excessive heat, bursting and fire and ultimately void your warrantee.
5. CAUTION
The Manufacturer reserves the right for the changes in the technical standards without advanced
notice.
The Manufacturer reserves the right for the changes in the technical specification without
advanced notice.
The Manufacturer reserves the right for the changes in this manual without further notice.
The Manufacturer reserves the ultimate right for the interpretation of this manual.
Table of contents
