SST FT196 Guide
23282 Mill Creek Drive, Suite 215
Laguna Hills, CA 92653 USA
+1.949.583.1857 Phone
+1.949.340.3343 Fax
www.safetysys.com
Multi-Spectrum IR Portable
Flame Detector Test Lamp
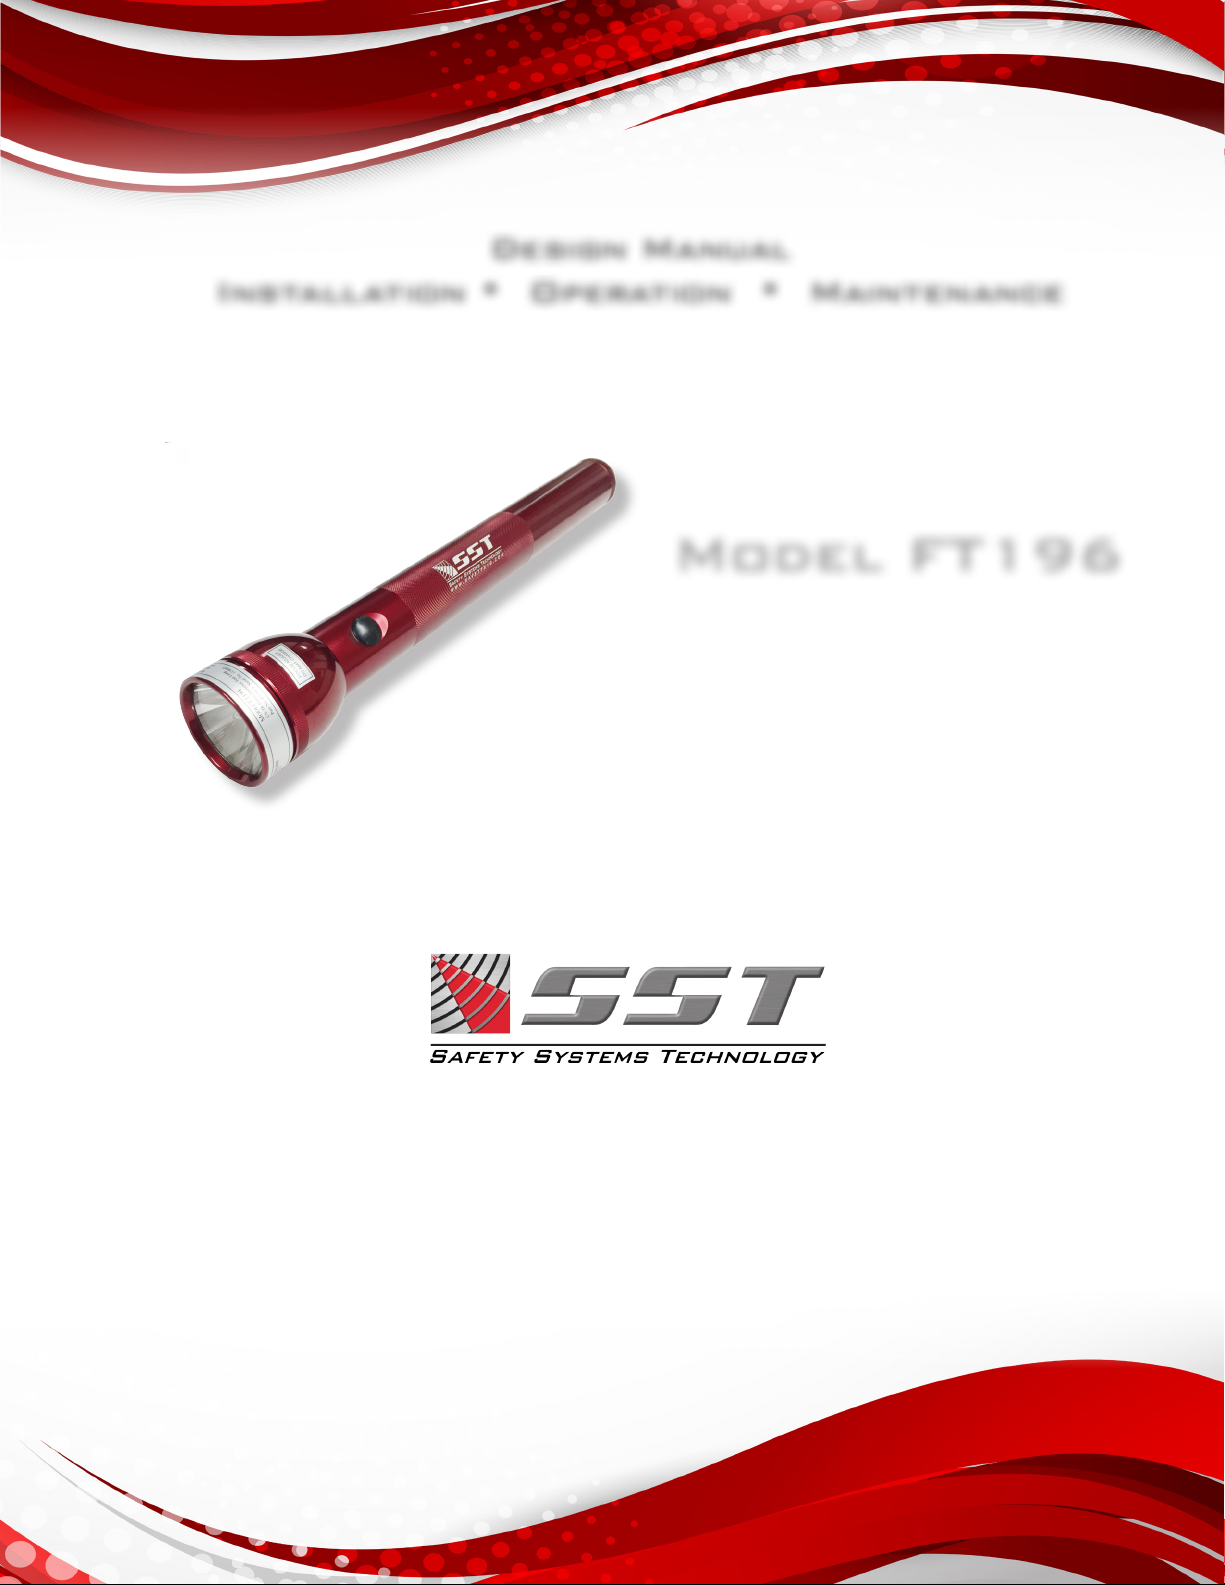
Model FT196
Design Manual
Installation • Operation • Maintenance
The information and technical data disclosed by this document may be used and disseminated only for the
purposes and to the extent specifically authorized by Safety Systems Technology in writing. Such information and
technical data are proprietary to Safety Systems Technology and may not be used or disseminated except as
provided in the foregoing sentence.

Blank Page

xii October, 2015
Quick Finder
MODEL FT196 Portable Flame Detector
Test Lamp
SAFETY INFORMATION................................................................................... 196-1
QUICK USE GUIDE .......................................................................................... 196-2
CONTENTS...................................................................................................................196-2
OPERATING THE TEST LAMP.....................................................................................196-2
GENERAL DESCRIPTION................................................................................ 196-3
OPERATIONAL DESCRIPTION....................................................................................196-3
SPECIFICATIONS............................................................................................. 196-4
SYSTEM SPECIFICATIONS.........................................................................................196-4
ENVIRONMENTAL SPECIFICATIONS .........................................................................196-4
MECHANICAL SPECIFICATIONS ................................................................................196-4
MAINTENANCE ............................................................................................... 196-5
FACTORY RECOMMENDED MAINTENANCE ............................................................196-5
LENS CLEANING .........................................................................................................196-5
ANNUAL BATTERY CHECK .........................................................................................196-5
FLAME DETECTOR TESTING ......................................................................... 196-6
FACTORY RECOMMENDED TEST SCHEDULE.........................................................196-6
WHEN TO TEST THE FLAME DETECTOR..................................................................196-6
TOOLS REQUIRED .....................................................................................................196-7
STEP-BY-STEP TEST PROCEDURE...........................................................................196-7
FAILED OR INCOMPLETE TEST .................................................................................196-8
TROUBLESHOOTING ...................................................................................... 196-9
TEST LAMP WON’T TURN ON ....................................................................................196-9
FLAME DETECTOR IS NOT RESPONDING................................................................196-9
TECHNICAL SUPPORT .............................................................................................196-10
SPARE PARTS AND ACCESSORIES............................................................. 196-10
REPLACEMENT PARTS ............................................................................................196-10
WARRANTY .................................................................................................... 196-11
REPAIRS ......................................................................................................... 196-11

October, 2015 xiii
Blank Page

January, 2016 196-1
Model FT196 Multi-Spectrum IR Portable Flame Detector Test Lamp
MODEL FT196 Portable Flame Detector
Test Lamp
SAFETY INFORMATION
Please read and understand this Design Manual BEFORE operating or conducting
maintenance on the ame detector test lamp.
Pay close attention to important messages marked as WARNINGS and IMPORTANT
throughout the Design Manual.
Failure to follow the instructions and safety precautions in this Design Manual can result in
serious injury or death.
Equipment that has been repaired or modied by the user, damaged as a result of an accident,
improper installation or used in an environment for which it was not intended will void the
warranty.
INSTALLATION WARNINGS
Use of this equipment to test ame detectors must only be conducted by trained and in some
cases a licensed personnel.
Observe the recognized standards of the appropriate authority in the in the country concerned.
Follow all appropriate standards to test the detector. Ensure all local regulations and site
safety procedures are followed.
Declassify the area before using the ame detector test lamp. The test lamp is intended
for non-hazardous applications. Do not use the test lamp in any location where potentially
explosive atmospheres exist.
DO NOT open the housing/enclosure or replace the batteries in potentially hazardous
atmospheres.
DO NOT tamper, modify, repair, or disassemble the electronics module or the test lamp.
DO NOT expose the test lamp to temperatures outside the recommended ranges as damage
or failure may occur.
Every effort has been made to ensure the accuracy of this Design Manual. However, Safety
Systems Technology assumes no responsibility for any errors or omissions in this document.
Please report any errors or omissions found in the content of the Design Manual.
Safety Systems Technology reserve the right to change or revise this Design Manual without
notice and without obligation to notify any person or organization of such changes. You may
request any additional information required that is not included in the Design Manual through
the local distributor or Safety Systems Technology.

196-2 January, 2016
Model FT196 Multi-Spectrum IR Portable Flame Detector Test Lamp
QUICK USE GUIDE
Contents
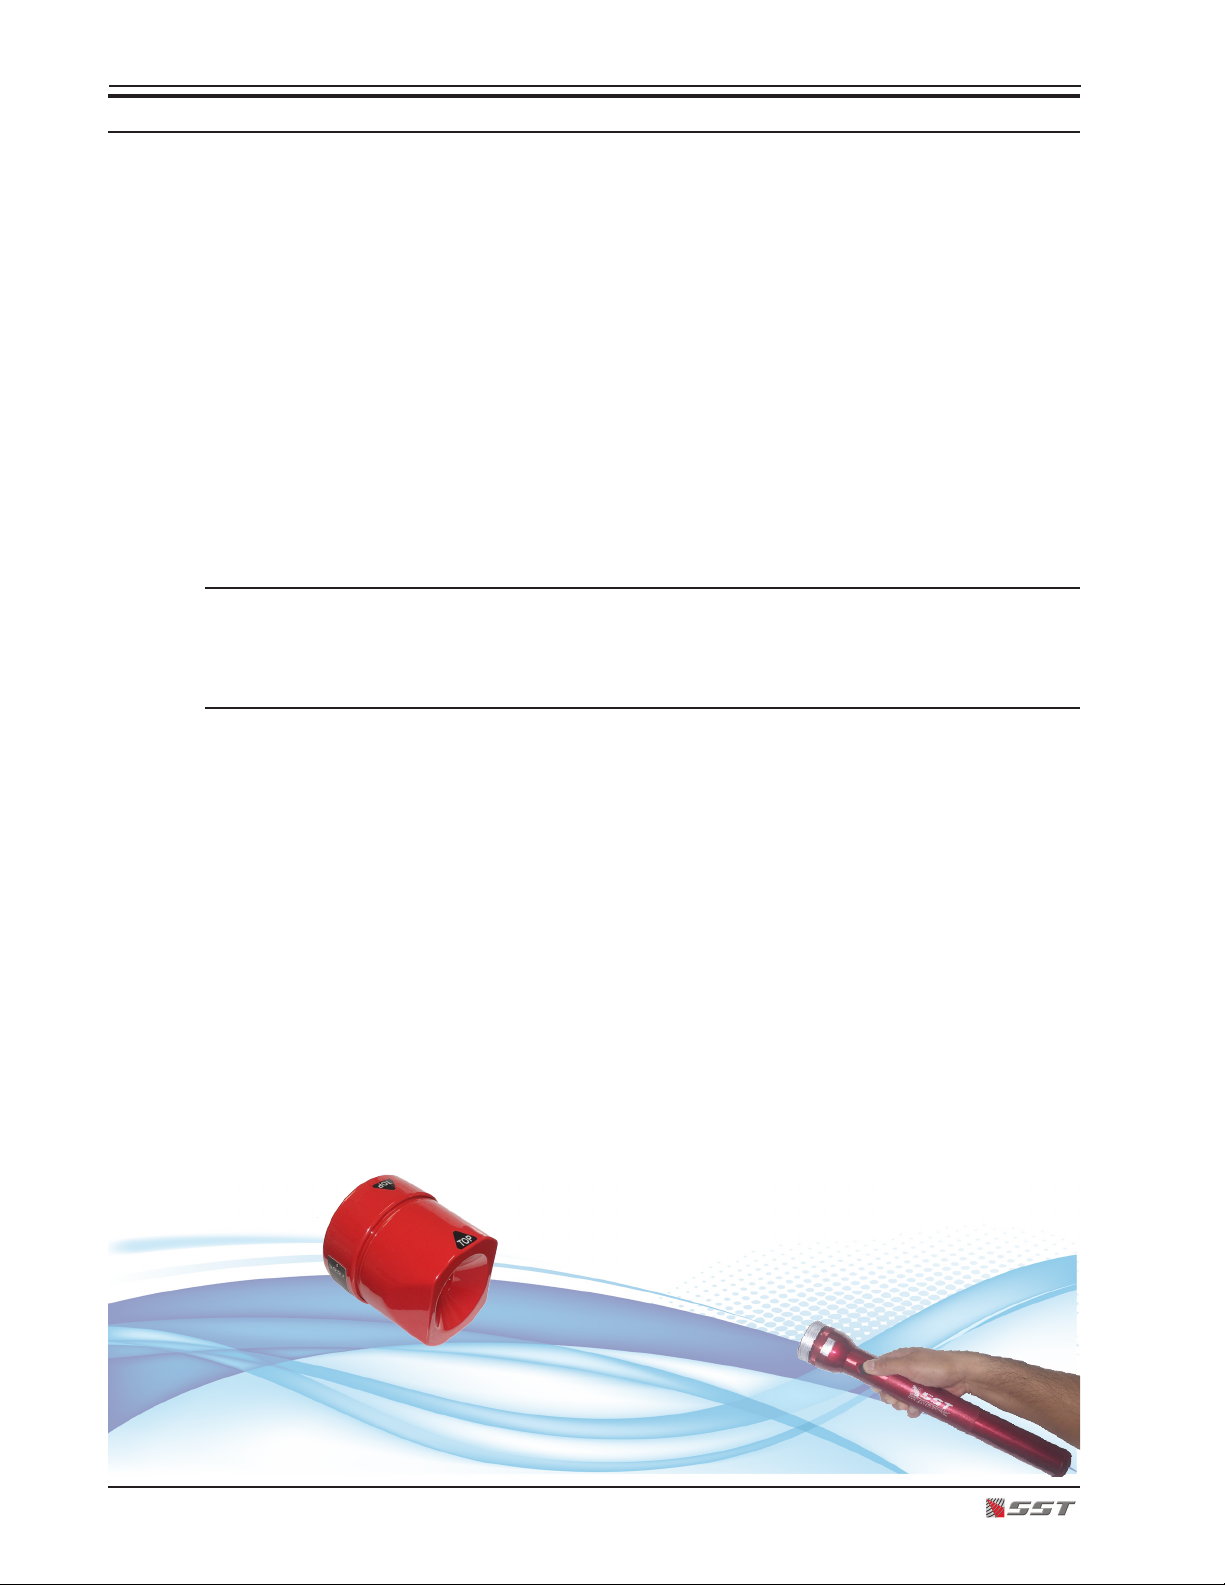
Model FT196 Flame Detector Test Lamp
4 standard disposable “D” cell batteries
Or 4 rechargeable batteries with 120 volt or 220 volt battery charger
!WARNING: De-classify the area to reduce the risk of ignition of hazardous atmosphere.
Combustible and ammable gases and vapors are very dangerous. Extreme caution
should be taken when these hazards are present.
!WARNING: DO NOT look directly into the test lamp while it is on. Never point the
test lamp at another person while it is on. When operating the ame detector test
lamp, shortwave ultraviolet radiation is emitted which can damage your eyesight.
Operating the Test Lamp
1. Open the case.
2. If using for the rst time, charge the rechargeable batteries if included.
3. Carefully remove the test lamp from the case.
4. Make sure the lens is free and clear of any dust, dirt, or debris prior to use
!IMPORTANT: Do not allow , dust, dirt, debris, or nger marks to get onto the face of
the lens. The transmission of the IR signal from the test lamp requires the lens to
be free of any obstruction to properly operate.
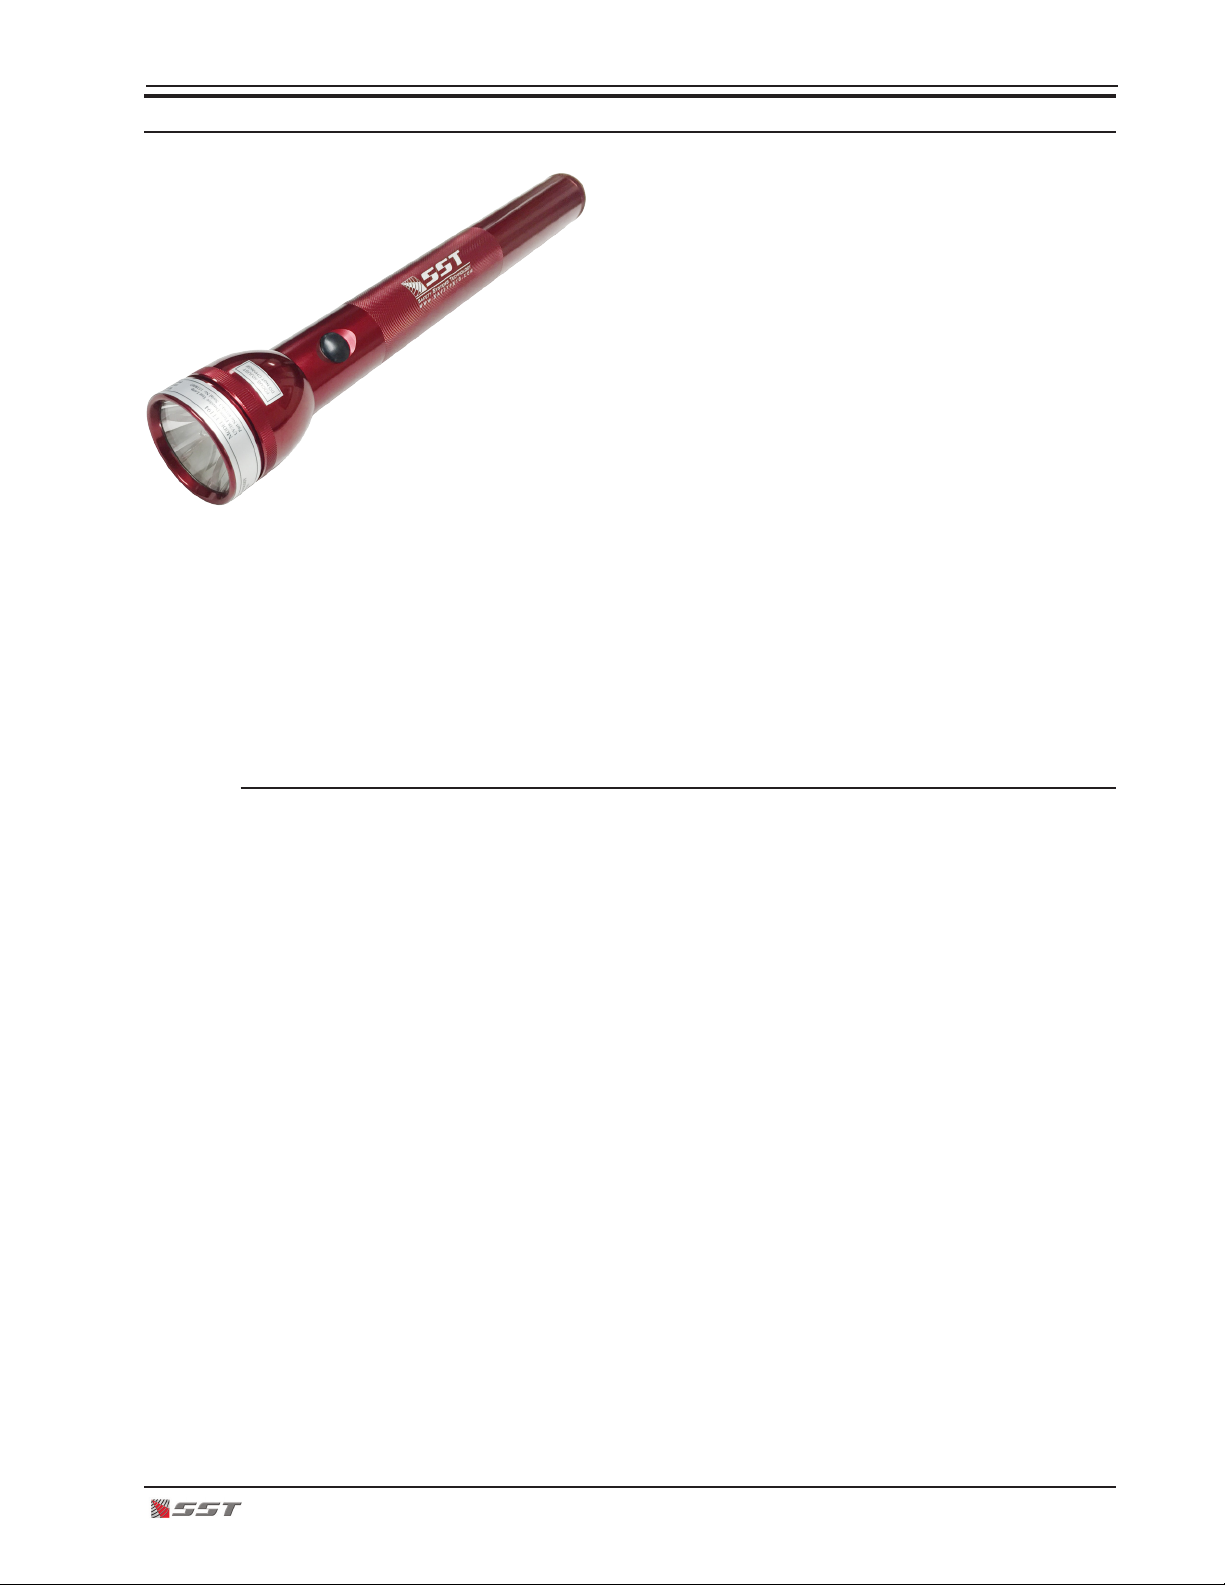
5. Position the test lamp within 5 feet (1.5 meters) from the ame detector and within the
detector’s eld-of-view
6. Point the head of the test lamp towards the viewing window of the ame detector
7. Press and HOLD the switch on the test lamp until the ame detector responds
You must continue pressing down the switch to activate the test lamp until the detector
responds
8. For SST’s Model F130, a red LED light will turn on to signal an alarm condition
9. Release the switch on the test lamp, you have successfully conrmed the ame
detector is operational
10. The ame detector will return to normal operation when the test lamp has been
deactivated turning off the red LED and only the green LED should be illuminated
11. Repeat test if necessary
12. Store the test lamp in the carrying case when not in use
January, 2016 196-3
Model FT196 Multi-Spectrum IR Portable Flame Detector Test Lamp
GENERAL DESCRIPTION
A re is composed of heat and light , both visible and
invisible. And during the combustion process, smoke
may be generated. A re will emit specic radiation in the
infrared and ultraviolet spectrum. A ame detector uses
specialized sensors to detect these radiation to report and
conrm a re.
The Model FT196 Flame Detector Test Lamp is a specically
designed portable source of infrared (IR) radiation for
testing Safety Systems Technology’s Multi-Spectrum IR
ame detectors. The test lamp is used to test and conrm
the operation of the ame detector. It tests the viewing
window of the detector is clean and unobstructed as well
as verify its internal electronics operation is functioning
normally similar to how a built-in internal automatic self-
test works. Furthermore, it will conrm the operation of the
detector’s critical alarm outputs such as the contact relays,
4-20 mA alarm output, and the system’s wiring terminals,
cabling and its connections, functionality of the re alarm
panel, proper audible and or visual alarm notication, and
the suppression system if required.
Operational Description
Inside the unit is a source lamp for infrared. The test lamp emits IR radiation which pulsates
at a slow rate to simulate the “icker” in a real re. Because all ame detectors are line-of-
sight devices, the test lamp also veries that the window of the ame detector is unobstructed
which will allow the transmission of the IR signals from the test lamp to reach the sensors.
Any obstruction such as dust, dirt, grease, or debris on the lens of the ame detector will
prevent it from seeing the simulated re from the test lamp. The test lamp must be within
10 feet or 3.0 meters of the detector and in the vicinity of the eld-of-view of the detector to
operate. The ame detector, depending on the settings, should respond to the test lamp
within seconds. And once the detector has detected an alarm condition, it should activate
the critical alarm outputs conrming normal operation.
Housed inside the test lamp is a state-of-the-art electronics module that controls the IR source
lamps to simulate a real ame. The test lamp uses a highly specialized sapphire lens which
allows transmission of the IR radiation. Always handle the test lamp with extreme caution
to prevent damage to the special lens. The test lamp functions on internal batteries which,
when fully charged, will allow operation for an extended period of time. The test lamp uses
a momentary switch and must be pressed and held to activate and operate the unit while
testing a ame detector. This prevents the test lamp from being left on and to conserve
battery power.

196-4 January, 2016
Model FT196 Multi-Spectrum IR Portable Flame Detector Test Lamp
SPECIFICATIONS
System Specications
Spectral Sensitivity: .......... 2 - 5 microns IR switched at 2 Hz rate
Operating Range ................... 10 feet (3.0 meters)
Operating Time ...................... Approximately 40 hours with new set of batteries
Warranty: ............................... 5 years
Environmental Specications
Operating Temperature ......... 32°F to 158°F (0°C to 70°C)
Operating Humidity ............... 0-100% RH, non-condensing
Ingress Protection ................. IP64
Mechanical Specications
Dimensions ........................... 14.62 inches long x 2.25 inches in diameter (371 x 57 mm)
Weight ................................... 2.5 lbs (1.134 kg)
Housing ................................. Aluminum
Test Lamp
Momentary Switch
Battery Compartment
Serial Number

January, 2016 196-5
Model FT196 Multi-Spectrum IR Portable Flame Detector Test Lamp
MAINTENANCE
Factory Recommended Maintenance
The ame detector test lamp has been designed with very little to no required maintenance.
Depending on your application and safety guidelines in your facility, additional maintenance
may be necessary to ensure the unit will functioning properly.
Periodic maintenance should be performed per the manufacturer’s recommendations and
instructions. Factory recommended regular maintenance schedule is as follows:
• Lens Cleaning Prior to Use
• Annual Battery Check
Maintenance intervals should be independently established through a documented procedure
such as a maintenance log maintained by plant/safety personnel or third party testing services.
Lens Cleaning
!WARNING: The lens material is a highly specialized sapphire designed to transmit
UV and IR radiation from the source lamps. NEVER clean the lens with Windex
or other commercial glass cleaners. These often contain silicone or other UV
inhibitors that will prevent the transmission of the UV and IR signals. Only use
water or alcohol to wipe the lens clean.
Cleaning the outside surface of the lens of any accumulated dust, dirt, lm or debris will
insure trouble free operation.
A clean, soft, lint-free cloth, tissue (lotion-free) or cotton swab should be used.
1. Wet the lens with water or alcohol.
2. Rub with a clean and dry cloth until the window is free of dirt, dust, or debris.
3. Let the lens dry completely.
Cleaning the lens prior to routine testing of the detectors will be sufcient in most cases
Annual Battery Check
The test lamp uses very little power and does not require frequent battery replacement. It
is recommended to periodically check the batteries prior to use when the test lamp has not
been used for an extended amount of time. Check for any damage or leaks and replace as
necessary.
Disposable Batteries
Disposable batteries should be replaced when it no longer supplies enough power to the test
lamp, is damaged or leaks. Use standard size “D” cell batteries.
Rechargeable Batteries
Rechargeable batteries should be replaced when it no longer holds a charge, is damaged or
leaks. Any standard size “D” rechargeable batteries are suitable.
196-6 January, 2016
Model FT196 Multi-Spectrum IR Portable Flame Detector Test Lamp
FLAME DETECTOR TESTING
!WARNING: The Model FT196 Flame Detector Test Lamp is not rated for use
in hazardous locations. De-classify the area to reduce the risk of ignition of
hazardous atmosphere. DO NOT use the test lamp where combustible and
ammable gases are present.
The Model FT196 Flame Detector Test Lamp is specically designed portable sources of
infrared radiation for testing Multi-Spectrum IR ame detectors. The test lamp pulsates an
IR radiation at a slow rate to simulate the “icker” of a real re.
The Model FT194 is a specially designed test lamp which consists of a highly specialized
sapphire lens. The sapphire lens allows transmission of the infrared (IR) radiation. This lens
is extremely expensive and must never be replaced with a standard glass or plastic lens.
Always handle the test lamp with extreme caution to prevent damage to the special lens.
Store the test lamp in the provided carrying case when not in use.
The following testing procedure refers to Safety Systems Technology’s line of ame detectors.
Factory Recommended Test Schedule
Factory recommends testing the ame detectors on a monthly basis to ensure proper
operation.
When to Test the Flame Detector
The following lists when to test the ame detector:
• After initial installation
• Every 30 days after the last operational test
• After a FAULT has been resolved
• After cleaning the lens
• In areas where severe lightning storms occur, it is recommended to test the ame
detectors after a severe lightning storm
!NOTE: The Monthly Operational Test can be performed by one person. No
manual adjustments are required for testing.
January, 2016 196-7
Model FT196 Multi-Spectrum IR Portable Flame Detector Test Lamp
Tools Required
Safety Systems Technology has specically designed a portable ame detector test lamp to
test its ame detectors.
SST Part # Description
196-1 Model FT196 Flame Detector Test Lamp
with rechargeable batteries and 120 volt
battery charger, carrying case included
196-2 Model FT196 Flame Detector Test Lamp
with standard “D” cell batteries, carrying
case included
196-3 Model FT196 Flame Detector Test Lamp
with rechargeable batteries and 240 volt
battery charger, carrying case included
!WARNING: The Model FT196 Flame Detector Test Lamp
is not rated for use in hazardous locations. De-classify
the area to reduce the risk of ignition of hazardous atmosphere. DO NOT use the
test lamp where combustible and ammable gases are present.
Step-by-step Test Procedure
!WARNING: DO NOT look directly into the test lamp while it is on. Never point the
test lamp at another person while it is on. When operating the ame detector test
lamp, shortwave ultraviolet radiation is emitted which can damage your eyesight.
1. To test a ame detector, position the ame detector test lamp within 10 feet (3.0
meters) from the ame detector and within its eld-of-view.
2. While aiming directly at the detector, PRESS and HOLD the test lamp switch. The
response of the detector will depend on the distance between the detector and the test
lamp.
3. Once the detector has detected the IR radiation from the test lamp, the red LED will
illuminate which can be seen from the viewing window of the detector.
4. Depress the test lamp switch once detector’s red LED is turned on.
For ame detectors with the Delayed Alarm set to NON-LATCHING, the detector will
automatically reset and the red LED will turn off.
For ame detectors with the Delayed Alarm set to LATCHING, the detector will have to
be manually reset to return to normal operation.
5. This concludes your test and you have conrmed the detector is operating normally.

196-8 January, 2016
Model FT196 Multi-Spectrum IR Portable Flame Detector Test Lamp
Failed or Incomplete Test
When testing the ame detector, make sure to account for the time delay settings of the
detector. The ame detector has a factory default time delay setting of 3 seconds and a user
selectable setting of 6 seconds. During this time, the ame detector conrms the presence
of radiation emitted by the re before reporting an alarm condition.
The response time of the detector will depend on the distance between the detector and the
test lamp.
Causes of Failed or Incomplete Tests
If the ame detector does not respond to the test lamp, check the following:
1. Conrm the ame detector has power.
A green LED indicator is illuminated on the viewing window of the detector to indicate
it is powered and operating.
2. Verify the test lamp is working.
While the unit if off, check that there are no dust, debris, nger marks, or any type of
oily residue on the lens. Clean the lens using a clean, soft, lint-free, tissue (lotion-
free), or cotton swab with water or alcohol. DO NOT use Windex or any commercial
glass cleaners.
3. Conrm the test lamp has power.
Point the test lamp on the oor or a wall while pressing and HOLDING the power
switch. DO NOT look directly on the lens of the test lamp while it is on. The test lamp
should light up and “icker.” Reduced intensity may indicate the batteries are low.
Recharge the batteries or replace them if using a disposable type.
4. Make sure the test lamp is within 10 feet (3.0 meters) from the ame detector and
pointed directly at the viewing window of the detector.
The test lamp must be within the detector’s eld of view. Move closer to the ame
detector and repeat the test.
5. Make sure you press and HOLD the power switch while pointing the test lamp directly
into the viewing window of the detector for at least 10 seconds or until the red LED
comes on.
6. SEE “Troubleshooting” section of the ame detector’s manual if the ame detector
doesn’t respond to the test lamp.

January, 2016 196-9
Model FT196 Multi-Spectrum IR Portable Flame Detector Test Lamp
TROUBLESHOOTING
!CAUTION: All repairs shall only be performed at a Safety Systems Technology
facility and by its authorized service personnel. Failure to comply will invalidate the
warranty on the detector.
!WARNING: Do not operate the test lamp or the battery charger in any location where
combustible gases, vapor, or dust is present. And do not change batteries in any
location where potentially explosive atmospheres exist.
Test Lamp Won’t Turn On
• You must PRESS and HOLD the switch to activate and continually operate the test lamp.
Depressing the switch will turn off the test lamp.
• Check if test lamp is generating any light. In bright areas, the ashing light generated by
the test lamp may not be visible. Check the test lamp in a dimly light room to verify if it is
generating a ashing light. NEVER look directly into the source lamp while the unit is on
as damage to your eyes may result.
The lack of intensity of the ashing light being generated by the test lamp may indicate
the batteries may need to be replaced.
• Check batteries. Make sure the batteries are properly installed inside the unit. Replace
any leaking or damaged batteries. For rechargeable batteries, charge the batteries. If the
batteries no longer holds a charge, replace as necessary.
• Check source lamps. DO NOT look directly into the source lamps when the test lamp is
ON or activated as damage to your eyes may result.
The IR source lamp inside the test lamps may be damaged or burnt out. Replace
source lamps or return the unit to Safety Systems Technology for repairs. SEE “Repairs”
section of this manual for detailed instructions on how to return the unit for repairs or
replacement.
Flame Detector is not Responding
• Verify you are testing SST’s Model F130 ame detector. The Model FT196 Multi-
Spectrum IR Flame Detector Test Lamp has been designed specically for multi-spectral
IR ame detectors. UV/IR operate on a different frequency and is not suitable for testing
with the test lamp.
• Conrm the ame detector has power. Most ame detectors have a green LED to
indicate normal operation. If the detector is not operating, troubleshoot the ame
detector. Repeat test once the ame detector is operational.
• Conrm the ame detector is not in alarm. An active red LED on the ame detector
may indicate the detector is in alarm. If the red LED remains on, this may indicate the
detector’s alarm is in LATCHING mode. Reset the ame detector and repeat test.
• Conrm the ame detector in not reporting a Fault. An active yellow LED on the ame
detector may indicate the detector is reporting a Fault. Troubleshoot the ame detector.
In some cases, the detector’s automatic self-check may have determined the lens on the
detector is obstructed. Clean the lens and repeat test.
• Verify you are within 5 feet (3.0 meters) from the ame detector and are within its eld-of-
view. Move closer to the ame detector and repeat test.
• Check the lens of the test lamp. Remove any obstruction such as dirt, grime, or debris.
If the lens has just been cleaned, make sure Windex or other commercial grade glass

196-10 January, 2016
Model FT196 Multi-Spectrum IR Portable Flame Detector Test Lamp
cleaners was not used. Use of these cleaners inhibit the transmission of IR signals to the
sensors.
Only use water or alcohol to clean the lens of the detector. SEE “Maintenance” section of
the manual for instructions on how to clean the lens of the detector.
Technical Support
Headquarters
Safety Systems Technology, Inc.
23282 Mill Creek Drive, Suite 215
Laguna Hills, CA 92653
U.S.A.
Phone Numbers
1.866.507.2264 Toll-free (USA only)
+1.949.583.1857 Main
+1.949.340.6643 FAX
E-Mail Addresses
[email protected] Sales
SPARE PARTS AND ACCESSORIES
To order spare parts and/or accessories, please contact the nearest Safety Systems
Technology’s authorized distributor or Safety Systems Technology Customer Care Department
and provide the following information:
• Part number
• Description
• Quantity
Replacement Parts
40196-3 Complete test lamp unit only, no batteries or other accessories
20356-95 Replacement IR source lamp *
* For IR source lamp replacement, it is recommended to send the unit to factory for repairs
to prevent any damage to the internal electronics and the lens.

January, 2016 196-11
Model FT196 Multi-Spectrum IR Portable Flame Detector Test Lamp
WARRANTY
Safety Systems Technology, Inc. warrants the Model FT196 to be free of defects in materials
or workmanship under normal use and will repair or replace any unit that is found to be
defective for ve years after the date of manufacture. Units that are damaged by exposure
to contaminants, incorrect hookup, abuse, accident, or abnormal operating conditions are
not covered by this warranty.
Defective or damaged equipment must be shipped to Safety Systems Technology accompanied
by a detailed description of any issue.
Safety Systems Technology reserves the right to make the nal determination of the nature
of and responsibility for defective or damaged equipment. Equipment that has been repaired
or modied by the user, damaged as the result of an accident, incorrectly installed or used in
an application or environment for which it was not intended is not covered by this warranty.
Safety Systems Technology’s responsibility under this warranty shall be limited to the repair
or replacement of the defective equipment at its option when it is returned to the factory
transportation prepaid. The defective unit will be repaired or replaced free of charge to the
customer and returned transportation prepaid. In all cases, this warranty is limited to the
cost of the equipment.
REPAIRS
All equipment requiring repair must be shipped to Safety Systems Technology accompanied
by a Return Material Authorization (RMA) form. The form can be downloaded through SST’s
website at www.safetysys.com.
1. The following information is required:
• Model Number or Part Number
• Serial Number - imprinted on the nameplate of the detector
• Brief description of the problem
• Contact information
• Complete shipping address for the return of the repaired items
2. Contact Safety Systems Technology to obtain an RMA number at:
+1.949.583.1857 Main
+1.866.507.2264 Toll-free number (USA only)
or via e-mail at [email protected]
3. Ship the unit(s) prepaid to with a copy of the RMA form inside the package:
Safety Systems Technology
Attention: Repair Department
23282 Mill Creek Drive, Suite 215
Laguna Hills, California 92653
U.S.A.
+1.949.583.1857 Phone
Upon receipt of your equipment, a repair estimate will be sent to you and repairs will be
made only after your authorization. Repair and shipping costs will be invoiced to account
holders or charged to a credit card.

Headquarters:
Safety Systems Technology, Inc.
23282 Mill Creek Drive
Suite 215
Laguna Hills, CA 92653 USA
+1.866.507.2264 Toll-Free (USA Only)
+1.949.583.1857 Phone
+1.949.340.3343 Fax
www.safetysys.com
Sales
Technical Support
This manual suits for next models
3
Table of contents
Popular Lighting Equipment manuals by other brands

Chauvet
Chauvet HIVE Quick reference guide

Federal Signal Corporation
Federal Signal Corporation HighLighter Elite Installation, operation and maintenance instructions

Jandy
Jandy Levolor K-1100 installation instructions

DELTA DORE
DELTA DORE TYXIA 411 Installation and user guide

DÖRR
DÖRR ML-2020 LED instruction manual

Govee
Govee H610B user manual


