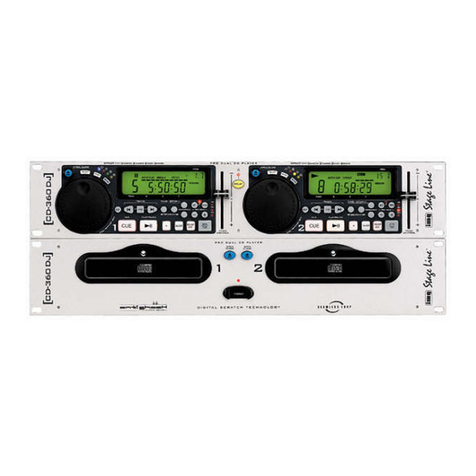
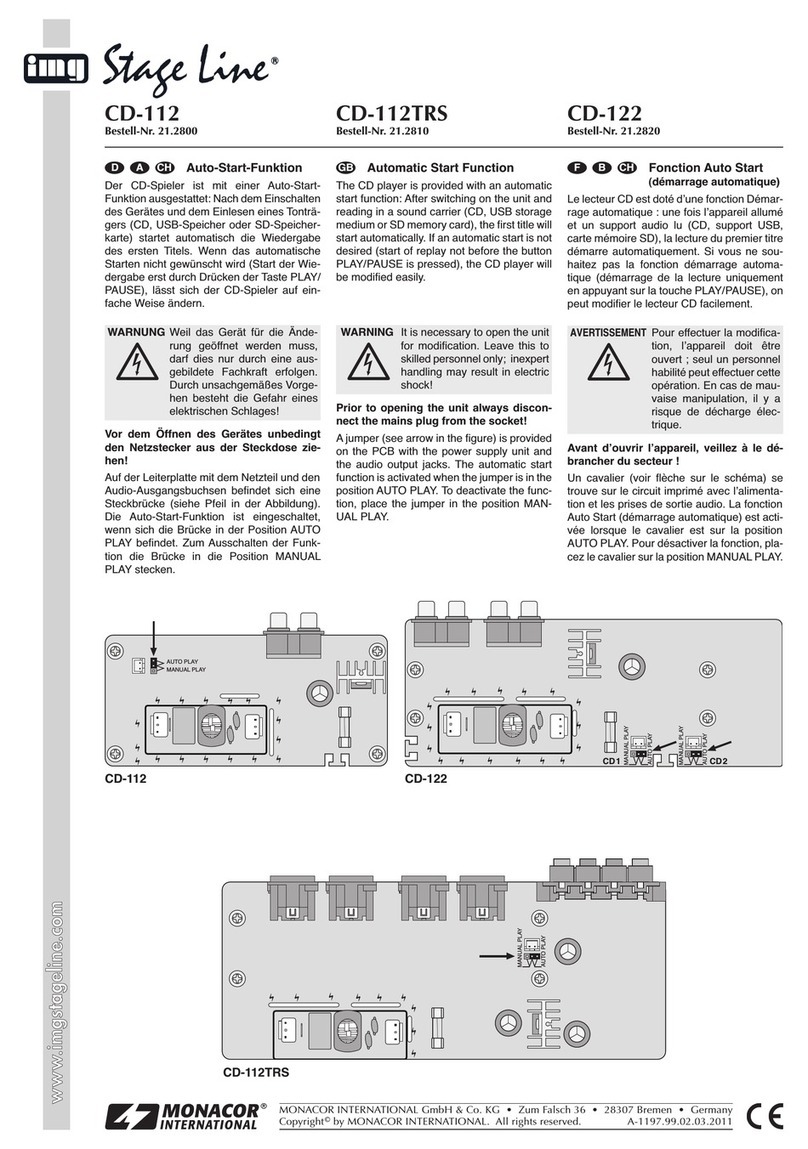
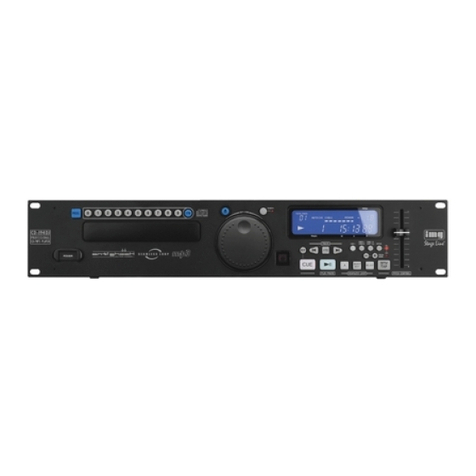
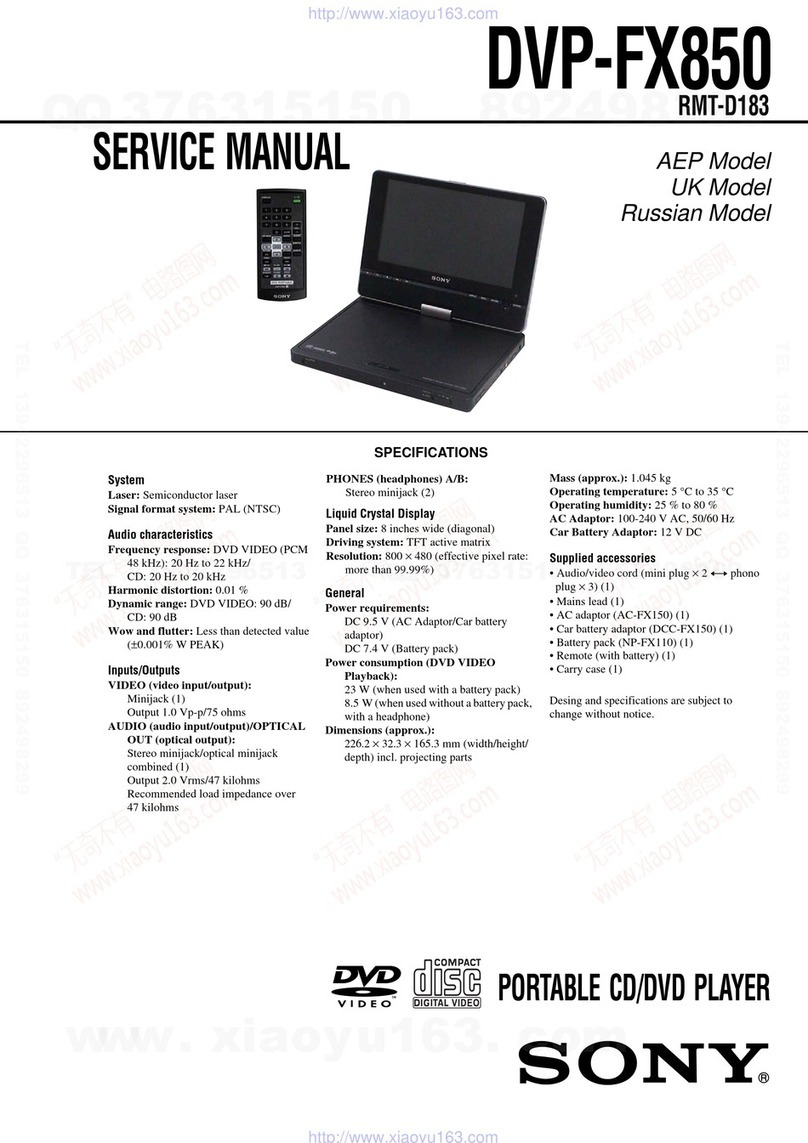
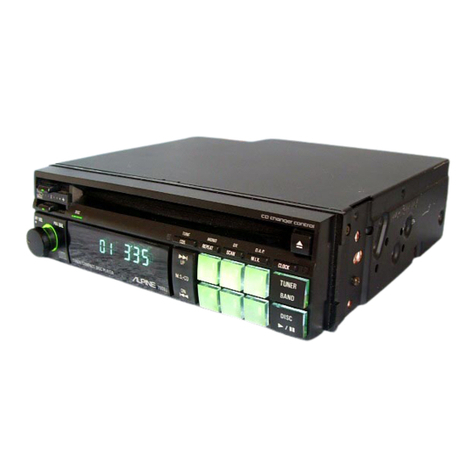
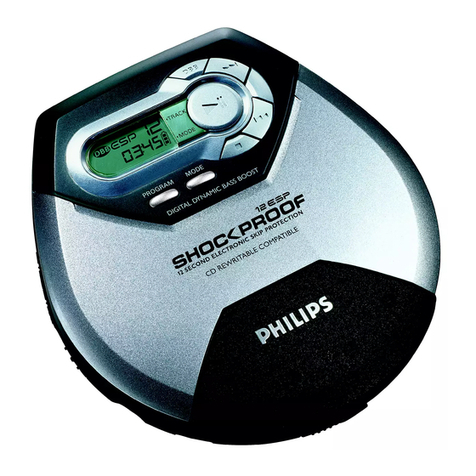
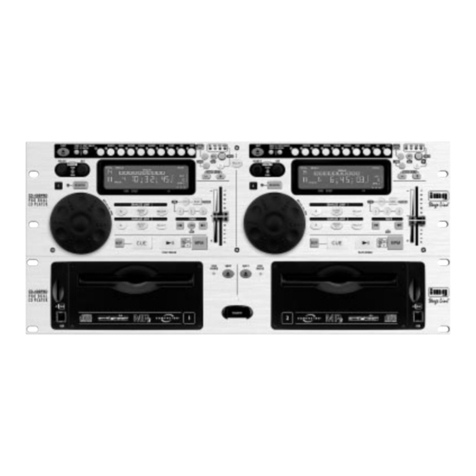
Stageline CD-164DJ User manual

BEDIENUNGSANLEITUNG • INSTRUCTION MANUAL • MODE D’EMPLOI
ISTRUZIONI PER L’USO • GEBRUIKSAANWIJZING • MANUAL DE INSTRUCCIONES • INSTRUKCJA OBSŁUGI
SIKKERHEDSOPLYSNINGER • SÄKERHETSFÖRESKRIFTER • TURVALLISUUDESTA
PROFESSIONELLER CD-PLAYER
PROFESSIONAL CD PLAYER
LECTEUR CD PROFESSIONNEL
LETTORE CD PROFESSIONALE
CD-164DJ Best.-Nr. 21.2090

2
wwwwww..iimmggssttaaggeelliinnee..ccoomm
Bevor Sie einschalten …
Wir wünschen Ihnen viel Spaß mit Ihrem neuen Gerät
von „img Stage Line“. Bitte lesen Sie diese Bedienungs-
anleitung vor dem Betrieb gründlich durch. Nur so lernen
Sie alle Funktionsmöglichkeiten kennen, vermeiden
Fehlbedienungen und schützen sich und Ihr Gerät vor
eventuellen Schäden durch unsachgemäßen Gebrauch.
Heben Sie die Anleitung für ein späteres Nachlesen auf.
Der deutsche Text beginnt auf der Seite 4.
Before switching on …
We wish you much pleasure with your new “img Stage
Line” unit. Please read these operating instructions care-
fully prior to operating the unit. Thus, you will get to know
all functions of the unit, operating errors will be pre-
vented, and yourself and the unit will be protected
against any damage caused by improper use. Please
keep the operating instructions for later use.
The English text starts on page 4.
Avant toute installation …
Nous vous souhaitons beaucoup de plaisir à utiliser cet
appareil “img Stage Line”. Lisez ce mode dʼemploi entiè-
rement avant toute utilisation. Uniquement ainsi, vous
pourrez apprendre lʼensemble des possibilités de fonc-
tionnement de lʼappareil, éviter toute manipulation erronée
et vous protéger, ainsi que lʼappareil, de dommages éven-
tuels engendrés par une utilisation inadaptée. Conservez
la notice pour pouvoir vous y reporter ultérieurement.
La version française se trouve page 11.
Prima di accendere …
Vi auguriamo buon divertimento con il vostro nuovo
apparecchio di “img Stage Line”. Leggete attentamente
le istruzioni prima di mettere in funzione lʼapparecchio.
Solo così potete conoscere tutte le funzionalità, evitare
comandi sbagliati e proteggere voi stessi e lʼapparecchio
da eventuali danni in seguito ad un uso improprio. Con-
servate le istruzioni per poterle consultare anche in
futuro.
Il testo italiano inizia a pagina 11.
D
A
CH
GB
Antes de la utilización …
Le deseamos una buena utilización para su nuevo apa-
rato “img Stage Line”. Por favor, lea estas instrucciones
de uso atentamente antes de hacer funcionar el aparato.
De esta manera conocerá todas las funciones de la uni-
dad, se prevendrán errores de operación, usted y el apa-
rato estarán protegidos en contra de todo daño causado
por un uso inadecuado. Por favor, guarde las instruccio-
nes para una futura utilización.
La versión española comienza en la página 18.
Voor u inschakelt …
Wij wensen u veel plezier met uw nieuwe apparaat van
“img Stage Line”. Lees deze gebruikershandleiding
grondig door, alvorens het apparaat in gebruik te nemen.
Alleen zo leert u alle functies kennen, vermijdt u foutieve
bediening en behoedt u zichzelf en het apparaat voor
eventuele schade door ondeskundig gebruik. Bewaar de
handleiding voor latere raadpleging.
De Nederlandstalige tekst vindt u op pagina 18.
Przed uruchomieniem …
Życzymy zadowolenia z nowego produktu “img Stage
Line”. Dzięki tej instrukcji obsługi będą państwo w stanie
poznać wszystkie funkcje tego urządzenia. Stosując się
do instrukcji unikną państwo błędów i ewentualnego
uszkodzenia urządzenia na skutek nieprawidłowego
użytkowania. Prosimy zachować instrukcję.
Tekst polski zaczyna się na stronie 25.
Før du tænder …
Tillykke med dit nye “img Stage Line” produkt. Læs sik-
kerhedsanvisningerne nøje før ibrugtagning, for at
beskytte Dem og enheden mod skader, der skyldes for-
kert brug. Gem venligst denne betjeningsvejledning til
senere brug.
Sikkerhedsanvisningerne findes på side 29.
Innan du slår på enheten …
Vi önskar dig mycket glädje med din nya “img Stage
Line” produkt. Läs igenom säkerhetsföreskrifterna innan
enheten tas i bruk för att undvika skador till följd av
felaktig hantering. Behåll instruktionerna för framtida
bruk.
Säkerhetsföreskrifterna återfinns på sidan 29.
Ennen kytkemistä …
Toivomme Sinulle paljon miellyttäviä hetkiä uuden “img
Stage Line” laitteen kanssa. Ennen laitteen käyttöä pyy-
dämme Sinua huolellisesti tutustumaan turvallisuusoh-
jeisiin. Näin vältyt vahingoilta, joita virheellinen laitteen
käyttö saattaa aiheuttaa. Ole hyvä ja säilytä käyttöohjeet
myöhempää tarvetta varten.
Turvallisuusohjeet löytyvät sivulta 29.
F
B
CH
I
ENL
PL DK
SFIN
B

3
12 3456
18 19 20 21 22
789101112141617
13 15
ab c d e
fg hij

Auf der ausklappbaren Seite 3 finden Sie alle be-
schriebenen Bedienelemente und Anschlüsse.
Inhalt
1 Übersicht der Bedienelemente
und Anschlüsse . . . . . . . . . . . . . . . . . . . . . 4
1.1 Frontseite . . . . . . . . . . . . . . . . . . . . . . . . . . . 4
1.2 Rückseite . . . . . . . . . . . . . . . . . . . . . . . . . . . 5
2 Hinweise für den sicheren Gebrauch . . . . 5
3 Einsatzmöglichkeiten . . . . . . . . . . . . . . . . 5
4 Gerät aufstellen und anschließen . . . . . . 5
5 Bedienung . . . . . . . . . . . . . . . . . . . . . . . . . 6
5.1 CD abspielen . . . . . . . . . . . . . . . . . . . . . . . . 6
5.2 Anzeige der Titelnummer, Laufzeit und . . . . . .
Taktschläge pro Minute . . . . . . . . . . . . . . . . 6
5.2.1 Die Laufzeitanzeige umschalten und
die Funktion OUTRO aktivieren . . . . . . . . . 6
5.2.2 Bargraph . . . . . . . . . . . . . . . . . . . . . . . . . . 6
5.2.3 Beatcounter . . . . . . . . . . . . . . . . . . . . . . . . 6
5.3 Betriebsart wählen . . . . . . . . . . . . . . . . . . . . 7
5.3.1 „Single“ – Einzeltitelwiedergabe . . . . . . . . 7
5.3.2 „Continue“ – Gesamttitelwiedergabe . . . . . 7
5.4 Anspielen eines Titels . . . . . . . . . . . . . . . . . 7
5.5 Schneller Vor- und Rücklauf . . . . . . . . . . . . 7
5.6 Genaues Anfahren einer bestimmten Stelle 7
5.7 Sprung zu einer zuvor bestimmten Stelle
(Cue-Punkt) . . . . . . . . . . . . . . . . . . . . . . . . . 7
5.8 Geschwindigkeit und Tonhöhe verändern . . 8
5.9 Takt zwischen 2 Musikstücken angleichen
(„Pitch Bend“) . . . . . . . . . . . . . . . . . . . . . . . . 8
6 Faderstart über ein Mischpult . . . . . . . . . . 8
7 Pflege des Gerätes . . . . . . . . . . . . . . . . . . . 9
8 Technische Daten . . . . . . . . . . . . . . . . . . . 9
9 Erklärung der Fachbegriffe . . . . . . . . . . . 10
1 Übersicht der Bedienelemente
und Anschlüsse
1.1 Frontseite (Abb.1)
1Ein-/Ausschalter POWER
2CD-Schublade
3Taste zum Öffnen und Schließen der CD-
Schublade (2); während des Abspielens einer
CD ist die CD-Schublade gegen unbeabsichtig-
tes Öffnen verriegelt
4Tasten und zum Anwählen des nächsten
gewünschten Titels:
Mit jedem Betätigen der Taste wird ein Titel
weitergesprungen. Beim Drücken der Taste
wird an den Anfang des gerade laufenden Titels
gesprungen. Durch mehrfaches Drücken der
Taste wird immer ein Titel weiter zurückge-
sprungen. Zum Überspringen mehrerer Titel die
entsprechende Taste gedrückt halten.
5Multifunktionsdisplay (Details siehe Abb. 2)
aSymbol für den Pausenmodus
bSymbol für den Wiedergabemodus
cAnzeige „CONTINUE“: signalisiert die Be-
triebsart „Gesamttitelwiedergabe“, siehe Posi-
tion 14 (Taste CONT./SINGLE)
dAnzeige „SINGLE AUTO CUE“: signalisiert die
Betriebsart „Einzeltitelwiedergabe“
eBargraph; gibt durch seine Länge die Restzeit
eines Titels bzw. der CD an [„REMAIN“ (i) ein-
geblendet] oder die bereits gespielte Zeit eines
Titels („REMAIN“ ausgeblendet)
fTitelnummer bzw. kurz nach dem Einlegen
einer CD die Anzahl der Titel auf der CD
gZeitanzeige in Minuten (M), Sekunden (S) und
Frames (F); siehe Position 11 (Taste TIME)
hAnzeige „OUTRO“; eingeblendet bei mit der
Taste TIME (11) aktivierter Funktion OUTRO
iAnzeige „REMAIN“; ist eingeblendet, wenn die
Restzeit eines Titels oder einer CD angezeigt
wird, siehe auch Position 11 (Taste TIME)
jAnzeige der mit dem Regler (17) eingestellten
prozentualen Abweichung von der Standard-
geschwindigkeit oder der mit der Taste BPM/
TAP (15) eingetippten Anzahl der Taktschläge
pro Minute
6Taste PITCH zum Aktivieren der mit dem Regler
(17) eingestellten Geschwindigkeitsabweichung
7Drehrad REV/FWD für die Funktion „Pitch Bend“
und im Pausenmodus zum exakten Anfahren
einer bestimmten Stelle
8Taste CUE zum Anspielen eines Titels und für
den Rücksprung zu einer zuvor bestimmten
Stelle (siehe Kapitel 5.4 bzw. 5.7)
9Taste +10 zur Titelanwahl;
mit jedem Tastendruck erfolgt ein Sprung über
10 Titel vorwärts
10 Taste zum Umschalten zwischen Wieder-
gabe (Anzeige ) und Pause (Anzeige )
11 Taste TIME zur Umschaltung der Zeitanzeige (g)
und zum Einschalten der Funktion OUTRO
Grundeinstellung: Anzeige der Restzeit des lau-
fenden Titels
1. Tastendruck: Anzeige der bereits gespiel-
ten Zeit des laufenden Titels
2. Tastendruck: Anzeige der Restzeit des lau-
fenden Titels und Einschalten
der Funktion OUTRO zum
Abspielen der jeweils letzten
30 Sekunden der folgenden
Titel (diese Funktion ist erst
ab dem nächsten Titel aktiv,
ggf. die Taste drücken)
3. Tastendruck: Anzeige der Restzeit der ge-
samten CD
4. Tastendruck: Zurückschalten auf die Grund-
einstellung
12 Tasten SEARCH und für den Vor- und
Rücklauf; wird eine der Tasten gedrückt gehal-
ten, fährt der CD-Player schnell vor bzw. zurück
13 Taste STOP zum Beenden der Wiedergabe
All operating elements and connections de-
scribed can be found on the fold-out page 3.
Contents
1 Operating Elements and Connections . . . 4
1.1 Front panel . . . . . . . . . . . . . . . . . . . . . . . . . . 4
1.2 Rear panel . . . . . . . . . . . . . . . . . . . . . . . . . . 5
2 Safety Notes . . . . . . . . . . . . . . . . . . . . . . . . 5
3 Applications . . . . . . . . . . . . . . . . . . . . . . . . 5
4 Setting-up and Connecting the Unit . . . . . 6
5 Operation . . . . . . . . . . . . . . . . . . . . . . . . . . 6
5.1 Playing a CD . . . . . . . . . . . . . . . . . . . . . . . . 6
5.2 Display of title number, playing time, and
beats per minute . . . . . . . . . . . . . . . . . . . . . 6
5.2.1 Switching over the display of the playing
time and activating the function OUTRO . . 6
5.2.2 Bar graph . . . . . . . . . . . . . . . . . . . . . . . . . . 6
5.2.3 Beat counter . . . . . . . . . . . . . . . . . . . . . . . . 7
5.3 Selecting the operating mode . . . . . . . . . . . 7
5.3.1 “Single” – single title replay . . . . . . . . . . . . 7
5.3.2 “Continue” – total title replay . . . . . . . . . . . 7
5.4 Short playing of a title beginning . . . . . . . . . 7
5.5 Fast forward and reverse . . . . . . . . . . . . . . 7
5.6 Precisely selecting a certain spot . . . . . . . . . 7
5.7 Return to a spot defined before (Cue point) . 7
5.8 Changing the speed and pitch . . . . . . . . . . . 8
5.9 Matching the beat between two music
pieces (“Pitch Bend”) . . . . . . . . . . . . . . . . . . 8
6 Fader Start via a Mixer . . . . . . . . . . . . . . . . 8
7 Maintenance of the Unit . . . . . . . . . . . . . . 9
8 Specifications . . . . . . . . . . . . . . . . . . . . . . . 9
9 Glossary . . . . . . . . . . . . . . . . . . . . . . . . . . 10
1 Operating Elements and Connections
1.1 Front panel (fig. 1)
1POWER switch
2CD tray
3Button to open and close the CD tray (2);
while playing a CD, the CD tray is locked against
unintentional opening
4Buttons and to select the next desired
title:
Each time the button is pressed, one title is
advanced. If button is pressed, the unit
returns to the beginning of the title currently play-
ing. If button is pressed several times, the
unit always returns one more title. For skipping
several titles, keep the corresponding button
pressed.
5Multifunction display (for details see fig. 2)
asymbol for the pause mode
bsymbol for the replay mode
cdisplay “CONTINUE”: indicates the operating
mode “total title replay”, see item 14 (button
CONT./SINGLE)
ddisplay “SINGLE AUTO CUE”: indicates the
operating mode “single title replay”
ebar graph; indicates by its length the remain-
ing time of a title or of the CD [“REMAIN” (i)
inserted] or the time already played of a title
(“REMAIN” cancelled)
ftitle number or shortly after inserting a CD, the
number of the titles on the CD
gtime display in minutes (M), seconds (S), and
frames (F); see item 11 (button TIME)
hdisplay “OUTRO”; inserted if function OUTRO
is activated with button TIME (11)
idisplay “REMAIN”; inserted if the remaining
time of a title or a CD is displayed, also see
item 11 (button TIME)
jdisplay of the percentage deviation from the
standard speed adjusted with control (17) or
the number of beats per minute entered with
button BPM/TAP (15)
6Button PITCH to activate the deviation of speed
adjusted with the control (17)
7Rotary wheel REV/FWD for the function “Pitch
Bend” and for precisely selecting a certain spot
in the pause mode
8Button CUE for shortly playing the beginning of a
title and for returning to a spot defined before
(see chapter 5.4 or 5.7)
9Button +10 for the title selection;
with each pressing of the button 10 titles are
skipped in forward direction
10 Button to switch between replay (display )
and pause (display )
11 Button TIME to switch over the time indication (g)
of the display and to switch on function OUTRO
Basic setting: display of the remaining time of
the current title
1st pressing
of button: display of the time already
played of the current title
2nd pressing
of button: display of the remaining time of
the current title and switching-on
of function OUTRO to play the
last 30 seconds respectively of
the following titles (this function is
only active as from the next title, if
necessary, press button )
3rd pressing
of button: display of the remaining time of
the entire CD
4th pressing
of button: switching back to the basic set-
ting
12 Buttons SEARCH and for fast forward
and reverse; if one of the buttons is kept pressed,
the CD player advances or reverses quickly
13 Button STOP to stop the replay
4
GB
D
A
CH

14 Taste CONT./SINGLE zur Auswahl der Betriebs-
art (siehe auch Kapitel 5.3)
Grundeinstellung:
„Single“ – Einzeltitelwiederga-
be; im Display wird „SINGLE
AUTO CUE“ (d) angezeigt
1. Tastendruck: „Continue“ – Wiedergabe aller
Titel der CD; im Display wird
„CONTINUE“ (c) angezeigt
2. Tastendruck Grundeinstellung – Einzeltitel-
wiedergabe
15 Taste BPM/TAP zur Anzeige der Taktschläge pro
Minute; dazu die Taste einige Male im Takt der
Musik antippen: das Display wechselt von der
Anzeige der Geschwindigkeitsabweichung (j) auf
die Anzahl der Taktschläge und die LED neben
der Taste leuchtet auf.
Zum Zurückschalten auf die Anzeige der Ge-
schwindigkeitsabweichung die Taste ca. 3 Sekun-
den gedrückt halten, bis die LED wieder erlischt.
16 Tasten PITCH BEND zur Synchronisation des
gerade laufenden Titels an den Takt eines auf
einem anderen Gerät laufenden Musikstückes.
Solange eine der Tasten betätigt wird, läuft der
Titel um 16 % schneller bzw. langsamer als mit
Standardgeschwindigkeit und die LED neben
der Taste PITCH (6) blinkt.
17 Schieberegler PITCH CONTROL zum Ändern
der Geschwindigkeit bzw. Tonhöhe (max. ±16 %);
die Einstellung des Reglers ist nur bei gedrückter
Taste PITCH (6) wirksam
1.2 Rückseite (Abb. 3)
18 digitaler Audioausgang (Cinch)
19 analoger Audioausgang mit Line-Pegel (Cinch,
Links/Rechts)
20 Umschalter für die Art der Fernsteuerung des
CD-Players über ein Mischpult mit Faderstart-
Funktion, siehe Kap. 6
LOCK SW: Der CD-Player wird bei Auf-/Zuzie-
hen des Mischpult-Faders über einen Ein-/
Ausschalter im Mischpult gestartet/auf Pau-
se geschaltet.
TACT SW: Der CD-Player wird bei Auf-/Zuzie-
hen des Mischpult-Faders über einen Taster
im Mischpult gestartet/auf Pause geschaltet.
CUE PLAY: Der CD-Player wird bei Auf-/Zu-
ziehen des Mischpult-Faders über einen vom
Mischpult gesendeten Steuerimpuls vom
Cue-Punkt aus gestartet/auf den Cue-Punkt
zurückgesetzt und auf Pause geschaltet.
21 3,5-mm-Klinkenbuchse für die Fernsteuerung
des CD-Players über ein Mischpult mit Fader-
start-Funktion, siehe Kap. 6
22 Netzkabel zum Anschluss an eine Steckdose
(230 V~/50 Hz)
2 Hinweise für den sicheren Gebrauch
Das Gerät entspricht allen relevanten Richtlinien der
EU und ist deshalb mit gekennzeichnet.
Beachten Sie auch unbedingt die folgenden Punkte:
Vorsicht! Blicken Sie bei geöffneter CD-Schublade
nicht in den CD-Schacht. Eventuell austretende
Laserstrahlen können zu Augenschäden führen.
Verwenden Sie das Gerät nur im Innenbereich.
Schützen Sie es vor Tropf- und Spritzwasser,
hoher Luftfeuchtigkeit und Hitze (zulässiger Ein-
satztemperaturbereich 0 – 40 °C).
Stellen Sie keine mit Flüssigkeit gefüllten Gefäße,
z. B. Trinkgläser, auf das Gerät.
Nehmen Sie das Gerät nicht in Betrieb bzw. zie-
hen Sie sofort den Netzstecker, wenn:
1. sichtbare Schäden am Gerät oder am Netz-
kabel vorhanden sind,
2. nach einem Sturz oder Ähnlichem der Verdacht
auf einen Defekt besteht,
3. Funktionsstörungen auftreten.
Geben Sie das Gerät in jedem Fall zur Reparatur
in eine Fachwerkstatt.
Ein beschädigtes Netzkabel darf nur durch den
Hersteller oder eine autorisierte Fachwerkstatt
ersetzt werden.
Ziehen Sie den Netzstecker nie am Kabel aus der
Steckdose, fassen Sie immer am Stecker an!
Wird das Gerät zweckentfremdet, nicht richtig an-
geschlossen, falsch bedient oder nicht fachgerecht
repariert, kann keine Haftung für daraus resultie-
rende Sach- oder Personenschäden und keine
Garantie für das Gerät übernommen werden.
3 Einsatzmöglichkeiten
Der CD-Player CD-164DJ ist speziell für den profes-
sionellen DJ-Bereich konzipiert. Viele Funktions-
möglichkeiten sind genau auf diesen Einsatzbereich
abgestimmt, z. B. Einzeltitelwiedergabe und der
manuelle Beatcounter.
Auf dem CD-Player können Audio-CDs und
selbst gebrannte CDs (Audio CD-R) abgespielt
werden. Bei wiederbeschreibbaren CDs (CD-RW)
kann es jedoch je nach CD-Typ, verwendetem CD-
Brenner und Brennprogramm beim Abspielen zu
Problemen kommen.
4 Gerät aufstellen und anschließen
Der CD-Player ist für die Montage in ein Rack
(482 mm/19″) vorgesehen. Hierzu werden 2 Höhen-
einheiten benötigt (1 Höheneinheit = 44,45 mm).
Der CD-Player lässt sich aber auch als frei stehen-
des Tischgerät verwenden. In diesem Fall muss er
auf einer ebenen, waagerechten Fläche aufgestellt
werden.
Soll das Gerät endgültig aus dem Betrieb
genommen werden, übergeben Sie es zur
umweltgerechten Entsorgung einem örtli-
chen Recyclingbetrieb.
WARNUNG Das Gerät wird mit lebensgefährli-
cher Netzspannung (230 V~) versorgt.
Nehmen Sie deshalb nie selbst Ein-
griffe am Gerät vor. Durch unsachge-
mäßes Vorgehen besteht die Gefahr
eines elektrischen Schlages.
14 Button CONT./SINGLE to select the operating
mode (also see chapter 5.3)
Basic setting: “Single” – single title replay;
“SINGLE AUTO CUE” (d) is dis-
played
1st pressing
of button: “Continue” – replay of all titles of
the CD; “CONTINUE” (c) is dis-
played
2nd pressing
of button: basic setting – single title replay
15 Button BPM/TAP to display the beats per min-
ute; for this purpose shortly press the button sev-
eral times to the beat of the music: the display
changes from the display of the speed deviation
(j) to the number of beats, and the LED next to
the button lights up.
To switch back to the display of the speed devia-
tion, keep the button pressed for approx. 3 sec-
onds until the LED is extinguished again.
16 Buttons PITCH BEND to synchronize the beat of
a title currently playing to that of a title playing on
another unit. As long as one of the buttons is
pressed, the title is played by 16 % faster or
slower than at standard speed, and the LED next
to the button PITCH (6) flashes.
17 Sliding control PITCH CONTROL to change the
speed or pitch (max. ±16 %);
the adjustment of the control is only effective
when button PITCH (6) is pressed
1.2 Rear panel (fig. 3)
18 Digital audio output (phono)
19 Analog audio output with line level (phono, left/
right)
20 Selector switch for the type of remote control of
the CD player via a mixer with fader start func-
tion, see chapter 6
LOCK SW: The CD player is started/set to pause
when advancing/closing the mixer fader via
an on/off switch in the mixer.
TACT SW: The CD player is started/set to pause
when advancing/closing the mixer fader via a
momentary pushbutton in the mixer.
CUE PLAY: The CD player is started from the
Cue point/reset to the Cue point and set to
pause via a control pulse sent by the mixer
when advancing/closing the mixer fader.
21 3.5 mm jack for the remote control of the CD player
via a mixer with fader start function, see chapter 6
22 Mains cable for connection to a socket (230 V~/
50 Hz)
2 Safety Notes
This unit corresponds to all relevant directives of the
EU and is therefore marked with .
It is essential to observe the following items:
Caution! Do not look into the CD compartment
when the CD tray is opened. Laser beams could
be emitted resulting in eye damage.
The unit is suitable for indoor use only. Protect it
against dripping water and splash water, high air
humidity, and heat (admissible ambient tempera-
ture range 0 – 40 °C).
Do not place any vessels filled with liquid, e. g.
drinking glasses, on the unit.
Do not set the unit into operation, and immediately
disconnect the mains plug from the mains socket if
1. there is visible damage to the unit or to the
mains cable,
2. a defect might have occurred after a drop or
similar accident,
3. there are malfunctions.
The unit must in any case be repaired by skilled
personnel.
A damaged mains cable must only be replaced by
the manufacturer or by authorized, skilled person-
nel.
Never pull the mains cable to disconnect the
mains plug from the mains socket, always seize
the plug!
No guarantee claims for the unit and no liability for
any resulting personal damage or material dam-
age will be accepted if the unit is used for other
purposes than originally intended, if it is not cor-
rectly connected, operated, or not repaired in an
expert way.
Important for U. K. Customers!
The wires in this mains lead are coloured in accord-
ance
with the following code:
blue = neutral
brown = live
As the colours of the wires in the mains lead of this
appliance may not correspond with the coloured
markings identifying the terminals in your plug,
proceed as follows:
1. The wire which is coloured blue must be con-
nected to the terminal in the plug which is
marked with the letter N or coloured black.
2. The wire which is coloured brown must be con-
nected to the terminal which is marked with the
letter L or coloured red.
3 Applications
The CD player CD-164DJ has especially been de-
signed for professional DJ applications. Many func-
tional features exactly match this field of application,
e. g. single title replay and the manual beat counter.
It is possible to play audio CDs and CDs you
have burnt yourself (audio CD-R) on the CD player.
If the unit is to be put out of operation defin-
itively, take it to a local recycling plant for
disposal which is not harmful to the envi-
ronment.
WARNING
The unit is supplied with hazardous
mains voltage (230 V~). Leave servic-
ing to skilled personnel only. Inexpert
handling may cause an electric shock
hazard.
5
GB
D
A
CH

Vor dem Anschluss bzw. vor dem Verändern von An-
schlüssen den CD-Player und die anzuschließen-
den Geräte ausschalten.
1) Ist an Ihrem Mischpult oder Verstärker ein Digital-
eingang vorhanden, diesen an den Digitalaus-
gang DIGITAL OUT (18) anschließen.
Bei Geräten ohne Digitaleingang den Stereo-
Ausgang LINE OUT (19) – linker Kanal L und
rechter Kanal R – über ein Cinch-Kabel mit
einem CD-Player-Eingang am Mischpult oder am
Verstärker verbinden.
2) Der CD-Player kann über ein Mischpult mit Fa-
derstart-Funktion ferngesteuert werden. Der An-
schluss der Steuerverbindung und die Art der
Fernsteuerung sind in Kapitel 6 erläutert.
3) Zuletzt den Netzstecker des Anschlusskabels
(22) in eine Steckdose (230 V~/50 Hz) stecken.
5 Bedienung
5.1 CD abspielen
1) Mit dem Ein-/Ausschalter POWER (1) den CD-
Player einschalten. Auf dem Display (5) erschei-
nen nacheinander folgende Anzeigen:
(schließen)
(lesen)
(keine CD) – wenn keine CD eingelegt ist
2) Mit der Taste (3) die CD-Schublade (2) öffnen.
Im Display erscheint (öffnen).
3) Eine CD mit der Beschriftung nach oben einlegen
und die CD-Schublade mit der Taste schlie-
ßen. Bei korrekt eingelegter CD gibt das Display
nach kurzer Zeit die Gesamttitelanzahl (f) und die
Gesamtspieldauer (g) der CD an und anschlie-
ßend die Spieldauer (g) des ersten Titels.
[Soll nach dem Einlegen der CD sofort der
erste Titel starten, die CD-Schublade mit der
Taste (10) schließen.]
4) Zum Starten mit dem ersten Titel die Taste
drücken (falls die CD-Schublade mit der Taste
geschlossen wurde). Solange die CD abgespielt
wird, zeigt das Display das Symbol (b).
Soll mit einem anderen Titel gestartet werden,
diesen über die Tasten , (4) oder +10 (9)
anwählen:
– Mit jedem Betätigen der Taste +10 erfolgt ein
Sprung über 10 Titel vorwärts.
– Durch Drücken der Taste wird immer ein
Titel weitergeschaltet. Beim Drücken der Taste
wird an den Anfang des gerade laufenden
Titels gesprungen. Durch mehrfaches Drü-
cken der Taste wird immer ein Titel weiter
zurückgesprungen. Zum Überspringen mehre-
rer Titel kann die Taste bzw. auch
gedrückt gehalten werden.
Danach den Titel mit der Taste starten.
5) Das Abspielen kann jederzeit mit der Taste
unterbrochen werden. Im Display erscheint das
Pausensymbol (a) und die LEDs über den
Tasten und CUE (8) blinken. Zum Weiterlau-
fen der CD die Taste noch einmal drücken.
6) Nach dem Einschalten steht das Gerät immer
auf Einzeltitelwiedergabe; das Display zeigt
„SINGLE AUTO CUE“ (d). Ist ein Titel zu Ende
gespielt, schaltet das Gerät am Anfang des näch-
sten Titels auf Pause. Soll jedoch automatisch
der nächste Titel gespielt werden, muss mit der
Taste CONT./SINGLE (14) auf Gesamttitelwie-
dergabe geschaltet werden (siehe auch Kapitel
5.3.2).
7) Soll das Abspielen einer CD vorzeitig beendet
werden, den CD-Player auf Pause schalten oder
mit der Taste STOP (13) das Laufwerk stoppen.
Die CD-Schublade kann nun mit der Taste
geöffnet werden.
Hinweis: Während der Wiedergabe ist die CD-
Schublade gegen unbeabsichtigtes Öff-
nen verriegelt.
8) Vor dem Ausschalten des Gerätes immer mit
der Taste die CD-Schublade schließen um
das Laser-Abtastsystem vor Verschmutzung zu
schützen. Erst dann das Gerät mit dem Ein-/Aus-
schalter POWER (1) abschalten.
5.2 Anzeige der Titelnummer, Laufzeit
und Taktschläge pro Minute
In der Grundeinstellung nach dem Einschalten gibt
das Display (Abb. 2) während der Wiedergabe einer
CD und bei eingeschalteter Pause die Nummer (f)
und die Restzeit (g) des gerade laufenden Titels an.
Zur Kennzeichnung der Restzeit signalisiert das
Display „REMAIN“ (i). Die Zeit wird in Minuten (M)
und Sekunden (S) angezeigt, wobei die Sekunden
noch einmal in 75 sogenannte „Frames” (F) unter-
teilt sind (1 Frame = 1/75 Sekunde).
5.2.1 Die Laufzeitanzeige umschalten
und die Funktion OUTRO aktivieren
Durch mehrfaches Betätigen der Taste TIME (11)
können folgende Zeitinformationen angezeigt und
die Funktion OUTRO gewählt werden:
1. Tastendruck: die bereits gespielte Zeit des laufen-
den Titels (die Anzeige „REMAIN“ erlischt)
2. Tastendruck: die Funktion OUTRO zum Abspielen
der jeweils letzten 30 Sekunden der weiteren
Titel (die Funktion ist erst ab dem nächsten Titel
aktiv – eventuell die Taste betätigen); die
Restzeit des laufenden Titels wird angezeigt
3. Tastendruck: die Restzeit der gesamten CD; die
Funktion OUTRO ist wieder deaktiviert
4. Tastendruck: Grundeinstellung (Anzeige der Rest-
zeit des laufenden Titels)
5.2.2 Bargraph
Der Bargraph (e) stellt die Titel- bzw. CD-Restzeit
oder die bereits gespielte Zeit eines Titels durch
seine Länge graphisch dar, je nachdem welche Zeit-
information im Display mit der Taste TIME (11) ge-
wählt wurde. Die letzten 30 Sekunden eines Titels
signalisiert der Bargraph durch Blinken in seiner
vollen Länge, wobei die letzten 15 Sekunden durch
ein schnelleres Blinken angezeigt werden.
5.2.3 Beatcounter
Mit dem manuellen Beatcounter lässt sich die An-
zahl der Taktschläge pro Minute (BPM = beats per
minute) des laufenden Titels feststellen:
However, in case of rewritable CDs (CD-RW) prob-
lems may arise while replaying depending on the
CD type, CD burner, and burning programme used.
4 Setting-up and Connecting the Unit
The CD player is provided for mounting into a rack
(482 mm/19″). For this purpose two rack spaces are
required (1 rack space = 44.45 mm). However, the
CD player can also be used as a table top unit. In this
case it must be placed on an even, horizontal sur-
face.
Prior to the connection or changing of connec-
tions switch off the CD player and the units to be
connected.
1) If a digital input is provided at your mixer or am-
plifier, connect it to the digital output DIGITAL
OUT (18).
In case of units without digital input connect
the stereo output LINE OUT (19) – left channel L
and right channel R – via a cable with phono con-
nectors to a CD player input at the mixer or ampli-
fier.
2) The CD player can be remote-controlled via a
mixer with fader start function. Information on the
connection of the control cable and type of
remote control can be found in chapter 6.
3) Finally connect the mains plug of the cable (22)
to a mains socket (230 V~/50 Hz).
5 Operation
5.1 Playing a CD
1) Switch on the CD player with the POWER switch
(1). The following indications are successively
displayed (5):
– if no CD has been inserted
2) Open the CD tray (2) with button (3). is
displayed.
3) Insert a CD with the lettering facing upwards and
close the CD tray with button . With the CD cor-
rectly inserted, after a short time the total number
of titles (f) and the total playing time (g) of the CD
are displayed and then the playing time (g) of the
first title.
[To start the first title immediately after inserting
the CD, close the CD tray with button (10).]
4) To start the first title, press button [if the CD
tray was closed with button ]. As long as the CD
is played, the symbol (b) is displayed.
To start with another title, select it via the but-
tons , (4) or +10 (9):
– Each time the button +10 is actuated, the unit
advances 10 titles.
– By pressing the button , the unit always
advances one title. By pressing the button ,
the unit goes to the beginning of the title cur-
rently playing. By pressing the button
repeatedly, the unit always returns one title. To
skip several titles, the button or can
also be kept pressed.
Then start the title with the button .
5) The playing can be interrupted any time with button
. The pause symbol (a) is displayed and the
LEDs above the buttons and CUE (8) flash. To
continue the CD, press button once again.
6) After switching-on, the unit is always set to single
title replay; “SINGLE AUTO CUE” (d) is displayed.
If a title is played to the end, the unit switches to
pause at the beginning of the next title. However,
for automatic playing of the next title, the unit
must be set to total title replay with button CONT./
SINGLE (14) [also see chap. 5.3.2].
7) To stop the CD replay at any time, set the CD
player to pause or stop the player mechanism
with the button STOP (13). The CD tray can now
be opened with button .
Note: While replaying, the CD tray is locked
against unintentional opening.
8) Prior to switching off the unit, always close the
CD tray with the button to protect the laser sys-
tem against impurities. Do not switch off the unit
with the POWER switch (1) before.
5.2 Display of title number, playing time,
and beats per minute
In the basic setting after switching-on, the number (f)
and the remaining time (g) of the currently playing
title are displayed (fig. 2) while replaying a CD and
with the pause mode activated. The display signal-
izes “REMAIN” (i) to indicate the remaining time.
The time is displayed in minutes (M) and seconds
(S), the seconds are again subdivided in 75 “frames”
(F) [1 frame = 1/75 second].
5.2.1 Switching over the display of the playing
time and activating the function OUTRO
By pressing button TIME (11) several times, the fol-
lowing time information and the function OUTRO
can be selected:
1st pressing of button: the time already played of the
current title (display “REMAIN” is extinguished)
2nd pressing of button: the function OUTRO for
playing in each case the last 30 seconds of fur-
ther titles (the function is only active as from the
next title – if required, press button ); the
remaining time of the current title is displayed
3rd pressing of button: the remaining time of the en-
tire CD; the function OUTRO is deactivated
again
4th pressing of button: basic setting (display of the
remaining time of the current title)
5.2.2 Bar graph
According to the time indication selected on the dis-
play with the button TIME (11), the bar graph (e)
shows graphically by its length the remaining time of
a title or CD or the time already played of a title. The
last 30 seconds of a title are indicated by the bar
graph flashing in its full length, the last 15 seconds
by even faster flashing.
6
GB
D
A
CH
1) Die Taste BPM/TAP (15) im Takt der Musik einige
Male antippen. Das Display wechselt von der
Anzeige der Geschwindigkeitsabweichung (j) auf
die Anzahl der Taktschläge und die LED neben
der Taste leuchtet auf.
2) Um bei dem nächsten Musikstück dessen Anzahl
der Taktschläge zu messen, die Taste BPM/TAP
wieder im Takt einige Male antippen. Das Display
zeigt den neuen Wert an.
3) Zum Zurückschalten auf die Anzeige der Ge-
schwindigkeitsabweichung die Taste BPM/TAP
ca. 3 Sekunden gedrückt halten, bis die LED wie-
der erlischt.
5.3 Betriebsart wählen
5.3.1 „Single“ – Einzeltitelwiedergabe
Nach dem Einschalten des CD-Players ist immer die
Einzeltitelwiedergabe aktiviert, die speziell für DJ-
Anwendungen vorgesehen ist:
1. Das Display zeigt „SINGLE AUTO CUE“ (d).
2. Nach dem Einlesen einer CD oder nach dem An-
wählen eines Titels steht der CD-Player exakt an
der Stelle, an der die Musik beginnt (nicht bei
Zeitindex 0:00:00).
Diese Stelle wird automatisch als Startpunkt
gespeichert. Das Display signalisiert dabei kurz
„ “. Nach dem Starten des Titels kann mit
der Taste CUE (8) auf diesen Startpunkt zurück-
gesprungen werden.
3. Nach dem Spielen eines Titels schaltet das Gerät
exakt an der Stelle auf Pause, an der die Musik
des nächsten Titels beginnt. Diese Stelle ist dann
als neuer Startpunkt gespeichert.
5.3.2 „Continue“ – Gesamttitelwiedergabe
Soll ein Titel nach dem anderen kontinuierlich abge-
spielt werden, mit der Taste CONT./SINGLE (14) auf
Gesamttitelwiedergabe schalten. Das Display springt
von „SINGLE AUTO CUE“ (d) auf „CONTINUE“ (c)
um. Zum Zurückschalten auf Einzeltitelwiedergabe
die Taste CONT./SINGLE erneut betätigen.
5.4 Anspielen eines Titels
1) Nach dem Einlegen einer CD zuerst ggf. mit der
Taste +10 (9) und dann mit der Taste bzw.
(4) auf den gewünschten Titel springen.
2) Erscheint im Display die Laufzeit (g) des Titels,
die Taste CUE (8) gedrückt halten. Der Titel wird
so lange angespielt, wie die Taste gedrückt wird.
3) Nach dem Loslassen der Taste CUE springt das
Gerät auf den Titelanfang zurück und schaltet auf
Pause. Zum Starten des Titels die Taste (10)
drücken. Auf den Titelanfang kann weiterhin mit
der Taste CUE zurückgesprungen werden.
5.5 Schneller Vor- und Rücklauf
Soll während des Abspielens einer CD der Titel
schnell weiter- oder zurückgefahren werden, die
Taste SEARCH oder (12) gedrückt halten.
Hinweise:
a Bei der Einzeltitelwiedergabe fährt der Rücklauf
bis zum Anfang des momentanen Titels. Dann
schaltet das Gerät auf Pause. Wird mit dem Vor-
lauf der nächste Titel erreicht, schaltet das Gerät
ebenfalls auf Pause.
b Bei der Gesamttitelwiedergabe fährt der Vor- und
Rücklauf auch über mehrere Titel, wird jedoch
am Anfang und am Ende der CD beendet.
c Im Pausenmodus wird nach einem Vor-/Rücklauf
die momentane Stelle ständig wiederholt, bis die
Wiedergabe mit der Taste (10) gestartet oder
die Taste CUE (8) zweimal angetippt wird.
5.6 Genaues Anfahren
einer bestimmten Stelle
Zum exakten Anfahren einer gewünschten Stelle bei
eingeschalteter Pause das Drehrad REV/FWD (7)
drehen. Auf der CD wird so lange und so schnell vor-
oder zurückgefahren, wie das Rad nach rechts oder
links gedreht wird. Auf dem Display kann in der Zeit-
anzeige (g) die genaue Position abgelesen und
in Schritten von 1 „Frame“ (F) angefahren werden
(1 Frame = 1/75 Sekunde). Nach dem Drehen wird die
momentane Stelle so lange wiederholt, bis die Taste
(10) gedrückt oder die Taste CUE (8) kurz zwei-
mal angetippt wird.
5.7 Sprung zu einer zuvor bestimmten
Stelle (Cue-Punkt)
1) Während des Abspielens eines Titels mit der
Taste (10) auf Pause schalten, wenn die
Stelle erreicht ist, zu der später zurückgesprun-
gen werden soll. Die LEDs über den Tasten
und CUE (8) blinken.
2) Bei Bedarf kann mit dem Drehrad REV/FWD (7)
die Stelle exakter angefahren werden. Die mo-
mentane Stelle ist fortlaufend zu hören.
3) Die Taste CUE (8) antippen. Dadurch wird intern
die Stelle markiert. Die LED über der Taste CUE
blinkt erst schnell und leuchtet dann kontinuier-
lich. Die LED über der Taste blinkt weiter als
Aufforderung die Wiedergabe zu starten.
4) Das Abspielen mit der Taste wieder starten.
5) Mit der Taste CUE kann nun auf die markierte
Stelle zurückgesprungen werden. Das Laufwerk
steht dann auf Pause.
6) Mit der Taste die Wiedergabe starten oder
die Taste CUE gedrückt halten. Nach dem Los-
lassen der Taste CUE steht das Laufwerk wieder
an der markierten Stelle auf Pause.
Hinweise:
a Bei Einzeltitelwiedergabe kann der Rücksprung
nur innerhalb eines Titels erfolgen. Beim Errei-
chen des nächsten Titels wird die markierte
Stelle durch den Startpunkt des nächsten Titels
ersetzt (siehe Kapitel 5.3.1).
b Sowohl bei Einzeltitel- als auch bei Gesamttitel-
wiedergabe wird beim Anwählen eines anderen
Titels mit den Tasten , (4) oder +10 (9) die
markierte Stelle immer durch den Anfang des ge-
wählten Titels ersetzt.
5.2.3 Beat counter
With the manual beat counter the number of beats
per minute (BPM) of the current title can be deter-
mined:
1) Shortly press button BPM/TAP (15) several times
to the beat of the music. The display changes
from the indication of the speed deviation (j) to
the number of beats and the LED next to the but-
ton lights up.
2) To determine the number of beats of the next
piece of music, shortly press again button BPM/
TAP several times to the beat. The display shows
the new value.
3) To switch back to the display of the speed devia-
tion, keep button BPM/TAP pressed for approx.
3 seconds until the LED is extinguished again.
5.3 Selecting the operating mode
5.3.1 “Single” – single title replay
After switching on the CD player, the single title
replay especially provided for DJ applications is
always activated:
1. The display shows “AUTO CUE SINGLE” (d).
2. After reading in a CD or after selecting a title, the
CD player is precisely at the spot where the
music starts (not at time index 0:00:00).
The unit automatically memorizes this spot as
a starting point. The display shortly indicates
“ ”. After starting the title, it is possible to
return to this starting point with the button CUE
(8).
3. After playing a title, the unit is set to pause pre-
cisely at the spot where the music of the next title
starts. This spot is then memorized as a new
starting point.
5.3.2 “Continue” – total title replay
For continuous replay of one title after the other,
switch to total title replay with the button CONT./
SINGLE (14). The display switches from “SINGLE
AUTO CUE” (d) to “CONTINUE” (c). To return to sin-
gle title replay, actuate the button CONT./ SINGLE
again.
5.4 Short playing of a title beginning
1) After inserting a CD, first go to the desired title
with button +10 (9), if necessary, and then with
button or (4).
2) If the playing time (g) of the title is displayed,
keep button CUE (8) pressed. The title is played
as long as the button is kept pressed.
3) After releasing button CUE, the unit returns to the
title beginning and switches to pause. To start the
title, press button (10). It is still possible to
return to the title beginning with button CUE.
5.5 Fast forward and reverse
For fast forward or reverse of the title while playing a
CD, keep button SEARCH or (12) pressed.
Notes:
a During the single title replay the reverse goes to
the beginning of the current title. Then the unit
switches to pause. If the next title is reached with
the fast forward, the unit switches to pause as
well.
b For the total title replay the fast forward and
reverse also goes beyond several titles, however,
it stops at the beginning and at the end of the CD.
c In the pause mode, after a fast forward or
reverse, the current spot is continuously repeat-
ed until the replay is started with button (10),
or button CUE (8) is shortly pressed twice.
5.6 Precisely selecting a certain spot
For precisely selecting a desired spot with the pause
mode activated, turn the rotary wheel REV/FWD (7).
The unit advances or reverses as long as and as
fast on the CD as the wheel is turned to the right or
left. It is possible to read the exact position in the
time indication (g) of the display and to select it in
steps of 1 “frame” (F) [1 frame = 1/75 second]. After
turning, the current spot is repeated until button
(10) is pressed or button CUE (8) is shortly pressed
twice.
5.7 Return to a spot defined before (Cue point)
1) While playing a title, switch to pause with button
(10) when the spot is reached to return to lat-
er. The LEDs above the buttons and CUE (8)
flash.
2) If required, it is possible to select this spot more
precisely with the rotary wheel REV/FWD (7).
The current spot can continuously be heard.
3) Shortly press button CUE (8). Thus, the spot is
internally marked. The LED above button CUE
first flashes fast and then lights up continuously.
The LED above button continues to flash as
a request to start the replay.
4) Start the replaying again with button .
5) With button CUE it is now possible to return to the
marked spot. Then the player mechanism is in
the pause mode.
6) Start the replay with button or keep button
CUE pressed. After releasing button CUE, the
player mechanism is at the marked spot in the
pause mode again.
Notes:
a With single title replay, it is only possible to
reverse within a title. When reaching the next
title, the marked spot is replaced by the starting
point of the next title (see chapter 5.3.1).
b Both with single title replay and total title replay,
the marked spot is always replaced by the begin-
ning of the selected title when selecting another
title with the buttons , (4) or +10 (9).
7
GB
D
A
CH

5.8 Geschwindigkeit und
Tonhöhe verändern
Die Geschwindigkeit und damit gleichzeitig die Ton-
höhe („pitch“) lassen sich mit dem Schieberegler
PITCH CONTROL (17) um max. ±16 % ändern.
1) Die Taste PITCH (6) drücken. Die LED neben der
Taste leuchtet.
2) Die Geschwindigkeit mit dem Schieberegler
PITCH CONTROL (17) verändern. Im Display
wird die prozentuale Abweichung (j) von der
Standardgeschwindigkeit angezeigt.
Wurde mit der Taste BPM/TAP (15) der manu-
elle Beatcounter aktiviert (siehe Kapitel 5.2.3
„Beatcounter“), zeigt das Display stattdessen die
Anzahl der Taktschläge pro Minute an, die sich
bei Verstellen des Schiebereglers entsprechend
ändert.
3) Mit der Taste PITCH kann zwischen der mit dem
Schieberegler eingestellten Geschwindigkeit und
der Standardgeschwindigkeit hin- und herge-
schaltet werden.
5.9 Takt zwischen 2 Musikstücken angleichen
(„Pitch Bend“)
Mit den Tasten PITCH BEND (16) kann der Takt des
gerade laufenden Titels an den Takt eines auf einem
anderen Gerät laufenden Musikstückes angepasst
werden.
1) Mit der Taste PITCH (6) den Schieberegler
PITCH CONTROL (17) aktivieren. Die LED ne-
ben der Taste muss leuchten.
2) Mit dem Regler PITCH CONTROL die Geschwin-
digkeit des laufenden Musikstückes an die Ge-
schwindigkeit des zweiten Musikstückes anglei-
chen.
3) Mit den Tasten PITCH BEND die Taktschläge bei-
der Musikstücke genau übereinander legen:
Solange die Taste +oder
-
gedrückt gehalten
wird, läuft der Titel um 16 % schneller bzw. lang-
samer als mit Standardgeschwindigkeit und die
LED der Taste PITCH sowie die Geschwindig-
keitsanzeige (j) blinken.
4) Durch Drehen des Drehrads REV/FWD (7) kann
ebenfalls eine Geschwindigkeitsänderung zur
Taktanpassung erfolgen.
6 Faderstart über ein Mischpult
Der CD-Player lässt sich über ein Mischpult mit
Faderstart-Funktion fernsteuern. Je nachdem, wie
das Mischpult konzipiert ist, kann die Steuerung über
einen Ein-/Ausschalter (wie bei den meisten Misch-
pulten aus dem Sortiment von „img Stage Line“),
einen Taster oder einen Steuerimpuls erfolgen.
1) Um eine Fehlfunktion zu vermeiden, zuerst den
CD-Player und das Mischpult ausschalten.
2) Mit dem Schalter (20) auf der Rückseite des CD-
Players die Art der Fernsteuerung einstellen:
a Position LOCK SW: Steuerung von “Start/
Pause” über einen Ein-/Ausschalter
Mit dem Öffnen des zugehörigen Mischpult-
Faders wird ein Schalter im Mischpult ge-
schlossen, der den CD-Player startet. Beim
Schließen des Faders öffnet der Schalter und
schaltet dadurch den CD-Player auf Pause.
Mischpult
Faderstart über Ein-/Ausschalter
b Position TACT SW: Steuerung von “Start/
Pause” über einen Taster
Wird der Taster das erste Mal beim Öffnen des
zugehörigen Faders am Mischpult betätigt,
startet der CD-Player. Wird der Taster zum
zweiten Mal beim Schließen des Faders be-
tätigt, schaltet der CD-Player auf Pause.
Mischpult
Faderstart über Taster
c Position CUE PLAY: Steuerung von “Start ab
dem Cue-Punkt/Rücksprung zum Cue-Punkt
(Pause)” über einen Impuls
Beim Aufziehen des zugehörigen Mischpult-
Faders wird durch einen kurzen Steuerimpuls
des Mischpults die Wiedergabe ab dem Cue-
Punkt (siehe Kap. 5.7) gestartet. Beim
Schließen des Faders springt das CD-Lauf-
werk durch einen weiteren Steuerimpuls
zurück zum Cue-Punkt und schaltet dort auf
Pause.
Mischpult
Faderstart über Steuerimpuls
3) Die entsprechende Faderstartbuchse am Misch-
pult über ein Verbindungskabel mit 3,5-mm-
Klinkensteckern (mono oder stereo) an die
Buchse START/PAUSE (21) anschließen.
5.8 Changing the speed and pitch
The speed and at the same time the pitch can be
changed by ±16 % max. with the sliding control
PITCH CONTROL (17):
1) Press button PITCH (6). The LED next to the but-
ton lights up.
2) Change the speed with the sliding control PITCH
CONTROL (17). The display shows the percent-
age deviation (j) from the standard speed.
If the manual beat counter has been activated
with the button BPM / TAP (15) [see chapter 5.2.3
“Beat counter”], the display instead indicates the
number of beats per minute which changes
accordingly when readjusting the sliding control.
3) With button PITCH it is possible to switch be-
tween the speed adjusted with the sliding control
and the standard speed and vice versa.
5.9 Matching the beat between two music
pieces (“Pitch Bend”)
With the buttons PITCH BEND (16) the beat of the
title currently playing can be matched to the beat of
a music piece playing on another unit.
1) Activate the sliding control PITCH CONTROL
(17) with button PITCH (6). The LED next to the
button must light up.
2) With the sliding control PITCH CONTROL match
the speed of the music piece currently playing to
the speed of the second music piece.
3) With buttons PITCH BEND synchronize the
beats of the two music pieces:
As long as the button + or
-
is kept pressed,
the title goes by 16 % faster or slower than at
standard speed and the LED of the PITCH button
and the speed indication (j) flash.
4) By turning the rotary wheel REV/FWD (7) it is
also possible to change the speed for pitch bend-
ing.
6 Fader Start via a Mixer
The CD player can be remote-controlled via a mixer
with fader start function. Depending on the design of
the mixer, the control can be made via an on/off
switch (as in case of most mixers of the product
range from “img Stage Line”), a momentary push-
button, or a control pulse.
1) To prevent a malfunction, first switch off the CD
player and the mixer.
2) With the switch (20) on the rear panel of the CD
player adjust the type of remote control:
a Position LOCK SW: Control of “start/pause”
via an on/off switch
When advancing the corresponding mixer
fader, a switch is closed in the mixer which
starts the CD player. When closing the fader,
the switch opens and thus switches the CD
player to pause.
mixer
Fader start via on/off switch
b Position TACT SW: Control of “start/pause”
via a momentary pushbutton
If the momentary pushbutton is actuated for
the first time when advancing the correspond-
ing fader on the mixer, the CD player starts. If
the momentary pushbutton is actuated for the
second time when closing the fader, the CD
player switches to pause.
mixer
Fader start via momentary pushbutton
c Position CUE PLAY: control of “start from the
Cue point/return to the Cue point (pause)” via
a pulse
When advancing the corresponding mixer
fader, the replay is started from the Cue point
(see chapter 5.7) by a short control pulse of
the mixer. When closing the fader, the CD
player mechanism returns to the Cue point
and is set to pause at this point by another
control pulse.
mixer
Fader start via control pulse
3) Connect the corresponding fader start jack on the
mixer via a cable with 3.5 mm plugs (mono or
stereo) to the jack START/PAUSE (21).
8
GB
D
A
CH

7 Pflege des Gerätes
Das Gerät vor Staub, Vibrationen, direktem Sonnen-
licht, Feuchtigkeit und Hitze schützen (zulässiger
Einsatztemperaturbereich 0 – 40 °C). Für die Reini-
gung nur ein weiches, trockenes Tuch verwenden,
auf keinen Fall Wasser oder Chemikalien.
Hinweis zu Tonaussetzern und Lesefehlern
Zigarettenrauch dringt leicht durch alle Öffnungen
des Gerätes und setzt sich auch auf der Optik des
Laser-Abtastsystems ab. Dieser Belag kann zu
Lesefehlern und Tonaussetzern führen. Da sich
Zigarettenrauch nicht immer vermeiden lässt (z. B.
in der Discothek), muss das Gerät dann in einer
Fachwerkstatt gereinigt werden. Diese Reinigung ist
kostenpflichtig, auch während der Garantiezeit!
8 Technische Daten
Frequenzbereich: . . . . . . . 20 – 20 000 Hz
Klirrfaktor: . . . . . . . . . . . . . < 0,1 %
Kanaltrennung: . . . . . . . . . > 80 dB
Dynamikumfang: . . . . . . . . > 90 dB
Störabstand: . . . . . . . . . . . > 80 dB
Gleichlaufschwankungen: . nicht messbar,
quarzgenau
Ausgänge
Line (analog): . . . . . . . . . 2 V
digital (koaxial): . . . . . . . 0,5 Vss, S/PDIF
Stromversorgung: . . . . . . . 230 V~/50 Hz
Leistungsaufnahme: . . . . . 15 VA
Einsatztemperatur: . . . . . . 0 – 40 °C
Abmessungen (B×H×T): . 482 × 89 × 260 mm,
2 Höheneinheiten
Gewicht: . . . . . . . . . . . . . . 4,2 kg
Änderungen vorbehalten.
7 Maintenance of the Unit
Protect the unit against dust, vibrations, direct sun-
light, humidity, and heat (admissible ambient tem-
perature range 0 – 40 °C). For cleaning only use a
soft, dry cloth, by no means water or chemicals.
Note on sound interruptions and reading errors
Cigarette smoke easily penetrates through all open-
ings of the unit and also deposits on the optics of the
laser system. This deposit may cause reading errors
and sound interruptions. As cigarette smoke cannot
always be prevented (e. g. in the discothèque), the
unit must be cleaned in a specialized workshop.
There is a charge on this cleaning, even during the
warranty time!
8 Specifications
Frequency range: . . . . . . . 20 – 20 000 Hz
THD: . . . . . . . . . . . . . . . . . < 0.1 %
Channel separation: . . . . . > 80 dB
Dynamic range: . . . . . . . . . > 90 dB
S/N ratio: . . . . . . . . . . . . . > 80 dB
Wow and flutter: . . . . . . . . cannot be measured,
quartz precision
Outputs
Line (analog): . . . . . . . . . 2 V
digital (coaxial): . . . . . . . 0.5 Vpp, S/PDIF
Power supply: . . . . . . . . . . 230 V~/50 Hz
Power consumption: . . . . . 15 VA
Ambient temperature: . . . . 0 – 40 °C
Dimensions (W × H × D): . 482 × 89 × 260 mm,
2 rack spaces
Weight: . . . . . . . . . . . . . . . 4.2 kg
Subject to technical modification.
9
GB
D
A
CH
Diese Bedienungsanleitung ist urheberrechtlich für MONACOR ®INTERNATIONAL GmbH & Co. KG
geschützt. Eine Reproduktion für eigene kommerzielle Zwecke – auch auszugsweise – ist untersagt.
All rights reserved by MONACOR ®INTERNATIONAL GmbH & Co. KG. No part of this instruction manual
may be reproduced in any form or by any means for any commercial use.

9 Erklärung der Fachbegriffe
Kursiv gedruckte Wörter sind Stichwörter, die wei-
tererklärt werden.
Auto Cue: Beim Anwählen eines Titels steht der
CD-Player exakt an der Stelle, an der die Musik
beginnt und nicht bei dem Zeitindex 0:00:00.
Dadurch startet nach dem Drücken der Taste
die Musik sofort ohne Pause.
Bargraph: Im Display stellt ein Balken durch seine
Länge die Titel- bzw. CD-Restzeit oder die bereits
gespielte Zeit eines Titels graphisch dar.
Beatcounter engl. Taktzähler: Ermittelt die Anzahl
der Taktschläge pro Minute (BPM) und damit, wie
schnell ein Musikstück gespielt wird.
BPM: engl. beats per minute = Taktschläge pro
Minute
Der integrierte manuelle Beatcounter ermittelt die
Anzahl der Taktschläge pro Minute eines Titels,
wenn die Taste BPM /TAP einige Male im Takt der
Musik angetippt wird.
CE ( -Zeichen) franz. Communauté Européenne
= Europäische Gemeinschaft: Bestimmte Pro-
dukte, die in der EU verkauft werden sollen, müs-
sen das CE-Zeichen tragen. Damit bestätigt der
Hersteller bzw. der Vertreiber, dass das Produkt
alle entsprechenden Richtlinien der EU erfüllt.
Continue Gesamttitelwiedergabe
Cue-Punkt: Mit der CUE-Taste frei wählbare Stelle
auf der CD, auf die direkt gesprungen werden
kann (bei Einzeltitelwiedergabe nur innerhalb
eines Titels möglich). Wird mit der CUE-Taste auf
den Cue-Punkt zurückgesprungen, schaltet der
CD-Player in den Pausenmodus.
digital: Informationen in Ziffern dargestellt. Ein Ana-
log-Digital-Wandler setzt die von einem Mikrofon
aufgenommen Schallwellen in eine schnell hinter-
einander folgende Serie von Einsen und Nullen
(Binärzahlen, z. B. „1001“ = 9) um, die dann auf
einer CD gespeichert werden. Jede Binärzahl ent-
spricht einem momentanen Wert einer Schall-
schwingung. Ein ausgeklügeltes Fehlerkorrektur-
system rechnet Aussetzer und Störungen heraus,
wodurch die hohe Wiedergabequalität entsteht.
Ein Digital-Analog-Wandler setzt die Binärzahlen
wieder in elektrische Schwingungen um, die dann
verstärkt zu einem Lautsprecher gelangen.
Einzeltitelwiedergabe: Spezielle Betriebsart für
DJ-Anwendungen: Nach dem Spielen eines Titels
schaltet das Gerät auf Pause, im Gegensatz zur
Gesamttitelwiedergabe.
Faderstart engl. to fade in = einblenden: Mit einem
Schieberegler (Fader) an einem Mischpult, das
über eine Faderstart-Funktion verfügt, kann das
CD-Laufwerk beim Aufziehen des Faders gestar-
tet und beim Zuziehen des Faders wieder auf
Pause geschaltet werden. Die Steuerung des CD-
Spielers erfolgt entweder über Schaltkontakte im
Mischpult oder über vom Mischpult gesendete
Steuerimpulse.
Frame engl. Rahmen: Die Musik auf einer CD ist in
Datenblöcken (Rahmen) gespeichert. In einem
Block ist die Musikinformation für eine 1⁄75 Sekunde
gespeichert. Eine Stelle auf der CD kann dadurch
in Schritten von 1⁄75 Sekunde präzise angefahren
werden.
Gesamttitelwiedergabe: Betriebsart zum kontinu-
ierlichen Abspielen eines Titels nach dem ande-
ren, im Gegensatz zur Einzeltitelwiedergabe.
LED engl. light emitting diode: Elektronisches Bau-
teil, das elektrischen Strom direkt in Licht umwan-
delt (ohne Erzeugung von Hitze wie bei einer
Glühlampe); leuchtet je nach Material in verschie-
denen Farben oder auch in Weiß.
Line (-Ausgang, -Eingang, -Pegel) engl. Leitung:
Um Signale von einem Gerät zum anderen über-
tragen zu können, müssen diese einen festgeleg-
ten Spannungswert haben, sonst ist keine opti-
male Übertragung möglich. Dieser Wert liegt zwi-
schen 0,1 V und 2 V (Volt) und wird als Line-Pegel
bezeichnet. Ein- und Ausgänge, die für diese
Pegel vorgesehen sind, tragen meistens die Be-
schriftung LINE.
OUTRO: Funktion, bei der nur die letzten 30 Sekun-
den eines Titels abgespielt werden.
Pitch engl. Tonhöhe: Mit dem Regler PITCH CON-
TROL lässt sich die Abspielgeschwindigkeit und
damit die Tonhöhe verändern.
Pitch Bend: Funktion, mit der kurzzeitig die Abspiel-
geschwindigkeit erhöht oder verringert werden
kann. Der Takt des gerade gespielten Titels kann
so mit dem Takt eines Titels, der auf einem ande-
ren Gerät abgespielt wird, zeitgleich laufen. Beim
Überblenden von einem zum anderen Titel wird
dadurch der Tanzrhythmus nicht gestört.
Rack engl. Gestell: Ein Rack dient zur Aufnahme
von Geräten mit einer genormten Breite von
482 mm (19″), um eine komplette Audioanlage zu-
sammenzustellen, z. B. CD-Player, Mischpult,
Equalizer, Verstärker.
Single Einzeltitelwiedergabe
Taster: Schalter, dessen Kontakt nur so lange
geschlossen ist, wie der Schalterknopf gedrückt
gehalten wird, Beispiel Klingelschalter.
9 Glossary
Words in italics are keywords which are further
explained in detail.
Auto Cue: When selecting a title, the CD player is
exactly on the spot where the music starts and not
at the time index 0:00:00. For this reason, the
music starts immediately without pause after
pressing the button .
Bar graph: In the display there is a bar which shows
graphically by its length the remaining time of a
title or a CD or the time already played of a title.
Beat counter: Determines the number of beats per
minute (BPM) and thus the replay speed of a
music piece.
BPM (= beats per minute): The integrated manual
beat counter determines the number of beats per
minute of a title when the button BPM/TAP is
shortly pressed several times to the beat of the
music.
CE ( mark); French: Communauté Européenne =
European Community: Certain products on sale in
the EU must have the CE mark. Thus, the manu-
facturer or the distributor confirms that the product
meets all corresponding EU requirements.
Continue Total title replay
Cue point: Spot on the CD selected as desired with
the CUE button. The unit is able to go directly to
this spot (in case of single title replay only possible
within a title). If the unit returns to the Cue point
with the CUE button, the CD player is set to the
pause mode.
Digital: Information displayed in digits. An analog-
digital converter converts the sound waves picked
up by a microphone into a sequence of ones and
zeroes rapidly succeeding one another (binary
numbers, e. g. “1001” = 9) which are then stored
on a CD. Each binary number corresponds to a
current value of a sound vibration. A sophisticated
error correction system removes sound interrup-
tions and disturbances by calculation which results
in a high reproduction quality. A digital-analog con-
verter reconverts the binary numbers into electric
oscillations which are then amplified and sent to a
speaker.
Fader start: With a sliding control (fader) on a mixer
equipped with a fader start function, the CD player
mechanism can be started by advancing the fader
and set to pause by closing the fader. The CD
player is controlled either via switching contacts in
the mixer or via control pulses sent by the mixer.
Frame: The music on a CD is memorized in data
blocks (frames). The music information for a 1⁄75 sec-
ond is memorized in one block. Aspot on the CD can
thus precisely be selected in steps of 1⁄75 second.
LED (light emitting diode): Electronic component
which directly converts electric current into light
(without generating heat like an incandescent
lamp); according to its material, it shows different
colours or also white.
Line (line output, line input, line level): To be able to
transmit signals from one unit to another, these
signals must have a fixed voltage value otherwise
an optimum transmission is impossible. This value
is between 0.1 V and 2 V (Volt) and is designated
as line level. Inputs and outputs provided for these
levels are mostly marked LINE.
Momentary pushbutton: Switch, the contact of
which is only closed as long as the switch knob is
kept pressed, e. g. bell button.
OUTRO: Function for replaying only the last 30 sec-
onds of a title.
Pitch: The PITCH CONTROL allows modification of
the replay speed and thus the pitch.
Pitch Bend: Function for temporary increase or
decrease in the replay speed. The beat of the title
currently playing can thus be synchronized to the
beat of a title playing on another unit. Crossfading
from one title to the other will not affect the dance
rhythm.
Rack: A rack serves for accommodating units of a
standardized width of 482 mm (19″) to compile a
complete audio system, e. g. CD player, mixer,
equalizer, amplifier.
Single single title replay
Single title replay: Special operating mode for DJ
applications: After replay of a title the unit is set to
pause, contrary to the total title replay.
Total title replay: Operating mode for replaying one
title after the other continuously, contrary to the
single title replay.
10
GB
D
A
CH

Vous trouverez sur la page 3, dépliable, les élé-
ments et branchements décrits.
Table des matières
1 Eléments et branchements . . . . . . . . . . . 11
1.1 Face avant . . . . . . . . . . . . . . . . . . . . . . . . . 11
1.2 Face arrière . . . . . . . . . . . . . . . . . . . . . . . . 12
2 Conseils dʼutilisation et de sécurité . . . . 12
3 Possibilités dʼutilisation . . . . . . . . . . . . . 12
4 Positionnement de lʼappareil
et branchements . . . . . . . . . . . . . . . . . . . 13
5 Utilisation . . . . . . . . . . . . . . . . . . . . . . . . . 13
5.1 Lecture de CD . . . . . . . . . . . . . . . . . . . . . . 13
5.2 Affichage du numéro des titres, de la durée
de lecture et du nombre de beats par minute 13
5.2.1 Commutation de lʼaffichage de la durée de
lecture et activation de la fonction OUTRO 13
5.2.2 Bargraphe . . . . . . . . . . . . . . . . . . . . . . . . 13
5.2.3 Compteur de beats . . . . . . . . . . . . . . . . . 14
5.3 Sélection du mode de fonctionnement . . . . 14
5.3.1 “Single” – Lecture titre par titre . . . . . . . . 14
5.3.2 “Continue” – Lecture de tous les titres . . . 14
5.4 Lecture des premières notes dʼun titre . . . . 14
5.5 Avance et retour rapides . . . . . . . . . . . . . . 14
5.6 Positionnement exact à un endroit donné . 14
5.7 Retour à un endroit préalablement
déterminé (point Cue) . . . . . . . . . . . . . . . . 14
5.8
Modification de la vitesse, de la hauteur tonale
15
5.9 Adaptation du rythme entre deux
morceaux de musique (“Pitch Bend”) . . . . 15
6 Démarrage électrique via une table
de mixage . . . . . . . . . . . . . . . . . . . . . . . . . 15
7 Entretien de lʼappareil . . . . . . . . . . . . . . . 16
8 Caractéristiques techniques . . . . . . . . . . 16
9 Glossaire technique . . . . . . . . . . . . . . . . . 17
1 Eléments et branchements
1.1 Face avant (schéma 1)
1Interrupteur POWER Marche/Arrêt
2Tiroir CD
3Touche pour ouvrir et fermer le tiroir CD (2) ;
pendant la lecture dʼun CD, le tiroir CD est ver-
rouillé contre toute ouverture intempestive.
4Touches et pour sélectionner le titre sui-
vant souhaité :
à chaque pression sur la touche , vous avan-
cez dʼun titre. Par une pression sur la touche ,
vous revenez au début du titre en cours de lec-
ture. Par plusieurs pressions sur la touche ,
vous reculez dʼun titre à chaque fois. Pour sauter
plusieurs titres, maintenez la touche correspon-
dante enfoncée.
5Affichage multifonctions (voir schéma 2 pour
plus de détails)
asymbole pour le mode Pause
bsymbole pour le mode Lecture
caffichage “CONTINUE” : indique le mode de
fonctionnement “Lecture de tous les titres”,
voir position 14 (touche CONT./SINGLE)
daffichage “SINGLE AUTO CUE” : indique le
mode de fonctionnement “Lecture titre par titre”
ebargraphe : indique par sa longueur, la durée
restante dʼun titre ou du CD [“REMAIN” (i)
sʼaffiche] ou la durée déjà lue dʼun titre
(“REMAIN” sʼéteint)
fnuméro du titre ou juste après avoir inséré un
CD, le nombre de titres sur le CD
gaffichage de la durée en minutes (M), secondes
(S) et frames (F), voir position 11 (touche TIME)
haffichage “OUTRO” : sʼaffiche lorsque la fonc-
tion OUTRO est activée avec la touche TIME
(11)
iaffichage “REMAIN” : sʼaffiche lorsque la durée
restante dʼun titre ou dʼun CD est indiquée ;
voir également position 11 (touche TIME)
jaffichage de la déviation, en pourcentage, de
la vitesse standard, réglée avec le potentio-
mètre (17) ou du nombre de beats par minute
saisis avec la touche BPM/TAP (15)
6Touche PITCH pour activer la déviation de
vitesse réglée avec le potentiomètre (17)
7Molette REV/FWD pour la fonction “Pitch Bend”
et en mode Pause pour se positionner exacte-
ment à un endroit précis
8Touche CUE pour lire brièvement le début dʼun
titre ou pour revenir à un endroit précédemment
défini (voir chapitre 5.4 ou 5.7)
9Touche +10 pour sélectionner le titre : à chaque
pression sur la touche, vous avancez de 10 ti-
tres.
10 Touche pour commuter entre Lecture (affi-
chage ) et Pause (affichage )
11 Touche TIME : commutation de lʼaffichage de
durée (g) et activation de la fonction OUTRO
réglage de base : affichage de la durée restante
du titre en cours
1ère pression : affichage de la durée déjà lue
du titre en cours
2ème pression : affichage de la durée restante
du titre en cours et activation
de la fonction OUTRO pour
lire respectivement les 30
dernières secondes des titres
suivants (Cette fonction nʼest
active quʼà partir du titre sui-
vant, si besoin enfoncez la
touche ).
3ème pression : affichage de la durée restante
de tout le CD
4ème pression : retour au réglage de base
12 Touches SEARCH et : avance et retour
rapides ; si une des touches est maintenue enfon-
cée, le lecteur CD avance/recule rapidement.
13 Touche STOP : arrêt de la lecture
A pagina 3, se aperta completamente, vedrete
sempre gli elementi di comando e i collegamenti
descritti.
Indice
1 Elementi di comando e collegamenti . . . 11
1.1 Pannello frontale . . . . . . . . . . . . . . . . . . . . 11
1.2 Pannello posteriore . . . . . . . . . . . . . . . . . . 12
2 Avvertenze di sicurezza . . . . . . . . . . . . . 12
3 Possibilità dʼimpiego . . . . . . . . . . . . . . . . 12
4 Collocamento e collegamenti . . . . . . . . . 12
5 Funzionamento . . . . . . . . . . . . . . . . . . . . 13
5.1 Riprodurre un CD . . . . . . . . . . . . . . . . . . . 13
5.2 Visualizzazione del numero del titolo,
della durata e del numero battute al minuto 13
5.2.1 Cambiare la visualizzazione della
durata e attivare la funzione OUTRO . . . 13
5.2.2 Diagramma a barre . . . . . . . . . . . . . . . . . 13
5.2.3 Beatcounter . . . . . . . . . . . . . . . . . . . . . . . 14
5.3 Selezionare la modalità di funzionamento . 14
5.3.1 “Single” – riproduzione di un singolo titolo 14
5.3.2 “Continue” – riproduzione di tutti i titoli . . 14
5.4 Riproduzione dellʼinizio di un titolo . . . . . . . 14
5.5 Avanzamento/ritorno veloce . . . . . . . . . . . 14
5.6 Posizionarsi con esattezza su un
determinato punto . . . . . . . . . . . . . . . . . . . 14
5.7 Ritorno ad un punto predeterminato
(punto Cue) . . . . . . . . . . . . . . . . . . . . . . . . 14
5.8 Variare la velocità e lʼaltezza del suono . . . 15
5.9 Adattamento del ritmo fra due brani
(“pitch bend”) . . . . . . . . . . . . . . . . . . . . . . . 15
6 Avviamento tramite fader dal mixer . . . . 15
7 Manutenzione . . . . . . . . . . . . . . . . . . . . . . 16
8 Dati tecnici . . . . . . . . . . . . . . . . . . . . . . . . 16
9 Spiegazione dei termini tecnici . . . . . . . 17
1 Elementi di comando e collegamenti
1.1 Pannello frontale (fig. 1)
1Interruttore on/off POWER
2Cassetto CD
3Tasto per aprire e chiudere il cassetto CD (2);
durante la riproduzione di un CD, il cassetto è
bloccato per escludere lʼapertura involontaria
4Tasti e per selezionare il prossimo titolo
desiderato:
con ogni pressione sul tasto si salta al titolo
successivo. Premendo il tasto , si torna allʼini-
zio del titolo corrente. Con ogni ulteriore pres-
sione del tasto si salta indietro di un titolo.
Per saltare più titoli, tenere premuto il tasto.
5Display multifunzionale (per particolari vedi fig. 2)
asimbolo per la pausa
bsimbolo per la riproduzione
cindicazione “CONTINUE”; indica la modalità
di riproduzione di tutti i titoli, vedi posizione 14
(tasto CONT./SINGLE)
dindicazione “SINGLE AUTO CUE”; indica la
modalità di riproduzione di un singolo titolo
ediagramma a barre; indica con la sua lunghez-
za il tempo restante di un titolo o del CD [si
vede “REMAIN” (i) sul display] oppure il tempo
già trascorso del titolo (non si vede “REMAIN”)
fnumero del titolo e, brevemente dopo lʼinseri-
mento di un CD, il numero dei titoli del CD
gindicazione del tempo in minuti (M), secondi
(S) e frames (F); vedi posizione 11 (tasto TIME)
hindicazione “OUTRO”; si vede se la funzione
OUTRO è stata attivata con il tasto TIME (11)
iindicazione “REMAIN”; si vede quando viene
indicato il tempo restante di un titolo o dellʼin-
tero CD; vedi anche il punto 11 (tasto TIME)
jindicazione della deviazione percentuale dalla
velocità standard impostata con il regolatore
(17) o del numero di battute/minuto impostato
con il tasto BPM/TAP (15)
6Tasto PITCH per attivare la deviazione dalla
velocità impostata con il regolatore (17)
7Manopola REV/FWD per la funzione “pitch
bend”, e nella modalità di pausa per individuare
un punto esatto
8Tasto CUE per riprodurre lʼinizio di un titolo e per
ritornare su un punto marcato precedentemente
(vedi capp. 5.4 e 5.7)
9Tasto +10 per selezionare un titolo;
con ogni pressione del tasto si saltano 10 titoli in
avanti
10 Tasto per passare fra riproduzione (simbolo
) e pausa (simbolo ).
11 Tasto TIME per commutare lʼindicazione del tem-
po (g) sul display e per attivare la funzione
OUTRO
Impostazione base: il tempo restante del tito-
lo corrente
1. pressione del tasto: il tempo già passato del
titolo corrente
2. pressione del tasto: tempo restante del titolo
corrente e attivazione
della funzione OUTRO
per riprodurre gli ultimi
30 secondi dei titoli se-
guenti (attiva solo dopo il
titolo successivo; even-
tualmente premere il
tasto )
3. pressione del tasto: il tempo restante dellʼin-
tero CD
4. pressione del tasto: ritorno allʼimpostazione
base
12 Tasti SEARCH e per lʼavanzamento e
ritorno veloce; se si tiene premuto uno dei tasti, il
lettore avanza o ritorna velocemente
13 Tasto STOP per fermare la riproduzione
14 Tasto CONT./SINGLE per scegliere la modalità
di funzionamento (vedi anche cap. 5.3)
Impostazione base: “Single” – riproduzione di
un titolo singolo; il
11
I
F
B
CH

14 Touche CONT./SINGLE pour sélectionner le
mode de fonctionnement (voir également cha-
pitre 5.3)
réglage de base : “Single” : lecture titre par
titre : sur lʼaffichage “SINGLE
AUTO CUE” (d) sʼaffiche
1ère pression : “Continue” : lecture de tous
les titres du CD : sur lʼafficha-
ge “CONTINUE” (c) sʼaffiche
2ème pression : réglage de base – lecture titre
par titre
15 Touche BPM/TAP : affichage du nombre de
beats par minute ; appuyez brièvement plusieurs
fois sur la touche en fonction du rythme de la
musique. Lʼaffichage passe de lʼindication de la
déviation de la vitesse (j) au nombre de beats et
la LED à côté de la touche brille.
Pour revenir à lʼaffichage de la déviation de la
vitesse, maintenez la touche enfoncée pendant
3 secondes env. jusquʼà ce que la LED sʼéteigne.
16 Touches PITCH BEND : synchronisation du titre
en cours de lecture avec le rythme dʼun morceau
de musique lu sur un autre appareil. Tant quʼune
des touches est activée, le titre est lu 16 % plus
vite ou moins vite quʼavec la vitesse standard et
la LED à côté de la touche PITCH (6) clignote.
17 Potentiomètre de réglage PITCH CONTROL
pour modifier la vitesse et la hauteur tonale
(±16 % max.) : le réglage du potentiomètre nʼest
efficace que si la touche PITCH (6) est enfoncée.
1.2 Face arrière (schéma 3)
18 Sortie audio digitale (RCA)
19 Sortie audio analogique avec niveau ligne (RCA,
Gauche/Droit)
20 Sélecteur du type de démarrage électrique du
lecteur CD via une table de mixage avec fonction
démarrage électrique, voir chapitre 6
LOCK SW : le lecteur CD est démarré ou mis sur
pause lorsquʼon ouvre/ferme le fader de la
table de mixage via un interrupteur marche/
arrêt.
TACT SW : le lecteur CD est démarré ou mis sur
pause lorsquʼon ouvre/ferme le fader de la
table de mixage via un bouton poussoir mo-
mentané.
CUE PLAY: le lecteur CD est démarré à partir du
point Cue/réinitialisé au point Cue et mis sur
pause via une impulsion de commande en-
voyée par la table de mixage lorsquʼon pous-
se ou ferme le fader de la table de mixage.
21 Fiche jack 3,5 femelle pour le démarrage élec-
trique du lecteur CD via une table de mixage avec
fonction démarrage électrique, voir chapitre 6
22 Cordon secteur à brancher à une prise 230 V~/
50 Hz
2 Conseils dʼutilisation et de sécurité
Cet appareil répond à toutes les directives néces-
saires de lʼUnion européenne et porte donc le sym-
bole .
Respectez scrupuleusement les points suivants :
Attention ! Ne regardez jamais dans le tiroir CD
sʼil est ouvert. Des rayonnements laser pourraient
émettre et causer des dommages aux yeux.
Lʼappareil nʼest conçu que pour une utilisation en
intérieur. Protégez-le des éclaboussures, de tout
type de projections dʼeau, de lʼhumidité élevée et
de la chaleur (température ambiante admissible
0 – 40 °C).
En aucun cas, vous ne devez poser dʼobjet conte-
nant du liquide ou un verre sur lʼappareil.
Ne faites jamais fonctionner lʼappareil et débran-
chez-le immédiatement lorsque :
1. des dommages sur lʼappareil et sur le cordon
secteur apparaissent.
2. après une chute ou accident similaire..., lʼappa-
reil peut présenter un défaut.
3. des dysfonctionnements apparaissent.
Dans tous les cas, les dommages doivent être
réparés par un technicien spécialisé.
Tout cordon secteur endommagé ne doit être rem-
placé que par le fabricant ou un technicien habi-
lité.
Ne débranchez jamais lʼappareil en tirant sur le
cordon secteur, tenez-le toujours par la prise.
Nous déclinons toute responsabilité en cas de
dommages corporels ou matériels résultants si
lʼappareil est utilisé dans un but autre que celui
pour lequel il a été conçu, sʼil nʼest pas correcte-
ment branché, utilisé ou sʼil nʼest pas réparé par
une personne habilitée ; de même, la garantie
deviendrait caduque.
3 Possibilités dʼutilisation
Le lecteur CD CD-164DJ est spécialement conçu
pour une utilisation DJ professionnelle. De nom-
breuses possibilités de fonctionnement sont préci-
sément définies dans ce but, par exemple la lecture
titre par titre et le compteur de beats manuel.
Sur le lecteur CD, il est possible de lire des CDs
audio, des CD-R audio (gravés) ; des problèmes
lors de la lecture peuvent survenir avec des CD-RW
(CDs réinscriptibles) selon le type de CD, le graveur
et le logiciel de gravure utilisés.
Lorsque lʼappareil est définitivement retiré
du service, vous devez le déposer dans
une usine de recyclage de proximité pour
contribuer à son élimination non polluante.
AVERTISSEMENT
Cet appareil est alimenté par
une tension dangereuse en
230 V~. Ne touchez jamais lʼin-
térieur de lʼappareil car en cas
de mauvaise manipulation
vous pourriez subir une dé-
charge électrique.
display indica “SINGLE
AUTO CUE” (d)
1. pressione del tasto: “Continue” – riproduzio-
ne di tutti i titoli del CD; il
display indica “CONTI-
NUE” (c)
2. pressione del tasto: impostazione base – ri-
produzione di singoli titoli
15 Tasto BPM/TAP per indicare le battute al minuto;
toccare più volte il tasto nel ritmo della musica: il
display passa dallʼindicazione della deviazione
dalla velocità standard (j) allʼindicazione del nu-
mero di battute, e il LED vicino al tasto si accende.
Per ritornare allʼindicazione della deviazione
dalla velocità standard tener premuto il tasto per
3 secondi ca. fino allo spegnimento del LED.
16 Tasti PITCH BEND per sincronizzare il ritmo del
titolo corrente con quello di un titolo riprodotto su
un altro apparecchio. Mentre si spinge uno dei
tasti, la velocità aumenta o si riduce del 16 % ri-
spetto alla velocitá standard e il LED vicino al
tasto PITCH (6) lampeggia.
17 Cursore PITCH CONTROL per modificare la
velocità e quindi il suono (±16 % max.);
tale regolazione ha effetto solo se il tasto PITCH
(6) è abbassato
1.2 Pannello posteriore (fig. 3)
18 Uscita audio digitale (RCA)
19 Uscita audio analogica con livello Line (RCA,
sin./dx.)
20 Selettore per la modalità di telecomando del let-
tore CD attraverso un mixer con avviamento con
fader, vedi cap. 6
LOCK SW: Il lettore CD si avvia/mette in pausa
aprendo/chiudendo il fader del mixer per
mezzo di un interruttore on/off.
TACT SW: Il lettore CD si avvia/mette in pausa
aprendo/chiudendo il fader del mixer per
mezzo di un pulsante.
CUE PLAY: Aprendo/chiudendo il fader del
mixer, il lettore CD viene avviato dal punto
Cue/riportato sul punto Cue e messo in pausa
per mezzo di un impulso di comando inviato
dal mixer.
21 Presa jack 3,5 mm per il telecomando del lettore
CD per mezzo di un mixer con funzione di avvia-
mento con fader, vedi cap. 6
22 Cavo per il collegamento con una presa di rete
(230 V~/50 Hz)
2 Avvertenze di sicurezza
Questʼapparecchio è conforme a tutte le direttive
rilevanti dellʼUE e pertanto porta la sigla .
Durante lʼuso si devono osservare assolutamente i
seguenti punti:
Attenzione! Non guardare dentro il pozzetto del
CD mentre il cassetto è aperto. Eventuali raggi
laser possono danneggiare gli occhi.
Lʼapparecchio è previsto solo per lʼuso allʼinterno
di locali. Proteggerlo dallʼacqua gocciolante e da-
gli spruzzi dʼacqua, da alta umidità dellʼaria e dal
calore (temperatura dʼimpiego ammessa fra 0 e
40 °C).
Non posare contenitore pieni di liquidi, p. es. bic-
chieri, sullʼapparecchio.
Non mettere in funzione lʼapparecchio e staccare
subito la spina rete se:
1. lʼapparecchio o il cavo rete presentano dei
danni visibili;
2. dopo una caduta o dopo eventi simili sussiste il
sospetto di un difetto;
3. lʼapparecchio non funziona correttamente.
Per la riparazione rivolgersi sempre ad una offi-
cina competente.
Il cavo rete, se danneggiato, può essere sostituito
solo dal costruttore o da un laboratorio autoriz-
zato.
Staccare il cavo rete afferrando la spina, senza ti-
rare il cavo.
Nel caso di uso improprio, di collegamenti sba-
gliati, di impiego scorretto o di riparazione non a
regola dʼarte non si assume nessuna responsabi-
lità per eventuali danni consequenziali a persone
o a cose e non si assume nessuna garanzia per lo
strumento.
3 Possibilità dʼimpiego
Il lettore CD CD-164DJ è stato realizzato special-
mente per uso DJ professionale. Infatti, molte fun-
zioni sono previste appositamente per quellʼimpie-
go, p. es. la riproduzione di un singolo titolo oppure il
beatcounter manuale.
Con il lettore CD si possono riprodurre CD audio,
CD masterizzati in proprio (Audio CD-R). Con i CD
riscrivibili (CD-RW) ci possono essere dei problemi
nella riproduzione a seconda del tipo del CD, del
masterizzatore e del programma di masterizza-
zione.
4 Collocamento e collegamenti
Il lettore CD è previsto per il montaggio in un rack
(482 mm/19″). In questo caso sono richieste 2 unità
di altezza (1 unità di altezza = 44,45 mm). Tuttavia, il
lettore CD si può collocare anche liberamente su un
tavolo. In questo caso deve comunque essere collo-
cato su un piano orizzontale.
Se si desidera eliminare lʼapparecchio defi-
nitivamente, consegnarlo per lo smalti-
mento ad unʼistituzione locale per il rici-
claggio.
AVVERTIMENTO
Questʼapparecchio funziona con
tensione di rete di 230 V~. Non
intervenire mai al suo interno;
la manipolazione scorretta può
provocare delle scariche peri-
colose.
12
I
F
B
CH

4 Positionnement de lʼappareil
et branchements
Le lecteur CD est prévu pour une installation en
rack 19″ = 482 mm, deux unités sont nécessaires
(1 unité = 44,45 mm). Le lecteur CD peut également
être posé sur une table mais dans ce cas sur une
surface plane et horizontale.
Avant dʼeffectuer ou de modifier les branchements,
assurez-vous que le lecteur CD et les autres appa-
reils à relier sont éteints.
1) Si sur votre table de mixage ou amplificateur, une
entrée digitale est prévue, reliez-la à la sortie
digitale DIGITAL OUT (18).
Pour des appareils sans entrée digitale, reliez
la sortie stéréo LINE OUT (19) – canal gauche L
et canal droit R – via un cordon RCA à une entrée
lecteur CD sur la table de mixage ou lʼamplifica-
teur.
2) Le lecteur peut être géré à distance via une table
de mixage avec fonction démarrage électrique.
Vous trouverez dans le chapitre 6 le branche-
ment de la liaison de commande et le type de
démarrage électrique.
3) Reliez enfin la prise du cordon secteur (22) à une
prise 230 V~/50 Hz.
5 Utilisation
5.1 Lecture de CD
1) Avec lʼinterrupteur POWER (1), allumez le lec-
teur CD. Sur lʼaffichage (5), les informations sui-
vantes apparaissent les unes après les autres :
fermer
lire
pas de CD inséré
2) Avec la touche (3), ouvrez le tiroir CD (2). Sur
lʼaffichage (ouvrir) sʼaffiche.
3) Placez un CD, inscription vers le haut, et refermez
le tiroir CD avec la touche . Si le CD est correc-
tement inséré, lʼaffichage indique, après quelques
instants, le nombre total de titres (f) et la durée
totale (g) du CD puis la durée du premier titre (g).
[Si le premier titre doit être lu immédiatement
après avoir inséré le CD, fermez le tiroir avec la
touche (10)].
4) Pour démarrer le premier titre, enfoncez la
touche (si le tiroir CD a été fermé avec la
touche ). Tant que le CD est lu, lʼaffichage
indique le symbole (b).
Si la lecture doit démarrer avec un autre titre,
sélectionnez-le avec les touches , (4) ou
+10 (9) :
– à chaque pression sur la touche +10, on
avance de 10 titres.
– par une pression sur la touche , on avance
toujours dʼun titre. Par une pression sur la
touche , vous revenez au début du titre en
cours de lecture. Par plusieurs pressions sur la
touche , vous reculez toujours dʼun titre.
Pour sauter plusieurs titres, maintenez la
touche ou enfoncée.
Démarrez ensuite le titre avec la touche .
5) A tout moment, la lecture peut être interrompue
avec la touche ; sur lʼaffichage, le symbole
Pause (a) apparaît, les LEDs au-dessus des
touches et CUE (8) clignotent. Pour pour-
suivre la lecture, enfoncez une nouvelle fois la
touche .
6) Une fois allumé, lʼappareil est toujours sur le
mode Lecture titre par titre ; lʼaffichage indique
“SINGLE AUTO CUE” (d). Si un titre est lu jus-
quʼà la fin, lʼappareil passe sur Pause au début
du titre suivant. Cependant, pour une lecture
automatique du titre suivant, passez sur le mode
Lecture de tous les titres avec la touche CONT./
SINGLE (14) [voir aussi chapitre 5.3.2].
7) Si la lecture du CD doit se terminer plus tôt, met-
tez le lecteur sur Pause ou arrêtez-le avec la
touche STOP (13). Le tiroir CD peut maintenant
être ouvert avec la touche .
Remarque : pendant la lecture, le tiroir CD est
verrouillé contre toute ouverture in-
tempestive.
8) Avant dʼéteindre lʼappareil, fermez toujours le
tiroir CD avec la touche pour protéger le sys-
tème laser des salissures. Nʼéteignez quʼensuite
lʼappareil avec lʼinterrupteur POWER (1).
5.2
Affichage du numéro des titres, de la durée
de lecture et du nombre de beats par minute
Dans le réglage de base, une fois lʼappareil allumé,
lʼaffichage (schéma 2) indique pendant la lecture
dʼun CD et en mode Pause, le numéro (f) et la durée
restante (g) du titre en cours. Sur lʼaffichage, “RE-
MAIN” (i) signale la durée restante. Elle est affichée
en minutes (M), secondes (S), les secondes étant
divisées en 75 “frames” (F) [1 frame = 1/75 seconde].
5.2.1 Commutation de lʼaffichage de la durée de
lecture et activation de la fonction OUTRO
Par plusieurs pressions sur la touche TIME (11), les
informations de temps suivantes peuvent être affi-
chées, vous pouvez également sélectionner la fonc-
tion OUTRO :
1ère pression : la durée déjà lue du titre en cours
(lʼaffichage “REMAIN” sʼéteint)
2ème pression : la fonction OUTRO pour lire respec-
tivement les 30 dernières secondes des titres
suivants (la fonction nʼest active quʼà partir du
titre suivant – si besoin, enfoncez la touche ) ;
la durée restante du titre en cours est affichée.
3ème pression : durée restante de tout le CD ; la
fonction OUTRO est à nouveau désactivée
4ème pression : réglage de base (affichage de la
durée restant du titre en cours)
5.2.2 Bargraphe
Le bargraphe (e) indique par sa longueur, la durée
restante dʼun titre ou du CD ou la durée déjà lue dʼun
titre en fonction des informations de temps sélec-
tionnées avec la touche TIME (11) sur lʼaffichage. Il
clignote dans toute sa longueur pour signaler les
30 dernières secondes dʼun titre, les 15 dernières
secondes sont signalées par un clignotement plus
rapide.
Prima di eseguire il collegamento o eventuali modi-
fiche, spegnere il lettore CD e gli apparecchi da col-
legare.
1) Se il vostro mixer o amplificatore è equipaggiato
con un ingresso digitale, lo si può collegare con
lʼuscita digitale DIGITAL OUT (18).
Nel caso di apparecchi senza ingressi digitali,
collegare lʼuscita stereo LINE OUT (19) – canale
sinistro L e destro R – con un ingresso per lettori
CD del mixer/amplificatore servendosi di un cavo
con connettori RCA.
2) Il lettore CD può essere telecomandato tramite
un mixer con avviamento tramite fader. Per il col-
legamento e il tipo di telecomando vedi cap. 6.
3) Alla fine inserire la spina del cavo rete (22) in una
presa (230 V~/50 Hz).
5 Funzionamento
5.1 Riprodurre un CD
1) Accendere lʼapparecchio con lʼinterruttore on/off
POWER (1). Sul display (5) appaiono una dopo
lʼaltra le seguenti scritte:
(chiudere)
(leggere)
(nessun CD) – se non è inserito nessun
CD.
2) Aprire il cassetto del CD (2) premendo il tasto
(3). Il display indica (aprire).
3) Inserire il CD con la scritta rivolta in alto e richiude-
re il cassetto premendo di nuovo il tasto . Se il
CD è inserito correttamente, dopo breve tempo, il
display indica il numero globale dei titoli (f) nonché
la durata complessiva del CD (g). Successiva-
mente viene indicata la durata del primo titolo (g).
[Se dopo lʼinserimento del CD deve partire
automaticamente il primo brano, chiudere il cas-
setto con il tasto (10).]
4) La riproduzione del primo titolo viene avviata con
il tasto (se il cassetto CD è stato chiuso con
il tasto ). Durante la riproduzione del CD, sul
display è visibile il simbolo (b).
Se si desidera iniziare con un altro titolo, sce-
glierlo con i tasti , (4) o +10 (9):
– con ogni pressione del tasto +10 si salta in
avanti di 10 titoli.
– premendo il tasto si salta avanti di un titolo.
Premendo il tasto si salta allʼinizio del titolo
corrente. Premendo più volte il tasto si salta
ogni volta indietro di un titolo. Per saltare più ti-
toli, è possibile tenere premuto i tasti o .
Quindi avviare la riproduzione con il tasto .
5) Con il tasto , si può in qualsiasi momento
interrompere la riproduzione. Sul display si vede
il simbolo di pausa (a), e i LED sopra i tasti
e CUE (8) lampeggiano. Per riprendere la ripro-
duzione premere di nuovo il tasto .
6) Dopo lʼaccensione, lʼapparecchio è sempre in
funzione di riproduzione di un singolo titolo e il
display indica “SINGLE AUTO CUE” (d). Al ter-
mine del titolo, lʼapparecchio si ferma in pausa
allʼinizio del titolo successivo. Per riprodurre
automaticamente il titolo successivo, attivare la
riproduzione dellʼintero CD mediante il tasto
CONT./SINGLE (14) [vedi anche cap. 5.3.2].
7) Per terminare la riproduzione prima del tempo,
attivare la pausa oppure arrestare il lettore con il
tasto STOP (13). Quindi si può aprire il cassetto
del CD con il tasto .
N.B.: Durante la riproduzione, il cassetto è bloc-
cato per escludere lʼapertura involontaria.
8) Prima di spegnere il lettore CD, chiudere sempre
il cassetto con il tasto per proteggere il sistema
a laser dallo sporco. Quindi spegnere lʼapparec-
chio con lʼinterruttore POWER (1).
5.2
Visualizzazione del numero del titolo, della
durata e del numero battute al minuto
Nellʼimpostazione base e durante la riproduzione di
un CD o con la pausa attivata, il display (fig. 2) indica,
dopo lʼaccensione, il numero (f) e il tempo restante
(g) del titolo attuale. Il tempo restante viene segna-
lato sul display con “REMAIN” (i). Lʼindicazione del
tempo è in minuti (M) e secondi (S), questi ultimi sud-
divisi ancora in 75 frames (F) [1 frame = 1/75 sec.].
5.2.1 Cambiare la visualizzazione della durata e
attivare la funzione OUTRO
Con la pressione ripetuta del tasto TIME (11) è pos-
sibile indicare le seguenti informazioni sul tempo e
attivare la funzione OUTRO:
1. pressione del tasto: il tempo già passato del titolo
corrente (lʼindicazione “RE-
MAIN” si spegne)
2. pressione del tasto: attivazione della funzione
OUTRO per riprodurre gli
ultimi 30 secondi dei titoli
seguenti (attiva solo dopo il
titolo successivo; eventual-
mente premere il tasto );
indicazione del tempo re-
stante del titolo corrente
3. pressione del tasto: il tempo restante dellʼintero
CD; la funzione OUTRO è
nuovamente disattivata
4. pressione del tasto: ritorno allʼimpostazione base
(indicazione del tempo re-
stante del titolo corrente)
5.2.2 Diagramma a barre
Il diagramma a barre (e) offre, con la sua lunghezza,
una visualizzazione grafica del tempo, ovvero della
durata del titolo o del tempo residuo del CD, oppure
il tempo già trascorso di un titolo, a seconda del tipo
di informazione selezionato sul display con il tasto
TIME (11). Gli ultimi 30 secondi di un titolo sono se-
gnalati con il lampeggìo del diagramma a barre in
tutta la sua lunghezza, con aumento della frequenza
negli ultimi 15 secondi.
13
I
F
B
CH

5.2.3 Compteur de beats
Avec le compteur manuel de beats, vous pouvez
déterminer le nombre de beats par minute (BPM) du
titre en cours de lecture :
1) Enfoncez la touche BPM/TAP (15) plusieurs fois
en fonction du rythme de la musique : lʼaffichage
passe de lʼindication de la déviation de vitesse (j)
au nombre de beats et la LED à côté de la touche
brille.
2) Pour mesurer le nombre de beats sur le morceau
suivant, enfoncez à nouveau, en rythme et
plusieurs fois la touche BPM/TAP ; lʼaffichage
indique la nouvelle valeur.
3) Pour revenir à lʼaffichage de la déviation de vites-
se, maintenez la touche BPM/TAP enfoncée
pendant 3 secondes environ jusquʼà ce que la
LED sʼéteigne.
5.3 Sélection du mode de fonctionnement
5.3.1 “Single” – Lecture titre par titre
Une fois lʼappareil allumé, le mode lecture titre par
titre est toujours activé, il est spécialement prévu
pour les utilisations DJ :
1. Lʼaffichage indique “SINGLE AUTO CUE” (d).
2. Après la lecture dʼun CD ou la sélection dʼun titre,
le lecteur CD est exactement à lʼendroit où la musi-
que démarre (et pas lʼindex de temps 0:00:00).
Cet endroit est automatiquement mémorisé
comme point de départ. Lʼaffichage indique briè-
vement “ ”. Après le démarrage du titre,
vous pouvez revenir à ce point de départ avec la
touche CUE (8).
3. Une fois le titre lu, lʼappareil passe en mode
Pause exactement à lʼendroit où la musique du
titre suivant démarre. Cet endroit est alors mé-
morisé comme nouveau point de démarrage.
5.3.2 “Continue” – Lecture de tous les titres
Si un titre doit être lu en continu lʼun après lʼautre,
commutez sur la lecture de tous les titres avec la
touche CONT./SINGLE (14). Lʼaffichage passe de
“SINGLE AUTO CUE” (d) à “CONTINUE” (c). Pour
revenir à la lecture titre par titre, enfoncez une nou-
velle fois la touche CONT./SINGLE.
5.4 Lecture des premières notes dʼun titre
1) Une fois le CD inséré, allez tout dʼabord au titre
souhaité avec la touche +10 (9), si nécessaire,
puis avec la touche ou (4).
2) Si sur lʼaffichage, la durée (g) du titre est visible,
maintenez la touche CUE (8) enfoncée. Le titre
est lu tant que la touche est enfoncée.
3) Lorsque la touche est relâchée, lʼappareil revient
au début du titre et passe sur Pause ; pour
démarrer le titre, enfoncez la touche (10) ; il
est possible de revenir au début du titre avec la
touche CUE.
5.5 Avance et retour rapides
Si pendant la lecture dʼun CD, vous souhaitez avan-
cer ou reculer rapidement la lecture du titre, mainte-
nez la touche SEARCH ou (12) enfoncée.
Remarques :
a Lors de la lecture titre par titre, le retour rapide va
jusquʼau début du titre en cours. Lʼappareil passe
ensuite sur Pause. Si avec lʼavance rapide le titre
suivant est atteint, lʼappareil passe également
sur Pause.
b Lors de la lecture globale, lʼavance et retour
rapides sʼeffectuent sur plusieurs titres mais sʼar-
rêtent à la fin ou au début du CD.
c En mode Pause, après une avance ou un retour
rapide, lʼendroit est répété en continu jusquʼà ce
que la lecture soit démarrée avec la touche
(10) ou que la touche CUE (8) soit enfoncée deux
fois.
5.6 Positionnement exact à un endroit donné
Pour aller exactement à un endroit donné, en mode
Pause activé, tournez la molette REV/FWD (7) ; le CD
avance ou recule aussi longtemps et aussi vite que le
bouton est tourné vers la gauche ou la droite. Sur lʼaf-
fichage, dans la zone durée (g), on peut lire la position
exacte et procéder par palier de 1 “frame” (1 frame =
1/75 seconde). Le segment est ensuite répété jusquʼà
ce que la touche (10) soit enfoncée ou que la
touche CUE (8) soit enfoncée brièvement deux fois.
5.7 Retour à un endroit préalablement
déterminé (point Cue)
1) Pendant la lecture dʼun titre, passez en mode
Pause avec la touche (10) lorsque lʼendroit
auquel on doit revenir ultérieurement est atteint.
Les LEDs au-dessus des touches et CUE (8)
clignotent.
2) Si besoin, vous pouvez vous positionner plus
exactement à lʼendroit voulu avec la molette
REV/FWD (7). Le segment est répété en continu.
3) Enfoncez brièvement la touche CUE (8). Lʼen-
droit est repéré de manière interne ; la LED au-
dessus de la touche CUE clignote tout dʼabord
rapidement puis brille en continu. La LED au-
dessus de la touche continue à clignoter,
incitant à démarrer la lecture.
4) Démarrez à nouveau la lecture avec la touche
.
5) Avec la touche CUE, il est possible de revenir à
lʼendroit marqué ; le lecteur est alors sur Pause.
6) Avec la touche , démarrez la lecture, ou main-
tenez la touche CUE enfoncée. Lorsque vous la
relâchez, le lecteur est sur Pause à lʼendroit mar-
qué.
Conseils :
a Dans le cas dʼune lecture titre par titre, le retour ne
peut se faire quʼau sein dʼun titre. Lorsque le titre
suivant est atteint, lʼendroit repéré est remplacé
par le point de départ du titre suivant (voir chap.
5.3.1).
b Aussi bien pour une lecture titre par titre quʼune
lecture de tous les titres, lʼendroit marqué est tou-
jours remplacé par le début du titre sélectionné
lorsquʼun autre titre est choisi avec les touches
, (4) ou +10 (9).
5.2.3 Beatcounter
Con il beatcounter manuale si può stabilire, per il
brano corrente, il numero delle battute al minuto
(BPM = beats per minute):
1) Toccare leggermente il tasto BPM/TAP (15) nel
ritmo della musica. Il display cambia dallʼindica-
zione della deviazione dalla velocità standard (j)
a quella del numero di battute, e il LED vicino al
tasto si accende.
2) Per misurare il numero delle battute del brano
successivo, ripetere lʼoperazione premendo an-
cora più volte il tasto BPM/TAP. Il display indica
ora il nuovo valore.
3) Per ritornare allʼindicazione della deviazione dalla
velocità standard tenere premuto il tasto BPM/
TAP per 3 secondi ca. fino allo spegnimento del
LED.
5.3 Selezionare la modalità di funzionamento
5.3.1 “Single” – Riproduzione di un singolo titolo
Dopo lʼaccensione del lettore è attivata sempre la
riproduzione di un singolo titolo, prevista special-
mente per lʼuso in discoteca.
1. Il display segna “AUTO CUE SINGLE” (d).
2. Dopo il rilevamento di un CD o dopo la selezione
di un titolo, il lettore si trova esattamente sul
punto dove inizia la musica (non sullʼindice di
tempo 0:00:00).
Questo punto viene memorizzato automatica-
mente come punto di avvio. Il display segnala
brevemente “ ”. Dopo lʼavvio del titolo, con il
tasto CUE (8) si può ritornare su tale punto.
3. Dopo la riproduzione di un titolo, il lettore si mette
in pausa esattamente nel punto dove inizia la
musica del titolo successivo. Tale punto rimane
quindi memorizzato come nuovo punto di avvio.
5.3.2 “Continue” – Riproduzione di tutti i titoli
Se si desidera riprodurre un titolo dopo lʼaltro senza
interruzione, attivare la riproduzione di tutti i titoli con
il tasto CONT./SINGLE (14). Il display passa da
“AUTO CUE SINGLE” (d) a “CONTINUE” (c). Per
ritornare alla riproduzione di un singolo titolo pre-
mere di nuovo il tasto CONT./SINGLE.
5.4 Riproduzione dellʼinizio di un titolo
1) Dopo aver inserito un CD, selezionare il titolo
desiderato dapprima eventualmente con il tasto
+10 (9) e quindi con il tasto o (4).
2) Se sul display si vede la durata (g) del titolo,
tenere premuto il tasto CUE (8). Lʼinizio del titolo
viene riprodotto per tutto il tempo in cui si tiene
premuto il tasto.
3) Se si libera il tasto CUE, lʼapparecchio torna allʼi-
nizio del titolo e va in pausa. Per avviare il titolo,
premere il tasto (10). Comunque, con il tasto
CUE si può tornare di nuovo allʼinizio del titolo.
5.5 Avanzamento/ritorno veloce
Se durante la riproduzione di un CD è richiesto lʼa-
vanzamento o il ritorno veloce, tenere premuto i tasti
SEARCH o (12).
N. B.:
a Durante la riproduzione di un singolo titolo, il ri-
torno veloce va fino allʼinizio del brano corrente.
Quindi il lettore va in pausa. Se con lʼavanza-
mento veloce si raggiunge il titolo successivo, il
lettore va pure in pausa.
b Durante la riproduzione di tutti i titoli, lʼavanza-
mento/ritorno veloce passa sopra diversi titoli,
ma termina allʼinizio e alla fine del CD.
c Durante la pausa, dopo lʼavanzamento/ritorno
veloce si ripete il punto attuale fino allʼavvio della
riproduzione con il tasto (10) oppure fino ad
una doppia leggera pressione del tasto CUE (8).
5.6 Posizionarsi con esattezza su un deter-
minato punto
Per posizionarsi con esattezza su un determinato
punto, girare la manopola REV/FWD (7) mentre è
attivata la pausa. Lo spostamento sul CD segue il
movimento della manopola; la posizione esatta è
visibile sul display tramite lʼindicazione del tempo (g)
con una precisione di 1 frame (1 F = 1/75 sec.). Dopo
aver girato la manopola, il punto attuale viene ripe-
tuto fino alla pressione del tasto (10) o fino a
due leggere pressioni del tasto CUE (8).
5.7 Ritorno ad un punto predeterminato
(punto Cue)
1) Durante la riproduzione di un titolo, attivare la
pausa con il tasto (10) non appena è rag-
giunto il punto su cui tornare successivamente. I
LED sopra i tasti e CUE (8) lampeggiano.
2) Se necessario, con la manopola REV/FWD (7)
posizionarsi esattamente su questo punto. Il
punto attuale viene riprodotto continuamente.
3) Toccare brevemente il tasto CUE (8). Così, tale
punto è marcato internamente. Il LED sopra il
tasto CUE lampeggia dapprima velocemente e
rimane poi acceso. Il LED sopra il tasto con-
tinua a lampeggiare come invito ad avviare la
riproduzione.
4) Avviare la riproduzione con il tasto .
5) Con il tasto CUE si può tornare sul punto mar-
cato. Il lettore CD si mette in pausa.
6) Avviare la riproduzione con il tasto oppure
tenendo premuto il tasto CUE. Lasciando il tasto
CUE, il lettore torna sul punto marcato e va in
pausa.
N. B.:
a Nella modalità di riproduzione di un titolo singolo,
il ritorno è possibile solo allʼinterno di un titolo. Se
si raggiunge il titolo successivo, il punto marcato
viene sostituito con il punto di avvio del titolo suc-
cessivo (vedi capitolo 5.3.1).
b Sia durante la riproduzione di un titolo singolo che
di tutti i titoli, selezionando un altro titolo con i tasti
, (4) o +10 (9), il punto marcato viene sem-
pre sostituito con lʼinizio del titolo selezionato.
14
I
F
B
CH

5.8 Modification de la vitesse, de la hauteur
tonale
La vitesse et donc la hauteur tonale (“pitch”) peu-
vent être modifiées avec le potentiomètre PITCH
CONTROL (17) de ±16 % maximum.
1) Enfoncez la touche PITCH (6), la LED à coté de
la touche brille.
2) Modifiez la vitesse avec le potentiomètre PITCH
CONTROL (17). Sur lʼaffichage est indiquée la
déviation en pourcentage (j) de la vitesse stan-
dard.
Si le compteur manuel de beats a été activé
avec la touche BPM/TAP (15) [voir chapitre 5.2.3
“Compteur de beats”], lʼaffichage indique le nom-
bre de beats par minute qui se modifie en consé-
quence, selon le réglage du potentiomètre.
3) Avec la touche PITCH, il est possible de passer
de la vitesse réglée avec le potentiomètre à la
vitesse standard et inversement.
5.9 Adaptation du rythme entre deux mor-
ceaux de musique (“Pitch Bend”)
Avec les touches PITCH BEND (16), vous pouvez
adapter le rythme du titre en cours de lecture au
rythme dʼun titre lu sur un autre appareil.
1) Avec la touche PITCH (6), activez le potentio-
mètre PITCH CONTROL (17), la LED à côté de la
touche doit briller.
2) Avec le potentiomètre PITCH CONTROL, adap-
tez la vitesse du morceau en cours de lecture à la
vitesse du second morceau.
3) Avec les touches PITCH BEND, faites exacte-
ment coïncider les deux rythmes : tant que la
touche + ou
-
est maintenue enfoncée, le titre est
lu 16 % plus vite ou moins vite quʼavec la vitesse
standard, la LED de la touche PITCH clignote
ainsi que lʼaffichage de la vitesse (j).
4) En tournant la molette REV/FWD (7), on peut
également modifier la vitesse pour une adapta-
tion du rythme.
6 Démarrage électrique
via une table de mixage
Le lecteur CD peut être activé à distance depuis une
table de mixage équipée de la fonction démarrage
électrique. Selon le mode de conception de la table
de mixage, la commande peut sʼeffectuer via un
interrupteur marche/arrêt (comme sur la plupart des
tables de mixage de la gamme “img Stage Line”), un
bouton poussoir momentané ou une impulsion de
commande.
1) Pour éviter toute mauvaise manipulation, étei-
gnez tout dʼabord le lecteur CD et la table de
mixage.
2) Avec lʼinterrupteur (20) sur la face arrière du lec-
teur CD, réglez le type de démarrage électrique :
a Position LOCK SW : commande de démar-
rage et arrêt via un interrupteur marche/arrêt
Lorsque le fader correspondant de la table est
ouvert, un interrupteur dans la table se ferme
et démarre le lecteur CD. Lorsque le fader est
fermé, lʼinterrupteur sʼouvre, le lecteur CD
passe sur Pause.
Table de mixage
Démarrage électrique via un interrupteur
marche/arrêt
b Position TACT SW : commande de démar-
rage et arrêt via un bouton poussoir momen-
tané.
Si le bouton poussoir momentané est activé
pour la première fois lorsque le fader corres-
pondant sur la table de mixage est poussé, le
lecteur CD démarre. Si le bouton poussoir
momentané est activé pour la deuxième fois
en tirant le fader, le lecteur CD passe sur
Pause.
Table de mixage
Démarrage électrique via un bouton poussoir
momentané
c Position CUE PLAY : commande du “Démar-
rage à partir du point Cue/retour au point Cue
(pause)” via une impulsion.
Lorsquʼon pousse le fader correspondant sur
la table, la lecture est démarrée à partir du
point Cue (voir chapitre 5.7) par une brève
impulsion de commande de la table. Lors-
quʼon ferme le fader, le lecteur CD revient au
point Cue et passe, à cet endroit, sur pause
par une autre impulsion de commande.
Table de mixage
Démarrage électrique par impulsion de com-
mande
3) Reliez la prise de démarrage électrique corres-
pondante sur la table de mixage, via un cordon
avec fiches jack 3,5 mâles (mono ou stéréo) à la
prise START/PAUSE (21).
5.8 Variare la velocità e lʼaltezza del suono
La velocità e quindi anche lʼaltezza del suono (pitch)
possono essere modificate del ±16 % max. median-
te il cursore PITCH CONTROL (17).
1) Premere il tasto PITCH (6). Si accende il LED
vicino al tasto.
2) Modificare la velocità con il cursore PITCH CON-
TROL (17). Il display indica la deviazione percen-
tuale dalla velocità standard (j).
Se con il tasto BPM/TAP (15) è stato attivato il
beatcounter manuale (vedi cap. 5.2.3), il display
indica il numero esatto delle battute al minuto che
cambia con lo spostamento del cursore.
3) Con il tasto PITCH si può cambiare fra la velocità
impostata con il cursore e quella standard.
5.9 Adattamento del ritmo fra due brani
(“pitch bend”)
Con i tasti PITCH BEND (16) è possibile adattare il
ritmo di un titolo a quello riprodotto su un altro appa-
recchio.
1) Con il tasto PITCH (6) attivare il cursore PITCH
CONTROL (17). Il LED vicino al tasto deve
accendersi.
2) Con il regolatore PITCH CONTROL adattare la
velocità del titolo corrente a quella dellʼaltro titolo.
3) Con i tasti PITCH BEND far si che le battute dei
due brani coincidano. Tenendo premuto i tasti +
o
-
, la velocità aumenta o diminuisce del 16 % ri-
spetto alla velocità standard, e il LED del tasto
PITCH nonché lʼindicazione della velocità (j) lam-
peggiano.
4) Una modifica della velocità per adattare il ritmo
è possibile anche girando la manopola REV/
FWD (7).
6 Avviamento tramite fader dal mixer
Il lettore CD può essere telecomandato mediante un
mixer che dispone della funzione di avviamento con
fader. A seconda del tipo del mixer, il comando può
essere fatto per mezzo di un interruttore on/off
(come nella maggior parte dei mixer di “img Stage
Line”), di un pulsante o di un impulso di comando.
1) Per escludere un funzionamento errato spegnere
prima il lettore CD e il mixer.
2) Con lʼinterruttore (20) posato sul retro del lettore
CD impostare la modalità di telecomando:
a Posizione LOCK SW: comando di avvio e
pausa per mezzo di un interruttore on/off
Aprendo il relativo fader del mixer si chiude un
interruttore nel mixer che attiva il lettore CD.
Chiudendo il fader, lʼinterruttore si apre met-
tendo il lettore CD in pausa.
Mixer
Avviamento tramite fader con interruttore
on/off
b Posizione TACT SW: comando di avvio e
pausa per mezzo di un pulsante
Se il pulsante viene attivato una prima volta
aprendo il relativo fader del mixer, il lettore CD
viene avviato. Se, chiudendo il fader, il pul-
sante viene azionato per la seconda volta, il
lettore CD va in pausa.
Mixer
Avviamento tramite fader con pulsante
c Posizione CUE PLAY: comando di “Avvio dal
punto Cue/ritorno al punto Cue (pausa)” per
mezzo di un impulso
Aprendo il relativo fader del mixer, tramite un
breve impulso di comando del mixer viene
avviata la riproduzione a partire dal punto Cue
(vedi cap. 5.7). Chiudendo il fader, il lettore CD
riceve un altro impulso di comando e ritorna al
punto Cue mettendosi in pausa.
Mixer
Avviamento con fader tramite un impulso di
comando
3) Collegare la relativa presa di avviamento con
fader del mixer con la presa START/PAUSE (21)
servendosi di un cavo di collegamento con jack
3,5 mm (mono o stereo).
15
I
F
B
CH

7 Entretien de lʼappareil
Protégez lʼappareil de la poussière, des vibrations,
de la lumière directe du soleil, dʼune humidité élevée
et de la chaleur (température de fonctionnement
admissible 0 – 40 °C). Pour le nettoyer, utilisez uni-
quement un chiffon sec et doux, en aucun cas, de
produits chimiques ou dʼeau.
Remarques sur les coupures du son
et les erreurs de lecture
La fumée de cigarettes sʼintroduit facilement dans
les ouvertures du lecteur et se dépose également
sur lʼoptique du système laser. Cela peut générer
des erreurs de lecture et des coupures de son. On
ne peut pas toujours éviter la fumée de cigarettes
(par exemple en discothèque), confiez impérative-
ment le nettoyage du lecteur à un technicien spécia-
lisé. Cette opération est à la charge de lʼutilisateur,
même lorsque lʼappareil est sous garantie.
8 Caractéristiques techniques
Bande passante : . . . . . . . 20 – 20 000 Hz
Taux de distorsion : . . . . . . < 0,1 %
Séparation des canaux : . . > 80 dB
Dynamique : . . . . . . . . . . . > 90 dB
Rapport signal/bruit : . . . . > 80 dB
Pleurage et scintillement : . non mesurable,
précision quartz
Sorties
Ligne (analogique) : . . . . 2 V
Digitale (coaxiale) : . . . . 0,5 Vcc, S/PDIF
Alimentation : . . . . . . . . . . 230 V~/50 Hz
Consommation : . . . . . . . . 15 VA
Température fonc. : . . . . . . 0 – 40 °C
Dimensions (L × H × P) : . . 482 × 89 × 260 mm,
2 unités
Poids : . . . . . . . . . . . . . . . . 4,2 kg
Tout droit de modification réservé.
7 Manutenzione
Proteggere lʼapparecchio dalla polvere, da vibra-
zioni, dalla luce diretta del sole, dallʼumidità e dal
calore (temperatura dʼimpiego ammessa fra 0 e
40 °C). Per la pulizia usare solo un panno asciutto;
non impiegare in nessun caso prodotti chimici o
acqua.
Note su possibili errori di lettura
Il fumo di sigarette penetra facilmente fra tutte le
aperture dellʼapparecchio e si deposita sul sistema
ottico della scansione ai raggi laser. Ciò può provo-
care errori di lettura e buchi nella riproduzione. Poi-
ché non si può escludere sempre il fumo di sigarette
(p. es. in una discoteca), lʼapparecchio deve essere
pulito in un laboratorio specializzato. Una tale pulizia
è a pagamento, anche durante il periodo di garan-
zia!
8 Dati tecnici
Gamma di frequenze: . . . . 20 – 20 000 Hz
Fattore di distorsione: . . . . < 0,1 %
Separazione canali: . . . . . > 80 dB
Dinamica: . . . . . . . . . . . . . > 90 dB
Rapporto S/R: . . . . . . . . . . > 80 dB
Variazione della velocità: . non misurabile, preci-
sione del quarzo
Uscite
Line (analogica): . . . . . . 2 V
digitale (coassiale): . . . . 0,5 Vpp, S/PDIF
Alimentazione: . . . . . . . . . 230 V~/50 Hz
Potenza assorbita: . . . . . . 15 VA
Temperatura dʼesercizio: . . 0 – 40 °C
Dimensioni (l × h × p): . . . . 482 × 89 × 260 mm,
2 unità di altezza
Peso: . . . . . . . . . . . . . . . . . 4,2 kg
Con riserva di modifiche tecniche.
16
I
F
B
CH
Notice d'utilisation protégée par le copyright de MONACOR ®INTERNATIONAL GmbH & Co. KG.
Toute reproduction même partielle à des fins commerciales est interdite.
La MONACOR ®INTERNATIONAL GmbH & Co. KG si riserva ogni diritto di elaborazione in qualsiasi forma
delle presenti istruzioni per l'uso. La riproduzione – anche parziale – per propri scopi commerciali è vietata.

9 Glossaire technique
Les termes indiqués en italique sont expliqués ulté-
rieurement.
Auto Cue : lors de la sélection dʼun titre, le lecteur
CD est exactement à lʼendroit où la musique com-
mence et pas à lʼindex temps 0:00:00. Ainsi, lors-
quʼon active la touche , la musique démarre
immédiatement, sans pause.
Bargraphe : un affichage graphique sous forme de
barre indique, par sa longueur, la durée restante
dʼun titre ou dʼun CD ou la durée déjà lue dʼun titre.
Bouton poussoir : interrupteur dont le contact est
maintenu fermé tant que le bouton est maintenu
enfoncé (p. ex. interrupteur de sonnette).
BPM : beats par minute : le compteur de beats
manuel intégré détermine le nombre de beats par
minute dʼun titre lorsque la touche BPM/TAP est
enfoncée plusieurs fois selon le rythme de la
musique.
CE : ( communauté européenne) : certains pro-
duits vendus dans la communauté européenne
doivent porter le symbole CE. Le fabricant et le
revendeur certifient ainsi que le produit répond
bien à lʼensemble des directives correspondantes
de lʼunion européenne.
Compteur de beats : détermine le nombre de beats
par minute (BPM) et ainsi la vitesse à laquelle le
morceau de musique est lu.
Continue lecture de tous les titres
Démarrage électrique : avec un potentiomètre
spécifique (fader) sur une table de mixage, dispo-
sant dʼune fonction de démarrage électrique, le
lecteur CD peut être démarré lorsque le fader est
poussé, ou mis sur pause lorsque le fader est
fermé. La commande du lecteur CD sʼeffectue soit
via les contacts de commutation dans la table de
mixage soit via les impulsions de commande
envoyées par la table de mixage.
Digital : informations représentées en chiffres ; un
convertisseur analogique/digital convertit les
ondes sonores captées par un micro en une suc-
cession rapide de uns et de zéros (nombres
binaires par exemple “1001” = 9) qui sont mémori-
sés sur le CD. Chaque nombre binaire correspond
à une valeur momentanée dʼune vibration sonore.
Par un système perfectionné de corrections dʼer-
reurs, on peut exclure par des calculs les interrup-
tions et interférences pour obtenir une meilleure
qualité de lecture. Un convertisseur digital/analo-
gique convertit les nombres binaires à nouveau,
en ondulations électriques qui parviennent ampli-
fiées à un haut-parleur.
Frame : la musique est stockée sur un CD en blocs
de données (angl. frames) ; dans un bloc, lʼinfor-
mation est stockée pour 1⁄75 seconde. On peut ainsi
aller à un endroit précis sur le CD par palier de
1⁄75 seconde.
Lecture de tous les titres : mode de fonctionne-
ment pour lire un titre lʼun après lʼautre, à lʼinverse
de la lecture titre par titre.
Lecture titre par titre : mode de fonctionnement
particulier pour des utilisations DJ ; après la lec-
ture dʼun titre, lʼappareil passe sur pause, à lʼin-
verse de la lecture de tous les titres.
LED : light emitting diode : composant électronique
qui convertit directement un courant électrique en
lumière (sans production de chaleur comme pour
une lampe à incandescence) ; brille selon le maté-
riau dans diverses couleurs ou même en blanc.
Line : ligne : (sortie, entrée, niveau Ligne) : pour
pouvoir transmettre des signaux dʼun appareil à un
autre, les signaux doivent avoir une valeur de ten-
sion constatée sinon aucune transmission opti-
male nʼest possible. Cette valeur est entre 0,1 V et
2 V (Volt) et est définie comme niveau Ligne ; les
entrées et sorties prévues pour ces niveaux por-
tent généralement lʼinscription LINE.
OUTRO : fonction pour laquelle seules les 30 der-
nières secondes dʼun titre sont lues.
Pitch : hauteur tonale : avec le réglage PITCH
CONTROL, il est possible de modifier la vitesse de
lecture et donc la hauteur tonale.
Pitch Bend : fonction avec laquelle la vitesse de
lecture peut être brièvement augmentée ou dimi-
nuée. Le rythme du titre en cours de lecture peut
ainsi être synchronisé avec le rythme dʼun titre lu
sur un autre appareil. Lors dʼune transition dʼun
titre vers un autre, le rythme de la musique nʼest
pas perturbé.
Point Cue : avec la touche CUE, endroit librement
sélectionnable sur le CD où le lecteur peut sauter
directement (en mode lecture titre par titre, pos-
sible uniquement au sein dʼun titre). Si on revient
au point Cue avec la touche CUE, le lecteur CD
passe en mode pause.
Rack : baie : dans un rack pour appareils avec une
largeur normalisée de 482 mm (19″), il est possible
de placer par exemple, un lecteur CD, une table
de mixage, un égaliseur, un amplificateur pour
monter des installations audio complètes.
Single lecture titre par titre
9 Spiegazione dei termini tecnici
I vocaboli in corsivo sono spiegati con i relativi
lemmi.
Auto Cue: Selezionando un titolo, il lettore CD si
trova esattamente sul punto dove inizia la musica
e non sullʼindice di tempo 0:00:00. Così la musica
inizia subito quando si preme il tasto .
Avviamento con fader engl. to fade in = aprire in
dissolvenza: Con un cursore (fader) di un mixer
che dispone della funzione di avviamento con
fader, il lettore CD può essere avviato aprendo il
fader, mentre va in pausa quando si chiude il
fader. Il comando del lettore CD avviene o per
mezzo di contatti di commutazione nel mixer
oppure tramite impulsi di comando inviati dal
mixer.
Beatcounter ingl. contatore delle battute; stabilisce
il numero delle battute al minuto (BPM) e quindi la
velocità di un brano musicale.
BPM ingl. beats per minute = battute al minuto; il
beatcounter manuale integrato individua il numero
di battute al minuto di un titolo, se il tasto
BPM/TAP viene premuto brevemente alcune volte
nel ritmo della musica.
CE (simbolo ) franc. Communauté Européenne =
Comunità europea: determinati prodotti destinati
alla vendita nellʼUE devono avere il simbolo CE
con il quale il costruttore o distributore certifica che
il prodotto è conforme alle relative norme dellʼUE.
Continue Riproduzione di tutti i titoli
Diagramma a barre: Sul display viene visualizzata
una barra che con la sua lunghezza indica il tempo
restante del titolo o del CD oppure il tempo già tra-
scorso del titolo.
digitale Informazioni in cifre; le onde sonore captate
da un microfono vengono convertite da un conver-
titore analogico/digitale in una serie di 1 e 0
(numeri binari, p. es. “1001” = 9) e memorizzate
sul CD. Ogni numero binario corrisponde al valore
momentaneo di un onda sonora. Un sofisticato
sistema di correzioni permette di compensare
eventuali difetti sul CD il che garantisce unʼalta qua-
lità di riproduzione. Un convertitore digitale/analog-
ico riconverte i numeri binari in oscillazioni elet-
triche che vengono poi amplificate e portate
allʼaltoparlante.
Frame ingl. cornice; la musica sul CD è memorizzata
in blocchi di dati. In un blocco (cornice), lʼinforma-
zione è memorizzata per 1⁄75 di secondo. Pertanto
è possibile trovare un punto sul CD con lʼesattezza
di un 1⁄75 di secondo.
LED ingl. light emitting diode = componente elettro-
nico che converte la corrente elettrica diretta-
mente in luce (senza produrre calore come la lam-
pada ad incandescenza). A seconda del materiale
sono possibili diversi colori, compreso il bianco.
Line (uscita, ingresso, livello Line); per trasmettere i
segnali da un apparecchio allʼaltro è richiesto una
tensione fissa; altrimenti non è possibile una tra-
smissione ottimale. Tale valore si trova fra 0,1 V e
2 V ed è chiamato livello Line. Gli ingressi e le
uscite previste per tale livello sono generalmente
contrassegnati con LINE.
OUTRO: Funzione in cui si riproducono solo gli
ultimi 30 secondi di un titolo.
Pitch ingl. altezza del suono; con il regolatore
PITCH CONTROL si può modificare la velocità di
riproduzione e quindi lʼaltezza del suono.
Pitch Bend: Funzione con cui si può aumentare o
ridurre brevemente la velocità di riproduzione, per
sincronizzare il ritmo del titolo corrente con quello
di un titolo riprodotto su un altro apparecchio.
Durante le dissolvenze fra due titoli il ritmo non
viene alterato.
Pulsante interruttore il contatto è chiuso solo finché
si tiene premuto il pulsante; tipico dei campanelli.
Punto Cue: Un punto del CD, liberamente selezio-
nabile per mezzo del tasto CUE, che si può chia-
mare direttamente (con la riproduzione di un sin-
golo titolo solo allʼinterno di un titolo). Se con il
tasto CUE si ritorna sul punto Cue, il lettore CD
passa nella modalità di pausa.
Rack: Una struttura per apparechi con larghezza
normalizzata (482 mm = 19″); per montarvi impianti
audio completi, p. es. lettori CD, mixer, equalizza-
tori, amplificatori.
Riproduzione di tutti i titoli: Modalità in cui un
titolo viene riprodotto dopo lʼaltro contrariamente
alla riproduzione di un singolo titolo.
Riproduzione di un singolo titolo: Modalità per
applicazioni in discoteca: dopo la riproduzione di
un titolo, il lettore va in pausa; il contrario è la ripro-
duzione di tutti i titoli.
Single Riproduzione di un singolo titolo
17
I
F
B
CH

Op de uitklapbare pagina 3 vindt u een overzicht
van de bedieningselementen en de aansluitingen.
Inhoudsopgave
1 Overzicht van de bedieningselementen
en aansluitingen . . . . . . . . . . . . . . . . . . . . 18
1.1 Frontpaneel . . . . . . . . . . . . . . . . . . . . . . . . 18
1.2 Achterzijde . . . . . . . . . . . . . . . . . . . . . . . . . 19
2 Veiligheidsvoorschriften . . . . . . . . . . . . . 19
3 Toepassingen . . . . . . . . . . . . . . . . . . . . . . 20
4 Het apparaat opstellen en aansluiten . . 20
5 Bediening . . . . . . . . . . . . . . . . . . . . . . . . . 20
5.1 De cd afspelen . . . . . . . . . . . . . . . . . . . . . . 20
5.2 Weergave van het tracknummer,
de looptijd en de beats per minuut . . . . . . . 20
5.2.1 De weergave van de speeltijd omscha-
kelen en de functie OUTRO activeren . . . 21
5.2.2 Bargrafiek . . . . . . . . . . . . . . . . . . . . . . . . . 21
5.2.3 Beatteller . . . . . . . . . . . . . . . . . . . . . . . . . 21
5.3 De bedrijfsmodus selecteren . . . . . . . . . . . 21
5.3.1
“Single” – Afspelen van een individuele track
21
5.3.2
“Continue” – Afspelen van de volledige cd
.21
5.4 Een track kort voorbeluisteren . . . . . . . . . . 21
5.5 Versneld vooruit en achteruit zoeken . . . . . 21
5.6 Een bepaalde plaats in een track precies
opzoeken . . . . . . . . . . . . . . . . . . . . . . . . . . 21
5.7 Naar een bepaalde plaats in
een track terugkeren (Cue-punt) . . . . . . . . 22
5.8 Afspeelsnelheid en toonhoogte wijzigen . . 22
5.9 Het ritme van twee muziekfragmenten
synchroniseren (“Pitch Bend”) . . . . . . . . . . 22
6 Faderstart via een mengpaneel . . . . . . . 22
7 Onderhoud van het apparaat . . . . . . . . . 23
8 Technische gegevens . . . . . . . . . . . . . . . 23
9 Verklaring van de vakbegrippen . . . . . . . 24
1 Overzicht van de bedienings-
elementen en aansluitingen
1.1 Frontpaneel (fig.1)
1POWER-schakelaar
2Cd-lade
3Toets om de cd-lade (2) te openen en te slui-
ten (2); tijdens het afspelen van een cd is de cd-
lade beveiligd tegen onbedoeld openen
4Toetsen en om de volgende gewenste
track te selecteren:
Telkens als u op de toets drukt, wordt een
track verder gesprongen. Door op de toets te
drukken, springt de cd-speler terug naar het be-
gin van de geselecteerde track. Door verschil-
lende keren op de toets te drukken, wordt tel-
kens een track teruggesprongen. U kunt de toets
ook ingedrukt houden om deze functie over ver-
schillende tracks te laten werken.
5Multifunctioneel display (details zie figuur 2)
aSymbool voor de pauzemodus
bSymbool voor de weergavemodus
cDe melding “CONTINUE”: duidt de bedrijfs-
modus “Afspelen van de volledige cd” aan, zie
positie 14 (toets CONT./SINGLE)
dWeergave “SINGLE AUTO CUE”: duidt de
bedrijfsmodus “Afspelen van een individuele
track” aan
eBargrafiek; duidt door zijn lengte de resterende
speeltijd van een track resp. de cd aan [“RE-
MAIN” (i) op het display] of de verstreken speel-
tijd van een track (“REMAIN” niet weergegeven)
fTracknummer resp. – kort na inleggen van
een cd – het aantal tracks op de cd
gTijdsaanduiding in minuten (M), seconden (S)
en frames (F); zie positie 11 (toets TIME)
hWeergave “OUTRO”; verschijnt op het dis-
play, wanneer de functie OUTRO met de toets
TIME (11) wordt geactiveerd
iWeergave “REMAIN”; verschijnt op het dis-
play, wanneer de resterende speeltijd van een
track of een cd wordt weergegeven, zie ook
positie 11 (toets TIME)
jWeergave van de met regelaar (17) ingestel-
de procentuele afwijking ten opzichte van de
standaardsnelheid of het aantal beats per mi-
nuut dat met toets BPM/TAP (15) is ingesteld
6Toets PITCH om de met de regelaar (17) inge-
stelde snelheidsafwijking te activeren
7Draaiknop REV/FWD voor de functie “Pitch
Bend” en in de pauzemodus om een bepaalde
plaats in een track nauwkeurig op te zoeken
8Toets CUE om een track voor te beluisteren en
om terug te keren naar een bepaalde plaats (zie
hoofdstuk 5.4 resp. 5.7)
9Toets +10 om tracks te selecteren;
door op de toets te drukken, springt u telkens
10 tracks vooruit
10 Toets om te wisselen tussen afspelen ( op
het display) en pauze ( op het display)
11 Toets TIME om naar een andere tijdsaanduiding
(g) te schakelen en om de functie OUTRO in te
schakelen
Basisinstelling: weergave van de resterende
tijd van de geselecteerde track
1ste keer drukken
op de knop: Weergave van de verstreken
afspeeltijd van de geselec-
teerde track
2de keer drukken
op de knop: Weergave van de resterende
speeltijd van de geselec-
teerde track en inschakelen
van de functie OUTRO om tel-
kens de laatste 30 seconden
van de volgende tracks af te
spelen (deze functie werkt pas
vanaf de volgende track, druk
eventueel op de toets )
3de keer drukken
op de knop: weergave van de resterende
speeltijd van de volledige cd
Puede encontrar todos los elementos de funcio-
namiento y las conexiones que se describen en
la página 3 desplegable.
Índice
1 Elementos y conexiones . . . . . . . . . . . . . 18
1.1 Parte delantera . . . . . . . . . . . . . . . . . . . . . 18
1.2 Parte trasera . . . . . . . . . . . . . . . . . . . . . . . 19
2 Consejos de seguridad y utilización . . . 19
3 Posibilidades de utilización . . . . . . . . . . 19
4
Posicionamiento del aparato y conexiones
20
5 Utilización . . . . . . . . . . . . . . . . . . . . . . . . . 20
5.1 Lectura de CD . . . . . . . . . . . . . . . . . . . . . . 20
5.2
Visualización del número de canción, de la
duración, de la cantidad de beats por minuto
20
5.2.1 Conmutación de la visualización de la
duración de la lectura
y activación de la función OUTRO . . . . . . 20
5.2.2 Barra gráfica . . . . . . . . . . . . . . . . . . . . . . 20
5.2.3 Contador de beats . . . . . . . . . . . . . . . . . . 21
5.3 Selección del modo de funcionamiento . . . 21
5.3.1 “Single” – Lectura canción por canción . . 21
5.3.2
“Continue” – Lectura de todas las canciones
21
5.4
Lectura de las primeras notas de una canción
21
5.5 Avance y retorno rápidos . . . . . . . . . . . . . . 21
5.6 Posicionamiento exacto en un lugar
determinado . . . . . . . . . . . . . . . . . . . . . . . . 21
5.7 Retorno a un lugar determinado
precedentemente (punto Cue) . . . . . . . . . . 21
5.8 Modificación de la velocidad, de la altura
tonal . . . . . . . . . . . . . . . . . . . . . . . . . . . . . . 22
5.9 Adaptación del ritmo entre dos canciones
(“Pitch Bend”) . . . . . . . . . . . . . . . . . . . . . . . 22
6
Arranque eléctrico vía una mesa de mezclas
22
7 Mantenimiento del aparato . . . . . . . . . . . 23
8 Características técnicas . . . . . . . . . . . . . 23
9 Glosario . . . . . . . . . . . . . . . . . . . . . . . . . . 24
1 Elementos y conexiones
1.1 Parte delantera (esquema 1)
1Interruptor POWER Marcha/Paro
2Bandeja CD
3Tecla para abrir y cerrar la bandeja CD (2);
durante la lectura de un CD, la bandeja CD está
cerrada contra toda apertura intempestiva.
4Teclas y para seleccionar la canción
siguiente deseada:
A cada presión de la tecla , avanza una can-
ción. Por una presión de la tecla , vuelve al
principio de la canción en curso de lectura. Por
varias presiones en la tecla , vuelve atrás una
canción por cada vez. Para saltar varias cancio-
nes, mantenga la tecla correspondiente pulsada.
5Visualización multifunciones (ver esquema 2
para más detalles).
aSímbolo para el modo Pausa.
bSímbolo para el modo Lectura.
cVisualización “CONTINUE”: indica el modo de
funcionamiento “lectura de todas las cancio-
nes”, ver posición 14 (tecla CONT./ SINGLE).
dVisualización “SINGLE AUTO CUE”: indica el
modo de funcionamiento “lectura canción por
canción”.
eBarra gráfica: indica por su longitud, la dura-
ción restante de una canción o del CD [“RE-
MAIN” (i) visualizada] o la duración que ya se
ha leído de una canción (“REMAIN” se apaga)
fNúmero de la canción o, justo después de la
inserción de un CD, número de canciones en
el CD.
gVisualización de la duración de minutos (M),
segundos (S) y frames (F), ver la posición 11
(tecla TIME).
hVisualización “OUTRO”: se visualiza si la fun-
ción OUTRO está activada con la tecla TIME
(11).
iVisualización “REMAIN”: se visualiza cuando
la duración restante de una canción o de un
CD está indicada; ver también posición 11
(tecla TIME).
jVisualización del desvío, en porcentaje, de la
velocidad estándar, regulada con el potenció-
metro (17) o de la cantidad de beats por
minuto escogidos con la tecla BPM/TAP (15).
6Tecla PITCH para activar el desvío de velocidad
regulada con el potenciómetro (17).
7Botón REV/FWD para la función “Pitch Bend” y
en modo Pausa para posicionarse exactamente
en un lugar preciso.
8Tecla CUE para reproducir brevemente el co-
mienzo de una canción o para volver a un lugar
precedentemente definido (ver capítulos 5.4 o
5.7).
9Tecla +10 para seleccionar la canción: en cada
presión sobre la tecla, usted avanza 10 cancio-
nes.
10 Tecla para conmutar entre Lectura (visuali-
zación ) y Pausa (visualización )
11 Tecla TIME: conmutación de la visualización de
la duración (g) y activación de la función OUTRO.
Regulación
de base: visualización de la duración restan-
te de la canción en curso.
1ª presión: visualización de la duración ya
leída de la canción en curso.
2ª presión: visualización de la duración restan-
te del título en curso y activación
de la función OUTRO para leer res-
pectivamente los 30 últimos segun-
dos de las canciones siguientes.
(Esta función solo es activa a partir
del título siguiente, si es necesario
pulse la tecla ).
3ª presión: visualización de la duración res-
tante de todo el CD.
4ª presión: retorno al reglaje de base.
12 Teclas SEARCH y : Avance y retorno rá-
pidos; si una de las teclas se mantiene pulsada,
el lector CD avanza/retrocede rápidamente.
18
E
NL
B

4de keer drukken
op de knop: Terugschakelen naar de ba-
sisinstelling
12 Toetsen SEARCH en om vooruit en
achteruit te zoeken; wanneer een van de toetsen
ingedrukt wordt gehouden, zoekt de cd-speler
versneld vooruit resp. achteruit
13 Toets STOP om het afspelen te beëindigen
14 Toets CONT./SINGLE voor het selecteren van
de afspeelmodus (zie ook hoofdstuk 5.3)
Basisinstelling: “Single” – Afspelen van een
individuele track; op het dis-
play verschijnt “SINGLE
AUTO CUE” (d)
1ste keer drukken
op de toets: “Continue” – Alle tracks van
de cd worden weergegeven;
op het display verschijnt
“CONTINUE” (c)
2de keer drukken
op de toets Basisinstelling – Afspelen van
een individuele track
15 Toets BPM/TAP voor het weergeven van het
aantal beats per minuut; tip hiervoor enkele
keren op de toets op het ritme van de muziek: op
het display wijzigt de weergave van de snel-
heidsafwijking (j) in de weergave van het aantal
beats, en de LED naast de toets licht op.
Om terug naar de weergave van de snelheidsaf-
wijking te schakelen, houdt u de toets ca. 3 se-
conden ingedrukt tot de LED weer uitgaat.
16 Toetsen PITCH BEND voor synchronisatie van
de geselecteerde track aan een geselecteerd
muziekfragment in een ander toestel. Zolang
een van de toetsen wordt ingedrukt, loopt de
track 16 % sneller resp. trager ten opzichte van
de standaardsnelheid, en de LED naast de toets
PITCH (6) knippert.
17 Schuifregelaar PITCH CONTROL om de snelheid
resp. toonhoogte te veranderen (max. ±16 %);
de instelling van de regelaar functioneert alleen,
wanneer de toets PITCH (6) is ingedrukt
1.2 Achterzijde (afb. 3)
18 Digitale audio-uitgang (Cinch)
19 Audio-uitgang met lijnniveau (cinch, links/rechts)
20 Keuzeschakelaar om de methode van afstands-
bediening van de cd-speler in te regelen via een
mengpaneel met faderstartfunctie, zie Hfdst. 6
LOCK SW: De cd-speler wordt bij het open- /
dichtschuiven van de regelaar op het meng-
paneel via een in-/uitschakelaar in het
mengpaneel gestart/in pauze gezet.
TACT SW: De cd-speler wordt bij het open-/
dichtschuiven van de regelaar op het meng-
paneel via een druktoets in het mengpaneel
gestart/in pauze gezet.
CUE PLAY: De cd-speler wordt bij het open- en
dichtschuiven van de regelaar op het meng-
paneel door middel van een stuurimpuls
vanuit het mengpaneel gestart; de cd-speler
begint te spelen vanaf het Cue-punt resp.
wordt gereset tot het Cue-punt en in pauze
geschakeld.
21 3,5 mm-stekkerbus om de cd-speler op afstand
te bedienen via een mengpaneel met faderstart-
functie, zie Hfdst. 6
22 Netsnoer voor aansluiting op een stopcontact
(230 V~/50 Hz)
2 Veiligheidsvoorschriften
Het apparaat is in overeenstemming met alle relevante
EU-Richtlijnen en is daarom gekenmerkt met .
Let eveneens op het volgende:
Opgelet! Kijk bij geopende cd-lade niet in het bin-
nenwerk van de cd-speler, want eventueel actieve
laserstralen kunnen oogletsels veroorzaken.
Het apparaat is uitsluitend geschikt voor gebruik
binnenshuis. Vermijd druip- en spatwater, uitzon-
derlijk warme plaatsen en plaatsen met een hoge
vochtigheid (toegestaan omgevingstemperatuur-
bereik: 0 – 40 °C).
Plaats geen bekers met vloeistof zoals drinkgla-
zen etc. op het apparaat.
Schakel het apparaat niet in resp. trek onmiddel-
lijk de stekker uit het stopcontact, wanneer:
1. het apparaat of het netsnoer zichtbaar bescha-
digd is,
2. er een defect zou kunnen optreden nadat het
apparaat bijvoorbeeld gevallen is,
3. het apparaat slecht functioneert.
Het apparaat moet in elk geval worden hersteld
door een gekwalificeerd vakman.
Een beschadigd netsnoer mag enkel door de
fabrikant of door een gekwalificeerd persoon wor-
den hersteld.
Trek de stekker nooit met het snoer uit het stop-
contact, maar aan de stekker zelf!
In geval van ongeoorloofd of verkeerd gebruik,
verkeerde aansluiting, foutieve bediening of van
herstelling door een niet-gekwalificeerd persoon
vervalt de garantie en de verantwoordelijkheid
voor hieruit resulterende materiële of lichamelijke
schade.
Wanneer het toestel definitief uit bedrijf ge-
nomen wordt, bezorg het dan voor milieu-
vriendelijke verwerking aan een plaatselijk
recyclagebedrijf.
WAARSCHUWING De netspanning (230 V~) van
het toestel is levensgevaarlijk.
Open het toestel niet, want
door onzorgvuldige ingrepen
loopt u het risico van een elek-
trische schok.
13 Tecla STOP: paro de la lectura.
14 Tecla CONT./SINGLE para seleccionar el modo
de funcionamiento (ver también capítulo 5.3).
Regulación
de base: “Single”: lectura canción por can-
ción: en el display aparece “SINGLE
AUTO CUE”(d).
1ª presión: “Continue”: lectura de todas las
canciones del CD: en el display
aparece “CONTINUE” (c).
2ª presión: regulación de base – lectura can-
ción por canción.
15 Tecla BPM/TAP: visualización de la cantidad de
beats por minuto; presione brevemente varias
veces la tecla en función del ritmo de la música.
La visualización pasa de la indicación del desvío
de la velocidad (j) a la cantidad de beats y el LED
al lado de la tecla brilla.
Para volver a la visualización de la velocidad,
mantenga la tecla presionada durante 3 segun-
dos más o menos hasta que el LED se apague.
16 Teclas PITCH BEND: sincronización de la can-
ción en curso de lectura con el ritmo de un frag-
mento de música leído sobre otro aparato. Mien-
tras una de las teclas se activa, la canción es
leída un 16 % más rápido o menos rápido que
con la velocidad estándar y el LED al lado de la
tecla PITCH (6) parpadea.
17 Potenciómetro de reglaje PITCH CONTROL
para modificar la velocidad y la altura tonal
(±16 % máx.);
la regulación del potenciómetro solamente es efi-
caz si la tecla PITCH (6) está presionada.
1.2 Parte trasera (esquema 3)
18 Salida audio digital (RCA).
19 Salida audio analógica con nivel línea (RCA,
Izquierda/Derecha).
20 Selector del tipo de arranque eléctrico del lector
CD vía una mesa de mezclas con la función de
arranque eléctrico, ver capítulo 6.
LOCK SW: el lector CD se arranca o se pone en
pausa cuando abrimos/cerramos el fader de
la mesa de mezclas vía un interruptor mar-
cha/paro.
TACT SW: el lector CD se arranca o se pone en
pausa cuando abrimos/cerramos el fader de
la mesa de mezclas vía un botón pulsador
momentáneo.
CUE PLAY: El lector CD está arrancado a partir
del punto Cue/reinicializado en el punto Cue y
puesto en pausa vía un impulso de control
enviado por la mesa de mezclas cuando se
pulsa o cierra el fader de la mesa de mezclas.
21 Toma jack 3,5 hembra para el arranque eléctrico
del lector CD vía una mesa de mezclas con fun-
ción de arranque eléctrico, ver capítulo 6.
22 Cable de red para conectar a una toma 230 V~/
50 Hz.
2 Consejos de seguridad y utilización
Este aparato cumple con todas las directivas rele-
vantes de la UE y por lo tanto está marcado con el
símbolo .
Respecte escrupulosamente los puntos siguientes:
¡Atención! No mire nunca el compartimiento CD
cuando la bandeja está abierta. Rayos láser
podrían emitir y generar daños en la vista.
El aparato está fabricado solo para una utilización
en interior. Protéjalo de salpicaduras, todo tipo de
proyecciones de agua, humedad elevada y calor
(temperatura de ambiente admisible 0 – 40 °C).
En ningún caso debe depositar objetos que con-
tienen líquidos o un vaso encima del aparato.
No haga funcionar el aparato y desconéctelo in-
mediatamente cuando:
1. Aparecen daños en el aparato o en el cable de
red.
2. Después de una caída o accidente similar…, el
aparato presenta defectos.
3. Aparecen disfunciones.
En cualquier caso, los daños deben de ser repa-
rados por un técnico especializado.
Todo cable de red dañado debe cambiarse única-
mente por el fabricante o por un técnico habilitado.
No desconecte nunca el aparato tirando sobre el
cable de red, agarrar siempre el enchufe.
Declinamos toda responsabilidad en caso de da-
ños corporales o materiales resultantes si el apa-
rato se utiliza en otro fin para el cual ha sido fabri-
cado, si no está conectado o utilizado correcta-
mente o si no está reparado por una persona habi-
litada; además, carecería de todo tipo de garantía.
3 Posibilidades de utilización
El lector CD, CD-164DJ está fabricado especial-
mente para una utilización DJ profesional. Múltiples
posibilidades de funcionamiento, se definen preci-
samente en esta finalidad, por ejemplo la lectura
canción por canción y el contador de beats manual.
En el lector CD es posible leer CDs audio, CD-R
audio (grabados). Podrían aparecer problemas de
lectura con los CD-RW (CDs regrabables) según el
tipo de CD, el grabador y el programa de grabación
utilizado.
Cuando el aparato está definitivamente
sacado del servicio, debe depositarlo en una
fábrica de reciclaje de proximidad para con-
tribuir a una eliminación no contaminante.
ADVERTENCIA El aparato está alimentado por
una tensión peligrosa de 230 V~.
No tocar nunca el interior del
aparato ya que en caso de una
mala manipulación podría sufrir
una descarga eléctrica mortal.
19
E
NL
B

3 Toepassingen
De cd-speler CD-164DJ is speciaal ontworpen voor
professionele DJ-toepassingen. Vele functiemoge-
lijkheden zijn precies op dit toepassingsbereik afge-
stemd, b.v. het afspelen van een individuele track en
de manuele beatteller.
Op de cd-speler kunnen conventionele cdʼs en
zelfgebrande cdʼs (cd-r of cd recordable) worden
afgespeeld. Bij herbeschrijfbare cdʼs (cd-rw) kan het
afspelen naargelang het cd-type en gebruikte cd-
brander echter problematisch verlopen.
4 Het apparaat opstellen en aansluiten
De cd-speler is voorzien voor montage in een 19″-
rack (482 mm) Hiervoor zijn 2 rack-eenheden nodig
(1 rack-eenheid = 44,45 mm). De cd-speler kan ech-
ter ook als vrijstaand tafelmodel worden gebruikt. In
dit geval dient hij op een vlakke en horizontale
ondergrond geplaatst te worden.
De in- en uitgangen mogen enkel worden aange-
sloten en gewijzigd, wanneer de cd-speler en de
aan te sluiten apparatuur is uitgeschakeld.
1) Indien uw mengpaneel of versterker uitgerust is
met een digitale ingang, verbind deze dan met de
digitale uitgang DIGITAL OUT (18).
Bij apparatuur zonder digitale ingang verbindt
u de stereo-uitgang LINE OUT (19) – linker
kanaal L en rechter kanaal R – via een cinch-
kabel met een cd-speleringang op het mengpa-
neel of de versterker.
2) De cd-speler kan via een mengpaneel met fader-
startfunctie op afstand worden bestuurd. De aan-
sluiting van de stuurverbinding en de methode
van afstandsbediening worden in hoofdstuk 6 toe-
gelicht.
3) Plug ten slotte de netstekker van het aansluit-
snoer (22) in een stopcontact (230 V~/50 Hz).
5 Bediening
5.1 De cd afspelen
1) Schakel de cd-speler in met de POWER-schake-
laar (1). Op het display (5) verschijnen na elkaar
volgende meldingen:
(sluiten)
(lezen)
(geen cd) – wanneer geen cd is aange-
bracht
2) Open de cd-lade (2) met de toets (3). Op het
display verschijnt “ ” (openen).
3) Leg een cd in de lade met het label naar boven
en sluit de cd-lade met de toets . Bij correct
ingelegde cd verschijnen na korte tijd het totale
aantal tracks (f) en de totale speelduur (g) van de
cd en vervolgens de speelduur (g) van de eerste
track op het display.
[Wenst u na het inleggen van de cd onmiddel-
lijk de eerste track te starten, dan kunt u de cd-
lade ook met de toets (10) sluiten.]
4) Om met de eerste track van de cd te starten,
drukt u op de toets (indien de cd-lade met de
toets werd gesloten). Zolang de cd wordt afge-
speeld, ziet u het symbool (b) op het display.
Als u met een andere track wilt starten, selec-
teer deze dan via de toets , (4) of +10 (9):
– Door op de toets +10 te drukken, springt u tel-
kens 10 tracks vooruit.
– Door verschillende keren op de toets te
drukken, wordt telkens een track verderge-
gaan. Door op de toets te drukken, springt
de cd-speler terug naar het begin van de gese-
lecteerde track. Door verschillende keren op
de toets te drukken, wordt telkens een
track teruggesprongen. U kunt de toets ,
ook ingedrukt houden om deze functie over
verschillende tracks te laten werken.
Start vervolgens de track met de toets .
5) Het afspelen kan op elk moment met de toets
worden onderbroken. Op het display verschijnt
het pauzesymbool (a), en LEDʼs boven de
toetsen en CUE (8) knipperen. Druk nog-
maals op de toets de cd verder af te spelen.
6) Bij inschakelen is het apparaat steeds ingesteld
op Afspelen van een individuele track; op het dis-
play verschijnt “SINGLE AUTO CUE” (d). Na het
afspelen van een track schakelt de cd-speler aan
het begin van de volgende track in pauze. Wenst
u echter de volgende track automatisch af te spe-
len, schakel dan met de toets CONT./SINGLE
(14) naar Afspelen van de volledige cd (zie ook
hoofdstuk 5.3.2).
7) Als u het afspelen van een cd voortijdig wilt
beëindigen, zet de cd-speler dan in pauze of stop
het afspeelmechanisme met de toets STOP (13).
De cd-lade kan alleen met de toets worden
geopend.
Tip: Zolang de cd wordt afgespeeld, is de cd-
lade beveiligd tegen onbedoeld openen.
8) Alvorens de speler uit te schakelen, dient u met
behulp van de toets de cd-lade steeds te slui-
ten. Zo vermijdt u dat er vuil in het laser-aftast-
systeem geraakt. Schakel pas dan de cd-speler
uit met de POWER-schakelaar (1).
5.2 Weergave van het tracknummer,
de looptijd en de beats per minuut
In de beginstand na inschakelen worden op het dis-
play (fig. 2) tijdens het afspelen van een CD en bij
ingeschakelde pauze de nummers (f) en de reste-
rende tijd (g) van de geselecteerde track weergege-
ven. Voor weergave van de resterende tijd verschijnt
de melding “REMAIN” (i) op het display. De tijd
wordt in minuten (M) en seconden (S) weergege-
ven, waarbij de seconden nog eens in 75 “frames”
(F) verdeeld zijn (1 frame = 1/75 seconde).
4 Posicionamiento del aparato
y conexiones
El lector CD está fabricado para una instalación en
rack 19″ = 482 mm, dos unidades son necesarias
(1 unidad = 44,45 mm). El lector CD también puede
colocarse encima de una mesa pero en este caso
sobre una superficie plana y horizontal.
Antes de efectuar o modificar las conexiones, ase-
gúrese que el lector CD y los otros aparatos a
conectar están apagados.
1) Si en su mesa de mezclas o amplificador, está
prevista una entrada digital, conéctela a la salida
DIGITAL OUT (18).
Para aparatos sin entrada digital, conecte la
salida estéreo LINE OUT (19) – canal izquierdo L
y canal derecho R – vía un cable RCA a una en-
trada lector CD en la mesa de mezclas o el
amplificador.
2) El lector CD también puede funcionar a distancia
vía una mesa de mezclas con arranque eléctrico.
En el capítulo 6 presentamos la conexión de la
unión de mando y el tipo de arranque eléctrico.
3) Conecte por fin la toma del cable de red (22) a
una toma 230 V~/50 Hz.
5 Utilización
5.1 Lectura de CD
1) Con el interruptor POWER (1), encienda el lector
CD. En la visualización (5), las informaciones
siguientes aparecen una detrás la otra:
: cerrar
: leer
: CD no insertado.
2) Con la tecla (3), abra la bandeja CD (2). En el
display se visualiza (abrir).
3) Coloque un CD, inscripción hacia arriba, y cierre
la bandeja CD con la tecla . Si el CD está co-
rrectamente insertado, la visualización indica,
después de unos instantes, la cantidad total de
canciones (f) y la duración total (g) del CD ade-
más, la duración de la primera canción (g).
[Si la primera canción debe leerse inmediata-
mente después de haber insertado el CD, cierre
la bandeja CD con la tecla (10)].
4) Para arrancar la primera canción, presione la
tecla (si la bandeja CD ha sido cerrada con la
tecla ). Mientras se lee el CD, la visualización
indica el símbolo (b).
Si la lectura debe arrancar con otra canción,
selecciónelo con las teclas , (4) o +10 (9):
– A cada presión sobre la tecla +10, avanzamos
de diez canciones.
– Por una presión sobre la tecla , avanzamos
siempre de una canción. Por una presión de la
tecla , vuelve al principio de la canción que
se está reproduciendo. Por varias presiones
sobre la tecla , retrocede siempre de una
canción. Para saltar varios títulos, mantenga
la tecla o presionada.
Después arranque la canción con la tecla .
5) En todo momento, la lectura puede ser interrum-
pida con la tecla ; en la visualización, el sím-
bolo Pausa (a) aparece, los LEDs encima de
las teclas y CUE (8) parpadean. Para seguir
con la lectura, presione de nuevo la tecla .
6) Una vez encendido, el aparato está siempre en
modo Lectura canción por canción; el display
indica “SINGLE AUTO CUE” (d). Si una canción
es leída hasta el final, el aparato se pone en
Pausa al principio de la próxima canción. No obs-
tante, para una lectura automática de la canción
siguiente, pase al modo Lectura de todas las
canciones con la tecla CONT./SINGLE (14) [ver
también capítulo 5.3.2].
7) Si la lectura del CD debe terminarse más tem-
prano, ponga el lector en Pausa o párelo con la
tecla STOP (13). La bandeja CD puede ahora ser
abierta con la tecla .
Ojo: durante la lectura, la bandeja CD está ce-
rrada en contra toda apertura inoportuna.
8) Antes de cerrar el aparato, cierre siempre la ban-
deja CD con la tecla para proteger el sistema
láser de la suciedad. Desconecte después el
aparato con el interruptor POWER (1).
5.2 Visualización del número de canción,
de la duración, de la cantidad de beats
por minuto
En la regulación de base, una vez encendido el apa-
rato, la visualización (esquema 2) indique durante la
lectura de un CD y en modo Pausa, el número (f) y
la duración restante (g) de la canción en curso. En la
visualización, “REMAIN” (i) indica la duración res-
tante. Se visualiza en minutos (M), segundos (S),
los segundos están divididos en 75 “frames” (F)
[1 frame = 1/75 segundo].
5.2.1 Conmutación de la visualización
de la duración de la lectura y
activación de la función OUTRO
Por varias presiones en la tecla TIME (11), las infor-
maciones de tiempo siguientes pueden ser visualiza-
das, también puede seleccionar la función OUTRO:
1ª presión: la duración ya leída de la reproducción
en curso (la visualización “REMAIN” se apaga).
2ª presión: la función OUTRO para leer los 30 últi-
mos segundos respectivamente de las cancio-
nes siguientes (la función solo es activa a partir
del título siguiente – si lo necesite pulse la tecla
); la duración restante de la canción en curso
se visualiza.
3ª presión: durada restante de todo el CD; la función
OUTRO es nuevamente desactivada.
4ª presión: regulación base (visualización de la du-
ración restante de la canción en curso).
5.2.2 Barra gráfica
La barra gráfica (e) indica por su longitud, la dura-
ción restante de una canción o del CD o la duración
ya leída de un título en función de las informaciones
de tiempo seleccionadas con la tecla TIME (11) y
visualizadas. Parpadea en toda su longitud para
20
E
NL
B
Table of contents
Other Stageline CD Player manuals

Stageline
Stageline CD-194DJ User manual

Stageline
Stageline cd-196usb User manual

Stageline
Stageline CD-112 User manual

Stageline
Stageline CD-262DJ User manual

Stageline
Stageline CD-400PRO User manual

Stageline
Stageline CD-360DJ User manual

Stageline
Stageline CD-50DJ User manual

Stageline
Stageline CD-20DJ User manual