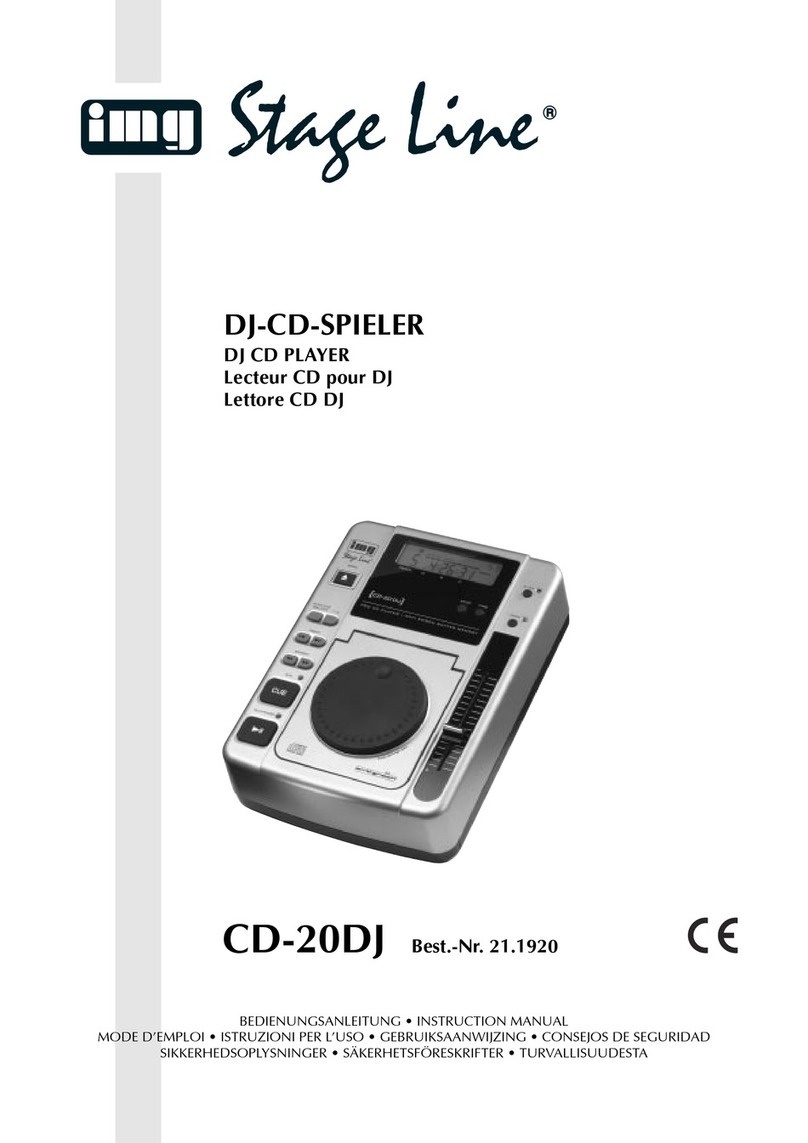
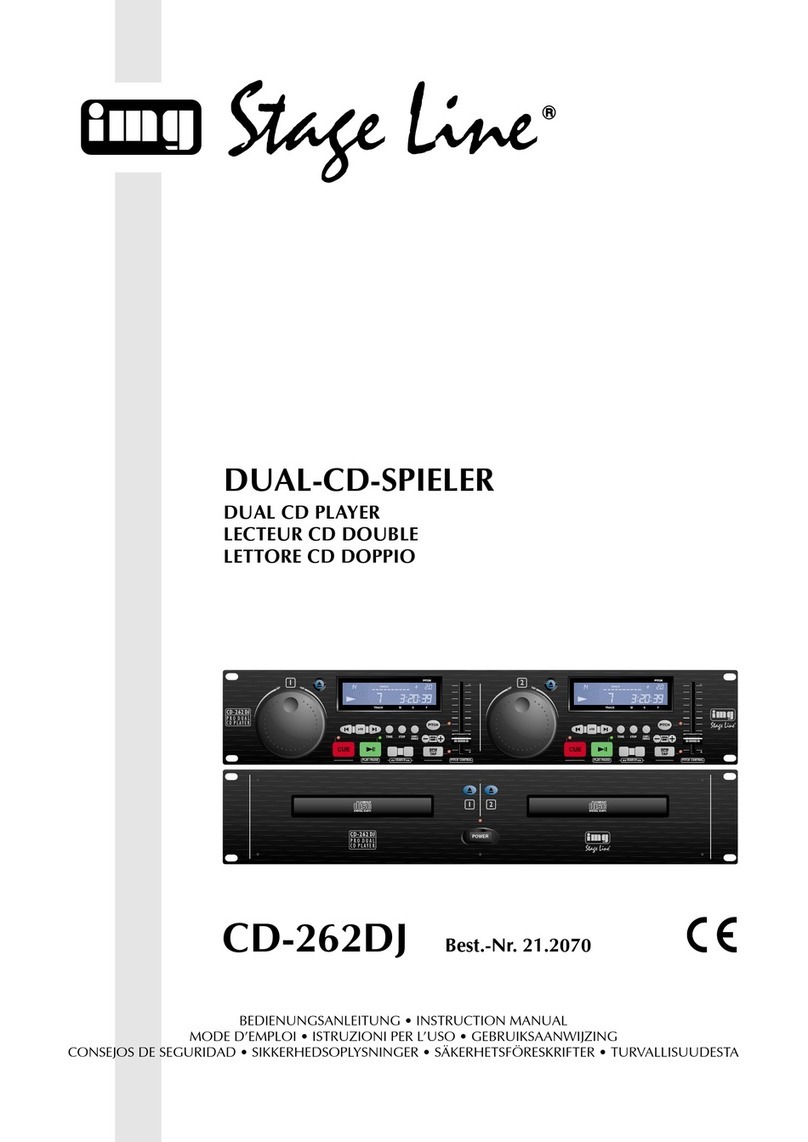
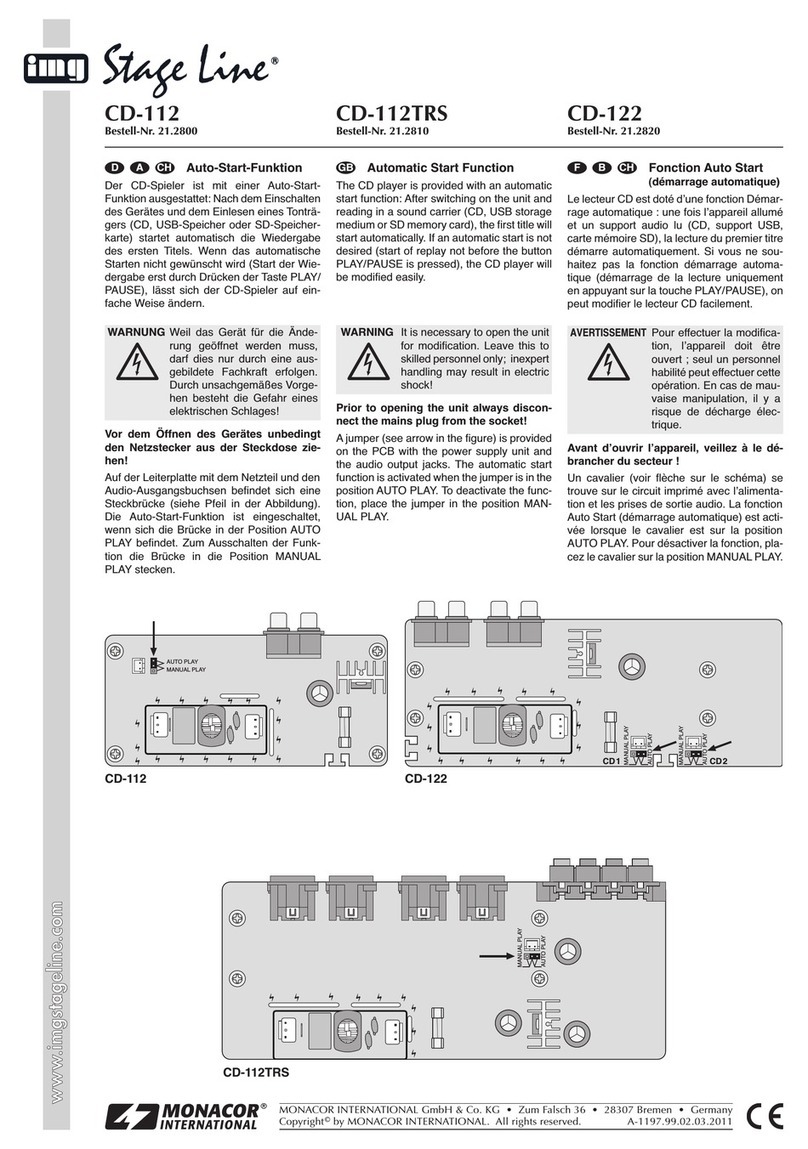
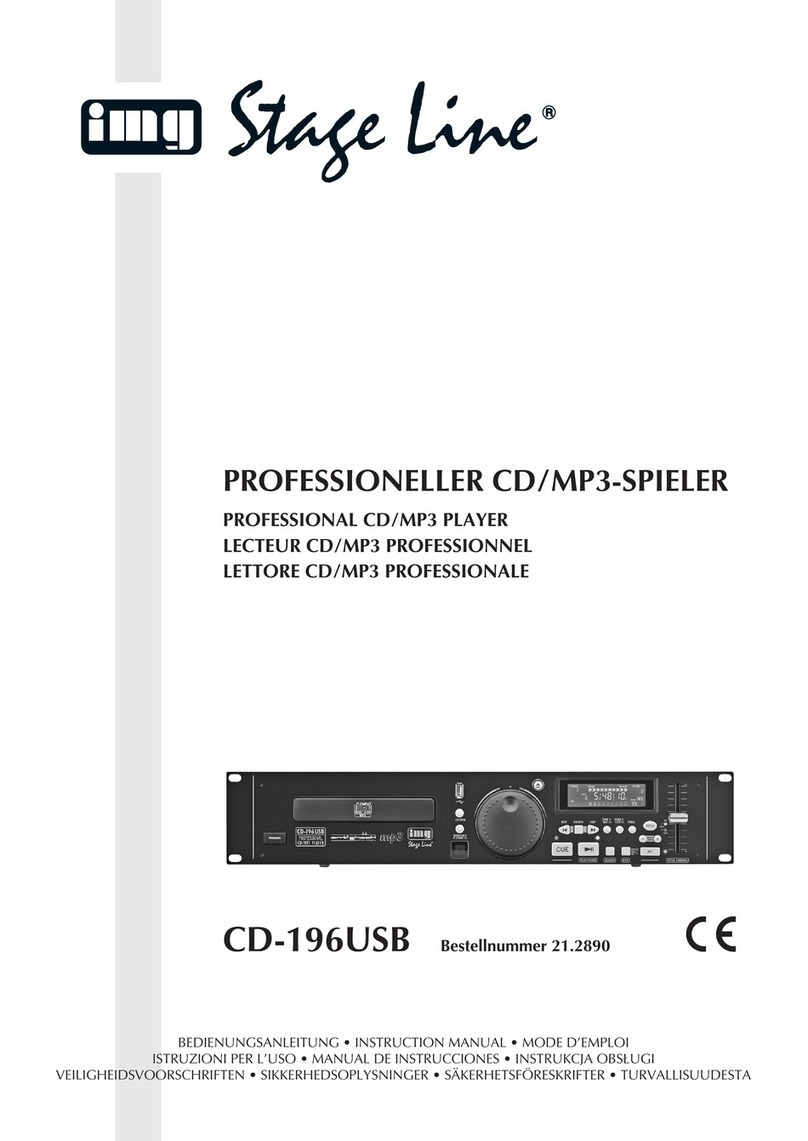
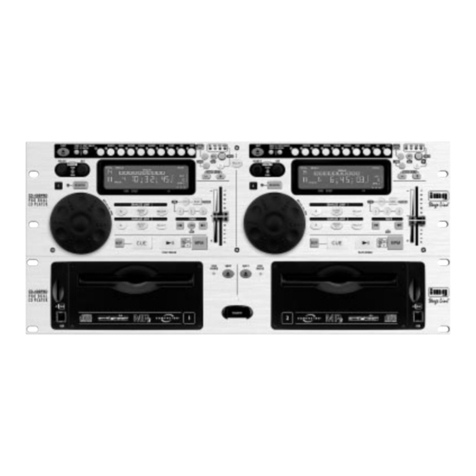
Stageline CD-360DJ User manual

BEDIENUNGSANLEITUNG • INSTRUCTION MANUAL • MODE D’EMPLOI
ISTRUZIONI PER L’USO • GEBRUIKSAANWIJZING • HANDLEIDING
CONSEJOS DE SEGURIDAD • SIKKERHEDSOPLYSNINGER • SÄKERHETSFÖRESKRIFTER • TURVALLISUUDESTA
PROFESSIONELLER DUAL-CD-SPIELER
PROFESSIONAL DUAL CD PLAYER
LECTEUR CD DOUBLE PROFESSIONEL
LETTORE CD DOPPIO PROFESSIONALE
CD-360DJ Best.-Nr. 21.1780

cd pla
Professional DJ dual CD player
Brillante Wiedergabe, ansprechendes Design, hohe
Funktionalität und erstklassige Verarbeitung kennzeich-
nen die CD-Spieler von IMG Stage Line.
Mit dem CD-360DJ haben Sie sich für einen multifunk-
tionalen professionellen Dual-CD-Spieler mit Anti-
Schock-System entschieden. Neben dem automati-
schen Beat-Counter fallen besonders die vielfältigen
Effektfunktionen auf. Ein erstklassiges Tool für an-
spruchsvolle DJs und die, die es werden wollen.
Brilliant reproduction, appealing design, high func-
tionality and first-class manufacture are typical for the
CD players from IMG Stage Line.
With the CD-360DJ you have decided on a multifunc-
tional professional dual CD player with anti-shock
system. Besides the automatic beat counter, the varying
effect functions are particularly noticeable. A first-class
tool for demanding DJs and for those who wish to
become one.
Scratch-Funktion
das extra große Drehrad für
Spezialeffekte, Scratch-Effekt
wie auf echtem Vinyl
Scratch function
The extra large rotary
wheel for special effects,
scratch effect like on real
vinyl
➄➁ ➂ ➃➀
➂
anti-shock system
seamless loop
master tempo
CD illumination
various digital effects
automatic beat counter
real time vinyl scratching
braking

ayer
Mit seinen professionellen Features meistert
der CD-360DJ spielend alle Aufgaben.
Neben Dual-CD-Laufwerk und Anti-Schock-
System bietet er Soundeffekte vom Brake bis
zum Scratching, Seamless-Loop, CUE, Fader-
start und zeigt die Beat-Counts auf dem Dis-
play.
With its professional features, the CD-360DJ
masters all tasks with great ease. Besides the
dual CD player mechanism and anti-shock
system the CD player offers sound effects
from brake to scratching, seamless loop, cue,
fader start, and shows the beat counts on the
display.
Illuminated buttons
Maximum operational safety: with
light quickly to the right button,
rubber coating for an optimum grip
Beleuchtete Tasten
Maximale Bediensicherheit: mit
Licht schnell zum richtigen Button,
Gummibeschichtung für optimale
Griffigkeit
White LED light
Exact illumination of the CD drawer and
of especially high luminous density
Weisses LED-Licht
Punktgenaue und besonders lichtstarke
Beleuchtung der CD-Schublade
Mastertempo
Regelung und individuelle
Anpassung der Laufwerks-
geschwindigkeit ohne Ton-
höhenveränderung
Master Tempo
Control and individual adjust-
ment of the running speed
of the CD player mechanism
without pitch variation
Brake-Funktion
Imitiert das von Plattenspielern
bekannte „Auslaufen“ oder
„Abbremsen“ und „Anlaufen“
Brake Function
Imitates the “running-out”
or “breaking” and “starting-up”
known from turntables
➀
➁
➄
➃

4
wwwwww..iimmggssttaaggeelliinnee..ccoomm
Bevor Sie einschalten ...
Wir wünschen Ihnen viel Spaß mit Ihrem neuen Gerät
von „img Stage Line“. Dabei soll Ihnen diese Bedie-
nungsanleitung helfen, alle Funktionsmöglichkeiten
kennenzulernen. Die Beachtung derAnleitung vermeidet
außerdem Fehlbedienungen und schützt Sie und Ihr
Gerät vor eventuellen Schäden durch unsachgemäßen
Gebrauch.
Den deutschen Text finden Sie auf den Seiten 6–14.
Before you switch on ...
We wish you much pleasure with your new unit by “img
Stage Line”. With these operating instructions you will be
able to get to know all functions of the unit. By following
these instructions false operations will be avoided, and
possible damage to you and your unit due to improper
use will be prevented.
You will find the English text on the pages 6–14.
D
A
CH
GB
Avant toute mise en service ...
Nous vous remercions d’avoir choisi un appareil “img
Stage Line” et vous souhaitons beaucoup de plaisir à
l’utiliser. Cette notice a pour objectif de vous aider à
mieux connaître les multiples facettes de l’appareil et à
vous éviter toute mauvaise manipulation.
La version française se trouve pages 15–23.
Prima di accendere ...
Vi auguriamo buon divertimento con il Vostro nuovo appa-
recchio “img Stage Line”. Le istruzioni per l’uso Vi pos-
sono aiutare a conoscere tutte le possibili funzioni. E
rispettando quanto spiegato nelle istruzioni, evitate di
commettere degli errori, e così proteggete Voi stessi, ma
anche l’apparecchio, da eventuali rischi per uso improprio.
Il testo italiano lo potete trovare alle pagine 15–23.
F
B
CH
I
Voordat u inschakelt ...
Wij wensen u veel plezier met uw nieuw toestel van “img
Stage Line”. Met behulp van bijgaande gebruiksaan-
wijzing zal u alle functiemogelijkheden leren kennen.
Door deze instructies op te volgen zal een slechte wer-
king vermeden worden, en zal een eventueel letsel aan
uzelf en schade aan uw toestel tengevolge van onzorg-
vuldig gebruik worden voorkomen.
U vindt de nederlandstalige tekst op de pagina’s 24–28.
Antes de cualquier instalación ...
Tenemos de agradecerle el haber adquirido un equipo
de “img Stage Line” y le deseamos un agrable uso. Por
favor lee las instrucciones de seguridad antes del uso.
La observación de las instrucciones de seguridad evita
operaciones erróneas y protege Vd. y vuestro aparato
contra todo daño posible por cualquier uso inadecuado.
Las instrucciones de seguridad se encuentran en la
página’s 29.
NL
B
E
Inden De tænder for apparatet ...
Vi ønsker Dem god fornøjelse med Deres nye “img Stage
Line” apparat. Læs oplysningerne for en sikker brug af ap-
paratet før ibrugtagning. Følg sikkerhedsoplysningerne for
at undgå forkert betjening og for at beskytte Dem og
Deres apparat mod skade på grund af forkert brug.
Sikkerhedsoplysningerne finder De på side 29.
Förskrift
Vi önskar dig mycket nöje med din nya enhet från “img
Stage Line”. Läs gärna säkerhetsinstruktionerna innan
du använder enheten. Genom att följa säkerhetsinstruk-
tionerna kan många problem undvikas, vilket annars kan
skada enheten.
Du finner säkerhetsinstruktionerna på sidan 29.
DK S
Ennen virran kytkemistä…
Toivomme, että uusi “img Stage Line”-laitteesi tuo sinulle
paljon iloa ja hyötyä. Ole hyvä ja lue käyttöohjeet ennen
laitteen käyttöönottoa. Luettuasi käyttöohjeet voit käyt-
tää laitetta turvallisesti ja vältyt laitteen väärinkäytöltä.
Käyttöohjeet löydät sivulta 30.
FIN

5
345
➂
CD-360 DJ
PRO DUAL CD PLAYER
RELAY
OPEN / CLOSE
CUE PLAY/PAUSE
TRACK
SEARCH
+10
TIME- STOP —
MT
BPM
PITCH
PITCH BENDCONT./SINGLE
PITCH
4%
8%
16%
PITCH
CONTROL
4
3
2
1
SELECT
ON/OFF
BRAKE
BOP
B/LOOPARELOOP
/EXIT
REV
FWD
1SCRATCH 2 FLANGER 3 FILTER 4 REVERSE
EFFECT
0
AUTO CUE SINGLE PITCH
REMAIN
OPEN / CLOSE
CUE PLAY/PAUSE
TRACK
SEARCH
+10
TIME- STOP —
MT
BPM
PITCH
PITCH BENDCONT./SINGLE
PITCH
4%
8%
16%
PITCH
CONTROL
4
3
2
1
SELECT
ON/OFF
BRAKE
BOP
B/LOOPARELOOP
/EXIT
REV
FWD
1SCRATCH 2 FLANGER 3 FILTER 4 REVERSE
EFFECT
0
AUTO CUE SINGLE PITCH
REMAIN
BRAKE
12
➃
AUTO CUE SINGLE PITCH
REMAIN
LOOP
CONTINUE
OUTRO
BRAKE BEAT
CD-360 DJ
DIGITAL SCRATCH TECHNOLOGY
antishock
BUFFER MEMORY
SEAMLESS LOOP
28 29 30 31 32
➄
➀
LASER KLASSE 1
CLASS LASER
LASER CLASSE 1
230V~/50Hz
CONNECT TO
REMOTE CONTROL1
CONNECT TO
REMOTE CONTROL2
LINE OUT
START/
PAUSE DIGITAL
OUT
LEFTRIGHT
LINE OUT
START/
PAUSE DIGITAL
OUT
LEFTRIGHT
abc d efgh i
jk lmn
33 34 35 36 37 38 39 40 41
OPEN / CLOSE
CUE PLAY/ PAUSE
TRACK
SEARCH
+10
TIME- STOP —
MT
BPM
PITCH
PITCH BENDCONT./SINGLE
PITCH
4%
8%
16%
4
3
2
1
SELECT
ON/OFF
BRAKE
BOP
B/LOOPARELOOP
/EXIT
REV
FWD
67891011 12 13 14 15 16
➁
17 18 19 20 21 22 23 24 25 26 27

Bitte klappen Sie die Seite 5 heraus. Sie sehen
dann immer die beschriebenen Bedienelemente
und Anschlüsse.
Inhalt
1Übersicht der Bedienelemente und
Anschlüsse . . . . . . . . . . . . . . . . . . . . . . . . . 6
1.1 Steuereinheit . . . . . . . . . . . . . . . . . . . . . . . . 6
1.2 Laufwerkeinheit Frontseite . . . . . . . . . . . . . . 8
1.3 Laufwerkeinheit Rückseite . . . . . . . . . . . . . . 8
2Hinweise für den sicheren Gebrauch . . . . 8
3Einsatzmöglichkeiten . . . . . . . . . . . . . . . . . 8
4Gerät aufstellen und anschließen . . . . . . . 9
5Bedienung . . . . . . . . . . . . . . . . . . . . . . . . . . 9
5.1 CD abspielen . . . . . . . . . . . . . . . . . . . . . . . . 9
5.2 Anzeige der Titelnummer, Laufzeit und
Taktschläge pro Minute . . . . . . . . . . . . . . . . . 9
5.2.1 Bargraph . . . . . . . . . . . . . . . . . . . . . . . . . 10
5.2.2 Beatcounter . . . . . . . . . . . . . . . . . . . . . . . 10
5.3 Betriebsart wählen . . . . . . . . . . . . . . . . . . . 10
5.3.1 Einzeltitelwiedergabe . . . . . . . . . . . . . . . . 10
5.3.2 Gesamttitelwiedergabe . . . . . . . . . . . . . . 10
5.3.3 Relay-Betrieb – automatischer Start des
anderen Laufwerks . . . . . . . . . . . . . . . . . 10
5.4 Anspielen eines Titels . . . . . . . . . . . . . . . . . 10
5.5 Schneller Vor- und Rücklauf . . . . . . . . . . . . 11
5.6 GenauesAnfahren einer bestimmten Stelle 11
5.7 Rücksprung zu einer zuvor bestimmten
Stelle/Stottereffekte erzeugen . . . . . . . . . . 11
5.8 Endlosschleife abspielen . . . . . . . . . . . . . . 11
5.9 Geschwindigkeit mit oder ohne Tonhöhen-
verschiebung verändern/
Anzahl der Taktschläge verändern . . . . . . . 12
5.10 Takt zwischen 2 Musikstücken angleichen .12
6Klangeffekte aktivieren . . . . . . . . . . . . . . 12
6.1 Brems-/Anlauffunktion BRAKE . . . . . . . . . . 13
7Faderstart über ein Mischpult . . . . . . . . . 13
8Pflege des Gerätes . . . . . . . . . . . . . . . . . . 13
9Technische Daten . . . . . . . . . . . . . . . . . . . 13
10 Erklärung der Fachbegriffe . . . . . . . . . . . 14
1Übersicht der Bedienelemente und
Anschlüsse
1.1 Steuereinheit (Abb. 1–3)
Im folgenden Text werden die Bedienelemente des
Laufwerks 1 erklärt. Die Bedienelemente des Lauf-
werks 2 sind vollkommen identisch.
1Bedienfeld für Laufwerk 1 (Details siehe Abb. 2)
2Bedienfeld für Laufwerk 2 (Details siehe Abb. 2)
3Multifunktionsdisplay (Details siehe Abb. 3)
aSymbol für den Wiedergabemodus
bSymbol für den Pausenmodus
cBargraph: gibt durch seine Länge die Restzeit
von einem Titel an [Anzeige „REMAIN“ (n) ein-
geblendet] oder die bereits gespielte Zeit eines
Titels (Anzeige „REMAIN“ ausgeblendet)
dAnzeige „CONTINUE“:
ist eingeblendet, wenn mit der Taste CONT./
SINGLE (24) die Gesamttitelwiedergabe akti-
viert wurde, siehe Position 24
eAnzeige „BRAKE“:
ist eingeblendet, wenn mit der Taste BRAKE
(10) die Brems-/Anlauffunktion aktiviert wurde,
siehe Position 10 Taste BRAKE
fAnzeige „AUTO CUE SINGLE“:
ist nach dem Einschalten eingeblendet und
signalisiert die Betriebsart Einzeltitelwieder-
gabe
gAnzeige „BEAT“:
ist eingeblendet, wenn mit der Taste BPM/
PITCH (26) die Geschwindigkeitsanzeige (i)
auf Anzeige der Taktschläge pro Minute um-
geschaltet wurde
hAnzeige „PITCH“:
ist nach dem Einschalten eingeblendet und
signalisiert, dass die Geschwindigkeitsan-
zeige (i) die mit dem Regler PITCH CONTROL
(4) eingestellte prozentuale Abweichung von
der Standardgeschwindigkeit anzeigt
iAnzeige der mit dem Regler PITCH CON-
TROL (4) eingestellten prozentualen Abwei-
chung von der Standardgeschwindigkeit
[„PITCH“ (h) ist eingeblendet] oder Anzeige
der Taktschläge pro Minute nach dem Um-
schalten mit der Taste BPM/PITCH (26)
[„BEAT“ (g) ist eingeblendet]
jTitelnummer bzw. kurz nach dem Einlegen
einer CD die Anzahl der Titel auf der CD
kZeitanzeige; siehe Position 13 Taste TIME
STOP
lAnzeige „OUTRO“:
ist eingeblendet, wenn mit der Taste TIME
STOP (13) die Funktion OUTRO aktiviert wurde
mAnzeige „LOOP“: ist eingeblendet, wenn eine
Endlosschleife abgespielt wird (siehe Kap. 5.8)
nAnzeige „REMAIN“: ist eingeblendet, wenn
die Restzeit eines Titels oder einer CD ange-
zeigt wird, siehe auch Position 13
4Schieberegler PITCH CONTROL zum Ändern
der Geschwindigkeit bzw. Tonhöhe (max. ±16 %);
die Einstellung des Reglers ist nur bei gedrückter
Taste PITCH (15) wirksam
5Taste RELAY zum automatischen Starten des
anderen Laufwerks am Ende eines Titels oder
am Ende der CD (siehe Kapitel 5.3.3)
Hinweis: Die Funktion lässt sich nur aktivieren,
wenn in beiden Laufwerken eine CD eingelegt ist
6Taste OPEN/CLOSE zum Öffnen und
Schließen der CD-Schublade [wie Taste OPEN/
CLOSE (30) an der Laufwerkeinheit]; während
des Abspielens einer CD ist die CD-Schublade
gegen unbeabsichtigtes Öffnen verriegelt
7Taste SELECT zurAuswahl einer der vier Effekte
Scratch, Flanger, Filter und Reverse,
siehe Kapitel 6
8Taste ON/OFF zum Ein- und Ausschalten des
mit der Taste SELECT (7) ausgewählten Effekts
9LEDs zurAnzeige des mit der Taste SELECT (7)
ausgewählten Effekts
1blau – Scratch
2rot – Flanger
3grün – Filter
4gelb – Reverse
Die entsprechende LED blinkt, wenn der Effekt
angewählt ist und leuchtet konstant, wenn der
Please unfold page 5. Thus you will always be
able to see the operating elements and connec-
tions described.
Contents
1Operating Elements and Connections . . . 6
1.1 Control unit . . . . . . . . . . . . . . . . . . . . . . . . . . 6
1.2 Player mechanism, front panel . . . . . . . . . . . 8
1.3 Player mechanism, rear panel . . . . . . . . . . . 8
2Safety Notes . . . . . . . . . . . . . . . . . . . . . . . . 8
3Applications . . . . . . . . . . . . . . . . . . . . . . . . 8
4Setting-up and Connecting the Unit . . . . . 9
5Operation . . . . . . . . . . . . . . . . . . . . . . . . . . . 9
5.1 Playing a CD . . . . . . . . . . . . . . . . . . . . . . . . . 9
5.2 Display of title number, playing time, and
beats per minute . . . . . . . . . . . . . . . . . . . . . . 9
5.2.1 Bar graph . . . . . . . . . . . . . . . . . . . . . . . . . 10
5.2.2 Beat counter . . . . . . . . . . . . . . . . . . . . . . 10
5.3 Selecting the operating mode . . . . . . . . . . . 10
5.3.1 Single title replay . . . . . . . . . . . . . . . . . . . 10
5.3.2 Total title replay . . . . . . . . . . . . . . . . . . . . 10
5.3.3 Relay operation – automatic start of
the other player mechanism . . . . . . . . . . 10
5.4 Short playing of a title beginning . . . . . . . . 10
5.5 Fast forward and reverse run . . . . . . . . . . . 11
5.6 Precise aiming at a certain spot . . . . . . . . . 11
5.7 Return to a spot defined before/generating
stuttering effects . . . . . . . . . . . . . . . . . . . . . 11
5.8 Replaying a continuous loop . . . . . . . . . . . . 11
5.9 Changing of speed with or without changing
the pitch/changing the number of beats . . . 12
5.10 Matching the beat between 2 music pieces 12
6Activating Sound Effects . . . . . . . . . . . . . . . 12
6.1 Braking/starting function BRAKE . . . . . . . . 13
7Fader Start via a Mixer . . . . . . . . . . . . . . . 13
8Maintenance of the Unit . . . . . . . . . . . . . . 13
9Specifications . . . . . . . . . . . . . . . . . . . . . . 13
10 Explanations of the Technical Terms . . . 14
1Operating Elements and Connec-
tions
1.1 Control unit (figs. 1–3)
In the following text the operating elements of player
mechanism 1 are explained. The operating elements
of player mechanism 2 are identical.
1Operating panel for player mechanism 1
(details see fig. 2)
2Operating panel for player mechanism 2
(details see fig. 2)
3Multifunction display (details see fig. 3)
asymbol for the replay mode
bsymbol for the pause mode
cbar graph: indicates the remaining time of a
title by its length [“REMAIN” (n) is displayed]
or the time already played of a title (“REMAIN”
is extinguished)
ddisplay “CONTINUE”:
is inserted if the total title replay has been
activated with button CONT./SINGLE (24),
see item 24
edisplay “BRAKE”:
is inserted if the braking/starting function has
been activated with button BRAKE (10),
see item 10 button BRAKE
fdisplay “AUTO CUE SINGLE”:
is inserted after switching-on and signalizes
the operating mode of single title replay
gdisplay “BEAT”:
is inserted if the pitch display (i) has been
switched to display of the beats per minute
with button BPM/PITCH (26)
hdisplay “PITCH”:
is inserted after switching-on and signalizes
that the pitch display (i) indicates the percen-
tage deviation from the standard speed ad-
justed with the PITCH CONTROL (4)
idisplay of the percentage deviation from the
standard speed adjusted with the PITCH
CONTROL (4) [“PITCH” (h) is inserted] or dis-
play of the beats per minute after switching
with button BPM/PITCH (26) [“BEAT” (g) is
inserted]
jtitle number or shortly after inserting a CD the
number of titles on the CD
ktime display; see item 13 button TIME STOP
ldisplay “OUTRO”:
is inserted if function OUTRO has been
activated with button TIME STOP (13)
mdisplay “LOOP”: is inserted if a continuous
loop is played (see chapter 5.8)
ndisplay “REMAIN”: is inserted if the remaining
time of a title or a CD is displayed, also see
item 13
4Sliding control PITCH CONTROL to change the
speed or pitch (max. ±16%); the adjustment of
the control is only effective when button PITCH
(15) is pressed
5Button RELAY for automatic start of the other
player mechanism at the end of a title or at the
end of the CD (see chapter 5.3.3)
Note: the function can only be activated if a CD is
inserted in both player mechanisms
6Button OPEN/CLOSE to open and close the
CD drawer [like button OPEN/CLOSE (30) at the
player mechanism unit];
while playing a CD, the CD drawer is locked
against unintentional opening
7Button SELECT to select one of the four effects
Scratch, Flanger, Filter, and Reverse,
see chapter 6
8Button ON/OFF to switch on and off the effect
selected with button SELECT (7)
9LEDs to display the effect selected with button
SELECT (7)
1blue – Scratch
2red – Flanger
3green – filter
4yellow – reverse
The corresponding LED flashes if the effect is
selected and constantly lights if the effect has
been switched on with button ON/OFF (8).
6
GB
D
A
CH

Effekt mit der Taste ON/OFF (8) eingeschaltet
wurde.
10 Taste BRAKE zum Ein- und Ausschalten der
Brems-/Anlauffunktion
Bei eingeschalteter Funktion ist im Display die
Anzeige „BRAKE“ (e) eingeblendet. Wird jetzt
mit der Taste (21) bei einem laufenden
Musiktitel auf Pause geschaltet, stoppt die Wie-
dergabe nicht abrupt, sondern wird bis zum Still-
stand abgebremst. Beim erneuten Starten der
Wiedergabe mit der Taste läuft dann der Titel
zuerst langsam an.
11 Tasten und zum Anwählen des nächsten
gewünschten Titels:
Mit jedem Betätigen der Taste wird ein Titel
weitergesprungen. Beim Drücken der Taste
wird an den Anfang des gerade laufenden Titels
gesprungen. Durch mehrfaches Drücken der
Taste wird immer ein Titel weiter zurückge-
sprungen. Zum Überspringen mehrerer Titel die
entsprechende Taste gedrückt halten.
12 Tasten SEARCH und für den Vor- und
Rücklauf; wird eine der Tasten gedrückt gehal-
ten, fährt der CD-Player schnell vor bzw. zurück
13 Taste TIME STOP:
wird die Taste länger als 3 Sekunden gedrückt
gehalten, stoppt das Laufwerk;
zur Umschaltung der Display-Zeitanzeige (k) die
Taste nur kurz antippen:
Grundeinstellung: Anzeige der Restzeit des lau-
fenden Titels
1. Tastendruck: Anzeige der bereits gespiel-
ten Zeit des laufenden Titels
2. Tastendruck: Anzeige der Restzeit des lau-
fenden Titels und Einschalten
der Funktion OUTRO zumAb-
spielen der jeweils letzten 30
Sekunden der folgenden Titel
(diese Funktion ist erst ab dem
nächsten Titel aktiv, ggf. die
Taste drücken)
3. Tastendruck: Anzeige der Restzeit der ge-
samten CD und Ausschalten
der Funktion OUTRO
4. Tastendruck: Zurückschalten auf die Grund-
einstellung
14 Taste MT (Master Tempo) für konstante Tonhöhe
Wurde die Taste betätigt (LED neben der Taste
leuchtet), bleibt bei Veränderung der Abspielge-
schwindigkeit mit dem Regler PITCH CONTROL
(4) die Tonhöhe konstant.
15 Taste PITCH zum Aktivieren der mit dem Regler
PITCH CONTROL (4) eingestellten Geschwin-
digkeit [eine der LEDs (16) leuchtet] und zur
Auswahl des Geschwindigkeitseinstellbereiches
(4%, 8% oder 16%)
Um wieder auf die Standardgeschwindigkeit
zurückzuschalten die Taste solange gedrückt
halten (ca. 2s), bis die LED (16) erlischt.
16 LEDs zur Anzeige des ausgewählten Geschwin-
digkeitseinstellbereiches und zur Anzeige, dass
der Regler PITCH CONTROL (4) aktiviert ist
17 Drehrad FWD/REV zum exakten Anfahren einer
bestimmten Stelle im Pausenmodus. Bei einge-
schalteter Pause wird auf der CD so lange und
so schnell vor- oder zurückgefahren, wie das
Rad gedreht wird. Nach dem Drehen wird die
momentane Stelle so lange wiederholt, bis die
Taste (21) gedrückt oder die Taste CUE (19)
zweimal angetippt wird.
Bei laufender CD kann durch Vor- und Zurück-
drehen des Drehrads ein „Leier“-Effekt erzeugt
werden.
Wurde ein Klangeffekt mit der Taste ON/OFF (8)
eingeschaltet, lässt sich der Effekt mit dem Dreh-
rad verändern bzw. steuern (siehe Kapitel 6).
18 Taste BOP zum Zurückspringen und sofortigem
Starten der Wiedergabe ab dem Anfang eines
gerade laufenden Titels oder ab einem zuvor mit
der Taste CUE (19) gewählten Startpunkt
Durch kurzes, mehrfaches Drücken dieser Taste
lassen sich Stottereffekte erzeugen.
19 Taste CUE zum Anspielen eines Titels und für
den Rücksprung zu einer zuvor bestimmten
Stelle (siehe Kapitel 5.4 bzw. 5.7)
20 Taste +10 zur Titelanwahl;
mit jedem Tastendruck erfolgt ein Sprung über
10 Titel vorwärts
21 Taste zum Umschalten zwischen Wieder-
gabe [Anzeige (a)] und Pause [Anzeige (b)]
22 Taste A zum Bestimmen des Startpunktes einer
Endlosschleife (siehe Kapitel 5.8)
23 Taste B/LOOP zum Bestimmen des Endpunktes
einer Endlosschleife und gleichzeitigem Starten
der Schleife (siehe Kapitel 5.8)
24 Taste CONT./SINGLE zur Auswahl des Betriebs-
modus (siehe auch Kapitel 5.3)
Grundeinstellung: Einzeltitelwiedergabe;
im Display wird „AUTO CUE
SINGLE“ (f) angezeigt
1. Tastendruck: Wiedergabe aller Titel der CD
und endlose Wiederholung
der gesamten CD; im Display
wird „CONTINUE“ (d) an-
gezeigt
2. Tastendruck: Zurückschalten auf die Grund-
einstellung
25 Taste RELOOP/EXIT zum Beenden einer Endlos-
schleife und zum erneutenAbspielen der Schleife
26 Taste BPM/PITCH zum Umschalten der
Geschwindigkeitsanzeige (i) zwischen
aAnzeige der mit dem Regler PITCH CON-
TROL (4) gewählten Geschwindigkeitsab-
weichung in % [Anzeige „PITCH“ (h) ist ein-
geblendet]
bAnzeige der Taktschläge pro Minute (BPM =
Beats Per Minute) über den automatischen
Beatcounter [Anzeige „BEAT“ (g) ist einge-
blendet]
27 Tasten PITCH BEND zur Synchronisation des
Taktes eines Titels auf dem Laufwerk 1 an den
eines Titels auf dem Laufwerk 2
Solange eine der Tasten betätigt wird, ist die
Geschwindigkeit niedriger bzw. höher.
10 Button BRAKE to switch on and off the brak-
ing/starting function
If the function is switched on, the display
“BRAKE” (e) is inserted. If the unit is now
switched to pause with button (21) while a
music title is playing, the replay does not stop
abruptly but it is braked until the standstill. When
starting the replay with button again, the title
starts slowly first.
11 Buttons and to select the next desired
title:
With each pressing of button , one more title
is advanced. While pressing button , the unit
goes to the beginning of the currently playing
title. If button is pressed several times,
always one more title is reversed. To skip several
titles, keep the corresponding button pressed.
12 Buttons SEARCH and for the fast for-
ward and reverse run; if one of the buttons is kept
pressed, the CD player advances or reverses
quickly.
13 Button TIME STOP:
if the button is kept pressed for more than 3
seconds, the player mechanism stops;
to switch the time indication (k) of the display,
press the button only shortly:
basic setting: display of the remaining
time of the currently play-
ing title
1st pressing of button: display of the time al-
ready played of the cur-
rent title
2nd pressing of button: display of the remaining
time of the currently play-
ing title and switching-on
of function OUTRO to play
the last 30 seconds of the
following titles in each
case (this function is only
active as from the next
title, press button , if
required)
3rd pressing of button: display of the remaining
time of the entire CD and
switching-off of function
OUTRO
4th pressing of button: switching back to the
basic setting
14 Button MT (master tempo) for constant pitch
If the button has been actuated (LED next to the
button lights up), the pitch remains constant
when the playing speed is changed with the
PITCH CONTROL (4)
15 Button PITCH to activate the speed adjusted
with the PITCH CONTROL (4) [one of the LEDs
(16) lights up] and to select the adjusting range
of the speed (4%, 8%, or 16%)
To switch back to the standard speed, keep the
button pressed (for approx. 2s) until the LED
(16) extinguishes.
16 LEDs to display the selected adjusting range of
the speed and to display that the PITCH CON-
TROL (4) has been activated
17 Rotary wheel FWD/REV for precise aiming at a
certain spot in the pause mode. If the pause mode
is switched on, the unit advances or reverses as
long and as quickly on the CD as the wheel is
turned. After turning, the current spot is repeated
until button (21) is pressed or button CUE (19)
is shortly pressed twice.
While playing a CD, a “dragging” effect can be
generated by turning the rotary wheel forward
and backward.
If a sound effect has been switched on with but-
ton ON/OFF (8), the effect can be changed or
controlled with the rotary wheel (see chapter 6).
18 Button BOP to reverse and immediate start the
replay as from the beginning of a currently play-
ing title or a starting point selected before with
button CUE (19)
By shortly pressing this button several times,
stuttering effects can be generated.
19 Button CUE for short playing of a title beginning
and for returning to a spot defined before (see
chapter 5.4 or 5.7)
20 Button +10 for title selection;
with each pressing of the button 10 titles are
skipped in forward direction
21 Button to switch between replay [display
(a)] and pause [display (b)]
22 Button A to define the starting point of a contin-
uous loop (see chapter 5.8)
23 Button B/LOOP to define the ending point of a
continuous loop and simultaneous starting of the
loop (see chapter 5.8)
24 Button CONT./SINGLE to select the operating
mode (also see chapter 5.3)
basic setting: single title replay: “AUTO
CUE SINGLE” (f) is dis-
played
1st pressing of button: replay of all titles of the
CD and continuous re-
peat of the entire CD;
“CONTINUE” (d) is dis-
played
2nd pressing of button: switching back to the
basic setting
25 Button RELOOP/EXIT to stop a continuous loop
and to play the loop again
26 Button BPM/PITCH to switch the speed indica-
tion (i) between
adisplay of the speed deviation in % selected
with the PITCH CONTROL (4) [display
“PITCH” (h) is inserted]
bdisplay of the beats per minute (= BPM) via
the automatic beat counter [display “BEAT”
(g) is inserted]
27 Buttons PITCH BEND to synchronize the beat of
a title on player mechanism 1 to that of a title on
player mechanism 2
As long as one of the buttons is pressed, the
speed is lower or higher. 7
GB
D
A
CH

1.2 Laufwerkeinheit Frontseite (Abb. 4)
28 CD-Schublade
29 Beleuchtung (weiße LED) für die geöffnete CD-
Schublade
30 Taste OPEN/CLOSE zum Öffnen und
Schließen der CD-Schublade [wie Taste OPEN/
CLOSE (6) an der Steuereinheit];
während des Abspielens einer CD ist die CD-
Schublade gegen unbeabsichtigtes Öffnen ver-
riegelt
31 Ein-/Ausschalter POWER
32 Betriebsanzeige
1.3 Laufwerkeinheit Rückseite (Abb. 5)
33 3,5-mm-Mono-Klinkenbuchse für die Fernsteue-
rung der Funktion „Start/Pause“ von Laufwerk 2
über ein Mischpult mit Kontaktsteuerung
(siehe Kapitel 7)
34 digitaler Audioausgang DIGITAL OUT von Lauf-
werk 2
35 analoger Audioausgang LINE OUT mit Line-
Pegel von Laufwerk 2
36 gelbe Verbindungsbuchse zum Anschluss der
Steuereinheit:
mit der gelben Buchse REMOTE CONTROL/
CONNECT TO MAIN UNIT 2, über das beilie-
gende Anschlusskabel mit den gelben Steckern,
verbinden (siehe Kapitel 4)
37 Netzkabel zum Anschluss an eine Steckdose
(230V~/50Hz)
38 3,5-mm-Mono-Klinkenbuchse für die Fernsteue-
rung der Funktion „Start/Pause“ von Laufwerk 1
über ein Mischpult mit Kontaktsteuerung
(siehe Kapitel 7)
39 digitaler Audioausgang DIGITAL OUT von Lauf-
werk 1
40 analoger Audioausgang LINE OUT mit Line-
Pegel von Laufwerk 1
41 schwarze Verbindungsbuchse zum Anschluss
der Steuereinheit:
mit der schwarzen Buchse REMOTE CON-
TROL/CONNECT TO MAIN UNIT 1, über das
beiliegende Anschlusskabel mit den schwarzen
Steckern, verbinden (siehe Kapitel 4)
2Hinweise für den sicheren Gebrauch
Dieses Gerät entspricht der Richtlinie für elektro-
magnetische Verträglichkeit 89/336/EWG und der
Niederspannungsrichtlinie 73/23/EWG.
Beachten Sie auch unbedingt die folgenden Punkte:
●Vorsicht! Blicken Sie bei geöffneter CD-Schub-
lade nicht in den CD-Schacht. Eventuell austre-
tende Laserstrahlen können zu Augenschäden
führen.
●Verwenden Sie das Gerät nur im Innenbereich.
Schützen Sie es vor Tropf- und Spritzwasser,
hoher Luftfeuchtigkeit und Hitze (zulässiger Ein-
satztemperaturbereich 0–40°C).
●Stellen Sie keine mit Flüssigkeit gefüllten Gefäße,
z.B. Trinkgläser, auf das Gerät.
●Nehmen Sie das Gerät nicht in Betrieb bzw. zie-
hen Sie sofort den Netzstecker, wenn:
1. sichtbare Schäden am Gerät oder an der Netz-
anschlussleitung vorhanden sind,
2. nach einem Sturz oder Ähnlichem der Verdacht
auf einen Defekt besteht,
3. Funktionsstörungen auftreten.
Geben Sie das Gerät in jedem Fall zur Reparatur
in eine Fachwerkstatt.
●Eine beschädigte Netzanschlussleitung darf nur
durch den Hersteller oder eine autorisierte Fach-
werkstatt ersetzt werden.
●Ziehen Sie den Netzstecker nie an der Zuleitung
aus der Steckdose, immer am Stecker anfassen!
●Wird das Gerät zweckentfremdet, falsch bedient
oder nicht fachgerecht repariert, kann für eventu-
elle Schäden keine Haftung übernommen werden.
●Soll das Gerät endgültig aus dem Betrieb genom-
men werden, übergeben Sie es zur umweltge-
rechten Entsorgung einem örtlichen Recycling-
betrieb.
3Einsatzmöglichkeiten
Der Dual-CD-Player CD-360DJ mit zwei Laufwer-
ken ist speziell für den professionellen DJ-Bereich
konzipiert. Viele Funktionsmöglichkeiten sind genau
auf diesen Einsatzbereich abgestimmt, z.B. auto-
matischer Beatcounter, nahtlose Wiedergabe einer
Endlosschleife, Einzeltitelwiedergabe oder Aktivie-
rung von Klangeffekten.
Auf dem CD-Player können Audio-CDs und
selbst gebrannte CDs (Audio CD-R) abgespielt wer-
den. Wiederbeschreibbare CDs (CD-RW) lassen
sich nicht abspielen.
Der CD-Player ist mit einem Anti-Schock-Spei-
cher für 10 Sekunden ausgestattet, in den vor der
Wiedergabe die Musik eingelesen wird. Bei einer
Störung der CD-Abtastung durch Stöße oder Vibra-
tion wird die Musik aus dem Speicher gelesen. So
werden Tonunterbrechungen umgangen. Das Anti-
Schock-System kann jedoch keine anhaltenden
Stöße oder Vibrationen ausgleichen.
Achtung! Das Gerät wird mit lebensgefährlicher
Netzspannung (230V~) versorgt. Neh-
men Sie deshalb nie selbst Eingriffe im
Gerät vor. Durch unsachgemäßes Vor-
gehen besteht die Gefahr eines elektri-
schen Schlages. Außerdem erlischt
beim Öffnen des Gerätes jeglicher
Garantieanspruch.
1.2 Player mechanism, front panel (fig. 4)
28 CD drawer
29 Illumination (white LED) for the open CD drawer
30 Button OPEN/CLOSE to open and close the
CD drawer [like button OPEN/CLOSE (6) at the
control unit];
while playing a CD, the CD drawer is locked
against unintentional opening
31 POWER switch
32 POWER LED
1.3 Player mechanism, rear panel (fig. 5)
33 3.5 mm mono jack for the remote control of func-
tion “Start/Pause” of player mechanism 2 via a
mixer with contact control (see chapter 7)
34 Digital audio output DIGITAL OUT of player
mechanism 2
35 Analog audio output LINE OUT with line level of
player mechanism 2
36 Yellow jack for connection of the control unit:
to be connected to the yellow jack REMOTE
CONTROL/CONNECT TO MAIN UNIT 2, via the
supplied cable with the yellow plugs
(see chapter 4)
37 Mains cable for connection to a mains socket
(230V~/50Hz)
38 3.5 mm mono jack for the remote control of func-
tion “Start/Pause” of player mechanism 1 via a
mixer with contact control (see chapter 7)
39 Digital audio output DIGITAL OUT of player me-
chanism 1
40 Analog audio output LINE OUT with line level of
player mechanism 1
41 Black jack for connection of the control unit:
to be connected to the black jack REMOTE CON-
TROL/CONNECT TO MAIN UNIT 1, via the sup-
plied cable with the black plugs (see chapter 4)
2Safety Notes
This unit corresponds to the directive 89/336/EEC
for electromagnetic compatibility and to the low volt-
age directive 73/23/EEC.
It is essential to observe the following items:
●Caution! Do not look into the CD mechanism
when the CD drawer is opened. Laser beams
could be emitted resulting in eye damage.
●The unit is suitable for indoor use only. Protect it
against dripping water and splash water, high
humidity, and heat (admissible ambient tempera-
ture range 0–40°C).
●Do not place any vessels filled with liquid, e.g.
drinking glasses, on the unit.
●Do not set the unit into operation, and immediately
disconnect the mains plug from the mains socket
if
1. there is visible damage to the unit or to the
mains cable,
2. a defect might have occurred after a drop or
similar accident,
3. there are malfunctions.
The unit must in any case be repaired by skilled
personnel.
●Adamaged mains cable must only be replaced by
the manufacturer or by authorized, skilled person-
nel.
●Never pull the mains cable to disconnect the
mains plug from the mains socket!
●If the unit is used for purposes other than originally
intended, if it is not operated correctly or not re-
paired in an expert way, there is no liability for pos-
sible damage.
●If the unit is to be put out of operation definitively,
take it to a local recycling plant for disposal which
is not harmful to the environment.
●Important for U.K. Customers!
The wires in this mains lead are coloured in
accordance with the following code:
blue = neutral
brown = live
As the colours of the wires in the mains lead of this
appliance may not correspond with the coloured
markings identifying the terminals in your plug,
proceed as follows:
1. The wire which is coloured blue must be con-
nected to the terminal in the plug which is
marked with the letter Nor coloured black.
2. The wire which is coloured brown must be con-
nected to the terminal which is marked with the
letter Lor coloured red.
3Applications
The dual CD player CD-360DJ with two player
mechanisms is especially designed for professional
DJ applications. Many functional features exactly
match this field of application, e.g. automatic beat
counter, seamless replay of a continuous loop,
single title replay, or activation of sound effects.
It is possible to replay on the CD player: audio
CDs and CDs you have burnt yourself (audio CD-R).
Rewritable CDs (CD-RW) cannot be replayed.
The CD player is equipped with an anti-shock
memory for 10 seconds into which the music is read
prior to the replay. If the CD sampling is disturbed by
shocks or vibrations, the music is read from the
memory. Thus, sound interruptions are avoided.
However, the anti-shock system cannot equalize
lasting shocks or vibrations.
Attention!The unit is supplied with hazardous
mains voltage (230V~). Leave servic-
ing to skilled personnel only. Inexpert
handling may cause an electric shock
hazard. Furthermore, any guarantee
claim will expire if the unit has been
opened.
8
GB
D
A
CH

4Gerät aufstellen und anschließen
Die Steuer- und die Laufwerkeinheit sind für die
Montage in ein Rack (482mm/19") vorgesehen,
können aber auch als freistehende Tischgeräte ver-
wendet werden. Die Laufwerkeinheit muss auf jeden
Fall waagerecht betrieben werden, während die
Steuereinheit beliebig, z.B. auch geneigt, eingebaut
werden kann. Für den Einbau in ein Rack werden für
die Steuereinheit und die Laufwerkeinheit je 2 HE
benötigt (HE = Höheneinheit = 44,45mm).
Vor demAnschluss bzw. vor dem Verändern vonAn-
schlüssen den CD-Player und die anzuschließen-
den Geräte ausschalten.
1) Die Steuereinheit und die Laufwerkeinheit mit
den beiden beiliegenden Anschlusskabeln ver-
binden.
Das Kabel mit den gelben Steckern:
Das Kabelende mit der Entstördrossel (kleines
Kästchen) in die gelbe Buchse (36) der Laufwerk-
einheit stecken und das andere Ende in die gelbe
Buchse REMOTE CONTROL/CONNECT TO
MAIN UNIT 2 der Steuereinheit.
Das Kabel mit den schwarzen Steckern:
Das Kabelende mit der Entstördrossel (kleines
Kästchen) in die schwarze Buchse (41) der
Laufwerkeinheit stecken und das andere Ende in
die schwarze Buchse REMOTE CONTROL/
CONNECT TO MAIN UNIT 1 der Steuereinheit.
2) Sind an Ihrem Mischpult oder Verstärker Digital-
eingänge vorhanden, diese an die gelben Cinch-
Buchsen DIGITAL OUT (34 und 39) anschließen.
Bei Geräten ohne Digitaleingang die Stereo-
Ausgänge LINE OUT (35 und 40) – linker Kanal
LEFT und rechter Kanal RIGHT – über Cinch-
Kabel mit den CD-Player-Eingängen am Mischpult
oder am Verstärker verbinden.
3) Die Laufwerke des CD-Players können über ein
Mischpult mit Kontaktsteuerung gestartet bzw.
auf Pause geschaltet werden. Zum Anschluss
der Steuerverbindung siehe Kapitel 7.
4) Zuletzt den Netzstecker des Anschlusskabels
(37) in eine Steckdose (230V~/50Hz) stecken.
5Bedienung
Im folgenden Text wird die Bedienung des Lauf-
werks 1 beschrieben. Die Bedienung des Lauf-
werks 2 ist vollkommen identisch.
5.1 CD abspielen
1) Mit dem Ein-/Ausschalter POWER (31) den CD-
Player einschalten. Die Betriebsanzeige (32)
leuchtet und auf dem Display (3) erscheinen
nacheinander folgende Anzeigen:
„close“ (schließen)
„read“ (lesen)
„no disc“ (keine CD) – wenn keine CD eingelegt ist
Nach dem Einschalten leuchtet auch die weiße
LED (29) zum Anstrahlen der geöffneten CD-
Schublade oder zum Lesen z.B. einer CD-Hülle
bei Dunkelheit.
2) Mit der Taste (6 oder 30) die CD-Schublade
(28) öffnen. Im Display erscheint „OPEN“ (offen).
3) Eine CD mit der Beschriftung nach oben einlegen
und die CD-Schublade mit der Taste
schließen. Bei korrekt eingelegter CD gibt das
Display nach kurzer Zeit die Gesamttitelanzahl (j)
und die Gesamtspieldauer (k) der CD an und an-
schließend die Spieldauer (k) des ersten Titels.
[Soll nach dem Einlegen der CD sofort der
erste Titel starten, die CD-Schublade mit der
Taste (21) schließen.]
4) Zum Starten mit dem ersten Titel die Taste
(21) drücken (falls die CD-Schublade mit der
Taste geschlossen wurde). Solange die CD
abgespielt wird, zeigt das Display das Symbol
(a). Soll mit einem anderen Titel gestartet wer-
den, zuerst ggf. die Taste +10 (20) und dann die
Taste oder (11) so oft drücken, bis die
gewünschte Titelnummer im Display erscheint.
Danach den Titel mit der Taste starten.
5) Das Abspielen kann jederzeit mit der Taste
unterbrochen werden. Im Display erscheint das
Pausensymbol (b). Die Tasten und CUE
(19) blinken. Zum Weiterlaufen der CD die Taste
noch einmal drücken.
6) Nach dem Einschalten steht das Gerät immer
auf Einzeltitelwiedergabe; das Display zeigt
„AUTO CUE SINGLE“ (f). Ist ein Titel zu Ende
gespielt, schaltet das Gerät amAnfang des nächs-
ten Titels auf Pause. Soll jedoch automatisch der
nächste Titel gespielt werden, muss mit der Taste
CONT./SINGLE (24) auf Gesamttitelwiedergabe
geschaltet werden (siehe auch Kapitel 5.3).
7) Während des Abspielens oder auch bei einge-
schalteter Pause kann mit der Taste +10 (20)
sowie mit den Tasten und (11) ein anderer
Titel angewählt werden:
Mit jedem Betätigen der Taste +10 erfolgt ein
Sprung über 10 Titel vorwärts.
Durch Drücken der Taste wird immer ein Titel
weitergeschaltet.
Beim Betätigen der Taste wird an den Anfang
des gerade laufenden Titels gesprungen. Durch
mehrfaches Drücken der Taste wird immer
ein Titel weiter zurückgesprungen. Zum Über-
springen mehrerer Titel kann die Taste bzw.
auch gedrückt gehalten werden.
8) Soll das Abspielen einer CD vorzeitig beendet
werden, mit der Taste auf Pause schalten.
Die CD-Schublade kann nun mit der Taste (6
oder 30) geöffnet werden.
Hinweis: Während der Wiedergabe ist die CD-
Schublade gegen unbeabsichtigtes Öffnen ver-
riegelt.
9) Vor dem Ausschalten des Gerätes immer mit
den Tasten die CD-Schubladen schließen um
die Laser-Abtastsysteme vor Verschmutzung zu
schützen. Erst dann das Gerät mit dem Ein-/Aus-
schalter POWER (31) abschalten.
5.2 Anzeige der Titelnummer, Laufzeit und
Taktschläge pro Minute
In der Grundeinstellung nach dem Einschalten gibt
das Display (Abb. 3) während der Wiedergabe einer
CD und bei eingeschalteter Pause die Titelnummer
(j) und die Restzeit (k) des gerade laufenden Titels
an. Zur Kennzeichnung der Restzeit signalisiert das
4Setting-up and Connecting the Unit
The control unit and the player mechanism unit are
provided for mounting into a rack (482mm/19"),
however, they can also be used as table top units.
The player mechanism unit must in any case be
operated in horizontal position while the control unit
can be installed as desired, e.g. also in inclined posi-
tion. For the installation into a rack two rack spaces
each are required for the control unit and the player
mechanism unit (1 rack space = 44.45mm).
Prior to the connection or changing of connections
switch off the CD player and the units to be con-
nected.
1) Connect the control unit and the player mecha-
nism unit with the two supplied cables.
The cable with the yellow plugs:
Connect the cable end with the anti-interference
choke (small box) to the yellow jack (36) of the
player mechanism unit and the other end to the
yellow jack REMOTE CONTROL/CONNECTTO
MAIN UNIT 2 of the control unit.
The cable with the black plugs:
Connect the cable end with the anti-interference
choke (small box) to the black jack (41) of the
player mechanism unit and the other end to the
black jack REMOTE CONTROL/CONNECT TO
MAIN UNIT 1 of the control unit.
2) If your mixer or amplifier is provided with digital
inputs, connect them to the yellow phono jacks
DIGITAL OUT (34 and 39).
For units without digital input, connect the
stereo outputs LINE OUT (35 and 40) – left chan-
nel LEFT and right channel RIGHT – via cables
with phono connectors to the CD player inputs at
the mixer or amplifier.
3) The player mechanisms of the CD player can be
started or switched to pause via a mixer with
contact control. To connect the control cable see
chapter 7.
4) Finally connect the mains plug of the cable (37)
to a mains socket (230V~/50Hz).
5Operation
In the following text the operation of player mecha-
nism 1 is described. The operation of player mecha-
nism 2 is exactly the same.
5.1 Playing a CD
1) Switch on the CD player with the POWER switch
(31). The POWER LED (32) lights up and the fol-
lowing indications are shown on the display (3)
one after the other:
“close”
“read”
“no disc” if no CD is inserted
After switching-on, also the white LED (29) lights
up for illuminating the open CD drawer or for
reading e.g. a CD cover in the dark.
2) With button (6 or 30) open the CD drawer (28).
“OPEN” is displayed.
3) Insert a CD with the lettering facing upwards and
close the CD drawer with button . If the CD is
correctly inserted, after a short time the display
shows the total title number (j) and the total play-
ing time (k) of the CD and then the playing time
(k) of the first title.
[To start the first title immediately after inserting
the CD, close the CD drawer with button (21).]
4) To start with the first title, press button (21) [if
the CD drawer has been closed with button ].
As long as the CD is played, the symbol (a) is
displayed. To start with another title, first press
button +10 (20), if required, and then button
or (11) so many times until the desired title
number is displayed. Then start the title with
button .
5) The replay can be interrupted any time with but-
ton . The pause symbol (b) is displayed.
Buttons and CUE (19) flash. To continue the
CD, press button once again.
6) After switching-on, the unit is always set to single
title replay; “AUTO CUE SINGLE” (f) is displayed.
If a title is played to the end, the unit switches to
pause at the beginning of the next title. However,
for automatic playing of the next title, the unit
must be switched to total title replay with button
CONT./SINGLE (24) – also see chapter 5.3.
7) While replaying or even with the pause mode
switchedon, it ispossible to selectanother title with
button +10 (20) and with buttons and (11):
With each pressing of button +10, 10 titles are
skipped in forward direction.
By pressing button , always one title is ad-
vanced.
With pressing button , the unit goes to the
beginning of the currently playing title. If button
is pressed several times, always one title is
reversed. To skip several titles, button or
can also be kept pressed.
8) To stop the playing of a CD before the end, switch
to pause with button . The CD drawer can
now be opened with button (6 or 30).
Note: While replaying, the CD drawer is locked
against unintentional opening.
9) Prior to switching off the unit, always close the
CD drawers with buttons to protect the laser
systems against impurities. Only then switch off
the unit with the POWER switch (31).
5.2 Display of title number, playing time,
and beats per minute
In the basic setting after switching-on, the title num-
ber (j) and the remaining time (k) of the currently
playing title are shown on the display (fig. 3) while a
CD is replayed and with the pause mode switched
on. The display signalizes “REMAIN” (n) to indicate
the remaining time. The time is displayed in minutes
(M) and seconds (S), the seconds are again sub-
divided in 75 “frames” (F) – 1 frame = 1/75 second.
By shortly pressing button TIME STOP (13)
several times, the following time information and func-
tion OUTRO can be selected (if the button is pressed
longer, the player mechanism switches to stop):
1st pressing of button
the time already played of the current title (dis-
play “REMAIN” extinguishes) 9
GB
D
A
CH
Display „REMAIN“ (n). Die Zeit wird in Minuten (M)
und Sekunden (S) angezeigt, wobei die Sekunden
noch einmal in 75 sogenannte „Frames” (F) unter-
teilt sind (1Frame = 1/75 Sekunde).
Durch mehrfaches kurzes Betätigen der Taste
TIME STOP (13) können folgende Zeitinformatio-
nen angezeigt und die Funktion OUTRO gewählt
werden (wird die Taste länger gedrückt, schaltet das
Laufwerk auf Stopp):
1. Tastendruck
die bereits gespielte Zeit des momentanen
Titels (die Anzeige „REMAIN“ erlischt)
2. Tastendruck
die Funktion OUTRO zumAbspielen der jeweils
letzten 30 Sekunden der weiteren Titel (die
Funktion ist erst ab dem nächsten Titel aktiv –
eventuell die Taste betätigen); die Restzeit
des laufenden Titels wird angezeigt
3. Tastendruck
die Restzeit der gesamten CD; der Bargraph (c)
erlischt und die Funktion OUTRO ist wieder
deaktiviert
4. Tastendruck
Grundeinstellung (Anzeige der Restzeit des lau-
fenden Titels)
5.2.1 Bargraph
Der Bargraph (c) stellt die Restzeit oder die bereits
gespielte Zeit eines Titels durch seine Länge gra-
phisch dar, je nachdem welche Zeitinformation im
Display mit der Taste TIME STOP (13) gewählt
wurde. Die letzten 30 Sekunden eines Titels signali-
siert der Bargraph durch Blinken in seiner vollen
Länge, wobei die letzten 15 Sekunden durch ein
schnelleres Blinken angezeigt werden.
Hinweis: Bei der Anzeige der Restzeit der gesam-
ten CD ist der Bargraph ausgeblendet.
5.2.2 Beatcounter
Der integrierte Beatcounter zählt ständig automa-
tisch die Taktschläge pro Minute des laufenden
Titels. Zur Anzeige der Anzahl der Taktschläge pro
Minute die Taste BPM/PITCH (26) kurz betätigen.
DieAnzeige „PITCH“ (h) erlischt und „BEAT“ (g) wird
eingeblendet. Das Anzeigefeld PITCH (i) gibt jetzt
die Anzahl der Taktschläge pro Minute an. Zum
Zurückschalten auf die Anzeige der mit dem Regler
PITCH CONTROL(4) eingestellten Geschwindigkeit
die Taste BPM/PITCH erneut drücken.
Hinweise
aSolange der Beatcounter noch kein brauchbares
Resultat gezählt hat (z.B. am Titelanfang), signa-
lisiert die Anzeige „– – –“.
bBei Musik ohne rhythmische Signalspitzen (z.B.
Klassik oder ruhige Musiktitel) kann der Beat-
counter keinen Wert ermitteln bzw. zeigt einen
falschen Wert an.
cWird mit dem schnellen Vor- oder Rücklauf [Taste
bzw. (12)] vor- oder zurückgefahren,
unterbricht der Beatcounter den Zählvorgang und
signalisiert „– – –“. Nach dem Vor- bzw. Rücklauf
muss er den richtigen Wert zuerst wieder neu
ermitteln.
5.3 Betriebsart wählen
5.3.1 Einzeltitelwiedergabe
Nach dem Einschalten des CD-Players ist immer
automatisch die Einzeltitelwiedergabe aktiviert, die
speziell für den Discobetrieb vorgesehen ist:
1. Das Display signalisiert „AUTO CUE SINGLE“ (f).
2. Beim Anwählen eines Titels steht der CD-Player
exakt an der Stelle, an der die Musik beginnt und
nicht bei dem Zeitindex 00:00:00. Das Display
signalisiert dabei kurz „A CUE“.
3. Nach dem Spielen eines Titels schaltet das Gerät
wieder exakt an der Stelle auf Pause, an der die
Musik des nächsten Titels beginnt.
5.3.2 Gesamttitelwiedergabe
Soll ein Titel nach dem anderen kontinuierlich abge-
spielt werden, mit der Taste CONT./SINGLE (24)
auf Gesamttitelwiedergabe schalten. Das Display
springt von „AUTO CUE SINGLE“ (f) auf „CONTI-
NUE“ (d) um. Zum Zurückschalten auf Einzeltitelwie-
dergabe die Taste CONT./SINGLE erneut betätigen.
5.3.3 Relay-Betrieb – automatischer Start des
anderen Laufwerks
Am Ende eines Titels oder am Ende einer CD kann
automatisch das andere Laufwerk gestartet werden.
1) Soll jeweils am Ende eines Titels das andere
Laufwerk starten, beide Laufwerke mit der Taste
CONT./SINGLE (24) auf Einzeltitelwiedergabe
schalten – „AUTO CUE SINGLE“ (f) muss in bei-
den Displays angezeigt werden.
2) Soll jeweils am Ende einer CD das andere Lauf-
werk starten, beide Laufwerke mit der Taste
CONT./SINGLE Gesamttitelwiedergabe schal-
ten – „CONTINUE“ (d) muss in beiden Displays
angezeigt werden.
3) Zuerst in beide Laufwerke eine CD einlegen.
Dann erst die Taste RELAY (5) betätigen. Die
LED über der Taste leuchtet.
4) Die Wiedergabe auf einem Laufwerk mit der Taste
(21) starten. Das andere Laufwerk muss auf
Pause geschaltet sein (Anzeige ). Sobald der
Titel bzw. die CD zu Ende gespielt ist, schaltet das
Laufwerk auf Pause und das andere Laufwerk
startet. Dieser Vorgang wird bis zum Ausschalten
des Relay-Betriebs endlos wiederholt. (Zum Aus-
schalten die Taste RELAY erneut drücken.)
5) An jeder Stelle der CD kann mit der Taste
zusätzlich die Wiedergabe von einem zum ande-
ren Laufwerk umgeschaltet werden.
6) Wird bei dem auf Pause stehenden Laufwerk eine
andere CD eingelegt, anschließend wieder den
Relay-Betrieb mit der Taste RELAY aktivieren.
Hinweis:Wirdin dieser BetriebsartdieTasteCUE(19)
des wiedergebenden Laufwerks betätigt, wechselt die
Wiedergabe zum anderen Laufwerk. Wird an dem auf
Pause stehenden Laufwerk die Taste CUE gedrückt
gehalten, wechselt die Wiedergabe solange zu die-
sem Laufwerk, wie die Taste gedrückt gehalten wird.
5.4 Anspielen eines Titels
1) Nach dem Einlegen einer CD zuerst ggf. mit der
Taste +10 (20) und dann mit der Taste bzw.
(11) auf den gewünschten Titel springen.
2) Erscheint im Display die Laufzeit (k) des Titels,
2nd pressing of button
function OUTRO to play the last 30 seconds of
the further titles (the function is only active as
from the next title – if necessary, press button
); the remaining time of the currently playing
title is displayed
3rd pressing of button
the remaining time of the entire CD; the bar
graph (c) extinguishes and function OUTRO is
deactivated again
4th pressing of button
basic setting (display of the remaining time of
the currently playing title)
5.2.1 Bar graph
There is a graphic display by the length of the bar
graph (c) of the remaining time or the time already
played of a title according to which time information
has been selected in the display with button TIME
STOP (13). The last 30 seconds of a title are signal-
ized by the bar graph flashing in its full length, the
last 15 seconds are displayed by faster flashing.
Note: The bar graph is extinguished if the remaining
time of the entire CD is displayed.
5.2.2 Beat counter
The integrated beat counter automatically counts
the beats per minute of the currently playing title in a
permanent way. To display the number of beats per
minute, shortly press button BPM/PITCH (26). The
display “PITCH” (h) extinguishes and “BEAT” (g) is
inserted. The display field PITCH (i) now indicates
the number of beats per minute. To switch back to
the display of the speed adjusted with the PITCH
CONTROL (4), press button BPM/PITCH again.
Notes
aAs long as the beat counter has not yet counted
any useful result (e.g. at the title beginning), the
display signalizes “– – –”.
bIf music without rhythmic signal peaks (e.g. clas-
sical music or silent music titles) is played, the
beat counter cannot determine any value or indi-
cates a wrong value.
cIf the unit advances or reverses with fast forward
or reverse run [button or (12)], the beat
counter interrupts the counting and signalizes
“– – –”. After the fast forward or reverse run it
must first determine the new correct value again.
5.3 Selecting the operating mode
5.3.1 Single title replay
After switching on the CD player, always the single
title replay is automatically activated which is espe-
cially provided for disco operation:
1. The display signalizes “AUTO CUE SINGLE” (f).
2. When selecting a title, the CD player is exactly at
the spot where the music starts and not at time
index 00:00:00. The display shortly indicates
“A CUE”.
3. After playing a title, the unit switches to pause
again exactly at the spot where the music of the
next title starts.
5.3.2 Total title replay
For continuous replay of one title after the other,
switch to total title replay with button CONT./SINGLE
(24). The display changes from “AUTO CUE SINGLE”
(f) to “CONTINUE” (d). To switch back to single title
replay, press button CONT./SINGLE again.
5.3.3 Relay operation – automatic start of the
other player mechanism
At the end of a title or at the end of a CD the other
player mechanism can automatically be started.
1) To start the other player mechanism at the end of
a title in each case, switch both player mecha-
nisms with button CONT./SINGLE (24) to single
title replay – “AUTO CUE SINGLE” (f) must be
shown in both displays.
2) To start the other player mechanism at the end of
a CD in each case, switch both player mecha-
nisms to total title replay with button CONT./
SINGLE – “CONTINUE” (d) must be shown in
both displays.
3) First insert a CD into both player mechanisms.
Only then press button RELAY (5). The LED
above the button lights up.
4) Start the replay on one player mechanism with
button (21). The other player mechanism
must be switched to pause (display ). As soon
as the title or the CD is played to the end, the
player mechanism switches to pause and the
other player mechanism starts. This is contin-
uously repeated until switching off the relay oper-
ation. (To switch off, press button RELAY again.)
5) In addition, at each spot of the CD it is possible to
switch the replay from one to the other player
mechanism with button .
6) If another CD is inserted into the player mecha-
nism in the pause mode, then activate the relay
operation with button RELAY again.
Note: If in this operating mode button CUE (19) of
the reproducing player mechanism is pressed, the
replay changes to the other player mechanism. If
button CUE is kept pressed at the player mecha-
nism in the pause mode, the replay changes to this
player mechanism as the long as the button is kept
pressed.
5.4 Short playing of a title beginning
1) After inserting a CD, go to the desired title first
with button +10 (20), if necessary, and then with
button or (11).
2) When the playing time (k) of the title is displayed,
keep button CUE (19) pressed. The title is played
as long as the button is kept pressed.
3) After releasing button CUE, the unit goes back to
the title beginning and switches to pause. To start
the title, press button (21). It is still possible to
go back to the title beginning with button CUE.
10
GB
D
A
CH

die Taste CUE (19) gedrückt halten. Der Titel wird
so lange angespielt, wie die Taste gedrückt wird.
3) Nach dem Loslassen der Taste CUE springt das
Gerät auf den Titelanfang zurück und schaltet auf
Pause. Zum Starten des Titels die Taste (21)
drücken. Auf den Titelanfang kann weiterhin mit
der Taste CUE zurückgesprungen werden.
5.5 Schneller Vor- und Rücklauf
Soll während des Abspielens einer CD der Titel
schnell weiter- oder zurückgefahren werden, die
Taste SEARCH oder (12) gedrückt halten.
Hinweise
aDer Vor- und Rücklauf fährt auch über mehrere
Titel bis zum Anfang oder Ende der CD. Wird
jedoch bei der Einzeltitelwiedergabe mit dem
Vorlauf der nächste Titel erreicht oder mit dem
Rücklauf der Titelanfang, schaltet das Gerät auf
Pause.
bIm Pausenmodus wird nach einem Vor- oder
Rücklauf die momentane Stelle ständig wieder-
holt, bis die Wiedergabe mit der Taste (21)
gestartet oder die Taste CUE (19) zweimal kurz
angetippt wird.
5.6 Genaues Anfahren einer bestimmten
Stelle
Zum exaktenAnfahren einer gewünschten Stelle bei
eingeschalteter Pause das Drehrad FWD/REV (17)
drehen.Auf der CD wird so lange und so schnell vor-
oder zurückgefahren, wie das Rad gedreht wird.
Dabei kann auf dem Display in der Zeitanzeige (k)
die genaue Position abgelesen und in Schritten von
1„Frame“ (F) angefahren werden (1 Frame = 1/75 Se-
kunde). Nach dem Drehen wird die momentane
Stelle so lange wiederholt, bis die Taste (21)
gedrückt oder die Taste CUE (19) kurz zweimal
angetippt wird.
Bei laufender CD können durch Vor- und Zurück-
drehen des Drehrads „Leier“-Effekte erzeugt wer-
den.
5.7 Rücksprung zu einer zuvor bestimmten
Stelle/ Stottereffekte erzeugen
1) Während des Abspielens eines Titels mit der
Taste (21) auf Pause schalten, wenn die
Stelle erreicht ist, zu der später zurückgesprun-
gen werden soll. Die Tasten und CUE (19)
blinken.
2) Bei Bedarf kann mit dem Drehrad FWD/REV
(17) die Stelle exakter angefahren werden. Die
momentane Stelle ist fortlaufend zu hören.
3) Die Taste CUE antippen. Dadurch wird intern die
Stelle markiert. Die Taste CUE leuchtet jetzt kon-
tinuierlich. Die Taste blinkt weiter als Auffor-
derung die Wiedergabe zu starten.
4) Das Abspielen mit der Taste wieder starten.
5) Mit der Taste CUE oder BOP (18) kann nun auf
die markierte Stelle zurückgesprungen werden.
Nach dem Drücken der Taste CUE steht das
Laufwerk an der markierten Stelle auf Pause,
während nach dem Betätigen der Taste BOP
sofort ab der markierten Stelle weitergespielt
wird.
Durch mehrfaches Drücken der Taste BOP
lassen sich so Stottereffekte erzeugen. Der Stot-
tereffekt ist dabei umso effektiver, je geeigneter
der Startpunkt ist (z.B. der Anfang eines Wortes
oder eines Instrumenteneinsatzes).
6) Wurde mit der Taste CUE zur markierten Stelle
zurückgesprungen, entweder die Wiedergabe
mit der Taste starten oder durch Gedrückt-
halten der Taste CUE. Nach dem Loslassen der
Taste CUE steht das Laufwerk wieder an der
markierten Stelle auf Pause.
Hinweis: Bei Einzeltitelwiedergabe kann der Rück-
sprung nur innerhalb eines Titels erfolgen.
5.8 Endlosschleife abspielen
Ein bestimmter Abschnitt auf der CD kann als naht-
lose Endlosschleife beliebig oft wiederholt werden.
1) MitderTaste (21) aufWiedergabe schalten. Ist
der Startpunkt der gewünschten Schleife erreicht
(Punkt a inAbb. 6), die Taste A (22) antippen.
2) Ist beim Weiterlaufen der Wiedergabe das ge-
wünschte Ende der Schleife erreicht (Punkt b),
die Taste B/LOOP (23) drücken. Der Abschnitt
zwischen den Punkten a und b wird fortlaufend
wiederholt. Im Display erscheint die Anzeige
„LOOP“ (m).
Endlosschleife abspielen ➅
3) Soll die Schleife beendet werden und der Titel
normal weiterlaufen, die Taste RELOOP/EXIT
(25) drücken (Abb. 7). Die Anzeige „LOOP“
erlischt. DurchAnwählen eines anderen Titels mit
der Taste +10 (20) und/oder der Taste bzw.
(11) wird die Schleife ebenfalls verlassen. Die
Schleife bleibt aber weiter gespeichert.
4) Zum erneuten Abspielen der Endlosschleife die
Taste RELOOP/EXIT betätigen.
Endlosschleife beenden und erneut aktivieren ➆
Tipps
aZwischen dem Start- und dem Endpunkt einer
Endlosschleife müssen mindestens 10 Frames
liegen (= 0,13Sekunden), sonst wird die Schleife
weder gespeichert noch gestartet.
bDer Start- und der Endpunkt einer Endlosschleife
PLAY c
LOOP
ab
1.
PLAY PLAY
LOOP
2.
5.5 Fast forward and reverse run
For fast forward or reverse of a title while playing a
CD, keep button SEARCH or (12) pressed.
Notes
aThe fast forward and reverse run also goes
beyond several titles up to the beginning or the
end of the CD. However, the unit switches to
pause in single title replay mode if the next title is
reached with the forward run or the title beginning
is reached with the reverse run.
bIn the pause mode, after a forward or reverse
run, the currently playing spot is continuously
repeated until the replay is started with button
(21) or button CUE (19) is shortly pressed
twice.
5.6 Precise aiming at a certain spot
For precise aiming at a certain spot with the pause
mode switched on, turn the rotary wheel FWD/REV
(17). The unit advances and reverses as long and as
quickly on the CD as the wheel is turned. Then it is
possible to read the exact position in the time dis-
play (k) and to aim at it in steps of 1 “frame” (1 frame
=1/75 second). After turning, the currently playing
spot is repeated so many times until button (21)
is pressed or button CUE (19) is shortly pressed
twice.
While playing a CD, “dragging” effects can be
generated by turning the rotary wheel forward and
backward.
5.7 Return to a spot defined before/
generating stuttering effects
1) While playing a title, switch to pause with button
(21) when the spot is reached to return to
later. Buttons and CUE (19) flash.
2) If required, it is possible to aim at this spot more
precisely with the rotary wheel FWD/REV (17).
The currently playing spot can continuously be
heard.
3) Shortly press button CUE. Thus, the spot is inter-
nally marked. Button CUE now lights up conti-
nuously. Button continues to flash as a
request to start the replay.
4) Start the replaying again with button .
5) With button CUE or BOP (18) it is now possible to
go back to the marked spot.After pressing button
CUE, the player mechanism is at the marked
spot in the pause mode, while after pressing but-
ton BOP the unit immediately continues to play
as from the marked spot.
If button BOP is pressed several times, it is
possible to generate stuttering effects. The stut-
tering effect is the more effective, the more the
starting point is suitable (e.g. beginning of a word
or starting of a musical instrument).
6) If the unit has returned to the marked spot with
button CUE, start the replay with button or by
keeping button CUE pressed.After releasing but-
ton CUE, the player mechanism is at the marked
spot in the pause mode again.
Note: In case of single title replay it is only possible
to return within a title.
5.8 Replaying a continuous loop
Acertain section on the CD can be repeated as a
seamless continuous loop as many times as de-
sired.
1) Switch to replay with button (21). If the start-
ing point of the desired loop is reached (point a in
fig. 6), shortly press button A (22).
2) If the desired end of the loop is reached while
continuing the replay (point b), press button B/
LOOP (23). The section between points a and b
is continuously repeated. “LOOP” (m) is dis-
played.
Replaying the continuous loop ➅
3) To stop the loop and to continue the title as
usually, press button RELOOP/EXIT (25) [fig. 7].
The display “LOOP” extinguishes. By selecting
another title with button +10 (20) and/or button
or (11), the loop is left as well. The loop
continues to be stored.
4) To replay the continuous loop again, press button
RELOOP/EXIT.
Stopping the continuous loop and activating it again ➆
Hints
aThere must be at least 10 frames (= 0.13
seconds) between starting point and ending point
of a continuous loop, otherwise the loop is neither
stored nor started.
bThe starting or ending point of a continuous loop
can be defined exactly to one frame (1/75 second):
1) When reaching the starting point, first switch
to pause with button . Precisely aim at the
spot with rotary wheel FWD/REV (17). Then
press button A (22).
2) Now either aim at the ending point with rotary
wheel FWD/REV or start the replay with
PLAY c
LOOP
ab
1.
PLAY PLAY
LOOP
2.
11
GB
D
A
CH

lassen sich auch auf einen Frame (1/75 Sekunde)
genau festlegen:
1) Beim Erreichen des Startpunktes zuerst mit
der Taste auf Pause schalten. Den Punkt
genau mit dem Drehrad FWD/REV (17) an-
fahren. Dann die Taste A (22) drücken.
2) Jetzt entweder den Endpunkt mit dem Dreh-
rad FWD/REV anfahren oder zuerst die Wie-
dergabe mit der Taste starten, beim Errei-
chen des Endpunktes wieder mit der Taste
auf Pause schalten und dann den End-
punkt genau mit dem Drehrad FWD/REV
anfahren.
3) Nachdem der Endpunkt genau angefahren ist,
die Taste B/LOOP (23) betätigen. Die Endlos-
schleife startet.
cBei einer gespeicherten Endlosschleife lassen
sich der Start- und der Endpunkt auch verschie-
ben. Sobald der neue Punkt erreicht ist, die Taste
Abzw. B/LOOP drücken. Dieses kann innerhalb
oder außerhalb der bisherigen Schleife erfolgen.
Zum Verschieben eines Punktes außerhalb der
gespeicherten Schleife muss zuerst die Schleife
mit der Taste RELOOP/EXIT (25) verlassen
werden.
dSoll eine Schleife nur einmal durchlaufen wer-
den, nach dem Festlegen des Startpunktes mit
der Taste A am gewünschten Endpunkt der
Schleife die Taste RELOOP/EXIT drücken. Nach
dem Durchlaufen der Schleife kann diese weiter-
hin für einen Durchlauf mit der Taste RELOOP/
EXIT erneut abgespielt werden (Abb. 8).
Schleife für nur einen Durchlauf abspielen ➇
5.9 Geschwindigkeit mit oder ohne Ton-
höhenverschiebung verändern /
Anzahl der Taktschläge verändern
Die Geschwindigkeit und damit gleichzeitig die
Anzahl der Taktschläge pro Minute lassen sich mit
dem Schieberegler PITCH CONTROL (4) um max.
±16%ändern:
1) Die Taste PITCH (15) drücken. Die LED „8%“
(16) leuchtet (Grundeinstellung nach dem Ein-
schalten) – der Einstellbereich beträgt ±8%.
2) Wird ein anderer Einstellbereich benötigt (±16%
für eine größere Geschwindigkeitsänderung oder
±4% für eine feinere Einstellung), die Taste
PITCH so oft betätigen, bis die entsprechende
LED (4%, 8%, 16%) leuchtet.
3) Die Geschwindigkeit mit dem Schieberegler
PITCH CONTROL(4) verändern. Im Display wird
die mit dem Schieberegler eingestellte prozen-
tuale Abweichung (i) von der Standardgeschwin-
digkeit angezeigt.
Wurde mit der Taste BPM/PITCH (26) auf die
Anzeige der Taktschläge pro Minute umgeschal-
tet [Anzeige „BEAT“ (g) ist eingeblendet], lässt
sich mit dem Schieberegler PITCH CONTROLdie
gewünschte Anzahl der Taktschläge pro Minute
einstellen.
4) Wurde die Taste MT (14) nicht gedrückt, ändert
sich mit der Geschwindigkeit auch proportional
die Tonhöhe. Soll die Tonhöhe jedoch trotz Ände-
rung der Geschwindigkeit konstant bleiben, die
Taste MT (Master Tempo) drücken.
5) Um auf die Standardgeschwindigkeit zurückzu-
schalten, die Taste PITCH (15) so lange gedrückt
halten, bis die entsprechende LED „4%“, „8%“
oder „16%“ erlischt (ca. 2 Sekunden).
5.10 Takt zwischen 2 Musikstücken angleichen
Mit den Tasten PITCH BEND (27) kann der Takt
eines Titels auf dem Laufwerk 1 an den Takt eines
Titels auf Laufwerk 2 angepasst (synchronisiert)
werden oder umgekehrt.
1) Mit der Taste PITCH (15) den Schieberegler
PITCH CONTROL (4) aktivieren und den Ein-
stellbereich wählen. Die LED (16) des gewählten
Einstellbereichs („4%“, „8%“ oder „16%“) muss
leuchten.
2) Mit dem Regler PITCH CONTROL die Geschwin-
digkeit des laufenden Musikstückes an die Ge-
schwindigkeit des zweiten Musikstückes anglei-
chen. Dazu am besten beide Displays mit der
Taste BPM/PITCH (26) auf die Anzeige der Takt-
schläge pro Minute umschalten.
3) Mit den Tasten PITCH BEND die Taktschläge bei-
der Musikstücke genau übereinander legen: So-
lange die Taste+oder
-
gedrückt gehalten wird,
läuft der Titel 16% schneller bzw. langsamer als
mit Standardgeschwindigkeit und die LED „4%“,
„8%“ oder „16%“ blinkt.
4) Durch Drehen des Drehrads REV/FWD (17)
kann ebenfalls eine Geschwindigkeitsänderung
zur Taktanpassung erfolgen.
Hinweis: Die Taste PITCH BEND +ist bei einer mit
dem Regler PITCH CONTROL (4) eingestellten
Geschwindigkeit von +16% unwirksam und die
Taste
-
bei einer Geschwindigkeit von
-
16%.
6Klangeffekte aktivieren
Durch die beiden integrierten Effektgeneratoren
lässt sich für jedes Laufwerk getrennt einer der fol-
genden Klangeffekte aktivieren:
1. SCRATCH(manuelles Drehen eines Plattentellers)
2. FLANGER (durchlaufende Klangverschiebung)
3. FILTER (Bass- bzw. Höhenfilter)
4. REVERSE(Rückwärtsabspielen)
Zusätzlich und unabhängig von einem dieser
Effekte kann die Funktion BRAKE (Bremse) einge-
schaltet werden – siehe Kapitel 6.1.
1) Zur Auswahl des Effekts die Taste SELECT (7) so
oft drücken, bis die LED (9) der entsprechenden
Effektnummer blinkt.
2) Den Effekt mit der Taste ON/OFF (8) einschal-
ten. Die entsprechende LED leuchtet jetzt konti-
nuierlich.
ab
1.
PLAY PLAY
1 x LOOP
2.
RELOOP
/EXIT
PLAY
x.
RELOOP
/EXIT
button first. When reaching the ending
point, switch again to pause with button
and then precisely aim at the ending point with
the rotary wheel FWD/REV.
3) After the ending point is precisely aimed at,
press button B/LOOP (23). The continuous
loop starts.
cIt is also possible to move the starting point and
ending point of a stored continuous loop.As soon
as the new point is reached, press button A or
B/LOOP. This can be done inside or outside the
present loop. To move a point outside the stored
loop, the loop must first be left with button
RELOOP/EXIT (25).
dFor running through a loop only once, after de-
fining the starting point with button A, press but-
ton RELOOP/EXIT at the desired ending point of
the loop. After running through the loop, it can be
replayed again for one time with button RE-
LOOP/EXIT (fig. 8).
Replaying a loop for one time only ➇
5.9 Changing the speed with or without
changing the pitch/
changing of number of beats
The speed and thus at the same time the number of
beats per minute can be changed by max. ±16%
with the sliding control PITCH CONTROL (4):
1) Press button PITCH (15). The LED “8%” (16)
lights up (basic adjustment after switching-on) –
the adjusting range is ±8%.
2) If another adjusting range is required (±16% for a
greater change of speed or ±4% for a finer
adjustment), press button PITCH so many times
until the corresponding LED (4%, 8%, 16%)
lights up.
3) Change the speed with sliding control PITCH
CONTROL (4). The display shows the percen-
tage deviation (i) from the standard speed ad-
justed with the sliding control.
If the display of the beats per minute has been
switched with button BPM/PITCH (26) [display
“BEAT” (g) is inserted], it is possible to adjust the
desired number of beats per minute with sliding
control PITCH CONTROL.
4) If button MT (14) has not been pressed, the pitch
also changes in proportion to the speed. How-
ever, to keep the pitch constant in spite of chang-
ing the speed, press button MT (master tempo).
5) To switch back to standard speed, keep button
PITCH (15) pressed until the corresponding LED
“4%”, “8%”, or “16%” extinguishes (for approx. 2
seconds).
5.10 Matching the beat between 2 music pieces
With buttons PITCH BEND (27) the beat of a title on
player mechanism 1 can be matched (synchronized)
to the beat of a title on player mechanism 2 or vice
versa.
1) Activate the sliding control PITCH CONTROL (4)
with button PITCH (15) and select the adjusting
range. The LED (16) of the desired adjusting
range (“4%”, “8%”, or “16%”) must light up.
2) With the PITCH CONTROL match the speed of
the currently playing music piece to that of the
second music piece. The best thing is to switch
both displays with button BPM/PITCH (26) to the
display of beats per minute.
3) With buttons PITCH BEND synchronize the
beats of both music pieces: as long as button +or
-
is kept pressed, the title goes 16% quicker or
slower than at standard speed and the LED
“4%”, “8%”, or “16%” flashes.
4) By turning the rotary wheel REV/FWD (17) it is
also possible to change the speed for beat
matching.
Note: Button PITCH BEND +is not effective at a
speed of +16% adjusted with the PITCH CONTROL
(4) and button
-
at a speed of
-
16%.
6Activating Sound Effects
Due to the two integrated effect generators it is pos-
sible to activate one of the following sound effects
separately for each player mechanism:
1. SCRATCH(manual turning of a turntable platter)
2. FLANGER (continuous sound displacement)
3. FILTER (filter for bass frequencies or high
frequencies)
4. REVERSE(reverse replaying)
In addition, and independent of one of these effects,
function BRAKE can be switched on – see chapter
6.1.
1) To select the effect, press button SELECT (7) so
many times until the LED (9) of the correspond-
ing effect number flashes.
2) Switch on the effect with button ON/OFF (8). The
corresponding LED now lights up continuously.
3) With the rotary wheel FWD/REV (17) change the
sound effect as desired:
With SCRATCH: by turning the wheel back and
forth, manual turning of the turntable platter is
simulated.
ab
1.
PLAY PLAY
1 x LOOP
2.
RELOOP
/EXIT
PLAY
x.
RELOOP
/EXIT
12
GB
D
A
CH

3) Mit dem Drehrad FWD/REV (17) den Klangeffekt
wie gewünscht verändern:
Bei SCRATCH: durch Hin-und-her-Drehen des
Rads wird das manuelle Drehen eines Platten-
spielertellers simuliert.
Bei FLANGER: durch Drehen entgegen dem
Uhrzeigersinn verlängert sich die Zeit eines
Effektdurchlaufs, durch Drehen im Uhrzeigersinn
wird sie immer kürzer.
Bei FILTER: durch Drehen entgegen dem Uhrzei-
gersinn werden immer mehr Höhen ausgeblen-
det, bis nur noch Bässe zu hören sind bzw. gar
nichts mehr zu hören ist. Durch Drehen im Uhr-
zeigersinn werden immer mehr Bässe ausge-
blendet, bis nur noch Höhen zu hören sind bzw.
gar nichts mehr zu hören ist.
Bei REVERSE: durch Drehen entgegen dem Uhr-
zeigersinn verringert sich die Abspielgeschwin-
digkeit und durch Drehen im Uhrzeigersinn er-
höht sie sich, solange das Rad gedreht wird.
4) Zum Ausschalten des Effekts die Taste ON/OFF
erneut drücken. Die LED (20) der entsprechen-
den Effektnummer blinkt wieder.
6.1 Brems-/Anlauffunktion BRAKE
Mit der Funktion Brake (Bremse) wird ein langsa-
mes Anlaufen und Auslaufen eines Plattenspielers
simuliert.
1) Die Taste BRAKE (10) drücken. Die Anzeige
„BRAKE“ (e) erscheint im Display.
2) Wird mitten in einem laufenden Musiktitel jetzt
mit der Taste (21) auf Pause geschaltet,
stoppt die Wiedergabe nicht abrupt, sondern wird
bis zum Stillstand abgebremst.
3) Beim erneuten Starten der Wiedergabe mit der
Taste läuft der Titel langsam an.
4) Zum Ausschalten der Funktion die Taste BRAKE
erneut betätigen.
7Faderstart über ein Mischpult
Der CD-Player lässt sich über ein Mischpult mit Kon-
taktsteuerung fernbedienen. Mit dem Öffnen des
entsprechenden Mischpult-Faders wird ein Schalter
im Mischpult geschlossen, der den CD-Player star-
tet. Beim Schließen des Faders öffnet der Schalter
und schaltet dadurch den CD-Player auf Pause. Im
Mischpult dürfen die Kontakte dieses Schalters mit
Masse verbunden sein, jedoch nicht mit einer Span-
nung!
Damit es nicht zu einer Fehlfunktion kommen
kann, zuerst den CD-Player und das Mischpult aus-
schalten. Die entsprechende Faderstartbuchse am
Mischpult über ein Verbindungskabel (siehe Abb.9)
an die Buchse START/PAUSE 1 (38) bzw. START/
PAUSE 2 (33) anschließen. Mixer
Verbindungskabel für den Faderstart
mit 3,5-mm-Mono-Klinkenstecker
Ist das Mischpult mit einer Vorhörfunktion (Monitor-
funktion) ausgestattet, kann trotz geschlossenem
Fader für den CD-Player ein Titel über einen Kopf-
hörer vorgehört werden:
1) Mit der Taste bzw. (11) und ggf. der Taste
+10 (20) auf den gewünschten Titel springen.
2) Die Taste CUE (19) gedrückt halten. Der Titel
spielt so lange, wie die Taste gedrückt wird.
3) Nach dem Loslassen der Taste CUE springt das
Gerät auf den Titelanfang zurück. Zum Starten
des Titels den entsprechenden Fader am Misch-
pult aufziehen.
Hinweis: Die Steuerung über Mischpult-Fader ist
bei Relay-Betrieb (siehe Kap. 5.3.3) nicht sinnvoll,
weil unabhängig von den zugehörigen Fadern die
Wiedergabe automatisch am Ende eines Titels
stoppt und das andere Laufwerk gestartet wird.
8Pflege des Gerätes
Das Gerät vor Staub, Vibrationen, direktem Sonnen-
licht, Feuchtigkeit und Hitze schützen (zulässiger
Einsatztemperaturbereich 0–40°C). Für die Reini-
gung nur ein weiches, trockenes Tuch verwenden,
auf keinen Fall Wasser oder Chemikalien.
Hinweis zu Tonaussetzern und Lesefehlern
Zigarettenrauch dringt leicht durch alle Öffnungen
des Gerätes und setzt sich auch auf der Optik des
Laser-Abtastsystems ab. Dieser Belag kann zu
Lesefehlern und Tonaussetzern führen. Da sich
Zigarettenrauch nicht immer vermeiden lässt (z.B.
in der Discothek), muss das Gerät dann in einer
Fachwerkstatt gereinigt werden. Diese Reinigung ist
kostenpflichtig, auch während der Garantiezeit!
9Technische Daten
Frequenzbereich: . . . . . . . 20–20000Hz, ±2dB
Klirrfaktor: . . . . . . . . . . . . . < 0,05%
Kanaltrennung: . . . . . . . . . > 65dB
Dynamikumfang: . . . . . . . . > 85dB
Störabstand: . . . . . . . . . . . > 65dB
Gleichlaufschwankungen: . nicht messbar,
quarzgenau
Ausgänge
Line (analog): . . . . . . . . . 2V
digital (koaxial): . . . . . . . 3,5V
Stromversorgung: . . . . . . . 230V~/50Hz/20VA
Einsatztemperatur: . . . . . . 0–40°C
Abmessungen (BxHxT)
Laufwerk: . . . . . . . . . . . . 482 x 88 x 270 mm,
2Höheneinheiten
Steuereinheit: . . . . . . . . 482 x 88 x 70 mm,
2Höheneinheiten
Gewicht: . . . . . . . . . . . . . . 7kg
Laut Angaben des Herstellers.
Änderungen vorbehalten.
➅
Start
Stop
With FLANGER: by turning counterclockwise, the
time of an effect run is extended, by turning it
clockwise it is getting shorter and shorter.
With FILTER: by turning counterclockwise, more
and more high frequencies disappear until only
bass frequencies can be heard or nothing can be
heard any more. By turning clockwise, more and
more bass frequencies disappear until only high
frequencies can be heard or nothing can be
heard any more.
With REVERSE: by turning counterclockwise, the
playing speed is reduced, and by turning clock-
wise, it increases as long as the wheel is turned.
4) To switch off the effect, press button ON/OFF
again. The LED (20) of the corresponding effect
number flashes again.
6.1 Braking/starting function BRAKE
With function Brake a slow starting and braking of a
turntable platter is simulated.
1) Press button BRAKE (10). “BRAKE” (e) is dis-
played.
2) If the unit is now switched to pause with button
(21) in the middle of a playing music title, the
replay does not abruptly stop but it is braked until
standstill.
3) When starting the replay again with button ,
the title starts slowly.
4) To switch off the function, press button BRAKE
again.
7Fader Start via a Mixer
The CD player can be remote-controlled via a mixer
with contact control. By opening the corresponding
fader of the mixer a switch is closed in the mixer
which starts the CD player. When closing the fader
the switch opens and thus switches the CD player to
pause. In the mixer the contacts of this switch may
be connected to ground, however not to a voltage!
To prevent a malfunction, first switch off the CD
player and the mixer. Connect the corresponding
fader start jack at the mixer via a cable (see fig. 9) to
jack START/PAUSE 1 (38) or START/PAUSE 2 (33).
Mixer
Connection cable for the fader start
with 3.5mm mono plug
If the mixer is equipped with a prefader listening
function (monitor function), it is possible to monitor a
title via headphones in spite of a closed fader for the
CD player:
1) Go to the desired title with button or (11)
or, if required, button +10 (20).
2) Keep button CUE (19) pressed. The title plays
plays as long as the button is pressed.
3) After releasing button CUE, the unit goes to the
title beginning. To start the title, advance the cor-
responding fader at the mixer.
Note: The control via mixer fader cannot be recom-
mended in case of relay operation (see chapter 5.3.3)
as, independent of the corresponding faders, the
replay stops automatically at the end of a title or CD
and the other player mechanism is started.
8Maintenance of the Unit
Protect the unit against dust, vibrations, direct sun-
light, humidity, and heat (admissible ambient tem-
perature range 0–40°C). For cleaning only use a
soft, dry cloth, by no means water or chemicals.
Note on sound interruptions and reading errors
Cigarette smoke easily penetrates through all open-
ings of the unit and deposits on the optics of the
laser system. This deposit may cause reading errors
and sound interruptions. As cigarette smoke cannot
always be avoided (e.g. in the discothèque), the unit
must be cleaned in a specialized workshop. There is
a charge on this cleaning, even during the warranty
time!
9Specifications
Frequency range: . . . . . . . 20 – 20000Hz, ±2dB
THD: . . . . . . . . . . . . . . . . . < 0.05%
Channel separation: . . . . . > 65dB
Dynamic range: . . . . . . . . . > 85dB
S/N ratio: . . . . . . . . . . . . . > 65dB
Wow and flutter: . . . . . . . . cannot be measured,
quartz precision
Outputs
line (analog): . . . . . . . . . 2V
digital (coaxial): . . . . . . . 3.5V
Power supply: . . . . . . . . . . 230V~/50Hz/20VA
Ambient temperature: . . . . 0–40°C
Dimensions (WxHxD)
player mechanism: . . . . 482 x 88 x 270mm,
2 rack spaces
control unit: . . . . . . . . . . 482 x 88 x 70mm,
2 rack spaces
Weight: . . . . . . . . . . . . . . . 7kg
According to the manufacturer.
Subject to change.
➅
Start
Stop
13
GB
D
A
CH

10 Erklärung der Fachbegriffe
Kursiv gedruckte Wörter sind Stichwörter, die weitererklärt werden.
Anti-Schock-Speicher (Memory) elektronischer Speicher, in
dem die Musik nach dem Lesen von der CD zwischengespei-
chert wird, um bei Erschütterungen Unterbrechungen zu
vermeiden
Auto Cue Beim Anwählen eines Titels steht der CD-Player
exakt an der Stelle, an der die Musik beginnt und nicht bei
dem Zeitindex 00:00:00. Dadurch startet nach dem Drücken
der Taste die Musik sofort ohne Pause.
Bargraph Im Multifunktionsdisplay wird ein Balken gezeigt, der
durch seine Länge die Restzeit oder die bereits gespielte Zeit
eines Titels graphisch darstellt
Beatcounter engl. Taktzähler, ermittelt automatisch die Anzahl
der Taktschläge pro Minute (BPM) und damit wie schnell ein
Musikstück gespielt wird
BOP (BOP = Stottereffekt); die Taste BOP dient zum Zu-
rückspringen und sofortigen Starten der Wiedergabe ab dem
Anfang des gerade laufenden Titels oder ab einem zuvor mit
der Taste CUE gewählten Startpunkt; durch kurzes, mehr-
faches Drücken der Taste BOP lassen sich Stottereffekte
erzeugen
BPM engl. beats per minute = Taktschläge pro Minute;
der integrierte Beatcounter ermittelt automatisch die Anzahl
der Taktschläge pro Minute
Brake engl. Bremse; mit der Funktion Brake wird ein langsa-
mes Anlaufen und Auslaufen eines Plattenspielers simuliert
Continuous Play ➔Gesamttitelwiedergabe
CUE-Funktion Rücksprung zu einer zuvor mit der Taste CUE
bestimmten Stelle (bei Einzeltitelwiedergabe nur innerhalb
eines Titels möglich)
digital Informationen in Ziffern dargestellt; die von einem Mikro-
fon aufgenomme Schallwellen werden von einem Analog-
Digital-Wandler in eine schnell hintereinander folgende Serie
von Einsen und Nullen (Binärzahlen, z. B. „1001“ = 9) umge-
setzt, die auf der CD gespeichert werden. Jede Binärzahl ent-
spricht einem momentanen Wert einer Schallschwingung.
Durch ein ausgeklügeltes Fehlerkorrektursystem können
Aussetzer und Störungen herausgerechnet werden, wodurch
die hohe Wiedergabequalität entsteht. Durch Rechen-
operationen lassen sich außerdem verschiedene Klang-
effekte erzeugen. Ein Digital-Analog-Wandler setzt die Binär-
zahlen wieder in elektrische Schwingungen um, die dann ver-
stärkt zu einem Lautsprecher gelangen.
Display ➔Multifunktionsdisplay
Einzeltitelwiedergabe spezielle Betriebsart für Discothek-
Anwendungen: Nach dem Spielen eines Titels schaltet das
Gerät auf Pause, im Gegensatz zur Gesamttitelwiedergabe
Elektromagnetische Verträglichkeit (EMV) Die EMV-Richt-
linie 89/336/EWG schreibt vor, wie groß die Störstrahlung
eines Gerätes maximal sein darf und mit welcher Störstrah-
lung es ohne Probleme belastet werden darf (Störfestigkeit)
Faderstart engl. to fade in = einblenden; mit einem speziellen
Schieberegler (Fader) an einem Mischpult kann das Laufwerk
beim Aufziehen des Faders gestartet und beim Zuziehen des
Faders wieder auf Pause geschaltet werden
Filter Bei dem Effekt Filter ist nur ein sehr schmaler Tonbereich
zu hören, der mit dem Drehrad FWD / REV vom tiefsten Bass-
bereich bis zum obersten Höhenbereich einstellbar ist.
Flanger Modulationseffekt, der eine durchlaufende Klangver-
schiebung erzeugt; erinnert an das Starten eines Düsenjets
Frame eng. Rahmen; die Musik auf einer CD ist in Daten-
blöcken (Rahmen) gespeichert. In einem Block ist die Musik-
information für eine 1/75 Sekunde gespeichert. Eine Stelle auf
der CD kann dadurch in Schritten von 1/75 Sekunde präzise
angefahren werden.
Gesamttitelwiedergabe Betriebsart zum Abspielen eines Titels
nach dem anderen, im Gegensatz zur Einzeltitelwiedergabe
Kontaktsteuerung Der CD-Player lässt sich für den Faderstart
über einen Schaltkontakt (Ein-/Ausschalter) steuern, der mit
dem Eingangskanal-Fader im Mischpult gekoppelt ist
LED engl. light emitting diode = elektronisches Bauteil, das
elektrischen Strom direkt in Licht umwandelt (ohne Erzeu-
gung von Hitze wie bei einer Glühlampe); leuchtet je nach
Material in verschiedenen Farben oder auch in Weiß
Line (-Ausgang, -Eingang, -Pegel) engl. Leitung; um Signale
von einem Gerät zum anderen übertragen zu können, müs-
sen diese einen festgelegten Spannungswert haben, sonst ist
keine optimale Übertragung möglich. Dieser Wert liegt zwi-
schen 0,1 V und 2 V (Volt) und wird als Line-Pegel bezeich-
net. Ein- und Ausgänge, die für diese Pegel vorgesehen sind,
tragen meistens die Beschriftung LINE.
Mastertempo Funktion, bei der trotz veränderter Abspielge-
schwindigkeit die Tonhöhe konstant bleibt
Monitorfunktion ➔Vorhörfunktion
Multifunktionsdisplay numerische und graphische Anzeige
von Funktionen, Betriebszuständen und Titel- bzw. CD-Spiel-
zeiten
Niederspannungsrichtlinie (73/23/EWG) Vorschrift für Geräte,
die mit Spannungen von 50 V bis 1500 V arbeiten und darum
für den Benutzer entsprechend sicher aufgebaut sein müssen
Outro Funktion, bei der nur die letzten 30 Sekunden eines
Titels abgespielt werden
Pitch engl. Tonhöhe; mit dem Regler PITCH CONTROL lässt sich
die Abspielgeschwindigkeit und damit die Tonhöhe verändern
Pitch Bend Funktion, mit der kurzzeitig die Abspielgeschwin-
digkeit erhöht oder verringert werden kann, um den Takt eines
Titels von einem Laufwerk an den Takt eines Titels auf dem
anderen Laufwerk zu synchronisieren
Rack engl. Gestell; in ein Rack für Geräte mit einer genormten
Breite von 482 mm (19") lassen sich z. B. CD-Spieler, Misch-
pult, Equalizer, Verstärker zu kompletten Audioanlagen
zusammenstellen
Relay-Betrieb Funktion, bei der die Titel oder die CDs automa-
tisch wechselweise zwischen den beiden Laufwerken abge-
spielt werden
Reverse engl. umgekehrt, entgegengesetzt; hier Rückwärtsab-
spielen der CD
Single Play ➔Einzeltitelwiedergabe
Scratch engl. kratzen; hier Effekt, der das manuelle Hin-und-
her-Drehen eines Plattenspielertellers simuliert
Track engl. Spur, Musikstück z. B. auf einer CD
Vorhörfunktion (Pre Fader Listening) Möglichkeit am Mischpult
trotz zugezogenem Fader (Schieberegler) das Musiksignal,
z. B. von einem CD-Player, über einen Kopfhörer abzuhören
um den nächsten Titel oder einen Startpunkt auszuwählen
10 Explanation of the Technical Terms
Words printed in italics are key-words which are further ex-
plained.
Anti-shock memory electronic memory in which the music is
temporarily memorized after reading from the CD to avoid
interruptions in case of shocks
Auto Cue When selecting a title, the CD player is exactly at the
spot where the music starts and not at the time index
00:00:00. For this reason the music starts immediately with-
out pause after pressing button .
Bar graph In the multifunction display there is a graphic display
of a bar which shows by its length the remaining time or the
time already played of a title
Beat counter automatically determines the number of beats
per minute (BPM) and thus how quickly a music piece is
played
BOP (= stuttering effect); the BOP button serves to go back and
to immediately start the replay from the beginning of the cur-
rently playing title or from a starting point selected before with
the CUE button; by shortly pressing the BOP button several
times, stuttering effects can be generated
BPM = beats per minute; the integrated beat counter automati-
cally determines the number of beats per minute
Brake; with the function brake a slow starting and braking of a
turntable is simulated
Contact control The CD player can be controlled for the fader
start via a switching contact (on/off switch) which is connect-
ed to the input channel fader in the mixer
Continuous Play ➔Total title replay
CUE function Return to a certain spot defined before with the
CUE button (in case of single title replay only possible within
a title)
digital information presented in figures; the sound waves
picked up by a microphone are converted by an analog-digital
converter into a series of figures of one and zero quickly
following each other (binary numbers, e. g. “1001” = 9). These
figures are memorized on the CD. Each binary number corre-
sponds to a momentary value of a sound vibration. Due to a
sophisticated error correction system, interruptions and
disturbances can be excluded by calculation, so that a high
reproduction quality comes into being. Due to arithmetical
operations it is furthermore possible to generate different
sound effects. A digital-analog converter converts the binary
numbers into electrical vibrations again which then arrive at
the speaker in an amplified way.
Display ➔Multifunction display
Electromagnetic compatibility (EMC) The EMC directive 89/
336/EEC stipulates the max. admissible interference radia-
tion of a unit and by which interference radiation it may be
charged without problems (resistance to interference)
Fader start; with a special fader start at a mixer the player
mechanism can be started when advancing the fader and be
switched to pause when closing the fader
Filter In case of the filter effect only a very narrow audio range
can be heard which can be adjusted with the rotary wheel
FWD/REV from the lowest bass range to the highest treble
range
Flanger modulation effect which generates a continuous sound
displacement; reminds of the take-off of a jet-plane
Frame; the music on a CD is stored in data blocks (frames). In
one block the music information for 1/75 second is stored. A
spot on the CD can thus precisely be aimed at in steps of
1/75 second
LED (Light Emitting Diode) electronic component which con-
verts electric current directly into light (without generating
heat like a bulb); lights according to material in different
colours or also in white
Line (line output, line input, line level); to be able to transmit sig-
nals from one unit to the other, the signals must have a de-
fined voltage value, otherwise no optimum transmission is
possible. This value is between 0.1 V and 2 V (volt) and is
called line level. Inputs and outputs provided for these levels
have the lettering LINE in most cases.
Low voltage directive (73/23/EEC) regulation for units operat-
ing with voltages from 50 V to 1500 V must be built up in a
correspondingly safe way to protect the user
Master tempo with this function the pitch remains constant in
spite of changed playing speed
Monitor function ➔PFL (Prefader listening function)
Multifunction display numerical and graphic display of func-
tions, operating conditions, and playing times of title or CD
Outro function for playing only the last 30 seconds of a title
PFL (Pre Fader Listening) function Facility at the mixer to
monitor the music signal e. g. of a CD player via headphones
in spite of a closed fader to select the next title or a starting
point
Pitch; with the PITCH CONTROL the playing speed and thus
the pitch can be changed
Pitch Bend function for short-time increase or decrease of the
playing speed to synchronize the beat of a title on one player
mechanism to that of a title on the other player mechanism
Rack; in a rack for units with a standardized width of 482 mm
(19") it is possible to compile e. g. CD player, mixer, equalizer,
amplifier to complete audio systems
Relay operation with this function the titles or the CDs are
automatically played on both player mechanisms alternately
Reverse in this context: reverse playing of the CD
Scratch in this context: effect which simulates the manual turn-
ing the turntable platter back and forth
Single play ➔single title replay
Single title replay: special operating mode for disco applica-
tions: after playing a title the unit switches to pause, contrary
to the total title replay
Total title replay operating mode for playing one title after the
other, contrary to the single title replay
Track music piece, e. g. on a CD
14
GB
D
A
CH

Ouvrez le présent livret page 5 de manière à
visualiser les éléments et branchements.
Table des matières
1Eléments et branchements . . . . . . . . . . . 15
1.1 Unité de commande . . . . . . . . . . . . . . . . . . 15
1.2 Unité de lecture, face avant . . . . . . . . . . . . 17
1.3 Unité de lecture, face arrière . . . . . . . . . . . 17
2Conseils d’utilisation et de sécurité . . . . 17
3Possibilités d’utilisation . . . . . . . . . . . . . 17
4Positionnement de l’appareil
et branchements . . . . . . . . . . . . . . . . . . . . 17
5Utilisation . . . . . . . . . . . . . . . . . . . . . . . . . 18
5 1 Lecture de CD . . . . . . . . . . . . . . . . . . . . . . 18
5.2 Affichage du numéro des titres, de la durée,
du nombre de beats par minute . . . . . . . . . 18
5.2.1 Bargraphe . . . . . . . . . . . . . . . . . . . . . . . . 19
5.2.2 Compteur de beats . . . . . . . . . . . . . . . . . 19
5.3 Sélection du mode de fonctionnement . . . . 19
5.3.1 Lecture titre par titre . . . . . . . . . . . . . . . . 19
5.3.2 Lecture de tous les titres . . . . . . . . . . . . . 19
5.3.3 Mode Relais – Démarrage automatique
du second lecteur . . . . . . . . . . . . . . . . . . 19
5.4 Lecture des premières notes d’un titre . . . . 19
5.5 Avance et retour rapides . . . . . . . . . . . . . . . 19
5.6 Positionnement à un endroit donné . . . . . . 20
5.7 Retour à un endroit préalablement
déterminé/Création d’effets “Sampler” . . . . 20
5.8 Lecture d’une boucle continue . . . . . . . . . . 20
5.9 Modification de la vitesse avec ou sans
modification de la hauteur tonale/
modification du nombre de beats . . . . . . . . 21
5.10 Adaptation du rythme entre deux
morceaux de musique . . . . . . . . . . . . . . . . 21
6Activation des effets sonores . . . . . . . . . 21
6.1 Fonction BRAKE freinage/démarrage . . . . 22
7Démarrage électrique via une
table de mixage . . . . . . . . . . . . . . . . . . . . . 22
8Entretien de l’appareil . . . . . . . . . . . . . . . 22
9Caractéristiques techniques . . . . . . . . . . 22
10 Glossaire technique . . . . . . . . . . . . . . . . . 23
1Eléments et branchements
1.1 Unité de commande (schémas 1–3)
Les éléments du lecteur 1 sont décrits dans le texte
suivant : ceux du lecteur 2 sont identiques.
1Eléments du lecteur 1 (voir détails schéma 2)
2Eléments du lecteur 2 (voir détails schéma 2)
3Affichage multifonctions (voir schéma 3 pour
plus de détails)
asymbole pour le mode Lecture
bsymbole pour le mode Pause
cbargraphe : indique par sa longueur, la durée
restante d’un titre [“REMAIN” (n) affiché] ou la
durée déjà lue d’un titre (affichage “REMAIN”
éteint)
daffichage “CONTINUE” :
s’affiche tout le temps lorsque le mode de
fonctionnement Lecture de tous les titres est
activé avec la touche CONT./SINGLE (24)
– voir également point 24
eaffichage “BRAKE” :
s’affiche lorsque la fonction freinage/démar-
rage est activée avec la touche BRAKE (10),
voir position 10, touche BRAKE
faffichage “AUTO CUE SINGLE” :
s’affiche après la mise sous tension et indique
le mode de fonctionnement Lecture titre par titre
gaffichage “BEAT” : s’affiche lorsque l’affichage
de la vitesse (i) est commuté sur l’affichage du
nombre de beats par minute avec la touche
BPM/PITCH (26)
haffichage “PITCH” :
s’affiche après la mise sous tension ; l’affich-
age (i) représente la déviation en pourcentage
de la vitesse standard, réglée avec le poten-
tiomètre PITCH CONTROL (4)
iaffichage de la déviation, en pourcentage, de
la vitesse standard, réglée avec le poten-
tiomètre PITCH CONTROL (4) [PITCH (h)
s’affiche] ou affichage du nombre de beats par
minute après commutation avec la touche
BPM/PITCH (26) [“BEAT” (g) s’affiche]
jnuméro du titre/nombre de titres sur le CD
quelques instants après avoir inséré le CD
kaffichage de la durée (voir point 13 touche
TIME STOP)
laffichage “OUTRO” :
s’affiche lorsque la fonction OUTRO est ac-
tivée avec la touche TIME STOP (13)
maffichage “LOOP” : s’affiche lorsque une boucle
continue est lue (voir chapitre 5.8)
naffichage “REMAIN” : s’affiche lorsque la
durée restante d’un titre ou d’un CD est
affichée (voir également position 13)
4Potentiomètre PITCH CONTROL pour modifier
la vitesse et par là même la hauteur tonale
(±16% max) ; le réglage du potentiomètre n’est
actif que si la touche PITCH (15) est enfoncée
5Touche RELAY pour le démarrage automatique
de l’autre lecteur à la fin d’un titre ou à la fin du
CD (voir chapitre 5.3.3)
Note : la fonction ne peut être activée que si un
CD est inséré dans chacun des lecteurs.
6Touche OPEN/CLOSE pour ouvrir et fermer
le tiroir CD [comme la touche OPEN/CLOSE
(30) sur l’unité de lecture] ; pendant la lecture
d’un CD, le tiroir CD est verrouillé contre toute
ouverture intempestive
7Touche SELECT : sélection d’un des quatre
effets Scratch, Flanger, Filter et Reverse
voir chapitre 6
8Touche ON/OFF : marche/arrêt de l’effet sélec-
tionné avec la touche SELECT (7)
9LEDs pour afficher l’effet sélectionné avec la
touche SELECT (7)
1bleu – Scratch
2rouge – Flanger
3vert – Filter
4jaune – Reverse
La LED correspondante clignote lorsque l’effet
est sélectionné et brille en continu lorsque l’effet
a été allumé avec la touche ON/OFF (8).
Vi preghiamo di aprire completamente la pagina 5.
Così vedrete sempre gli elementi di comando e i
collegamenti descritti.
Indice
1Elementi di comando e collegamenti . . . 15
1.1 Unità di comando . . . . . . . . . . . . . . . . . . . . 15
1.2 Unità lettore pannello frontale . . . . . . . . . . . 17
1.3 Unità lettore retro . . . . . . . . . . . . . . . . . . . . 17
2Avvertenze di sicurezza . . . . . . . . . . . . . . 17
3Possibilità d’impiego . . . . . . . . . . . . . . . . 17
4Collocamento e collegamento . . . . . . . . . 17
5Funzionamento . . . . . . . . . . . . . . . . . . . . . 18
5.1 Riprodurre un CD . . . . . . . . . . . . . . . . . . . . 18
5.2 Indicazione del numero del titolo, della
durata e del numero battute al minuto . . . . 18
5.2.1 Diagramma a barre . . . . . . . . . . . . . . . . . 18
5.2.2 Beatcounter . . . . . . . . . . . . . . . . . . . . . . . 19
5.3 Selezionare il modo di funzionamento . . . . 19
5.3.1 Riproduzione di un singolo titolo . . . . . . . 19
5.3.2 Riproduzione di tutti i titoli . . . . . . . . . . . . 19
5.3.3 “Relay” – avviamento automatico
dell’altro lettore . . . . . . . . . . . . . . . . . . . . 19
5.4 Riproduzione dell’inizio di un titolo . . . . . . . 19
5.5 Avanzamento e ritorno veloce . . . . . . . . . . 19
5.6 Posizionamento con esattezza su un punto
preciso . . . . . . . . . . . . . . . . . . . . . . . . . . . . 19
5.7 Ritorno ad un punto desiderato/
generazione di particolari effetti . . . . . . . . . 20
5.8 Riproduzione senza fine . . . . . . . . . . . . . . . 20
5.9 Modificare la velocità, l’altezza del suono e
numero battute . . . . . . . . . . . . . . . . . . . . . . 21
5.10 Adattare il ritmo fra due brani musicali . . . . 21
6Attivazione degli effetti sonori . . . . . . . . 21
6.1 Funzione di frenata/avvio BRAKE . . . . . . . 21
7Avviamento tramite il fader dal mixer . . . 22
8Manutenzione . . . . . . . . . . . . . . . . . . . . . . 22
9Dati tecnici . . . . . . . . . . . . . . . . . . . . . . . . 22
10 Spiegazione dei termini tecnici . . . . . . . . 23
1Elementi di comando e collegamenti
1.1 Unità di comando (fig. 1–3)
Nel testo che segue si illustrano gli elementi di
comando del lettore 1. Gli elementi di comando del
lettore 2 sono perfettamente identici.
1Comandi del lettore 1 (per i particolari vedi fig. 2)
2Comandi del lettore 2 (per i particolari vedi fig. 2)
3Display multifunzionale (vedi fig. 3)
asimbolo per la riproduzione
bsimbolo per la pausa
cdiagramma a barre; indica con la sua lunghez-
za il tempo restante di un titolo [si vede
“REMAIN” (n) sul display] oppure il tempo già
trascorso del titolo (non si vede ”REMAIN”)
dindicazione “CONTINUE”;
si vede se con il tasto CONT./SINGLE (24) è
stata attivata la modalità di riproduzione di tutti
i titoli; vedi anche il punto 24;
eindicazione “BRAKE”:
si vede se con il tasto BRAKE (10) è stata atti-
vata la funzione di frenata/avvio;
vedi anche il punto 10 tasto BRAKE
findicazione “AUTO CUE SINGLE”;
si vede dopo l’accensione e indica la modalità
di riproduzione di un singolo titolo;
gindicazione “BEAT”:
si vede se con il tasto BPM/PITCH (26) l’indi-
cazione della velocità (i) è commutata in indi-
cazione dei numeri di battute al minuto
hindicazione “PITCH”:
si vede dopo l’accensione e segnala che l’in-
dicazione della velocità (i) indica la deviazione
percentuale della velocità impostata con il
regolatore PITCH CONTROL(4) dalla velocità
standard
iindicazione della deviazione percentuale dalla
velocità standard impostata con il regolatore
PITCH CONTROL (4) [si vede “PITCH” (h)] o
dal numero di battute/minuto dopo commuta-
zione con il tasto BPM/PITCH (26) [si vede
“BEAT” (g)]
jnumero del titolo oppure, subito dopo l’inseri-
mento del CD, il numero globale dei titoli sul
CD
kindicazione del tempo; vedi anche il punto 13
(tasto TIME STOP)
lindicazione “OUTRO”:
si vede se la funzione OUTRO è stata attivata
con il tasto TIME STOP (13)
mindicazione “LOOP”; si vede nel caso di ripro-
duzione senza fine (vedi cap. 5.8)
nindicazione “REMAIN”; si vede quando viene
indicato il tempo restante di un titolo o dell’in-
tero CD; vedi anche il punto 13
4Cursore PITCH CONTROL per modificare la
velocità e quindi il suono (max. ±16%);
tale regolazione ha effetto solo se il tasto PITCH
(15) è abbassato
5Tasto RELAY per l’avvio automatico dell’altro let-
tore alle fine di un titolo o del CD (vedi cap. 5.3.3).
N.B.: La funzione può essere attivata solo se in
entrambi i lettori è inserito un CD
6Tasto OPEN/CLOSE per aprire e chiudere il
cassetto CD [come il tasto OPEN/CLOSE (30)
dell’unità lettore]; durante la riproduzione, il cas-
setto è bloccato per escludere l’apertura involon-
taria
7Tasto SELECT per selezionare uno dei quattro
effetti scratch, flanger, filter e riverse
8Tasto ON/OFF per attivare e disattivare l’effetto
selezionato con il tasto SELECT (7)
9LED per indicare l’effetto selezionato con il tasto
SELECT (7)
1blu – scratch
2rosso – flanger
3verde – filter
4giallo – riverse
Il relativo LED lampeggia se l’effetto è selezio-
nato e rimane accesso se l’effetto è stato attivato
con il tasto ON/OFF (8) 15
I
F
B
CH

10 Touche BRAKE : marche/arrêt de la fonction
freinage/démarrage
Lorsque la fonction est activée, “BRAKE” (e)
s’affiche. Si pendant la lecture d’un titre, le lec-
teur est mis sur Pause avec la touche (21),
la lecture ne s’arrête pas brutalement mais est
freinée jusqu’à obtenir l’arrêt. Lorsque vous
redémarrez la lecture avec la touche , le titre
redémarre lentement tout d’abord.
11 Touches et pour sélectionner le prochain
titre :
à chaque pression sur la touche , vous avan-
cez d’un titre. Par une pression sur la touche ,
vous revenez au début du titre en cours de lec-
ture. Par plusieurs pressions sur la touche ,
vous reculez d’un titre à chaque fois. Pour sauter
plusieurs titres, maintenez la touche correspon-
dante enfoncée.
12 Touches SEARCH et : avance et retour
rapides ; si une des touches est maintenue en-
foncée, le lecteur CD avance/recule rapidement.
13 Touche TIME STOP :
si la touche est maintenue enfoncée plus de 3
secondes, le lecteur s’arrête ;
pour commuter l’affichage de durée (k), enfon-
cez brièvement la touche :
réglage de base : affichage de la durée restante
du titre en cours
1ère pression : affichage de la durée déjà lue
du titre en cours
2ème pression : affichage de la durée restante
du titre en cours et activation
de la fonction OUTRO pour
lire respectivement les 30
dernières secondes des titres
suivants (cette fonction n’est
active qu’à partir du titre sui-
vant, si besoin enfoncez la
touche ).
3ème pression : affichage de la durée restante
de tout le CD et déconnexion
de la fonction OUTRO
4ème pression : retour au réglage de base
14 Touche MT (Master Tempo) pour une hauteur
tonale constante : si la touche est activée (la
LED à côté de la touche brille), la hauteur tonale
reste constante en cas de modification de la
vitesse de lecture avec le potentiomètre PITCH
CONTROL (4).
15 Touche PITCH pour activer la vitesse réglée
avec le potentiomètre PITCH CONTROL(4) [une
des LEDs (16) brille] et pour sélectionner la zone
de réglage de la vitesse (4%, 8% ou 16%).
Pour revenir à la vitesse standard, maintenez la
touche enfoncée (deux secondes environ) jus-
qu’à ce que la LED (16) s’éteigne.
16 LEDs d’affichage de la plage de vitesse sélec-
tionnée et de l’activation du réglage PITCH
CONTROL (4)
17 Bouton FWD/REV : positionnement exact à un
endroit donné en mode Pause. En mode Pause,
le CD avance ou recule aussi longtemps et aussi
vite que le bouton est tourné vers la gauche ou la
droite. Après avoir tourné le bouton, l’endroit est
répété jusqu’à ce que la touche (21) soit
enfoncée ou la touche CUE (19) soit enfoncée
deux fois brièvement.
Lorsque le CD est en cours de lecture, vous pou-
vez produire un effet “gondolé” en tournant le
bouton dans un sens puis dans l’autre.
Si un effet est commuté avec la touche ON/OFF
(8), l’effet peut être modifié/contrôlé avec le
bouton (voir chapitre 6).
18 Touche BOP pour un retour en arrière et un
démarrage immédiat de la lecture à partir du
début du titre en cours ou à partir d’un point pré-
alablement sélectionné avec la touche CUE (19).
Par plusieurs pressions brèves, vous pouvez
produire des effets “sampler”.
19 Touche CUE pour sélectionner un titre et pour
revenir à un endroit précédemment déterminé
(voir chapitre 5.4 ou 5.7)
20 Touche +10 pour sélectionner un titre : à chaque
pression, le lecteur fait un saut de 10 titres
21 Touche pour commuter entre lecture [affi-
chage (a)] et Pause [affichage (b)]
22 Touche A pour déterminer le point de départ
d’une boucle continue (voir chapitre 5.8)
23 Touche B/LOOP pour déterminer le point d’arrivée
d’une boucle continue et le démarrage simultané
de la boucle (voir également chapitre 5.8)
24 Touche CONT./SINGLE pour sélectionner le
mode de fonctionnement
(voir également chapitre 5.3)
réglage de base :lecture titre par titre :
sur l’affichage “AUTO CUE
SINGLE” (f) s’affiche
1ère pression : lecture de tous les titres du CD
et répétition continue de tout le
CD ; sur l’affichage “CONTI-
NUE” (d) s’affiche
2ème pression : retour au réglage de base
25 Touche RELOOP/EXIT pour terminer une boucle
continue et entamer une nouvelle lecture de la
boucle
26 Touche BPM/PITCH : commutation de l’affi-
chage de la vitesse (i) entre
aaffichage de la déviation en pourcentage de
la vitesse sélectionnée avec le réglage
PITCH CONTROL (4) [sur l’affichage
“PITCH ” (h) est visible]
baffichage du nombre de beats par minute
(BPM) via le compteur automatique de beats
[affichage “BEAT” (g) visible]
27 Touches PITCH BEND : synchronisation du
rythme d’un titre lu sur le lecteur 1 avec le rythme
d’un titre lu sur le lecteur 2.
Tant qu’une des touches est activée, la vitesse
est plus faible ou plus élevée.
10 Tasto BRAKE per attivare e disattivare la fun-
zione frenata/avvio
Se la funzione è attivata, nel display si vede
“BRAKE (e). Se ora con il tasto (21) si mette
in pausa un titolo corrente, la riproduzione non si
arresta subito ma viene frenata fino all’arresto.
Con il nuovo avvio con il tasto la riprodu-
zione inizia gradualmente.
11 Tasti e per selezionare il titolo desiderato:
con ogni pressione sul tasto si salta al titolo
successivo. Premendo il tasto , si torna all’ini-
zio del titolo corrente. Con ogni ulteriore pres-
sione del tasto si salta indietro di un titolo. Per
saltare più titoli, il tasto può rimanere premuto.
12 Tasti SEARCH e per l’avanzamento e
ritorno veloce; se si tiene premuto uno dei tasti, il
lettore avanza o ritorna velocemente
13 Tasto TIME STOP
se si tiene premuto per più di 3 secondi, il lettore
si arresta;
per commutare l’indicazione del tempo (k) sul
display premere solo brevemente:
Impostazione base: indicazione del tempo
restante del titolo cor-
rente
1. pressione del tasto: indicazione del tempo già
passato del titolo cor-
rente
2. pressione del tasto: indicazione del tempo
restante del titolo corren-
te e attivazione della fun-
zione OUTRO per ripro-
durre gli ultimi 30 secondi
dei titoli seguenti (attiva
solo dopo il titolo succes-
sivo; eventualmente pre-
mere il tasto )
3. pressione del tasto: indicazione del tempo
restante dell’intero CD e
disattivazione della fun-
zione OUTRO
4. pressione del tasto: ritorno all’impostazione
base
14 Tasto MT (MasterTempo) per altezza costante dei
toni. Se è stato azionato il tasto (il LED vicino al
tasto si accende), l’altezza dei toni rimane
costante se la velocità di riproduzione è stata
modificata con il regolatore PITCH CONTROL(4).
15 Tasto PITCH per attivare la velocità impostata con
il regolatore PITCH CONTROL (4) [si accende
uno dei LED (16)] e per selezionare il campo di
impostazione della velocità (4%, 8% o 16%).
Per ritornare alla velocità standard tener pre-
muto il tasto (ca. 2 sec.) finché il LED (16) si
spegne.
16 LED per segnalare il campo selezionato della
velocità e per indicare che è stato attivato il rego-
latore PITCH CONTROL (4)
17 Manopola FWD/REV per individuare un punto
esatto nella modalità “Pausa”. Se è attiva la
pausa, il CD avanza o ritorna velocemente
seguendo la rotazione della manopola. Quindi il
brano momentaneo viene ripetuto finché si
preme il tasto (21) oppure si spinge breve-
mente due volte il tasto CUE (19).
Con il CD in movimento, girando la manopola nei
due sensi, si può ottenere un particolare effetto
acustico.
Se con il tasto ON/OFF (8) è stato attivato un
effetto, tale effetto può essere modificato con la
manopola (vedi cap. 6).
18 Tasto BOP per ritornare all’inizio del titolo cor-
rente con riproduzione immediata dello stesso
oppure per la riproduzione da un punto selezio-
nate precedentemente con il tasto CUE (19)
Premendo più volte il tasto si può produrre un
particolare effetto con ripetuti inizi di un brano.
19 Tasto CUE per riprodurre l’inizio di un titolo e per
ritornare su un punto marcato precedentemente
(vedi capp. 5.4 e 5.7)
20 Tasto +10 per selezionare un titolo;
con ogni pressione del tasto si saltano 10 titoli in
avanti
21 Tasto per passare fra riproduzione [simbolo
(a)] e pausa [simbolo (b)].
22 Tasto A per fissare il punto di partenza per la
riproduzione senza fine (vedi cap. 5.8)
23 Tasto B/LOOP per fissare il termine di una ripro-
duzione senza fine e per avviare la riproduzione
senza fine (vedi cap. 5.8)
24 Tasto CONT./SINGLE per selezionare la moda-
lità di funzionamento (vedi anche cap. 5.3)
Impostazione base: riproduzione di un titolo
singolo; il display indica
“CUE SINGLE” (f)
1. pressione del tasto: riproduzione di tutti i titoli
del CD e ripetizione
senza fine del CD; il dis-
play indica “CONTINUE”
(d)
2. pressione del tasto: ritorno all’impostazione
base
25 Tasto RELOOP/EXIT per terminare la riprodu-
zione senza fine e per la nuova riproduzione del
loop
26 Tasto BPM/PITCH per cambiare l’indicazione
della velocità (i) fra
aindicazione della deviazione della velocità
selezionato con il regolatore PITCH CON-
TROL (4) in % [si vede “PITCH” (h)]
bindicazione del numero di battute al minuto
(BPM = beats per minute) con il beatcounter
automatico [si vede “BEAT” (g)]
27 Tasti PITCH BEND per sincronizzare il ritmo di
un titolo nel lettore 1 con quello di un titolo nel let-
tore 2.
Mentre si spinge uno dei tasti, la velocità
aumenta o si riduce.
16
I
F
B
CH

1.2 Unité de lecture, face avant (schéma 4)
28 Tiroir CD
29 Témoin (LED blanche) d’ouverture du tiroir CD
30 Touche OPEN/CLOSE pour ouvrir et fermer
le tiroir CD [comme la touche OPEN/CLOSE (6)
sur l’unité de commande] ;
pendant la lecture d’un CD, le tiroir CD est ver-
rouillé contre toute ouverture intempestive.
31 Interrupteur POWER Marche/Arrêt
32 Témoin de fonctionnement
1.3 Unité de lecture, face arrière (schéma 5)
33 Prise jack 3,5 mono pour la commande à di-
stance de la fonction “Marche/Arrêt” du lecteur 2
via une table de mixage dotée d’une commande
par contact (voir chapitre 7)
34 Sortie audio digitale DIGITAL OUT du lecteur 2
35 Sortie audio analogique LINE OUT à niveau
Ligne pour le lecteur 2
36 Prise de branchement jaune pour connecter
l’unité de commande :
à relier à la prise jaune REMOTE CONTROL/
CONNECT TO MAIN UNIT 2, via le cordon livré
avec les prises jaunes (voir chapitre 4)
37 Cordon secteur à brancher à une prise 230V~/
50Hz
38 Prise jack 3,5 mono pour la commande à di-
stance de la fonction “Marche/Arrêt” du lecteur 1
via une table de mixage dotée d’une commande
par contact (voir chapitre 7)
39 Sortie audio digitale DIGITAL OUT du lecteur 1
40 Sortie audio analogique LINE OUT à niveau
Ligne pour le lecteur 1
41 Prise de branchement noire pour connecter l’uni-
té de commande :
à relier à la prise noire REMOTE CONTROL/
CONNECT TO MAIN UNIT 1, via le cordon livré
avec les prises noires (voir chapitre 4)
2Conseils d’utilisation et de sécurité
Cet appareil répond à la norme européenne
89/336/CEE relative à la compatibilité électroma-
gnétique et à la norme 73/23/CEE portant sur les
appareils à basse tension.
Respectez scrupuleusement les points suivants :
●Attention ! Ne regardez jamais le compartiment
CD lorsque le tiroir est ouvert. Des rayons laser
pourraient générer des troubles de la vision.
●L’appareil n’est conçu que pour une utilisation en
intérieur. Protégez-le de tout type de projections
d’eau, des éclaboussures, d’une humidité élevée
et la chaleur (plage de température de fonctionne-
ment autorisée : 0–40°C).
●En aucun cas, vous ne devez poser d’objet conte-
nant du liquide ou un verre sur l’appareil.
●Ne le faites jamais fonctionner et débranchez-le
immédiatement lorsque :
1. des dommages sur l’appareil et sur le cordon
secteur apparaissent,
2. après une chute ou accident similaire..., l’ap-
pareil peut présenter un défaut,
3. des dysfonctionnements apparaissent.
Dans tous les cas, les dommages doivent être
réparés par un technicien spécialisé.
●Tout cordon secteur endommagé ne doit être rem-
placé que par le fabricant ou un technicien habilité.
●Ne débranchez jamais l’appareil en tirant sur le
cordon secteur.
●Nous déclinons toute responsabilité en cas de dom-
mage si l’appareil est utilisé dans un but autre que
celui pour lequel il a été conçu, s’il n’est pas correc-
tement utilisé ou réparé par une personne habilitée.
●Lorsque l’appareil est définitivement retiré du mar-
ché, vous devez le déposer dans une usine de
recyclage de proximité pour contribuer à son éli-
mination non polluante.
3Possibilités d’utilisation
Le lecteur CD double CD-360DJ avec deux unités
de lecture est spécialement conçu pour une utilisa-
tion DJ professionnelle. De nombreuses possibilités
de fonctionnement sont précisément définies dans
ce but, p.ex. un compteur de beats automatique,
une lecture d’une boucle continue, une lecture titre
par titre ou l’activation d’effets sonores.
Sur le CD-360DJ, il est possible de lire des CDs
audio, des CD-R (gravés) ; en revanche, les CD-RW
(CDs réinscriptibles) ne peuvent pas être lus.
Le lecteur CD est doté d’une mémoire anti chocs
de 10 secondes dans laquelle la musique est lue
avant la lecture. En cas d’un dysfonctionnement du
système par des coups ou vibrations, la musique est
lue depuis la mémoire. On évite ainsi les coupures
de son. Le système anti chocs ne peut cependant
pas compenser des vibrations ou chocs permanents.
4Positionnement de l’appareil et
branchements
Les unités de lecture et de commande sont prévues
pour une installation en rack 19" = 482mm mais
elles peuvent être directement posées sur une table.
L’unité de lecture doit, dans tous les cas, être placée
à l’horizontale ; l’unité de commande peut, p.ex,
être placée de manière inclinée. Pour un montage
en rack, 2 U (1 unité = 44,5mm) respectivement
pour les unités de commande et de lecture sont
nécessaires.
Avant d’effectuer ou de modifier les branchements,
assurez-vous que le lecteur CD et les autres
appareils reliés sont éteints.
1) Reliez l’unité de commande et l’unité de lecture
avec les deux cordons de liaison livrés.
Attention ! Cet appareil est alimenté par une ten-
sion dangereuse 230V~. Ne touchez
jamais l’intérieur de l’appareil car, en
cas de mauvaise manipulation, vous
pourriez subir une décharge électri-
que mortelle. En outre, l’ouverture de
l’appareil rend tout droit à la garantie
caduque.
1.2 Unità lettore pannello frontale (fig. 4)
28 Cassetto CD
29 Illuminazione del cassetto CD aperto (LED
bianco)
30 Tasto OPEN/CLOSE per aprire e chiudere il
cassetto CD [come il tasto OPEN/CLOSE (6)
dell’unità di comando];
durante la riproduzione, il cassetto è bloccato
per escludere l’apertura involontaria
31 Interruttore on/off POWER
32 Spia di funzionamento
1.3 Unità lettore retro (fig. 5)
33 Presa jack mono 3,5mm per il telecomando
della funzione “Start/Pausa” del lettore 2 tramite
un mixer con comando a contatto (vedi cap. 7)
34 Uscita audio digitale DIGITAL OUT del lettore 2
35 Uscita audio analogica LINE OUT con livello
Line del lettore 2
36 Presa di collegamento gialla per l’unità di
comando;
collegarla con la presa gialla REMOTE CON-
TROL/CONNECTTOMAINUNIT2 tramite ilcavo
in dotazione con i connettori gialli (vedi cap. 4)
37 Cavo rete per 230V~/50Hz
38 Presa jack mono 3,5mm per il telecomando
della funzione “Start/Pausa” del lettore 1 tramite
un mixer con comando a contatto (vedi cap. 7)
39 Uscita audio digitale DIGITAL OUT del lettore 1
40 Uscita audio analogica LINE OUT con livello
Line del lettore 1
41 Presa di collegamento nera per l’unità di coman-
do;
collegarla con la presa nera REMOTE CON-
TROL/CONNECTTOMAINUNIT1 tramite ilcavo
in dotazione con i connettori neri (vedi cap. 4)
2Avvertenze di sicurezza
Questo apparecchio è conforme alle direttive EMC
89/336/CEE per la compatibilità elettromagnetica
73/23/CEE per apparecchi a bassa tensione.
Durante l’uso si devono osservare assolutamente i
seguenti punti:
●Attenzione! Non guardare dentro il pozzetto del
CD mentre il cassetto è aperto. Eventuali raggi
laser possono danneggiare gli occhi.
●L’apparecchio è previsto solo per l’uso all’interno
di locali. Proteggerlo dall’acqua gocciolante e
dagli spruzzi d’acqua, da alta umidità dell’aria e
dal calore (temperatura d’impiego ammessa fra
0°C e 40°C).
●Non posare contenitore pieni di liquidi, p.es.
bicchieri, sull’apparecchio.
●Non mettere in funzione l’apparecchio e staccare
subito la spina rete se:
1. l’apparecchio o il cavo rete presentano dei
danni visibili;
2. dopo una caduta o dopo eventi simili sussiste il
sospetto di un difetto;
3. l’apparecchio non funziona correttamente.
Per la riparazione rivolgersi sempre ad una offi-
cina competente.
●Il cavo rete, se danneggiato, può essere sostituito
solo dal costruttore o da un laboratorio autorizzato.
●Staccare il cavo rete afferrando la spina, senza ti-
rare il cavo.
●Nel caso di uso improprio, di impiego scorretto o
di riparazione non a regola d’arte non si assume
nessuna responsabilità per eventuali danni.
●Se si desidera eliminare l’apparecchio definitiva-
mente, consegnarlo per lo smaltimento ad un’isti-
tuzione locale per il riciclaggio.
3Possibilità d’impiego
Il lettore CD doppio CD-360DJ con 2 lettori CD è
stato realizzato specialmente per uso DJ professio-
nale. Infatti, molte funzioni sono previste apposita-
mente per quell’impiego, p.es. il beatcounter auto-
matico, la riproduzione senza fine, la riproduzione di
un singolo titolo oppure l’attivazione di effetti sonori.
Con il lettore CD si possono riprodurre CD audio
e CD masterizzati in proprio (Audio CD-R). Non
sono riproducibili invece i CD riscrivibili (CD-RW).
Il lettore CD è equipaggiato con una memoria
anti-shock di 10 secondi che legge la musica prima
della riproduzione. Se la scansione del CD viene
disturbata da colpi o vibrazioni, la musica viene letta
da questa memoria per escludere delle interruzioni.
Tuttavia, il sistema anti-shock non può compensare
ripetuti colpi o vibrazioni lunghe.
4 Collocamento e collegamenti
Le unità di comando e lettore sono previste per il
montaggio in un rack (482mm/19"), ma si possono
collocare anche liberamente su un tavolo. L’unità
lettore deve comunque essere collocata su un piano
perfettamente orizzontale. L’unità di comando
invece può essere montata a piacere, anche incli-
nata. Per il montaggio in un rack, le due unità richie-
dono ciascuna 2 unità di altezza (1 unità di altezza =
44,45mm).
Eseguire il collegamento o eventuali modifiche solo
con tutti gli apparecchi spenti.
1) Collegare l’unità di comando e il lettore mediante
i due cavi di collegamento in dotazione.
Il cavo con i connettori gialli:
il terminale con il soppressore di radiodisturbi (la
piccola scatola) nella presa giallo (36) del lettore
e l’altro terminale nella presa gialla REMOTE
CONTROL/CONNECT TO MAIN UNIT 2 dell’
unità di comando.
Il cavo con i connettori neri:
il terminale con il soppressore di radiodisturbi (la
piccola scatola) nella presa nera (41) del lettore e
Attenzione! Questo apparecchio funziona con ten-
sione di rete di 230V~. Non intervenire
mai al suo interno; la manipolazione
scorretta può provocare delle scariche
pericolose. Se l’apparecchio viene
aperto, cessa ogni diritto di garanzia.
17
I
F
B
CH

le cordon avec les fiches jaunes :
l’extrémité du câble avec la self d’anti-parasitage
(petite boîte) avec la prise jaune (36) de l’unité de
lecture et l’autre extrémité à la prise jaune RE-
MOTE CONTROL/CONNECT TO MAIN UNIT 2
de l’unité de commande.
le cordon avec les fiches noires :
l’extrémité du câble avec la self d’anti-parasitage
(petite boîte) avec la prise noire (41) de l’unité de
lecture et l’autre extrémité à la prise noire
REMOTE CONTROL/CONNECT TO MAIN
UNIT 1 de l’unité de commande.
2) Si la table de mixage ou l’amplificateur est dotée
d’entrées digitales, reliez-les aux prises jaunes
RCA DIGITAL OUT (34 et 39).
Sur les appareils dépourvus d’entrée digitale,
reliez les sorties stéréo LINE OUT (35 et 40) –
canal gauche LEFT et canal droit RIGHT– via les
cordons RCA aux entrées lecteur CD sur la table
de mixage ou l’amplificateur.
3) Les lecteurs peuvent être démarrés ou mis sur
Pause via une table de mixage à commande par
contact. Voir chapitre 7 pour le branchement du
câble de commande.
4) Reliez enfin la prise du cordon secteur (37) à une
prise 230V ~/50Hz.
5Utilisation
Le texte suivant décrit l’utilisation du lecteur 1 ; l’uti-
lisation du lecteur 2 est en tout point identique.
5.1 Lecture de CD
1) Avec l’interrupteur POWER (31), allumez le lec-
teur CD. Le témoin de fonctionnement (32) brille
et sur l’affichage (3), les informations suivantes
apparaissent les unes après les autres :
“close” : fermeture
“read” : lecture
“no disc” : pas de CD inséré
Après la mise sous tension, la LED blanche (29)
brille également pour éclairer le tiroir CD ouvert
ou pour permettre de lire, p.ex. un boîtier dans
un environnement sombre.
2) Avec la touche (6 ou 30), ouvrez le tiroir CD
(28). Sur l’affichage “OPEN” (ouvert) s’affiche.
3) Placez un CD, inscription vers le haut, et refermez
le tiroir avec la touche . Si le CD est correcte-
ment inséré, l’affichage indique, après quelques
instants, le nombre total de titres (j) et la durée
totale (k) du CD puis la durée du premier titre (k).
[Si le premier titre doit être lu immédiatement
après avoir inséré le CD, fermez le tiroir avec la
touche (21)].
4) Pour démarrer avec le premier titre, enfoncez la
touche (21) [si le tiroir a été fermé avec la
touche ]. Tant que le CD est lu, l’affichage indi-
que le symbole (a). Si la lecture doit démarrer
avec un autre titre, enfoncez tout d’abord la tou-
che +10 (20), si nécessaire, puis enfoncez la tou-
che ou (11) autant de fois que nécessaire
jusqu’à ce que le numéro du titre voulu appa-
raisse sur l’affichage. Démarrez ensuite le titre
avec la touche .
5) A tout moment, la lecture peut être interrompue
avec la touche ; sur l’affichage, le symbole
Pause (b) apparaît ; les touches et CUE
(19) clignotent. Pour poursuivre la lecture, enfon-
cez une nouvelle fois la touche .
6) Une fois allumé, l’appareil est toujours sur le
mode Lecture titre par titre ; l’affichage indique
“AUTO CUE SINGLE” (f). Si un titre est lu jusqu’à
la fin, l’appareil passe sur Pause au début du titre
suivant. Si, le titre suivant, en revanche, doit être
lu automatiquement, il faut commuter avec la tou-
che CONT./SINGLE (24) sur le mode Lecture de
tous les titres (voir chapitre 5.3).
7) Pendant la lecture ou en mode Pause, il est pos-
sible de sélectionner un autre titre avec la touche
+10 (20) et les touches et (11) :
À chaque pression sur la touche +10, le lecteur
fait un saut de 10 titres vers l’avant.
En enfonçant la touche , on avance toujours
d’un titre.
En enfonçant la touche , vous revenez au
début du titre en cours de lecture. Par plusieurs
pressions sur la touche , vous reculez toujours
d’un titre. Pour sauter plusieurs titres, maintenez
la touche ou enfoncée.
8) Si la lecture du CD doit se terminer plus tôt, mettez
le lecteur sur Pause avec la touche . Le tiroir
CD peut être ouvert avec la touche (6 ou 30).
Remarque : Pendant la lecture, le tiroir est ver-
rouillé contre toute ouverture intempestive.
9) Avant d’éteindre l’appareil, fermez toujours les
tiroirs CD avec les touches pour protéger les
systèmes laser des salissures. Eteignez ensuite
l’appareil avec l’interrupteur POWER (31).
5.2 Affichage du numéro des titres, de la
durée, du nombre de beats par minute
Dans le réglage de base, une fois l’appareil allumé,
l’affichage (schéma 3) indique pendant la lecture et
en mode Pause, le numéro (j) et la durée restante
(k) du titre en cours. Sur l’affichage, “REMAIN” (n)
signale la durée restante. Elle est affichée en minu-
tes (M), secondes (S), les secondes étant divisées
en 75 “Frames” (F) [1 frame = 1/75 seconde].
Par plusieurs brèves pressions sur la touche TIME
STOP (13), les informations de temps suivantes sont
affichées, vous pouvez également sélectionner la
fonction OUTRO si la touche est maintenue enfoncée
plus longtemps, le lecteur passe sur Arrêt).
1ère pression :
la durée déjà lue du titre en cours (l’affichage
“REMAIN” s’éteint)
2ème pression :
la fonction OUTRO pour lire les 30 dernières
secondes des titres suivants : (la fonction n’est
active qu’à partir du titre suivant – si besoin,
enfoncez la touche ) ; la durée restante du
titre en cours est affichée.
3ème pression :
durée restante de tout le CD ; le bargraphe (c)
s’éteint, la fonction OUTRO est à nouveau
désactivée
l’altro terminale nella presa nera REMOTE CON-
TROL/CONNECT TO MAIN UNIT 1 dell’unità di
comando.
2) Se il vostro mixer o amplificatore è equipaggiato
con ingressi digitali, questi si possono collegare
con le prese cinch gialle DIGITAL OUT (34 e 39).
Nel caso di apparecchi senza ingressi digitali,
collegare le uscite stereo LINE OUT (35 e 40) –
canale sinistro LEFT e destro RIGHT – con gli
ingressi per lettori CD del mixer/amplificatore
servendosi di cavi cinch.
3) Le unità lettore possono essere avviate o messe
in pausa tramite un mixer con comando a con-
tatto. Per il collegamento vedi capitolo 7.
4) Alla fine inserire la spina del cavo rete (37) in una
presa (230V~/50Hz).
5Funzionamento
Il testo seguente descrive il funzionamento dell’unità
lettore 1. Il funzionamento del lettore 2 è perfetta-
mente identico.
5.1 Riprodurre un CD
1) Accendere l’apparecchio con l’interruttore on/off
POWER (31). Si accende la spia di funzio-
namento (32). Sul display (3) appaiono una dopo
l’altra le seguenti scritte:
“close” (chiudere)
“read” (leggere)
“no disc” (nessun CD) – se non è inserito nessun
CD.
Dopo l’accensione si accende anche il LED
bianco (29) per illuminare il cassetto CD aperto o
per leggere il cover del CD nel buio
2) Aprire il cassetto del CD (28) premendo il tasto
(6 o 30). Il display indica ”OPEN” (aperto).
3) Inserire il CD con la scritta rivolta in alto e richiu-
dere il cassetto premendo di nuovo il tasto . Se il
CD è inserito correttamente, dopo breve tempo, il
display indica il numero globale dei titoli (j) nonché
la durata complessiva del CD (k). Successiva-
mente viene indicata la durata del primo titolo (k).
[Se dopo l’inserimento del CD deve partire
automaticamente il primo brano, si può chiudere
il cassetto con il tasto (21).]
4) La riproduzione del primo titolo viene avviata con
il tasto (21) [se il cassetto CD è stato chiuso
con il tasto ]. Durante la riproduzione del CD,
sul display è visibile il simbolo (a). Se si desi-
dera iniziare con un altro titolo, premere dap-
prima, se necessario, il tasto +10 (20) e quindi
uno dei tasti o (11) finché il numero del
titolo desiderato appare sul display. Quindi avvi-
are la riproduzione con il tasto .
5) Con il tasto , si può in qualsiasi momento
interrompere la riproduzione. Sul display si vede
il simbolo di pausa (b), e i tasti e CUE (19)
lampeggiano. Per riprendere la riproduzione pre-
mere di nuovo il tasto .
6) Dopo l’accensione, l’apparecchio è sempre in
funzione di riproduzione di un singolo titolo e il
display indica “AUTO CUE SINGLE” (f). Al ter-
mine del titolo, l’apparecchio si ferma in pausa
all’inizio del titolo successivo. Per riprodurre
automaticamente il titolo successivo, attivare la
riproduzione dell’intero CD mediante il tasto
CONT./SINGLE (24) – vedi anche cap. 5.3.
7) Durante la riproduzione o durante la pausa, con i
tasti +10 (20) e o (11) si può selezionare
un altro titolo:
Premendo il tasto +10 si salta avanti di 10 titoli.
Premendo il tasto si salta avanti di un titolo.
Premendo il tasto si salta all’inizio del brano
attuale. Con ogni ulteriore pressione del tasto
si torna indietro di un titolo. Per saltare diversi
titoli, i tasti o possono rimanere premuti.
8) Per terminare la riproduzione prima del tempo,
attivare la pausa il tasto . Quindi si può aprire
il cassetto del CD con il tasto (6 o 30).
N.B.: Durante la riproduzione, il cassetto è bloc-
cato per escludere l’apertura involontaria.
9) Prima di spegnere il lettore CD, chiudere sempre
i cassetti con i tasti per proteggere il sistema a
laser dallo sporco. Quindi spegnere l’appa-
recchio con l’interruttore POWER (31).
5.2 Indicazione del numero del titolo, della
durata e del numero battute al minuto
Nell’impostazione base e durante la riproduzione di
un CD o con la pausa attivata, il display (fig. 3)
indica, dopo l’accensione, il numero (j) e il tempo
restante (k) del titolo attuale. Il tempo restante viene
segnalato sul display con ”REMAIN” (n). L’indica-
zione del tempo è in minuti (M) e secondi (S), questi
ultimi suddivisi ancora in 75 frames (F) [1 frame =
1/75 sec.].
Con la pressione ripetuta del tasto TIME STOP
(13) è possibile indicare diverse informazioni sul
tempo e attivare la funzione OUTRO (se il tasto
viene premuto per un tempo prolungato, il lettore va
su STOP):
1. pressione del tasto:
il tempo già passato del titolo corrente (l’indica-
zione “REMAIN” si spegne)
2. pressione del tasto:
attivazione della funzione OUTRO per ripro-
durre gli ultimi 30 secondi dei titoli seguenti
(attiva solo dopo il titolo successivo; eventual-
mente premere il tasto ); il tempo restante e
titolo corrente
3. pressione del tasto:
il tempo restante dell’intero CD; il diagramma a
barre (c) si spegne e la funzione OUTRO è nuo-
vamente disattivata
4. pressione del tasto:
ritorno all’impostazione base (indicazione del
tempo restante del titolo corrente)
5.2.1 Diagramma a barre
Il diagramma a barre (c) offre, con la sua lunghezza,
una visualizzazione grafica del tempo, ovvero del
tempo residuo o già trascorso di un titolo, a seconda
del tipo di informazione selezionato sul display con il
tasto TIME STOP (13). Gli ultimi 30 secondi di un
18
I
F
B
CH

4ème pression :
réglage de base (affichage de la durée restant
du titre en cours)
5.2.1 Bargraphe
Le bargraphe (c) indique par sa longueur, la durée
restante ou la durée déjà lue d’un titre en fonction
des informations de temps sélectionnées avec la
touche TIME STOP (13) sur l’affichage. Il clignote
dans toute sa longueur pour signaler les 30 derniè-
res secondes d’un titre, les 15 dernières secondes
sont signalées par un clignotement plus rapide.
Remarque : le bargraphe est éteint si la durée res-
tante de tout le CD est affichée.
5.2.2 Compteur de beats
Le compteur intégré de beats compte en perma-
nence et automatiquement le nombre de beats par
minute du titre en cours de lecture. Pour afficher le
nombre de beats par minute, enfoncez la touche
BPM/PITCH (26) brièvement. L’affichage “PITCH”
(h) s’éteint et “BEAT” (g) est visible. La zone PITCH
(i) indique maintenant le nombre de beats par
minute. Pour revenir à l’affichage de la vitesse
réglée avec le réglage PITCH CONTROL(4), enfon-
cez une nouvelle fois la touche BPM/PITCH.
Remarques :
a) Tant que le compteur de beats n’a compté aucun
résultat utilisable, (p.ex. au début du titre), l’af-
fichage indique “ – – – ”.
b) Pour des morceaux de musique sans pointes de
rythme (p.ex. musique classique ou titres cal-
mes), le compteur de beats ne peut déterminer
de valeur et indique une valeur erronée.
c) Si l’avance/retour rapide est activée avec la tou-
che ou (12), le compteur de beats cesse
le processus de décompte et indique “ – – – ”.
Après l’avance/retour rapide, il doit tout d’abord
déterminer à nouveau la valeur correcte.
5.3 Sélection du mode de fonctionnement
5.3.1 Lecture titre par titre
Une fois le lecteur allumé, le mode lecture titre par
titre est automatiquement activé ; ce mode est spé-
cialement conçu pour une utilisation en discothèque.
1. L’affichage indique “AUTO CUE SINGLE” (f).
2. Lorsqu’un titre est sélectionné, le lecteur est
exactement à l’endroit où la musique commence
et pas à l’index de temps 00:00:00. L’affichage
indique brièvement “A CUE”.
3. Après la lecture d’un titre, l’appareil se met à nou-
veau sur Pause, exactement à l’endroit où la
musique du titre suivant commence.
5.3.2 Lecture de tous les titres
Si un titre doit être lu à la suite du précédent, com-
mutez le lecteur avec la touche CONT./SINGLE (24)
sur le mode de lecture de tous les titres. L’affichage
passe de “AUTO CUE SINGLE” (f) sur “CONTINUE”
(d). Pour revenir au mode de lecture titre par titre,
enfoncez une nouvelle fois la touche CONT./
SINGLE.
5.3.3 Mode Relais – Démarrage automatique du
second lecteur
Ala fin d’un titre ou d’un CD, le second lecteur peut,
dans tous les cas, être démarré automatiquement.
1) Pour démarrer le second lecteur à la fin d’un titre,
mettez les deux lecteurs sur le mode lecture titre
par titre avec la touche CONT./SINGLE (24) –
“AUTO CUE SINGLE” (f) doit s’afficher sur les
deux lecteurs.
2) Pour démarrer le second lecteur à la fin d’un CD,
mettez les deux lecteurs sur le mode lecture de
tous les titres avec la touche CONT./SINGLE –
“CONTINUE” (d) doit s’afficher sur les deux lec-
teurs.
3) Insérez un CD dans chacun des lecteurs.
Activez ensuite la touche RELAY (5), la LED au-
dessus de la touche brille.
4) Démarrez la lecture sur un lecteur avec la touche
(21). L’autre lecteur doit être sur Pause
(affichage ). Dès que le titre ou le CD est en-
tièrement lu, le lecteur passe sur Pause et l’autre
lecteur démarre. Ce processus se répète en con-
tinu jusqu’à ce que le mode fonctionnement
Relais soit désactivé. (Enfoncez une nouvelle
fois la touche RELAY pour le désactiver).
5) Atout endroit du CD, il est possible de commuter la
lecture d’un lecteur sur l’autre avec la touche .
6) Si un autre CD est inséré dans le lecteur mis sur
Pause, activez le mode Relais avec la touche
RELAY.
Remarque : si dans ce mode de fonctionnement, la
touche CUE (19) du lecteur en cours de lecture est
activée, la lecture passe sur l’autre lecteur. Si la tou-
che CUE est maintenue enfoncée sur le lecteur mis
sur pause, la lecture s’effectue alors sur ce lecteur,
tant que la touche est maintenue enfoncée.
5.4 Lecture des premières notes d’un titre
1) Une fois le CD inséré, allez tout d’abord au titre
souhaité avec la touche +10 (20), si nécessaire,
puis avec les touches ou (11).
2) Lorsque sur l’affichage, la durée du titre (k) est
visible, maintenez la touche CUE (19) enfoncée.
Le titre est lu tant que la touche est enfoncée.
3) Lorsque la touche est relâchée, l’appareil revient
au début du titre et passe sur Pause ; pour
démarrer le titre, enfoncez la touche (21) ; il
est possible de revenir au début du titre avec la
touche CUE.
5.5 Avance et retour rapides
Si pendant la lecture d’un CD, vous souhaitez avan-
cer ou reculer rapidement la lecture, maintenez la
touche SEARCH ou (12) enfoncée.
Remarques :
a) L’avance/retour rapide se fait sur plusieurs titres
jusqu’à la fin/début du CD ; l’appareil passe sur
Pause, si en mode lecture titre par titre le titre sui-
vant est atteint avec l’avance rapide ou si le
début du titre est atteint avec le retour rapide.
titolo sono segnalati con il lampeggio del diagramma
a barre in tutta la sua lunghezza, con aumento della
frequenza negli ultimi 15 secondi.
N.B.: Durante la visualizzazione del tempo restante
dell’intero CD, il diagramma a barre non è visibile.
5.2.2 Beatcounter
Il beatcounter integrato conta automaticamente e in
continuazione il numero delle battute al minuto del
brano corrente. Per visualizzare il numero delle bat-
tute al minuto premere brevemente il tasto
BPM/PITCH (26). L’indicazione “PITCH” (h) si
spegne e appare la scritta “BEAT” (g). Il campo di
visualizzazione PITCH (i) indica ora il numero di bat-
tute al minuto. Per ritornare all’indicazione della
deviazione dalla velocità standard impostata con il
regolatore PITCH CONTROL(4) premere di nuovo il
tasto BPM/PITCH.
N.B.
aFinché il beatcounter non ha contato un risultato
utile (p.es. all’inizio del titolo), viene visualizzato
“– – –”.
bCon musica senza picchi dinamici ritmici (p.es.
musica classico o lenta), il beatcounter non
riesce a stabilire nessun valore oppure indica un
valore sbagliato.
cSe con l’avanzamento/ritorno veloce [tasti o
(12)] ci si sposta in avanti o indietro, il beat-
counter interrompe il conteggio e segnala “– – –”.
Successivamente deve di nuovo stabilire il valore
corretto.
5.3 Selezionare il modo di funzionamento
5.3.1 Riproduzione di un singolo titolo
Dopo l’accensione è attivata sempre la riproduzione
di singoli titoli, prevista specialmente per l’uso in dis-
coteca.
1. Il display segna ”AUTO CUE SINGLE” (f).
2. Dopo la selezione di un titolo, il lettore si trova
esattamente sul punto dove inizia la musica e
non sull’indice di tempo 00:00:00. Il display se-
gnala brevemente “A CUE”.
3. Dopo la riproduzione di un titolo, il lettore si mette
in pausa esattamente nel punto dove inizia la
musica del titolo successivo.
5.3.2 Riproduzione di tutti i titoli
Se si desidera riprodurre un titolo dopo l’altro senza
interruzione, attivare la riproduzione di tutti i titoli con
il tasto CONT./SINGLE (24). Il display passa da
“AUTO CUE SINGLE” (f) a “CONTINUE” (d). Per
ritornare alla riproduzione di un singolo titolo pre-
mere di nuovo il tasto CONT./SINGLE.
5.3.3 Funzionamento Relay – avvio automatico
dell’altro lettore
Alla fine di un titolo o del CD si può avviare automa-
ticamente l’altro lettore.
1) Se alla fine di un titolo si vuole avviare l’altro let-
tore, attivare per entrambi i lettori la riproduzione
di un titolo singolo azionando il tasto CONT./
SINGLE (24) – entrambi i display devono indi-
care “AUTO CUE SINGLE” (f).
2) Se alla fine del CD si vuole avviare l’altro lettore,
attivare per entrambi i lettori la riproduzione di
tutti i titoli azionando il tasto CONT./SINGLE (24)
– entrambi i display devono indicare “CONTI-
NUE” (d).
3) Inserire un CD in ogni lettore. Quindi azionare il
tasto RELAY (5). Il LED sopra il tasto si accende.
4) Avviare la riproduzione su un lettore con il tasto
(21). L’altro lettore deve essere in pausa
(simbolo ). Non appena il titolo è terminato, il
lettore si mette in pausa e l’altro lettore si avvia.
Tale procedura si ripete senza soluzione di conti-
nuità finché non si cambia la modalità di funzio-
namento (azionando di nuovo il tasto RELAY).
5) Azionando il tasto del lettore 1 o 2, si può
passare cambiare lettore in qualsiasi momento.
6) Se in un lettore in pausa si inserisce un CD
occorre riattivare la modalità Relay premendo il
tasto RELAY.
N.B.: Se in questa modalità si aziona il tasto CUE
(19) del lettore attivo, la riproduzione passa all’altro
lettore. Se sul lettore in pausa si tiene premuto il
tasto CUE, la riproduzione passa a questo lettore
finché si tiene premuto il tasto.
5.4 Riproduzione dell’inizio di un titolo
1) Dopo aver inserito un CD, selezionare il titolo
desiderato, dapprima con il tasto +10 (20) – se
necessario – e quindi con i tasti o (11).
2) Se sul display si vede la durata (k) del titolo,
tenere premuto il tasto CUE (19). Il titolo viene
riprodotto per tutto il tempo in cui si tiene premuto
il tasto.
3) Se si libera il tasto CUE, l’apparecchio torna all’
inizio del titolo e va in pausa. Per avviare il titolo,
premere il tasto (21). Quindi, con il tasto CUE
si può tornare di nuovo all’inizio del titolo.
5.5 Avanzamento/ritorno veloce
Se durante la riproduzione di un CD è richiesto l’a-
vanzamento o il ritorno veloce, tenere premuto i tasti
SEARCH o (12).
N.B.
aL’avanzamento/ritorno veloce passa sopra
diversi titoli, ma termina all’inizio e alla fine del
CD. Se con la riproduzione di un singolo titolo
con l’avanzamento veloce si raggiunge il titolo
successivo, oppure se con il ritorno veloce si rag-
giunge l’inizio del titolo, il lettore va in pausa.
bNella modalità di pausa, dopo l’avanza-
mento/ritorno veloce si ripete il punto attuale fino
all’avvio della riproduzione con il tasto (21)
oppure fino ad una doppia pressione del tasto
CUE (19).
5.6 Posizionarsi con esattezza su un deter-
minato punto
Per posizionarsi con esattezza su un determinato
punto girare la manopola FWD/REV (17) mentre è
attivata la pausa. Lo spostamento sul CD segue il 19
I
F
B
CH

b) En mode Pause, après une avance ou un retour
rapide, l’endroit est répété en continu jusqu’à ce
que la lecture soit démarrée avec la touche
(21) ou que la touche CUE (19) soit enfoncée
brièvement deux fois.
5.6 Positionnement à un endroit donné
Pour aller à un endroit donné, en mode Pause
activé, tournez le bouton FWD/REV (17) ; le CD
avance ou recule aussi longtemps et aussi vite que
le bouton est tourné vers la gauche ou la droite. Sur
l’affichage, dans la zone durée (k), on peut lire la
position exacte et procéder par palier de 1 frame
(1 frame = 1/75 seconde). Le segment est ensuite
répété jusqu’à ce que la touche (21) soit enfon-
cée ou que la touche CUE (19) soit enfoncée briève-
ment deux fois.
Pour un CD en cours de lecture, l’avance et
retour rapides de la molette peuvent permettre de
créer des effets ”gondolés”.
5.7 Retour à un endroit préalablement dé-
terminé/ Création d’effets “Sampler”
1) Pendant la lecture d’un titre, passez en mode
Pause avec la touche (21) lorsque l’endroit
qui doit servir de point de départ est atteint. Les
touches et CUE (19) clignotent.
2) Si besoin, vous pouvez vous positionner exacte-
ment à l’endroit voulu avec le bouton FWD/REV
(17). Le segment est répété en continu.
3) Enfoncez la touche CUE. L’endroit est repéré de
manière interne ; la touche CUE brille en continu.
La touche clignote, incitant à démarrer la lec-
ture.
4) Démarrez à nouveau la lecture avec la touche
.
5) Avec la touche CUE ou BOP (18), il est possible
de revenir à l’endroit marqué. Une fois la touche
CUE enfoncée, le lecteur est sur Pause à l’en-
droit marqué ; en revanche, avec la touche BOP,
la lecture est poursuivie immédiatement à partir
de l’endroit marqué.
Par plusieurs pressions sur la touche BOP, on
peut produire des effets “sampler”. Cet effet est
d’autant plus puissant que le point de départ est
adapté (p.ex. le début d’un mot ou une phrase
musicale).
6) Si l’appareil est revenu à l’endroit repéré avec la
touche CUE démarrez la lecture avec la touche
ou en gardant la touche CUE enfoncée. Lors-
qu’elle est relâchée, le lecteur est à nouveau à
l’endroit marqué en mode Pause.
Remarque : en mode lecture titre par titre, le retour
ne peut s’effectuer qu’au sein d’un titre.
5.8 Lecture d’une boucle continue
Un segment donné sur le CD peut être répété aussi
souvent que souhaité dans une boucle continue par-
faite.
1) Avec la touche (21), commutez le lecteur sur
le mode Lecture. Si le point de départ de la
boucle voulue est atteint (point a, schéma 6),
enfoncez brièvement la touche A (22).
2) Lorsque, une fois la lecture lancée, la fin voulue
de la boucle est atteinte (point b), enfoncez la
touche B/LOOP (23). Le segment entre les
points a et b est répété en continu ; sur l’affi-
chage, “LOOP” (m) est visible.
Lecture d’une boucle continue ➅
3) Pour arrêter la boucle continue et poursuivre le
titre normalement, enfoncez la touche RELOOP/
EXIT (25) – schéma 7. L’affichage “LOOP”
– s’éteint. En sélectionnant un autre titre avec la
touche +10 (20) et/ou la touche / (11), la
boucle est quittée. Mais elle reste mémorisée.
4) Pour une nouvelle lecture de la boucle, enfoncez
la touche RELOOP/EXIT.
Fin d’une boucle continue
et nouvelle activation ➆
Trucs :
a) Entre le point de départ et le point d’arrivée d’une
boucle continue, il faut 10 frames au moins (=
0,13 secondes) sinon la boucle n’est pas mémo-
risée et ne démarre pas.
b) Le point de départ ou le point d’arrivée d’une
boucle peut également être défini avec la préci-
sion de 1 frame (1/75 seconde) :
1) Lorsque le point de départ est atteint, passez
tout d’abord sur Pause avec la touche .
Allez avec précision à l’endroit avec le bouton
FWD/REV (17) puis enfoncez la touche A
(22).
2) Maintenant, soit allez au point d’arrivée avec
le bouton FWD/REV ou démarrez tout d’a-
bord la lecture avec la touche ; lorsque le
point d’arrivée est atteint, mettez le lecteur sur
Pause avec la touche puis utilisez le bou-
ton FWD/REV pour affiner le point d’arrivée.
3) Une fois le point d’arrivée localisé avec préci-
sion, enfoncez la touche B/LOOP (23), la
boucle continue démarre.
c) Pour une boucle mémorisée, les points de départ
et d’arrivée peuvent être déplacés ; dès que le
nouveau point est atteint, enfoncez la touche A
ou B/LOOP ; cela peut se faire dans ou en
dehors de la boucle déjà existante. Pour dépla-
cer un point en dehors de la boucle mémorisée, il
PLAY c
LOOP
ab
1.
PLAY PLAY
LOOP
2.
movimento della manopola; la posizione esatta è
visibile sul display (k) tramite l’indicazione del tempo
con una precisione di 1 frame (1 F = 1/75 sec.). Dopo
aver girato la manopola, il punto attuale viene ripe-
tuto fino alla pressione del tasto (21) o fino a
due brevi pressioni del tasto CUE (19).
Con il CD in movimento, girando la manopola si
possono generare particolari effetti sonori.
5.7 Ritorno al punto desiderato/
generazione di particolari effetti
1) Durante la riproduzione di un titolo, attivare la
pausa con il tasto (21) non appena è rag-
giunto il punto su cui tornare successivamente. I
tasti e CUE (19) lampeggiano.
2) Se necessario, con la manopola FWD/REV (17)
posizionarsi esattamente su questo punto. Il
punto attuale viene riprodotto continuamente.
3) Toccare brevemente il tasto CUE. Così, tale
punto è marcato internamente. Il tasto CUE
rimane ora acceso. Il tasto continua a lam-
peggiare come invito ad avviare la riproduzione.
4) Avviare la riproduzione con il tasto .
5) Con il tasto CUE o BOP (18) si può tornare sul
punto marcato. Dopo aver premuto il tasto CUE,
il lettore CD si mette in pausa sul punto marcato,
mentre azionando il tasto BOP la riproduzione
inizia subito dal punto marcato.
Premendo più volte il tasto BOP si possono
generare effetti particolari come la ripetizione
continua di un segnale. L’effetto è più interes-
sante se si sceglie bene il punto di partenza
(p.es. l’inizio di una parola, generando l’effetto di
balbuziente avvio di uno strumento).
6) Se con il tasto CUE si è tornati sul punto marcato,
avviare la riproduzione con il tasto oppure
tenendo premuto il tasto CUE. Lasciando il tasto
CUE, il lettore torna sul punto marcato e va in
pausa.
N.B.: Nella modalità di riproduzione di un titolo sin-
golo, il ritorno è possibile solo all’interno di un titolo.
5.8 Riproduzione senza fine
È possibile la riproduzione senza fine di una deter-
minata parte del CD.
1) Con il tasto (21) attivare la riproduzione. Se è
stato raggiunto il punto di inizio del loop deside-
rato (punto a in fig. 6), premere brevemente il
tasto A (22).
2) Se poi si raggiunge la fine del loop (punto b), pre-
mere il tasto B/LOOP (23). Il brano contenuto fra
i punti a e b viene ripetuto ininterrottamente. Il
display segnala “LOOP” (m).
Riproduzione senza fine di un brano ➅
3)Per terminare il loop e per proseguire normal-
mente, premere il tasto RELOOP/EXIT (25) – vedi
fig. 7. L’indicazione “LOOP” si spegne. Anche se-
lezionando un altro titolo con il tasto +10 (20) e/o
con i tasti o (11) si esce dal loop che co-
munque rimane memorizzato.
4) Per riprodurre nuovamente lo stesso loop azio-
nare il tasto RELOOP/EXIT.
Terminare la riproduzione senza
fine ed attivarla di nuovo ➆
Alcuni consigli:
aFra l’inizio e la fine di un loop devono essere non
meno di 10 frame (= 0,13 secondi); altrimenti il
loop non viene né memorizzato né avviato.
bÈpossibile fissare i punti di inizio e di fine di un
loop con l’esattezza di un frame (1/75 secondo):
1) Vicino al punto di partenza attivare dapprima
la pausa con il tasto . Quindi fissare il
punto con esattezza servendosi della mano-
pola FWD/REV (17) e premere il tasto A(22).
2) Selezionare la fine con la manopola FWD/
REV oppure avviare la riproduzione dapprima
con il tasto . Arrivando vicino al punto
finale attivare nuovamente la pausa con il
tasto e quindi individuare con esattezza il
punto finale con la manopola FWD/REV.
3) Dopo aver individuato bene il punto della fine
del loop azionare il tasto B/LOOP (23). La
riproduzione del loop ha inizio.
cIn un loop memorizzato si possono spostare i
punti di partenza e di fine. Non appena è rag-
giunto il nuovo punto premere rispettivamente il
tastoAo B/LOOP. Tale punto può trovare si all’in-
terno o all’esterno del loop precedente. Per spo-
stare il punto al di fuori del loop occorre prima
uscire dal loop con il tasto RELOOP/EXIT (25).
dPer riprodurre il loop una sola volta, dopo aver
stabilito il punto di inizio con il tasto A, premere il
tasto RELOOP/EXIT sul punto finale. Dopo la
riproduzione del loop, quest’ultimo può essere
riprodotto altre volte premendo il tasto RELOOP/
EXIT (fig. 8).
Riproduzione del loop per una sola volta ➇
ab
1.
PLAY PLAY
1 x LOOP
2.
RELOOP
/EXIT
PLAY
x.
RELOOP
/EXIT
PLAY c
LOOP
ab
1.
PLAY PLAY
LOOP
2.
20
I
F
B
CH
Table of contents
Other Stageline CD Player manuals

Stageline
Stageline CD-112 User manual

Stageline
Stageline CD-400PRO User manual

Stageline
Stageline CD-262DJ User manual

Stageline
Stageline CD-164DJ User manual

Stageline
Stageline CD-50DJ User manual

Stageline
Stageline CD-194DJ User manual

Stageline
Stageline CD-20DJ User manual

Stageline
Stageline cd-196usb User manual
Popular CD Player manuals by other brands

Philips
Philips EXP7361 manual

Sony
Sony CDP-XE270 - Compact Disc Player Service manual

Sony
Sony CDX-CA750X Primary User Manual (English, Espanol,... operating instructions

Philips
Philips Soundmachine AZ3831 user manual

Panasonic
Panasonic CX-DP801EUC operating instructions

Sony
Sony Discman D-151 Service manual