Stanley SRA60 User manual

© 2015 Stanley Black & Decker, Inc.
New Britain, CT 06053
U.S.A.
74914 2/2016 Ver 3
USER MANUAL
Safety, Operation and Maintenance
SRA
COMPACTION
RAMMER
SRA 60
SRA 68

2 ► SRA User Manual
DECLARATION OF CONFORMITY
ÜBEREINSTIMMUNGS-ERKLARUNG
DECLARATION DE CONFORMITE CEE
DECLARACION DE CONFORMIDAD
DICHIARAZIONE DI CONFORMITA
Hydraulic Tools
______________________________________________________________________
I, the undersigned:
Ich, der Unterzeichnende:
Je soussigné:
El abajo firmante:
lo sottoscritto:
Weisbeck, Andy
Surname and First names/Familiennname und Vornamen/Nom et prénom/Nombre y apellido/Cognome e nome
hereby declare that the equipment specified hereunder:,bestätige hiermit, daß erklaren Produkt genannten Werk oder Gerät:,
déclare que l’équipement visé ci-dessous:,Por la presente declaro que el equipo se especifica a continuación:,
Dichiaro che le apparecchiature specificate di seguito:
1. Category: Compaction Rammer
Kategorie:
Catégorie:
Categoria:
Categoria:
2. Make/Marke/Marque/Marca/Marca Stanley
3. Type/Typ/Type/Tipo/Tipo: SRA601H, SRA681H
4. Serial number of equipment:
Seriennummer des Geräts:
Numéro de série de l’équipement:
Numero de serie del equipo:
Matricola dell´attrezzatura:
All
5. Mass/Masse/Masse/Masa/Massa 60 kg, 68 kg
Has been manufactured in conformity with, Wurde hergestellt in Übereinstimmung mit, Est fabriqué conformément
Ha sido fabricado de acuerdo con, E’ stata costruita in conformitá con
Directive/Standards
Richtlinie/Standards
Directives/Normes
Directriz/Los Normas
Direttiva/Norme
No.
Nr
Numéro
No
n.
Approved body
Prüfung durch
Organisme agréé
Aprobado
Collaudato
Machinery Directive
2006/42/EG
2006/42/EC
2006/42/CE
2000/14/EG
2000/14/EC
2000/14/CE
2005/88EG
2005/88/EC
2005/88/CE
2004/108/EG
2004/108/EC
2004/108/CE
Self
Self
Self
Self
Self
Self
Self
Self
Self
Self
Self
Self
Measurements:
Messungen
Mesures
Mediciones
Misurazioni
SRA60 Honda
GX100 2.2 kW
SRA60 Honda
GXR120RT 2.7 kW
SRA68 Honda
GX100 2.2 kW
SRA68 Honda
GXR120RT 2.7 kW
105 dB
105 dB
105 dB
105 dB
108 dB*
108 dB*
108 dB*
108 dB*
6. Special Provisions: Harmonized standards: 7. Measurements: Measured Sound Power Level
Spezielle Bestimmungen: EN 500-1; EN500-4 Messungen Guaranteed Sound Power Level*
Dispositions particulières: Mesures Annex VIII of 2000/14/EC
Provisiones especiales: Mediciones
Disposizioni speciali:Misurazioni
8. Representative in the Union: Patrick Vervier,Stanley Dubuis 17-19, rue Jules Berthonneau-BP 3406 41034 Blois Cedex, France.
Vertreter in der Union/Représentant dans l’union/Representante en la Union/Rappresentante presso l’Unione
Done at/Ort/Fait à/Dado en/Fatto a Stanley Hydraulic Tools, Milwaukie, Oregon USA Date/Datum/le/Fecha/Data 01-04-2015
Signature/Unterschrift/Signature/Firma/Firma
Position/Position/Fonction/Cargo/Posizione Director of Product Development

SRA User Manual ◄ 3
DECLARATION OF CONFORMITY ..........................................................................................................................2
TABLE OF CONTENTS.............................................................................................................................................3
SAFETY SYMBOLS ..................................................................................................................................................4
FOREWORD .............................................................................................................................................................5
SAFETY................................................................................................................................................................6 - 7
TECHNICAL DATA ...............................................................................................................................................8 - 9
OPERATION.....................................................................................................................................................10 - 14
TRANSPORT ..........................................................................................................................................................15
MAINTENANCE ...............................................................................................................................................16 - 25
RETROFIT...............................................................................................................................................................26
TROUBLESHOOTING ............................................................................................................................................27
SERVICING: This manual contains safety, operation, and routine maintenance instructions. Stanley Hydraulic Tools
recommends that servicing this machine, other than routine maintenance, must be performed by an authorized and
certied dealer. Please read the following warning.
For the nearest authorized and certied dealer, call Stanley Hydraulic Tools at the number listed on the back of this
manual and ask for a Customer Service Representative.
WARNING
SERIOUS INJURY OR DEATH COULD RESULT FROM THE IMPROPER REPAIR OR
SERVICE OF THIS TOOL.
REPAIRS AND / OR SERVICE TO THIS TOOL MUST ONLY BE DONE BY AN
AUTHORIZED AND CERTIFIED DEALER.
TABLE OF CONTENTS
IMPORTANT
To ll out a Product Warranty Validation form, and for information on your warranty,
visit Stanleyhydraulics.com and select the Company tab, Warranty.
(NOTE: The warranty Validation record must be submitted to validate the warranty).

4 ► SRA User Manual
Always observe safety symbols. They are included for your safety and for the protection of the tool.
LOCAL SAFETY REGULATIONS
Enter any local safety regulations here. Keep these instructions in an area accessible to the operator and mainte-
nance personnel.
Safety symbols and signal words, as shown below, are used to emphasize all operator, maintenance and repair ac-
tions which, if not strictly followed, could result in a life-threatening situation, bodily injury or damage to equipment.
This is the safety alert symbol. It is used to alert you to potential personal injury
hazards. Obey all safety messages that follow this symbol to avoid possible injury
or death.
DANGER
This safety alert and signal word indicate an imminently hazardous situation which,
if not avoided, will result in death or serious injury.
WARNING
This safety alert and signal word indicate a potentially hazardous situation which, if
not avoided, could result in death or serious injury.
CAUTION
This safety alert and signal word indicate a potentially hazardous situation which, if
not avoided, could result in death or serious injury.
CAUTION
This signal word indicates a potentially hazardous situation which, if not avoided,
may result in property damage.
NOTICE
This signal word indicates a situation which, if not avoided, will result in damage to
the equipment.
IMPORTANT
This signal word indicates a situation which, if not avoided, may result in damage
to the equipment.
SAFETY SYMBOLS

SRA User Manual ◄ 5
FOREWORD
These instructions include:
• Safety regulations
• Operating instructions
• Maintenance instructions
These instructions are intended to simplify operation of
the machine and to avoid malfunctions through improp-
er operation. Observing the maintenance instructions
will increase the reliability and service life of the
machine when used on the construction site and reduce
repair costs and downtimes.
Always keep these instructions at the place of use of
the machine.
Only operate the machine as instructed and follow
these instructions.
Do not fail to comply with the safety provisions, as well
as the rules for safety and health protection at work as
well as the applicable accident prevention regulations.
Also observe the corresponding rules and regulations
valid in your state and or country.
Stanley is not liable for the function of the machine
when used in an improper manner and for other than
the intended purpose.
Operating errors, improper maintenance and the use
of incorrect operating materials are not covered by the
warranty.
The above information does not extend the warranty
and liability conditions of business of Stanley.
We reserve the right to make changes due to technical
development without announcement.
PLEASE ENTER (DATA ON MACHINE TYPE PLATE)
1. MACH.-TYPE:
2. MACH.-NO.:
3. ENGINE-TYPE:
4. ENGINE-NO.:

6 ► SRA User Manual
SAFETY
This Stanley machine has been designed and constructed
in conformance with current standards and directives. This
machine can constitute a danger to persons and property if:
• It is not used for the intended purpose
• It is not operated by trained personnel
• It is incorrectly modied or converted
• The safety requirements are not observed
For this reason, all persons concerned with operation,
maintenance and repair of the machine must read and follow
the safety requirements. This may have to be conrmed with
respect to the user company by signature.
The following also apply:
• The pertinent regulations for the prevention of accidents
• Generally recognised safety rules and road trafc regulations
• Country-specic requirements
Intended use
This machine is only intended for:
• The compaction of all types of surfaces
• Repairs to all types of surfaces
• Stabilisation of pavements and roads
• Working in trenches
• Underlling and compaction of verges
Improper use
The machine can constitute a hazard if used improperly by un-
trained persons or not for the intended purpose.
For example:
• Working in horizontal direction
• Pile driving
• Compaction of verges
Who is allowed to operate the machine?
Only trained, instructed and authorised persons over the age of
18 may operate the machine. The responsibilities must be clearly
dened and observed prior to operation of the machine.
In variance from this, minors can be employed, as long as it is
necessary to their training objective and their protection is as-
sured by a supervisor.
Persons who are under the inuence of alcohol, medicines or
drugs must not operate, maintain or repair the machine.
Maintenance and repairs, in particular of hydraulic systems and
electronic components require special knowledge and must be
carried out only by trained specialists (mechanics specialising in
construction and agricultural machinery).
Conversions and changes to the machine
Unauthorised changes to the machine are not permitted for safety
reasons.
Original parts and accessories have been specially designed for
the machine. It should be noted that parts and special equipment
not supplied by Stanley are not approved by Stanley . The instal-
lation and/or the use of such products can also affect the active
and/or passive safety.
The manufacturer disclaims all liability for any damage caused by
using non-original parts or special equipment.
Safety information contained in the operating and maintenance
instructions
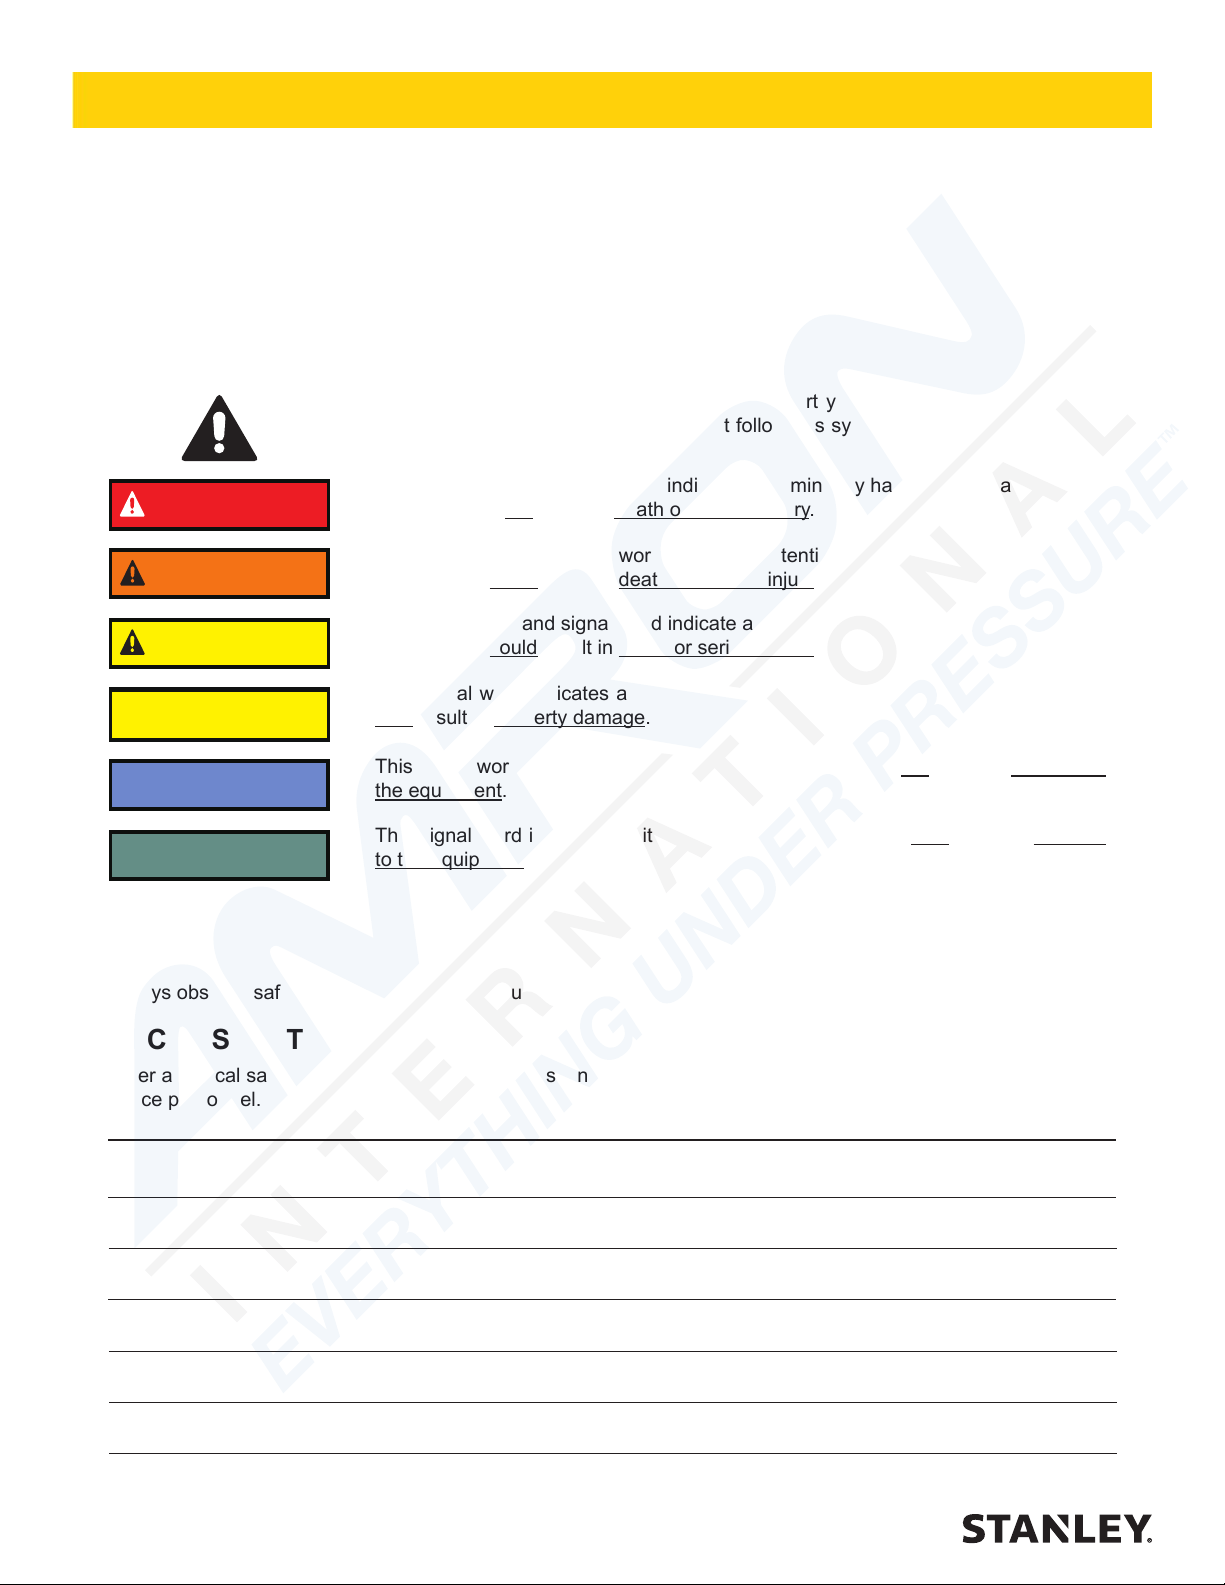
The following terms and symbols are used in this operating
manual that draw attention to important information:
Refers to special information and/or orders and
prohibitions directed towards preventing damage
Refers to orders and prohibitions designed to
prevent injury or extensive damage.
Refers to special information on how to use the machine
most efciently.
Loading the machine
Always shut off the motor when loading and transporting. Secure
the machine to prevent it tilting or slipping.
A risk to life exists if persons walk or stand under suspended
loads. It should be noted that the machine may swing when sus-
pended. Secure the machine on transport vehicles to prevent it
rolling, slipping or tilting.
Starting the machine
Before starting the machine
Familiarise yourself with the operating and control elements and
mode of operation of the machine and the working area.
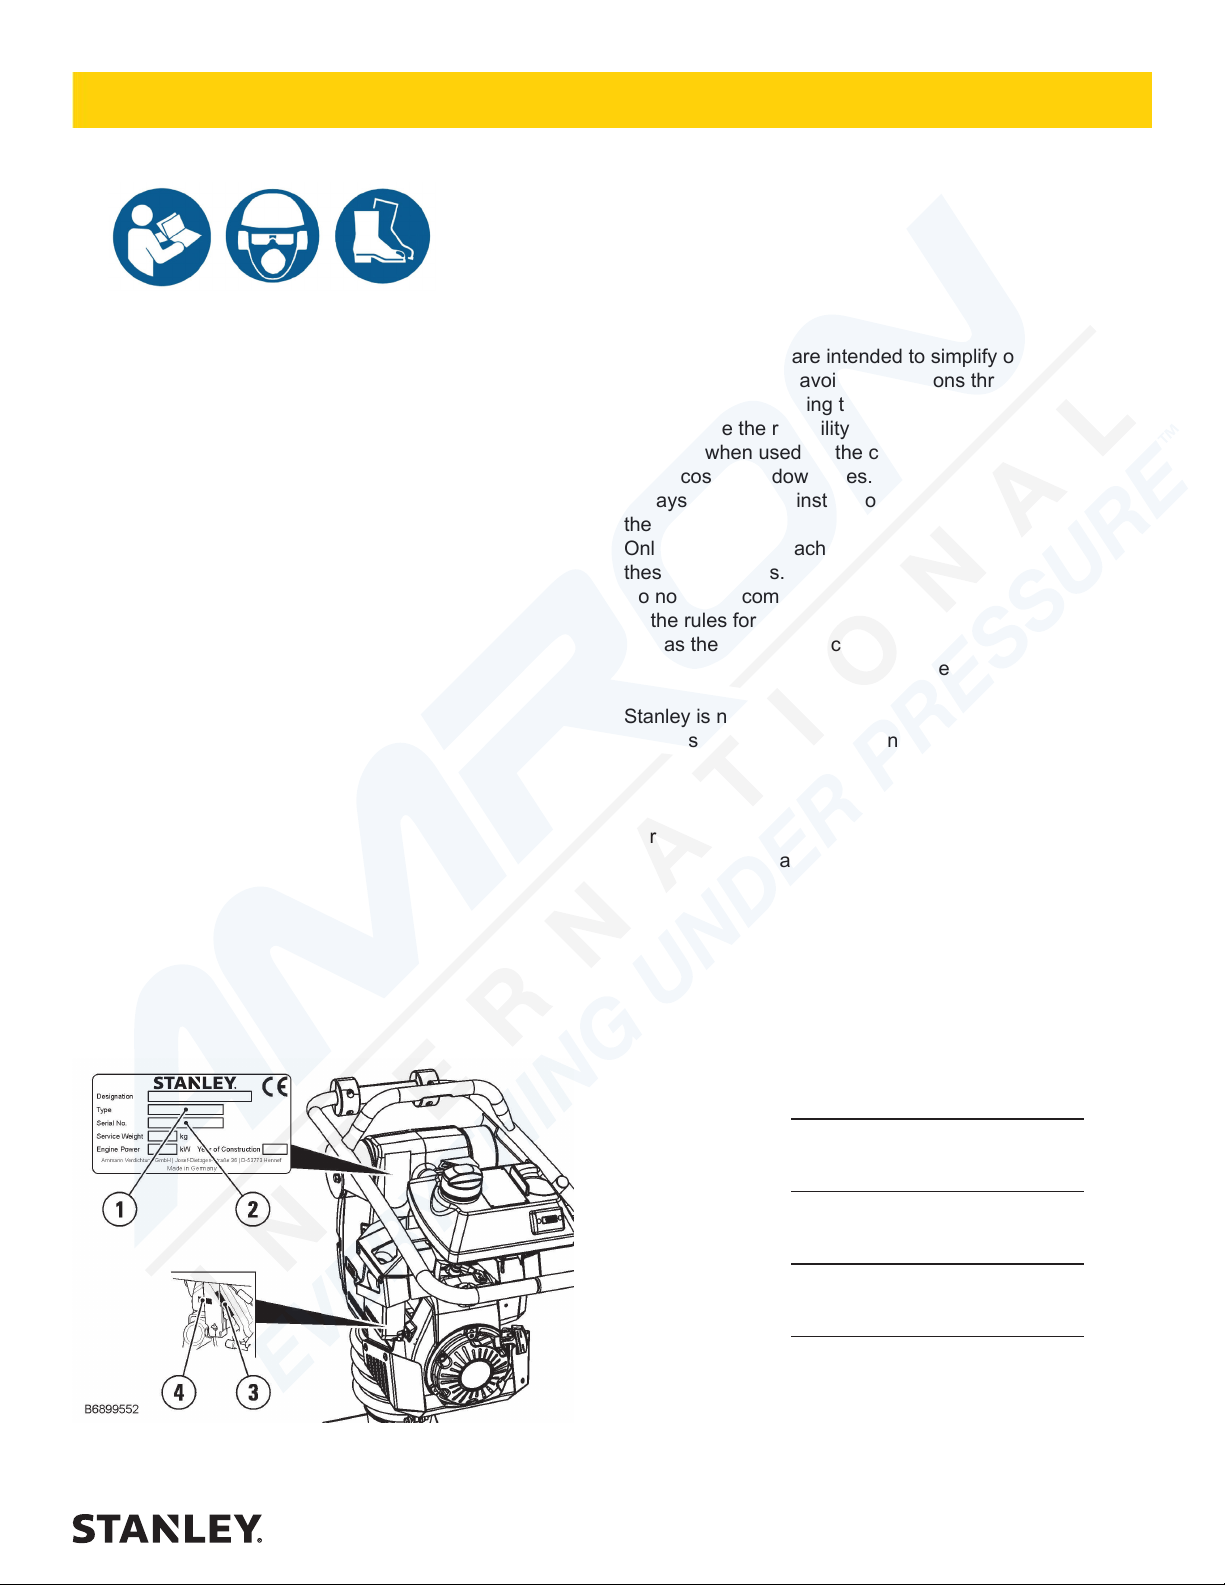
Use personal protective equipment (protective helmet, safety
shoes, etc.) Use hearing protection.
Before starting the machine, check whether:
• The machine has any noticeable defects
• All protective devices are securely in place
• The control elements function
• The machine is free from oily and ignitable material
• All handles are free from grease, oils, fuels, dirt, snow and ice.
Only use machines that have been regularly maintained.
Starting in enclosed spaces, tunnels, mines or deep ditches
Engine exhaust gas are highly dangerous!
For this reason, when operating the machine in enclosed spaces,
tunnels, mines or deep ditches, it is important to ensure that there
is sufcient air to breath (see UVV «Construction work», BGV
C22, paragraphs 40 and 41).
Operation
Guide the machine so that hands do not come against xed ob-
jects; risk of injury.
Guide the machine so that the operator cannot be crushed be-
tween the machine and hard objects.
Listen for any abnormal noise and smoke. Locate the cause and
have the damaged repaired.
Do not hold the throttle below «MAX», as this can damage the
centrifugal clutch.
Never release the machine with the engine running. Keep feet
away from the tamping base plate.
Parking the machine
If possible, park the machine on a level, rm surface.
Before leaving the machine:
Secure the machine to prevent it tilting.
Attention
Danger
Important

SRA User Manual ◄ 7
SAFETY
Refuelling
Only refuel the machine with the engine switched off. Do not
refuel the machine in enclosed areas.
Avoid naked ames, no smoking. Avoid fuel spillage.
Collect spilt fuel in a suitable container and prevent spillage enter-
ing the soil.
Do not inhale petrol fumes.
Maintenance
Only qualied and authorised persons may carry out maintenance
work.
Keep unauthorised persons away from the machine.
Never carry out maintenance work with the engine running. Park
the machine on a level, rm surface.
Working on the fuel system
Avoid naked ames, no smoking, avoid fuel spillage. Collect spilt
fuel in a suitable container and prevent spillage entering the soil.
Dispose of spilt fuel in an environmentally acceptable manner.
Do not inhale petrol fumes.
Working on the engine
When working on the air lter, no dirt must fall into the air duct.
Do not work on the exhaust when hot; risk of burns!
When working on the engine exhaust port, no combustion resi-
dues must fall into the cylinder.
Do not touch the piston with cleaning tools.
Working on the tamping plate
Wipe off any excess oil, collect spilt oil in a suitable container and
dispose of in an environmentally acceptable manner.
Keep oily materials in a specially marked container and dispose of
in an environmentally acceptable manner.
Cleaning
Never clean the machine with the engine running.
Never use petroleum spirit or other ammable materials for clean-
ing purposes.
When using pressure cleaning equipment, do aim the jet directly
at electrical parts and insulating material or cover these before-
hand.
Do not place the water jet directly in the air lter, exhaust or air
intake port.
After completing maintenance work
Ret all protective devices on completing maintenance work.
Repair
Only qualied and authorised persons may carry out repairs.
Exhaust gases are dangerous! When starting the machine in en-
closed areas, sufcient ventilation must be ensured!
If the machine should break down, hang a warning sign on the
control arm.
Testing
Road rollers, trench rollers and vibrating plates and tampers must
be tested for safety depending on the operating conditions as
required,however at least once a year by an expert.
Disposal of the machine after nish of its service life
At disposal of the machine after nish of its service life, the owner
is obliged to comply with national regulations and laws on wastes
and protection of environment. Therefore we recommend in such
cases to contact the following:
• professional specialized companies engaged in such activities
and having the relevant certicate.
• the manufacturers or contracting service organizations autho-
rized by him.
The manufacturer is not responsible for damages to health of
owners neither for damages to the environment in events of failing
to comply with above mentioned hygienic and ecological priciples.

8 ► SRA User Manual
TECHNICAL DATA
SRA 60 SRA 68
1. DIMENSIONS
A 340 MM / 13.3 IN
B 280 MM / 11 IN
C 710 MM / 28 IN
D 1020 - 1120 MM / 40.1 IN - 44 IN
E 355 MM / 14 IN
2. WEIGHTS
SERVICE WEIGHT (CECE) 62 KG / 136.6 LB 68 KG / 150 LB
3. DRIVE
ENGINE HONDA GX100 HONDA GX100
TYPE SINGLE-CYLINDER, FOUR-STROKE PETROL
POWER OUTPUT ISO 9249 2.2 KW (3.0 HP)
SPEED 4300 1/MIN
COOLING FORCED AIR
TANK CAPACITIY 3.2 L / 0.85 GAL
FUEL CONSUMPTION ABOUT 0.9 L/H
4. VIBRATION
NUMBER OF IMPACTS 680 1/MIN
JUMPING HEIGHT UP TO 65 MM / 2.55 IN
WORKING SPEED UP TO 13.5 M/MIN.
TAMPING CAPACITY UP TO 225 M²/H
COMPACTION DEPTH, MAX. UP TO 45 CM UP TO 50 CM
IMPACT FORCE 11.5 KN 13 KN
IMPACT ENERGY 90 J 105 J

SRA User Manual ◄ 9
TECHNICAL DATA
SRA 60 SRA 68
5. OPTIONAL EQUIPMENT
CYCLONIC FILTER
TRANSPORTATION WHEELS
BASE PLATE B=165 MM / 6.5 IN.
BASE PLATE B=200 MM / 8 IN.
BASE PLATE B=230 MM / 9 IN.
BASE PLATE B=330 MM / 13 IN.
BASE PLATE B=400 MM / 16 IN.
BASE PLATE B=340 MM ASYMMETRICAL
TAMPING FOOT EXTENSION
OPTION (STANDARD, NO GUAGE)
OPTION - TRAILER ASSY P/N-75085 SEE PARTS MANUAL PAGE 27
OPTION (P/N-75348)
OPTION (P/N-75347)
OPTION (P/N-75346)
OPTION (P/N-75358
OPTION (P-N-75359)
OPTION (P/N-75367)
OPTION (P/N-75370)
6. NOISE AND VIBRATION DATA
THE FOLLOWING NOISE AND VIBRATION DATA ACCORDING TO EC MACHINERY DIRECTIVE IN THE VERSION
(2006/42/EC), WAS DETERMINED, TAKING INTO ACCOUNT THE FOLLOWING STANDARDS AND DIRECTIVES. IN
OPERATIONAL USE, VALUES CAN DEVIATE DEPENDING ON THE PREVAILING CONDITIONS.
6.1 NOISE DATA1)
THE NOISE DATA SPECIFIED IN APPENDIX 1, SUB-CLAUSE 1.7.4.U OF THE EC MACHINERY DIRECTIVE IS FOR:
SOUND PRESSURE LEVEL AT THE
WORKPLACE LPA
94 dB
MEASURED SOUND POWER LEVEL LWA,
M
105 dB
GUARANTEED SOUND POWER LEVEL
LWA,G
108 dB
THE NOISE VALUES WERE DETERMINED, TAKING INTO ACCOUNT THE FOLLOWING DIRECTIVES AND STAN-
DARDS: DIRECTIVE 2000/14/EC / EN ISO 3744 / EN 500-4
6.2 VIBRATION DATA
HAND/ARM VIBRATION VALUES ACCORDING TO APPENDIX 1, SUB-CLAUSE 3.6.3.1 OF THE EC MACHINERY
DIRECTIVE:
TOTAL VIBRATION VALUE OF THE ACCEL-
ERATION AHV
13 m/s² 11 m/s²
UNCERTAINTY K 1.0 m/s²
THE ACCELERATION VALUE WAS DETERMINED, TAKING INTO ACCOUNT THE FOLLOWING DIRECTIVES AND
STANDARDS: EN 500-4 / DIN EN ISO 5349
1) AS THE PERMISSIBLE RATING SOUND LEVEL OF 85 DB (A) CAN BE EXCEEDED BY THIS MACHINE, OPERATORS
MUST WEAR HEARING PROTECTORS.

10 ► SRA User Manual
OPERATION
The SRA 60 / 68 vibrating tamper is a reliable compacting
device thanks to its stable, robust design.
The engine drives the crank mechanism by a centrifugal
clutch and a transmission.
The machine is to be used only for:
• Compacting all types of ground
• All types of ground repair work
• Paving pathways
• Work in ditches
• Underlling and compression of shoulders
Description
Use caution on sloping embankments! Slipping
hazard from rolling material and slick surfaces.
Do not work on concrete or hardened surfaces.
Danger
Overview
1 FUEL TANK
2 GUIDE BAR, ADJUSTABLE
3 FUEL TAP
4 CHOKE LEVER
5 ENGINE
6 CARRYING HANDLE
7 PADFOOT
8 CENTRIFUGAL CLUTCH / CRANK MECHANISM
9 TRANSPORT ROLLER
10 ACCELERATOR
Use personal protective equipment (especially
noise protection devices and safety shoes). Follow
the safety instructions.
Follow the operation and maintenance manual.
Read the motor operating manual.Comply with its
instructions for safety, operation and
maintenance.
• Set the machine on an even surface.
• Inspection:
- Motor oil level
- Fuel supply
- Padfoot oil level
- Fuel tank and lines for leaks
- Bellows for damage and leaks
- Screw connections for tightness
- Conditions of the motor and the machine
• If lubrication is needed, add it according to the lubrication
chart.
Danger

SRA User Manual ◄ 11
OPERATION
Engine Operation
Low oil protection
The motor is equipped with low oil protection:
• If the motor oil is too low, the motor won't start.
• When the starter handle (1) is pulled, the control light (2)
blinks. In this case
- Check the motor oil level and top it off, if necessary.
• Repeat the starting process.
Start the Engine
• Turn the fuel tap (3) «ON».
• Set the choke lever (4) to «CLOSE».
Do not use the choke (4) if the motor is hot or
the outdoor temperature is high. If the motor
doesn't start at operating temperature, close
the choke before starting.
Important
• Set the throttle (5) to «MIN».
If the motor doesn't start, set the throttle lever
about 1/3 of the way to «MAX».
Important

12 ► SRA User Manual
OPERATION
•
Turn the motor switch (6) to «ON».
• Pull the starter handle (1) lightly until you feel resis-
tance (I.), and then pull it hard all the way (II.).
Don't let the starter handle (1) spring back against
the motor. Manually return the starter rope back to
the initial position to prevent damage to the starter.
Attention
After the motor starts
• Set the throttle lever to «MIN» (idle).
• Let the motor warm up for one or two minutes.
• Slide the choke lever (4) to «OPEN» while the
machine warms up.

SRA User Manual ◄ 13
OPERATION
Shutting off the motor
In emergency situations, turn the motor switch
to «OFF» to shut off the motor.
Important
• Set the throttle lever (5) to «MIN».
• Turn the motor switch (6) to «OFF».
• Set the fuel tap (3) to «OFF».
Working with the tamper
Setting the working height
Setting the guide bar out of the optimal position
can increase hand/arm vibration. This must be
considered when determining the exposure period.
Attention
• Loosen the screws (1) enough so that the bracket moves
up and down. Do not take them completely out.
• Set the working height by turning the guide bar (2).
• Tighten the screws (1).
• To set the ergonomically optimal position
- Loosen the screws (1),
- Set the markers above one another.
- Tighten the screws (1).

14 ► SRA User Manual
Operation
Important
Danger
OPERATION
Guide the machine only with the guide bar, and
don't lift it during operation.
Always keep an eye on the machine when its
motor is running.
• The operator's position is in the forward direction behind
the machine.
• Set the throttle (5) to «MAX»; the machine works at its
highest frequency.
If the motor oil is too low, the motor won't start.
The dumping height of the material to be com
pressed should not be higher than the vibrating
tamper can drive over.
• To get uniform operating performance, throttle lever
should be at max position.
Rate of Advance
• The rate of advance can be inuenced in two ways:
- By changing the tilt:
Forward tilt = forward quickly
Rearward tilt = forward slowly
- By putting weight on the guide bar:
No weight = forward slowly
Heavy weight = forward quickly

SRA User Manual ◄ 15
TRANSPORT
Transporting and Loading
Transporting over short distance
The machine must only be transported or loaded
with the motor off.
Make sure that the machine does not endanger
people by tilting or sliding.
Tie the machine down so that it is secured against
rolling, sliding or tipping over.
When lifting the machine, hang the lifting device
only in the cross member provided.
The machine should not swing during suspension.
Do not stand under suspended loads.
Use only safe, sufciently strong lifting devices.
General Instructions
• Do not lay the tamper on the carburettor side.
Danger
• Over short distances, transport the tamper lying on the
castors, with the motor shut off.
Loading
• To load the tamper, hang the slinging equipment in the
cross member (1).
Tying the machine down
• After loading the tamper on the vehicle, tie it down
through the guide bar and handle.

16 ► SRA User Manual
MAINTENANCE
General Information
Careful maintenance:
Extended life expectancy.
Higher functional reliability.
Lower idle times.
Higher reliability.
Lower repair costs.
• Observe the safety regulations!
• Only carry out maintenance with the engine switched off.
• Before carrying out maintenance work, remove the spark
plug connector.
• Clean the engine and machine prior to carrying out main-
tenance work.
• Park the machine on a level surface and secure to prevent
rolling and slipping.
Maintenance Schedule
• Ensure that fuels, lubricants and replacement parts are
disposed of in a safe and environmentally acceptable
manner.
• Avoid short-circuits on current-carrying cables.
• When cleaning the machine with a high-pressure water
jet, do not aim the jet directly at electrical components.
• After washing, blow components dry with compressed
air to prevent creepage currents or corrosion.
Works
Intervals Daily 20 h 50 h 100 h 200 h 300 h As
Required
Clean machine •
Check engine oil level 1)•
Change engine oil 1)• 3)•
Check air lter &
Foam Air Filter 1)•
Clean air lter &
Foam Air Filter1)• •
Change air lter element 1) 2)• •
Clean fuel lter 2)•
Check/clean spark plug 1)•
Change spark plug 1) 2)•
Check valve clearance 1)•
Cle an spark arrester 1)•
Check timing belt 1)•
Checking the bellows •
Tamping system: Check oil level •
Tamping system: Change oil 2)•
Check rubber buffers •
Check screwed connections for
tightness • 3)•
1)See engine operating manual
2)minimum once a year
3)for the rst time

SRA User Manual ◄ 17
MAINTENANCE
Lubrication Schedule
Lubricating point Quantity Changing intervals
[operating hours] Lubricant Order No.
1. Engine
Honda GX100 0.4 l First time after 20 h;
then every 100 h
Engine oil
API SG-CE
SAE 10W40
2-80601100
2. Tamping system
0.65 l After 200 h
or annually
Engine oil
API SG-CE
SAE 10W40
2-80601100
Alternative Lubrication Schedule

18 ► SRA User Manual
MAINTENANCE
Motor Maintenance
This operating manual explains only the daily motor mainte-
nance. Be aware of the motor operating manual and the
maintenance instructions and intervals given in it.
Rell with fuel
Add fuel only when the motor is shut off.
No open ame.
No smoking.
Do not ll the tank in enclosed spaces.
Do not inhale fuel fumes.
Do not spill fuel. Clean up leaking fuel. Do not let it
seep into the soil.
Danger
• Shut off the engine.
• Close the fuel tap (1).
• Clean the area around the fuel ller pipe (2).
• Open the fuel ller pipe.
• Visually check the fuel level. Refuel when the fuel is low.
Never use stale or contaminated petrol or an oil/
petrol blend. Make sure no dirt or water gets into
the fuel tank.
Important
• Pour the fuel up to the lower edge of the tank's maximum
fuel level line. Do not overll. Use only unleaded fuel.
• Wipe up spilt petrol before starting the motor.
• Tightly close the fuel cap (2).
Checking the motor oil level
Collect used oil and dispose of it in an
environmentally sound way.
Do not let oil seep into the ground or sewer.
Replace defective seals immediately.
• Set the vibrating tamper aside horizontally.
• Shut off the engine.
Environment
• Pull out the oil cap/dipstick (1) and clean it.
• Put the oil cap/dipstick (1) into the ller hole, but don't
screw it in.
• Pull the oil cap/dipstick (1) out and check the oil level.
• If necessary, ll the oil to the upper limit mark (the lower
edge of the ller hole). Do not overll.
• Screw the oil cap/dipstick (1) in and lock it.

SRA User Manual ◄ 19
MAINTENANCE
Cleaning the Fuel Filter
No open ame.
No smoking.
Do not inhale fuel fumes.
Do not spill fuel. Clean up leaking fuel.
Do not let it seep into the soil.
Danger
• Loosen the fuel hose (1) and pull it off the fuel tap.
• Open the fuel tap (2).
• Drain and collect the fuel.
• Screw off the fuel tap (2).
• Screw off the fuel lter (3) and clean it in petroleum ether.
• Put the fuel lter (3) and the fuel tap (2) back on.
Optionally use a new seal.
• Install the fuel hose.

20 ► SRA User Manual
MAINTENANCE
Air Filter
Replace the lter element:
– when the lter element is damaged
– if there is wet or oily contamination
– after six cleanings
– if motor performance suffers
– at least once a year
When cleaning the machine with a pressure washer, do
not hold it directly over the air lter or pre-separator.
Never use petrol or cleaning solutions with a low
ash point to clean the air lter element.
In the work area, do not smoke, and prevent open
ames or sparks. These pose a re or explosion hazard!
Never run the motor without an air lter.
Do not allow dirt into the air channel and carburettor.
• Clean the intakes (1).
• Loosen the wing nuts (2).
• Remove and clean the lter cover (3) with the wing nut.
• Carefully pull the lter cartridge (4) out of the lter housing (5).
Attention
• Clean the lter housing (5), especially at the back.
• Hold the lter cartridge (4) at an angle up to the light, or shine
light through it, and check it for tears and other damage.
• Blow dry compressed air (max. 5 bar) through the lter car-
tridge (4) from the inside out.
Wear safety glasses - eye hazard!
Danger • Note the number of lter cartridge cleanings.
• Carefully install the lter cartridge (4).
• Put on the lter cover (3).
Other manuals for SRA60
1
This manual suits for next models
1
Table of contents