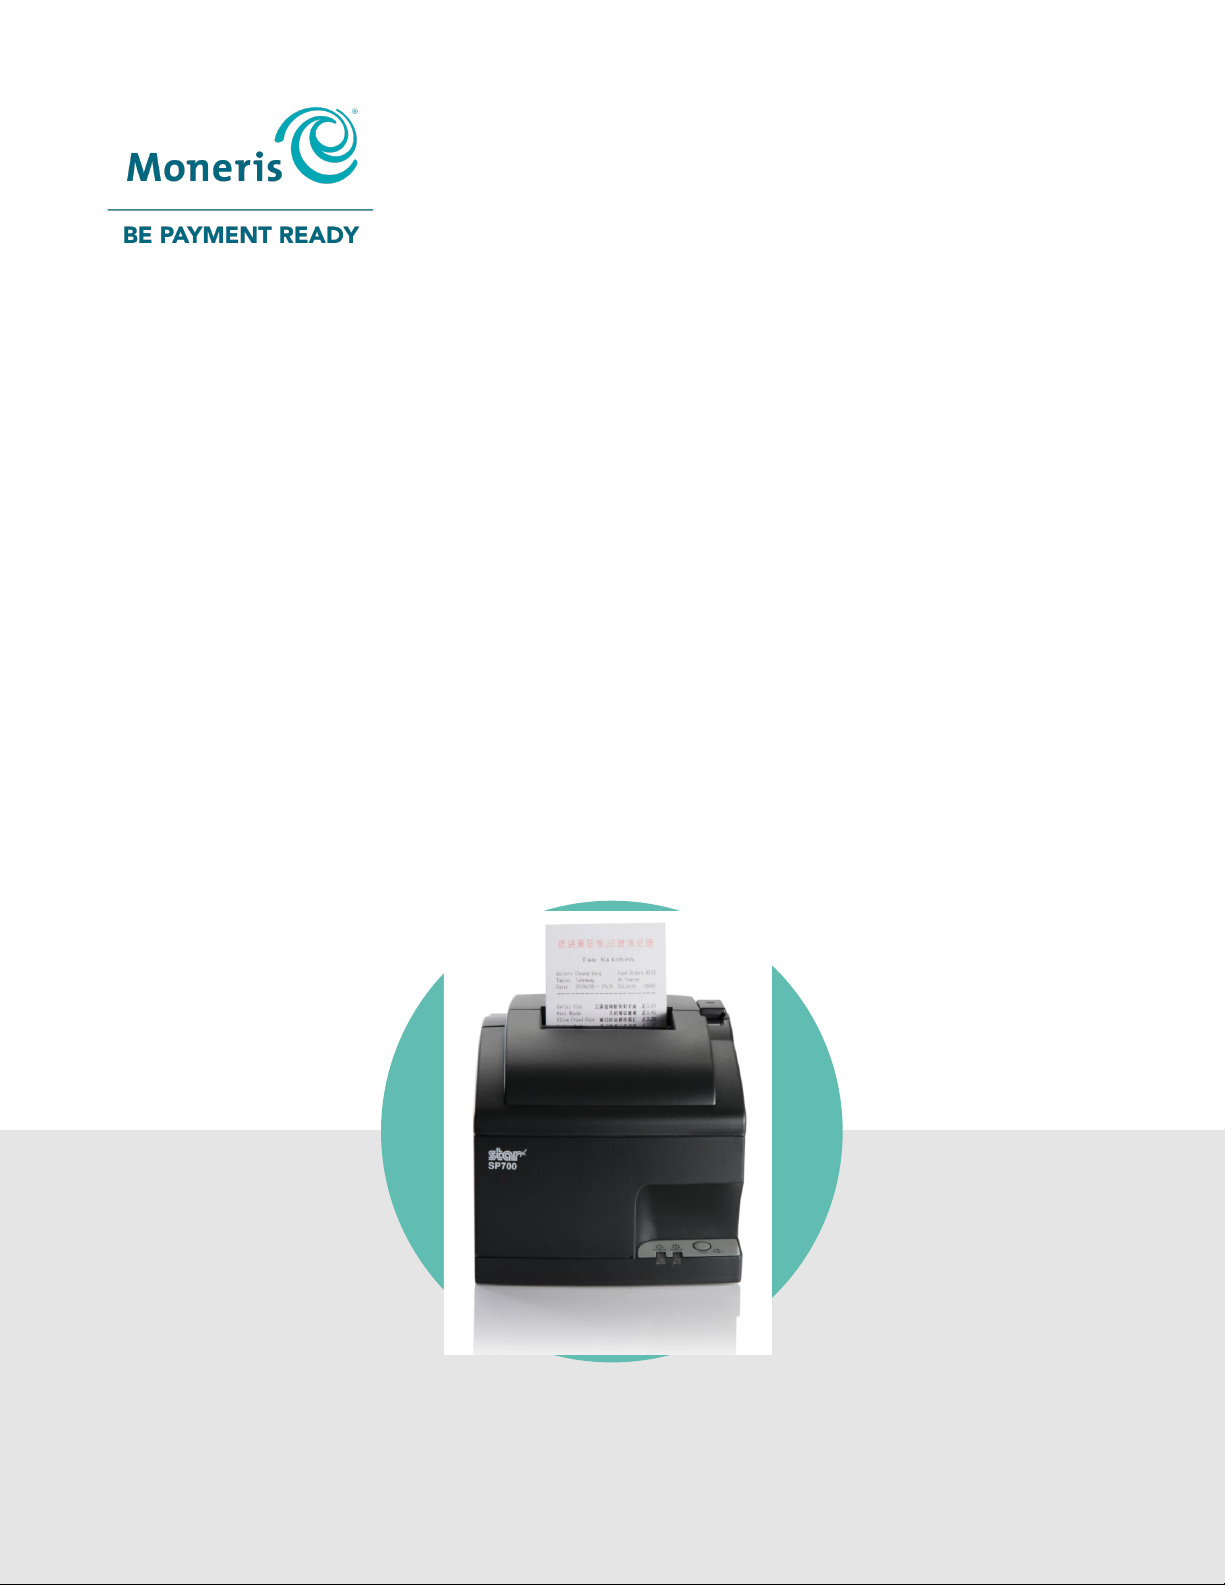
Star SP700 Series User manual
(05/2022)
Moneris Go Appétit
Hardware Installation Guide

Need help?
Toll free: 1-866-319-7450
Web: moneris.com/support-goappetit
Record your Moneris merchant ID here:

Moneris Go Appétit: Hardware Installation Guide 1
Contents
Setting up your hardware .............................................................................................2
Before you get started.................................................................................................................................. 3
Setting up the kitchen printer....................................................................................................................... 4
Before you get started........................................................................................................................................4
Set up the printer hardware...............................................................................................................................4
Enable the printer in the portal..........................................................................................................................5
Assign the printer to a kitchen ...........................................................................................................................6
Troubleshooting printer issues ..................................................................................................................... 8
Merchant support.......................................................................................................11

Moneris Go Appétit: Hardware Installation Guide 2
In this section, we go over everything you need to
know to set up your hardware for the Moneris Go
Appétit restaurant solution.
Setting up your hardware
Setting up
your hardware

Moneris Go Appétit: Hardware Installation Guide 3
Before you get started
Before you begin installing the hardware in your restaurant, please ensure you have the following:
Access to the Moneris Go Appétit portal on a PC or laptop
A suitable place to situate your hardware within your restaurant environment, e.g., a location away from
heat and water sources.
The Kitchen Display tablets need to be on the same network (using the same router) as the kitchen printer
to ensure orders get printed.

Moneris Go Appétit: Hardware Installation Guide 4
Setting up the kitchen printer
The kitchen printer should be placed in the kitchen, but away from any heat sources or areas where it can get
splashed or dirty with food particles during the process of preparing dishes for your customers.
These instructions explain how to set up the printer hardware, how to enable the printer in the portal, and how
to assign the printer to a kitchen. Follow the instructions in this section for all kitchen printers in your restaurant.
Before you get started
In order to properly set up the printer, ensure the following conditions have been met:
You are able to login to the Moneris Go Appétit portal.
Kitchens have been created and defined in the Moneris Go Appétit portal. For more information on creating
and defining kitchens, refer to the Moneris® Go Appétit: Using your Restaurant Solution guide.
The Kitchen Display tablets are functioning and on the same network as the router to which you connect the
kitchen printer.
Set up the printer hardware
Note: You are required to connect the printer to the WiFi router in your establishment that provides connection
to your Kitchen Display tablets. You may need to contact your network/IT technician to help you with the wiring
and running cable.
1. Follow the manufacturer’s instructions to connect the power and Ethernet cables to the rear of the printer.
2. Follow the manufacturer’s instructions to install the paper roll and ribbon inside the printer.
3. Connect the Ethernet cable to an available port on your router.
4. Turn on the printer by toggling the power switch on the right side of the printer.

Moneris Go Appétit: Hardware Installation Guide 5
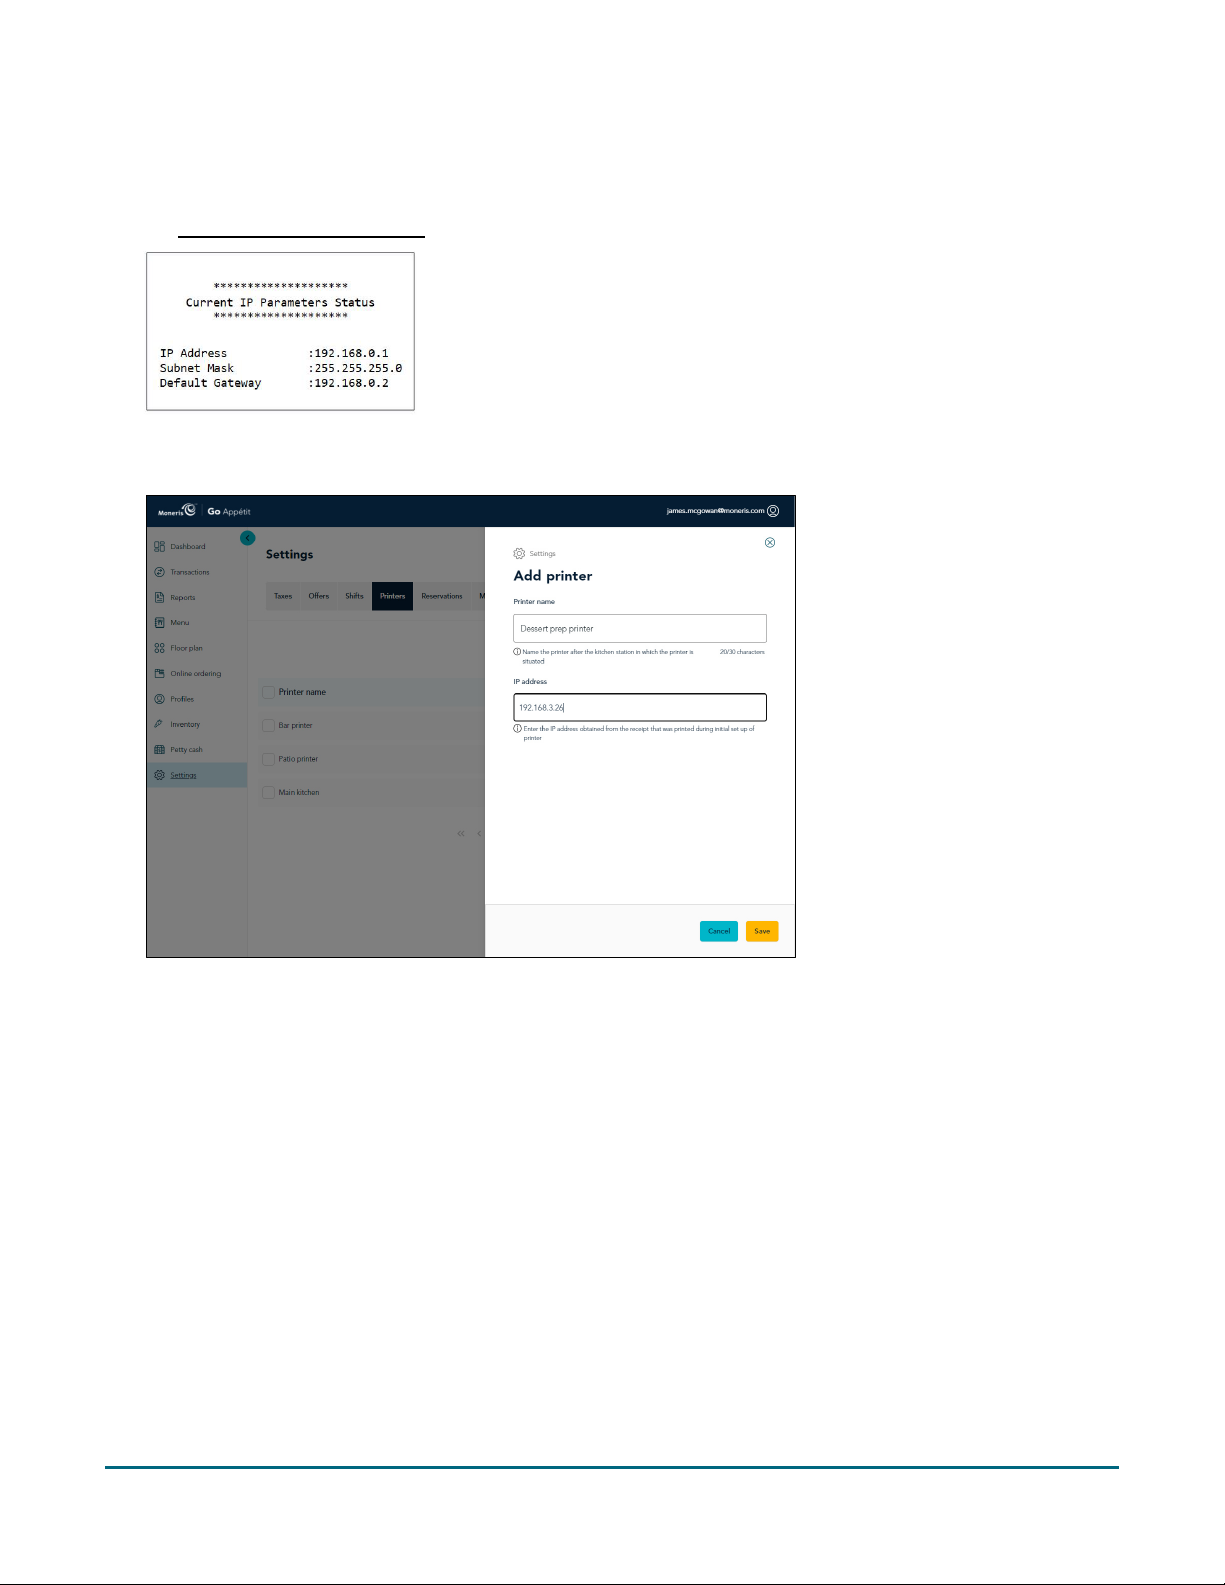
5. Once the printer powers on and you see the green LED, power off the printer using the toggle switch.
6. Hold down the FEED button on the front of the printer, and use the toggle switch to power it back on again.
The printer will print two long receipts. Keep these receipts to use for later setup steps.
7. Repeat steps 1-6 to install other kitchen printers in other kitchens in your business as necessary.
Enable the printer in the portal
Now that the printer hardware has been set up, it needs to be enabled in the Go Appétit portal. Follow the
instructions below to enable the printer.
Note: For information on logging in to the portal, refer to the Moneris® Go Appétit: Using your Restaurant
Solution guide.
1. Log in to the portal using your credentials.
2. On the main menu, click Settings.
3. On the Settings screen, click the Printers tab at the top of the screen.
4. On the Printers tab, click the Add printer button.
5. In the Add printer side panel, click inside the Printer name field and give this printer a name.
Note: You should name the printer after the kitchen in which it is situated.
Moneris Go Appétit: Hardware Installation Guide 6
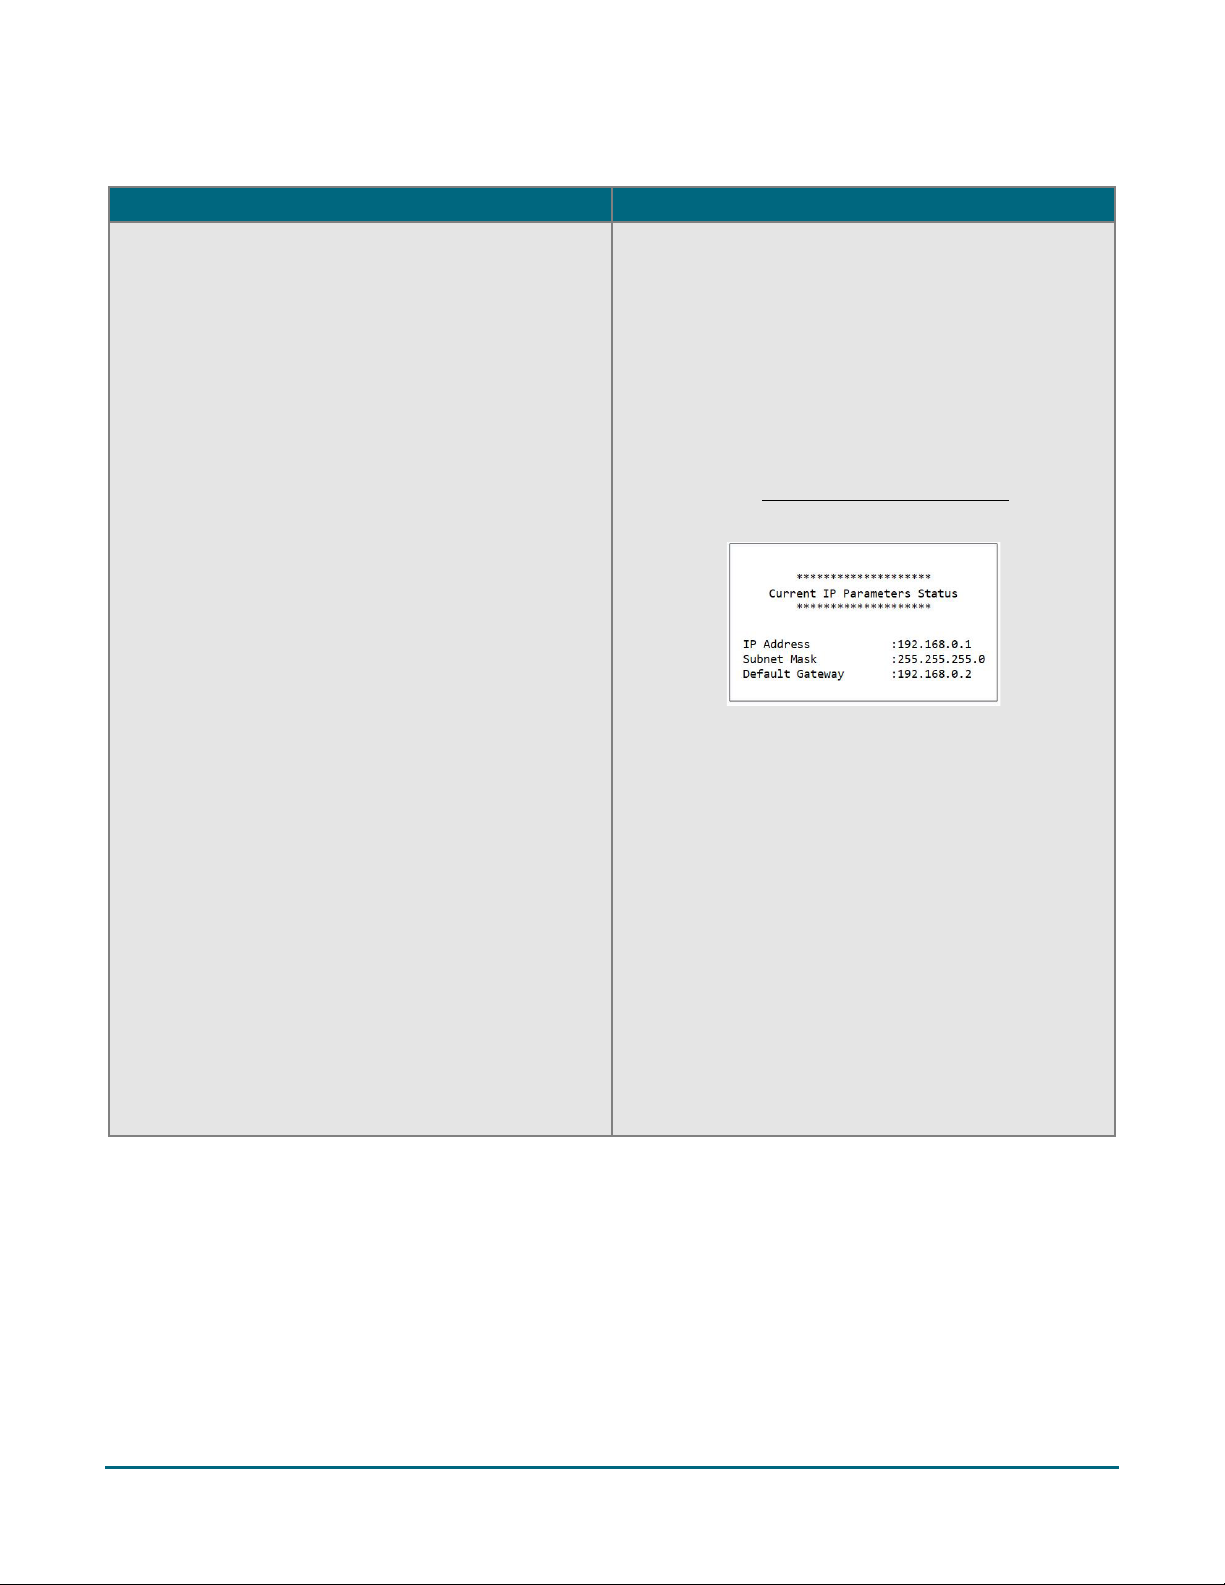
6. Click inside the IP address field and enter the IP address obtained from the receipt that printed in step 6 of
the Set up the printer hardware section on the previous page.
Note: You only need to add the numbers and the periods. The printout shows something called “BOOTP”
that is not required for this field.
7. Click the Save button at the bottom of the screen.
8. If you need to add other printers, click the Add printer button and repeat steps 5-7 for those additional
printers as well.
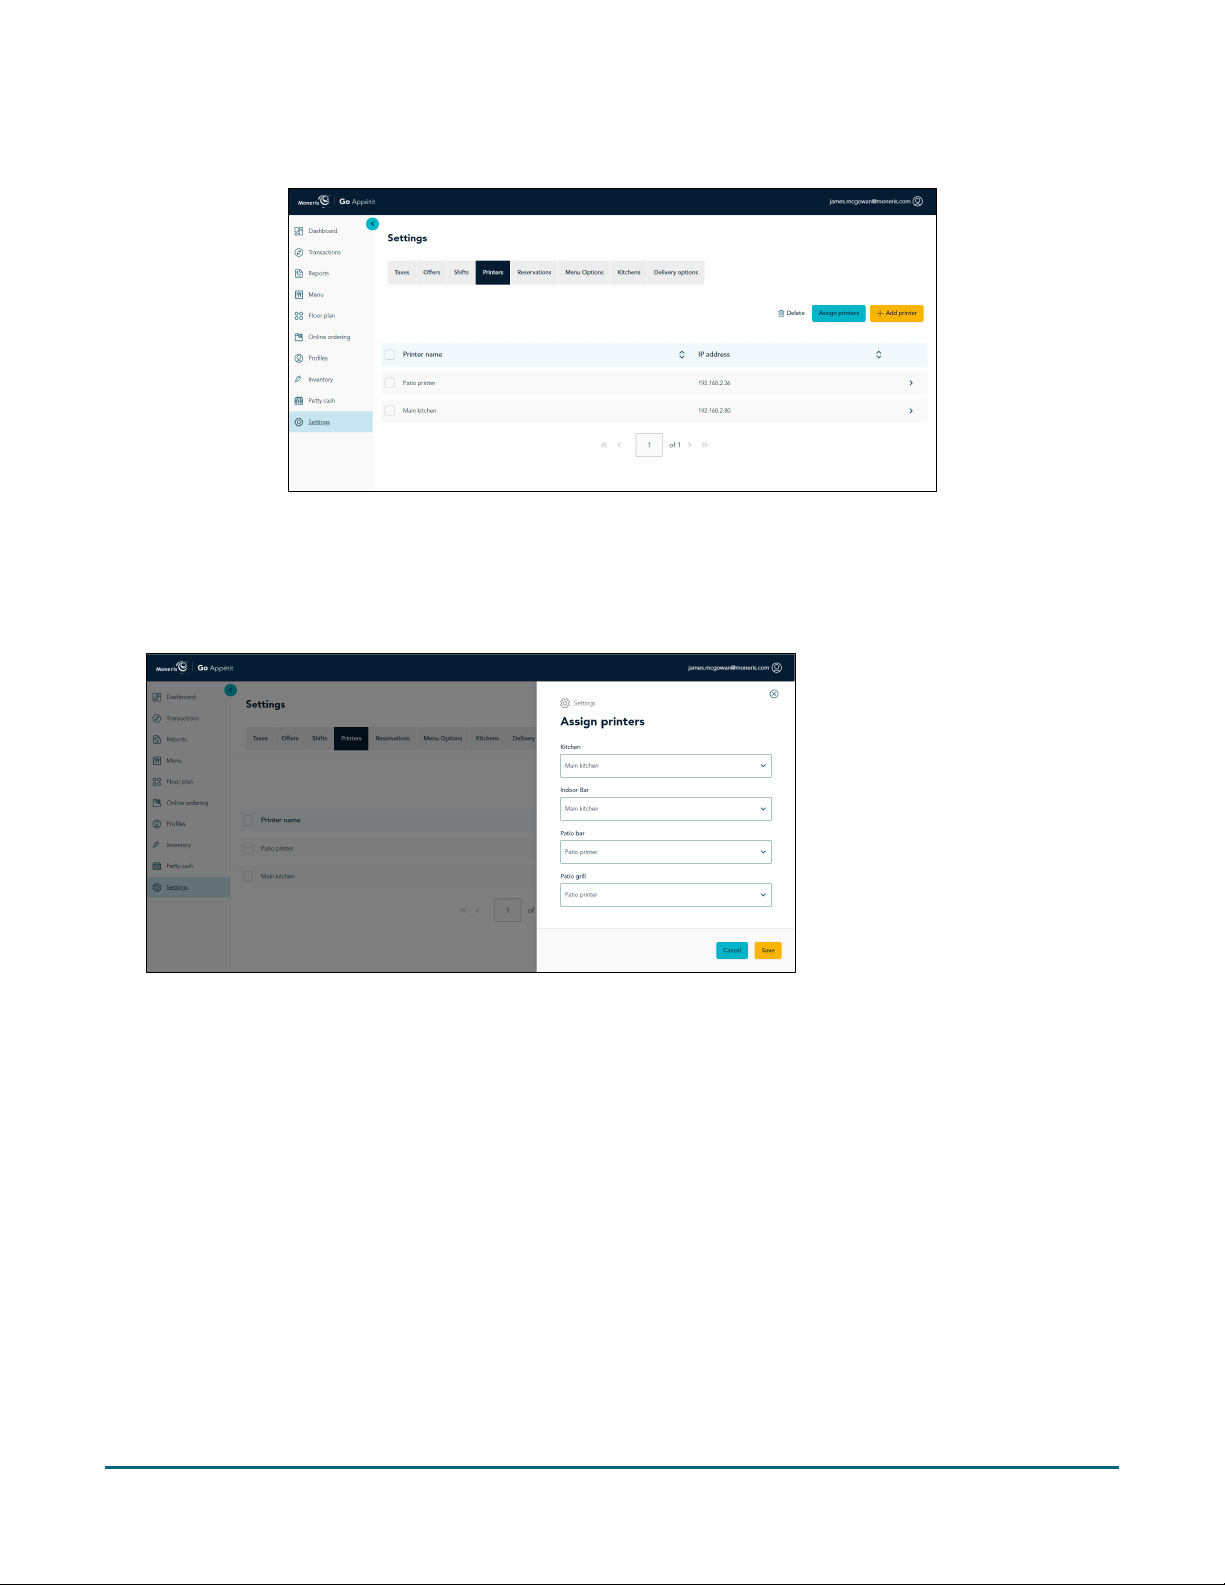
Assign the printer to a kitchen
The final step is to assign the printer to a kitchen, so that as orders are sent from the app on the terminal or
tablet, they are printed off.
Moneris Go Appétit: Hardware Installation Guide 7
1. In the portal, click the Printers tab on the Settings screen.
2. Click the Assign printers button.
3. In the Assign printers panel, for each kitchen listed, click the drop-down menu and select the printer to
which you will route the orders.
4. When finished, click the Save button.
A popup confirmation appears.
Congratulations! You are now ready to print order tickets from your kitchen printers.
Moneris Go Appétit: Hardware Installation Guide 8
Troubleshooting printer issues
Refer to the table below for some troubleshooting steps in case you are having problems with your printer.
Issue
Solution
Printer is printing and the paper is feeding, but
printing is not visible on the paper.
The ribbon may be installed incorrectly in the
printer’s housing, or the section of the ribbon you are
using has dried out. Try the following steps to
resolve:
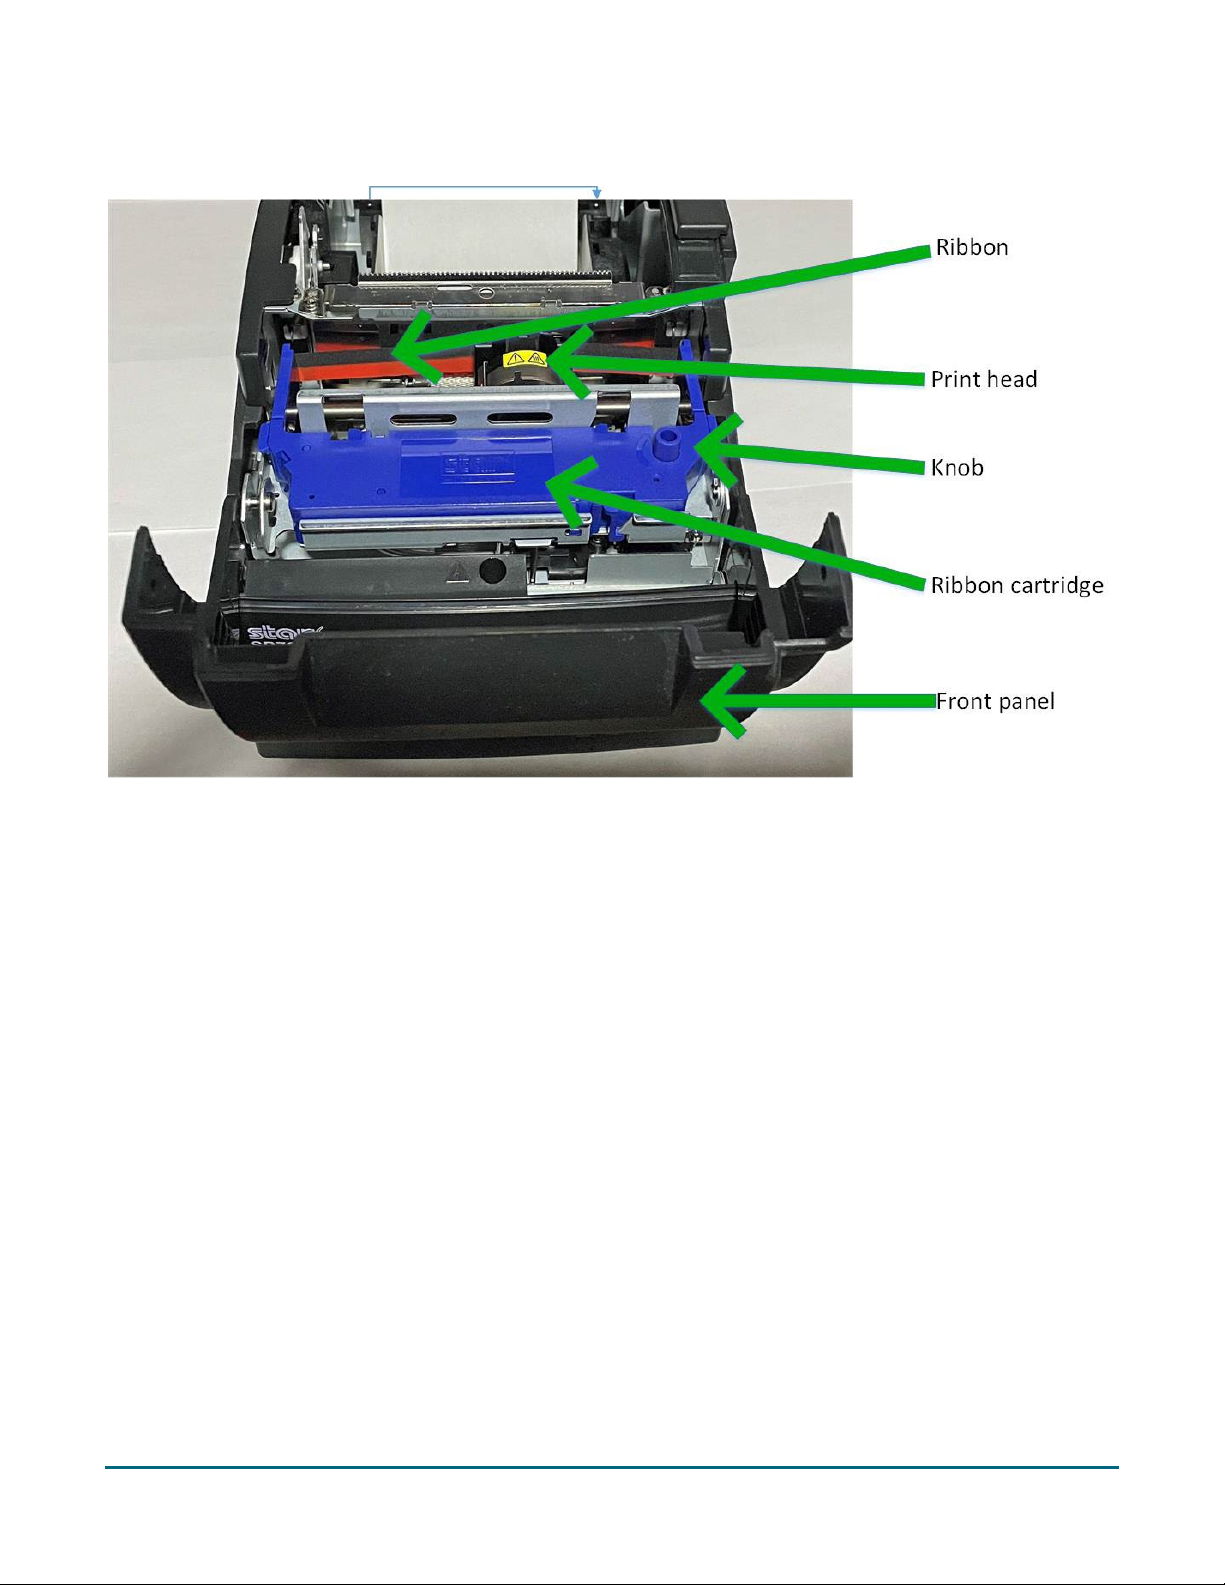
1. Power off the printer.
2. Open the lid of the printer where you insert the
paper roll, then open the front panel to expose
the ribbon.
3. Ensure the ribbon is situated correctly, with the
black portion of the ribbon on top and the red
portion on the bottom, and that the ribbon is
situated between the print head and the paper.
Refer to the image on page 10 for more
information on the interior of the printer.
4. (Optional) Turn the blue knob on the ribbon
cartridge clockwise to advance the ribbon.
5. Close up the front panel, then close up the lid.
6. Hold down the FEED button on the front of the
printer, and use the toggle switch to power it
back on again.
The printer will print two long receipts. If you see
printing on the paper, it is working.
Moneris Go Appétit: Hardware Installation Guide 9
Issue
Solution
Kitchen tickets not printing when orders are received There is most likely an issue where your Kitchen
Display tablets are not on the same Wi-Fi network
that your printer is connected to. This can occur
when there are multiple routers in a building, and the
kitchen tablet is accessing the network from a
different router than the one the kitchen printer is
physically connected to.
Before you begin troubleshooting, be sure you have
the IP address obtained from the receipt that printed
in step 6 of the Set up the printer hardware section
on page 4.
1. Open your kitchen tablet’s Settings page, and
locate the Wi-Fi settings.
2. In the Wi-Fi settings, locate the IP address.
3. Check if the first 3 sets of numbers in the IP
address printed on the receipt match the first 3
numbers of the IP address displayed on the
tablet’s screen. For example, if your tablet IP
address is 192.168.10.20, and your printer shows
192.168.8.5, then they are indeed on different
networks.
4. Try changing the Kitchen Display tablet to a
different network, then comparing the IP
addresses until you can ensure that they are on
the same network following step 3 above.
Moneris Go Appétit: Hardware Installation Guide 10

Moneris Go Appétit: Hardware Installation Guide 11
At Moneris, help is always here for you 24/7.
Merchant support
Merchant
support

Moneris Go Appétit: Hardware Installation Guide 12
If you need assistance with your payment processing
solution, we’re here to help, 24/7.
We’re only one click away.
Visit moneris.com/support-goappetit to:
Access support resources for your Moneris Go Appétit restaurant solution
View how-to instructional videos
Visit shop.moneris.com to purchase point-of-sale supplies and receipt paper
Visit moneris.com/insights for business and payment news, trends, customer success stories, and quarterly
reports & insights
Need us on-site? We’ll be there.
One call and a knowledgeable technician can be on the way. Count on minimal disruptions to your business as
our Field Services provide assistance with your payment terminals.
Can’t find what you are looking for?
Call Moneris Customer Care (available 24/7) toll-free at 1-866-319-7450. We’ll be happy to help.
You can also send us a secure message 24/7 by logging in to Merchant Direct® at
moneris.com/mymerchantdirect.

MONERIS, MONERIS BE PAYMENT READY & Design and MERCHANT DIRECT are registered trademarks of Moneris Solutions Corporation. All other marks or
registered trademarks are the property of their respective owners.
© 2022 Moneris Solutions Corporation, 3300 Bloor Street West, Toronto, Ontario, M8X 2X2. All Rights Reserved. This document shall not wholly or in part,
in any form or by any means, electronic, mechanical, including photocopying, be reproduced or transmitted without the authorized consent of Moneris
Solutions Corporation. This document is for informational purposes only. Neither Moneris Solutions Corporation nor any of its affiliates shall be liable for
any direct, indirect, incidental, consequential or punitive damages arising out of use of any of the information contained in this document. Neither Moneris
Solutions Corporation or any of its affiliates nor any of our or their respective licensors, licensees, service providers or suppliers warrant or make any
representation regarding the use or the results of the use of the information, content and materials contained in this document in terms of their
correctness, accuracy, reliability or otherwise.
Your credit and/or debit card processing is governed by the terms and conditions of your agreement(s) for merchant credit/debit card processing services
with Moneris Solutions Corporation. It is your responsibility to ensure that proper card processing procedures are followed at all times. Please refer to the
Moneris Merchant Operating Manual (available at: moneris.com/caftc) and the terms and conditions of your applicable agreement(s) for credit/debit
processing or other services with Moneris Solutions Corporation for details.
MGA Hardware Install-EN (05/2022)
Other manuals for SP700 Series
2
Table of contents
Other Star Touch Terminal manuals


Popular Touch Terminal manuals by other brands


Beckhoff
Beckhoff KL9540 Documentation

Symbol
Symbol VRC 6940 Product reference guide

PairGain
PairGain HiGain Line Unit HLU-388 Quick installation guide

Vivotech
Vivotech ViVOpay 4800 user guide

POSIFLEX
POSIFLEX Jiva KS-6215 Series Technical manual

AddSecure
AddSecure IRIS-4 50 Quick Installation and Maintenance Guide


