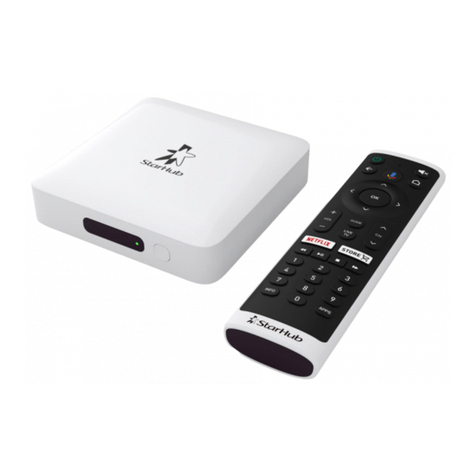
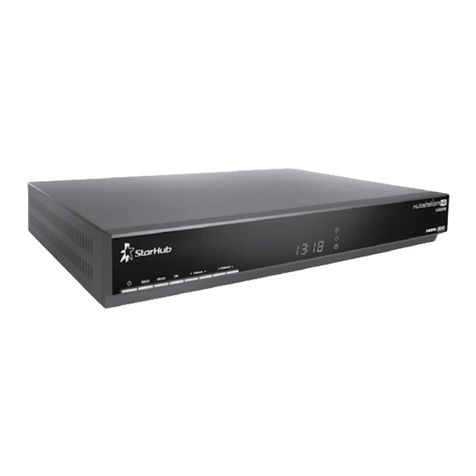
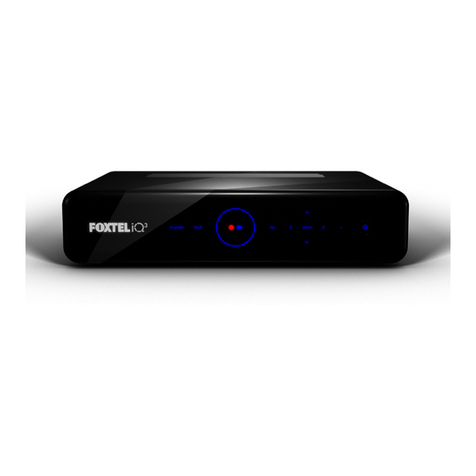
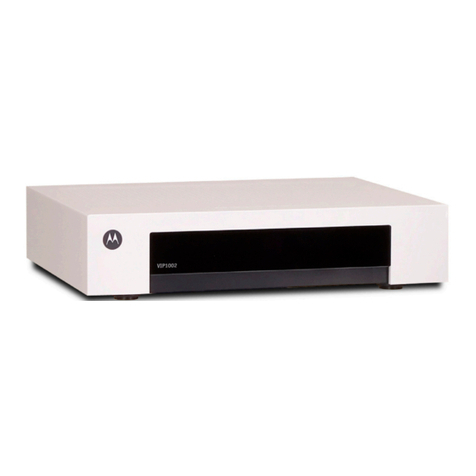
StarHub ABQ-1H57-SCV User manual


150711
Contents
1 Getting Started
Digital Set-top Box / 1–2
Remote Control / 3
Smart Card / 4
2 Guide To Digital Cable Applications
On-Screen TV Guide / 5
Genre Search / 6
Video Mosaic / 7
Info Bar / 8
Programme Information In Chinese / 9
Programme Alert (Set Reminder) / 9
Favourite Channel Setting / 10
Last Channel Recall / 10
Parental Lock Setting / 11
Auto-Tune Setting / 12
Change PIN / 13
Preference Settings / 14
3 Guide To Interactive Applications
Interactive TV / 15
TV Games / 15
eTV / 16
4 Technical Information
Installation Guide
Digital Set-top Box (ABQ-1H57-SCV)
- Option 1: Connection via AV cable (Recommended) / 17
- Option 2: Connection via RF cables – For TV units without AV inputs / 18
- Option 3: Connection via AV cables to VCR/DVD-R / 19
Digital Set-top Box (SCV-2110C)
- Option 1: Connection via AV cable (Recommended) / 20
- Option 2: Connection via RF cables – For TV units without AV inputs / 21
- Option 3: Connection via AV cables to VCR/DVD-R / 22
Digital Set-top Box (DCI15SHB)
- Option 1: Connection via AV cable (Recommended) / 23
- Option 2: Connection via RF cables – For TV units without AV inputs / 24
- Option 3: Connection via AV cables to VCR/DVD-R / 25
Tuning Procedures /26
Recording / 27-28

OK
Press both CHANNEL UP / DOWN buttons for confirrmation of selecion
BACK
Press both VOLUME UP / DOWN buttons to move back one level in the MENU System
Smart Card Slot
Graphics
Front Panel Buttons
POWER ON/OFF
Pressing button alternates between ON and STANDBY modes
CHANNEL UP/DOWN
Channel change or navigates when in MENU system
VOLUME UP/DOWN
Volume change or navigates when in MENU system
MENU
Enters and exits MENU system
POWER On LED Indicator
Green = ON
Red = Standby
Flashing = IR Transmission in progress
POWER On LED Indicator
Green = ON
Red = Standby
Flashing = IR Transmission in progress
MUTE
Red = Muted
Front Panel Buttons
LED Indicators
MESSAGE
Yellow = Message Waiting
ONLINE
Green = IP address
assigned by
external
cable modem
POWER ON/OFF
Pressing button alternates between ON and STANDBY modes
OK
Confirmation of selection
BACK
Moves back one level in MENU system
MENU
Enters and exits MENU system
CHANNEL UP/DOWN
Channel change or navigates when in MENU system
VOLUME UP/DOWN
Volume change or navigates when in MENU system
Smart Card Slot
Graphics
The digital set-top box provides you with a host of special features including the menu
system, volume control and channel navigation. You can access these features via the control
buttons on the front of the digital set-top box.
Getting Started
1
Digital Set-top Box (ABQ-1H57-SCV)
Digital Set-top Box (SCV-2110C)
5 Trouble Shooting
Tips for Improving TV reception / 29
6 Signal Leakage
A Reminder / 30
7 General Information
MACROVISION Product Notice / 30

OK
Press both CHANNEL UP / DOWN buttons for confirrmation of selecion
BACK
Press both VOLUME UP / DOWN buttons to move back one level in the MENU System
Smart Card Slot
Graphics
Front Panel Buttons
POWER ON/OFF
Pressing button alternates between ON and STANDBY modes
CHANNEL UP/DOWN
Channel change or navigates when in MENU system
VOLUME UP/DOWN
Volume change or navigates when in MENU system
MENU
Enters and exits MENU system
POWER On LED Indicator
Green = ON
Red = Standby
Flashing = IR Transmission in progress
POWER On LED Indicator
Green = ON
Red = Standby
Flashing = IR Transmission in progress
MUTE
Red = Muted
Front Panel Buttons
LED Indicators
MESSAGE
Yellow = Message Waiting
ONLINE
Green = IP address
assigned by
external
cable modem
POWER ON/OFF
Pressing button alternates between ON and STANDBY modes
OK
Confirmation of selection
BACK
Moves back one level in MENU system
MENU
Enters and exits MENU system
CHANNEL UP/DOWN
Channel change or navigates when in MENU system
VOLUME UP/DOWN
Volume change or navigates when in MENU system
Smart Card Slot
Graphics
The digital set-top box provides you with a host of special features including the menu
system, volume control and channel navigation. You can access these features via the control
buttons on the front of the digital set-top box.
Getting Started
1
Digital Set-top Box (ABQ-1H57-SCV)
Digital Set-top Box (SCV-2110C)

2
POWER On LED Indicator
Green = ON
Red = Standby
Flashing = IR Transmission in progress
Front Panel Buttons
ONLINE
Green = IP address
assigned by
external
cable modem
Pressing button alternates between ON and STANDBY modes
POWER ON/OFF
OK
Confirmation of selection
BACK
Moves back one level in MENU system
MENU
Enters and exits MENU system
CHANNEL UP/DOWN
Channel change or navigates when in MENU system
VOLUME UP/DOWN
Volume change or navigates when in MENU system
Smart Card Slot
Graphics
IMPORTANT
• When you switch off your television set, you should always put the digital set-top box on
stand-by mode for regular software updates.
• Always place your digital set-top box on a smooth, flat surface.
• Air should circulate freely under and around the box to prevent overheating. Do not place
anything on top of your digital set-top box.
• Do not place the digital set-top box near wet or moist areas.
• If the display flickers and the digital set-top box does not change channels, unplug it from
the wall cable point and wait at least ten seconds before plugging it back again. Press the
ON/OFF button to reactivate the digital set-top box and try again.
• Do not dismantle the digital set-top box to attempt servicing it on your own. Always refer to
our Customer Care at 1633.
Do not remove or deface the bar code label pasted on the digital set-top box.
Digital Set-top Box (DCI15SHB)
Getting Started

3
The remote control offers you the convenience of accessing the same features available from
the digital set-top box remotely.
Getting Started
Remote Control
IMPORTANT
When using the remote control, make sure there are no obstructions between the remote
control and the digital set-top box.
If the channels can be changed with the digital set-top box and not with the remote control,
check if the remote control batteries are weak.
If you cannot change channels using either the digital set-top box or the remote control, do
not attempt your own servicing. Check with our Customer Care at 1633.
* For future use.
Red Green Yellow Blue
Power On/Off
TV Viewing or
Last Channel Recall
Mute On/Off
Audio Track Selection
Info Bar On/Off
Navigation Buttons -
Up/Down/Left/Right
Confirmation Key
Channel Change - Up/Down
Back one level in Menu system
Access Menu system
Access Favourite Channels list
Access Video Mosaic
Alphanumeric keypad for
programme selection and
selected application usage.
Colour Function Keys
Access TV Guide
Volume Change - Up/Down
Exit Menu system
Access Demand TV
Access TV Games

4
Every digital set-top box has a designated Smart Card which can be found in the Smart Card
slot in the front of the digital set-top box.
The Smart Card is used to store data of your unique customer subscription package. It also
allows StarHub to provide 'live' updates of programme rights and other application data
directly to your digital set-top box.
How To Insert
If you are inserting your Smart Card, please follow the directional
arrow indicated on the Smart Card. If your Smart Card is not
inserted correctly, an error message will appear on your TV screen.
IMPORTANT
Please keep the Smart Card in its slot at all times. Removal of Smart Card can lead to
disruption of programmes or interruption of regular software updates from StarHub.
Should you suspect that your Smart Card is faulty, do not attempt to service it yourself. For
assistance, please contact our Customer Care at 1633.
Getting Started
Smart Card
Smart Card Slot
To avoid service disruption, please do not
remove this smart card from the slot.
This card is the property of
StarHub and must be
returned upon request.
Nagravision is a trademark
of Kudelski SA Switzerland
This card is the property of
StarHub and must be
returned upon request.
Nagravision is a trademark
of Kudelski SA Switzerland

5
The On-Screen TV Guide gives you access to comprehensive information on current and
upcoming programmes including schedules, synopses, cast and crew, available audio tracks
and programme genre for the channel of your choice. (Note: Information may not be available for some
programmes).
To access the On-Screen TV Guide, press the GUIDE button on your remote control. You
will see the Channel Listing on your TV screen as shown below.
How To Use
Functions Directions
1. To choose a channel. The channel you are currently watching is highlighted.
Use the UP or DOWN arrow button on your
remote control to scroll through the list of channels
and press the OK button to go to the channel you
wish to watch.
2. To access current and upcoming Press the RIGHT arrow button on your remote
programmes list. control for Programme Listing. The highlight and arrow
buttons will move to the programme list on the right.
3. To access programme schedules On the Programme Listing Page, press the
for today. UP or DOWN arrow button to scroll.
4. To access programme schedules Press the RIGHT arrow button on your remote
for tomorrow. control.
5. To access programmes schedules Press the RIGHT arrow button on your remote
for the day after tomorrow. control.
6. To access programme schedules Press RIGHT arrow button on your remote control.
from 4th to 7th day. Press LEFT arrow button to return to the previous
day.
7. For additional information on Press the GREEN or INFO button .
programmes.
Note: Additional programme information such
as synopses, cast and audio tracks
may not be available for some programmes.
Guide To Digital Cable Applications
On-Screen TV Guide
Green

6
To help you find your favourite programmes easily, you can sort the channels in the
On-Screen TV Guide according to their genre.
By default, the channels are arranged according to Channel Number.
Use the YELLOW (SORT) button to sort the channels further. You can sort the channels in
the On-Screen TV Guide in the following sequence:
How To Use
Functions Directions
1. To sort the channels in the Press the GUIDE button on your remote control.
On-Screen TV Guide according The channels are arranged according to Channel
to genre. Number by default. Press the YELLOW (SORT)
button once to arrange the channels according
to Channel Name.
Press the YELLOW (SORT) button again to
display only the Favourites List.
Continue to press the YELLOW (SORT) button to
search through the other genres in the sequence above.
Guide to Digital Cable Features
Genre Search
Channel Number
Channel Name
(Alphabetical Order)
Favourites List
International
Ethnic
Sports
Kids
Education
Lifestyle
Entertainment
Movies
News
Chinese
Yellow
Yellow
Yellow
Yellow

7
Video Mosaic allows you easy access to your full selection of channels. To access
Video Mosaic, press the MOSAIC button on the remote control. A multiplex of 16 windows
per page will be displayed. Each window represents one channel.
How To Use
Functions Directions
1. To view all channels available. Press the MOSAIC button .
Move the highlighted box using the LEFT or
RIGHT arrow button on your remote control.
2. To select a channel. Move the highlighted box to the selected channel
and press the OK button on your remote
control for a full-screen view. If you have not
subscribed to the selected channels, you will not be
able to have a full-screen view.
3. To access the On-Screen TV Guide Move the highlighted box to the channel
for a channel. you wish to select and press the GUIDE button .
4. To return to Video Mosaic from Press the MOSAIC button .
the On-Screen TV Guide.
5. To exit Video Mosaic and return to Press the TV or EXIT button.
the last watched channel anytime.
Guide To Digital Cable Applications
Video Mosaic

8
Yellow
Green
Green
Info Bar gives you details of the programmes you are watching including the channel number,
channel name, programme genre, programme title and programme start and end times.
Details of programmes in the next 24 hours will also be available on the Info Bar.
How To Use
Functions Directions
1. To access the Info Bar for a Press the INFO button on the remote control.
programme you have selected.
2. To access channel information for Use the UP or DOWN arrow button on your
a programme currently showing remote control to scroll through the channel listings.
on another channel.
3. To check the programmes within Press RIGHT arrow button to proceed to the next
24 hours. programme. Press LEFT arrow button to go back
to the previous programme.
4. To access more detailed Press the GREEN or INFO button.
programme information.
5. To access additional programme Press the GREEN or INFO button.
information (Info Page).
6. To select your preferred audio track Press the AUDIO button .
for the programme.
Note: Selection is possible only if another
language is available.
7. To toggle between English and Press the YELLOW (LANG) button .
Chinese programme information.
Note: Chinese programme information is
available for Chinese programmes only.
Guide To Digital Cable Applications
Info Bar

9
How To Use
Functions
1. To change the Preferred
Language.
This mode allows for programme information to be in Chinese text for Chinese channels and
in English text for all other channels.
If you prefer, you may change the Preferred Language Setting to English to view all
programme information in English only.
Guide To Digital Cable Applications
Programme Information In Chinese
You can programme your digital set-top box to prompt you with an on-screen message when
your favourite programmes are about to be shown. You can also set the preferred time for
the message to appear, from 1 to 60 minutes before showtime.
Programme Alert (Set Reminder)
How To Use
Functions
1. To Add/Delete Alert
Directions
Press MENU button , select Settings using the UP
or DOWN arrow buttons.
Press RIGHT arrow button to select General and press
OK button to confirm.
Use the LEFT or RIGHT arrow button to select
Bilingual or English as the Preferred Language Setting.
Note: Chinese programme information is available only for Chinese programmes.
Directions
Press the GUIDE button on your remote control.
Press the UP or DOWN arrow button to select the
channel for programme you want to be alerted of.
Press the RIGHT arrow button, followed by the UP
or DOWN arrow button to select the appropriate
programme time-slot.
Press the YELLOW (ALERT) button to access the Set
Reminder Screen.
Press the GREEN (ADD) button to set your preferred
Alert Duration (i.e. how long before the programme starts for
the alert message to pop up on-screen).
By pressing LEFT or RIGHT button, you can
choose from the following options:
1 min 2 min 5 min 15 min
20 min 30 min 40 min 50 min 60 min
Press the OK button to confirm your selection.
To delete an alert, select the entry you want to delete and
press the YELLOW (DELETE) button . The selected
Programme Alert will be deleted from the list.
Green
Yellow
Yellow

10
Guide to Digital Cable Features
Favourite Channel Setting
Last Channel Recall
For instant access to the channel you were last viewing, press the TV button .
Functions Directions
1. To set a favourite channel. Press the MENU button on your remote control.
Select TV Guide followed by Favourites on the TV screen.
Use the UP or DOWN arrow button to choose the
channels and press the YELLOW (SELECT) button to
select your favourite channels.
Press the OK button to confirm your selection and
return to the main Menu.
2. To access a favourite Option 1
channel. Press the FAVOURITE button on your remote control
to access your favourite channels. Surf your favourite
channels by pressing the FAVOURITE button .
Option 2
Press the GUIDE button while watching TV and your
favourite channels will be listed in alphabetical order. Select
the channel you want to watch and press the OK button .
3. To remove a favourite Press the MENU button on your remote control.
channel. Select TV Guide followed by Favourites on the TV screen.
Use the YELLOW button to remove your previous
selection(s).
Press the OK button to confirm your selection and
return to the main Menu.
You can switch within a pre-selected list of preferred channels by pressing the FAVOURITE
button on your remote control. To begin, you must select the channels to be included in
your list of favourite channels.
How To Use
Yellow
Yellow

11
Parental Lock Setting
You may choose to lock a number of channels, after which they will only be accessible via a
6-digit (numeric) Personal Identification Number (PIN). This feature allows parents to control
what their children watch.
Guide To Digital Cable Applications
How To Use
Functions Directions
1. To lock a channel. Press the MENU button on your remote control.
Select TV Guide followed by Parental Lock on the TV screen.
Enter your 6-digit numeric PIN to access the Channel Listing
screen. (The default PIN is 000000). To set a new PIN, see
Change PIN section.
Scroll to the channel using the UP or DOWN arrow button.
In the Channel Listing screen, use the YELLOW LANG button
to select the channels you wish to lock.
Press the BLUE button to confirm and save your selection.
The channels you have selected will now be accessible only by
entering the correct 6-digit numeric PIN.
2. To unlock a channel. Press the MENU button on your remote control. Select TV
Guide followed by Parental Lock on the TV screen.
Enter your 6-digit numeric PIN to access the Channel Listing screen.
In the Channel Listing screen, use the YELLOW (LANG) button
to select the channels you wish to unlock.
Press the BLUE button to confirm and save your selection.
The channels you have selected are now unlocked and accessible
by anyone.
Yellow
Blue
Yellow
Blue

12
Blue
Yellow
Green
Guide To Digital Cable Applications
Auto-Tune Setting
You may prepare your digital set-top box to switch channels at pre-determined times and
dates for recording purposes.
How To Use
Functions Directions
1. To access Auto-Tune. Press the MENU button on your remote control.
Select TV Guide followed by Auto-Tune on the TV
screen, to access the Auto-Tune event list.
2. To add a new Auto-Tune event. Within the Auto-Tune screen, press the GREEN (ADD)
button to add a new event. You will be required
to set the following:
Frequency Start Date
Start Time Channel
3. To set the Frequency. Use the LEFT or RIGHT arrow button to select
from the following options:
Once
Daily
Weekly
4. To fix Start Date. Use the LEFT or RIGHT arrow button on
your remote control to set the date for Auto-Tune to
activate, e.g. Mon 05 Jan.
5. To confirm Start Time. Using the number buttons on your remote control,
enter the time you want the digital set-top box to
switch to the channel of your choice. The time is
displayed in 12-hour format, e.g. 01:30PM or
11:25AM. Use the RIGHT arrow button to select
"AM" or "PM".
6. To select the Channel. Using the LEFT or RIGHT arrow button
on your remote control, select the Channel you want
the digital set-top box to tune to.
When done, press the BLUE button to confirm
and save your options.
7. To view and delete your preset Press the MENU button on your remote control.
event. Select TV Guide followed by Auto-Tune on the TV
screen to access the Auto-Tune event list.
To delete an event on the list, select the event and
press the YELLOW button . The selected event
will be deleted from the list.

13
Guide To Digital Cable Applications
Change PIN
This function allows you to replace the default or old PIN of your digital set-top box with a new
number. The PIN should be kept confidential as it will enable you secured access to selected
services or features.
How To Use
Functions Directions
1. To change/set a new PIN. Press the MENU button on your remote control.
Select Settings followed by Change PIN on the
TV screen.
Enter your current 6-digit numeric PIN. (The default
PIN is set to 000000). Press the BLUE button to
confirm your PIN and access the next screen.
On the next screen, enter and confirm your new PIN.
Press the BLUE (OK) button to save the new PIN.
A message will appear on-screen to inform you if the
change has been successful. Press the BLUE button
again to return to the main Menu.
Blue
Blue
Blue
Note: Please be reminded that the PIN
should be kept confidential.

14
Guide To Digital Cable Applications
Preference Settings
This function personalises your viewing preferences including Info Bar Duration, Preferred
Language, Preferred Audio, TV Aspect Ratio and Video Format.
Directions
Press MENU button on your remote control.
Select Settings followed by General, then select Info
Bar Duration.
Use the LEFT or RIGHT arrow button to set
the duration you wish the Info Bar to appear on the TV
screen.
Press the OK button to confirm your selection.
Select Settings followed by General. Scroll to
Preferred Language and use the LEFT or
RIGHT arrow button to change the settings.
The default language is Bilingual. This mode
allows for programme information to be in Chinese
text for Chinese channels and English text for all
other channels.
Select Settings followed by General. Scroll to
Preferred Audio and use the LEFT or RIGHT
arrow button to select your Preferred Audio language.
Select Settings followed by General. Scroll to Auto
Load Ch Apps and use the LEFT or RIGHT
arrow button to change the settings.
The default setting is Yes. This mode allows all
applications (EG. HBO On Demand, Ch 602) to
automatically load the portal.
Select Settings followed by General. Scroll to TV
display and use the LEFT or RIGHT arrow
buttons to select your TV display settings (Standard
or Widescreen).
If you are using a widescreen TV set, you can set the
TV display to widescreen to enjoy selected channels
in widescreen format.
Default Pal
How To Use
Functions
1. To change Info Bar Duration.
2. To change Preferred Language.
3. To change Preferred Audio.
4. To change Auto Load Ch Apps.
5. To change the TV Display.
6. Video Format.

15
Guide To Interactive Servcies
Interactive TV
Interactive TV on channel 899 brings you a whole new level of experience via your existing TV,
into a world of information and interactivity, 24 hours a day, 7 days a week.
The suite of content available for a start includes, “Live” Financial Stock prices, Lottery results,
Weather report, Movies Showtime’s, StarHub Promotions, Communities, etc.
For the first time in Singapore, you can now purchase Golden Village movie tickets via
Interactive TV. Select your movie and buy up to 8 days in advance from the comfort of your
couch. What’s more, you will automatically get to enjoy GV Movie Club membership from first
purchase.
With more upcoming free content, there will be no more toggling between mobile and the web
as your television will have it all.
TV Games
Playin’TV is a round-the-clock games channel that offers easy-to-play and exciting interactive
TV games your whole family will love. There are five complimentary TV games and 19 paid
games for your whole family to enjoy.
Select Playin’TV at the GAMELAND portal to access the 19 paid games on the TV screen.
Playing instructions are available within each game.
To access your favourite free TV games, press the Games button on your remote control.
When you see the GAMELAND portal, select FunZone to launch the complimentary TV games
page or select Free Games to enjoy a free game from Playin ‘TV.

16
eTV provides you more interactivity with your favourite TV programme. You can get more
information on the programme you are watching and even participate in votes and contests
while watching TV.
To access eTV, press the GREEN button on the remote control when the eTV icon appears
on the top of the screen.
Guide to Interactive Services
eTV (Available only for eTV supported programmes)
Directions
Use the LEFT , RIGHT , UP or DOWN
arrow buttons to select the different tabs. Select
OK button to confirm.
Use the LEFT , RIGHT , UP or DOWN
arrow buttons to select the different tabs. Select
OK button to confirm.
Press BACK , TV , EXIT or YELLOW
buttons.
How To Use
Functions
1. To access the different tabs on eTV
2. To select the categories within eTV
3. To exit eTV and return to the last
watched channel Yellow
Green

17
Option 1: Connection via AV cables (Recommended)
Technical Information
Installation Guide - Digital Set-top Box (ABQ-1H57-SCV)
To TV AV In
CABLE IN TV OUT
1
2
4
Digital set-top box
(Back)
ETHERNET POWER CABLE
Connect RF cable
from the cable TV
point to the digital
set-top box Cable In. Connect AV cable from the
digital set-top box AV Out to
TV AV In.
3Power on the
digital set-top box
and TV unit.
Switch your TV to the
AV Channel to watch your
StarHub TV programmes.
StarHub
CableTV point
STEREO AUDIO
RIGHT LEFT
VIDEO
Red White Yellow
Viewing Procedure
1) Switch your TV to the AV Channel to watch your programmes.
2) Select the desired channel using the remote control of your digital set-top box.
HDMI/DVIHDMI/DVI
TV
(Back)
RF IN
R
Red
L
White
VideoVideoSTEREO AUDIOSTEREO AUDIO
Video
Yellow
Y
Green
Pb
Blue
Pr
Red
TV
(Back)
RF IN
Y
Green
Pb
Blue
Pr
Red
R
Red
L
White
VideoSTEREO AUDIO
Video
Yellow
Video
Yellow
L
White
R
Red
ComponentAV
Video
Yellow
L
White
R
Red
ComponentAV
This manual suits for next models
2
Table of contents
Other StarHub Set-top Box manuals
