StarLapse Time-Tapse System Operating instructions

In its basic configuration the StarLapse System can be used to add dynamics to your time-lapse videos.
SIMPLE PAN MODE
The camera will pivot horizontally at the degree-per-hour rate set by the controller. Your tripod head
mounting plate should be set vertically. Use a 90° adapter or adjust the legs if necessary.
Using the 1/4-20 or 3/8-16 threaded hole, mount the
small dovetail plate to the tripod head with the narrow
side inward.
StarLapse — Simple Operating Instructions

Attach the StarLapse motor assembly to
the dovetail making sure to securely
tighten the thumb knob.
Loosen knurled knob to release the
clutch. Point the StarLapse in the
desired direction and re-tighten.
Mount your camera to the longer dovetail
plate using a 1/4-20 socket cap screw.
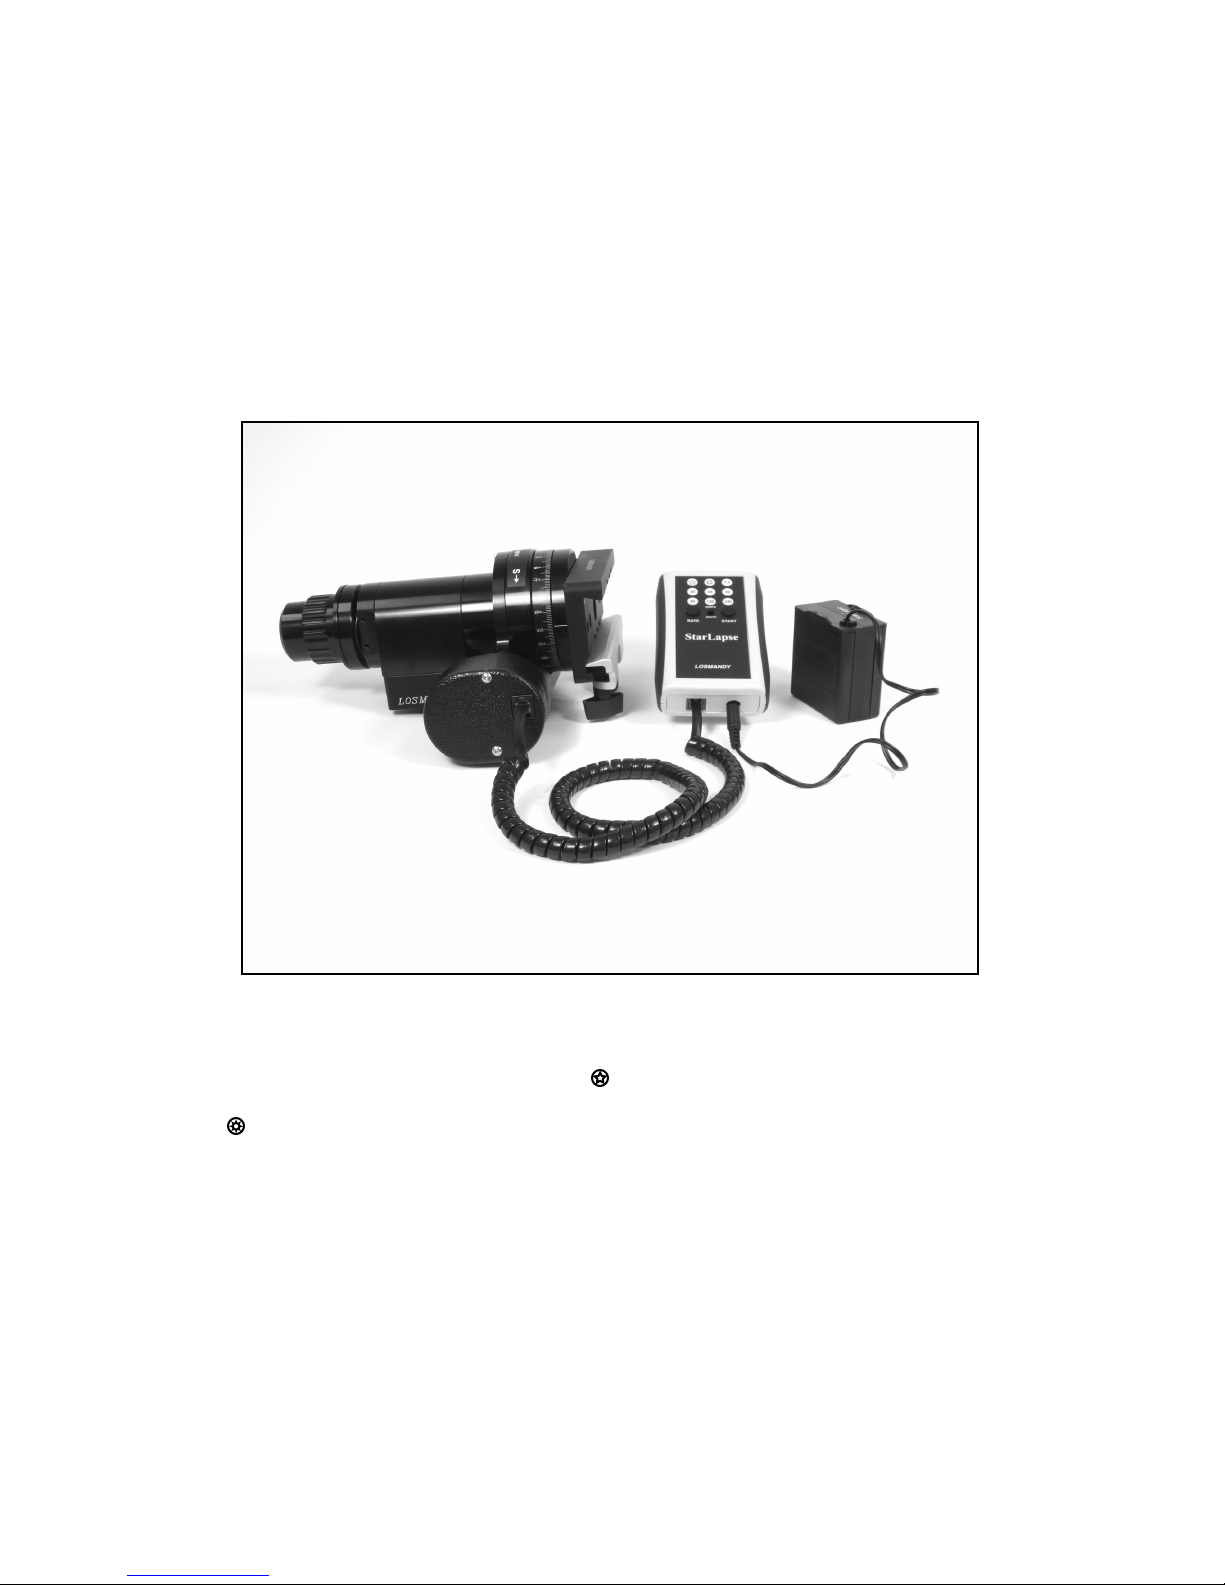
Slide the dovetail with the attached
camera onto the dovetail clamp of the
motor assembly with the center of gravity
as close as possible over the center of
rotation. In this photo the dovetail is
offset to allow clearance of the lens
barrel to permit rotation. Also note that
the tripod handle has been removed to
avoid interference with the StarLapse
rotation.
StarLapse — Simple Operating Instructions
USING THE ELECTRONICS
Connect a center-positive 12 volt DC power source rated at 500 milliamps or higher to the input
connector. Our battery pack (STLA-BP) loaded with eight AA alkaline batteries is recommended, and can
operate the system for more than sixty hours when used at the moderate or slower speeds. Where AC is
available you can use our universal DC power supply (part# ACDC). Circuitry of the StarLapse is
regulated to protect the internal electronics, however, the motor is driven directly from the DC input
voltage. The motor is optimized for 12 volts but can safely operate at a slightly higher voltage. DO NOT
EXCEED 18 VOLTS for the power source! The system will run at voltages as low as 7 volts but the motor
may no longer have enough torque to reliably pulse.
The motor connects with a 6-conductor modular connector. Be sure to dress the cable such that it will not
bind or impede the motion of the StarLapse system.
When power is applied to the control, the first icon will glow to indicate that the system is set for the
default SIDEREAL mode. Press the RATE button to cycle through the icons and select the desired speed.
The SUN represents the SOLAR rate of 15°/hour, and all numeric icons are degrees/hour.
The NORTH/SOUTH switch determines the direction of rotation as indicated by the arrows on the
StarLapse motor assembly. For celestial use set the slide switch for NORTH or SOUTH depending on your
location with respect to the equator. The StarLapse must be polar-aligned when tracking stars.
Press START when you want the motion to begin. The center icon (30) will pulse in sync with the motor
speed to indicate proper operation.
All buttons become inoperative once the system is started. To stop or change operation you must
temporarily disconnect the power from the controller and start over.
StarLapse — Simple Operating Instructions

SLOW-MODE
If you press AND HOLD the START button for three seconds all speeds become 1/10th the indicated value,
IE: “20” is 2 degrees per hour; “60” is 6 degrees per hour, etc. The three vertical center LEDs (SOLAR,
30, 120) will flash to indicate operation in the SLOW-MODE. You may want to use this when time intervals
between frames may run into minutes.
TILTING THE CAMERA
If your shot requires the camera to point away
from horizontal, you will need to use a ball-joint
or tilt plate adapter as shown. Use the strongest
available and be sure to tighten securely before
starting the shot.
AND A FINAL NOTE ON PANNING RATES...
An easy way to figure out your degree-per-hour panning speed is to start with your frame rate and
determine how far you want the camera to pan during the duration of the entire exposure.
For example, you want to shoot one frame per second, to be played back at a speed of 30 frames per
second. That means every hour of shooting will provide 3600 frames (60 secs x 60 mins), with a playback
duration of 120 seconds or two minutes (3600/30).
You plan on shooting for two hours (total playback of four minutes) and want to pan 120° during that time.
You would select the 60° per hour rate.
* * * * * * * * * * * * * * * * * * * * * * * * * * * * * *
Accessories are also available to permit time-lapse TILT motion, celestial tracking, compound
movements, and more...
Please go to www.losmandy.com for the latest information and demo videos of the StarLapse system.
StarLapse — Simple Operating Instructions
Table of contents
Popular Camera Accessories manuals by other brands

Viltrox
Viltrox EF-NEX Mount instructions

Calumet
Calumet 7100 Series CK7114 operating instructions

Ropox
Ropox 4Single Series User manual and installation instructions

Cambo
Cambo Wide DS Digital Series Main operating instructions

Samsung
Samsung SHG-120 Specification sheet

Ryobi
Ryobi BPL-1820 Owner's operating manual


