1. When the antenna is not being used,
it is recommended that you remove
whip section.
2. Check all bolted joints and cables
and connectors regularly.
3. To improve communications on short
(30-500km) distances, please order
optional FG4200 NVIS kit.
4. Use original accessories and feel
free to ask for assistance.
DANGER HIGH VOLTAGE! NEVER touch the antenna whip, antenna housing or ground
terminal while transmitting. Watch for overhead electrical wires.
NEVER use the antenna without whip and ground terminal connection.
DO NOT transmit from the 9360 while re-fueling the vehicle manually or using petrol station.
Antenna radiation can cause tiny sparks between fuel canister and tank inlet, which may result in
fire or explosion.
FOR TRAFFIC SAFETY
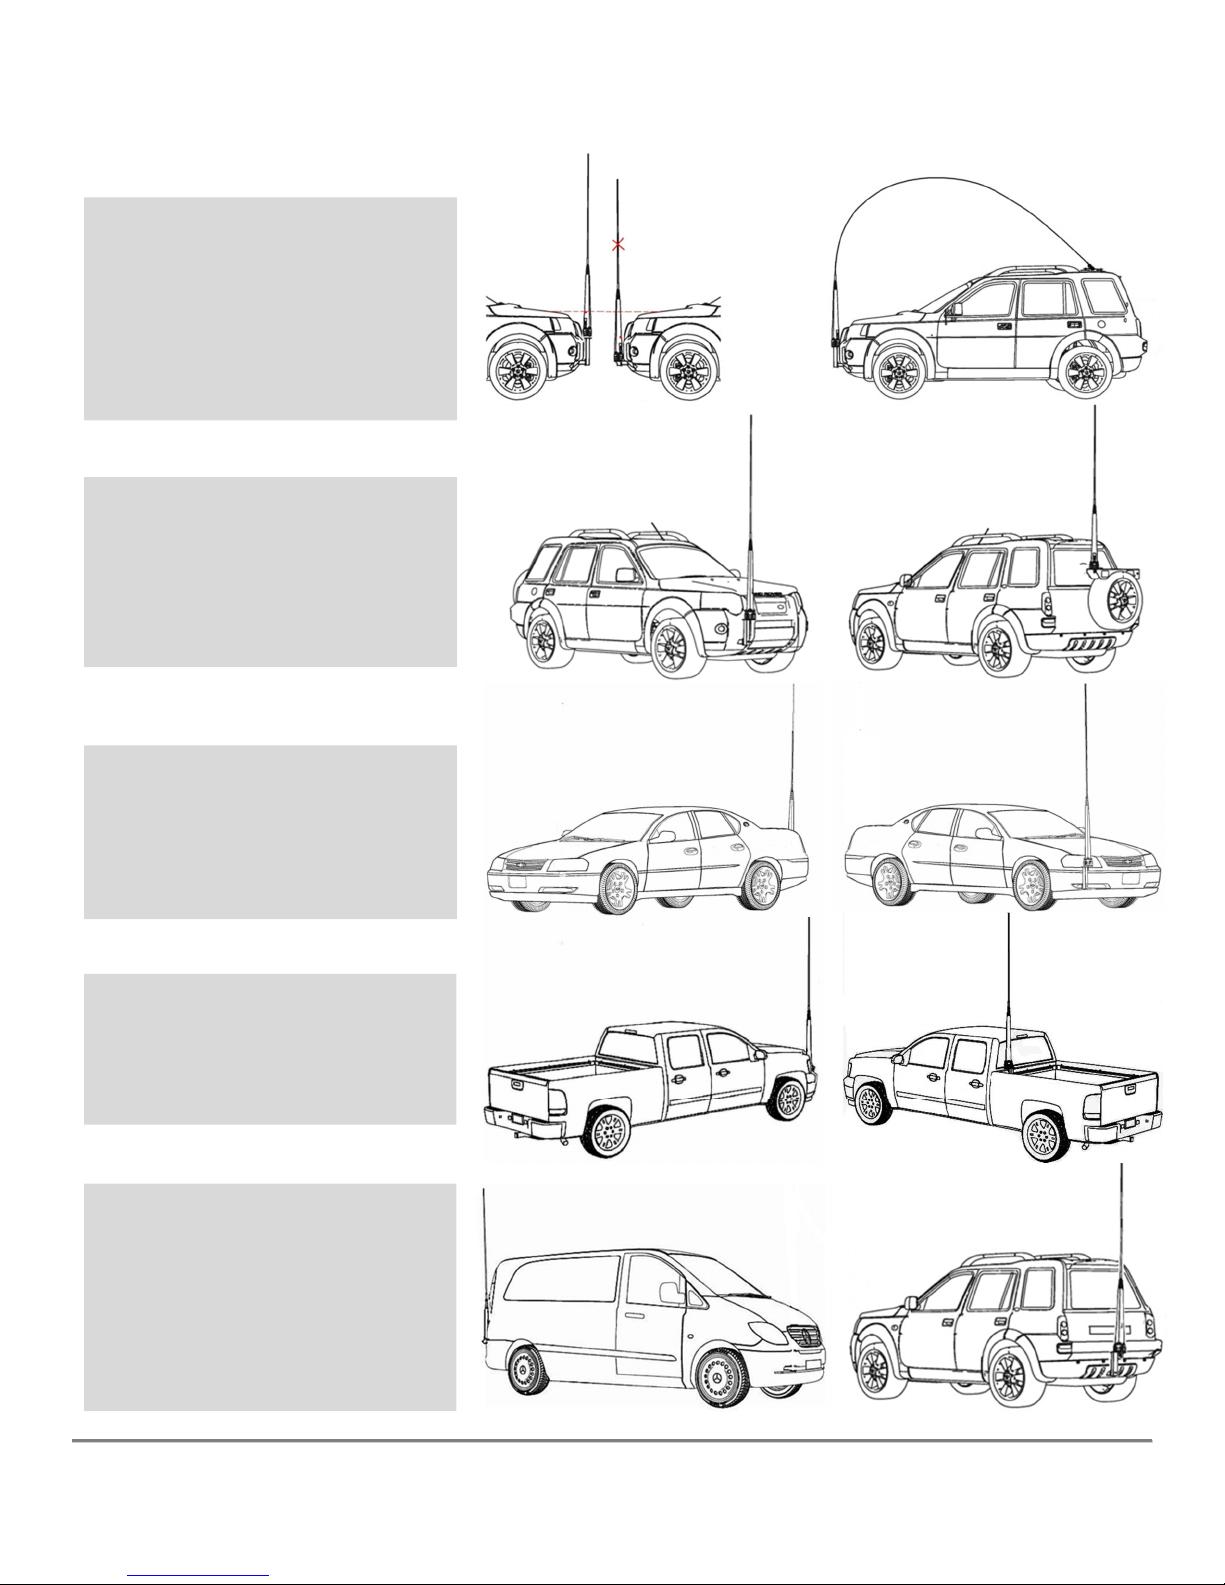
Use original Antenna Mounting Hardware options, which cover most of installations scenarios on
virtually any type of vehicle to ensure the best communications and compliance with traffic safety
guidelines.
Select or fabricate strong metal bracket with antenna plate, about 8-10mm thick, and bolt or weld it
firmly to the vehicle chassis or other strong structure. For the greatest radiation effectiveness,
position antenna as high as possible. For human safety, mount antenna at the front and opposite
side of steering wheel, whenever possible. Refer to the pictorial installations in the overleaf. Make
sure to allow enough clearance around antenna so that antenna flexing will not damage the
vehicle – bear in mind that Main Assembly can flex as much as 16cm, without damage. Make sure
the upper 2/3rds of the antenna Main Assembly is as far from vehicle’s vertical and horizontal
metal panels as possible. Use the antenna Level Mark for reference. Mount the antenna on the
bracket plate provided with 17mm hole for the M16x2mm threaded mounting stud. Rotate Main
Assembly until VENT and EARTH STRAP are directed towards the vehicle body, and then firmly
tighten the stud nut. Use only the original hardware and proper tools.
RF-GROUND:
It is absolutely essential that the antenna is connected to an effective and stabile RF GROUND
POINT – the vehicle chassis. It is further recommended that body panels are also bonded to the
vehicle chassis. Make sure all contact points are free of paint and grinded to shiny finish and
protected from rusting with conductive grease, before bolting the mounting stud and ground strap
terminals.
CABLING:
Three cables are supplied with each antenna – a coaxial cable, a control cable and an adapter
cable. A ground strap is provided on the base of the antenna to ensure reliable connection with
vehicle metalwork: Connect the ground strap to both the chassis frame and the cabin metalwork,
whenever possible. Avoid feeding antenna cables together with the engine ignition cabling routes.
Use one-point ground for entire HF system where your transceiver is installed. Feed both (B+ and
B-) thick wires from the vehicle battery to the transceiver location. Do not use the vehicle’s
metalwork as replacement of the B- wire. Refer to typical correct installation cabling diagram for
the location of antenna cables and connection points.
SETTING UP:
Your antenna is supplied with preconfigured software and direct plug-in Adapter Cable only if you
have specified your transceiver type on ordering the antenna. In this case your antenna is ready
for use after completing Installation as described above. You do not need to use CPS9300 CD
and USB cable included in CPS9300 SW PACK. Keep those accessories in a safe place for
future use.
PC AIDED CONFIGURATION:
If your antenna is received with Universal Adapter (open wire) Cable 9300.B17.005 and you are in
doubt how to configure antenna for use with your transceiver, please refer to CPS9300 SW PACK
USER GUIDE included, or contact your dealer for assistance.
Thank you for purchasing the Stealth 9360 Automatic
Tuning Whip Antenna. The 9360 operates with your
transceiver between 1.6 and 30MHz.
Please read this guide thoroughly before installing and
operating the 9360.
The antenna is a critical element in any communication system. Correct installation is very important factor for achieving utmost of your
antenna system performance and operation of your transceiver. We recommend that installation of STEALTH 93-series antennas are
carried out by qualified technicians only.