manuals.online logo
Brands
  1. Home
  2. •
  3. Brands
  4. •
  5. Curt Group
  6. •
  7. Automobile Accessories
  8. •
  9. Curt Group 13458 User manual

Curt Group 13458 User manual

CURTMFG.COM •PRODUCT SUPPORT: 877.287.8634 •13458-INS-RA •07/06/2020 •ECN7212 •PAGE 1
Product Registration and Warranty
CURT stands behind our products with industry-leading warranties. To get copies of the product
warranties, register your purchase or provide feedback, visit: warranty.curtgroup.com/surveys
Weight Carrying Capacity
Gross trailer weight (GTW) 5,000 lbs.
Tongue weight (TW) 750 lbs.
INSTALLATION MANUAL 13458
Tools Required
Ratchet Socket, 13mm
Torque wrench Socket, 3/4"
Socket extension, 6” Aviation sheers
Safety glasses --
* For a tools reference guide visit
curtmfg.com/trailer-hitch-installation
Level of Difficulty
Easy
Installation difficulty levels are based on time
and effort involved and may vary depending on
the installer level of expertise, condition of the
vehicle and proper tools and equipment.
WARNING
Never exceed the vehicle manufacturer's recommended towing capacity.
SAFETY INSTRUCTIONS
Safety glasses should be worn at all times while installing this product.
NOTICE
Visit www.curtmfg.com for a full-color copy of this
instruction manual, as well as helpful videos, guides and much more!
Before you begin installation, read all instructions thoroughly.
Proper tools will improve the quality of installation and reduce the time required.
This installation requires:
• Lowering of the exhaust
• Trimming the fascia, if applicable
• Fishwiring
Periodic inspection of the trailer hitch should be performed to ensure all
mounting hardware remains tight and structural components are secure.
To help prevent damage to the product or vehicle, refer to the specified
torque specifications when securing hardware during the installation process.
Parts List
Item Qty Description
1 4 Carriage bolt,
1/2”-13 x 1-1/2”, grade 8
2 4 Square-hole spacer,
1/4" x 1" x 3"
3 4 Serrated-flange nut, 1/2"-13
4 4 Fishwire, 1/2”
5 1 Flange bolt,
M8-1.25 x 35mm, CL 10.9
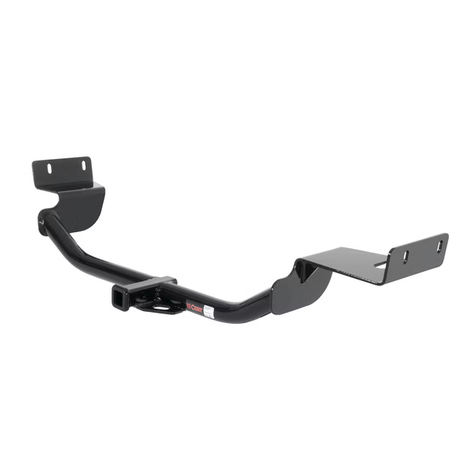
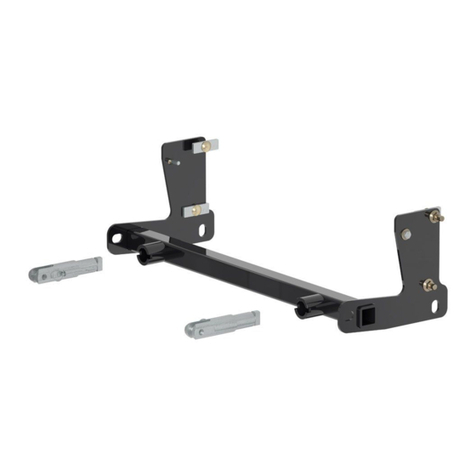
Product Photo
CURTMFG.COM •PRODUCT SUPPORT: 877.287.8634 •13458-INS-RA •07/06/2020 •ECN7212 •PAGE 2
ASSEMBLY
This technique can be used if exhaust
hanger removal pliers are not available.
Using a 5/8" open end wrench, slide
the wrench up to the rubber isolator,
cradling the hanger rod as shown.
Place the flat edge of a pry bar between
the wrench and the hanger stop or hanger
rod. Then simply rotate the pry bar toward
the wrench to remove the rubber isolator.
Note: Using a lubricant or soapy
water on the hanger rod and the
rubber isolator helps removal.
RUBBER ISOLATOR
REMOVAL DIAGRAM
Attach the fishwire to
the carriage bolt and
slide the spacer onto
the fishwire.
Push the bolt through
the hole followed by
the spacer, as shown.
Pull the bolt back into
position, protruding
from the frame.
REVERSE PULL FISHWIRE TECHNIQUE
FRONT
REAR
Insert coiled end of fishwire tool through hitch
mounting hole in vehicle frame rail and out the
access hole. Pass coiled end of fishwire
through spacer and thread bolt into
coil. Kink wire to keep spacer
seperate from bolt as shown.
Pull fishwire, spacer and
bolt through frame and
out mounting hole. Use
fishwire to guide hitch during mounting and
prevent loss of bolt or spacer inside frame rail.
MOUNTING
HOLE
ACCESS
HOLE
FISHWIRE TECHNIQUE
Parts List
Item Qty Description
1 4 Carriage bolt,
1/2”-13 x 1-1/2”, grade 8
2 4 Square-hole spacer,
1/4" x 1" x 3"
3 4 Serrated-flange nut, 1/2"-13
4 4 Fishwire, 1/2”
5 1 Flange bolt,
M8-1.25 x 35mm, CL 10.9
1
5
4
3
2
CURTMFG.COM •PRODUCT SUPPORT: 877.287.8634 •13458-INS-RA •07/06/2020 •ECN7212 •PAGE 3
Step 1
Lower the exhaust by using a 13mm
socket to remove exhaust hanger bolt
on the bottom of the driver-side frame
rail and removing the exhaust isolator
on the passenger-side frame rail.
This technique can be used if exhaust
hanger removal pliers are not available.
Using a 5/8" open end wrench, slide
the wrench up to the rubber isolator,
cradling the hanger rod as shown.
Place the flat edge of a pry bar between
the wrench and the hanger stop or hanger
rod. Then simply rotate the pry bar toward
the wrench to remove the rubber isolator.
Note: Using a lubricant or soapy
water on the hanger rod and the
rubber isolator helps removal.
RUBBER ISOLATOR
REMOVAL DIAGRAM
Step 2
Fishwire two 1/2” carriage bolts (#1)
and square-hole spacers (#2) into the
rearward most holes in the frame rails.
Reverse fishwire the remaining carriage
bolts and spacers into the access holes.
Insert coiled end of fishwire tool through hitch
mounting hole in vehicle frame rail and out the
access hole. Pass coiled end of fishwire
through spacer and thread bolt into
coil. Kink wire to keep spacer
seperate from bolt as shown.
Pull fishwire, spacer and
bolt through frame and
out mounting hole. Use
fishwire to guide hitch during mounting and
prevent loss of bolt or spacer inside frame rail.
MOUNTING
HOLE
ACCESS
HOLE
FISHWIRE TECHNIQUE
Attach the fishwire to
the carriage bolt and
slide the spacer onto
the fishwire.
Push the bolt through
the hole followed by
the spacer, as shown.
Pull the bolt back into
position, protruding
from the frame.
REVERSE PULL FISHWIRE TECHNIQUE
Step 3
Raise the trailer hitch into position and loosely
secure with 1/2” serrated-flange nuts (#3).
Torque all 1/2” fasteners to 110 lb-ft.
Note: The untextured portion of bumper
cover may need to be trimmed near the
receiver tube if the spacing is too tight.
CURTMFG.COM •PRODUCT SUPPORT: 877.287.8634 •13458-INS-RA •07/06/2020 •ECN7212 •PAGE 4
TOWING BASICS & SAFETY INFORMATION
For information on safely towing your trailer, visit curtmfg.com/understanding-towing.
Final Installed Image
Step 4
Reinstall the exhaust isolator and hanger
using the provided M8 flange bolt (#5)
and torque it to 23 lb-ft.

Other Curt Group Automobile Accessories manuals
Curt Group UWS TBV-49 User manual

Curt Group

Curt Group UWS TBV-49 User manual

Curt Group 19279 User manual

Curt Group

Curt Group 19279 User manual

Curt Group 60638 User manual

Curt Group

Curt Group 60638 User manual

Curt Group 70105 User manual

Curt Group

Curt Group 70105 User manual

Curt Group 60628 User manual

Curt Group

Curt Group 60628 User manual

Curt Group Q16 User manual

Curt Group

Curt Group Q16 User manual

Curt Group 11392 User manual

Curt Group

Curt Group 11392 User manual

Curt Group Liverne 401801 User manual

Curt Group

Curt Group Liverne 401801 User manual

Curt Group 40247 User manual

Curt Group

Curt Group 40247 User manual

Curt Group 48411 User manual

Curt Group

Curt Group 48411 User manual

Curt Group TruTrack 17500 User manual

Curt Group

Curt Group TruTrack 17500 User manual

Curt Group 13387 User manual

Curt Group

Curt Group 13387 User manual

Curt Group 58975 User manual

Curt Group

Curt Group 58975 User manual

Curt Group ARIES 2051132 User manual

Curt Group

Curt Group ARIES 2051132 User manual

Curt Group ARIES S225045 User manual

Curt Group

Curt Group ARIES S225045 User manual

Curt Group 45144 User manual

Curt Group

Curt Group 45144 User manual

Curt Group 18113 User manual

Curt Group

Curt Group 18113 User manual
Curt Group Aries 2074113 User manual

Curt Group

Curt Group Aries 2074113 User manual

Curt Group 13415 User manual

Curt Group

Curt Group 13415 User manual

Curt Group Betterweigh User manual

Curt Group

Curt Group Betterweigh User manual

Curt Group Aries 2055115 User manual

Curt Group

Curt Group Aries 2055115 User manual

Curt Group ARIES AL234046 User manual

Curt Group

Curt Group ARIES AL234046 User manual

Curt Group ARIES S224046 User manual

Curt Group

Curt Group ARIES S224046 User manual

Curt Group 18320 User manual

Curt Group

Curt Group 18320 User manual

Popular Automobile Accessories manuals by other brands

Havis-Shields Van Slide Out Side Step KK-S-ST-SS Install instructions

Havis-Shields

Havis-Shields Van Slide Out Side Step KK-S-ST-SS Install instructions

Rear view safety RVS-770613-NM Product manual installation & instructions

Rear view safety

Rear view safety RVS-770613-NM Product manual installation & instructions

LOYDS Smartfloor installation manual

LOYDS

LOYDS Smartfloor installation manual

cam Walmec 40093 Al Mounting instructions

cam

cam Walmec 40093 Al Mounting instructions

Rightline Gear 100R20 instructions

Rightline Gear

Rightline Gear 100R20 instructions

Code 3 XTP Series Installation and operation instructions

Code 3

Code 3 XTP Series Installation and operation instructions

Directed DIRECTECHS CHRYSLER8 installation guide

Directed

Directed DIRECTECHS CHRYSLER8 installation guide

Thule 1745 instructions

Thule

Thule 1745 instructions

Menabo DIAMOND 450 Fitting instructions

Menabo

Menabo DIAMOND 450 Fitting instructions

Subaru SPN0000974 user guide

Subaru

Subaru SPN0000974 user guide

iBeam TE-FORD-SV-1 installation instructions

iBeam

iBeam TE-FORD-SV-1 installation instructions

Free2Move eSolutions Annex installation manual

Free2Move eSolutions

Free2Move eSolutions Annex installation manual

Curt Manufacturing 18153 installation manual

Curt Manufacturing

Curt Manufacturing 18153 installation manual

LoD Offroad Armor Lite Series quick guide

LoD Offroad

LoD Offroad Armor Lite Series quick guide

Goobay 11425 user manual

Goobay

Goobay 11425 user manual

Scosche DASHMOUNT HDM quick start guide

Scosche

Scosche DASHMOUNT HDM quick start guide

Phonocar VM549 instruction manual

Phonocar

Phonocar VM549 instruction manual

Whispbar K317W Fitting instructions

Whispbar

Whispbar K317W Fitting instructions

manuals.online logo
manuals.online logoBrands
  • About & Mission
  • Contact us
  • Privacy Policy
  • Terms and Conditions

Copyright 2025 Manuals.Online. All Rights Reserved.