en
If you use a floor drain, you must integrate it into the foundation
slab in advance.
The sketches show the excavation dimensions required. Fig.2
After the concrete base can be walked on, the two lateral
retaining walls are erected.
Please use mounting wall blocks or concrete blocks with a width
of 24 cm width. Each row of hollow blocks is filled with concrete
and reinforced vertically and horizontally with structural steel.
2.1.2 Step 2-Unpack the pool:
At this point you should carefully open all the boxes that came with
your pool. Arrange all the parts and familiarise yourself with them by
comparing them to the parts list in the appendix. Count the quantity of
parts and compare this with the packing list as well. If anything is
missing, this will allow you to contact the people you bought the pool
from before you start assembling the pool.
Once you have established that you have all the parts you need for
your pool, proceed with the instructions. Fig.4
3
Assembly and assembly instructions
3.1.1 Assembling the lower border
First put the straight sections of the floor rail together using the
connecting tubes.
Place the straight sections of the floor rail directly in front of the
wall in the styrofoam gap.
in front of the wall in the polystyrene gap and place opposite
the length of the wall.
The wall is slightly longer. Then join the curved sections of the
bottom rail together and use them to complete the curves of the
front sides.
Please check the symmetry carefully. To close the corner wall, it
may be necessary to shorten a floor segment. Please deburr this
segment and put it back together.
3.1.2 Mounting the steel wall
IMPORTANT: DO NOT PERFORM THIS STEP IN WINDY
CONDITIONS. THE WALL IS VERY HEAVY AND DIFFICULT TO
CONTROL ON A WINDY DAY. IF THE WALL IS CARRIED AWAY
BY THE WIND DURING ASSEMBLY, DANGEROUS SITUATIONS
MAY ARISE AND/OR THE POOL MAY BE DAMAGED.
We recommend assembling the ladder first, as you will need it to
climb into the pool during further assembly. Also, before assembling
the pool wall, bring the packing bag with the liner into the interior of
the pool.
Place the pool wall where the skim-mer will later be mounted. We
recommend wearing safety gloves.
Start unwinding here. Please also make sure that the skimmer cut-
out is in the upper area of the steel wall. Fig.6
The white coated side of the pool wall is on the outside. A plug-in
profile is attached to one end of the pool wall. Pull off this profile. Now
you can slowly unwind the rolled-up steel jacket on the inside of the
specified outline (risk of injury! When cutting open the tensioning
straps, pay attention to the pre-tensioning) and at the same time
insert it into the slot of the bottom profile.
Set up the steel jacket with several people so that there are no kinks
in the jacket.
Swimming pool set Styria oval | 2020_V2
Place the two ends of the sheathing close to each other, take the
plug-in profile and insert it over the folded ends of the steel sheathing
accordingly.
The bevelled side of the plug-in profile must be at the top. Please
make sure that the fold is in the correct position in the plug-in profile.
It must be possible to slide the plug-in profile smoothly over the
rebate. By slightly moving the two ends of the steel casing back and
forth, you can improve the ease of movement of the plug-in profile.
Incorrect insertion and violent impact of the insertion profile will
damage the steel shell and impair the stability of the pool.
In the area of the straight walls, the pool wall must be fixed with
the enclosed metal brackets.
The holes required for this must be drilled and rust-protected
again. Then tape over the screw heads with double-sided tape
and pad over them again with a foil patch.
Fig.7
4.1.1 Mounting or application of the film
Do not install the liner at temperatures that are too low or too high.
The foil is a thermoplastic material.
You should therefore only install it at a minimum of 15º C and not
above 25º C. First spread out the lining in the pool so that the bottom
weld is in the area of the bottom rail according to the shape of the
pool.
Please make sure that the vertical weld seam is not in the area of the
skimmer or the inlet nozzles, as otherwise the tightness is not
guaranteed.
Only walk on the lining barefoot or with socks to avoid damage.
Lift the wall section of the pool liner evenly and fasten it to the steel
liner.
hook it onto the steel jacket with the hook-in braid. So that
To ensure that the steel shell remains in position and the hanging
brace is secured, attach a piece of handrail profile after each hanging.
Any slanted folds in the wall part of the lining can be compensated for
by moving it. If there are creases in the bottom part of the liner, push
them evenly outwards from the centre of the pool. Now fill the pool
with water up to a height of approx. 2 cm and smooth out the
remaining folds.
Please note that at a water level of approx. 5 cm or more, the inner
shell can no longer be smoothed out due to the high water pressure.
Now you can continue to fill the pool up to about 10 cm
below the first built-in parts.
4.1.2 Assembly of the handrail rails
Connect two handrail sections with the connecting tubes and press
the handrail onto the pool wall via the suspension profile with the
groove.
However, before you have pressed a handrail segment completely
onto the pool wall, insert a second handrail segment in front of it and
thus gradually complete the entire handrail.
If there are gaps between the sections, you should loosen the
handrail again and push it tightly together.
At the point where the first and last handrail segments meet, the last
handrail segment may now be too long. If the handrail segment is
too long, cut it to the exact length on one side with a hacksaw. To
close the last handrail segment, pull the ends of both segments off
the pool wall, insert the connecting tubes into the last section and
then press the complete handrail back on.
Due to temperature fluctuations, gaps can occur between the
individual handrail segments, but these gaps must be completely
filled.
Swimming pool set Styria oval | 2020_V2 Site 4 of 6
en
are normal. If necessary, a sawed-off section can be inserted
here.Fig.8
4.1.3 Assembly of the components (skimmer and nozzle)
In any case, the installation of the built-in parts should only be carried
out when the water level has reached approx. 10 cm below the
installation height of the respective built-in part, so that the foil lies
smoothly against the side wall.
There are various possibilities for installation, whereby our pools have
a punched hole for the standard skimmer and a punched hole for the
inlet nozzle at the factory.
Please note the wind direction (when aligning the steel wall). You
should place the skimmer in such a way that the surface dirt is
already driven to the skimmer by the wind.
For further information on the installation of the skimmer, please refer
to the special installation instructions for the skimmer.
4.1.4 Basin backfill
The basin should be backfilled with an approx. 20 cm thick lean
concrete layer. Fig.
We recommend placing 2 cm thick polystyrene sheets between the
pool wall and the concrete for thermal insulation and to protect the
steel wall from the outside. However, care must be taken that the wall
is not deformed by the pressure of the concrete.
The backfilling must be done in layers (water and concrete) with a
height of approx. 30 cm. The bottom layer should be set before the
next layer is placed.
The concrete must not be too wet and must not be vibrated or
tamped. Otherwise the pool wall will bulge inwards.
5.1.1 Important pool maintenance
Keep the pool wall and frame clean. Always wash off any pool
product residue from the pool frame. Wash it regularly with a mild
soap solution (no lubricant).
Apply a clear non-yellowing household wax to all metal components
at least once a year.
Your pool and liner should be checked regularly for holes, breaks,
scratches and small punctures. IMMEDIATE CORRECTIVE
MEASURES SHOULD BE TAKEN for any problems.
Minor damage and holes in the liner can be easily repaired using the
repair kit available from your local dealer. Scratches on the pool wall
& frame should be repaired with stainless enamel paint. Brush off any
rust with a wire brush and paint on a coat of enamel followed by a
coat of matching paint.
Pool water is full of various chemicals that can attack metal parts over
time.
If a part can continue to rust, the pool structure will be damaged,
which could result in excessive property damage or even injury.
There are certain areas in and under the skimmer area that should be
carefully and regularly inspected. If this area is wet and remains wet
for a long time, it usually means that there is a leak.
The skimmer/skimmer back seals should be replaced if faulty.
If the skimmer/skimmer back seals are not properly maintained, your
warranty will be void!
5.1.2 Winterise the pool
In winter your pool is subjected to more pressure than in summer; this
company is not liable for any damage caused by incorrect winter
measures.
Our pools and liners are designed to be left in place throughout the
winter, but are still covered by the warranty of the liner purchased.
Continue chlorinating and filtering until the pool is taken out of
service.
Before taking your pool out of service for the winter, a complete
inspection of the pool must be carried out.
- Check all connections to ensure that everything is tight and in good
condition.
- Check all signs of rust or deterioration of any parts.
Lower the water level to about 2cm below the skimmer inlet (if using
winter stubble for the nozzle) or 2cm below the inlet nozzle. In winter,
this level must be checked constantly, as it must not reach the
skimmer or nozzle openings during the entire winter.
We recommend sinking so-called ice pressure pads into the pool
water, as these prevent the formation of a full-surface layer of ice
which could damage the foil.
Adding a winter protection agent to the remaining pool water makes it
easier to get your pool ready for the next season.
A winter cover is also recommended to protect the pool from debris
and to prevent the water level from rising. Please note that this cover
lies directly on the water surface and does not stretch. This could
damage the pool surround.
Be sure to remove excess snow and ice from the winter cover to
reduce pressure.
Swimming pool set Styria oval | 2020_V2 Site 9 of 12
en
6 Images
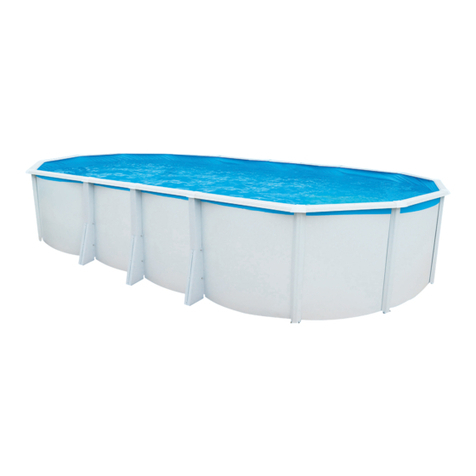
Example - oval-shaped pool
a. Earth
b. Base plate (reinforced)
c. Retaining wall (reinforced)
d. Floor rail
e. Steel casing
f. Plug-in profile
g. Foil lining
h. Handrail
i. Insulation (waterproof polystyrene)
j. lean concrete
Basin m Wall m
W x L A R i M
3,00 x 4,90 1,90 1,50 3,04 2,10
3,60 x 6,25 2,63 1,80 3,64 2,82
3,60 x 7,37 3,77 1,80 3,64 4,00
4,00 x 8,00 4,00 2,00 4,04 4,20
Fig.4
Fig.2
Fig.3
Fig.5
Fig.1
Swimming pool set Styria oval | 2020_V2
Site 8 of 12
en
Operating instructions
Read this instruction manual carefully before setting up the pool.
Caution: Failure to follow our operating instructions or safety
instructions exactly may result in damage to the pool or injury to
persons.
ØRead the operating instructions and all the instructions given.
ØDo not climb, stand or sit on a pool structure or the filtration
system. Filtration systems, pumps and various equipment must
be positioned in such a way that they cannot be used by small
children to access the pool.
ØDo not go into the pool during thunderstorms or heavy rain.
ØChildren are to be watched permanently.
ØDo not jump in! - Do not play too wildly! - Do not run or push!
1 General Informations
1.1.1 Introduction
Below are some helpful hints to consider before setting up your pool.
1) Read the entire manual before you start. This way you can find out
exactly what is involved in setting up your swimming pool before you
start.
2) DO NOT ASSEMBLE THE POOL IN WINDY OR STORMY
WEATHER. This not only makes the installation more difficult, but
can also cause damage to your pool before it is even completely
installed.
3) Please check all safety material and local laws before starting the
set-up.
In the pool package you will find a yellow safety envelope. This
envelope contains the safety material and the warning stickers to be
attached to your pool. If any of these items are missing, please
contact your dealer to obtain them. The warranty will be void if all
safety measures are not taken.
4) When making a warranty claim, it is important to specify the size
and model of your pool to speed up the processing of your claim.
All this information can be found on the labels of the boxes in which
your pool is packed or checked on the delivery note.
5) Make sure that you have the necessary tools and materials
available before assembly. Below you will find a list of the necessary
tools and materials.
6) ATTENTION! Steel wall pools are not suitable for salt water! All
important questions such as installation requirements or building
code requirements will be answered by your specialist on site.
1.1.2 Required tools and accessories
These tools are needed for assembly, but are not included in the set:
ØPhillips screwdriver
Øslotted screwdriver
ØInsulating tape
ØMeasuring tape
ØStanley knife
ØSwimming pool fleece
ØSafety gloves
ØSpirit level
1.1.3 The ideal location for your pool
Do not position the pool on top of underground pipes, waste
water tanks, under electrical wires, near dangerous structures.
Ensure that you comply with all local building regulations and
have obtained all necessary building permits for your area.
Please note that oval Styria pools must be fully installed for
structural reasons!
In addition, a concrete foundation slab with iron reinforcement
and the erection of lateral retaining walls is mandatory!
2 Preparation
2.1.1 Step 1-Alignment of the concrete slab and the lateral
Retaining walls:
The following information is only to be understood as a
guideline!
A master builder or structural engineer must decide on the
strength of the foundation and retaining walls and the materials
to be used. We accept no liability whatsoever for damage
caused by inadequate planning and execution of work on the
part of the builder.
If there is a risk of slope water, we recommend an additional approx.
20 cm thick roll with drainage. The foundation slab should be about
30 cm larger than the main dimensions of the pool and should of
course be laid horizontally.
Reinforced with a structural steel mat, a thickness of 15-20 cm is
sufficient. The pool stands securely on this and the edge cannot sink
in and the bottom is always smooth for cleaning.
The lateral retaining walls are to be connected to the base plate by
iron reinforcements.
In addition to stabilisation at the curves, backfilling with lean concrete
must be carried out. See point 4.1.4 and fig. 1.
If a technical room (filter system) is planned, it should have a size of
2.50 m x 2.00 m. A ventilation system for the technical room must be
provided. Ventilation of the technical room is required.
The depth of the excavation can be calculated as follows:
Roll + concrete base + insulation + pool depth
After excavating and draining (possibly laying drainage/rolling) the
excavation pit, first create a concrete base at least 15 cm thick. Insert
the steel mesh. Reinforcements must be placed in the concrete base
in the middle of the future walls.
The size of the concrete base corresponds to the dimensions of the
excavation pit. The reinforcement bars are angled, about 25x25 cm.
The distance between the two rows of reinforcement bars is
(when using 24 cm wide hollow blocks for the walls) 3.24 m, 3.48 m,
3.78 m, 4.44 m and 5.28 m respectively.
The concrete base is to be smoothly sloped. The maximum slope
along the length and width must not exceed 1 cm.
If you use a floor drain, you must integrate it into the foundation slab
in advance.
The sketches show the excavation dimensions required. Fig.2
After the concrete base can be walked on, the two lateral retaining
walls are erected.
Please use mounting wall blocks or concrete blocks with a width of
24 cm width. Each row of hollow blocks is filled with concrete and
reinforced vertically and horizontally with structural steel.
