manuals.online logo
Brands
  1. Home
  2. •
  3. Brands
  4. •
  5. Steren
  6. •
  7. Outdoor Light
  8. •
  9. Steren LAM-010 User manual

Steren LAM-010 User manual

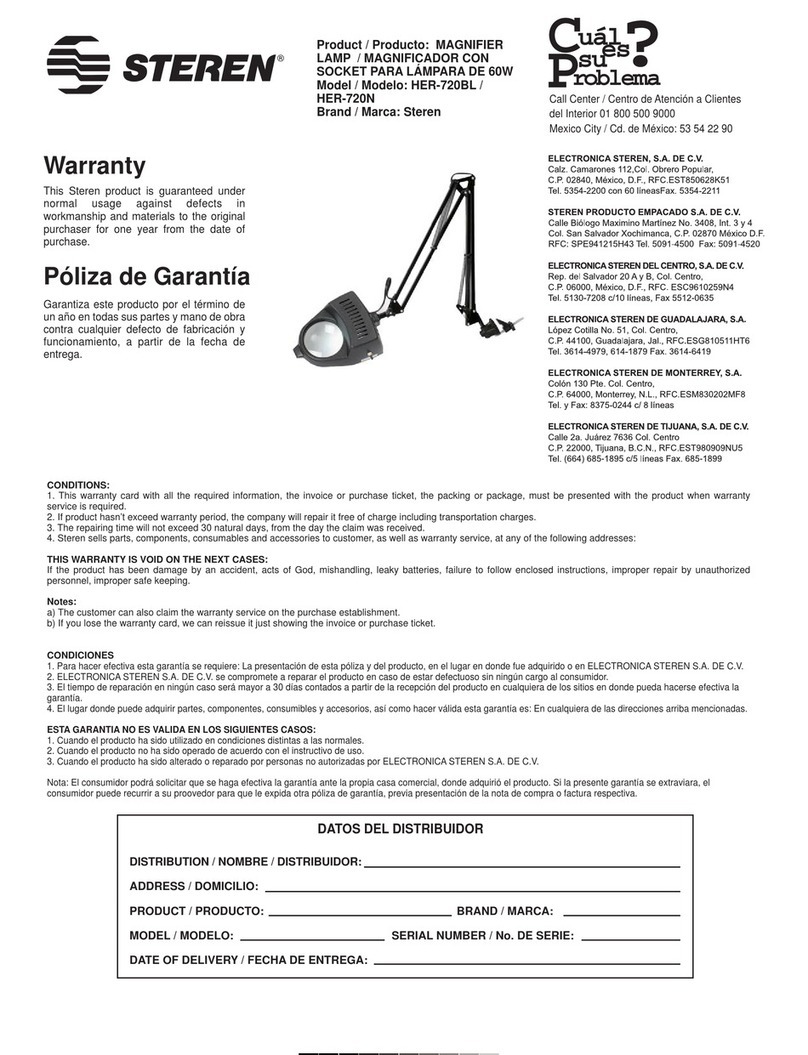
Product / Producto: FLUORESCENT
EMERGENCY LAMP / LÁMPARA DE
EMERGENCIA
Model / Modelo: LAM-010 / LAM-020
Brand / Marca: Steren
CONDICIONES
1. Para hacer efectiva esta garantía se requiere: La presentación de esta póliza y del producto, en el lugar en donde fue adquirido o en ELECTRONICA STEREN S.A. DE C.V.
2. ELECTRONICA STEREN S.A. DE C.V. se compromete a reparar el producto en caso de estar defectuoso sin ningún cargo al consumidor.
3. El tiempo de reparación en ningún caso será mayor a 30 días contados a partir de la recepción del producto en cualquiera de los sitios en donde pueda hacerse efectiva la
garantía.
4. El lugar donde puede adquirir partes, componentes, consumibles y accesorios, así como hacer válida esta garantía es: En cualquiera de las direcciones arriba mencionadas.
ESTA GARANTIA NO ES VALIDA EN LOS SIGUIENTES CASOS:
1. Cuando el producto ha sido utilizado en condiciones distintas a las normales.
2. Cuando el producto no ha sido operado de acuerdo con el instructivo de uso.
3. Cuando el producto ha sido alterado o reparado por personas no autorizadas por ELECTRONICA STEREN S.A. DE C.V.
Nota: El consumidor podrá solicitar que se haga efectiva la garantía ante la propia casa comercial, donde adquirió el producto. Si la presente garantía se extraviara, el
consumidor puede recurrir a su proovedor para que le expida otra póliza de garantía, previa presentación de la nota de compra o factura respectiva.
DATOS DEL DISTRIBUIDOR
DISTRIBUTION / NOMBRE / DISTRIBUIDOR:
ADDRESS / DOMICILIO:
PRODUCT / PRODUCTO: BRAND / MARCA:
MODEL / MODELO: SERIAL NUMBER / No. DE SERIE:
DATE OF DELIVERY / FECHA DE ENTREGA:
Call Center / Centro de Atención a Clientes
del Interior 01 800 500 9000
Mexico City / Cd. de México: 53 54 22 90
Warranty
CONDITIONS:
1. This warranty card with all the required information, the invoice or purchase ticket, the packing or package, must be presented with the product when warranty
service is required.
2. If product hasn’t exceed warranty period, the company will repair it free of charge including transportation charges.
3. The repairing time will not exceed 30 natural days, from the day the claim was received.
4. Steren sells parts, components, consumables and accessories to customer, as well as warranty service, at any of the following addresses:
THIS WARRANTY IS VOID ON THE NEXT CASES:
If the product has been damage by an accident, acts of God, mishandling, leaky batteries, failure to follow enclosed instructions, improper repair by unauthorized
personnel, improper safe keeping.
Notes:
a) The customer can also claim the warranty service on the purchase establishment.
b) If you lose the warranty card, we can reissue it just showing the invoice or purchase ticket.
Póliza de Garantía
This Steren product is guaranteed under
normal usage against defects in
workmanship and materials to the original
purchaser for one year from the date of
purchase.
Garantiza este producto por el término de
un año en todas sus partes y mano de obra
contra cualquier defecto de fabricación y
funcionamiento, a partir de la fecha de
entrega.
LAM-010 LAM-020
INSTRUCTIVO DE USO DE LÁMPARA DE EMERGENCIA
Modelo: LAM-010 / LAM-020
Marca: Steren
Antes de utilizar su nueva Lámpara de emergencia lea este
instructivo para evitar cualquier mal funcionamiento. Guárdelo para
futuras referencias.
Utilice su nueva lámpara de emergencia cuando existen fallas en la
corriente eléctrica. De esta forma no se quedará a oscuras, y no tendrá
que utilizar velas para alumbrar los espacios oscuros. Así mismo, si
mantiene conectada la lámpara a un contacto casero y en el momento
que exista una falla eléctrica, el equipo automáticamente se encenderá.
Cuenta con una duración de hasta 7 horas (LAM-010) y de 3 horas
(LAM-020).
IMPORTANTE
No use ni almacene este equipo en lugares donde existan goteras o
salpicaduras de agua. Puede causar un mal funcionamiento o un choque
eléctrico.
No intente abrir el equipo, puede ocasionar malfuncionamiento y
anulación de la garantía.
No exponga el equipo a temperaturas extremas.
El reemplazo de batería sólo puede ser realizado por personal autorizado.
Siempre utilice un paño suave limpio y seco para limpiar el equipo.
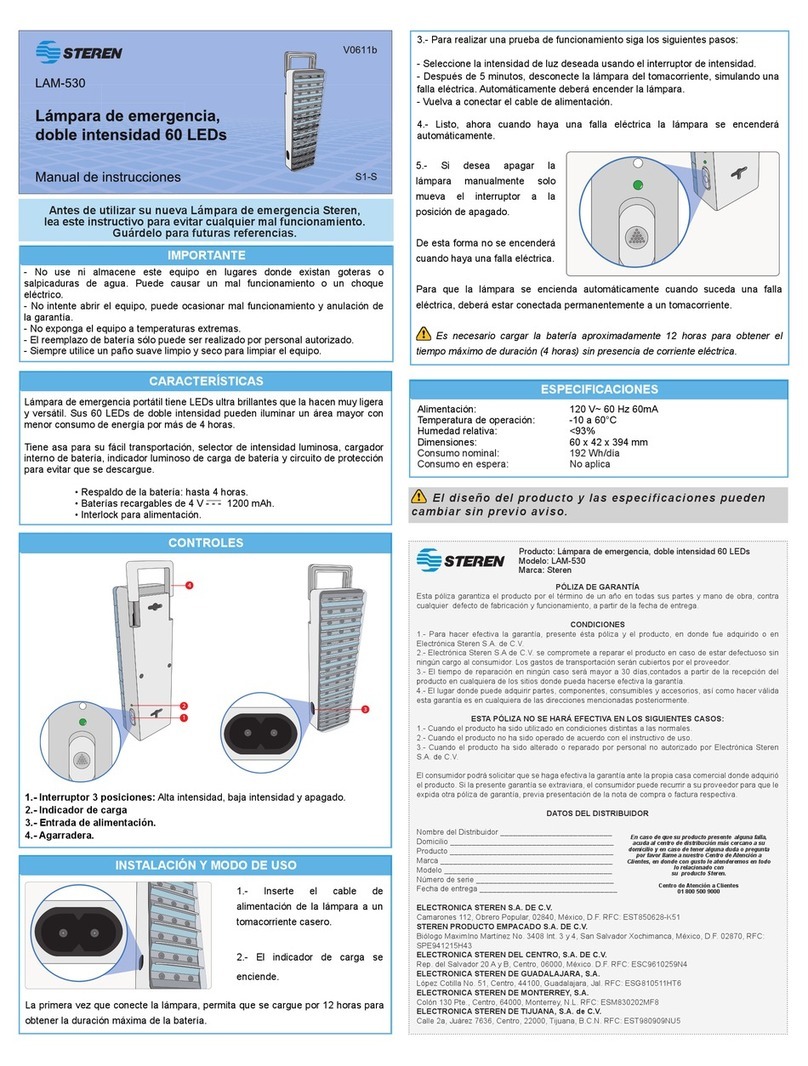
CARACTERÍSTICAS PRINCIPALES
2 tubos de luz blanca de 8W cada una (LAM-010)
1 tubo de luz blanca de 20W (LAM-020)
Botón de prueba
Botón de intensidad (LAM-010)
Indicadores de carga y batería
Agarradera deslizable
CONTROLES
1.- Agarradera
2.- Botón de prueba (Test)
3.- Encendido / Apagado
(On / Off) (LAM-020)
Botón de intensidad
(LAM-010)
4.- Indicador de Batería (Battery)
5.- Indicador de Carga (Charge)
6.- Cordón de Encendido / Apagado
(LAM-020)
7- Compartimiento de batería
(LAM-020)
8.- Cable de alimentación
INSTRUCTION MANUAL FOR FLUORESCENT EMERGENCY LAMP
Model: LAM-010 / LAM-020
Brand: Steren
Before using your new Fluorescent Emergency Lamp, please read
this instruction manual to prevent any damage. Put it away in a safe
place for future references.
Use your new emergency lamp when electrical current system fails. Never
stay in dark again and never use candles to illuminate an space. Plug the
emergency lamp into an AC household outlet and automatically lights on
when the electrical current system fails.
Long battery life, up to 7 hours (LAM-010) or 3 hours (LAM-020).
IMPORTANT
Do not use or store the equipment near wet places. May cause
malfunction or electrical shock.
Do not try to open the equipment, may cause malfunction and warranty
repeal.
Do not expose the equipment to extreme weather.
Battery replacement can only be made by authorized personnel.
Clean only with a soft, dry cloth.
MAIN FEATURES
2 white tubes, 8W each one (LAM-010)
1 white tube, 20W (LAM-020)
Test button
Intensity button (LAM-010)
Charge and Battery indicators
Slip holder
CONTROLS
1.- Holder
2.- Test button
3.- On / Off switch
(LAM-020)
intensity button
(LAM-010)
4.- Battery LED
5.- Charge LED
6.- On / Off cord
(LAM-020)
7.- Battery compartment
(LAM-020)
8.- Power cord
2
3
4
5
6
1
8
7
INSTALACIÓN Y FORMA DE USO
1.- Inserte el cable de alimentación de la lámpara en un tomacorriente
casero.
2.- El indicador de carga se enciende.
3.- En el caso del modelo LAM-010:
a) Cambie la posición del interruptor de encendido a UNA sóla
lámpara y presione el botón de Prueba (Test) (2), deberá
encender una sóla lámpara.
b) Cambie la posición del interruptor de encendido a DOS
lámparas, y oprima el botón de Prueba (Test) (2), deberán
encender las dos lámparas.
c) Seleccione la intensidad de luz deseada, una o dos lámparas.
4.- En el caso del modelo LAM-020:
a) Cambie la posición del interruptor de encendido a ON y
presione el botón de prueba (Test) (2), la lámpara deberá
encender y el indicador de Batería (Battery) (4) se encenderá.
En caso de que no se encienda, jale el cordón de Encendido
(6).
5.- Después de 5 minutos, desconecte la lámpara del tomacorriente,
simulando una falla eléctrica. Automáticamente deberá encender. El LED
indicador de batería (Battery) (4) se encenderá.
6.- Si desea apagar la lámpara utilice el cordón de encendido / apagado
(únicamente LAM-020) (6) o el interruptor (3).
Nota:
Si desea utilizar el cordón de encendido / apagado (6) deberá colocar el
interruptor de encendido / apagado (3) en la posición de ON.
Para que la lámpara se encienda automáticamente, deberá estar
conectada permanentemente a un tomacorriente.
ESPECIFICACIONES
Nota:
El diseño del producto y las especificaciones pueden cambiar sin previo
aviso.
INSTALLATION AND USE
1.- Plug the lamp’s power cord into anAC household outlet.
2.- The charge LED lights on.
3.- On model LAM-010:
a) Place the On / Off switch in the position of ONE lamp, then
press Test (2) button, only one lamp will be turn on.
b) Place the On / Off switch in the position of TWO lamps, then
press Test (2) button, both lamps will be turn on.
c) Choose the intensity of the light: one or two lamps.
4.- On model LAM-020:
a) Place the On / Off switch to ON, then press Test (2) button,
the lamp must turn on and the Battery LED (4) will light on.
In case that the lamp won’t light on, pull the On / Off cord (6)
out.
5.- After 5 minutes, unplug the lamp from the outlet, simulating an
electrical fail. The lamp turns on automatically. The Battery LED indicator
(4) will light on.
6.- If you want to turn the lamp off, use the on / off cord (only LAMP-020)
(6) or the on / off switch (3).
Note:
If you want to use the on / off cord (6) you must place the on / off switch (3)
in ON position.
If you want to turn the lamp on automatically when the electrical current
fails, plug the emergency lamp into an AC household outlet permanently.
SPECIFICATIONS
Note:
Product design and specifications are subject to change, without notice.
LAM-010 LAM-020
Entrada 110V~ 60Hz 4W max 110V~ 60Hz 7W
Input
Batería 6V 4Ah 6V 4Ah
Battery
Duración 7 horas 3 horas
Duration 7 hours 3 hours
Dimensiones 410 x 76 x 85mm 700 x 80 x 105mm
Dimensions 16,1 x 2,9 x 3,3in 27,5 x 3,1 x 4,1in
Other manuals for LAM-010

1

This manual suits for next models

1

Other Steren Outdoor Light manuals

Steren LAM-530 User manual

Steren

Steren LAM-530 User manual

Steren LAM-507 User manual

Steren

Steren LAM-507 User manual

Steren LAM-825 User manual

Steren

Steren LAM-825 User manual

Steren LAM-073 User manual

Steren

Steren LAM-073 User manual

Steren CCTV-450 User manual

Steren

Steren CCTV-450 User manual

Steren LAM-830 User manual

Steren

Steren LAM-830 User manual

Steren LAM-850 User manual

Steren

Steren LAM-850 User manual

Steren LAM-745 User manual

Steren

Steren LAM-745 User manual

Steren HER-720BL User manual

Steren

Steren HER-720BL User manual

Steren LAM-850 User manual

Steren

Steren LAM-850 User manual

Popular Outdoor Light manuals by other brands

Quoizel T0272 Assembly and installation instructions

Quoizel

Quoizel T0272 Assembly and installation instructions

Endon Burford instruction manual

Endon

Endon Burford instruction manual

Ingo Maurer The MaMo Nouchies Samurai Mounting instructions

Ingo Maurer

Ingo Maurer The MaMo Nouchies Samurai Mounting instructions

nordlux Fuse Mounting instruction

nordlux

nordlux Fuse Mounting instruction

MAUL MAULaludra manual

MAUL

MAUL MAULaludra manual

Costway EP24442 user manual

Costway

Costway EP24442 user manual

Kichler Lighting 15382BK instructions

Kichler Lighting

Kichler Lighting 15382BK instructions

Quoizel MBH8409PN Assembly instruction sheet

Quoizel

Quoizel MBH8409PN Assembly instruction sheet

Utilitech FSI 80-8312-2PK quick start guide

Utilitech

Utilitech FSI 80-8312-2PK quick start guide

BEGA 88 863 Instructions for use

BEGA

BEGA 88 863 Instructions for use

Iluminarc ILUMILINE ML user manual

Iluminarc

Iluminarc ILUMILINE ML user manual

modway Nourish EEI-5609 Assembly instructions

modway

modway Nourish EEI-5609 Assembly instructions

Portfolio WLL131SB user manual

Portfolio

Portfolio WLL131SB user manual

Home Zone Security ELI0764V installation instructions

Home Zone Security

Home Zone Security ELI0764V installation instructions

Urban Barn CALLAN FLOOR LAMP Use and care guide

Urban Barn

Urban Barn CALLAN FLOOR LAMP Use and care guide

DoorHan LAMP installation manual

DoorHan

DoorHan LAMP installation manual

MOOD COGOLIN Installation and operating instructions

MOOD

MOOD COGOLIN Installation and operating instructions

Faro Barcelona ALFA 70025 Installation

Faro Barcelona

Faro Barcelona ALFA 70025 Installation

manuals.online logo
manuals.online logoBrands
  • About & Mission
  • Contact us
  • Privacy Policy
  • Terms and Conditions

Copyright 2025 Manuals.Online. All Rights Reserved.