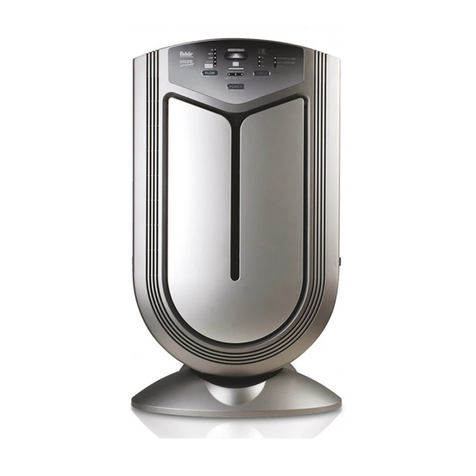
Steril-Aire RIDS User manual

Installation and Operation Instructions
Remedial In-Room
Decontamination System
(RIDS)
Patents 5,334,347, 5,817,276, 5,866,076, 6,245,293, 6,267,924, 6,280,686,
6,313,470, 6,372,186, 6,423,882, 6,500,267, 6,589,476, 6,627,000 & others pending.
Made in USA
CAUTION: Install and remove Emitters
from system only by grasping ceramic
ends, not glass (as glass may break).
NOTE: Read this entire instruction sheet
before starting the installation.
IMPORTANT CONSIDERATIONS
Improper installation, adjustment, alteration, service,
maintenance, or use can cause fire, electrical shock, or
other conditions which may cause personal injury or
property damage. Consult your supplier or Steril-Aire for
information or assistance. In regards to the statements
below, understand the signal words DANGER, WARNING,
or CAUTION. These words are universally used for overall
safety. DANGER identifies the most serious hazards which
will result in severe personal injury or death. WARNING
signifies hazards which could result in personal injury or
death. CAUTION is used to identify unsafe practices
resulting in minor personal injury or product and property
damage.
WARNING: Before performing fixture installation,
maintenance, or service, ensure unit is disconnected
from power. Electrical shock can cause injury or death.
CAUTIONS:
• Never expose eyes or skin to UVC light from
any source. Wear gloves, face shield/glasses
(per ANSI Z87.1) and cover all exposed skin.
• Do not touch Emitterglass without gloves.
Damage to Emitter may result. Oil from
fingerprints will permanently etch glass of
Emitter and weaken structure. If necessary,
clean Emitter using the included Steril-Aire
cleaning kit (isopropyl alcohol and a lint-free
wipe may be substituted).
• Voltages outside of the range designed for the
unit will void the warranty and do permanent
damage to the entire unit.
• Emitter contains a small quantity of mercury. If
an Emitter breaks, clean and dispose of with
care.
• UVC energy may cause damage to non-metallic
components except for UV-rated and HVAC-
style drain pans. Select operating locations
that prevent exposure to vulnerable
components. If operating locations are limited,
such components shall be protected with UV
resistant material such as aluminum foil,
aluminum duct tape, metallic shields, etc.
INSTALLATION & OPERATION
1. Unpack contents and check for damage.
2. Set base down onto its wheels. Set wheel brake if
needed.
3. Insert 1” tube into base, aligning tube slot until tube
cannot rotate. Tighten set screw with included Allen
wrench.
4. Set tray over 1” tube with power supplies facing down,
aligning tray holes with the collar pins.
5. Slide set collar over tube, aligning collar holes with the
pins. Push collar and tray down and tighten set screw.
6. Ensure entire unit is not connected to power
source. Plug cord (from power supply tray) into base.
7. Snap the clips of the cord from the power supplies
along the length of the 1” tube.
8. Slide the ¾” tube into the 1” tube until the tube
bottoms out at its collar.

Thank you for choosing the #1 “UVC for HVAC” product sold worldwide. Please contact your local supplier or Steril-Aire directly if we
can provide any further information or service. Your satisfaction is very important to us.
Please call 1-800-2-STERIL or log onto www.steril-aire.com.
Steril-Aire, Inc. cannot and does not guarantee that all organisms will be inactivated or killed or that use of Steril-Aire, Inc. UVC Emitters will prevent
infection or illness.
1341
Note: Ensure to install Emitters before power is
applied. Installing Emitters after power has been
applied will trigger the “End-of Lamp-Life” circuit
and the Emitters will not light! If this happens,
shut off power for 10 minutes and then turn power
back on. Emitters will then light.
9. Please wear safety glasses before installing
Emitters. Bottom Emitters: Holding blue Emitter end,
attach socket through base hole and push Emitter into
hole until ceramic collar bottoms out. Snap blue end
into clip directly above socket connection. Do not
attach Emitter glass to clip, and do not push
ceramic end into clip by holding glass (as glass
may break).
10. Top Emitters: Holding blue Emitter end, attach socket
from under tray. Snap blue end into top clip. Snap
white end into tray clip (ceramic collar sitting on clip).
11. Before connecting to power source, connect an
extension cord (min. 16 AWG) to male receptacle on
side of base. Ensure cord extends to outlet in
another room to avoid exposure to UVC light.
12. Plug extension cord into a 120 V outlet. Emitters shall
emit a bright blue hue.
Changing out Emitters:
Please wear safety glasses before removing
Emitters. When removing any Emitter from a clip,
always grasp the ceramic ends; never hold onto
glass (as glass may break). For removal of top
Emitters, first detach socket from Emitter, then detach
blue end, and then detach white end from clips. For
removal of bottom Emitters, detach blue end from clip,
then (holding blue end) pull Emitter out of socket.
MAINTENANCE
Emitters need to be periodically replaced to maintain design
output. The change-out basis depends upon the
application, number of times switched on/off per day, and
the hours of operation. Emitters are to be replaced when
output falls to 50% of initial output (or as specified) by
actual radiometer measurements. A Steril-Aire UVC
Radiometer Kit may be used for such measurements. If a
radiometer is unavailable, Emitters should be replaced after
9,000 hours of use.
TROUBLESHOOTING
Symptom Recommended Action (in order of priority)
EmitterTM Does Not Light
1. Turn off power for 10 minutes, and then turn power back on.
2. Replace Emitter with new unit. Normal replacements
recommended once per year.
3. Check line voltage.
4. Check wiring to Emitter.
5. Replace power supply.
Low Output (Radiometer Reading) or
Visibly Weak Light
1. Replace Emitter with new unit.
2. Check line voltage.
3. Check wiring to Emitter.
Red/Orange Light
1. Check ambient temperature. If the temperature is at or
below 35°F, Emitter is too cold to operate properly.
2. If ambient temperature is in excess of 35°F, follow actions
for the Low Output symptom.
ORDERING INFORMATION
Part Number Description
11000700 / 11000701 Steril-Aire RIDS / Sleeved-Emitter RIDS
10000132 Power Supply, 120-230 V
21000600 / 21000601 GTS 42 VO Emitter / Sleeved Emitter
This manual suits for next models
2
Popular Air Cleaner manuals by other brands
SMC Networks
SMC Networks IZS30 SERIES Operation manual
Vava
Vava VA-EE008 user guide
Blaupunkt
Blaupunkt AIRPURE AP 2.0 Operating and installation instructions
Surgically Clean Air
Surgically Clean Air SCA7000E Operational manual
Be Cool
Be Cool BCRS2102F instruction manual
Soehnle
Soehnle AIRFRESH CLEAN CONNECT 500 user manual
