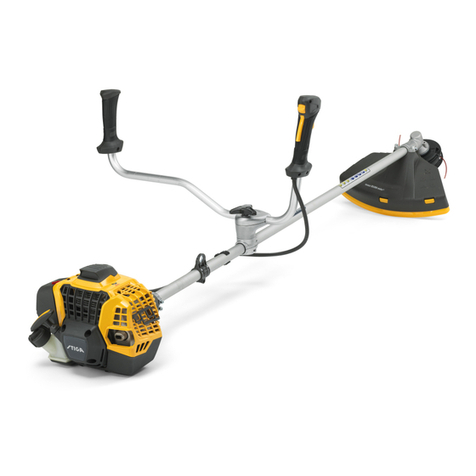
Stiga SBC 627 K User manual

171501231/3 07/2015
SBC 627 K
SBC 627 KD
SBC 635 K
SBC 635 KD
SBC 645 K
SBC 643 KD
SBC 645 KD
SBC 645 KF
SBC 653 K
SBC 653 KD
SBC 653 KF
IT
Decespugliatore a motore portatile manualmente
MANUALE DI ISTRUZIONI
ATTENZIONE: prima di usare la macchina, leggere attentamente il presente libretto.
BG
BS
UPUTSTVO ZA UPOTREBU
CS
DA
BRUGSANVISNING
DE
Motorbetriebener Freischneider
GEBRAUCHSANWEISUNG
EL
EN
Portable hand-held powered brush-cutter
OPERATOR’S MANUAL
ES
MANUAL DE INSTRUCCIONES
ET
KASUTUSJUHEND
FI
KÄYTTÖOHJEET
FR
MANUEL D’UTILISATION
HR
HU
LT
NAUDOJIMO INSTRUKCIJOS
LV
LIETOŠANAS INSTRUKCIJA
MK
NL
Met de hand draagbare bosmaaier met motor
GEBRUIKERSHANDLEIDING
NO
INSTRUKSJONSBOK
PL
All manuals and user guides at all-guides.com
all-guides.com

PT
MANUAL DE INSTRUÇÕES
RO
RU
SK
SL
SR
SV
BRUKSANVISNING
TR
KULLANIM KILAVUZU
All manuals and user guides at all-guides.com

I
ITALIANO - ................................................................................................... IT
.............................................................. BG
BOSANSKI - Prijevod originalnih uputa ........................................................................................ BS
......................................................................... CS
DANSK - Oversættelse af den originale brugsanvisning .............................................................. DA
DEUTSCH - Übersetzung der Originalbetriebsanleitung .............................................................. DE
................................................... EL
ENGLISH - Translation of the original instruction .......................................................................... EN
ESPAÑOL - Traducción del Manual Original ................................................................................ ES
..................................................................................... ET
.................................................................................... FI
FRANÇAIS - Traduction de la notice originale .............................................................................. FR
HRVATSKI - Prijevod originalnih uputa ......................................................................................... HR
........................................................................... HU
............................................................................... LT
.................................................................... LV
................................................................ MK
................................................... NL
......................................................................... NO
................................................................................ PL

............................................................................... PT
............................................................................ RO
..................................................................... RU
............................................................... SK
...................................................................................... SL

SRPSKI - Prevod originalnih uputstva ........................................................................................... SR
.................................................................. SV
.................................................................................... TR
All manuals and user guides at all-guides.com

II
c
31
32
33 37
All manuals and user guides at all-guides.com

III
SBC 627
K
627
KD
635
K
635
KD
643
KD
645
K
645
KD
645
KF
653
K
653
KD
653
KF
6,8 7,2 7,4 7,6 8,7 8,4 9,9 12,2 910,5 13
3 26,3/0,77 34,4/1,03 45,4/1,42 53,2/2,0
-1 2700 - 3000
-1 8400
l0,5 0,7 0,9 1,1
NGK-R
BPMR7A NGK-R
BPMR7A NGK-R BPMR7A NGK-R BPMR8Y
50:1 = 2%
255 255 255 255 255 255 255 255 255 255 255
– – – – 255 – 255 – – 255 –
dB(A)
dB(A) 87,6
387,6
396,4
396,4
398,1
398,1
397,3
396,3
396,1
397,1
396,7
3
dB(A)
dB(A) 102
3102
3109,4
3109,4
3110,6
3110,6
3110,4
3110,7
3110,8
3110,4
3111,5
3
dB(A) 105 105 113 113 113 113 113 113 113 113 113
2
23,14
1,5 –
–3,04
1,5 –
––
–3,66
1,5 –
–2,90
1,5 3,73
1,5 –
–2,92
1,5
2
23,09
1,5 –
–3,65
1,5 –
––
–3,58
1,5 –
–2,20
1,5 3,96
1,5 –
–2,02
1,5
2
2–
–2,54
1,5 –
–2,95
1,5 3,22
1,5 –
–3,54
1,5 –
––
–3,99
1,5 –
–
2
2–
–3,12
1,5 –
–3,33
1,5 3,48
1,5 –
–3,70
1,5 –
––
–4,02
1,5 –
–
118802323/0
OOOOOOOOOOO
118802323/0
XXXXXXXXXXX
118802316/0
118802323/0
O O O O O X X X X X X
118802314/0
118802323/0
X X X X X O O O O O O
118802315/0
118802323/0
OOOOOOOOOOO
1911-9134-01
118802324/0
(–) (–) (–) (–) (–) (–) O (–) (–) O (–)
118802317/0
118802324/0
(–) (–) (–) (–) (–) (–) O (–) (–) O (–)
All manuals and user guides at all-guides.com

IV
All manuals and user guides at all-guides.com
all-guides.com

V
All manuals and user guides at all-guides.com

VI
1
2
31a
4
All manuals and user guides at all-guides.com

VII
2
1
3
120 mm
(4,75 in.)
Ø 2,4 mm
2 x 3,0m (118in.)
All manuals and user guides at all-guides.com

VIII
2
1
3
120 mm
(4,75 in.)
Ø 2,4 mm
2 x 3,0m (118in.)
b
a
12
12c
All manuals and user guides at all-guides.com

IX
2
1
3
120 mm
(4,75 in.)
Ø 2,4 mm
2 x 3,0m (118in.)
All manuals and user guides at all-guides.com
all-guides.com

All manuals and user guides at all-guides.com

1
TABLE OF CONTENTS
....................... 10
........................................ 11
Operating instructions .................................. 13
................................. 13
................................... 16
................................. 17
4.
... 18
............................. 20
.................. 22
7. Diagnostics ........................................... 22
HOW TO READ THE MANUAL
-
-
NOTE or
IMPORTANT These give details or further infor-
mation on what has already been said, and aim
to prevent damage to the machine or cause other
damage.
WARNING! Non-observance will result in
the risk of injury to oneself or others.
DANGER! Non-observance will result in
the risk of serious injury or death to oneself
or others.
GETTING TO KNOW THE MACHINE
-
DESCRIPTION OF THE MACHINE
AND ITS RANGE OF USE
-
-
-
the cutting device.
EN IMPORTANT - READ CAREFULLY BEFORE USING THE MACHINE.
Intended use
for:
-
Improper use
-
-
-
ting device is not used on ground level;
– pruning trees;
above the operator’s belt level;
-
terial;
IDENTIFICATION LABEL
AND MACHINE COMPONENTS
2.
3.
4.
5.
6.
7.
Article code
Drive tube
Cutting device
a. 3-point blade
b. Cutting line head
Cutting device guard
Front handgrip
Guard
Handle bar
Rear handgrip
Connection point (of the harness)
All manuals and user guides at all-guides.com

2
Harness
a.
b.
c.
22. Blade protection (for transport)
23.
32. Throttle control
33.
34. Starter grip
35.
36.
37. Throttle shutter (if provided)
DESCRIPTION OF EXPLANATORY
SYMBOLS (where applicable)
42.
a= stop
b= running
43.
44.
45. Cutting device rotation direction
SAFETY REQUIREMENTS
have therefore been placed on various parts of
-
-
and others.
52.
53. -
-
ceeding 85 dB (A). Wear ear protectors,
54.
55.
56.
suitable cutting devices.
57. Danger:
Using circular saw blades with ma-
-
-
ide. DO NOT start up in an enclosed area.
TECHNICAL DATA AND ACCESSORIES
Mass
Engine
3 or 4 points
Operator ear noise pressure level
on the front handgrip
on the rear handgrip
on the left handgrip
on the right handgrip
Cutting device code
Protection code
(–) not provided
SAFETY REGULATIONS
A) TRAINING
-
All manuals and user guides at all-guides.com

3
-
erator.
than one person.
-
-
-
sponsible for accidents or unexpected events
B) PRELIMINARY OPERATIONS
-
chine.
-
-
-
vices.
-
-
for such use.
-
ing a funnel.
– add fuel before starting the engine. Never re-
-
rated and fuel vapours have dissipated.
condition and in particular:
to the neutral position;
one position to the other;
-
original spare parts. Parts that are not of the
-
speed.
and the connection point of the harness, and the
guards are suitable for the cutting tool being
C) DURING USE
develop.
-
the operator;
-
stacles;
All manuals and user guides at all-guides.com

4
-
ground.
of the cutting device.
– do not direct the silencer and therefore the ex-
5) Do not change the engine settings or over-
speed the engine.
after pressing the throttle trigger, the engine
the blades.
10) Stop the engine:
– before refuelling;
plug cable:
-
-
-
-
branches, stones, etc.). Do not touch the
-
-
D) MAINTENANCE AND STORAGE
-
the storage area.
be done outdoors once the engine has cooled
the cutting device.
-
tenance.
-
dren!
E) TRANSPORTATION AND HANDLING
position the cutting device in the opposite di-
rection to that used during operations.
-
chine, position it so that it can cause no danger
fuel spillage.
OPERATING INSTRUCTIONS
-
ual.
IMPORTANT The machine is supplied with
some of the components disassembled and the
fuel tank empty.
WARNING! Always wear strong protec-
All manuals and user guides at all-guides.com
all-guides.com

5
tive gloves to handle the cutting devices.
Mount the components very carefully so as
not to impair the safety and efficiency of the
machine. If in doubt, contact your dealer.
WARNING! Unpacking and completing
the assembly should be done on a flat and
stable surface, with enough space for moving
the machine and its packaging, always mak-
ing use of suitable equipment.
-
– Slide the contoured plate (1) until it is close to
the holes in the drive tube (2).
– Fit the top part (3) of the front handgrip on the
three holes provided on the drive tube (2) to
adjust the handgrip to the operator’s prefer-
ence.
-
(Fig. 2)
cap (2).
controls are on the right.
– Fasten the casing (4) of the controls to its ca-
ble fastener (5).
NOTE Loosening the knob (1) the handle bar can
be rotated to reduce its bulk for storage.
– Put the handle bar (5) into the seat in the sup-
the right.
– Fasten the casing (6) of the controls to its ca-
ble fastener (7).
NOTE Lifting the lever (1) the handle bar can be
moved to the position most comfortable for the
operator.
– Slide the contoured plate (1) until it is close to
the holes in the drive tube (2).
– Fit the top part (3) of the front handgrip on the
three holes provided on the drive tube (2) to
adjust the handgrip to the operator’s prefer-
ence.
– -
–
–
–
–
protruding hub of the front handgrip (14) and
–
on the support.
–
and (22) to the corresponding cables on the
DEVICE (Fig. 5)
WARNING! Each cutting device is pro-
vided with a specific guard. Never use guards
other than those indicated for each cutting
device.
WARNING! Wear protective gloves and
fit the blade guard.
– Insert the tab (3) in the guard seat (2) and fas-
DEVICES AND PREPARING GUARDS
WARNING! Use only original cut-
All manuals and user guides at all-guides.com

6
ting devices or ones homologated by the
Manufacturer.
job to be done, according to these general indi-
cations:
– the 3-point blade is suitable for cutting brush-
– the 4-point blade is suitable for cutting tough
grass over large surfaces;
– the cutting line head
-
den;
–
felled.
-
IMPORTANT The cutting devices are fastened
with a left-hand thread and therefore must be un-
screwed clockwise and screwed on anticlock-
wise. Remove all elements that may have been
assembled, which will be used in various con-
figurations, according to the cutting device used.
(Fig. 6)
– Fit the inner ring-nut (1) in the indicated di-
-
-
-
-
(9).
-
the cup (6).
blade (3) and the inner ring-nut.
– Fit the inner ring-nut (1) in the indicated di-
-
-
ic hole of the inner ring-nut (1), then turn the
-
– Fit the additional guard (8), inserting the cou-
plers into the respective seats in the guard (9)
WARNING! When using the cutting line
head, the additional guard, with line cutting
knife, must always be fitted.
hole of the inner ring-nut, then turn the ring-nut
-
ing rotation.
– Fit the inner ring-nut (1) in the indicated direc-
-
–
-
-
All manuals and user guides at all-guides.com

7
WARNING! This guard must not be used
for other cutting devices.
-
the cup (6).
blade (3) and the inner ring-nut.
2. PREPARING TO WORK
-
2.2 PREPARING THE FUEL MIXTURE
-
ing oil.
IMPORTANT Using petrol alone will damage the
engine and is cause for invalidation of the war-
ranty.
IMPORTANT Use only quality fuels and oils to
maintain high performance and guarantee the du-
ration of the mechanical parts over time.
least 90 ON.
IMPORTANT Unleaded petrol tends to create de-
posits in the container if preserved for more than 2
months Always use fresh petrol!
2.2.2 Oil characteristics
-
high level of protection.
-
parts petrol.
DANGER! Petrol and the fuel mixture are
highly inflammable!
– Keep the petrol and fuel mixture in homolo-
gated fuel containers, in a safe place, away
from any flames or heat sources.
– Never leave the containers within the reach
of children.
– Never smoke whilst preparing the mixture
and avoid inhaling the petrol fumes.
-
– Add all the oil, according to the chart.
– Add the rest of the petrol.
IMPORTANT The fuel mixture tends to age. Do
not prepare excessive amounts of the fuel mixture
to avoid the formation of deposits.
IMPORTANT Keep the petrol and fuel mixture
containers separate and easily identifiable to
avoid the mistake of using one in place of the
other.
IMPORTANT Periodically clean the petrol and
fuel mixture containers to remove any eventual
deposits.
2.3 REFUELLING
DANGER! Never smoke whilst refuelling
and avoid inhaling the petrol fumes.
WARNING! Carefully open the tank top
as pressure could have formed inside.
Before refuelling:
All manuals and user guides at all-guides.com

8
WARNING! Always close the fuel tank
cap firmly.
WARNING! Immediately clean all traces
of fuel which may have dripped on the ma-
chine or the ground and do not start the en-
gine until the petrol fumes have dissipated.
3. USING THE MACHINE
WARNING! The machine must be started
in an area at least 3 metres from where you
refilled the fuel tank.
Before starting the engine:
WARNING! A “cold” start of the engine
means starting it after at least 5 minutes from
when it was switched off or after refuelling.
1. Models SBC 627 K/KD – 635 K/KD
643 KD – 645 K/KD/KF – 653 KF:
Models SBC 653 K/KD:
the shutter (1a) button, then release the le-
ver (3) and the throttle (2), so the button (1a)
«B» position”.
(Fig. 10).
IMPORTANT To prevent distortions, the drive
tube must not be used as a support for the hand
or knee during startup.
-
IMPORTANT To avoid breaking the starter ca-
ble, do not pull the whole length of it or let it slide
along the edge of the cable guide hole. Release
the starter grip gradually, to avoid letting it fly back
uncontrollably.
6. Pull the starter grip again until the engine
WARNING! Starting the engine with the
choke engaged causes the cutting device to
move, only stopping when the choke is dis-
connected.
7. Models SBC 627 K/KD – 635 K/KD
643 KD – 645 K/KD/KF :
-
sition.
Models SBC 653 KF:
As soon as the engine is started, disengage
-
Models SBC 653 K/KD:
As soon as the engine is started, disengage
-
-
engage the shutter (1a) and bring the engine
IMPORTANT If the starter grip is pulled repeated-
ly with the choke on, it may flood the engine and
make starting difficult.
-
trodes and replace it on the engine.
-
above in points 1-4-5-6.
All manuals and user guides at all-guides.com
Other manuals for SBC 627 K
6
This manual suits for next models
10
Table of contents
Other Stiga Brush Cutter manuals

Stiga
Stiga B 26 J User manual

Stiga
Stiga BC 625 Series User manual

Stiga
Stiga SBC 627 K User manual

Stiga
Stiga SB 32 D User manual

Stiga
Stiga SB 425 HD User manual

Stiga
Stiga BC 80 Li User manual

Stiga
Stiga SBC 627 K User manual

Stiga
Stiga BC 636 User manual

Stiga
Stiga SB 52 PRO User manual

Stiga
Stiga SB 27 JD User manual

Stiga
Stiga B 26 JA User manual

Stiga
Stiga SB 435 HD User manual

Stiga
Stiga BC 646 User manual

Stiga
Stiga SBC 627 K User manual

Stiga
Stiga BC 636 User manual

Stiga
Stiga SBC 627 K User manual

Stiga
Stiga ESB 1000 J User manual

Stiga
Stiga SBC 425 H User manual

Stiga
Stiga TR 625 Series User manual

Stiga
Stiga BC 48 Li User manual