Stihl FR 460 TC M Series User manual

Contents
1 Introduction................................................. 2
2 Guide to Using this Manual.........................2
3 Overview..................................................... 3
4 Safety Precautions......................................4
5 Preparing Trimmer for Operation.............. 11
6 Assembling the Trimmer........................... 11
7 Adjusting Trimmer for User....................... 14
8 Mixing Fuel and Refueling the Brushcutter
.................................................................. 14
9 Starting and Stopping the Engine............. 15
10 Testing the Trimmer..................................16
11 Operating the Trimmer..............................16
12 After Finishing Work..................................18
13 Transporting..............................................18
14 Storing.......................................................18
15 Cleaning....................................................19
16 Maintenance............................................. 19
17 Repairing...................................................20
18 Troubleshooting........................................ 20
19 Specifications............................................21
20 Combinations of Cutting Attachments and
Deflectors..................................................22
21 Approved Power Tool Attachments.......... 22
22 Spare Parts and Accessories....................22
23 Disposal.................................................... 23
24 EC Declaration of Conformity................... 23
25 UKCA Declaration of Conformity.............. 23
1 Introduction
Dear Customer,
Thank you for choosing STIHL. We develop and
manufacture our quality products to meet our
customers’ requirements. The products are
designed for reliability even under extreme con‐
ditions.
STIHL also stands for premium service quality.
Our dealers guarantee competent advice and
instruction as well as comprehensive service
support.
STIHL expressly commit themselves to a sus‐
tainable and responsible handling of natural
resources. This user manual is intended to help
you use your STIHL product safely and in an
environmentally friendly manner over a long
service life.
We thank you for your confidence in us and hope
you will enjoy working with your STIHL product.
Dr. Nikolas Stihl
IMPORTANT! READ BEFORE USING AND
KEEP IN A SAFE PLACE FOR REFERENCE.
2 Guide to Using this Manual
2.1 Applicable Documentation
Local safety regulations apply.
► Read, understand and save the following
documents in addition to this instruction man‐
ual:
–Instruction manual and packaging of the
cutting attachment you are using
2.2 Symbols used with warnings in
the text
WARNING
■ This symbol indicates dangers that can cause
serious injuries or death.
► The measures indicated can avoid serious
injuries or death.
NOTICE
■ This symbol indicates dangers that can cause
damage to property.
► The measures indicated can avoid damage
to property.
2.3 Symbols in Text
This symbol refers to a chapter in this
instruction manual.
English
2 0458-771-0101-A
© ANDREAS STIHL AG & Co. KG 2022
0458-771-0101-A. VA0.D22.
Printed on chlorine-free paper
Printing inks contain vegetable oils, paper can be recycled.
Translation of Original Instruction Manual
0000009873_004_GB

3 Overview
3.1 Brushcutter
11
1
2
15
23
16
8
9
10
24
13
14
3
19
18
7
17
25
26
27
22
21
20
28
29
30
31
12
6
5
4
#
0000099489_001
1 Flexible shaft
Transmits engine power to cutting attach‐
ment.
2 Flexible Drive Tube
Connects coupling sleeve to powerhead and
protects the flexible shaft.
3 Filter cover
Covers the air filter.
4 Air filter
The air filter filters the air entering the engine.
5 Manual fuel pump
The manual fuel pump makes it easier to start
the engine.
6 Choke lever
The choke lever helps start the engine.
7 Shutter
The shutter is used to select summer or win‐
ter operating mode.
8 Spark plug
Ignites the fuel-air mixture in the engine.
9 Spark plug boot
Connects the ignition lead to the spark plug.
10 Cover
Covers the spark plug.
11 Tool bag
Tools can be stored in the tool bag.
12 Carrying strap
The carrying strap distributes the weight of
the brushcutter across the body.
13 Starter grip
The starter grip is used for starting the
engine.
14 Fuel tank cap
The fuel tank cap closes the fuel tank.
15 Muffler
Reduces brushcutter noise emissions.
16 Throttle cable retainer
The throttle cable retainer secures the throttle
cable in position.
17 Throttle cable
Connects the throttle trigger to the engine.
18 Throttle trigger lockout
The throttle trigger lockout unlocks the throttle
trigger.
19 Stop switch
The stop switch shuts off the engine.
20 Coupling sleeve
Connects the flexible drive tube to the shaft.
21 Protective cap
Covers the end of the shaft.
22 Barrier bar
Maintains distance between operator’s leg
and a metal cutting attachment.
23 Stop pin
The stop pin blocks the shaft while a cutting
attachment is being mounted.
24 Opening for stop pin
The opening for the stop pin accommodates
the stop pin.
25 Screw plug
The screw plug closes the filler opening for
STIHL gear grease.
26 Gear housing
The gear housing encloses the gearbox.
27 Shaft
The shaft connects all components.
28 Loop handle
For holding and controlling the brushcutter.
29 Wing screw
Clamps the flexible shaft to the shaft.
30 Throttle trigger
The throttle trigger is used to control the
engine speed.
3 Overview English
0458-771-0101-A 3

31 Control handle
The control handle is used for operating,
holding and controlling the brushcutter.
# Rating plate with machine number
3.2 Deflectors and Cutting Attach‐
ments
The illustrations show examples of deflectors
and cutting attachments. Approved combinations
are listed in this instruction manual, 20.
1 1
2
4
3
76
5
0000-GXX-8182-A0
1 Universal deflector
Protects user from flying debris and contact
with the cutting attachment.
2 Grass Cutting Blade
Cuts grass and weeds.
3 Brush Knife
Cuts brushwood.
4 Transport Guard
Helps protect user from contact with metal
cutting attachments.
5 Skirt
Extends universal deflector for use with a
mowing head.
6 Line Limiting Blade
Trims mowing line to correct length.
7 Mowing Head
The mowing head contains the mowing line.
3.3 Icons
Meanings of symbols that may be on the trimmer
and the deflector:
This icon denotes the fuel tank.
This symbol denotes the manual fuel
pump.
Shutter is in winter mode in this position.
Shutter is in summer mode in this position.
Engine is operated or started with the
choke control in this position.
Engine can be started with the choke con‐
trol in this position.
This symbol marks the stop switch.
This icon shows the direction of rota‐
tion of the cutting attachment.
This icon shows the maximum diame‐
ter of the cutting attachment in millime‐
ters.
This icon shows the rated speed of the cut‐
ting attachment.
L
W
A
Guaranteed sound power level in
accordance with Directive 2000/14/EC
in dB(A) for the purpose of comparing
the sound emissions of products.
4 Safety Precautions
4.1 Warning Signs
4.1.1 Warning Symbols
Meanings of warning signs on the trimmer:
Observe safety notices and take the
necessary precautions.
Read, understand and save the
instruction manual.
Wear safety glasses, hearing protec‐
tion and a hard hat.
Wear safety boots.
Wear work gloves.
Observe safety notices on kickback
and take the necessary precautions.
Observe safety notices on flying debris
and take the necessary precautions.
15m (50ft)
Maintain safe distance.
Do not touch hot surface.
English 4 Safety Precautions
4 0458-771-0101-A

4.1.2 Deflector for mowing heads
Meanings of warning signs and labels on the
deflector for mowing heads:
Use this deflector for mowing heads.
Do not use this deflector for grass cut‐
ting blades.
Do nit use this deflector for brush kni‐
ves.
Do not use this deflector for shredder
blades.
Do not use this deflector for circular
saw blades.
4.1.3 Universal Deflector and Skirt
Universal deflector
Meanings of warning signs on the universal
deflector:
Do not use this deflector without skirt
for mowing heads.
Use this deflector for grass cutting
blades.
Use use this deflector for brush knives.
Use this deflector for shredder blades.
Do not use this deflector for circular
saw blades.
Skirt
Meanings of warning signs on the skirt:
Use the universal deflector with skirt
and line limiting blade for mowing
heads.
4.2 Intended Use
The STIHL FR 460 TC-FM brushcutter backpack
is designed for the following applications:
–With a mowing head: Mowing grass
–with a grass cutting blade: Mowing grass and
weeds
–with a brush knife: Cutting brush with a stem
diameter up to 20 mm
WARNING
■ Using the brushcutter for purposes other than
those it is designed for may result in serious or
fatal injuries and damage to property.
►Use the brushcutter as described in this
User Manual.
4.3 The Operator
WARNING
■ Users who have had no instruction cannot rec‐
ognize or assess the risks involved in using
the trimmer. The user or other persons may
sustain serious or fatal injuries.
► Read, understand and save the
instruction manual.
► If you pass the trimmer is on to another
user: Always give them the instruction man‐
ual.
►Make sure the user meets the following
requirements:
–The user must be rested.
–The user must be in good physical con‐
dition and mental health to operate and
work with the trimmer. If the user’s
physical, sensory or mental ability is
restricted, he or she may work only
under the supervision of or as instructed
by a responsible person.
–The user is able to recognize and
assess the risks involved in using the
trimmer.
–The user must be of legal age or is
being trained in a trade under supervi‐
sion in accordance with national rules
and regulations.
–The user has received instruction from a
STIHL servicing dealer or other experi‐
enced user before working with the trim‐
mer for the first time.
–The user must not be under the influ‐
ence of alcohol, medication or drugs.
► If you have any queries: Contact a STIHL
servicing dealer for assistance.
4 Safety Precautions English
0458-771-0101-A 5

■ The trimmer’s ignition system produces an
electromagnetic field. This field may interfere
with some pacemakers. This can result in seri‐
ous or fatal injuries.
►If the user has a pacemaker: Make sure the
pacemaker is not affected.
4.4 Clothing and equipment
WARNING
■ Long hair can be drawn into the brushcutter
during operation. This may result in serious
injury to the user.
►Tie up and confine long hair above your
shoulders so that it cannot be pulled into
the machine.
■Objects can be thrown at high speed during
operation. This may result in injury to the user.
► Wear close-fitting safety glasses.
Suitable safety glasses are tested in
accordance with EN 166 or national
regulations and available commer‐
cially with the corresponding mark‐
ing.
►Wear face protection.
► Wear long trousers made from resistant
material.
■ Noise is generated during operation. Noise
can damage your hearing.
► Wear ear protection.
■ Falling objects can cause head injuries.
► If objects are likely to fall while work‐
ing: wear a hard hat.
■ Dust can be whipped up during operation.
Whipped up dust can damage the respiratory
passages and cause allergic reactions.
►If dust is generated: Wear a dust respirator
mask.
■ Inappropriate clothing can snag on wood,
brush or the brushcutter. Users not wearing
suitable clothing are at risk of serious injury.
►Wear close-fitting clothing.
► Remove scarves and jewelry.
■ The user may come into contact with the rotat‐
ing cutting attachment during operation. This
may result in serious injury to the user.
►Wear robust footwear.
► If you are using a metal cutting
attachment: Wear steel-toed safety
boots.
► Wear long trousers made from resistant
material.
■ The user may come into contact with the cut‐
ting attachment or line limiting blade during
cleaning and maintenance work. This may
result in injury to the user.
► Wear work gloves made from resist‐
ant material.
■ Wearing unsuitable footwear may cause the
user to slip. This may result in injury to the
user.
►Wear sturdy, closed-toed footwear with
high-grip soles.
4.5 Working Area and Surround‐
ings
WARNING
■ Bystanders, children and animals are not
aware of the dangers of the brushcutter or fly‐
ing debris. This may result in serious injury to
bystanders, children and animals and damage
to property.
15m (50ft)
► Do not allow bystanders,
children or animals within 15
meters of the work area.
► Maintain a clearance of 15 meters from
objects.
► Do not leave the brushcutter unattended.
► Make sure that children cannot play with
the brushcutter.
■ Hot exhaust gas is emitted through the muffler
while the engine is running. Hot exhaust gas
can ignite easily flammable materials and
cause a fire.
►Keep exhaust gas well away from easily
flammable materials.
4.6 Safe Condition
4.6.1 Brushcutter
The brushcutter is in a safe condition if the fol‐
lowing points are observed:
–The brushcutter is not damaged.
–There is no fuel leaking from the trimmer.
–The fuel tank cap is closed.
–The brushcutter is clean.
–The controls function properly and have not
been modified.
–A combination of cutting attachment and
deflector recommended in this user manual is
mounted.
–The cutting attachment and deflector are prop‐
erly mounted.
English 4 Safety Precautions
6 0458-771-0101-A

–Genuine STIHL accessories for this brushcut‐
ter are fitted.
–The accessories are correctly attached.
–All accessible screws and fastening parts are
firmly tightened.
–Cutting attachment does not run while engine
is idling.
WARNING
■ If not in safe condition, components may no
longer operate correctly, safety devices may
be disabled and fuel leakage may occur.
There is a risk of serious or fatal injury.
►Work only with an undamaged brushcutter.
► If fuel is leaking from the trimmer: Do not
use the trimmer and contact a STIHL dealer
for assistance.
►Close the fuel tank cap.
► If the brushcutter is dirty: Clean the brush‐
cutter.
► Never attempt to modify your brushcutter.
Exception: Mounting one of the combina‐
tions of cutting attachment and deflector
recommended in this user manual.
►If the controls do not function properly: Do
not use your brushcutter.
► Fit genuine STIHL accessories for this
brushcutter.
► Mount the cutting attachment and deflector
as described in this user manual.
► Attach accessories as described in this
User Manual or in the User Manual for the
accessories.
►Tighten loose screws and fastening parts.
► If the cutting attachment rotates when the
engine is idling: Rectify the malfunction.
► Never insert objects into the openings of
the brushcutter.
► Replace worn or damaged labels.
► If you are unsure: Consult a STIHL servic‐
ing dealer.
4.6.2 Deflector
The deflector is in a safe condition if the following
points are observed:
–The deflector is not damaged.
–The screws on the guard are tightened to the
correct torque.
–If the guard is used for mowing heads: The
line limiter blade is correctly installed.
WARNING
■If not in safe condition, components may no
longer operate correctly and safety devices
may be disabled. This may result in serious
injury to the user.
►Work only with an undamaged deflector.
► Tighten the screws on the guard to the cor‐
rect tightening torque, 6.5.1.
► If the guard for mowing heads is used:
Work with a properly attached cut-off blade.
► If you have any doubts, be sure to consult a
STIHL dealer.
4.6.3 Mowing Head
The mowing head is in a safe condition if the fol‐
lowing points are observed:
–The mowing head is not damaged.
–The mowing head is not jammed.
–The mowing lines are properly installed.
–The wear limits are not exceeded.
WARNING
■ If they are in an unsafe condition, parts of the
mowing head or mowing lines may come off
and be ejected at high speed. They may
cause serious injury to persons.
►Work only with an undamaged mowing
head.
► Never use metal objects in place of the
nylon mowing lines.
► Observe and remain inside the wear limits.
► If you have any doubts, be sure to consult a
STIHL dealer.
4.6.4 Metal cutting attachment
The metal cutting attachment is in a safe condi‐
tion if the following points are observed:
–Metal cutting attachment and mounting hard‐
ware are undamaged.
–Metal cutting attachment is not warped.
–Metal cutting attachment is properly mounted.
–Metal cutting attachment is correctly sharp‐
ened.
–Cutting edges of the metal cutting attachment
have no burrs.
–The wear limits are not exceeded.
–If a metal cutting attachment not manufactured
by STIHL is used, it must not be heavier,
thicker, of a different shape, of a lower quality,
or larger in diameter than the largest metal
cutting attachment approved by STIHL.
WARNING
■If it is not in an safe condition, parts of the
metal cutting attachment may come off and be
thrown at high speed. They may cause serious
injury to persons.
►Never work with a damaged metal cutting
attachment or damaged mounting hard‐
ware.
4 Safety Precautions English
0458-771-0101-A 7

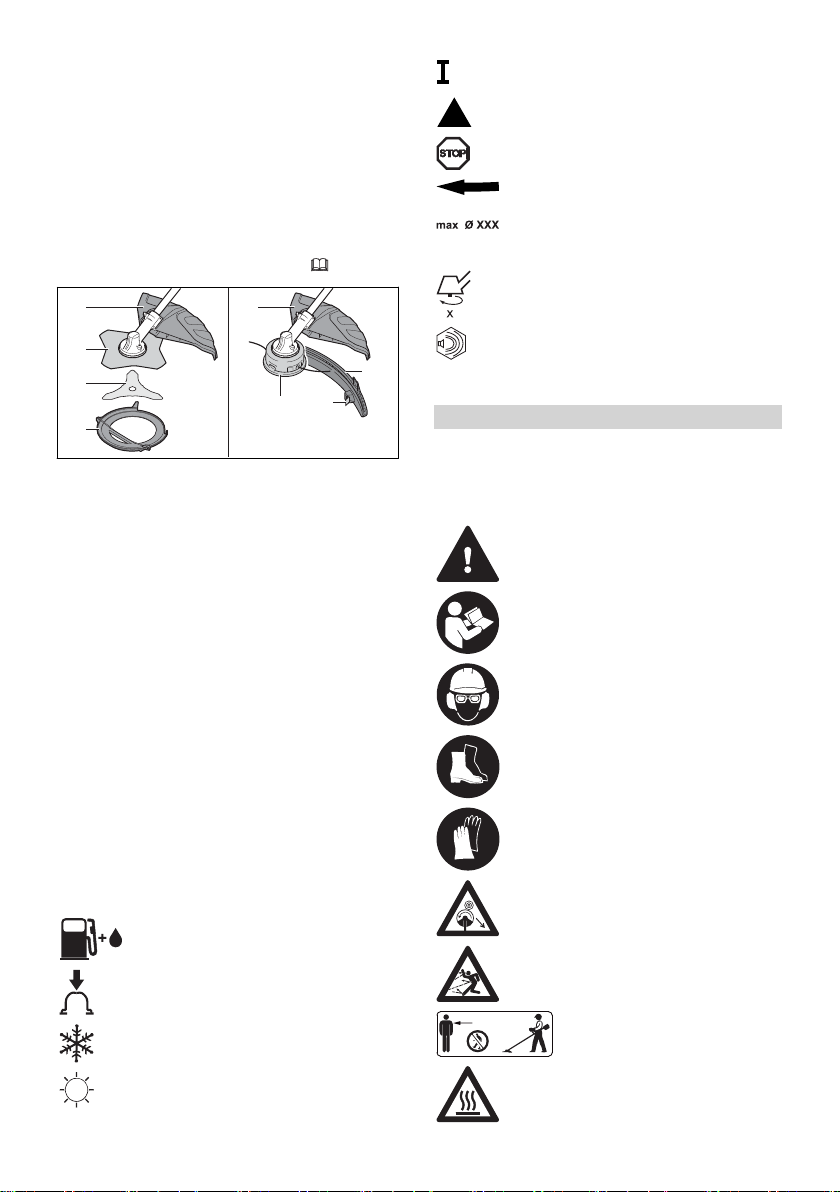
► Sharpen the metal cutting attachment cor‐
rectly.
► Deburr the cutting edges with a file.
► Have the metal cutting attachment bal‐
anced by a STIHL servicing dealer.
► Observe and remain inside the wear limits.
► Use a metal cutting attachment specified in
these instructions for use.
► If you have any doubts, be sure to consult a
STIHL dealer.
4.7 Fuel Mixture and Refueling
WARNING
■ This brushcutter requires a fuel mixture of gas‐
oline and two-stroke engine oil. Mixed fuel and
gasoline are extremely flammable. If fuel mix‐
ture or gasoline make contact with open fire or
hot objects, they can cause a fire or explo‐
sions. Persons may be seriously or fatally
injured and property may be damaged.
►Protect fuel mixture and gasoline from heat
and fire.
► Do not spill fuel mixture or gasoline.
► If fuel is spilled: Wipe up fuel with a cloth
and do not attempt to start engine until all
parts of the brushcutter are dry.
►Do not smoke.
► Never refuel near a fire.
► Shut off the engine and allow it to cool
down before refueling.
► Start the engine at least 3 meters from the
fueling spot, outdoors only.
■ Inhaling fuel fumes and gasoline fumes can
have toxic effects.
► Avoid inhaling fuel fumes or gasoline
fumes.
► Refuel in a well-ventilated location.
■ The brushcutter becomes hot during opera‐
tion. The fuel expands and excess pressure
can build up in the tank. Fuel can escape as a
spray when the fuel tank cap is opened. The
escaping fuel can ignite. This may result in
serious injury to the user.
►Allow the brushcutter to cool down first and
then open the fuel tank cap carefully.
■ Clothing that has been in contact with fuel or
gasoline will ignite more easily. Persons may
be seriously or fatally injured and property
may be damaged.
►If your clothing comes into contact with fuel
or gasoline: Change your clothing.
■ Fuel mix, gasoline and two-stroke engine oil
can harm the environment.
► Do not spill fuel, gasoline or two-stroke
engine oil.
► Dispose of fuel mix, gasoline and two-
stroke engine oil in accordance with local
regulations and environmental require‐
ments.
■Fuel, gasoline or two-stroke engine oil can
cause irritation if they come into direct contact
with the skin or eyes.
►Avoid contact with fuel, gasoline and two-
stroke engine oil.
► If skin contact occurs: Wash affected areas
of skin with plenty of water and soap.
► If the event of contact with eyes: Rinse
eyes with plenty of water for at least
15 minutes and consult a doctor.
■The brushcutter's ignition system produces
sparks. Unconfined sparks may cause a fire or
an explosion in an easily combustible or explo‐
sive environment. Persons may be seriously
or fatally injured and property may be dam‐
aged.
►Use the spark plugs described in this
instruction manual.
► Insert and tighten down the spark plug.
► Connect the spark plug boot and press it
down firmly.
■ The brushcutter can become damaged if it is
run with a fuel mixture that includes unsuitable
gasoline or an unsuitable two-stroke engine
oil, and also if an incorrect mix ratio of gaso‐
line and two-stroke engine oil is used.
►Mix the fuel as described in this User Man‐
ual.
■ The mixture of gasoline and two-stroke engine
oil can separate or age if it is stored for a long
period. The brushcutter can be damaged if it is
used with a fuel mix that has become separa‐
ted or has aged.
►Before refueling the brushcutter: Thor‐
oughly mix the fuel.
► Use a mixture of gasoline and two-stroke
engine oil that is not older than 30 days
(STIHL MotoMix: 5 years).
4.8 Working
WARNING
■If the engine is not started properly, the user
may lose control of the trimmer. This may
result in serious injury to the user.
►Start the engine as described in this instruc‐
tion manual.
► If the cutting attachment is touching the
ground or objects: Do not start the engine.
■If the start flap lever is in the position when
the engine is started, the engine speed is
higher than the idle speed and the cutting
English 4 Safety Precautions
8 0458-771-0101-A

attachment can rotate as soon as the engine
is running. This may result in serious injury to
the user.
►Do not touch the cutting attachment.
► Start the engine as described in this instruc‐
tion manual.
■ In certain situations, the user may no longer
be able to concentrate on their work. The user
can lose control of the trimmer, stumble or fall
and be seriously injured.
►Keep calm and plan your work.
► If light and visibility are poor: Do not use
your trimmer.
► Operate the trimmer alone.
► Keep the cutting attachment close to the
ground.
► Watch out for obstacles.
► Work standing on the ground and keep your
balance.
► If you start feeling fatigue: Take a break.If
you start feeling fatigue: Take a break.
■ Exhaust gas is produced when the engine is
running. Breathing in exhaust gas can have
toxic effects.Breathing in exhaust gas can
have toxic effects.
►Avoid inhaling exhaust gas.
► Operate the trimmer is a well ventilated
location.
► In the event of nausea, headache, visual
disturbances, problems with hearing or diz‐
ziness: Stop work and seek medical advice.
■The user’s ability to hear and assess noises is
restricted when wearing hearing protection
with the engine running.
►Keep calm and plan your work.
■ In case of working with the trimmer and the
start flap lever is in the position , the user
cannot work with the power brush in a control‐
led manner. This may result in serious injury to
the user.
►Check that the choke lever is in position
during operation.
► Start the engine as described in this instruc‐
tion manual.
■ The rotating cutting attachment can cut the
user. This may result in serious injury to the
user.
►Do not touch the rotating cutting attach‐
ment.
► If the cutting attachment is blocked by an
object: Shut off the engine. Before clearing
the jam.
■If you work with mowing lines that are too
long, the brush cutter may be damaged.
► Use a suitable deflector with attached line
limiting blade.
■ The machine can be damaged if you open the
throttle while the cutting attachment is blocked
by an object.
►Shut off the engine. before clearing the jam.
■ If the behavior of the trimmer changes during
operation or feels unusual, it may no longer be
in a safe condition. This may result in serious
injury to people and damage to property.
►Stop work and consult a STIHL servicing
dealer.
■ Trimmer vibrations may occur during opera‐
tion.
► Wear gloves.
► Take breaks.
► If signs of a circulatory disturbance occur:
Consult a doctor.
■ If the cutting attachment makes contact with a
foreign object during operation, the object or
parts of it may be thrown at high speed. Per‐
sons may be injured or property damaged.
►Remove foreign objects from the working
area.
■ If the rotating cutting attachment makes con‐
tact with a hard object, sparks may occur and
the cutting attachment may be damaged.
Sparks can cause fires in a flammable envi‐
ronment. Persons may be seriously or fatally
injured and property may be damaged.
►Do not use in a flammable environment.
► Make sure the cutting attachment is in a
safe condition.
■ Note that the cutting attachment continues to
rotate for a short period after you release the
trigger. They may cause serious injury to per‐
sons.
►Wait until the cutting attachment comes to a
complete stop.
■ In an emergency, the user may start to panic
and forget to take off the carrying system. This
may result in serious injury to the user.
►Practice taking off the carrying system.
4 Safety Precautions English
0458-771-0101-A 9

4.9 Reactive forces
0000-GXX-3025-A1
Kickout can be caused for the following reasons:
–The shaded area or the black area of the rotat‐
ing metal cutting attachment comes into con‐
tact with a solid object and is suddenly braked.
–The rotating metal cutting attachment gets
pinched in the cut.
The risk of kickout is greatest in the black area.
WARNING
■ These situations can abruptly decelerate or
stop rotation of the cutting attachment and
cause the cutting attachment to be thrown to
the right or in the direction of the user (black
arrow). The user can lose control of the trim‐
mer. This may result in serous or fatal injury to
people.
►Hold the trimmer firmly with both hands.
► Work as described in this user manual.
► Do not use the black area for cutting.
► Use a combination of cutting attachment
and deflector recommended in this instruc‐
tion manual.
►Sharpen the metal cutting attachment cor‐
rectly.
► Work with the engine running at full throttle.
4.10 Transporting
WARNING
■The gearbox can get hot during operation.
There is a risk of burn injuries.
► Do not touch a hot gearbox.
■ The trimmer may turn over or shift during
transport. This may result in personal injuries
and damage to property.
►Shut off the engine.
► If a metal cutting attachment is mounted: Fit
the transport guard.
► Secure the trimmer with lashing straps or a
net to prevent it turning over and moving.
■ The muffler and engine may be hot after a
period of operation. There is a risk of burn
injuries.
►Carry the trimmer on your back.
4.11 Storing
WARNING
■Children are not aware of and cannot assess
the dangers of a trimmer and can be seriously
injured.
►Shut off the engine.
► If a metal cutting attachment is mounted: Fit
the transport guard.
► Store the trimmer out of the reach of chil‐
dren.
■ Dampness can corrode the electrical contacts
on the trimmer and metal components. This
can damage the trimmer.
►Store the trimmer in a clean and dry condi‐
tion.
4.12 Cleaning, maintenance and
repair
WARNING
■ The cutting attachment can start rotating unin‐
tentionally if the engine is running during
cleaning, maintenance or repair operations.
This may result in serious injury to people and
damage to property.
►Shut off the engine.
■ The muffler and engine may be hot after a
period of operation. This can result in burn
injuries.
►Wait until the muffler and engine cool down.
■ The gear housing can get hot during opera‐
tion. There is a risk of burn injuries.
► Do not touch a hot gear housing.
■ Aggressive cleaning agents, a water jet or
pointed objects can damage the trimmer,
deflector or the cutting attachment. If the trim‐
mer, deflector and cutting attachment are not
cleaned correctly, components may no longer
function properly or safety devices may be
rendered inoperative. Persons may be seri‐
ously injured.
► Clean the brushcutter, deflector and cutting
attachment as described in this User Man‐
ual.
■If the brushcutter, deflector or cutting attach‐
ment is not maintained or repaired as descri‐
bed in this User Manual, components may no
longer function properly or safety devices may
be rendered inoperative. This can result in
serious or fatal injuries.
►Maintain or repair the brushcutter and the
deflector as described in this User Manual.
English 4 Safety Precautions
10 0458-771-0101-A

► Maintain the cutting attachment as descri‐
bed in the User Manual supplied with the
cutting attachment being used or on the
cutting attachment’s packaging.
■The user can be cut by the sharp cutting
edges while cleaning or maintaining cutting
attachments. This may result in injury to the
user.
► Wear work gloves made of robust
material.
5 Preparing Trimmer for
Operation
5.1 Preparing the Brushcutter for
Operation
The following steps must be performed before
commencing work:
► Ensure that the following components are in
safe condition:
–Brushcutter, 4.6.1.
–Deflector, 4.6.2.
–Mowing head or metal cutting attachment,
4.6.3 or 4.6.4.
►Clean the brushcutter, 15.1.
►Mount the powerhead, 6.1
►Mount the shaft, 6.2.
►Mount the loop handle, 6.3.
► Select combination of cutting attachment and
deflector, 20.1.
►Mount the deflector, 6.5.1.
► If you are using a universal deflector together
with a mowing head: Fit the skirt and line limit‐
ing blade, 6.6.1.
► If you are using a metal cutting attachment:
Mount loop handle with barrier bar, 6.4.
► Mount mowing head or metal cutting attach‐
ment, 6.7.1 or 6.8.1.
►Fill the brushcutter with fuel, 8.2.
►Fit and adjust the carrying system, 7.1.
►Check the controls, 10.1.
► If you cannot carry out this work: Do not use
your brushcutter and contact your STIHL
dealer for assistance.
6 Assembling the Trimmer
6.1 Mounting the Powerhead
► Shut off the engine.
1
2
1
2
3
4
0000099439_001
► Remove the screw (1) and washer (2).
► Hold the powerhead against the carrying sys‐
tem (3) in such a way that the flexible drive
tube (4) points to the front.
► Insert the screw (1) together with the washer
(2) and tighten it to a torque of 10 Nm.
The powerhead need not be removed again.
6.2 Fitting the Shaft
4
66
11
5
2
33
7
0000099457_001
► Loosen the wing screw (1).
► Remove the protective cap (2).
► Line up the lug (5) and the slot (4).
► Push the shaft (6) into the coupling sleeve (3)
as far as the limit stop.
The red line (7) is flush with the coupling
sleeve (3).
► Tighten down the wing screw (1) securely.
10
9
8
9
0000099458_001
► Secure the throttle cable (8) with the throttle
cable retainer (9) to the flexible drive tube (10)
in such a way that the throttle cable (8) is not
wrapped around the flexible drive tube (10).
6.3 Mounting the Loop Handle
► Shut off the engine.
5 Preparing Trimmer for Operation English
0458-771-0101-A 11

1
23
4
5
6
7
a
0000099459_001
► Fit clamp (4) in the loop handle (3).
► Place the loop handle (3) with clamp (4) on the
shaft (5).
► Fit the washers (2) on the screws (1).
► Press the clamp (6) against the shaft (5).
► Insert the screws (1) through holes in the loop
handle (3) and clamps (4 and 6).
► Fit the nuts (7).
► Slide the loop handle (3) until the distance (a)
is no more than 20 cm.
► Firmly tighten the nuts (7).
6.4 Mounting the Loop Handle with
Barrier Bar
► Shut off the engine.
a
4
5
6
3
7
8
2
1
0000099460_001
► Insert the nuts (2) in the barrier bar (1) so that
the holes line up.
► Fit the clamp (5) in the loop handle (3).
► Place the loop handle (3) with clamp (5) and
barrier bar (4) on the shaft (6).
► Press the clamp (7) against the shaft (6).
► Insert the screws (8).
► Slide the loop handle (3) until the distance (a)
is no more than 20 cm.
► Tighten the screws (8) securely.
6.5 Mounting and Removing the
Deflector
6.5.1 Mounting the Deflector
► Shut off the engine.
1
2
0000-GXX-3027-A0
► Push the deflector (1) into the guides on the
gear housing up to the limit stop.
► Insert and tighten the screws (2).
6.5.2 Removing the Deflector
► Shut off the engine.
► Take out screws.
► Remove guard.
6.6 Fitting and Removing the Skirt
6.6.1 Fitting the Skirt
► Shut off the engine.
3
2
4
0000-GXX-3028-A1
1
► Slide the guide slot in the skirt (2) onto the
deflector (1) – it must snap into position.
► Push the line limiting blade (3) into the slot in
the skirt (2).
► Insert and tighten down the screw (4) firmly.
6.6.2 Removing the Skirt
► Shut off the engine.
1
0000-GXX-3030-A2
2
► Insert stop pin (2) into the hole in the skirt (1).
► Use the stop pin (2) to slide the skirt (1) off the
deflector.
The line limiting blade (1) can be left on the skirt.
English 6 Assembling the Trimmer
12 0458-771-0101-A

6.7 Mounting and Removing the
Mowing Head
6.7.1 Mounting the Mowing Head
► Shut off the engine.
2
3
4
0000-GXX-3031-A0
1
4
1
► Place the thrust plate (2) on the shaft (3) so
that its smaller diameter faces up.
► Fit the mowing head (1) on the shaft (3) and
turn it counterclockwise by hand.
► Insert the stop pin (4) in the bore up to the limit
stop and hold it depressed.
► Turn the mowing head (1) counterclockwise
until the stop pin (4) engages in position.
The shaft (3) is now blocked.
► Tighten down the mowing head (1) firmly by
hand.
► Remove the stop pin (4).
6.7.2 Removing the Mowing Head
► Shut off the engine.
► Insert the stop pin in the bore as far as stop
and hold it depressed.
► Rotate the mowing head until the stop pin
engages in position.
The shaft is now blocked.
► Unscrew the mowing head clockwise.
► Remove the thrust plate.
► Remove stop pin.
6.8 Removing and Installing Metal
Cutting Attachment
6.8.1 Mounting the Metal Cutting Attach‐
ment
► Shut off the engine.
1
0000-GXX-3032-A1
2
3
4
5
6
7
► Place the thrust plate (5) on the shaft (6) so
that its smaller diameter faces up.
► Place the metal cutting attachment (4) on the
thrust plate (5). If you are fitting a grass cutting
blade with more than 4 cutting edges: Its cut‐
ting edges must face in the same direction as
the arrow on the deflector.
► Place the thrust washer (3) on the metal cut‐
ting attachment (4) so that its raised side faces
up.
► Place the rider plate (2) on the thrust washer
(3) so that its closed side faces up.
► Insert the stop pin (7) in the bore as far as
stop and hold it depressed.
► Rotate the metal cutting attachment (4) coun‐
terclockwise until the stop pin (7) engages in
position.
The shaft (6) is now blocked.
► Fit the nut (1) counterclockwise and tighten it
down firmly.
► Remove the stop pin (7).
6.8.2 Removing the metal cutting attach‐
ment
► Shut off the engine.
► Insert the stop pin in the bore up to the limit
stop and hold it depressed.
► Rotate the metal cutting attachment clockwise
until the stop pin engages in position.
The shaft is now blocked.
► Unscrew the mounting nut clockwise.
► Remove the fastening parts, metal cutting tool
and pressure plate.
► Remove the stop pin.
6 Assembling the Trimmer English
0458-771-0101-A 13

7 Adjusting Trimmer for User
7.1 Fitting and Adjusting the Carry‐
ing System
► Put the carrying system on your back.
1
0000-GXX-7843-A0
► Close buckle (1) on the waist belt.
2
0000-GXX-7844-A0
► Tighten the straps until the waist belt fits
snugly on your hips and the back padding is
against your back.
► Thread the end of the waist belt through the
loop (2).
7.2 Removing the Carrying System
► Shut off the engine.
► Loosen the straps.
► Open the buckle on the waist belt.
► Take the trimmer off your back.
8 Mixing Fuel and Refueling
the Brushcutter
8.1 Mixing fuel
The fuel required for this trimmer is a mixture of
gasoline and two-stroke engine oil, in a mixing
ratio of 1:50.
STIHL recommends you use STIHL MotoMix.
If you mix the fuel yourself, use only STIHL two-
stroke engine oil or another high-performance
engine oil in accordance with JASO FB, JASO
FC, JASO FD, ISO-L-EGB, ISO-L-EGC or ISO-L-
EGD.
STIHL specifies STIHL HP Ultra two-stroke
engine oil or an equivalent high-performance
engine oil in order to maintain emission limits
over the machine’s service life.
► Make sure that the octane number of the gas‐
oline is at least 90 RON and the ethanol con‐
tent is not more than 10% (for Brazil: 27%).
► Make sure the two-stroke engine oil you are
using meets requirements.
► Depending on the desired amount of fuel,
determine the correct amounts of two-stroke
engine oil and gasoline in a mixing ratio of
1:50. Examples for fuel mixes:
–20 ml Two-stroke engine oil, 1 l gasoline
–60 ml Two-stroke engine oil, 3 l gasoline
–100 ml Two-stroke engine oil, 5 l gasoline
► Pour two-stroke engine oil into a clean
approved fuel canister first and then add gaso‐
line.
► Stir the fuel before topping up.
8.2 Fueling the brushcutter
► Shut off the engine.
► Place your brushcutter on a level surface so
that the fuel tank cap faces up.
► Use a damp cloth to clean the fuel tank cap
and the area around it.
0000099186_001
► Turn the tank cap counterclockwise until it can
be removed.
► Remove the fuel tank cap.
NOTICE
■ Exposure to light, direct sunlight and extreme
temperatures may accelerate fuel separation
or aging. The brushcutter can be damaged if it
is used with a fuel mix that has become sepa‐
rated or has aged.
►Thoroughly mix the fuel.
► Do not top up with fuel stored for more than
30 days (STIHL MotoMix: 5 years).
► When topping up, ensure that no fuel is spil‐
led and that the fuel level remains at least
15 mm under the edge of the tank.
English 7 Adjusting Trimmer for User
14 0458-771-0101-A

0000099187_001
► Fit the fuel tank cap on the tank opening.
► Turn the tank cap clockwise and tighten it
down firmly by hand.
The fuel tank is closed.
9 Starting and Stopping the
Engine
9.1 Starting the engine
► Place the brushcutter on a level surface so
that the cutting attachment does not touch the
ground or other objects.
► Remove the transport guard.
1
2
4
3
0000099490_001
► Depress the manual fuel pump (1) at least 5
times.
► If the engine is warm: Leave the choke lever
(2) in position .
► If the engine is at ambient temperature: Push
in the choke lever (2) at the edge and set it in
position .
0000099491_001
NOTICE
■ The brushcutter can be damaged if pressed
into the ground with your foot or knee.
► Press the brushcutter against the ground
with your left hand. Do not stand or kneel
on the shaft.
► Press the brushcutter against the ground with
your left hand.
► Pull the starter grip slowly with your right hand
until you feel it engage.
► Pull the starter grip quickly and allow the
starter rope to rewind several times until the
engine runs.
►If the choke lever (2) is in position : Briefly
press the throttle lever lockout (3) and the
throttle trigger (4).
The choke control (2) springs to position .
The engine runs at idling speed.
► If the engine is cold: Warm up engine by
briefly opening the throttle.
► If the cutting attachment rotates when the
engine is idling: Rectify the malfunction.
Throttle cable adjustment is not correct.
► If the engine does not start: Move the choke
lever (2) to position and try again to start
the engine.
► If the engine is flooded: Try to start the engine
again with the choke lever (2) in position .
9.2 Shut off the engine.
2
1
3
0000099499_001
► Release the throttle trigger (1) and throttle trig‐
ger lockout (2).
The cutting attachment comes to a standstill.
► Depress the stop switch (3).
The engine stops.
► If the engine does not stop:
►Move the choke lever to position .
The engine stops.
► Do not use your trimmer and contact a
STIHL servicing dealer for assistance.
The brushcutter is defective.
9 Starting and Stopping the Engine English
0458-771-0101-A 15

As long as the stop switch is pressed, the ignition
is switched off. After the stop switch has been
released again, the ignition is switched on again.
10 Testing the Trimmer
10.1 Checking the controls
Throttle trigger lockout and throttle trigger
► Shut off the engine.
► Attempt to pull the trigger without depressing
the lockout lever.
► If the trigger can be pulled: Do not use your
trimmer and contact your STIHL dealer for
assistance.
The throttle trigger lockout is defective.
► Press the throttle trigger lockout and keep
pressed.
► Depress the throttle trigger.
► Release the throttle trigger and throttle trigger
lockout.
► If the trigger or trigger lockout is stiff or does
not spring back to the idle position: Do not use
your trimmer and contact your STIHL dealer
for assistance.
Trigger or trigger lockout is faulty.
Throttle cable adjustment
► Start the engine.
► Attempt to pull the trigger without depressing
the lockout lever.
► If the engine accelerates: Adjust the throttle
cable.
Throttle cable adjustment is not correct.
Shut off the engine
► Start the engine.
► Depress the stop switch.
The engine stops.
► If the engine does not stop:
►Move the choke lever to position .
The engine stops.
► Do not use your trimmer and contact a
STIHL servicing dealer for assistance.
The brushcutter is defective.
11 Operating the Trimmer
11.1 Setting to winter mode
The carburetor may ice up if the engine is oper‐
ated at temperatures below +10 °C. The shutter
must be set to the winter mode so that the carbu‐
retor is additionally heated by warm air from
around the engine.
NOTICE
■ The engine may overheat if is operated in win‐
ter mode at temperatures above +10 °C.
► Change setting to summer mode.
► Shut off the engine.
1
2
0000-GXX-8720-A0
1
2
3
► Take out the screw (1).
► Pull out the shutter (2).
► Hold the shutter (2) so the snowflake points to
the mark (3).
► Insert the shutter (2).
► Fit the screw (1).
When working at temperatures below -10°C or in
powder or drifting snow, a cover plate must also
be fitted to the engine housing and an air filter
with plastic webbing. The accessories are availa‐
ble from a STIHL servicing dealer.
11.2 Summer Operation
The shutter must be set to summer mode when
working at temperatures above +10°C.
► Shut off the engine.
1
1
2
2
3
0000-GXX-8721-A0
► Take out the screw (1).
► Pull out the shutter (2).
► Hold the shutter (2) so the sun points to the
mark (3).
► Fit the shutter.
► Fit the screw (1).
11.3 Calibrating the brushcutter
The trimmer adjusts itself automatically for opti‐
mum performance during operation. Calibration
enables the brushcutter to be adjusted to run
faster for optimum performance.
English 10 Testing the Trimmer
16 0458-771-0101-A

► If the outside temperature is below -10°C or
the engine is cold:
► Start the engine.
► Fit the carrying system.
► Hold and guide the brushcutter.
► Warm up the engine at full throttle for about
1 minute.
► Shut off the engine.
► Remove the cutting attachment.
This allows the brushcutter to reliably adjust
itself to the optimum performance.
1
min
AB C
s> 40 s30-60 s
0000099676_001
►Move the choke lever to position .
► Start the engine without depressing the throttle
trigger.
The engine runs and the choke lever remains
in position .
► Run the engine for at least 30 seconds but no
more than 60 seconds (A) without depressing
the throttle trigger.
► Hold and guide the brushcutter in such a way
that the gearbox does not touch the ground or
other objects.
NOTICE
■ The calibration process is aborted if the throt‐
tle trigger is released before the trigger is
properly calibrated. It is then necessary to
restart the calibration process.
►Keep the throttle trigger fully depressed.
NOTICE
■ The trimmer can be incorrectly calibrated if the
throttle trigger is not kept fully depressed dur‐
ing calibration. This can damage the brushcut‐
ter.
►Keep the throttle trigger fully depressed.
► Depress the throttle trigger for at least 40
seconds (B) and hold it in that position.
The engine accelerates and the trimmer is
calibrated. The engine speed fluctuates and
increases perceptibly during calibration.
► If the engine stalls: Make another attempt to
calibrate the trimmer.
► If the engine stops repeatedly: Do not use
your trimmer and contact your STIHL servicing
dealer for assistance.
The brushcutter is defective.
► As soon as the engine speed drops noticeably
(C): Release the throttle trigger.
The engine runs at idling speed. The brushcut‐
ter is calibrated and ready for use.
► Shut off the engine.
► Mount the cutting attachment.
11.4 Holding and Controlling the
Trimmer
0000-GXX-8177-A0
► Carry the trimmer on your back.
► Hold the trimmer firmly with your right hand on
the control handle – wrap your thumb around
the handle.
► Hold the trimmer with your left hand on the
loop handle – wrap your thumb around the
loop handle.
11.5 Mowing
The cutting height is determined by the distance
of the cutting attachment from the ground.
AB
0000090918_002
Mowing with a mowing head (A)
► Swing the brushcutter steadily back and forth
in an arc.
► Move forward slowly in a controlled manner.
Mowing with a grass cutting blade or brush
knife (B)
► Mow with the left part of the metal cutting
attachment.
► Move forward slowly in a controlled manner.
11 Operating the Trimmer English
0458-771-0101-A 17

11.6 Thinning with a brush knife
0000099488_001
► Dip the metal cutting attachment into the
thicket from above.
► Do not lift metal cutting tool above waist
height.
11.7 Adjusting Nylon Line
11.7.1 Line Feed on AutoCut Mowing Head
► Tap the rotating mowing head on the ground.
About 30 mm of fresh nylon line is advanced.
The line limiting blade in the deflector trims the
mowing lines to the correct length.
1
2
0000-GXX-4037-A1
Automatic feed does not operate if the mowing
lines are shorter than 25 mm.
► Shut off the engine.
► Depress the spool (1) on the mowing head
and hold it depressed.
► Pull out the mowing lines (2).
► If the mowing lines (2) cannot be pulled out to
the required length: Replace the spool (1) or
the mowing lines (2).
The spool is empty.
11.7.2 Line Feed on SuperCut Mowing
Heads
Mowing lines are adjusted automatically. The line
limiting blade in the deflector trims the mowing
lines to the correct length.
Automatic feed will not take place if the mowing
lines are shorter than 40 mm.
► Shut off the engine.
► Pull out the mowing lines.
► If the mowing lines cannot be pulled out to
required length: Replace nylon line.
The spool is empty.
12 After Finishing Work
12.1 When Work is Finished
► Shut off the engine.
► Allow trimmer to cool down.
► If the brushcutter is wet: Allow the brushcutter
to dry.
► Clean the brushcutter.
► Clean the deflector.
► Clean the cutting attachment.
► If a metal cutting attachment is mounted: Fit
the matching transport guard.
13 Transporting
13.1 Transporting the brushcutter
► Shut off the engine.
► If a metal cutting attachment is mounted:
Attach the appropriate transport guard.
1
4
2
3
0000099461_001
► Loosen the wing screw (1).
► Remove shaft (2) from the coupling sleeve (3).
► Mount the protective cap (4).
4
5
0000099462_001
► Secure the control handle (4) with the
strap (5).
Carrying the brushcutter
► Carry the trimmer on your back.
Transporting the trimmer in a vehicle
► Secure the brushcutter to prevent it tipping
over or moving.
14 Storing
14.1 Storing the Brushcutter
► Shut off the engine.
English 12 After Finishing Work
18 0458-771-0101-A

► If a metal cutting attachment is mounted: Fit
the appropriate transport guard.
► Ensure that the following conditions are met
when storing the brushcutter:
–The brushcutter is out of the reach of chil‐
dren.
–The brushcutter is clean and dry.
► If you store the trimmer for more than 30 days:
► Remove the cutting attachment.
► Open the fuel tank cap.
► Drain the fuel tank.
► Close the fuel tank.
► If a manual fuel pump is fitted: Press the
manual fuel pump at least 5 times.
► Start the engine and run it at idling speed
until it stops.
15 Cleaning
15.1 Cleaning the Trimmer
► Shut off the engine.
► Allow trimmer to cool down.
► Clean the trimmer with a damp cloth or STIHL
resin solvent.
► Clean cooling air slots with a soft brush.
15.2 Cleaning the Deflector and Cut‐
ting Attachment
► Shut off the engine.
► Clean the deflector and cutting attachment
with a damp cloth or a soft brush.
16 Maintenance
16.1 Maintenance Intervals
The maintenance intervals are dependent on the
environmental and operating conditions. STIHL
recommends the following maintenance inter‐
vals:
After every 25 hours of operation
► Lubricate the gearbox.
► Lubricate flexible shaft and turn it around.
After every 100 hours of operation
► Install a new spark plug.
Monthly
► Have fuel tank cleaned by a STIHL servicing
dealer.
► Have pickup body (filter) in fuel tank cleaned
by a STIHL servicing dealer.
Every 12 months
► Have pickup body (filter) in fuel tank replaced
by a STIHL servicing dealer.
16.2 Lubricating and turning around
the flexible shaft
4
5
6
3
2
1
3
0000099444_001
► Secure the throttle cable (4) in position using
the throttle cable retainers (3).
► Remove the screw (1).
► Pull off the flexible drive tube (2) together with
the flexible shaft (6).
► Note which end of the flexible shaft (6) was
attached to the powerhead and which end of
the flexible shaft (6) is attached to the coupling
sleeve (5).
► Completely pull out the flexible shaft (6).
► If the flexible shaft (6) has turned blue:
Replace the flexible shaft (6).
► Lubricate the flexible shaft (6) with an even
coat of STIHL multi-purpose grease.
► Turn the flexible shaft (6) through 180°.
► Push the flexible shaft (6) into the flexible drive
tube (2).
The end of the flexible shaft (6) that was previ‐
ously attached to the powerhead is now point‐
ing toward the coupling sleeve (5).
a
6
1
4
3
2
6
0000099445_001
► Turn flexible shaft (6) back and forth and push
it in direction of coupling sleeve (5) until dis‐
tance (a) is 1.5 cm.
► Fit the flexible drive tube (2) with the flexible
shaft (6) in the powerhead and align it so that
the word TOP on the flexible drive tube (2)
faces up.
The marking line at the TOP arrowhead must
be flush with the edge of the powerhead.
► Fit the screw (1).
► Secure the throttle cable (4) with the throttle
cable retainer (3) to the flexible shaft (2) in
such a way that the throttle cable (4) is not
wrapped around the flexible shaft (2).
15 Cleaning English
0458-771-0101-A 19

16.3 Lubricating the gearbox
2
1
0000082409_002
► Remove screw plug (2).
► If no grease can be seen on the end of the
screw plug (2):
► Screw in the tube of STIHL gear lubri‐
cant (1).
► Squeeze 5 g of STIHL gear grease into the
gear housing.
► Unscrew the tube of STIHL gear lubri‐
cant (1).
► Refit and firmly tighten the screw plug (2) .
► Run the brushcutter for 1 minute without
load.
The STIHL gear lubricant is evenly distrib‐
uted.
16.4 Sharpening and Balancing a
Metal Cutting Attachment
Correctly sharpening and balancing metal cutting
attachments requires a lot of practice.
STIHL recommends you have metal cutting
attachments resharpened and balanced by a
STIHL servicing dealer.
► Sharpen the metal cutting attachment as
described in the instructions and on the pack‐
aging supplied with the cutting attachment you
are using.
17 Repairing
17.1 Repairing the Trimmer and
Cutting Attachment
The trimmer and cutting attachment cannot be
repaired by the user.
► If the trimmer or cutting attachment is dam‐
aged: Do not use your trimmer or cutting
attachment and contact your STIHL servicing
dealer.
18 Troubleshooting
18.1 Troubleshooting the Brushcutter
Most problems can be attributed to the same cause.
► Carry out the following measures:
► Replace the air filter.
► Clean or replace the spark plug.
► Adjust for winter or summer operation.
► If the problem continues: Carry out the measured listed below.
Fault Cause Remedy
The engine does not
start.
There is not enough
fuel in the fuel tank.
► Prepare fuel mix and refuel the trimmer.
The carburetor is too
hot.
► Allow trimmer to cool down.
► Depress the manual fuel pump at least 10 times
before starting the engine.
The carburetor has
iced up.
► Allow brushcutter to warm up to +10°C.
The engine idles
erratically.
The carburetor has
iced up.
► Allow brushcutter to warm up to +10°C.
The engine stops
while idling.
The carburetor has
iced up.
► Allow brushcutter to warm up to +10°C.
Cutting attachment
runs while engine is
idling.
Throttle cable adjust‐
ment is not correct.
► Adjust the throttle cable.
The engine does not
reach maximum
speed.
Trimmer is not cor‐
rectly tuned to ambi‐
ent conditions.
► Calibrate the brushcutter.
English 17 Repairing
20 0458-771-0101-A
This manual suits for next models
1
Table of contents
Other Stihl Brush Cutter manuals