Stihl HT 105 User manual

STIHL HT 105, 134, 135 Instruction Manual
Notice d’emploi

Original Instruction ManualPrinted on chlorine-free paper
Printing inks contain vegetable oils, paper can be recycled.
© ANDREAS STIHL AG & Co. KG, 2020
0458-699-8221-A. VA0.L20.
0000009248_003_GB
HT 105, HT 134, HT 135
English
1
This instruction manual is protected by copyright. All rights reserved, especially the rights to reproduce, translate and process
with electronic systems.
Contents
Dear Customer,
Thank you for choosing a quality
engineered STIHL product.
It has been built using modern
production techniques and
comprehensive quality assurance.
Every effort has been made to ensure
your satisfaction and trouble-free use of
the product.
Please contact your dealer or our sales
company if you have any queries
concerning this product.
Your
Dr. Nikolas Stihl
Guide to Using this Manual 2
Safety Precautions and Working
Techniques 3
Using the Unit 8
Assembling the Unit 10
Cutting Attachment 11
Mounting the Bar and Chain 12
Tensioning the Chain 13
Checking Chain Tension 13
Adjusting the Throttle Cable 13
Fitting the Clip 14
Fuel 14
Fueling 15
Chain Lubricant 16
Filling Chain Oil Tank 16
Checking Chain Lubrication 18
Adjusting the Telescoping Shaft 18
Fitting the Harness 19
Backpack Carrying System 19
Starting / Stopping the Engine 21
Maintaining and Sharpening the
Saw Chain 23
Operating Instructions 26
Taking Care of the Guide Bar 27
Replacing the Air Filter 27
Engine Management 28
Adjusting the Carburetor 28
Spark Arresting Screen in Muffler 28
Spark Plug 29
Storing the Machine 30
Checking and Replacing the Chain
Sprocket 30
Maintenance and Care 32
Main Parts 34
Specifications 36
Maintenance and Repairs 37
Disposal 37
STIHL Limited Emission Control
Warranty Statement 38

HT 105, HT 134, HT 135
English
2
Pictograms
The meanings of the pictograms
attached to the machine are explained in
this manual.
Depending on the model concerned, the
following pictograms may be attached to
your machine.
Symbols in Text
Many operating and safety instructions
are supported by illustrations.
The individual steps or procedures
described in the manual may be shown
in different ways:
NA bullet indicates a step or
procedure.
A description of a step or procedure that
refers directly to an illustration may
contain item numbers that appear in the
illustration. For example:
NRemove the screw (1)
NPull the spark arresting screen (2)
upwards out of the muffler
In addition to the operating instructions,
this manual may contain paragraphs
that require your special attention. Such
paragraphs are indicated with the
symbols and signal words described
below:
DANGER
Indicates a hazardous situation that, if
not avoided, will result in death or
serious injury.
WARNING
Indicates a hazardous situation that, if
not avoided, could result in death or
serious injury.
NOTICE
Indicates a risk of property damage,
including damage to the machine or its
individual components.
Engineering Improvements
STIHL’s philosophy is to continually
improve all of its products. As a result,
engineering changes and improvements
are made from time to time. Therefore,
some changes, modifications and
improvements may not be covered in
this manual. If the operating
characteristics or the appearance of
your machine differs from those
described in this manual, please contact
your STIHL dealer or the STIHL
distributor for your area for assistance.
Guide to Using this Manual
Fuel tank; fuel mixture of
gasoline and engine oil
Chain oil tank; chain oil
Direction of chain rotation
Operate manual fuel
pump
Manual fuel pump

HT 105, HT 134, HT 135
English
3
Observe all applicable local safety
regulations, e.g. by trade organizations,
social insurance institutions, labor safety
authorities etc.
If you have never used a power tool
before: Have your dealer or other
experienced user show you how to
operate your machine – or attend a
special course to learn how to operate it.
Minors are not allowed to work with the
power tool – except adolescents above
16 years of age who are instructed
under supervision.
Children, animals and bystanders must
remain at a distance.
When not using the machine, it must be
laid down in such a way that it does not
endanger anyone. Ensure that the
machine cannot be used without
authorization.
The user is responsible for accidents or
risks involving third parties or their
property.
Do not lend or rent your power tool
without the User Manual. Be sure that
anyone using it understands the
information contained in this manual.
The use of machines that emit noise
may be limited to certain hours of the
day as specified by national and/or
regional or local regulations.
Anyone operating the machine must be
well rested, in good physical health and
in good mental condition.
If you have any condition that might be
aggravated by strenuous work, check
with your doctor before operating a
machine.
If you have a pacemaker: The ignition
system of your machine produces an
electromagnetic field of very low
intensity. This field may interfere with
some pacemakers. STIHL recommends
that persons with pacemakers consult
their physician and the pacemaker
manufacturer to reduce any health risk.
Anyone who has consumed alcohol or
drugs or medicines affecting their ability
to react must not operate a power tool.
Use your pole pruner for limbing only
(removing or pruning branches). Saw
wood and wooden objects only.
The machine must not be used for any
other purposes – risk of accidents!
Only use guide bars, saw chains, chain
sprockets and accessories that are
explicitly approved for this power tool
model by STIHL or are technically
identical. If you have any questions in
this respect, consult your dealer. Use
only high quality parts and accessories.
in order to avoid the risk of accidents
and damage to the machine.
STIHL recommends the use of STIHL
original tools, guide bars, saw chains,
chain sprockets and accessories. They
are specifically designed to match the
product and meet your performance
requirements.
Never attempt to modify your power tool
in any way since this may increase the
risk of personal injury. STIHL excludes
all liability for personal injury and
damage to property caused while using
unauthorized attachments.
Do not use a high-pressure washer to
clean the power tool. The solid jet of
water may damage parts of the unit.
Clothing and equipment
Wear proper protective clothing and
equipment.
Do not wear clothing which could
become trapped in wood, brush or
moving parts of the machine. Do not
wear a scarf, necktie or jewelry. Tie up
and confine long hair above your
shoulders.
Safety Precautions and
Working Techniques
Special safety precau-
tions must be observed
when working with the
pole pruner because it
operates at a very high
chain speed, has very
sharp cutters and a long
reach.
It is important you read
and understand the User
Manual before commis-
sioning and keep it in a
safe place for future ref-
erence. Non-compliance
with the User Manual
may cause serious or
even fatal injury.
Clothing must be sturdy
but allow complete free-
dom of movement. Wear
close-fitting clothes such
as a boiler suit, not a
loose jacket.
Wear cut protection
safety boots with non-slip
soles and steel toe caps.

HT 105, HT 134, HT 135
English
4
WARNING
Wear "personal" sound protection, e.g.
ear defenders.
Wear a safety hard hat where there is a
danger of head injuries from falling
objects.
STIHL can supply a comprehensive
range of personal protective equipment.
Transporting the machine
Always stop the engine.
Always fit the chain scabbard – even
when you carry the power tool for short
distances.
Ensure that the power tool is always well
balanced and hold it by the shaft for
carrying. Do not touch hot parts of the
machine, especially the surface of the
muffler – Risk of burns!
By vehicle: When transporting in a
vehicle, properly secure your machine to
prevent turnover, damage and fuel
spillage.
Refueling
Always shut off the engine before
refueling.
Do not fuel a hot engine – fuel may spill
and cause a fire.
Open the fuel cap carefully to allow any
pressure build-up in the tank to release
slowly and avoid fuel spillage.
Only refuel the machine in a well
ventilated place. If fuel has been spilled,
immediately clean the machine – do not
allow your clothes to be splashed with
fuel. If that happens, change your
clothes at once.
This helps reduce the risk of unit
vibrations causing an incorrectly
tightened fuel cap to loosen or come off
and spill quantities of fuel.
Check for leaks. Do not start the engine
if there is a fuel leak – serious or fatal
burns could result!
Before starting
Check that your power tool is properly
assembled and in good condition – refer
to appropriate chapters in the User
Manual.
–Check the fuel system for leaks,
especially the visible parts, e. g.,
fuel cap, hose connections, manual
fuel pump (only in machines with a
manual fuel pump). In case of
leakage and damage, do not start
the engine – risk of fire! Have the
machine serviced by a dealer
before using it
–Correctly mounted guide bar
–Correctly tensioned saw chain
–The stop switch must be easy to
push
–Check the choke lever, throttle
trigger and throttle trigger lockout
for smooth action - throttle trigger
must return automatically to idle
position. The choke lever must
spring back from the g and <
positions to the run position F when
the throttle trigger lockout and
throttle trigger are squeezed
–Check that the spark plug boot is
secure – a loose boot may cause
sparking that could ignite
combustible fumes and cause a fire!
–Never attempt to modify the controls
or safety devices
To reduce the risk of eye
injuries, wear close-fit-
ting safety glasses in
accordance with Euro-
pean Standard EN 166.
Make sure the safety
glasses are a snug fit.
Wear sturdy protective
gloves made of a resist-
ant material (e. g.
leather).
275BA009 KN
Gasoline is highly flam-
mable – keep away from
fire or flame – do not spill
any fuel – no smoking.
After fueling, tighten
down the screw-type fuel
cap as securely as
possible.

HT 105, HT 134, HT 135
English
5
–Keep the handles dry and clean –
free from oil and dirt – this is
important for safe control of the
machine
–Adjust the harness to suit your
height and reach. Observe the
chapter "Fitting the Harness"
To reduce the risk of personal injury, do
not operate your power tool if it is
damaged or not properly assembled!
If you use a harness: Practice setting
down the machine quickly by removing
the harness or by unhooking the
machine as you would in an emergency.
To avoid damage, do not throw the
machine to the ground when practicing.
Starting the engine
Start the engine at least 3 meters from
the fueling spot, outdoors only.
Place the power tool on level ground in
an open area. Make sure you have good
balance and secure footing. Hold the
power tool securely. The chain must be
clear of the ground and all other
obstructions because it may begin to run
when the engine starts.
Your power tool is designed to be
operated by one person only. Do not
allow other persons within a radius of
15 m of your own position – even when
starting the power tool – Risk of injury!
Start the engine as described in the user
manual.
The saw chain continues running for a
short period when you release the
throttle trigger – flywheel effect!
Check engine idling speed: The saw
chain must not move when the engine is
idling – with the throttle trigger released.
Keep easily flammable materials (e.g.
wood chips, bark, dry grass, fuel) away
from the hot exhaust gas flow and the
hot muffler surface – Risk of fire!
Holding and guiding the machine
Always hold the power tool firmly with
both hands – right hand on the control
handle, left hand on the drive tube –
even if you are left-handed. Wrap your
thumbs firmly around the control handle
and shaft.
Machines with telescopic shaft: Extend
the telescopic shaft only as far as the
working height.
While working
Make sure you always have good
balance and secure footing.
In the event of impending danger or in
an emergency, switch off the engine
immediately by pressing the stop switch.
Do not allow other persons within a
radius of 15 m of your own position due
to falling branches and ejected wood
particles – Risk of injury!
This distance must also be maintained in
relation to objects (vehicles, window
panes) – risk of property damage!
Keep the bar nose at least 15 m away
from electric power lines . Electric
current may also arc over from high-
voltage cables at greater distance. Have
the power switched off before starting
work in the immediate vicinity of power
lines.
390BA026 KN
This power tool is not
insulated. Keep at least
15 m away from electric
power lines – Danger of
fatal electric shock!
15m (50ft)
15m (50ft)

HT 105, HT 134, HT 135
English
6
Switch off the engine before changing
the saw chain – Risk of injury!
Ensure that the engine idling speed is
correct. The saw chain must not move
when the throttle trigger has been
released.
It the saw chain continues moving, have
the machine repaired by your specialist
dealer. Check and correct the idle speed
setting at regular intervals.
Never leave a running machine
unattended.
Take special care in slippery, wet
conditions, in snow and on slopes,
uneven ground, etc. – Risk of slipping!
Watch out for obstacles: tree stumps,
roots – risk of tripping or stumbling!
When working at heights:
–Always use a lift bucket
–Never use the machine while
standing on a ladder or in a tree
–Never work on an insecure support
–Never use the machine with just one
hand
Be particularly alert and cautious when
wearing hearing protection because
your ability to hear warnings (shouts,
alarms, etc.) is restricted.
Take breaks when you start getting tired
or feeling fatigue – risk of accidents!
Work calmly and carefully – in daylight
conditions and only when visibility is
good. Proceed with caution, do not put
others in danger.
To reduce the risk of serious or fatal
injury from breathing toxic fumes,
ensure proper ventilation when working
in trenches, hollows or other confined
locations.
Stop work immediately if you start
suffering from nausea, headaches,
impaired vision (e.g. your field of vision
gets smaller), impaired hearing,
dizziness, or impaired concentration –
these symptoms may possibly be the
result of too-high exhaust gas
concentration – Risk of accidents!
Operate your power tool so that it
produces a minimum of noise and
emissions – do not run the engine
unnecessarily, accelerate the engine
only when working.
To reduce the risk of fire, do not smoke
while operating or standing near your
power tool. Combustible fuel vapor may
escape from the fuel system.
Dust (e.g. sawdust), fumes and smoke,
generated while using the machine, may
be hazardous to health. Wear a dust
mask in case of dust formation.
If your power tool is subjected to
unusually high loads for which it was not
designed (e.g. heavy impact or a fall),
always check that it is in good condition
before continuing work – see also
"Before Starting". Check in particular
that the fuel system has no leaks and the
safety equipment is fully operative.
Never use a power tool that is no longer
safe to operate. In case of doubt, contact
a dealer.
If you use a harness, ensure that the
exhaust gas flow is diverted away from
your body – Risk of fire!
Limbing
Hold the power tool at an angle. Do not
stand directly underneath the limb being
cut. Do not exceed an angle of 60° from
the horizontal. Watch for falling wood.
Keep the work area clear – remove
interfering limbs and brush.
As soon as the engine is
running, the power
machine generates toxic
exhaust gas. These
gases may be odorless
and invisible and may
contain unburned hydro-
carbons and benzene.
Never run the engine
indoors or in poorly venti-
lated locations, even if
your model is equipped
with a catalytic converter.
246BA030 KN

HT 105, HT 134, HT 135
English
7
Before sawing branches, establish an
escape route and remove all obstacles.
When performing the separating cut,
position the bar against the branch near
the hook. This will prevent the power tool
from making jolting movements when
you start the separating cut.
Start the cut with the saw chain at full
throttle.
Always cut with a correctly sharpened,
properly tensioned saw chain – the
depth gauge setting must not be too
large.
Do not operate your power tool in the
starting throttle position – engine speed
cannot be controlled in this position.
Perform cross-cut from the top
downward to avoid the chain pinching in
the cut.
If branches are thick or heavy, make a
relief cut – see "Using the Pole Pruner".
Exercise extreme caution when sawing
branches under tension – Risk of injury!
Always make a relieving cut on the
compression side first and then perform
the bucking cut at the tension side.
Be careful when cutting splintered wood
– Risk of injury from ejected pieces of
wood!
If working on a slope, always stand uphill
or to the side of the branch which is to be
sawn. Watch out for rolling branches.
Note when reaching the end of a cut that
the power tool is no longer supported by
the guide bar in the cut. The user must
bear the weight of the machine – risk of
loss of control!
Always pull the power tool out of the cut
with the saw chain running.
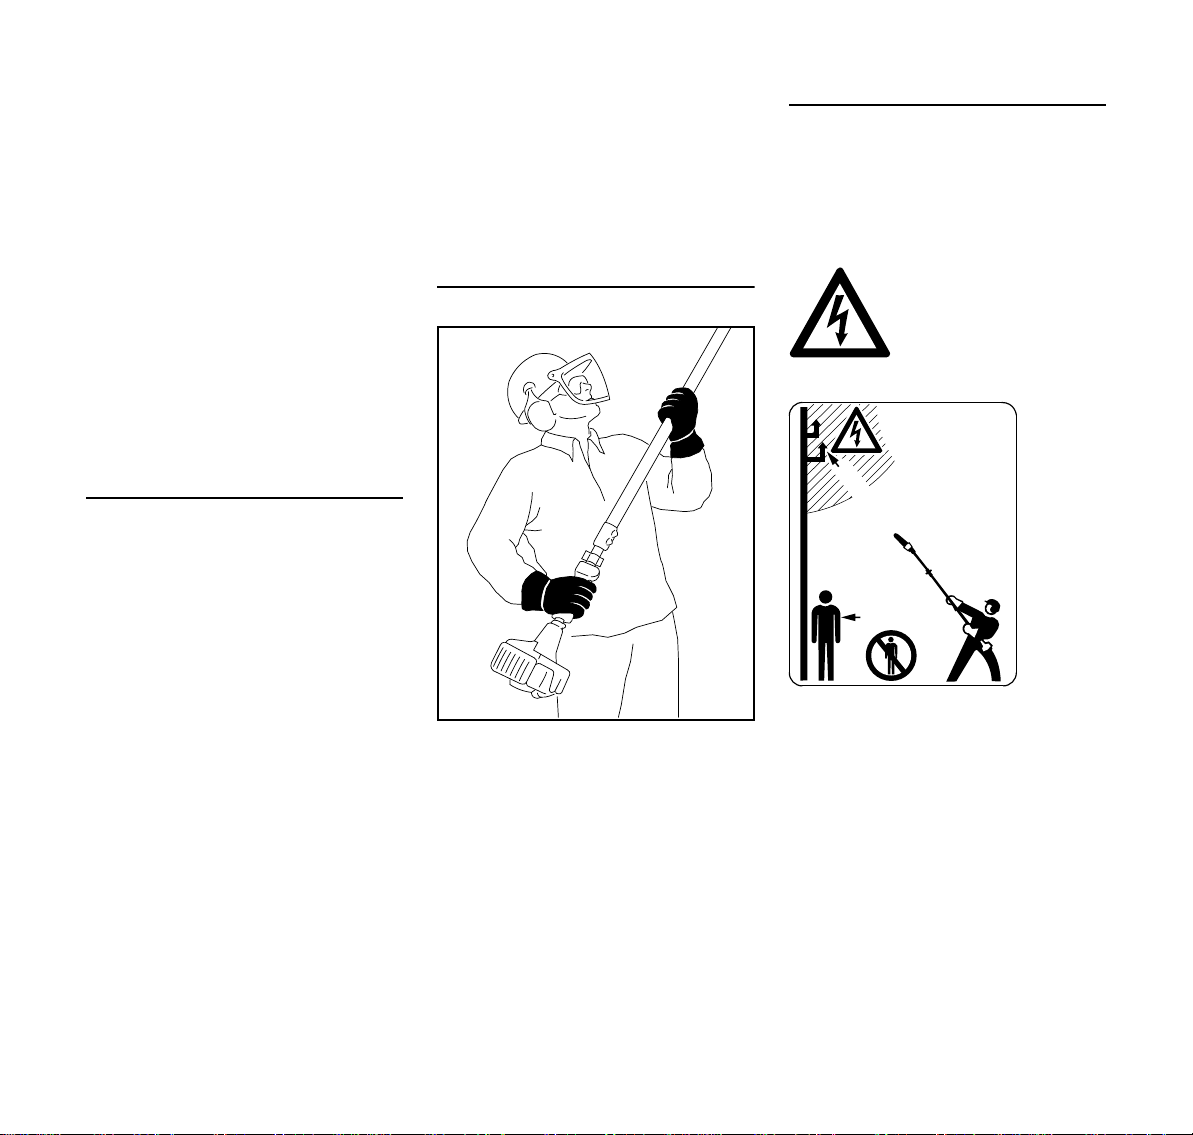
Use the power tool for limbing and
pruning only, not for felling – Risk of
accidents!
Keep the saw chain away from any
foreign objects: Stones, nails, etc. may
be ejected and damage the saw chain.
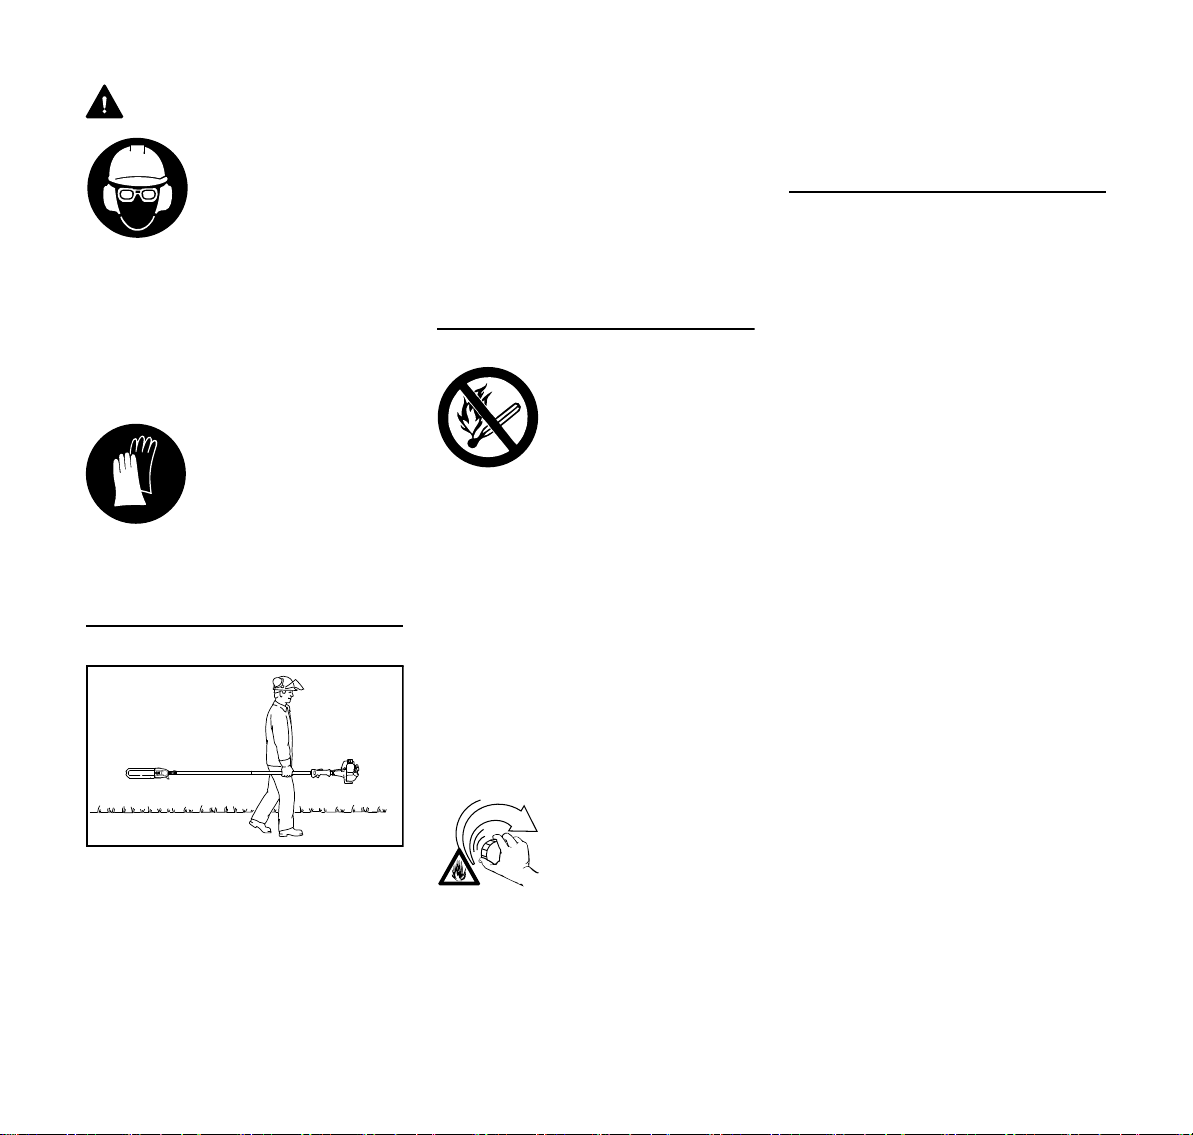
If a rotating saw chain hits a stone or
another hard object, sparks may be
generated which may ignite easily
flammable materials under certain
conditions. Also dried-out plants and
brushwood are combustible, above all in
hot and dry weather. If there is a risk of
fire, do not use your pole pruner near
easily flammable materials, dry plants or
scrub. It is mandatory that you ask the
responsible forestry office about the
current fire hazard.
Before you leave the machine: Shut the
engine off.
Vibrations
Prolonged use of the power tool may
result in vibration-induced circulation
problems in the hands (whitefinger
disease).
No general recommendation can be
given for the length of usage because it
depends on several factors.
The period of usage is prolonged by:
–Hand protection (wearing warm
gloves)
–Work breaks
The period of usage is shortened by:
–Any personal tendency to suffer
from poor circulation (symptoms:
frequently cold fingers, tingling
sensations).
–Low outside temperatures.
–The force with which the handles
are held (a tight grip restricts
circulation).
Continual and regular users should
monitor closely the condition of their
hands and fingers. If any of the above
symptoms appear (e.g. tingling
sensation in fingers), seek medical
advice.
Maintenance and Repairs
Service the machine regularly. Do not
attempt any maintenance or repair work
not described in the instruction manual.
Have all other work performed by a
servicing dealer.
STIHL recommends that you have
servicing and repair work carried out
exclusively by an authorized STIHL
servicing dealer. STIHL dealers are
regularly given the opportunity to attend
training courses and are supplied with
the necessary technical information.
Only use high-quality replacement parts
in order to avoid the risk of accidents
and damage to the machine. If you have
any questions in this respect, consult a
servicing dealer.
0000003462_002

HT 105, HT 134, HT 135
English
8
STIHL recommends the use of genuine
STIHL replacement parts. They are
specifically designed to match your
model and meet your performance
requirements.
To reduce the risk of injury from
unintentional engine startup, always
shut off the engine and disconnect the
spark plug boot before performing any
repairs, maintenance or cleaning work. –
Exception: Carburetor and idle speed
adjustments.
Do not turn the engine over on the
starter with the spark plug boot or spark
plug removed since there is otherwise a
risk of fire from uncontained sparking.
To reduce the risk of fire, do not service
or store your machine near open flames.
Check the fuel filler cap for leaks at
regular intervals.
Use only a spark plug of the type
approved by STIHL and make sure it is
in good condition – see "Specifications".
Inspect the ignition lead (insulation in
good condition, secure connection).
Check the condition of the muffler.
To reduce the risk of fire, do not operate
your machine if the muffler is damaged
or missing – there is also a risk of
hearing damage.
Do not touch a hot muffler since burn
injury will result.
Shut off the engine
–before checking chain tension.
–before retensioning the chain.
–before replacing the chain.
–before rectifying problems.
Observe sharpening instructions – keep
the chain and guide bar in good
condition at all times for safe and correct
handling of the machine. The chain must
be properly sharpened, tensioned and
well lubricated.
Always change the chain, guide bar and
sprocket in good time.
Store fuel and chain lubricant in properly
labeled, safety-type canisters only.
When handling gasoline, avoid direct
contact with the skin and avoid inhaling
fuel vapor – health risk.
Maintenance, replacement, or repair of
the emission control devices and
systems may be performed by any
nonroad engine repair establishment or
individual. However, if you make a
warranty claim for a component which
has not been serviced or maintained
properly, STIHL may deny coverage.
For any maintenance please refer to the
maintenance chart and to the warranty
statement near the end of the instruction
manual.
Preparation
NWear suitable protective clothing,
observe safety precautions.
NAdjust telescoping shaft to the
required length (HT 105, HT 135
only)
NStarting the engine
NFitting the harness
Cutting sequence
To allow branches to free fall, always cut
the lower branches first. Prune heavy
branches (large diameter) in several
controllable pieces.
WARNING
Never stand directly underneath the
branch you are cutting – be wary of
falling branches. – Note that a branch
may spring back at you after it hits the
ground – risk of injury.
Disposal
Do not throw cuttings into the garbage
can – they can be composted.
Working techniques
Hold the control handle with your right
hand, and the shaft with your left hand.
Your left arm should be extended to the
most comfortable position.
Using the Unit

HT 105, HT 134, HT 135
English
9
for HT 134
Always hold the shaft with your left hand
in the area of the handle hose.
The shaft should always be held at an
angle of 60° or less.
The least tiring working position is a tool
angle of 60°.
Any lesser angle may be used to suit the
situation.
Cross-cut
To avoid pinching the bar in the cut,
position the cutting attachment with the
housing against the branch and then
perform the cross-cut from the top
downwards.
Relieving cut
To avoid tearing the bark on thick
branches, always start by performing a
Nrelieving cut (1) on the underside of
the branch. To do this, position the
cutting attachment and guide it
down to the bar nose in an arc.
NPerform the cross cut (2) – position
the slide with the housing against
the branch.
Flush-cutting thick branches
If the branch diameter is more than
10 cm (4 in), first
Nperform the undercut (3) and then
cross-cut at a distance of about
20 cm/8 in (A) from the final cut.
Then carry out the flush-cut (4),
starting with a relieving cut and
finishing with a cross-cut.
246BA030 KN
0000003462_002
2
1
0000003451_002
3
4
A
390BA024 KN

HT 105, HT 134, HT 135
English
10
Cutting above obstacles
The machine's long reach makes it
possible to prune branches that are
overhanging obstacles, such as rivers or
lakes. The tool angle in this case
depends on the position of the branch.
Cutting from a lift bucket
The machine's long reach enables
cutting to be performed next to the trunk
without the risk of the lift bucket
damaging other branches. The tool
angle in this case depends on the
position of the branch.
Assembling the Pole Pruner
NRemove the cap (1)
NAdjust the telescopic shaft to a = 10
cm (HT 105, HT 135)
NMark b = 6 cm on the shaft (2)
NSlide the transmission (3) onto the
shaft (2) up to mark b
NAlign the collet (4) (with the
clamping screws at the bottom of
the shaft) and the transmission (3)
(with the oil tank cap facing up) as
shown
NTighten down the screws (5) firmly
If you cannot push the transmission (3)
onto the shaft (2) up to mark b:
NUnscrew the nut (7) and remove the
chain sprocket cover (6)
NTurn the chain sprocket (8) and
push the transmission (3) onto shaft
(2) up to mark b
NPlace the chain sprocket cover (6)
NFit the nut (7) and tighten it down
firmly
HT 105, HT 135
NRemove the protective cap (9)
NTurn the shaft (2) and press it in the
direction of the control handle (10)
and the housing (11) until the
distance c = 2 cm
0000-GXX-1568-A0
0000-GXX-1569-A0
Assembling the Unit
b
1
2
3
a
0000098170_001
4
3
90°
90°
5
0000098528_001
7
6
8
0000098622_001
9
2
10
11 c
0000098171_001

HT 105, HT 134, HT 135
English
11
NAlign the housing (11) (with the
manual fuel pump facing up), the
control handle (with the stop switch
facing up) and the transmission (3)
(with the oil tank cap facing up) as
shown
NTighten down the screws (12) firmly
The pole pruner does not need to
dismantled again.
A cutting attachment consists of the saw
chain, guide bar and chain sprocket.
The cutting attachment that comes
standard is designed to exactly match
the pole pruner.
–The pitch (t) of the saw chain (1),
chain sprocket and the nose
sprocket of the Rollomatic guide bar
must match.
–The drive link gauge (2) of the saw
chain (1) must match the groove
width of the guide bar (3).
If non-matching components are used,
the cutting attachment may be damaged
beyond repair after a short period of
operation.
Chain Scabbard
The scope of supply includes a bar
scabbard that matches the cutting
attachment.
If guide bars of different lengths are
mounted to the pole pruner, always use
a chain scabbard of the correct length
which covers the complete guide bar.
The length of the matching guide bars is
marked on the side of the chain
scabbard.
11
10
3
90°
90°
0000098529_001
12
0000098594_001
Cutting Attachment
001BA248 KN
1
2
3
a
001BA244 KN

HT 105, HT 134, HT 135
English
12
Removing the chain sprocket cover
NUnscrew the nut and remove the
cover
NTurn the screw (1)
counterclockwise until the tensioner
slide (2) butts against the left end of
the housing slot, then back it off 5
full turns
Fitting the saw chain
WARNING
Wear work gloves to protect your hands
from the sharp cutters.
NFit the saw chain – start at the bar
nose
NFit the guide bar over the screw (3)
and engage peg of tensioner slide in
the hole (4) – place the saw chain
over the chain sprocket (5) at the
same time
NTurn the tensioning screw (1)
clockwise until there is very little
chain sag on the underside of the
bar – and the drive link tangs are
engaged in the bar groove
NRefit the cover and screw on the nut
finger-tight
NGo to chapter on "Tensioning the
Saw Chain"
Mounting the Bar and Chain
0000003452_002
2
1
0000097194_001
390BA003 KN
1
5
390BA044 KN
43

HT 105, HT 134, HT 135
English
13
Re-tensioning during cutting work:
NShut off the engine
NLoosen nuts
NRaise the guide bar at the nose
NUse the screwdriver to turn the
screw (1) to the right until the saw
chain rests against the underside of
the guide bar
NRaise the guide bar further and
tighten the nuts securely
NNext step: Continue with "Checking
Chain Tension"
A new saw chain has to be re-tensioned
more often than one that has been in
use for some time.
NCheck chain tension frequently –
see chapter on "Operating
Instructions"
NShut off the engine
NWear work gloves to protect your
hands
NThe saw chain must fit snugly
against the underside of the bar and
it must still be possible to pull the
chain along the guide bar by hand
NIf necessary, re-tension the saw
chain
A new saw chain has to be re-tensioned
more often than one that has been in
use for some time.
NCheck chain tension frequently –
see chapter on "Operating
Instructions"
It may be necessary to correct the
adjustment of the throttle cable after
assembling the machine or after a
prolonged period of operation.
Adjust the throttle cable only when the
unit is completely and properly
assembled.
NSet the throttle trigger to the full
throttle position.
NCarefully rotate the screw in the
throttle trigger in the direction of the
arrow until you feel initial resistance.
Then rotate it another half turn in the
same direction.
Tensioning the Chain
1
390BA045 KN
Checking Chain Tension
390BA046 KN
Adjusting the Throttle Cable
002BA655 KN

HT 105, HT 134, HT 135
English
14
Clip-On Carrying Ring (only versions
with telescoping shaft)
Position of carrying ring
Depending on the shaft length, the
following positions are recommended:
–Telescoping shaft compressed,
distance A = 15 cm (6 in)
–Telescoping shaft fully extended,
distance B = 50 cm (20 in)
Fitting the clip-on carrying ring
NSqueeze the ends (arrows) together
and push carrying ring onto the
shaft.
This engine is certified to operate on
unleaded gasoline and the STIHL two-
stroke engine oil at a mix ratio of 50:1.
Your engine requires a mixture of high-
quality gasoline and two-stroke air
cooled engine oil.
Use mid-grade unleaded gasoline with a
minimum octane rating of 89 ((R+M)/2)
and no more than 10% ethanol content.
Fuel with an octane rating below 89 may
increase engine temperatures. This, in
turn, increases the risk of piston seizure
and damage to the engine.
The chemical composition of the fuel is
also important. Some fuel additives not
only detrimentally affect elastomers
(carburetor diaphragms, oil seals, fuel
lines, etc.), but magnesium castings and
catalytic converters as well. This could
cause running problems or damage the
engine. For this reason STIHL
recommends that you use only quality
unleaded gasoline.
Gasoline with an ethanol content of
more than 10% can cause running
problems and major damage in engines
and should not be used.
For further details, see
www.STIHLusa.com/ethanol
The ethanol content in gasoline affects
engine speed – it may be necessary to
readjust the carburetor if you use fuels
with various ethanol contents.
WARNING
To reduce the risk of personal injury
from loss of control and / or contact with
the running cutting tool, do not use your
unit with incorrect idle adjustment. At
correct idle speed, the cutting tool
should not move.
If your power tool´s idle speed is
incorrectly adjusted, have your
authorized STIHL servicing dealer
check your machine and make the
proper adjustments and repairs.
The idle speed and maximum speed of
the engine change if you switch from a
fuel with a certain ethanol content to
another fuel with a much higher or lower
ethanol content.
This problem can be avoided by always
using fuel with the same ethanol
content.
To ensure the maximum performance of
your STIHL engine, use a high quality 2-
cycle engine oil, such as STIHL 2-cycle
engine oils. STIHL 2-cycle engine oils
are specially designed for STIHL
engines. To help your engine run
cleaner and reduce harmful carbon
deposits, STIHL recommends using
STIHL HP Ultra 2-cycle engine oil, or
use an equivalent high quality 2-cycle
engine oil.
To meet the requirements of EPA and
CARB we recommend to use STIHL HP
Ultra oil or equivalent.
Do not use NMMA or TCW rated (two-
stroke water cooled) mix oils or other
mix oils that state they are for use in both
water cooled and air cooled engines
(e.g., outboard motors, snowmobiles,
chain saws, mopeds, etc.).
Fitting the Clip
A
B
0000-GXX-1673-A0
0000-GXX-1672-A0
Fuel

HT 105, HT 134, HT 135
English
15
Take care when handling gasoline.
Avoid direct contact with the skin and
avoid inhaling fuel vapor. When filling at
the pump, first remove the container
from your vehicle and place the
container on the ground before filling. To
reduce the risk of sparks from static
discharge and resulting fire and/or
explosion, do not fill fuel containers that
are sitting in or on a vehicle or trailer.
The container should be kept tightly
closed in order to limit the amount of
moisture that gets into the mixture.
The machine’s fuel tank should be
cleaned as necessary.
STIHL MotoMix
STIHL recommends the use of STIHL
MotoMix. STIHL MotoMix has a high
octane rating and ensures that you
always use the right gasoline/oil mix
ratio.
STIHL MotoMix uses STIHL HP Ultra
two-stroke engine oil suited for high
performance engines.
For further details, see
www.STIHLusa.com/ethanol
Fuel mix ages
If not using STIHL MotoMix, only mix
sufficient fuel for a few days of work, not
to exceed 30 days of storage. Store in
approved fuel-containers only. When
mixing, pour oil into the container first,
and then add gasoline. Close the
container and shake it vigorously by
hand to ensure proper mix of oil and
gasoline.
Dispose of empty mixing-oil containers
only at authorized disposal locations.
Preparations
NBefore fueling, clean the filler cap
and the area around it to ensure that
no dirt falls into the tank.
NPosition the machine so that the
tank cap faces up.
Opening the Tank Cap
NTurn the cap counterclockwise until
it can be removed from the tank
opening.
NRemove the tank cap.
Gasoline Oil (STIHL 50:1 or equiva-
lent high-quality oils)
Liters Liters (ml)
1 0.02 (20)
5 0.10 (100)
10 0.20 (200)
20 0.40 (400)
US gal. US fl. oz.
12.6
2 1/2 6.4
5 12.8
Fueling
0000-GXX-0476-A0
002BA447 KN

HT 105, HT 134, HT 135
English
16
Filling Up with Fuel
Take care not to spill fuel while fueling
and do not overfill the tank.
STIHL recommends you use the STIHL
filler nozzle for fuel (special accessory).
NFill up with fuel.
Closing the Tank Cap
NPlace the cap in the opening.
NTurn the cap clockwise as far as
stop and tighten it down as firmly as
possible by hand.
For automatic and reliable lubrication of
the chain and guide bar – use only an
environmentally compatible quality
chain and bar lubricant. Rapidly
biodegradable STIHL BioPlus is
recommended.
NOTICE
Biological chain oil must be resistant to
aging (e.g. STIHL BioPlus), since it will
otherwise quickly turn to resin. This
results in hard deposits that are difficult
to remove, especially in the area of the
chain drive and chain. It may even cause
the oil pump to seize.
The service life of the chain and guide
bar depends on the quality of the
lubricant. It is therefore essential to use
only a specially formulated chain
lubricant.
WARNING
Do not use waste oil. Renewed contact
with waste oil can cause skin cancer.
Moreover, waste oil is environmentally
harmful.
NOTICE
Waste oil does not have the necessary
lubricating properties and is unsuitable
for chain lubrication.
Preparations
NThoroughly clean the fuel cap and
the area around it to ensure that no
dirt falls into the tank
NPosition the machine so that the fuel
cap is facing upwards
To open:
NOpen the bracket
002BA448 KN
Chain Lubricant Filling Chain Oil Tank
0000097195 001
0000,GXX-0135-A0 KN

HT 105, HT 134, HT 135
English
17
NTwist fuel cap (ca. 1/4 turn)
Markings on fuel cap and oil tank must
align
NRemove the fuel cap
Filling up with chain oil
NFill up with chain oil
Take care not to spill chain oil during
refilling and do not overfill the tank.
STIHL recommends use of the STIHL
filling system for chain oil (special
accessory).
To close:
Clip is in an upright position:
NFit the fuel cap – marks on the fuel
cap and oil tank must line up.
NPush the fuel cap down as far as it
will go
NHold the fuel cap down and twist it
clockwise until it engages
Then the markings on fuel cap and oil
tank will align
NClose the bracket lock
The fuel cap is locked
If the oil level in the tank does not go
down, the reason may be a problem in
the oil supply system: Check chain
lubrication, clean the oilways, contact
your dealer for assistance if necessary.
STIHL recommends that maintenance
and repair work be carried out only by
authorised STIHL dealers.
If the fuel cap will not lock onto the oil
tank
The base of the fuel cap is tilted in
relation to the upper part.
NRemove the fuel cap from the oil
tank and look at it from above
0000-GXX-0136-A0
0000-GXX-0137-A0 KN
0000-GXX-0138-A0 KN
0000-GXX-0137-A0 KN
0000-GXX-0139-A0 KN
0000-GXX-0140-A0 KN
0000-GXX-0141-A0 KN
0000-GX-0142 A0 KN

HT 105, HT 134, HT 135
English
18
NFit fuel cap and twist it
counterclockwise until it engages in
the seat of the filling port
NContinue to twist the fuel cap
counterclockwise (approx. 1/4 turn)
– this will twist the base of the cap
into the correct position
NTwist the fuel cap clockwise and
close it – see section "Closing"
The saw chain must always throw off a
small amount of oil.
NOTICE
Never operate without chain lubrication.
If the chain runs dry, the whole cutting
attachment will be irretrievably damaged
within a very short time. Always check
chain lubrication and the oil level in the
tank before starting work.
Every new chain has to be broken in for
about 2 to 3 minutes.
After breaking in the chain, check chain
tension and adjust if necessary – see
"Checking Chain Tension".
WARNING
Always shut off the engine and fit the
chain scabbard!
NLoosen the clamp nut half a turn
counterclockwise
NAdjust the shaft to the required
length
NTighten the nut clockwise
left: Base of fuel cap is tilted –
interior marking (1) is aligned
with the exterior marking
right: Bottom of the fuel cap in cor-
rect position – inner mark is
under the grip. It does not
align with the exterior
marking
002BA584 KN
1
0000-GXX-0136-A0
Checking Chain Lubrication
390BA048 KN
Adjusting the Telescoping
Shaft
0000097196_001
Other manuals for HT 105
2
This manual suits for next models
2
Table of contents
Languages:
Other Stihl Pole Saw manuals

Stihl
Stihl HTA 66 User manual

Stihl
Stihl FS 100 RX User manual

Stihl
Stihl HTE 60 User manual

Stihl
Stihl HTA 65 User manual

Stihl
Stihl HT 56 C User manual

Stihl
Stihl KombiTool HT-KM 4182 User manual

Stihl
Stihl FS 100 RX User manual

Stihl
Stihl HT-KM User manual

Stihl
Stihl HT 102 User manual

Stihl
Stihl HT70 User manual