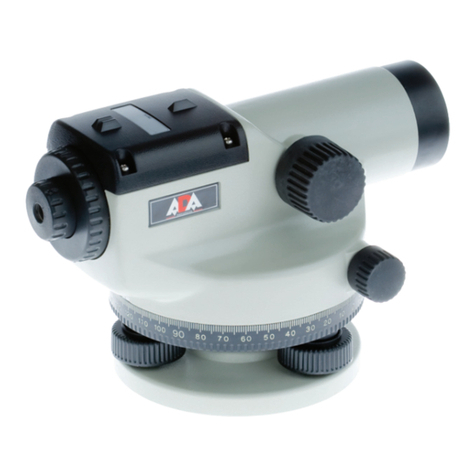
STONEX D1 User manual

STONEX D1
Digital Level
User Guide
www.stonexpositioning.com

Stonex D1 Digital Level –User Guide 1
STONEX D1 Digital Level –User Guide
Ver. 2 –Rev. 2 (December 2015)

Stonex D1 Digital Level –User Guide 2
Table of contents
1. What is in the box........................................................................................ 4
2. Introduction.................................................................................................. 5
3. Technical specifications .............................................................................. 6
4. Preliminary operations................................................................................ 8
4.1 Parts of the instrument..............................................................................................8
4.2 Remove and recharge the battery........................................................................9
4.3 Buttons function........................................................................................................10
4.4 Bar-code leveling staff............................................................................................ 10
5. General operation...................................................................................... 11
5.1 Instrument set up ..................................................................................................... 11
5.2 Levelling-up.................................................................................................................11
5.3 Sighting and focusing.............................................................................................11
5.4 Optical reading on staff .........................................................................................11
5.5 Azimuth measuring.................................................................................................. 12
5.6 Electronic reading..................................................................................................... 13
5.7 Measuring error types ............................................................................................14
6. Instrument settings ................................................................................... 15
6.1 Unit setting..................................................................................................................15
6.2 Auto Off setting......................................................................................................... 16
6.3 Repeated measurement setting .........................................................................17
6.4 Setting of positive staff and reverse staff.......................................................18
6.5 Setting of measuring times ..................................................................................19
7 Check and adjustments.............................................................................. 21
7.1 Tripod.............................................................................................................................21
7.2 Circular bubble........................................................................................................... 21
7.3 Electronic i angle check and adjust...................................................................22
8. Instrument maintenance........................................................................... 24
8.1 Cleaning and Drying................................................................................................ 24
8.2 Storage.......................................................................................................................... 24
8.3 Transportation............................................................................................................ 24
8.4 Check ............................................................................................................................. 24
9. Copyrights, warranty and environmental recycling ............................. 25
9.1 Safety Recommendations .....................................................................................29

Stonex D1 Digital Level –User Guide 3

Stonex D1 Digital Level –User Guide 4
1. What is in the box
Stonex D1 Digital Level instrument unit N.1
p/n 30-350551 BT32, Li-Ion battery, 7.4V, 2.000mAh N.1
p/n 30-350502 FDJ6-L1, battery charger 110/220V for
BT32/BT82/BT 43 N.1
N/A B3120, flexible barcode tape (2m) N.1
N/A Silica gel N.1
N/A Plastic Rain cover N.1
N/A Wrench (2.5mm) N.1
N/A Wrench (3mm) N.1
N/A Adjusting pin N.1
User Guide (ENG)
Available barcode staffs (to be ordered separately, not included in the
bundle)
p/n 30-070051 B2620, high accuracy fiberglass staff, 2m, 1 segment,
barcode on side 1, mm on side 2
p/n 30-070053 B2650, aluminium staff, 5m, 4 segments, barcode on side 1,
mm on side 2

Stonex D1 Digital Level –User Guide 5
2. Introduction
Thank you and congratulations for your choice and confidence in STONEX.
STONEX D1 Digital Level is a rugged and reliable tool that will cut your working
times and any possible typing and reading error.
To fully appreciate your new Digital Level we suggest to read and fully
understand the User manual.
In case you need additional explanations, please contact your local Stonex
Product identification.
The model and the serial number are on the right side of the instrument.
Please enter the S/N in the following field refer to this information when you
contact your Dealer or the STONEX Support/Service.
Product: STONEX D1 Digital Level - Serial N.: ___________________
STONEX D1 digital level is designed with a new coding technology, which
maximize work efficiency and minimize typing and staff reading errors,
providing consistent measurement precision and speed, regardless of
operator skill.
Stonex D1 is the perfect levelling instrument for general construction
engineering, deformation surveys, agricultural water conservancy and
geodetic leveling. Using the accurate Stonex fiberglass staff, Stonex D1 can be
used for Third and Fourth-order Geodetic leveling networks.
The fast and accurate automatic compensator gives always high accuracy
measurements and working efficiency. The instrument’s working temperature
is between -20℃and +50℃.

Stonex D1 Digital Level –User Guide 6
3. Technical specifications
ACCURACY
Standard Deviation (1 km double run - ISO 17123-2)
Electronic measurement
±1.5mm (1)
Optical measurement
±1.5mm (1)
Distance measuring accuracy
D ≤10m <±10mm
D >10m <±0.2 %×D (1)
ELECTRONIC MEASUREMENT
Time for single measurement
< 2s
Measuring range
2-80m
Measuring mode
single, tracking
DISPLAY RESOLUTION (mm/ft)
Height
1/0.01
Distance
10/0.1
TELESCOPE
Image
Erect
Magnification
28x
Clear objective aperture
45mm
Field of view at 100m
2.6m
Shortest focusing distance
0.8m
AUTOMATIC COMPENSATOR
Working range
15′
Setting accuracy
±0.4″
POWER
Battery (B31-1400)
Li-ion, 2000mAh, 7.4V
rechargeable
Continuous operation time
Approx. 40 hours

Stonex D1 Digital Level –User Guide 7
(1) using Stonex fiberglass staff p/n 30-070051
MEASURING PROGRAMS
On-board programs
DH, inverse staff measurement,
i error checking and adjustment
OTHERS
Display
Segment display
Keyboard
Function key board,6 keys
Interface
RS-232C
Sensitivity of circular level
8'/2mm
Water and dust protection
IP54
Operating temperature
-20℃~+50℃
Net weight
2kg, battery included
Specifications subject to change without notice

Stonex D1 Digital Level –User Guide 8
4.Preliminary operations
4.1 Parts of the instrument
1. Footscrew
2. Horizontal circle
3. Adjusting screw for circular bubble
4. Battery
5. Circular bubble
6. Mirror
7. Objective
8. Horizontal movement knob
9. Bottom plate
10. Compensator check button
11 Gunsights
12. Eyepiece ring
13. Keyboard
14. Display
15. Model label
16. Trigger key
17. Serial number
18. Focusing knob
1
9
8
7
6
5
4
3
2
10
11
12
13
14
15
16
17
18

Stonex D1 Digital Level –User Guide 9
4.2 Remove and recharge the battery
Removing the battery
Press the buckle and pull out the battery.
Recharging the battery:
Insert the charger jack into the plug of
the battery;
insert the charger into a 100VAC-
240VAC (50-60Hz) plug,
check if the the LED is lite (RED).
As the recharge is completed, the LED turns
green. This takes about 3-4 hours.
Caution: the battery charger is intended for indoor use only.
Note:
1. New batteries need to be fully charged and discharged several times to reach their
best performances; the first charge should be not less than 10 hours, continuing the
charge even when the led is green;
3. LED behavior:
- RED lit: charging in progress;
- GREEN lit: charging completed;
- RED Flashing: no-loading, connection failed or defective battery.

Stonex D1 Digital Level –User Guide 10
4.3 Buttons function
Key
First Function
Second Function
Power on/off
Backlight on/off
MENU
Enter and shift setting menu
Change settings
SET
Save settings
Change display mode for distance and height
Return to previous
menu
MEAS
Start measuring
4.4 Bar-code leveling staff
Digital level D1 electronic readings require a specific bar-code staff. The best
leveling precision is reached using accurate fiberglass one section bar-code
staffs. Anyway even aluminium foldable staff and the coded band included in
the basic set can be used for less accurate leveling operations.
Note
Only Stonex barcoded staff must be used with D1; staffs from any other producer give
no electronic reading of the staff itself.

Stonex D1 Digital Level –User Guide 11
5. General operation
5.1 Instrument set up
Position a solid tripod –aluminium or wooden –on a suitable place around in
the middle of the levelling base, and firmly fix it on the ground; the tripod
head should be leveled as flat as possible, to minimize the levelling procedure
using the bubble on the instrument.
Carefully take the instrument from the transport case and place it on the tripod
head. Support it with one hand, and tighten the 5/8” centering screw of the
tripod on the bottom of the unit to make sure it is secured to the tripod.
5.2 Levelling-up
Once the instrument is fixed on the tripod, turn the footscrews to make it
perfectly leveled. As the bubble is in the middle of the circular level, the
instrument is pretty leveled.
The bubble image can be directly observed through the mirror (N. 6, pag.7)
5.3 Sighting and focusing
Before to aim to the staff, it is necessary to focus the telescope crosshair. Aim
the telescope toward a bright background and turn the eyepiece ring (N. 12,
pag. 7) until the crosshair appears sharp and absolutely black.
Then aim to the staff sighting through the gunsights (N. 11, pag.7), and turn
the focusing knob (N.18, pag.7) until the staff image appears sharp and is free
from parallax with respect to the crosshair, i.e. there should be no apparent
movement between the horizontal crosshair and a staff graduation when the
observer moves his eye slightly up and down.
Finally turn the instrument with the horizontal movement knob (N.8, pag.7)
unitl the vertical crosshair is exactly aimed on to the centre of the staff.
5.4 Optical reading on staff
After sighting the staff, check whether the circular bubble is in the middle, and
press the compensator button (N.10, pag.7) to check whether the
compensator is working properly.
Read out the value through eyepiece according to the position of horizontal
crosshair on the staff.

Stonex D1 Digital Level –User Guide 12
Then read out the millimeter value on the display which is within a centimeter
interval and relevant to horizontal crosshair. When strong wind or ground
vibration happens, the Surveyor should support the center of tripod with
hands so as to make it more stable.
In order to compute the horizontal distance, the following procedure is
necessary:
Read out the values of top line and bottom line of stadia hairs. Calculate the
distance from instrument to staff, that is, L=100×l.
Note:
l: Distance between top line and bottom line in the cross hairs.
L: The distance from target to instrument.
100: Multiplication factor of telescope.
In the right figure, the difference between the upper (1.648) and the bottom
(1.588) line is 0.060m, thus the horizontal distance is 0.060×100=6.0m.
Optical reading of horizontal crosshair is: 1.618m.
Optical reading of top line is: 1.648m.
Optical reading of bottom line is: 1.588m.
Imaging information on staff:
Optical reading of elevation is: 1.618m.
Horizontal distance is: 6.0m.
5.5 Azimuth measuring
Collimate target A with vertical crosshair, the angle value of horizontal index
plate is X, rotate the instrument, and collimate target B, the angle value of
horizontal index plate is Y, then ∠AOB=X-Y.
Imaging information on staff

Stonex D1 Digital Level –User Guide 13
5.6 Electronic reading
Switch on the instrument by long pressing the “POWER” button, and aim to
the staff with optical sight. Turn focusing knob until the staff image appears
sharp and is free from parallax with respect to the crosshair.
The staff must be turned on the bar code side.
Turn tangent screw to place vertical crosshair of reticle in the middle of the
staff. If the horizontal crosshair of the reticle is not perpendicular to staff, move
the staff to make it through. Press “MEAS” button to start measuring.
After measuring result is obtained, press “height” button to enter “height
difference” display, press “MEAS” button again, the instrument calculates and
displays elevation difference automatically.
Press “backlight” button to turn on or off backlight of the screen. After
initiating the instrument, short press “POWER” button to turn on or off battery
indicator. After measurement complete, long press “POWER” button to power
off.
Azimuth measuring

Stonex D1 Digital Level –User Guide 14
5.7 Measuring error types
01
Environment is too dark
02
Lack of contrast, environment is not good for digital measurement
03
Incorrect barcode, false focusing, blurry barcode, etc; focus and collimate again
04
Wrong barcode, check staff, focus and collimate again
05
Staff is too close
06
Below barcode is not enough to read, check staff
07
Some barcode is not enough to read, check staff
08
Up barcode is not enough to read, check staff
09
Wrong barcode, check staff
10
Some barcode is not enough to read, check staff
11
Wrong barcode, check staff
Long press
“POWER”button
to power on
Collimate bar-code staff
and press “MEAS”
button to carry out
measuring
press “height”
() button
Press “MEAS”button
again to start
measuring
Place bar-code staff
on next surveying
point and press
“MEAS”button
Repeat above steps
until all surveying
points are measured
completely
Long press
“POWER”
button to power
off

Stonex D1 Digital Level –User Guide 15
12
Measuring stop, collimate and measure again
13
Environment is too bright
17
Measuring error
6. Instrument settings
As the instrument is initialized, press “MENU” button to enter the preferred
settings. Press “height” button to exit.
6.1 Unit setting
Display unit (unit selection), and default setting is m(meter). Relevant
minimum resolution is shown in below table.
①Steps:
Press “SET” button to enter function selection menu;
Press “MENU” button to select unit (display circularly): m(meter),
ft(feet), f.i (feet/inch);
Press “SET” button to confirm;
Press “height” button to return to the selection menu.
Unit selection
Displayed value
Minimum resolution
m(meter)
h(height)/dh(elevation difference)
0.0002m
d(distance)
0.001m
ft(feet)
h(height)/dh(elevation difference)
0.0001ft
d(distance)
0.001ft
f.i(feet/inch)
h(height)/dh(elevation difference)
1/8inch
d(distance)
1/8inch

Stonex D1 Digital Level –User Guide 16
②Flow diagram:
6.2 Auto Off setting
Auto p-off (power off automatically), and default setting is off. When auto off
setting is on and there’s no operation on instrument in ten minutes, the
instrument will be powered off automatically.
①Steps:
Press “SET”button to enter function selection menu;
Press “MENU”button to select (display circularly): off/on;
Press “SET”button to confirm;
Press “height”button to return function selection menu.
Press “MENU”
button
Press “MENU”button
to
set unit
Press “SET”
button to
confirm setting
Press “height”
button to return
interface of
instrument settings
Press “SET”
button to enter
into unit setting

Stonex D1 Digital Level –User Guide 17
②Flow diagram:
6.3 Repeated measurement setting
Select Repeat (repeated measurement setting), default setting is off.
①Steps:
Press “SET” button to enter function selection menu;
Press “MENU” button to select (display circularly): off/on;
Press “SET” button to confirm;
Press “height” button to return function selection menu.
Press “MENU”
button twice
Press “MENU”button
to set circularly: turn
on(on)/turn off(off)
Press “SET”
button to
confirm setting
Press “height”
button to return
interface of
instrument settings
Press “SET”button
to enter into
setting of powering
off

Stonex D1 Digital Level –User Guide 18
②Flow diagram:
6.4 Setting of positive staff and reverse staff
Select Rodtype (setting of positive or reverse staff), default setting is “pos”
mode (positive staff). Underground and indoor survey often are more
comfortable using reverse staff (“neg” mode).
Once set as “neg” mode, the instrument will enter into this mode while
measuring. Normal measuring can be carried out under the condition that the
instrument must be reset as positive staff (“pos” mode).
①Steps:
Press “SET” button to enter function selection menu;
Press “MENU” button to select (display circularly): pos (positive
staff), neg (reverse staff);
Press “SET” button to confirm;
Press “height” button to return function selection menu.
Press “MENU”
button three times
Press “MENU”button to
set circularly: turn
on(on)/turn off(off)
Press “SET”button
to confirm setting
Press “height”button
to return interface of
instrument settings
Press “SET”button to
enter into setting of
repeating
measurement

Stonex D1 Digital Level –User Guide 19
②Flow diagram:
6.5 Setting of measuring times
Select Repeat N (setting of measuring times), default setting is 3 times.
①Steps:
Press “SET”button to enter;
Press “MENU”button to select (display circularly): 1—10;
Press “SET”button to confirm;
Press “height”button to return function selection menu.
Press “MENU”
button four times
Press “MENU”button to
set circularly: (Pos)/ (nEg)
Press “SET”button
to confirm setting
Press “height”button
to return interface of
instrument settings
Press “SET”button to
enter into setting of
positive staff and
reverse staff
Table of contents
