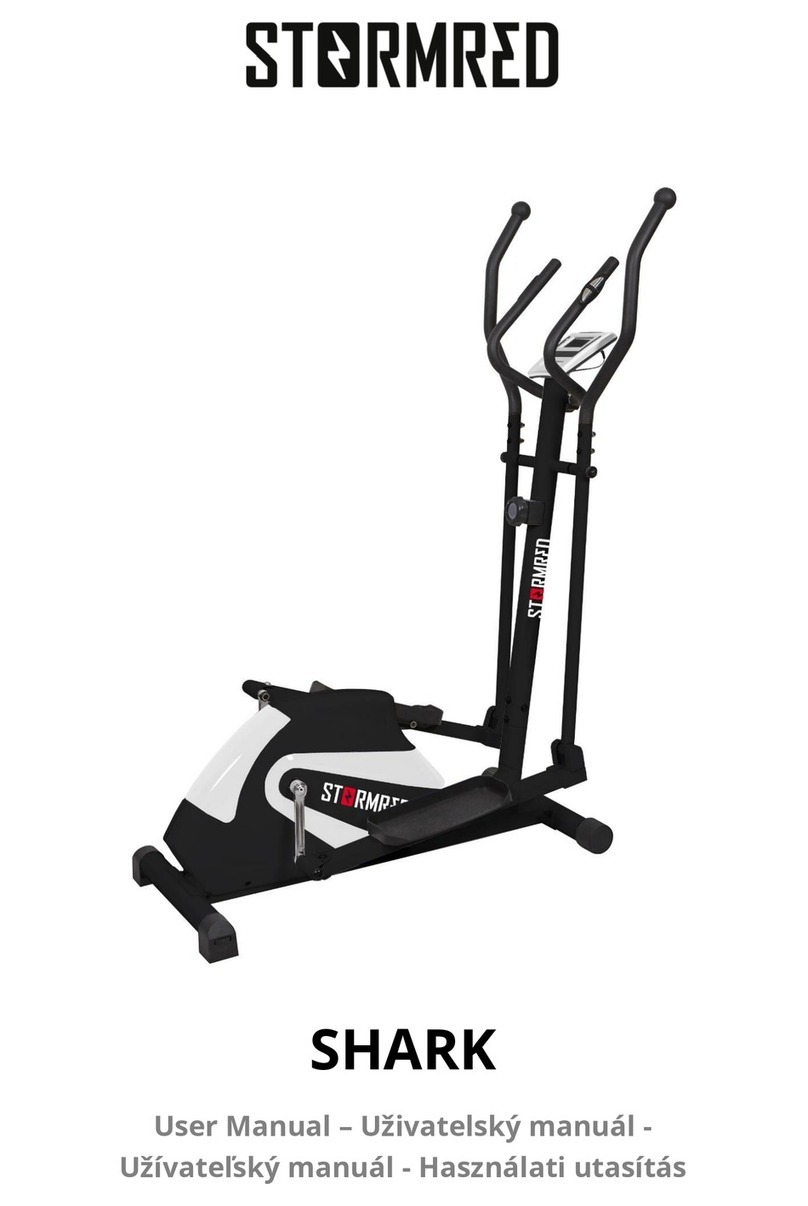
StormRed EAGLE User manual

EAGLE
User Manual –Uživatelský manuál-
Užívateľský manuál - Használati utasítás

2
English
3 –20
Czech
21 –38
Slovak
39 –56
Magyar
57 –75

3
Dear Customer,
Thank you for purchasing our product. This exercise bike will help you meet your goal of
being in good physical condition and developing your muscles properly within your
home environment.
Before putting the exercise bike into operation, please read the assembly and operating
instructions carefully, even if you have purchased the machine assembled.
If you have purchased the machine in its original carton, i.e. in disassembled condition,
please pay attention to the assembly instructions. Before starting the assembly, carefully
remove the individual components from the box, check them for completeness/damage
and follow the instructions for assembly. Use only the original parts supplied. We believe
that you will be satisfied with the product you have purchased, and the machine will
contribute to the consolidation of your health. We wish you much success, endurance,
and strength in achieving your sporting goals.
If you have any questions, you can contact us using the methods below.
✉www.alza.co.uk/kontakt
✆+44 (0)203 514 4411
Importer Alza.cz a.s., Jankovcova 1522/53, Holešovice, 170 00 Prague 7, www.alza.cz

4
Safety rules
•Place the machine on a firm, level and clean surface and make sure it is stable. It
is recommended to put protective layer/pad under the machine to prevent
possible damage to the floor.
•Do not use the machine:
oOutdoors (the machine is specially designed for indoor use),
oOn uneven surfaces,
oIn direct sunlight or near a heat source,
oIn damp or wet environments,
oIn an enclosed space where air does not circulate (unventilated rooms) or
in an area with flammable liquid or gas.
•Leave a clear area of at least 60 cm around the machine in the direction of access
(preferably on all sides). The clear space must also include space for emergency
exit from the machine. If the machine is located close to other equipment, this
free space can be shared.
•Insert the plug directly into the socket, do not use an extension cord or splitter.
Errors may occur if the power supply is unstable. Please do not use the same
electrical outlet as for computers, air conditioners, etc.
•If the supply cable fails, replace it with the supply cable provided by the
manufacturer/importer of the machine. Contact your local distributor for
replacement.
•WARNING: The safe level of training equipment can only be delayed if it is
regularly checked for damage and wear. Periodically check all bolts and nuts
for proper tightening. Check all parts regularly, if damaged, do not use the
machine and replace damaged parts immediately or contact the supplier.
Remove the machine from service until it is repaired and fully operational. Ensure
that none of the adjustments protrude, they could interfere with movement.
•Make sure that the main switch is turned off and the machine is disconnected
from the mains before removing the machine guard or carrying out maintenance
or changing parts.
•Unplug the machine when not in use.
•There is a risk of electric shock or death if water enters the machine.
•Keep this manual for future reference and also if you need to order spare parts.
•A maximum of one person can use the machine at a time.
•Before starting the exercise, remove all dangerous objects with sharp edges from
around the machine.
•Before exercising, adjust the saddle, its height, and the distance of the
handlebars. You should be comfortable. The height of the saddle should be
about the height of your hips. Your leg should not be fully extended, even when
the pedal is at its lowest position. Your arms should be slightly bent when holding
the handlebars. When training, try to keep your back straight (even if you are

5
slightly bent over), keeping your head in extension of your spine.
Tip: Keep your gaze directed approximately two metres in front of the exercise
bike, do not look down at your feet for long periods of time. For an effective and
safe workout, secure your foot to the pedals with a strap.
By exercising on the exercise bike, you are strengthening mainly the thigh, calf
and buttock muscles. With proper and regular exercise, the cardiovascular
system is also strengthened.
Start training with a moderate load and at a slower pace. It is equally important
to end the training in this way. You can pedal the exercise bike sitting or standing.
Pedal smoothly and rhythmically. It is also important to breathe correctly,
regularly, and deeply (into the abdomen).
•Please take extra care if you watch TV or engage in other entertainment while
you are exercising on the machine. Other concurrent activities may distract your
concentration and cause you to lose your balance and become injured.
•Improper use (e.g. excessive exercise, abrupt movements without warm-up,
wrong settings) can damage your health. Consult your physician about your
medical condition (cardiac system, blood pressure, orthopedical problems, etc.)
before starting to exercise, especially if you suffer from any of the following
conditions: high blood pressure, diabetes, respiratory diseases, other chronic or
complicated diseases; also, if you are overweight, a smoker, or if the user is a
pregnant or nursing woman. If you experience any of the symptoms listed below
while exercising, stop exercising immediately and contact your physician. Such
symptoms include chest pain/pressure, irregular heartbeat, very shortened
breathing, feeling faint, light-headedness, nausea.
•Children, elderly persons, and pregnant women should not use the machine
without supervision or without consulting a doctor.
•The manufacturer is not responsible for any injury, damage or failure caused by
the use of this product or by improper assembly and maintenance of the
machine.
•Consult a fitness trainer for the right way to exercise.
•When exercising, we recommend wearing comfortable sports clothing and
suitable sports shoes. Your clothes should not be too loose to avoid getting
caught by the machine.
•Please put away jewellery (chains, rings, etc.).
•Do not leave novice athletes and children unsupervised on or near the machine
(especially when it is in use) to avoid possible injury. Do not leave children (under
12 years of age) or pets playing near the machine. This machine is not a toy.
•Please ensure you drink enough water if you exercise on the machine for more
than 20 minutes.
•WARNING: The heart rate monitoring system (if equipped) may not be accurate.
Overexertion during training can cause serious injury or death. If you experience
nausea, stop exercising immediately!

6
The maximum user weight is 150 kg. The weight of the machine is 43,8kg. The
classification of the machine is Use Class H, that is, for domestic use only. The machine
is not intended for commercial use and higher power loads. The accuracy class is C (low).
The machine complies with EN ISO 20957-1:2013 and EN ISO 20957-5:2016.
Parts list

7
Number
Name
Number of
1
Computer
1
2
End cap
2
3
Handlebars
1
4
Screw
2
5
Handheld pulse pad
2
6
Handlebar foam
2
7
Handheld pulse cable
2
8L
Plastic computer cover L
1
8R
Plastic computer cover R
1
9
Screw M5
5
10
Screw M4
1
11
Spacer tube
1
12
T-shaped button
1
13
Lower computer cable
1
14
Sensing cable
1
15
Sensor
1
16
Cable
1
17
Grooved pin with round head
1
18
Pipe connection
1
19
Case
1
20
Pipe end cap
2
21
Saddlebag
1
22
Saddle
1
23
Matrix
1
24
Pipe slide
1
25
Knob 12
1
26L
Left crank
1
26R
Right crank
1
27
M8 hexagon head screw against loosening
2
28
Crank end
2
29L
Pedal L
1
29R
Pedal R
1
30
Self-tapping screw
5
31L
Chain cover L
1
31R
Chain cover R
1
32
Screw M5
4
33
C-shaped washer
1
34
Wavy washer
1
35
Pad
3
36
Bearing 6003RZ
2
37L
Rear end cap L
1
37R
Rear end cap R
1
38
Rear stabiliser bar
1
39
Screw
8
40
DC cable
1
41
Screw
2
42
Engine
1
43
Screw
3

8
44
Pad
2
45
Caterpillar bike
1
46
Bet
1
47
Pedal axle
1
48
Allen screw M8*12mm
3
49
Plastic cover for the main post
1
50
Main frame
1
51
M8 Allen screw
2
52L
Front cover L
1
52R
Front cover R
1
53
Front stabiliser bar
1
54
Pad
6
55
Allen screw M8*20mm
7
56
Spring washer
6
57
Curved pad
2
58
Upper computer cable
1
59
Main post
1
60
Screw M5
4
61
Flange nut
2
62
M10 nuts
2
63
Bearing 6300 RZ
1
64
Pad
1
65
Flywheel
1
66
Bearing 6003RZ
1
67
Unidirectional bearing
1
68
Bearing 6203RZ
1
69
Flywheel axis
1
70
Small caterpillar bike
1
71
Bearing 6000 RZ
1
72
Free stand
1
73
Wavy washer
3
74
Idle
1
75
Matrix
2
76
Spring
1
77
Hexagon bolt M6
2
78
Spring washer
2
79
Pad
2
80
Set of magnets
1
81
Flywheel shaft
1
82
Cone spring
1
83
Double-headed screw
1
84
M6 nuts
1
85
Plastic washer
1
86
Pad
1
87
Matrix
2
88
Allen key
1
89
Combination wrench
1
90
Adapter
1

9
Installation
Step 1
Step 2

10
Step 3
Step 4

11
Step 5
Step 6

12
Step 7
Step 8

13
Display
TIME
Count up - No pre-set target, time will count down from 00:00 to a
maximum of 99:59 with each increment being 1 minute.
Countdown - If you train with a pre-set time, the time will count down
from reset to 00:00.
Each pre-set increment or decrement is 1 minute between 00:00 and
99:00.
SPEED
Displays the current training speed. The maximum speed is 99.9
KM/H or ML/H.
DISTANCE
Accumulates the total distance from 0.00 to 99.9 km or ML. The user
can pre-set the target distance data using the UP/DOWN button.
Each increase or decrease is 0.1 KM or ML between 0.00~99.9.
CALORIES
Accumulates calorie consumption during a workout from 0 to a
maximum of 9999 calories. (This data is a rough guide for comparing
different exercise sessions that cannot be used in treatment.)
PULSE
The user can set the target pulse from 0-30 to 230; and the computer
buzzer will beep when the actual heart rate during the workout
exceeds the target value.
RPM
Displays the number of revolutions per minute. Display range 0~999
WATTY
Exercise power consumption Range 0~999
In constant Watt mode, the computer will remain at the pre-set watt
value (setting range 0~350)
MANUAL
Training in manual mode.
PROGRAMME
12 PROGRAM selection.
USER
PROGRAMME
The user creates a resistance level profile.
H.R.C.
Target HR training regimen.
WATT
PROGRAMME
Constant WATT training mode.
Up (encoder)
Increase the level of resistance.
Selecting settings.
Down
(encoder)
Reduce the level of resistance.
Selecting settings.
Mode / Enter
Confirm the setting or selection.
Reset
Hold down for 2 seconds, the computer will reboot and start from
user settings.
Return to the main menu during a pre-set workout value or stop
mode.
Beginning
End
Starting or ending the exercise.
Recovery
Test the heart rate recovery status.
Body fat
In stop mode, press to measure body fat.

14
Turn on
Plug in the power supply, the computer turns on and displays all segments on the LCD
for 2 seconds (Figure 1).
Drawing 1
Then go to User Data Settings. Use UP or DOWN (Encoder) to select U1~U4 (Figure 2),
then set the ATTITUDE, AGE, HEIGHT, WEIGHT (Figure 3) and confirm by pressing the
MODE / ENTER button. After the user data profile is completed, the computer will enter
the main menu.
Drawing 2
Drawing 3
Choice of training
Use UP or DOWN (Encoder) to select the training Manual (Figure 4) Program (Figure 5),
User Program (Figure 6), H.R.C. (Figure 7), Watt (Figure 8).
Drawing 4
Drawing 5
Drawing 6
Drawing 7
Drawing 8

15
Manual mode
Press START in the main menu to start the exercise in manual mode.
1. Use UP or DOWN (Encoder) to select the exercise program, select Manual and press
MODE / ENTER to enter.
2. Use UP or DOWN (Encoder) to pre-set TIME (Figure 9), DISTANCE (Figure 10), CALORIES
(Figure 11), PULSE (Figure 12) and press MODE / ENTER to confirm.
3. Press the START/STOP buttons to start the exercise. Use UP or DOWN (encoder) to
adjust the load level. The load level display in the WATT window, without adjustment for
3 seconds, switches to the WATT display (Figure 13).
4. Press the START/STOP buttons to pause the exercise. Press RESET to return to the
main menu.
Drawing 9
Drawing 10
Drawing 11
Drawing 12
Drawing 13

16
Program mode
1. Use UP or DOWN (encoder) to select the exercise program, press MODE / ENTER to
enter.
2. Use UP or DOWN (encoder) to select program 1~12 (fig.14) and press MODE / ENTER
to enter.
3. Use UP or DOWN (encoder) to pre-set the TIME.
4. Press the START/STOP button to start the exercise. Use UP or DOWN (encoder) to
adjust the load level.
5. Press the START/STOP button to pause the workout. Press RESET to return to the
main menu.
Drawing 14
User program mode
1. Use UP or DOWN (encoder) to select the exercise program, select the user program
mode and press MODE / ENTER to enter.
2. Use UP or DOWN (Encoder) to create a user profile (Figure 15). There are a total of 20
columns, the user can adjust the load level of each column. During adjustment, the user
can hold MODE/ENTER for 2 seconds to exit.
3. Use UP or DOWN (encoder) to set the TIME.
4. Press the START/STOP button to start the exercise. Use UP or DOWN (encoder) to
adjust the load level.
5. Press the START/STOP button to pause the workout. Press RESET to return to the
main menu.
Drawing 15
H.R.C. Mode
1. Use UP or DOWN (encoder) to select the exercise program, select H.R.C. and press
MODE / ENTER to enter.
2. Use UP or DOWN (Encoder) to select 55% (Figure 16), 75%.90% or TAG (TARGET H.R.)
(default: 100, Figure 17).

17
3. Use the UP or DOWN (encoder) to pre-set the TIME of the workout.
4. Press the START/STOP button to start or stop training. Press RESET to return to the
main menu.
Drawing 16
Drawing 17
WATT mode
1. Use UP or DOWN (encoder) to select the exercise program, select WATT and press
MODE / ENTER to enter.
2. Use the UP or DOWN encoder to pre-set the WATT target (default: 120, Figure 18).
3. Use UP or DOWN (encoder) to pre-set the TIME.
4. Press the START/STOP button to start the exercise. Use UP or DOWN (encoder) to
adjust the WATT level.
5. Press the START/STOP button to pause the workout. Press RESET to return to the
main menu.
Drawing 18
Recovery
After a period of exercise, hold on to the handles or wear a chest belt and press the
RECOVERY button. The display of all functions will stop except "TIME" will start counting
down from 00:60 to 00:00 (Figure 19). The screen will display your heart rate recovery
status using F1, F2.... to F6. F1 is the best, F6 is the worst (drawing 20). The user can
continue to exercise to improve the heart rate recovery status. (Press the RECOVERY
button again to return to the main display.)
Drawing 19
Drawing 20

18
Body fat
1. In STOP mode, press the BODY FAT button to start the body fat measurement (Figure
21).
2. Users must hold both hands on the handles during the measurement. And the LCD
will display "= " "= = " (Figure 22) for 8 seconds until the computer completes the
measurement.
3. The LCD will display the BODY FAT recommendation symbol, BODY FAT percentage
(Figure 23), BMI (Figure 24) for 30 seconds.
4. Error message:
*The LCD display will show "= = " " " = =" (Figure 25) - this means you are not holding the
handle or wearing the chest belt correctly.
*E-1 - No heart rate signal input was detected.
*E-4 - Occurs when the FAT % is below 5 or above 50 and the BMI score is below 5 or
above 50 (Figure 26).
Drawing 21
Drawing 22
Drawing 23
Drawing 24
Drawing 25
Drawing 26
Notes:
•After four minutes without pedalling or pulse input, the console switches to
power saving mode. Press any key to wake up the console.
•If the computer behaves abnormally, unplug the adapter, and plug it back in.

19
Care and maintenance
•Before cleaning, make sure the machine is disconnected from the mains. Wipe
off the sweat after each exercise.
•Regularly wipe off dust and dirt from the surface of the entire machine with a soft
damp cloth (water or mild detergents are sufficient). After cleaning, wipe the
machine dry.
•Use the machine in a clean, ventilated, and dry room.
•Tighten all screws properly during assembly (check tightening again after about
10 hours of use). If there is increased noise, it is necessary to check that all
connections are tightened correctly.
•If the computer does not display correctly, check the connection of the scanning
cables (between each other and with the display).
Storage
Store the machine indoors in a clean, dry area. Protect it from direct sunlight and high
temperatures. Do not place any items on the treadmill. Make sure the main switch is off
and the machine is not plugged into electricity. Avoid using more static electricity with
the exercise bike, which can interfere with the proper functioning of the meters or even
damage them.

20
Warranty conditions
A new product purchased from Alza.cz is covered by a 2-year warranty. In case of need
for repair or other service within the warranty period, please contact the seller of the
product directly, it is necessary to present the original proof of purchase with the date of
purchase.
The following shall be deemed to be a breach of warranty for which a claim may
not be accepted:
•Use of the product for a purpose other than that for which it is intended or
failure to follow the instructions for maintenance, operation and servicing of the
product.
•Damage to the product due to natural disaster, unauthorized person or
mechanical fault of the buyer (e.g. during transportation, cleaning by improper
means, etc.).
•Natural wear and aging of consumables or components during use (e.g. batteries,
etc.).
•The action of adverse external influences such as solar and other radiation or
electromagnetic fields, liquid ingress, object ingress, mains surges, electrostatic
discharge of voltage (including lightning), faulty supply or input voltage and
improper polarity of this voltage, chemical processes such as used power
supplies, etc.
•If anyone has made alterations, modifications, design changes or adaptations to
change or extend the product's functions from the design purchased or use non-
original parts.
Table of contents
Languages:
Other StormRed Exercise Bike manuals
Popular Exercise Bike manuals by other brands
LIFESTYLER
LIFESTYLER C760 owner's manual
Schwinn
Schwinn AD7 AirDyne Service manual
Taurus
Taurus Z9.9 Pro Assembly and operating instructions
Vision Fitness
Vision Fitness R2000 Assembly guide

Sunny Health & Fitness
Sunny Health & Fitness SF-B1516 user manual

Christopeit Sport
Christopeit Sport XL 2000 Assembly and exercise instructions
