STOVES Sterling Contemporary 800DF Instruction Manual

Users Guide & Installation
Handbook
Please read carefully and retain for future reference
Duel Fuel Range Cooker (Sterling, Richmond & Gourmet)
Gas hob with electric ovens and grill
All sizes included
www.stoves.co.uk
08 27189 01 Ra DF 2/6/05 9:40 AM Page 1

Introduction
Thank you for buying this high quality appliance from us
We would like to congratulate you on choosing this cooker, and hope you find it
to be an attractive and beneficial addition to your kitchen. We hope you will
enjoy many years of cooking with this appliance, whether you are cooking for
yourself, your family or your friends!
This hard working cooker can handle many culinary tasks, leading to ambitious
and creative cooking all round.
This handbook is designed to help you through each step of owning your new
cooker, from installation, to use.
Please read through all of this guide carefully before you start using your cooker,
as we have endeavoured to answer as many questions as possible, and provide
you with as much support as we can.
If, however, you should find something missing, or not covered, please contact
the Stoves Customer Care team who will be only too happy to assist you on:
0870 444 9929
In addition you could always try the website for frequently asked questions and
more Customer Care information.
In addition, you have also been provided with a card for registering your appli-
ance for it’s one year guarantee, and a leaflet for extended warranty.
Our policy is one of constant development and improvement, therefore we can-
not guarantee the strict accuracy of all of our illustrations and specifications -
changes may have been made subsequent to publishing.
08 27189 01 Ra DF 2/6/05 9:40 AM Page 2

Contents
User’s Section . . . . . . . . . . . . . . . . . . . . . . . . . . . . . . . . . . . . . . . . . . . 1 -56
Introduction . . . . . . . . . . . . . . . . . . . . . . . . . . . . . . . . . . . . . . . . . . . . . . . . . 1
Specifications . . . . . . . . . . . . . . . . . . . . . . . . . . . . . . . . . . . . . . . . . . . . . 2 - 3
Before using your cooker. . . . . . . . . . . . . . . . . . . . . . . . . . . . . . . . . . . . . . . . 4
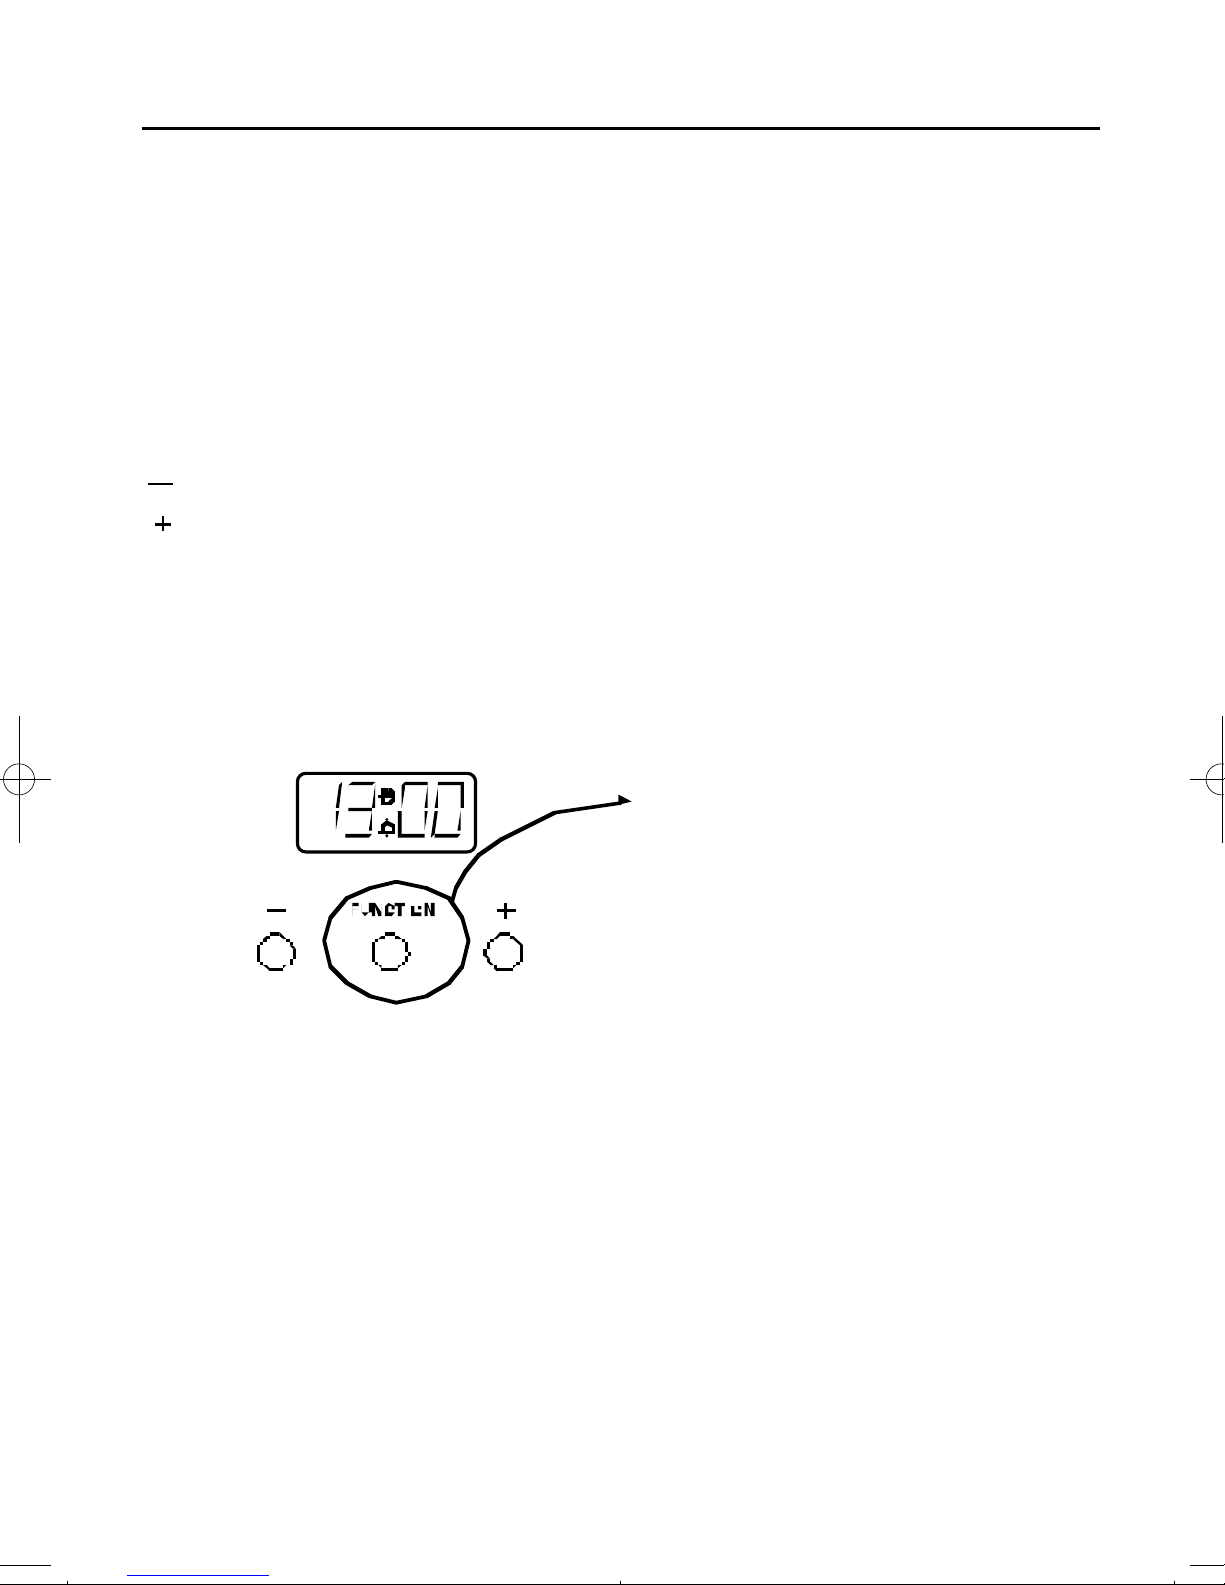
Using the Programmer/Clock . . . . . . . . . . . . . . . . . . . . . . . . . . . . . . . . . 5 - 13
Using your hob . . . . . . . . . . . . . . . . . . . . . . . . . . . . . . . . . . . . . . . . . 14 - 20
Using the hob safely . . . . . . . . . . . . . . . . . . . . . . . . . . . . . . . . . . . . . . . . 14
Getting started . . . . . . . . . . . . . . . . . . . . . . . . . . . . . . . . . . . . . . . . . . . . 15
The fold down lid . . . . . . . . . . . . . . . . . . . . . . . . . . . . . . . . . . . . . . . . . . 16
Your griddle . . . . . . . . . . . . . . . . . . . . . . . . . . . . . . . . . . . . . . . . . . . . . . 17
Tips & Hints . . . . . . . . . . . . . . . . . . . . . . . . . . . . . . . . . . . . . . . . . . . . . . 18
Care & cleaning . . . . . . . . . . . . . . . . . . . . . . . . . . . . . . . . . . . . . . . . 19 - 20
Your Grill . . . . . . . . . . . . . . . . . . . . . . . . . . . . . . . . . . . . . . . . . . . . . 21 - 26
Using the grill safely (all models) . . . . . . . . . . . . . . . . . . . . . . . . . . . . . . . 21
Your grill (Sterling & Gourmet models) . . . . . . . . . . . . . . . . . . . . . . . . 22 - 23
Your grill (Richmond models). . . . . . . . . . . . . . . . . . . . . . . . . . . . . . . 24 - 25
General grill information. . . . . . . . . . . . . . . . . . . . . . . . . . . . . . . . . . . . . . 26
Your Top Oven (Richmond models) . . . . . . . . . . . . . . . . . . . . . . . . 27 - 29
Using the top oven safely. . . . . . . . . . . . . . . . . . . . . . . . . . . . . . . . . . . . . 27
Your conventional top oven . . . . . . . . . . . . . . . . . . . . . . . . . . . . . . . . . . . 28
Tip & Hints . . . . . . . . . . . . . . . . . . . . . . . . . . . . . . . . . . . . . . . . . . . . . . . 29
Top oven guide . . . . . . . . . . . . . . . . . . . . . . . . . . . . . . . . . . . . . . . . . . . . 30
Cleaning the top oven/grills (all models) . . . . . . . . . . . . . . . . . . . . . . . . . . 31
Your Main Oven(s) . . . . . . . . . . . . . . . . . . . . . . . . . . . . . . . . . . . . . . 32 - 39
Using the main ovens safely . . . . . . . . . . . . . . . . . . . . . . . . . . . . . . . . . . . 32
Your multifunction ovens (all models) - Functions. . . . . . . . . . . . . . . . . . . . 33
Your multifunction oven(s) . . . . . . . . . . . . . . . . . . . . . . . . . . . . . . . . 34 - 35
Your fanned oven(s) . . . . . . . . . . . . . . . . . . . . . . . . . . . . . . . . . . . . . 36 - 37
Fanned oven (tips & hints) . . . . . . . . . . . . . . . . . . . . . . . . . . . . . . . . 38 - 39
08 27189 01 Ra DF 2/6/05 9:40 AM Page 3

Contents
Guides & Information . . . . . . . . . . . . . . . . . . . . . . . . . . . . . . . . . . . 40 - 57
Main oven guide ( all models). . . . . . . . . . . . . . . . . . . . . . . . . . . . . . . . . . 40
General roasting guide . . . . . . . . . . . . . . . . . . . . . . . . . . . . . . . . . . . 41 - 43
Slow cook oven (Sterling & Richmond) . . . . . . . . . . . . . . . . . . . . . . . 44 - 46
General baking guide . . . . . . . . . . . . . . . . . . . . . . . . . . . . . . . . . . . . 47 - 51
Storage compartment . . . . . . . . . . . . . . . . . . . . . . . . . . . . . . . . . . . . . . . 52
Cleaning the main oven . . . . . . . . . . . . . . . . . . . . . . . . . . . . . . . . . . . . . . 53
Telescopic shelving system . . . . . . . . . . . . . . . . . . . . . . . . . . . . . . . . 54 - 55
Cleaning the outside of your cooker . . . . . . . . . . . . . . . . . . . . . . . . . . 56 - 57
Installation Instructions . . . . . . . . . . . . . . . . . . . . . . . . . . . . . . . . . 58 - 65
Clearances . . . . . . . . . . . . . . . . . . . . . . . . . . . . . . . . . . . . . . . . . . . . . . . 59
Regulations & Requirements . . . . . . . . . . . . . . . . . . . . . . . . . . . . . . . 60 - 61
Connecting to the electrical supply (except Gourmet 900DF). . . . . . . . . . . . 62
Connecting to the electrical supply (Gourmet 900DF only) . . . . . . . . . . . . . 63
Connecting to the gas supply . . . . . . . . . . . . . . . . . . . . . . . . . . . . . . . . . . 64
Securing your appliance . . . . . . . . . . . . . . . . . . . . . . . . . . . . . . . . . . . . . . 65
Technical Data . . . . . . . . . . . . . . . . . . . . . . . . . . . . . . . . . . . . . . . . . 66 - 70
Customer Care . . . . . . . . . . . . . . . . . . . . . . . . . . . . . . . . . . . . . . . . . 71 - 73
Changing lightbulbs . . . . . . . . . . . . . . . . . . . . . . . . . . . . . . . . . . . . . . . . . 71
Service record . . . . . . . . . . . . . . . . . . . . . . . . . . . . . . . . . . . . . . . . . . . . . 72
Cook shop. . . . . . . . . . . . . . . . . . . . . . . . . . . . . . . . . . . . . . . . . . . . . . . . 73
08 27189 01 Ra DF 2/6/05 9:40 AM Page 4

Introduction
Your range cooker
The specification table:
We have supplied a specification table at the front of this handbook which shows
all of the products covered by this guide, please read this carefully as it will iden-
tify your appliance and it’s features. Please do not worry if some of the sections
in this book don’t apply to you, just read thoroughly the parts which do.
Our range cookers come in the following dimensions:
Width: Height Depth:
70cm 90 - 91.5cm 60cm
80cm 90 - 91.5cm 60cm
90cm 90 - 91.5cm 60cm
100cm 90 - 91.5cm 60cm
110cm 90 - 91.5cm 60cm
120cm 90 - 91.5cm 60cm
Please note:
The height of you appliance can only be adjusted if it has adjustable
feet.
These measurements are nominal and meant as a guide only.
1
If you smell gas:
Do not try to light any appliance. Do not touch any electrical switch.
Call the Gas Emergency Helpline at TRANSCO on: 0800 111999
08 27189 01 Ra DF 2/6/05 9:40 AM Page 5

Sterling
Contemporary
800DF
Sterling
Contemporary
1000DF
Sterling
Contemporary
1100DF
Richmond
Traditional
1000DF
Hob burners:
For ratings see Technical
Data
Auxillary 4 4 4 4
Semi Rapid 4 4 4 4
Rapid 4 4 4 4
Wok 4 4 4 4
Timer:
LED/Programmer? 4 4 4 4
LED/Min. Minder?
Top oven:
Grill?
Top oven & Grill? 4
Top LHS
Main oven:
Conventional?
Fanned? 4
Top RHS
4
Top RHS
4
Top RHS
Multifunction? 4
Top LHS
4
Top LHS
4
Top LHS
4
Bottom LHS
Slow Cook? 4
Top RHS
4
Bottom RHS
4
Bottom RHS
4
Bottom RHS
Size? (cms) 80 100 110 100
Features:
Fascia cooling? 4 4 4 4
Oven lights? 4 4 4 4
Pristine enamel interior? 4 4 4 4
Cook Clean interior?
Auto ignition? 4 4 4 4
Storage compartment? 4 4 4
Specifications 2
08 27189 01 Ra DF 2/6/05 9:40 AM Page 6

Specifications 3
08 27189 00
Richmond
Traditional
1100DF
Gourmet
Professional
900DF
Gourmet
Professional
1100DF
Hob burners:
For ratings see Technical
Data
Auxillary 4 4 4
Semi Rapid 4 4 4
Rapid 4 4 4
Wok 4 4 4
Timer:
LED/Programmer? 4
LED/Min. Minder?
Top oven:
Grill?
Top oven & Grill? 4
Top LHS
Main oven:
Conventional?
Fanned? 4
Top RHS
4
Top RHS
Multifunction? 4
Bottom LHS
4 4
LHS
Slow Cook? 4
Bottom RHS
Size? (cms) 110 90 110
Features:
Fascia cooling? 4 4 4
Oven lights? 4 4 4
Pristine enamel interior? 4 4 4
Cook Clean interior?
Auto ignition? 4 4 4
Storage compartment? 4 4
08 27189 01 Ra DF 2/6/05 9:40 AM Page 7

Before Using Your Cooker
Before using this appliance please make sure that you have removed all packag-
ing and wrapping. Some of the furniture inside this appliance may have addi-
tional wrapping.
It is also advised that you turn the ovens and/or grill on for a short while, this
will burn off any residues left from manufacturing. There may be a smell which
accompanies this process - but this is nothing to worry about and is harmless.
We also recommend that you wash the oven shelves, the baking tray, the grill
pan, and the grill pan trivet before their first use in hot soapy water, this will
remove the protective oil coating.
Although every care has been taken to ensure this appliance has no burrs, or
sharp edges, we recommend that you wear protective gloves when installing and
moving this appliance. This will prevent any injury.
Before installation we advise that these instructions are read thoroughly, this will
allow for preparation and will save time and labour. Always use a registered
installer for this appliance.
!
4
08 27189 01 Ra DF 2/6/05 9:40 AM Page 8

The programmer/clock
Introduction
This appliance comes with an automatic programmer and clock. Through your
programmer you will be able to set the time of day, set the minute minder, and
semi and fully automatically cook. The programmer is vital to the working of
your appliance, and reading this section will make sure that you get the most
out of your ovens.
The programmer buttons
minus
plus
The ‘function’ button in the centre is used for setting the minute minder and set-
ting up the automatic cooking. See below for details.
A
Press once : Minute Minder
Press twice : Cook Time
Press three times : End Time
5
08 27189 01 Ra DF 2/6/05 9:40 AM Page 9

The programmer/clock
Symbols on the display.
This ‘A’ symbol appears when either a semi, or fully
automatic program is selected. This symbol will
flash while a program is being set. Once a program
is set the symbol will light up, and remain lit until
the alarm sounds, or the program is cancelled
This Bell symbol appears when the Minute Minder
function has been selected. While the Minute
Minder is being set, the Bell symbol flashes. Once
the length of time is set, the Bell symbol remains lit
until the time runs down, or the function is can-
celled.
This ‘dur’ message and ‘A’ symbol appear when you are
asked to set the length of time you require the oven to
cook automatically for. Using the Plus and Minus buttons
adjusts this accordingly.
This ‘End’ message and ‘A’ symbol appear when you are
asked to enter in an end time, or when you would like
the oven to switch itself off.
A
Automatic symbol
Minute Minder symbol
A
A
6
08 27189 01 Ra DF 2/6/05 9:40 AM Page 10

The programmer/clock
Setting the time of day
Before you do anything with your ovens, you must set the correct time of day.
This will enable you to make the most of all the ovens functions.
lPress the Plus and Minus buttons together for a few seconds, and release.
lThe ‘l’in between the numbers on the LED Display will begin to flash.
lWhile the ‘l’ is flashing it is possible to adjust the time using the Plus and Minus
buttons. Once the time has been set, allow approximately 30 seconds before
using any of the other timer functions. This ensures that the time will remain
correct.
Setting an alarm tone
There are three tones to chose from.
lPress the
minus
button to listen to the first tone.
lRelease the
minus
button and press it again to listen to the second tone etc.
lReleasing the
minus
button after the tone has sounded will automatically select
that tone
A
7
08 27189 01 Ra DF 2/6/05 9:40 AM Page 11

The programmer/clock
Setting the minute minder
uTo set the Minute Minder, press the Function button once. The bell symbol will
appear and start flashing. The flashing only lasts for 5 seconds so the time
must be set within this time frame.
uUse the Plus and Minus button to set the length of time required. Once this has
been done, the Minute Minder is set.
uWhen the desired length of time has counted down the alarm will sound.
uTo cancel the tone, press any of the buttons.
uTo cancel the Minute Minder at any time, press the Plus and Minus buttons
together.
8
08 27189 01 Ra DF 2/6/05 9:40 AM Page 12

The programmer/clock
Semi-automatic cooking
There are two types of semi automatic cooking available on this appliance.
The oven must be switched on, and in use to use either of these functions
successfully.
l The Duration method allows you to set the oven for a specific length of time.
If a dish needed 2 hours to cook, then it would be possible for you to set the
oven to turn off 2 hours later. This allows you to be sure that your food will be
cooked for a set length of time and no longer.
l The End Time method allows you to enter a specific time when you would like
the oven to switch off.
If you wish to leave the oven unattended, then it offers peace of mind that the
oven will have turned itself off at the set time.
However, once the program is set then it cannot be adjusted. Extra time cannot
be added, nor can the end time be extended.
To cancel the semi automatic programs, press both the Plus and Minus buttons
together. This can be done at any time during the cooking process. Then if nec-
essary, re program.
For the instructions on how to use both of these functions, please see the fo ll o w i n g
p a g e .
Fully automatic cooking
This function incorporates both a duration and an end time and is meant to be used
when you wish to delay the start time.
We recommend that the first few times this function is used you are in the house, this
w i ll fa m i liarise you with your oven and pre vents food from being ove r, or under
c o o k e d .
C a r e must be taken when selecting foods for this function, it is not recommended fo r
certain food items which may spoil, or are sensit i v e to being left.
It is also advisable to set the end time to be as close to your return as possible to
p r e vent food being left standing.
9
08 27189 01 Ra DF 2/6/05 9:40 AM Page 13

Setting the Programmer
Semi - Automatic Cooking
The Duration method
u Press the Function button twice, which will skip past the
Minute Minder.
u The display will flash the word ‘dur’, and the ‘A’ will flash
on the left hand side of the display.
u Use the Plus and Minus buttons to set the length of time
you want to cook for. This must be done within 5 seconds or
the time of day will show again.
Once this is done the oven will automatically switch off
once the time has elapsed, and the alarm will sound.
To switch off the alarm, press anybutton. To view any
remaining time press the function button twice.
The End Time method
u Press the Function button three times, which will skip
past the Minute Minder and the Duration programmer.
u The display will flash the word ‘End’ and the ‘A’ will flash
on the left hand side of the display.
u Use the Plus and Minus buttons to select the time the oven is
required to turn off.
Once this is done the oven will turn itself off at the time
you have selected.
To switch off the alarm, press any button.
Important: Once the oven has switched itself off
please make sure you turn to oven controls to the ‘off’
position and set the oven to manual by pressing the
Cook Time and Ready Time buttons together.
A
A
A
A
A
A
10
08 27189 01 Ra DF 2/6/05 9:40 AM Page 14

Setting the Programmer
Fully Automatic Cooking (example)
This programming method is best suited for when a delayed start time is required.
Unlike the semi automatic methods this requires both the duration and the end
time to be entered. The timer will work out the start time and begin cooking.
u Press the function button twice to select the length of
time your food will need.
uThe ‘A’ on the left hand side will flash and the ‘dur’ message
will flash up.
u Using the Plus and Minus buttons set the time you
require within 5 seconds of the ‘dur’ message.
The automatic cooking symbol will
appear to show that the oven is no
longer in manual mode but in automatic
mode.
A
A
A
11
08 27189 01 Ra DF 2/6/05 9:40 AM Page 15

Setting the programmer
Fully Automatic Cooking (example)
u Press the function button three times to select an end
time.
u The ‘End’ message will be displayed.
u Using the Plus and Minus buttons, set the time you would
like the oven to switch off.
u Set the temperature of the oven and place the food inside.
While the automatic function is running, the ‘A’ will appear statically on the display,
with the time.
Try to keep the end time as close to when you expect to return, this will prevent
cooked food from being left standing in a warm oven.
The timer will calculate the appropriate start time.
Important: Once the oven has switched itself off please make sure
you turn to oven controls to the ‘off’ position and set the oven to
manual by pressing the Cook Time and Ready Time buttons together.
A
A
A
12
08 27189 01 Ra DF 2/6/05 9:40 AM Page 16

Setting the programmer
Automatic cooking
These notes below are to help you with using the automatic cooking facility.
Please make sure that you read them carefully before you start using the
automatic functions.
Do
• Familiarise yourself with the use of the programmer.
• Select foods which are as fresh as possible, and as cold as possible - ie;
preferably straight from the refrigerator.
•Choose foods which are suitable for cooking from a cold start, as some dishes
will be affected by being left uncooked, at room temperature, perhaps for sev-
eral hours, especially when the weather is hot.
• Make sure that meat, poultry and uncooked food are thoroughly thawed before
placing them in the oven.
• Cover dishes with lids or foil, as they may be left standing in the oven for some
time before cooking.
Do not
•Never place warm food in the oven for delayed cooking - eg; stews prepared
by frying meat first must be thoroughly cooled before placing in the oven.
•Do not cook dishes containing left over cooked meat or poultry, or pastry
dishes with wet fillings, as they are not suitable for automatic cooking.
•Do not put food items intended for delayed cooking into a warm oven - allow
the oven to cool before setting for delayed cooking.
•Do not over-fill dishes containing liquids, as they might boil over.
•Never leave food in the oven to cool slowly after cooking, serve immediately
or refrigerate.
13
08 27189 01 Ra DF 2/6/05 9:40 AM Page 17

Your Hob
Using the hob safely
4 Always make sure that children are supervised when they are near to the
hob when it is turned on.
4 Always ensure that pan bases are dry, and flat based before using them on
the hob.
4 Always position pans over the centre of the hotplate, and turn the handles to
a safe position so they cannot be knocked or grabbed - failure to do this may
lead to accidents and injury.
4 Always use pans which are no smaller than 100mm (4”), or larger than
250mm (10”). Pans which are larger, or smaller than this may result in slower
cooking times.
6 Never use double pans, rimbased pans, old or misshapen pans, or any pan
which is not stable on a flat surface.
6 Never leave cooking fat, or oil unattended.
6 Never use commercial simmering aids, or heat diffusers, as they create
excessive heat and can damage the surface of the hob.
6 Never use the hob for any other purpose than cooking food. This could lead
to accidents, and will invalidate any guarantee or warranty you may have
taken out.
14
Always make sure before you start using the hob that the burner
caps, rings and pansupports are correctly placed.
This will prevent pans becoming unstable while in use, and ensure
an uninterrupted gas flow.
08 27189 01 Ra DF 2/6/05 9:40 AM Page 18

Your Hob
Getting started
Place your pan onto the pansupports above the burner you wish to use.
Push in and turn the control knob for your selected burner, to the full on symbol.
The control knobs on these range cookers act as the ignition buttons, to ignite
push in the control knob and hold until the burner lights.
To simmer, turn the control knob to the small flame symbol. This will ensure
that the flame is just large enough to gently heat the contents of the pan.
Always make sure that your pans are place correctly on the burners as shown
below:
Always make sure the lid (if fitted) on your cooker has been lifted before
starting to use the hob, if the lid falls while the hob is in use the SBS will cut
off the gas supply - please do not use this as a method of turning off
your appliance.
Note: You might hear a slight popping noise while using the hob burners, this is
quite normal. However, if anything appears unusual about the appliance i.e. a
change in the flame appearance or the operation of the controls - seek expert
advice before continuing to use.
15
08 27189 01 Ra DF 2/6/05 9:40 AM Page 19

Your Hob
The fold down lid - if fitted
Caution:
Glass lids may shatter when heated. Turn off all the burners before
shutting the lid.
When opening and closing the lid, use the cooler outer sides of the lid trim.
The lid must be opened fully, so there is no danger of it closing while the hob is
being used.
The appliance may be fitted with a switch-back system, which will automatically
turn off the hotplate controls if they are i n a d ve r t e n tly left on as the lid is closed.
The lid is not intended to be used as a work surface, as it becomes hot when any
part of the cooker is in use, and the surface may be scratched if items with rough
or sharp surfaces are placed on it.
16
08 27189 01 Ra DF 2/6/05 9:40 AM Page 20
This manual suits for next models
6
Table of contents
Other STOVES Kitchen Appliance manuals