Strauss water TS WaterBar Reference guide

TS WaterBar
Customer Guide

Dear Customer,
We are pleased you decided to join Strauss Water, with the purchase of your new TS
Water Purifier. The TS allows you and your family to enjoy tasty, quality, Hot, Cold or
Sparkling water, all to your own preference and liking.
Why read this?
This guide is the shortest and best way to get to know your new TS. The guide
explains and answers most of the questions you may have during the activation of
the water bar.
How can you contact us?
If there are any questions that are left unanswered by this guide, please visit our
website, where we will provide a swift response through our Service center.
Strauss Water has spared no expense to make sure your Water Purifier complies with
the strictest international standards, so that you and your family can enjoy quality
clear water. Therefore, we recommend that you sit back, pour yourself a glass of
clear or sparkling water, and enjoy.

4
Contents
1. Unit Description.................................................................................................................6
2. Manufacturer......................................................................................................................6
3. Specifications .....................................................................................................................6
4. Replacement Components .............................................................................................7
4.a Service..................................................................................................................................7
4.b Replacement Components instructions ......................................................................7
5. Installation ..........................................................................................................................7
6. Manufacturer’s Certificate of Compliance..................................................................8
7. General Overview........................................................................................................... 10
8. Operation/Control Panel............................................................................................... 11
9. Operating the Water Purifier ...................................................................................... 12
a. Cold Water Dispensing .................................................................................................12
b. Predetermined Cold Water Dispensing ....................................................................12
c. Predetermined Cold Water Dispensing ־
Large
Quantity (1 litre) .................................................................................................12
d. Hot Water Dispensing ..................................................................................................12
e. Predetermined Hot Water Dispensing.......................................................................13
f. Water Boiling ..................................................................................................................13
g. Hot Water Dispensing when "Child Safety" Mode is ON........................................14
h. Mixed Water Dispensing...............................................................................................14
i. Predetermined Dispensing of a Strong Cup of Sparkling Water..........................15
j. Predetermined Dispensing of a Regular Cup of Sparkling Water........................15
k. Predetermined Dispensing of a Fine Cup of Sparkling Water...............................15
l. Predetermined Dispensing of a Jug of Sparkling Water ........................................16
10. Setting Menu Functions ................................................................................................ 16
a. General.............................................................................................................................16
b. Clock.................................................................................................................................16
b.1 Setting the Clock............................................................................................................16
b.2 Setting 12/24 Hour Format .........................................................................................17
b.3 Wake-Up..........................................................................................................................17
c. Shutdown.........................................................................................................................17
d. Keypad Lock....................................................................................................................18

5
e. Energy Saving Mode......................................................................................................18
f. Activating the Energy Saving Mode...........................................................................19
g. Child Safety Mode..........................................................................................................19
h. Keypad Sound.................................................................................................................20
i. Display Settings .............................................................................................................20
i.1 Clock Display.................................................................................................................... 20
j. Language Setting...........................................................................................................21
k. Restoring Factory Settings...........................................................................................22
l. Defining Water Temperatures ....................................................................................22
l.1 Setting Cold Water Temperature ................................................................................ 22
l.2 Setting Mix Water Temperature .................................................................................. 23
l.3 Setting Hot Water Temperature.................................................................................. 23
m. Defining Water Quantities ...........................................................................................24
m.1 Defining Cold Water Quantity...................................................................................... 24
m.2 Defining Mix Water Quantity........................................................................................ 24
m.3 Defining Hot Water Quantity ....................................................................................... 25
m.4 Defining Quantity of Jug of Cold Water...................................................................... 25
m.5 Defining Quantity of Jug of Sparkling Water............................................................. 26
n. Setting the Sparkling Water Levels............................................................................26
11. Periodic Maintenance and Care .................................................................................27
a. Emptying the Drip Collector......................................................................................... 27
b. UV-C Lamp and Filter Replacement ........................................................................... 27
c. Fliter Replacement Counter ......................................................................................... 28
d. UV-C Lamp Replacement Counter.............................................................................. 28
e. Washing Tanks................................................................................................................. 29
f. Reset.................................................................................................................................. 29
12. CO2 Cylinder Replacement Indication ......................................................................30
13. Vacations .........................................................................................................................30
14. CO2Cylinder Replacement Procedure......................................................................31
15. Cleaning the TS Water Purifier....................................................................................32
16. Safety Precautions.........................................................................................................33
17. Troubleshooting ............................................................................................................35
18. Specifications .................................................................................................................34

6
1. Unit Description
Point-Of-Use (POU) drinking water UV activated carbon unit.
2. Manufacturer
Strauss-water, Or Yehuda 1, Israel.
Global web site: www.strauss-water.com
Manufactured in Shinzen, China
3. Specifications
Power supply 230 volts
1Electricity
Voltage
Frequency
Rated consumption*
Heating power consumption
Current consumption
230V, 1 Phase
50 Hz
1990 Watts
1800 Watts
8.5 A
2Cooling system
Cold/Sparkling Tank volume
Cooling capacity**
Cold water output***
Δ
Cooling temperature range
Sparkling Water capacity
1.6 litres / 0.42 gallons
125 W
40 cups/hour
5 -20°C /41-68°F
Continuous up to 5 cups (cooling range)
3Heating systems
Tank volume
Hot water output
ΔΔ
Heating temperature range
1.4 litres/0.37 gallons
60 cups/hour
92 - 96°C/197-205°F
4Replacement components
UV lamp
ΔΔΔ
Activate carbon filter
ΔΔΔΔ
11 Wat t s
2 micron
5Water inlet pressure
Min
Max****
1.5 ATM/0.15 MPA/22 PSI
6 ATM/0.6 MPA/88 PSI
6 Service flow
1.3 LPM for hot water / 2 LPM for cold water
(0.34 GPM for hot water / 0.53 GPM)
7Inlet water temperature
4-42˚C/39-108°F working temperature
8Product dimensions
Height
Depth
Width
36.3 cm/14.3 In
43.3 cm/17 In
31.8 cm/12.5 In
9Weight (dry)
16 kg/35.2 lbs

7
Maximum ambient temperature: +32°C/90°F
* ASHRAE Conditions Evaporation Temperature +7.2°C/45°F
** ASHRAE Conditions Evaporation Temperature -5.2°C/22.6°F
*** Water outputs are measured when the ambient temperature is no greater than 25°C/77°F and
the network water temperature is no greater than 22°C/71.6°F and calculated according to a
standard cup of 200ml/6.7oz
**** If pressure is greater, it is necessary to install a pressure valve on the water line before the device.
Δ Cold water delivery is performed with a delay of 90 seconds between one cup and the next.
Δ Δ Hot water delivery is performed with a delay of 60 seconds between one cup and the next.
Δ Δ Δ UV lamp should be replaced every 12 months.
Δ Δ Δ Δ Life time 2000 liters (520 gallon) / 6 months, the earlier of the two.
Attention! This device is intended for dispensing water into cups, pitchers, personal
bottles and pans.
4. Replacement Components
4.a Service
Please check the Strauss-water web site for replaceable components vendors and service.
4.b Replacement Components instructions
Please follow the replacement instructions attached to the appliance package and
consumable components:
• Active Carbon filter
• UV-C Lamp.
5. Installation
The units should be installed by qualified company technician.

8
6. Manufacturer’s Certificate of Compliance
Strauss Water Israel and its quality assurance system is certified for ISO 9001:2008
Electrical
• CE - Electrical Safety Standard European requirements
• UL - Electrical Safety Standard North America requirements
Performance and performance data sheet
Point-Of-Use (POU) drinking water UV activated carbon unit.
TS Bar is tested and certified against NSF/ANSI standards by WQA under "Gold Seal"
program/NSF as verified and substantiated by test data against (*):
• NSF/ANSI 42/ 53 - "Material safety"
• NSF/ANSI 55 - "Ultraviolet, Class B disinfection" (**)
• NSF/ANSI 42 - "Drinking Water Aesthetic Effect" – reduction of Aesthetic
chlorine, taste and odor, Particulate reduction Class III (***)
Israeli Standard IS 1505 - "Domestic water treatment devise"
• Microbiological water purifier
• Chlorine reduction – Class I
• Particulate reduction of ≥ 2 micron

9
(*) The testing was performed under standard laboratory conditions, actual performance may
vary. This system has been tested according to NSF/ANSI 42 for reduction of the substances
listed below. The concentration of the indicated substances in water entering the system was
reduced to a concentration less than or equal to the permissible limit for water leaving the
system, as specified in NSF standards.
(**) This Class B system or component conforms to NSF/ANSI 55 for the supplemental bactericidal
treatment disinfected public drinking water or other drinking water which has been tested
and deemed acceptable for human consumption by the state or local health agency having
jurisdiction. The system is only designed to reduce normally occurring non-pathogenic nuisance
microorganisms. Class B Systems are not intended for treatment of contaminated water.
Certified by WQA
(***) Do not use with water that is microbiologically unsafe or of unknown quality without
adequate disinfection before or after the system
Oren Grayfner
Quality Manager
Strauss Water
10
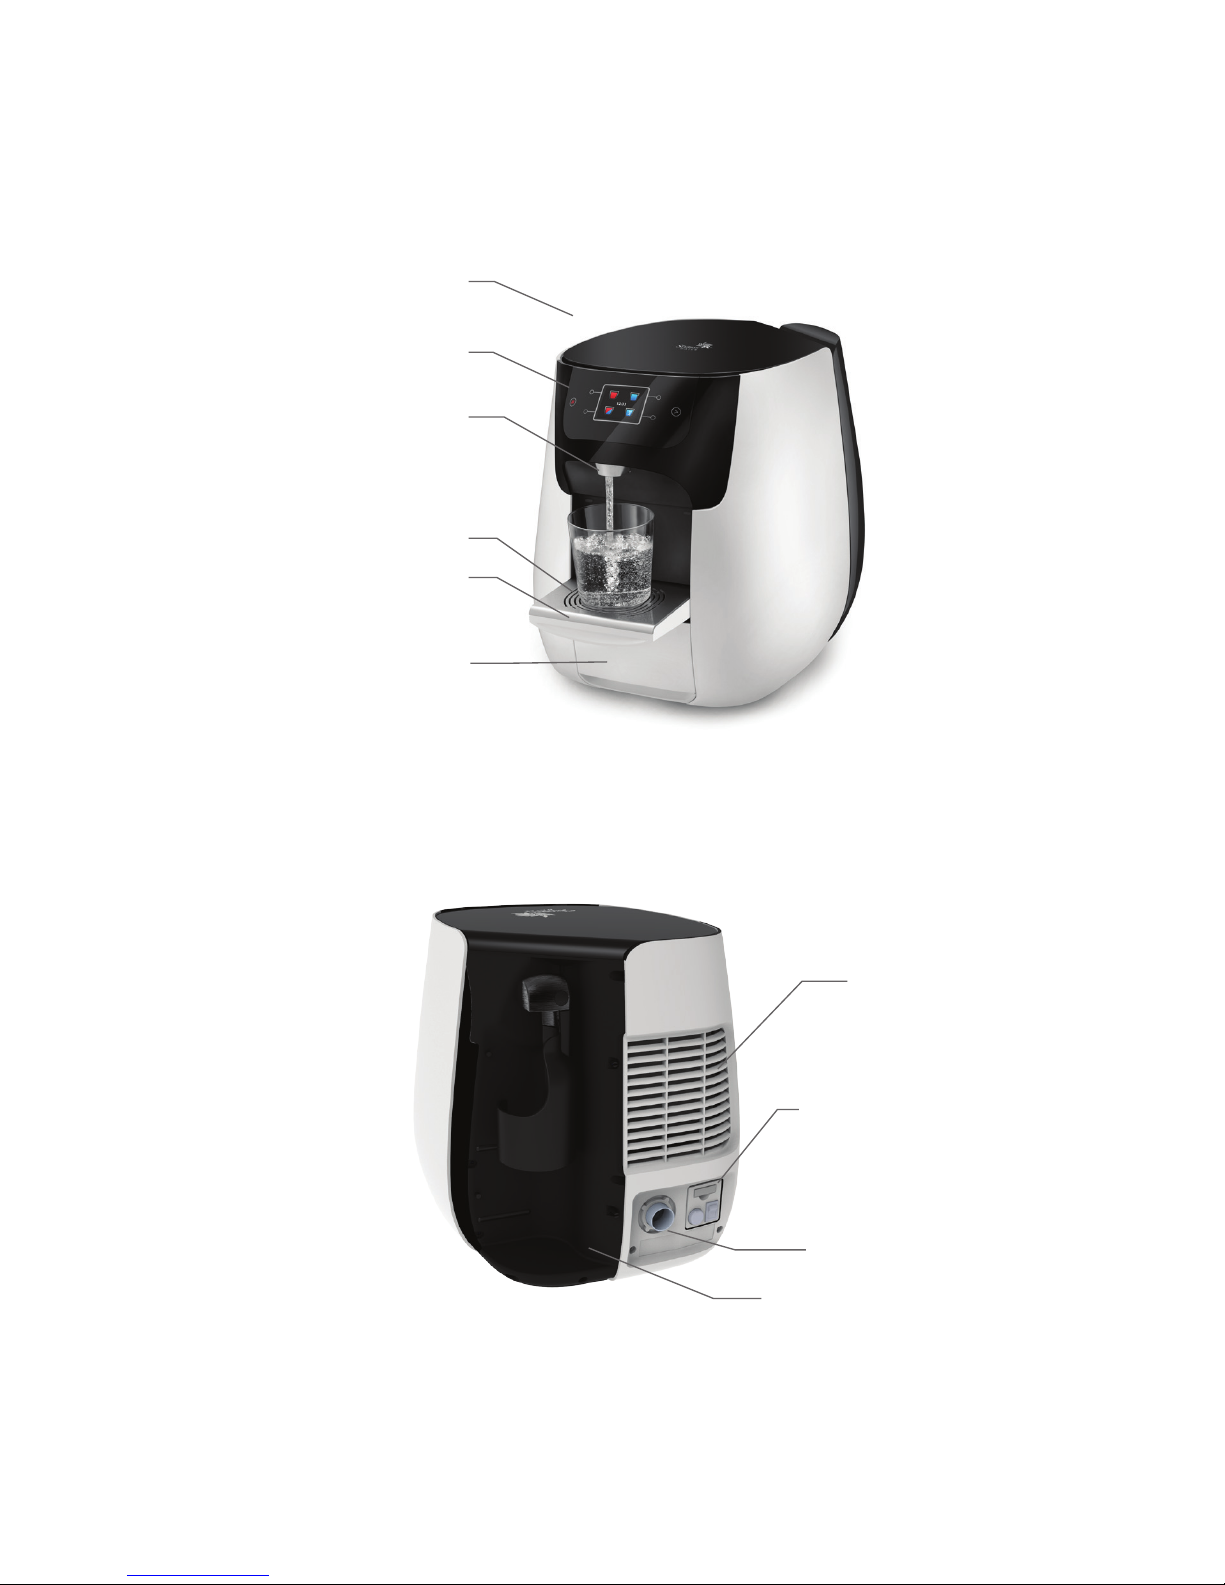
7. General Overview
1. Top Cover
2. Digital Operation/Control panel
3. Water Spout
5. Folding Tray
6. Drop Collector
7. Air vent
8. Electrical Cable
and Heating system
10. CO2Cylinder housing
9. Water inlet
4. Tray grid

11
8. Operation/Control Panel
1. Mixed water dispensing button with predetermined quantity and temperature
2. Extra Hot - Water boiling button (blinks until boiling completes)
3. Water boiling indicator (blinks until boiling completes)
4. Hot water dispensing button
5. Digital screen display
6. Water boiling animation (blinks until boiling completes)
7. Wake-up Timer indication (appears when the option is activated))
8. Child Safety Indication (Appears When "Child Safety" Mode is ON)
9. Cold water dispensing button
10. Menu Selections Button (when pressed for several seconds) and sparkling water dispensing
options
11. Sparkling water dispensing button
12. CO2
cylinder indicator (displays when
CO2
levels are low)
13. Clock
2
13
3
11
10
1
47
5 9
8
12
6
12
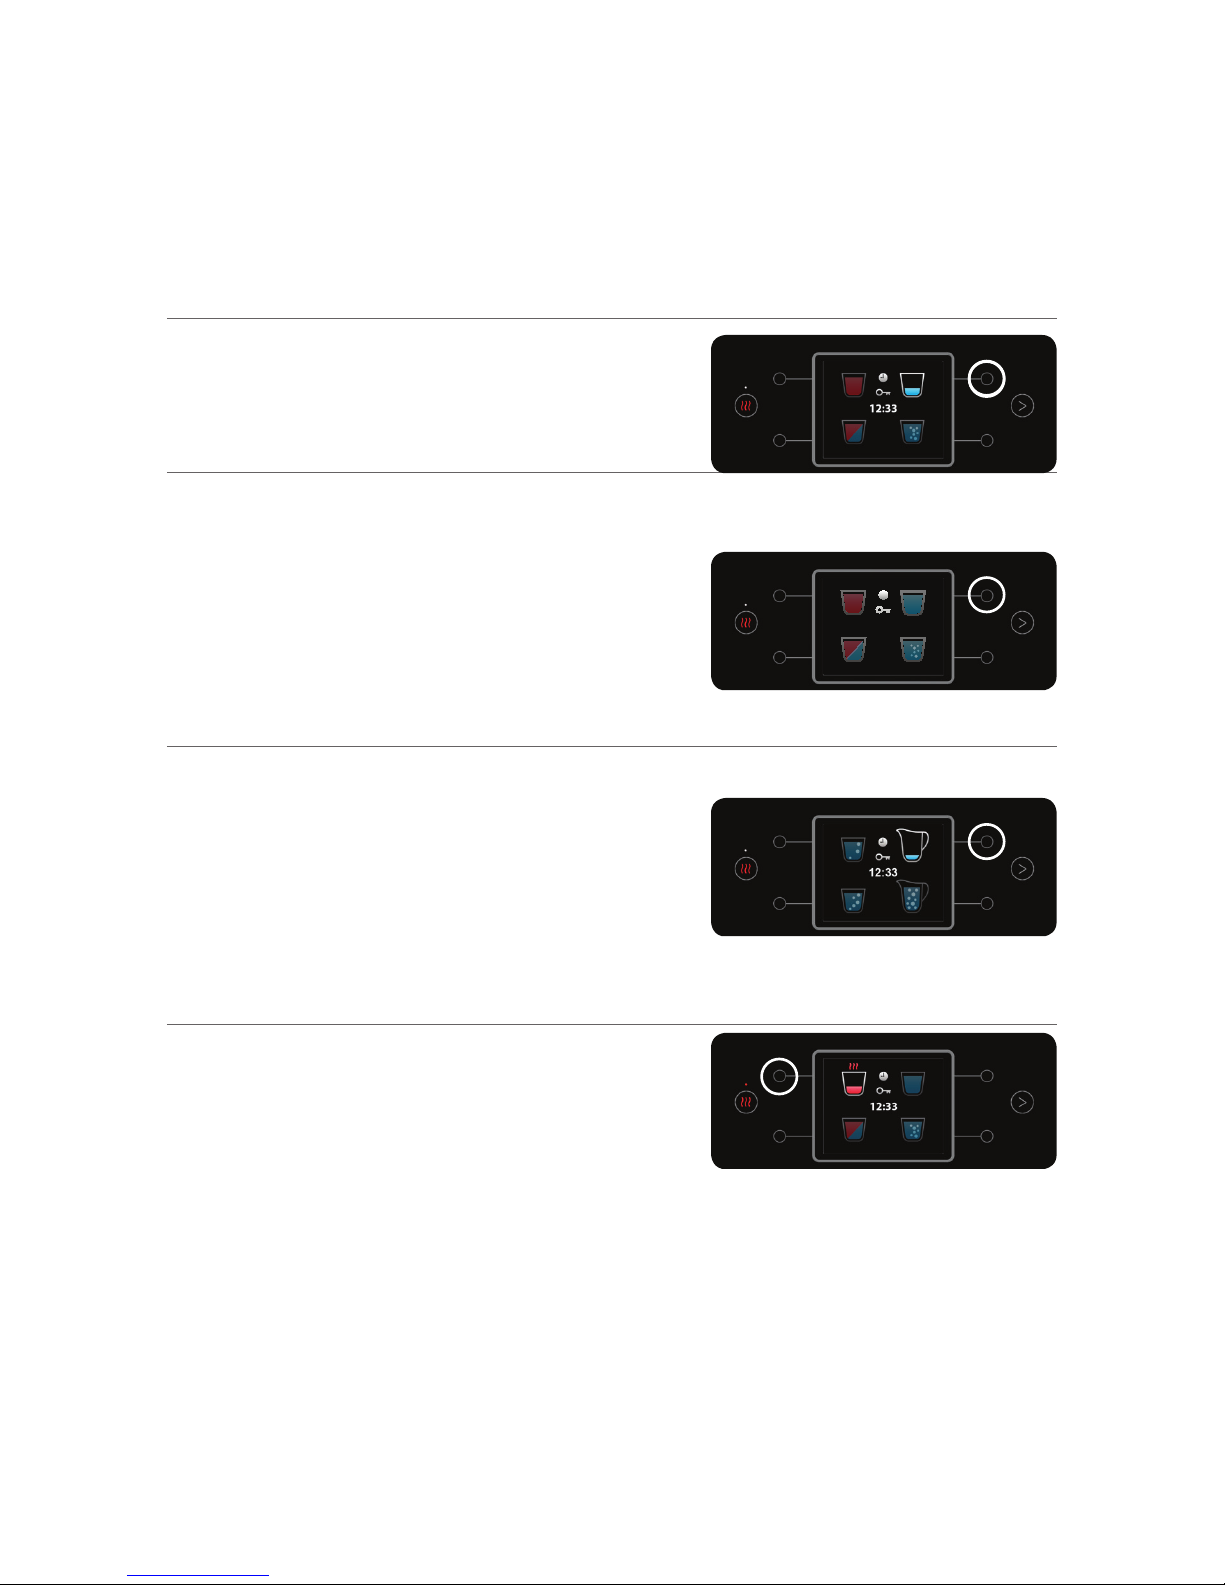
9. Operating the Water Purifier
a. Cold Water Dispensing
Press and hold the Upper Right button for
cold water dispensing. Water will be dispensed
as long as you hold the button.
b. Predetermined Cold Water
Dispensing
Press the Upper Right button for dispensing a
predetermined quantity of cold water.
To stop water dispensing, press any button.
c. Predetermined Cold Water
Dispensing ־Large Quantity
(1 litre)
Press the MENU button and then press the Upper
Right button to dispense 1 litre of cold water.
To stop water dispensing, press any button.
d. Hot Water Dispensing
Press and hold the Upper Left button for hot water
dispensing. Water will be dispensed as long as you
hold the button.
Note: The Hot Water Cup on screen will turn white
when the hot water temperature is low.
PRESS ANY KEY TO STOP
13
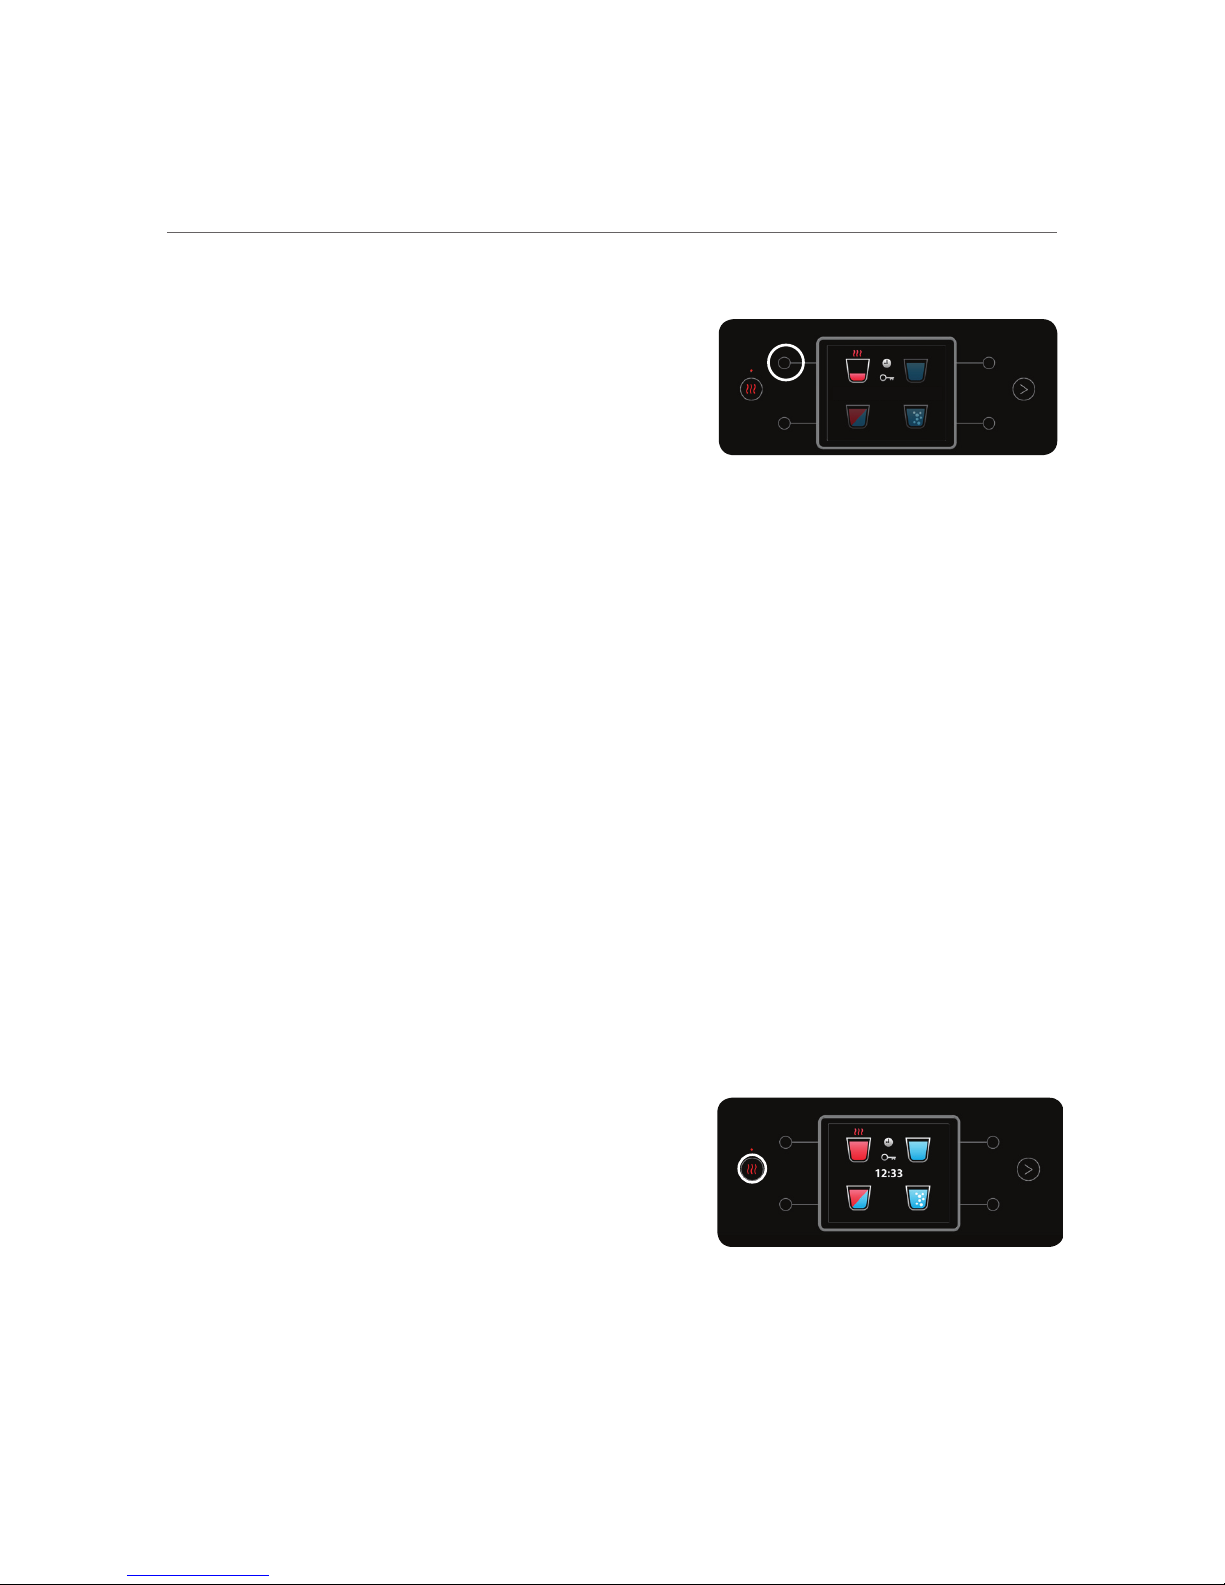
e. Predetermined Hot Water Dispensing
Press the Upper Left button once for a
predetermined quantity of hot water.
To stop water dispensing, press
any button.
This function is not available if the
"Child Safety" mode is active.
Note: The Hot Water Cup on screen will
turn white when the hot water temperature
is low.
Attention! You can disable the
predetermined hot water dispensing function.
Attention! Due to changes in water supply,
the predetermined water quantity may change.
After water dispensing, please make sure the
desired quantity was indeed received (this is
especially important when preparing baby
food, medicine etc.). If the quantity has
changed, you can reset the desired quantity.
f. Water Boiling
To heat the hot water up to near boiling
temperature, press the Extra Hot button.
The LED light will flash until the water reaches
near boiling point.
When boiling is done, the LED light will
become stable red and the steam symbol
on the Hot Water Cup will light up.
PRESS ANY KEY TO STOP

14
g. Hot Water Dispensing when
"Child Safety" Mode is ON
Hot water dispensing in "Child Safety" mode
is always accompanied by a beep.
To dispense hot water, press the Upper Left
button and simultaneously press the Upper
Right button.
Water dispenses as long as the Upper Left
button is pressed (no need to hold the
Upper Left button during water dispensing).
h. Mixed Water Dispensing
A mix of cold water that has been purified
by UV-C and hot water.
To dispense mixed water at a predetermined
temperature and quanity, press the Lower
Left button.
To stop water dispensing, press any button.
When "Child Safety" mode is ON, press the
Lower Left button and Upper Right button
simultaneously.
There is no need to hold the Upper Right
button during water dispensing.
Caution! Mix water is dispensed from two
different spouts. When pouring into a
narrow-necked bottle, use a funnel or dispense the
water into a wide-opening jug first

15
i. Predetermined Dispensing of
a Strong Cup of Sparkling Water
To dispense a strong level of sparkling water,
press the Lower Right button. A predetermined
volume of sparkling water will be dispensed.
It is recemmended to wait until dispensing has
completed.
The defalut level of sparkling water on the screen is
Strong, yet the level can be changed.
j. Predetermined Dispensing of
a Regular Cup of Sparkling Water
To dispense a regular level of sparkling water,
press the Lower Right button. A predetermined
volume of sparkling water will be dispensed.
It is recemmended to wait until dispensing has
completed.
The defalut level of sparkling water on the screen is
Strong, yet the level can be changed..
k. Predetermined Dispensing of
a Fine Cup of Sparkling Water
To dispense a Fine level of sparkling water,
press the Lower Right button. A predetermined
volume of sparkling water will be dispensed.
It is recemmended to wait until dispensing has
completed.
The defalut level of sparkling water on the screen is
Strong, yet the level can be changed..
PRESS ANY KEY TO STOP
PRESS ANY KEY TO STOP

16
l. Predetermined Dispensing of
a Jug of Sparkling Water
To dispense a jug of sparkling water, press the
Menu button and from the next screen, press
the Lower Right button.
10. Setting Menu Functions
a. General
The Menu allows you to change general
settings and maintenance preferences, and
to modify personal settings according to your
own taste. Press button #1 to enter the menu.
Use the arrows (buttons #2 and #3 to move
between the menu options, and press button
#4 to choose the desired option.
To exit a selected option, press button #5.
b. Clock
The clock appears on the display screen as
long as the appliance is connected to a
power source. In case of a power failure, the
clock has to be re-set.
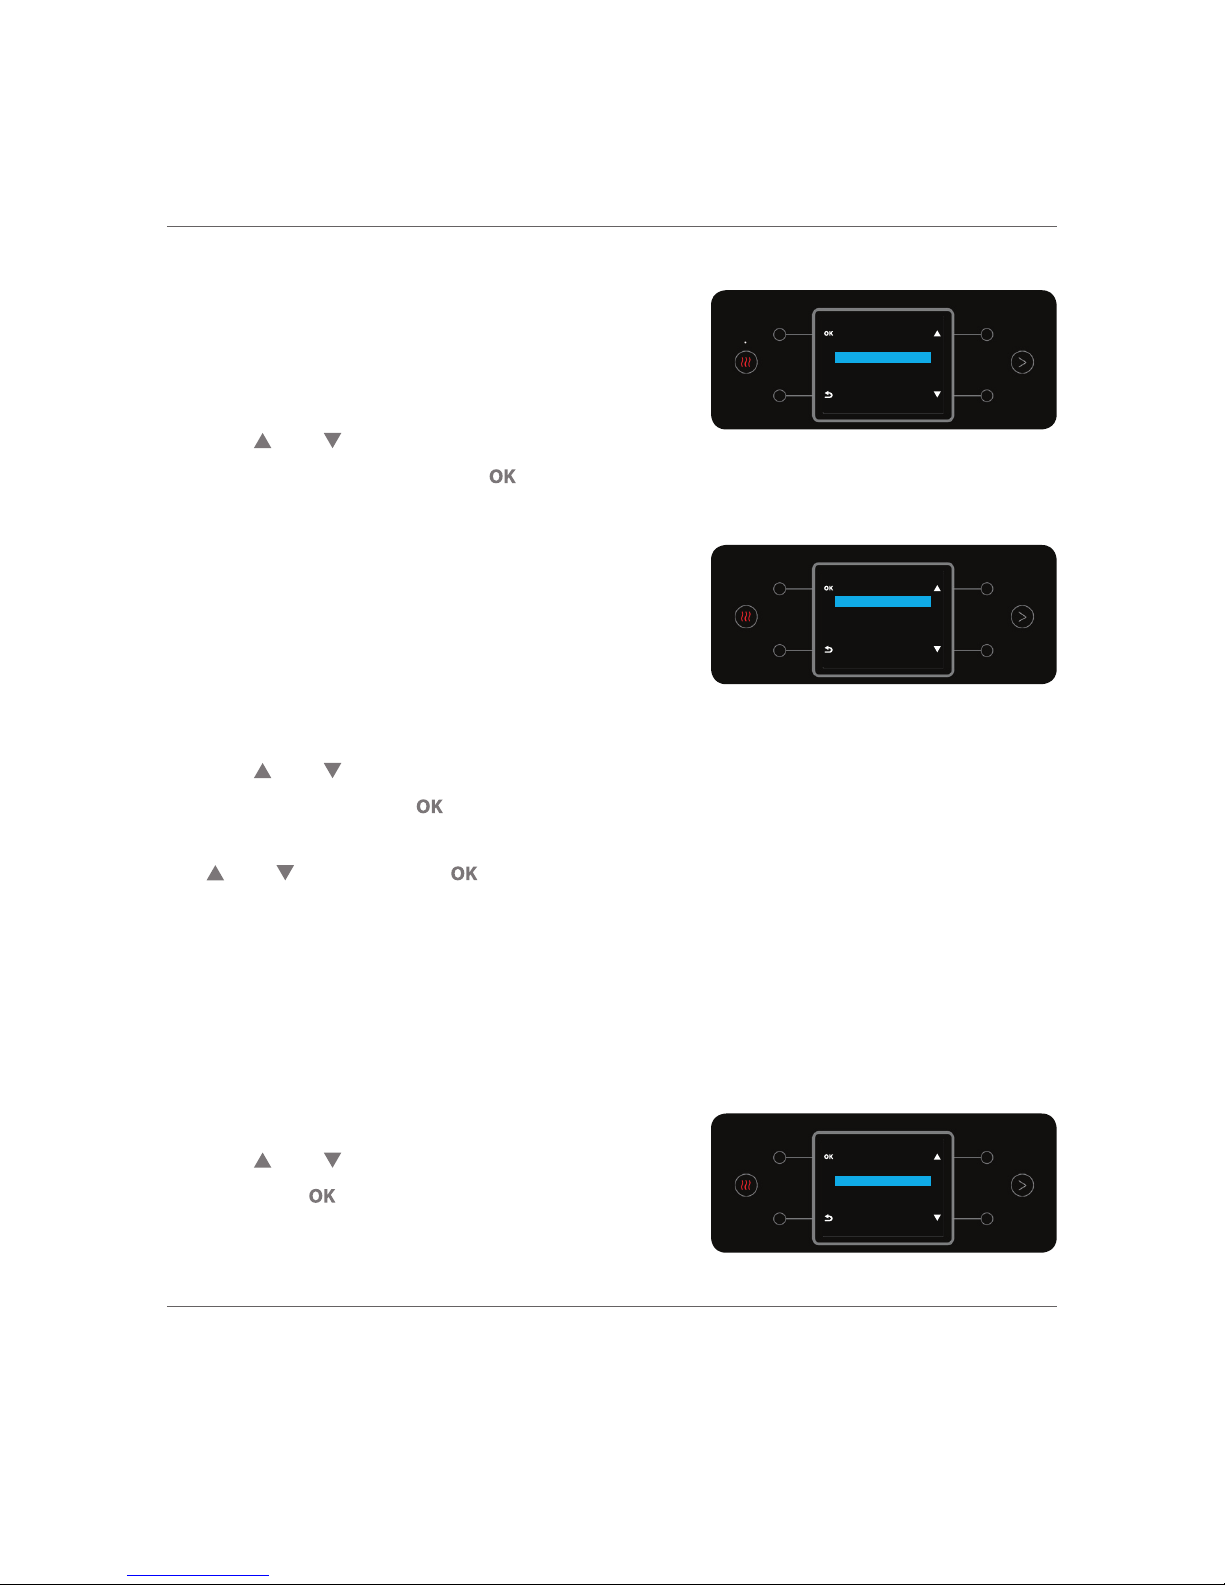
b.1 Setting the Clock
To set the clock, enter the "Clock" sub-menu:
MAIN MENU > CLOCK > SET CLOCK
The date and time will appear on the display.
Setting the Hour - Use the
and
buttons to
set the hour. Press
to confirm.
Setting the Minutes - Use the
and
buttons
to set the minutes. Press
to confirm.
טירפת
ןועש
תופדעה
רישכמ תקוזחת
תורדגה
היגרנאב ןוכסח
םישקמ תליענ
יוביכ
ענ
MENU
CLOCK
PREFERENCES
MAINTENANCE
SETTINGS
ENERGY SAVING
KEYPAD LOCK
SHUT DOWN
טירפת
ןועש
תופדעה
רישכמ תקוזחת
תורדגה
היגרנאב ןוכסח
םישקמ תליענ
יוביכ
ענ
MENU
CLOCK
PREFERENCES
MAINTENANCE
SETTINGS
ENERGY SAVING
KEYPAD LOCK
SHUT DOWN
CLOCK
CLOCK SET
CLOCK FORMAT
WAKE UP
טירפת
ןועש
תופדעה
רישכמ תקוזחת
תורדגה
היגרנאב ןוכסח
םישקמ תליענ
יוביכ
ענ
MENU
CLOCK
PREFERENCES
MAINTENANCE
SETTINGS
ENERGY SAVING
KEYPAD LOCK
SHUT DOWN
CLOCK
CLOCK SET
CLOCK FORMAT
WAKE UP
21: 55
Other alerts
CLOCK SET
07:30PM
17
b.2 Setting 12/24 Hour Format
You can choose a 24 or 12-hour display.
To set the clock, enter the "Clock" sub-menu:
MAIN MENU > CLOCK > CLOCK FORMAT
Use the
and
buttons to shift between the
12 and 24-hour display. Press
to confirm.
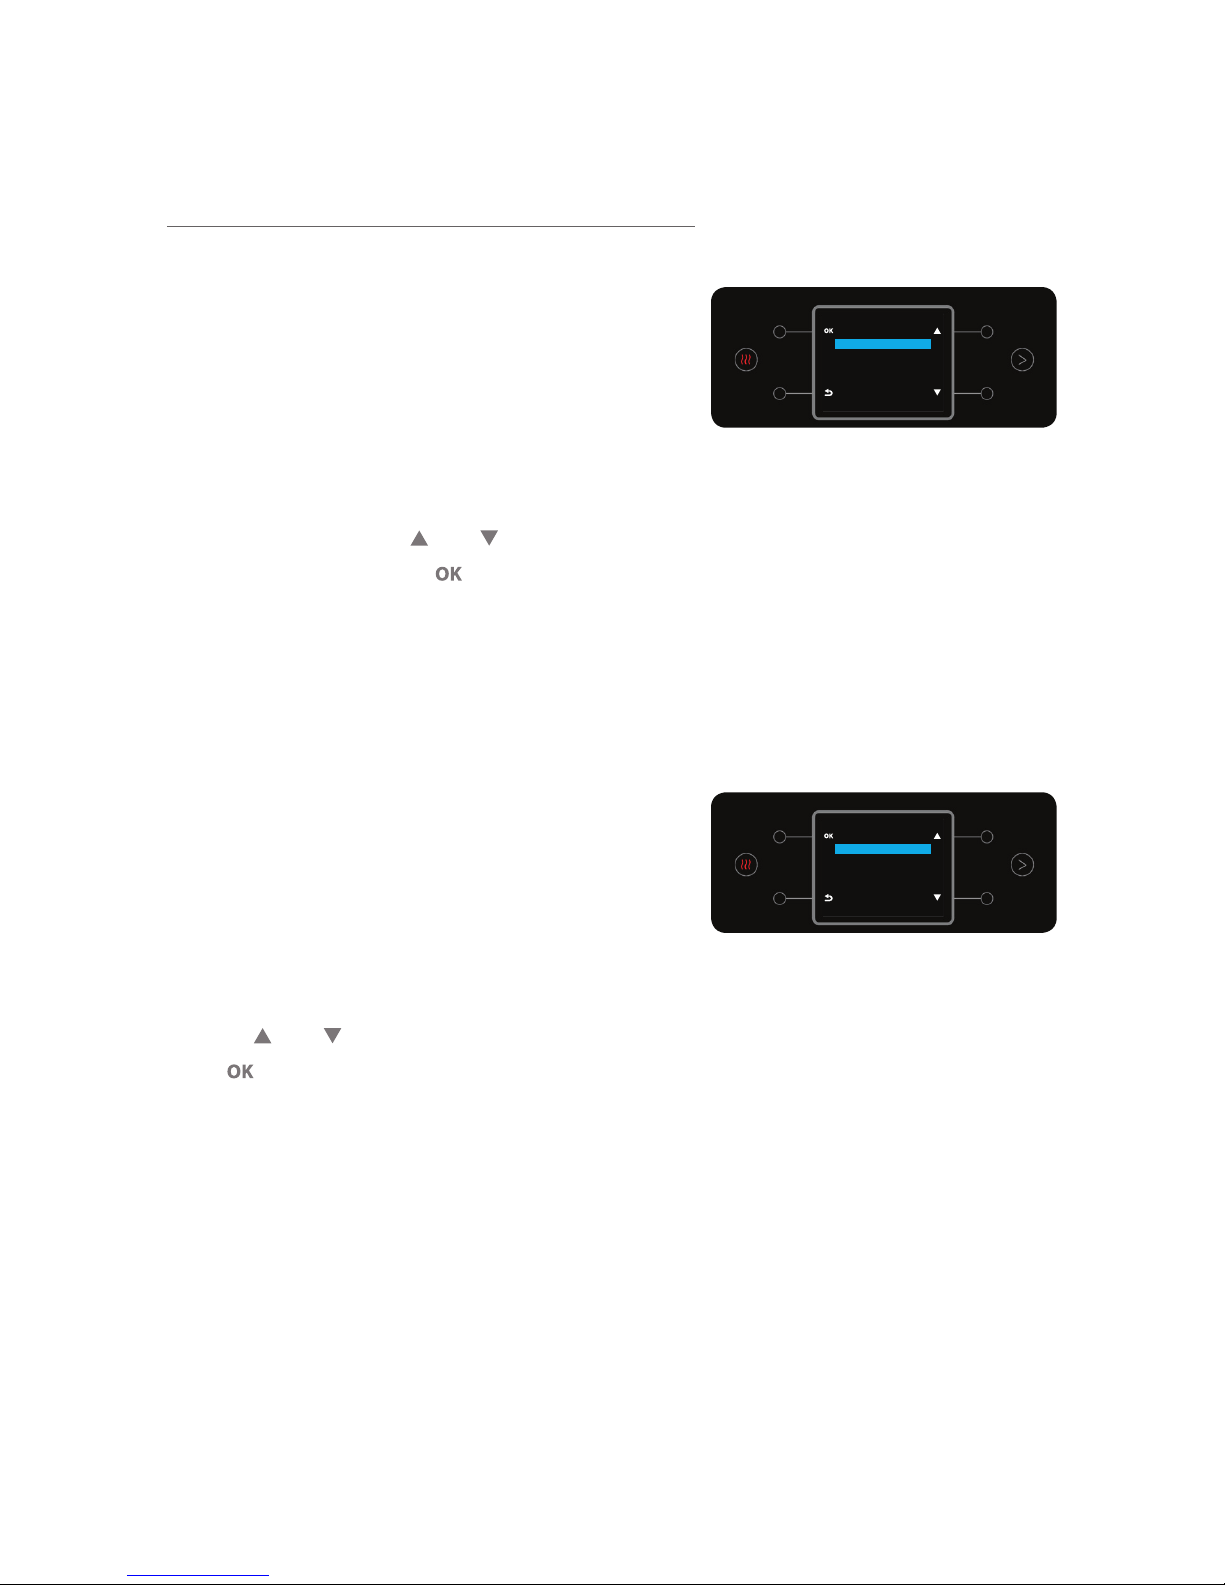
b.3 Wake-Up
This option allows setting two distinct times to
turn ON the heating system, for example:
Morning and Evening. To set the automatic wake
up, enter the Wake-Up Setting function from:
MAIN MENU > CLOCK > WAKE-UP > SET WAKE UP (1 OR 2)
Use the
and
buttons to shift between the
ON/OFF setting. Press
to confirm
To define the time (Hour and Minutes), use
the
and
buttons. Press
to confirm.
c Shutdown
This option allows shutting down the screen,
the cooling system and the heating system.
To shut down the system, enter the Shutdown menu from:
MAIN MENU > SHUTDOWN
Use the
and
buttons to select the ON
option. Press
to confirm
Press any button to exit this setting.
טירפת
ןועש
תופדעה
רישכמ תקוזחת
תורדגה
היגרנאב ןוכסח
םישקמ תליענ
יוביכ
ענ
MENU
CLOCK
PREFERENCES
MAINTENANCE
SETTINGS
ENERGY SAVING
KEYPAD LOCK
SHUT DOWN
CLOCK
CLOCK SET
CLOCK FORMAT
WAKE UP
21: 55
Other alerts
CLOCK SET
07:30PM
CLOCK FORMAT
24 HOURS
12 HOURS
טירפת
ןועש
תופדעה
רישכמ תקוזחת
תורדגה
היגרנאב ןוכסח
םישקמ תליענ
יוביכ
ענ
MENU
CLOCK
PREFERENCES
MAINTENANCE
SETTINGS
ENERGY SAVING
KEYPAD LOCK
SHUT DOWN
CLOCK
CLOCK SET
CLOCK FORMAT
WAKE UP
21: 55
Other alerts
CLOCK SET
07:30PM
CLOCK FORMAT
24 HOURS
12 HOURS
WAKE UP 1
ON
OFF
טירפת
ןועש
תופדעה
רישכמ תקוזחת
תורדגה
היגרנאב ןוכסח
םישקמ תליענ
יוביכ
ענ
MENU
CLOCK
PREFERENCES
MAINTENANCE
SETTINGS
ENERGY SAVING
KEYPAD LOCK
SHUT DOWN
CLOCK
CLOCK SET
CLOCK FORMAT
WAKE UP
21: 55
Other alerts
CLOCK SET
07:30PM
CLOCK FORMAT
24 HOURS
12 HOURS

18
d Keypad Lock
This option allows locking the keypad so that
no dispensing or other operation can be
performed. When the Keypad lock is active,
the symbol will be displayed on screen
and the
symbol will light up permenently.
To lock the keypad, enter the Keypad Lock
menu from: MAIN MENU > KEYPAD LOCK
Use the
and
buttons to change the Keypad
lock options. Press
to confirm
Press any button to exit this setting.
Note: (1) You can enable/disable the Keypad
lock by simultaneously pressing the
and buttons.
(2) Before cleaning the screen and before replacing
the
CO2
cylinder, it is recommended to activate
this function in order to prevent water dispensing
during the cleaning process.
e. Energy Saving Mode
This option automatically switches off the heating
system after a predetermined period of time. In
this mode, the appliance will be ready for cold,
sparkling and mix water dispensing, but not for
hot water dispensing.
Note: The heating system will be activated if
mix water is dispensed.
To dispense hot water in Energy Saving mode,
press the
button and wait for the temperature to
reach the desired level (for the LED above the
button
and the steam above the hot water cup to
turn red). Hot water is dispensed at near
boiling temperature. Hot water cannot be
dispensed until the temperature reaches above
85
º
C (to maintain the purity of the dispensed water).
טירפת
ןועש
תופדעה
רישכמ תקוזחת
תורדגה
היגרנאב ןוכסח
םישקמ תליענ
יוביכ
ענ
MENU
CLOCK
PREFERENCES
MAINTENANCE
SETTINGS
ENERGY SAVING
KEYPAD LOCK
SHUT DOWN
CLOCK
CLOCK SET
CLOCK FORMAT
WAKE UP
21: 55
Other alerts
CLOCK SET
07:30PM
CLOCK FORMAT
24 HOURS
12 HOURS
WAKE UP 1
ON
OFF
To unlock keypad
Press & hold EXTRA HOT
and then press MENU
for 2 seconds

19
f. Activating the Energy Saving Mode
To set the Energy Saving mode timer, enter
the Energy Saving Mode sub-menu:
MAIN MENU >ENERGY SAVING> ACTIVATION
To set the energy saving mode so that
the mode will be activated after a
predetermined time period (30-90
minutes), use the use the
and
buttons.
Press to confirm the selected time period.
g. Child Safety Mode
When this option is activated, dispensing hot
water is enabled only when the Upper Left and
Upper Right buttons are pressed simultaneously.
Dispensing mix water is enabled only when
pressing the Lower Left and Upper Right buttons
simultaneously. To activate/deactivate the
"Child Safety" mode, enter the "Child Lock" sub-menu:
MAIN MENU > SETTINGS > CHILD LOCK
The current setting ־ON / OFF ־will appear on the display.
Use the
and
buttons to change the setting. Press
to confirm
Press any button to exit this setting
טירפת
ןועש
תופדעה
רישכמ תקוזחת
תורדגה
היגרנאב ןוכסח
םישקמ תליענ
יוביכ
ענ
MENU
CLOCK
PREFERENCES
MAINTENANCE
SETTINGS
ENERGY SAVING
KEYPAD LOCK
SHUT DOWN
CLOCK
CLOCK SET
CLOCK FORMAT
WAKE UP
21: 55
Other alerts
CLOCK SET
07:30PM
CLOCK FORMAT
24 HOURS
12 HOURS
WAKE UP 1
ON
OFF
To unlock keypad
Press & hold EXTRA HOT
and then press MENU
for 2 seconds
ENERGY SAVING
activate after (min.)
30
90
60
OFF
CHILD LOCK
ON
OFF
20
h. Keypad Sound
When this option is activated a short beep
will be heard with every press of a button.
To activate the option, enter the
"Keypad Sound" sub-menu:
MAIN MENU > SETTINGS > KEYPAD
SOUND
The current setting ־ON / OFF ־will appear
on the display. Use the
and
buttons to
change the setting. Press
to confirm
Press any button to exit this setting.
i. Display Settings
i.1 Clock Display
This option allows to select the permanent display
of the clock on the main screen.
To select the clock
view, enter the "Clock Display" sub-menu:
MAIN MENU > SETTINGS > DISPLAY >
CLOCK VIEW
The current setting ־ON / OFF ־will appear on
the display.
Use the
and
buttons to change the setting.
Press
to confirm
Press any button to exit this setting
טירפת
ןועש
תופדעה
רישכמ תקוזחת
תורדגה
היגרנאב ןוכסח
םישקמ תליענ
יוביכ
ענ
MENU
CLOCK
PREFERENCES
MAINTENANCE
SETTINGS
ENERGY SAVING
KEYPAD LOCK
SHUT DOWN
CLOCK
CLOCK SET
CLOCK FORMAT
WAKE UP
21: 55
Other alerts
CLOCK SET
07:30PM
CLOCK FORMAT
24 HOURS
12 HOURS
WAKE UP 1
ON
OFF
To unlock keypad
Press & hold EXTRA HOT
and then press MENU
for 2 seconds
ENERGY SAVING
activate after (min.)
30
90
60
OFF
CHILD LOCK
ON
OFF
KEYPAD SOUND
ON
OFF
CLOCK DISPLAY
ON
OFF
Table of contents
Other Strauss water Water Filtration System manuals

Popular Water Filtration System manuals by other brands

Universal Blue
Universal Blue UACC4002-20 instruction manual

ThePondguy
ThePondguy SimplyClear Filter 1250 product manual

Range Master
Range Master Aquaclassic TSA4 instructions

Aqua One
Aqua One MariSys 240 manual

DELTA PLUS
DELTA PLUS M9000 Series Instructions for use

Aqua Guard
Aqua Guard SandMaster SM16102S owner's manual


