Streetwize SWDL6 User manual

Information for use
SWDL6
12V Halogen - 20cm (8”)
Driving Lights
IMPORTANT - Please Read: Only install these lights if you have prior
knowledge or experience of installing electrical equipment to your vehicle.
Otherwise, please seek assistance from a qualified, competent professional.
Intention For Use
Thank you for purchasing this pair of 12V Halogen 8” Driving Lights from Streetwize. These
lights are primarily designed for driving off-road, and they provide added brightness when
driving at night or in low light conditions.
These lights are NOT intended for use on motorcycles and for on-road driving. It also should
NOT be used with a 230V mains power supply, this includes home lighting and commercial
lighting.
Before installing & using these lights, we advise that you read through all the information in
this document. Please keep this document for future reference.
Product Elements
Pair of halogen driving lights with mounting brackets pre-fitted.
Installation Instructions
IMPORTANT: These halogen driving lights must be fitted at the base of the front of your vehicle.
When positioning these lights on your vehicle, it should not interfere with head lights or
indicator lights.
PLEASE READ: Please refer to your vehicle’s handbook on the electrical wiring in your vehicle.
The instructions below are generic and should be used as a guidance
What you need for this installation
• Drill
• 8mm drill bit
• Marker pen
• Red wiring (length will vary depending on the vehicle)
• Black wiring (length will vary depending on the vehicle)
1. First ensure your vehicle is fully switched off.
2. Find a suitable position to mount these driving lights. Make sure that you find an
appropriate position on the front of your vehicle, where the driving lights will not block the
headlights or the indicator lights.
3. Mark where you are going to drill the holes with a suitable marker pen (not included).
Since you are installing two lights, you will only need to drill two holes. Make sure there is
an even gap between the holes.
4. Then with a 8mm drill bit (not included), drill the holes where you have made your marks
(drill not included).
5. Using the fitted mounting bracket, secure the lights via the newly drilled holes. Ensure the
lights are securely in place.
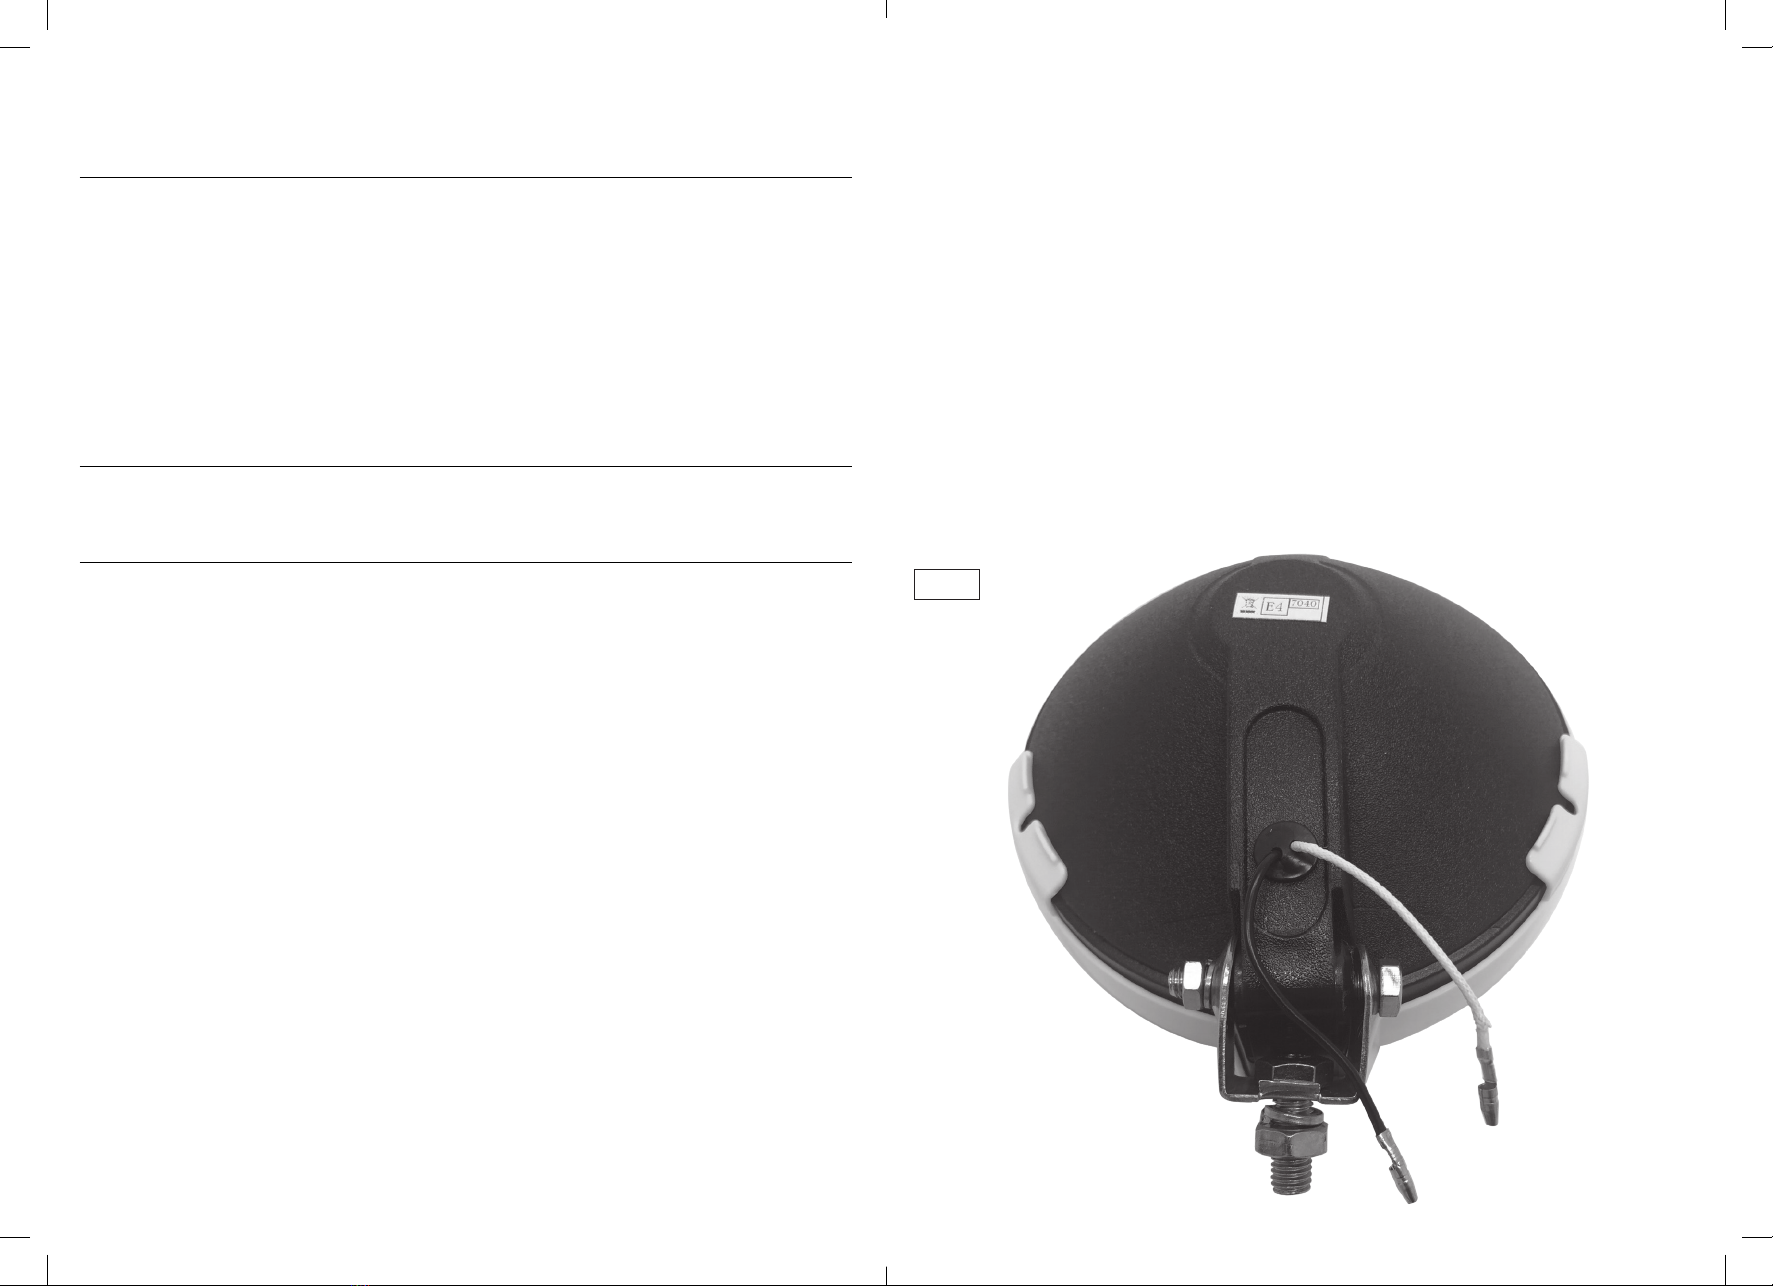
6. With the red wire, connect to the light’s white cable (figure 1). Thread the other end of the
red wire to the positive terminal of your vehicle 12V battery.
7. With the black wire, connect it to the light’s black cable (figure 1). Thread the other end of
the black cable and then connect it to a metal part of your vehicle so that it is earthed.
8. Check all the cables are connected properly before testing.
Fig 1

Streetwize, Ashburton Road West,
Trafford Park, Manchester, M17 1RY
www.streetwizeaccessories.com
EU Regd. Address: Ace Supply Co (Europe) Ltd. D02 A098, ROI
For Product Support:
E: suppor[email protected]
T: +44 (0)161 447 8597
For Trade Enquiries:
T: +44 (0)161 447 8580
Technical Specifications
Name
Supplier Code
Voltage
Bulb
Size
Streetwize 12V Halogen Driving Lights - 20cm (8”)
SWDL6
12V
H3-55W
20cm (8”)
Health & Safety Guidelines
1. Only people with knowledge and experience should attempt to install these lights to
your vehicle.
2. This product is not a toy. Please keep children supervised at all times when they are
using this product.
3. Always ensure your vehicle is fully switched off when installing this product.
4. Always ensure the black cable is earth.
Health & Safety Guidelines
and provide the product name and supplier code (see Technical Specifications) along with the
technical query.


