manuals.online logo
Brands
  1. Home
  2. •
  3. Brands
  4. •
  5. Stromberg Carlson Products
  6. •
  7. Ladder
  8. •
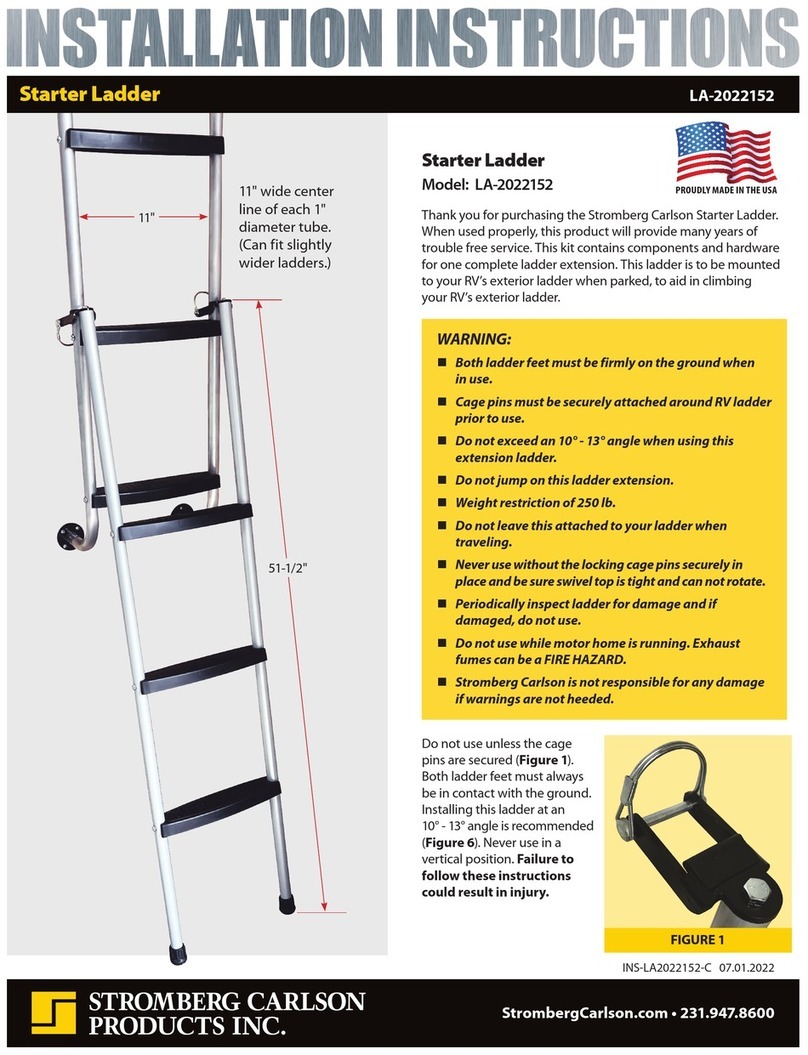
  9. Stromberg Carlson Products LA-2021460 User manual

Stromberg Carlson Products LA-2021460 User manual

StrombergCarlson.com • 231.947.8600
INS-2021BL-C 01.26.2022
Bunk Ladders LA-2021460, LA-2021460B, LA-2021466, LA-2021466B
FIGURE 1
PROUDLY MADE IN THE USA
FIGURE 2 FIGURE 3
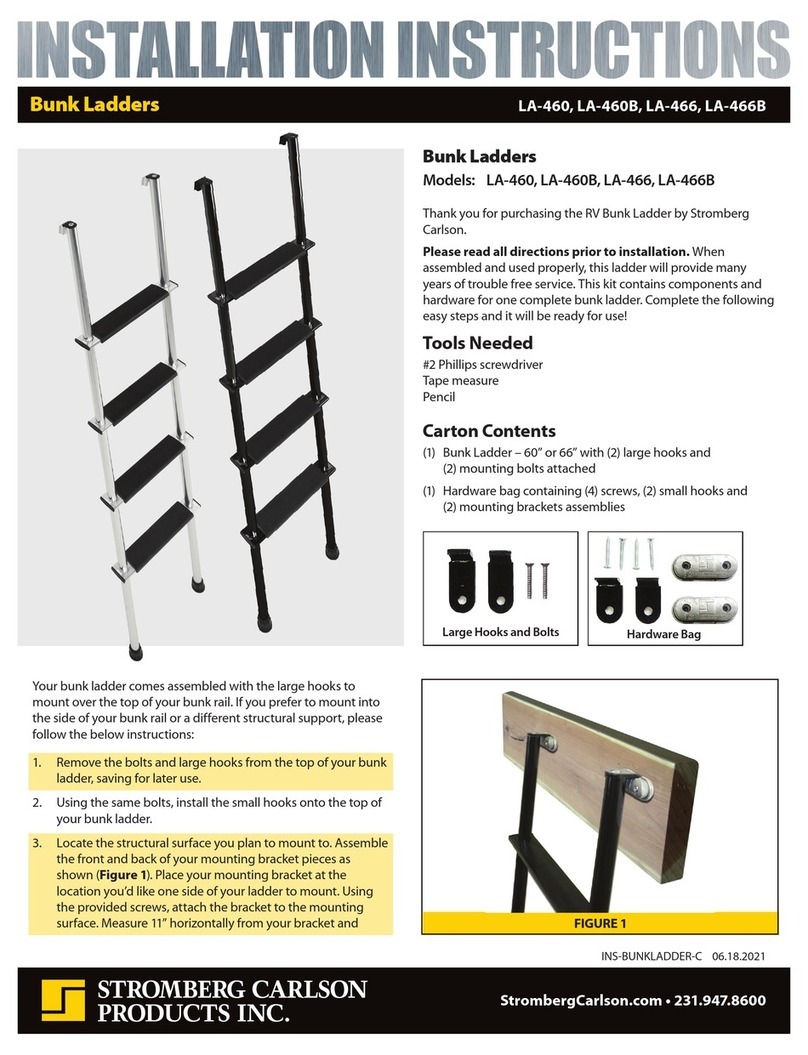
Bunk Ladders
Models: LA-2021460, LA-2021460B,
LA-2021466, LA-2021466B
Thank you for purchasing the RV Bunk Ladder
by Stromberg Carlson.
Please read all directions prior to installation. When
assembled and used properly, this ladder will provide many
years of trouble-free service. This kit contains components and
hardware for one complete bunk ladder. Complete the following
easy steps and it will be ready for use.
Tools Needed
#2 Phillips screwdriver
7/16” wrench
Tape Measure and pencil (if installing brackets)
Masking tape (if trimming tube length)
Hacksaw or fine tooth saw (if trimming tube length)
Carton Contents (Figure 1)
(2) pc 1” diameter x 60” or 66” tubing with rubber foot
already installed
(4) pc ladder treads
(2) pc hooks
(2) pc brackets
(8) sets fasteners for treads
(8) pc 1/4” x 1-3/4” bolts
(8) pc 1/4” flat washers
(8) pc 1/4” nylon lock nuts
(2) sets of #10-barrel combo fasteners
(2) pc 1” #10-barrel body nuts
(2) pc #10 x 5/16” bolt
4 pc screws #10 x 1” screws for bracket mounting
1. Using the 1/4” x 1-3/4” long bolts, 1/4” flat washers and 1/4”
lock nuts, attach the treads to the upright tubes.
(Figures 2 & 3)
• There is a slight divot in the side face of each tread. Use
this divot to face all treads in the same direction when
attaching to the tubes.
• The dimples in the upright tubes should face away from
the tread (the punched hole that is smooth should sit
next to the tread), with the bolts penetrating through the
dimpled side of the tubing into the tread end.
Bunk Ladders LA-2021460, LA-2021460B, LA-2021466, LA-2021466B
StrombergCarlson.com • 231.947.8600
IMPORTANT! Your Bunk Ladder is designed to be installed
at no more than an 11° angle from vertical as shown in
Figure 4. It is to be installed so the distance from the ladder
legs (resting on the floor) to the bunk rail are no greater
than shown. To install otherwise can cause damage and
will invalidate the Manufacturer’s Limited Warranty.
If your ladder is at a greater angle/greater distance, you can
remove the ladder feet and trim the bottom of your ladder
tubing to the appropriate length to achieve the angle
measurement shown. To protect powder coat finish from
chipping, apply masking tape to tube before making cut.
The website below can assist you in determining the ladder
length needed to achieve the 11° angle with your bunk
height.
www.omnicalculator.com/math/right-triangle-side-angle
Scan
here for
installation
video
PATENT PENDING
FIGURE 4
LADDER BUNK
LENGTH HEIGHT
58” 56.9”
57” 55.9”
56” 55”
55” 54”
54” 53”
53” 52”
52” 51”
51” 50”
TRIM CHART FOR LADDER TO MAINTAIN 11
º
ANGLE
(TRIM FROM BOTTOM)
LADDER BUNK
LENGTH HEIGHT
66” 64.8”
65” 63.8”
64” 62.8”
63” 61.8”
62” 60.8”
61” 59.5”
60” 58.9”
59” 57.9”
If parts are missing or damaged, contact Stromberg Carlson.
231-947-8600 www.StrombergCarlson.com
FIGURE 4 FIGURE 5
• The upright tubes have a slight bend to them. You should
tighten the treads to the uprights until they are square, but
do not over tighten as you could collapse the tube wall,
weakening the ladder.
2. Using the #10-barrel nuts and #10 x 5/16” bolts, secure the
hooks to the tops of the upright tubes.
• Insert the hooks into the tube ends in the same direction,
with the tread divots facing the bunk bed – hidden from
view when the ladder is in place.
• The hooks can go directly over the facia board of a bunk
frame to keep the ladder secure during use. If that is
undesirable for your use, brackets are included to secure
the ladder to the bunk frame (step 3).
3. Using the #10 x 1” screws, mount the brackets to the bed
frame, pre-marking the needed drill holes.
• Brackets are included in this package to secure your ladder
to the bunk frame/facia when in use. (Figures 4 & 5) This
is only if you do not wish to hang mount your ladder as
outlined in step 2.
• Under no circumstances should the ladder be free to hang
from the bracket only with no support from the ground up.
60” 58.9” 64.8”66”
12.011” 13.156”
11º11º

This manual suits for next models

3

Other Stromberg Carlson Products Ladder manuals

Stromberg Carlson Products LA-401 User manual

Stromberg Carlson Products

Stromberg Carlson Products LA-401 User manual

Stromberg Carlson Products LA-460 User manual

Stromberg Carlson Products

Stromberg Carlson Products LA-460 User manual

Stromberg Carlson Products LA-401 User manual

Stromberg Carlson Products

Stromberg Carlson Products LA-401 User manual

Stromberg Carlson Products LA-2022152 User manual

Stromberg Carlson Products

Stromberg Carlson Products LA-2022152 User manual

Stromberg Carlson Products LA-401 User manual

Stromberg Carlson Products

Stromberg Carlson Products LA-401 User manual

Popular Ladder manuals by other brands

JBM 52149 instruction manual

JBM

JBM 52149 instruction manual

Vestil COL-4-36-23 instruction manual

Vestil

Vestil COL-4-36-23 instruction manual

Stockmaster Step-Thru Assembly instructions

Stockmaster

Stockmaster Step-Thru Assembly instructions

Branach TerrainMaster User instructions

Branach

Branach TerrainMaster User instructions

Altrex 503567 instructions

Altrex

Altrex 503567 instructions

BPS Big Red Foot user guide

BPS

BPS Big Red Foot user guide

Power Step PSA-EX2500-FRS manual

Power Step

Power Step PSA-EX2500-FRS manual

Fiamma DELUXE SPRINTER Installation and usage instructions

Fiamma

Fiamma DELUXE SPRINTER Installation and usage instructions

Confer Plastics 6000 quick start guide

Confer Plastics

Confer Plastics 6000 quick start guide

Wenger OnBoard Series Assembly and owner's manual

Wenger

Wenger OnBoard Series Assembly and owner's manual

Fiamma DELUXE 5D Installation and usage instructions

Fiamma

Fiamma DELUXE 5D Installation and usage instructions

Main Access 200400T Assembly instructions

Main Access

Main Access 200400T Assembly instructions

Costway TS10052 manual

Costway

Costway TS10052 manual

Stockmaster Navigator User instructions

Stockmaster

Stockmaster Navigator User instructions

SUPPORTPLUS FF8296 quick start guide

SUPPORTPLUS

SUPPORTPLUS FF8296 quick start guide

Sealey ASCL2 instruction manual

Sealey

Sealey ASCL2 instruction manual

FACAL CASTIGLIA Series quick guide

FACAL

FACAL CASTIGLIA Series quick guide

Roto Columbus installation manual

Roto

Roto Columbus installation manual

manuals.online logo
manuals.online logoBrands
  • About & Mission
  • Contact us
  • Privacy Policy
  • Terms and Conditions

Copyright 2025 Manuals.Online. All Rights Reserved.