phone: 231-947-8600
www.strombergcarlson.com
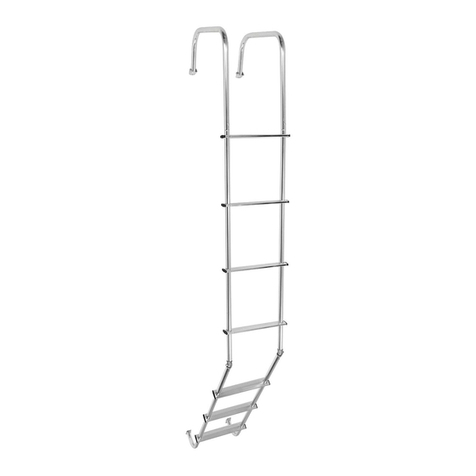
UNIVERSAL EXTERIOR RV LADDER
MODEL # LA-401 & LA-401BA
INS-LA401 & INS-LA401BA
03.12.2018
9. Place the rectangular mounting plates from the Bottom J-Shaped Ladder Section (part #3) against your RV (at
a location where backing/framing exists), approximately 6” to 12” above your bumper, in line with the top two
ladder sections already installed.
10. Maintaining 5” spacing between the ladder and the rear wall of your
RV, mark the ladder tubing where the Bottom J-Shaped and Middle
Straight Ladder Sections meet. Trim excess ladder tubing, using a
hacksaw or tube cutter. See FIG. 2
11. For RVs with a flat rear wall, turn the (2) Swivel Castings (part #5) 90°
(so they swivel left and right when facing the ladder) and insert them
in the Middle Straight and Bottom J-Shaped Ladder Sections. Inserting
the Swivel Castings in this manner will prevent the ladder from sagging
in toward or bulging away from your RV. Using a 3/16” drill bit, drill a
hole through the ladder tubing and Swivel Casting ½” above and ½”
below the trimmed ladder end. Connect the ladder tubing and Swivel
Castings using (4) #10-24 x 30 mm Bolts (part #7).
12. For RVs with a curved rear wall, keep the (2) Swivel Castings (part #5)
in line with the ladder uprights (so they swivel toward and away from
you when facing the ladder) and insert them in the Middle Straight
and Bottom J-Shaped Ladder Sections. Inserting the Swivel Castings in this manner will allow the ladder to pivot,
following the curve of your RV. Using a 3/16” drill bit, drill a hole through the ladder tubing and Swivel Casting
½” above and ½” below the trimmed ladder end. Connect the ladder tubing and Swivel Castings using (4) #10-
24 x 30 mm Bolts (part #7).
13. Using (8) #10 Sheet Metal Screws (part #7), secure the Bottom J-Shaped Ladder Section brackets to your RV.
14. Attach the bottom (2) 5” Standoff Assemblies (part #4) to your RV, using (8) #10 Sheet Metal Screws (part #7).
Be sure to attach where your RV ladder and the pre-identified backing/framing locations coincide, turning the
standoff mounting plate in the orientation that best aligns with the structural backing in your RV. These
standoffs should meet your ladder uprights 8”-10” below your Swivel Castings.
15. Mark your ladder uprights where the standoffs meet. Using a ¼” drill bit, drill through your ladder uprights and
attach them to the standoffs, using the bolts that were stored during shipment in the cap of the standoff.
Be sure to use an outdoor type sealant at all points where holes are being drilled into your RV.
CAUTION: All screws connecting the ladder to the RV must be fastened to the RV’s blocking or sub frame. If
you are uncertain about the blocking or sub frame location, contact your trailer manufacturer. It is unsafe to
use a ladder that is not connected to the RV’s blocking or sub frame. Be sure to maintain safe contact with your
new ladder at all times while ascending or descending.
Maximum weight capacity –250 lbs. when properly installed.

