FOR YOUR SAFETY:
6. Make sure that the bit is firmly clamped, and that the collet chuck is locked.
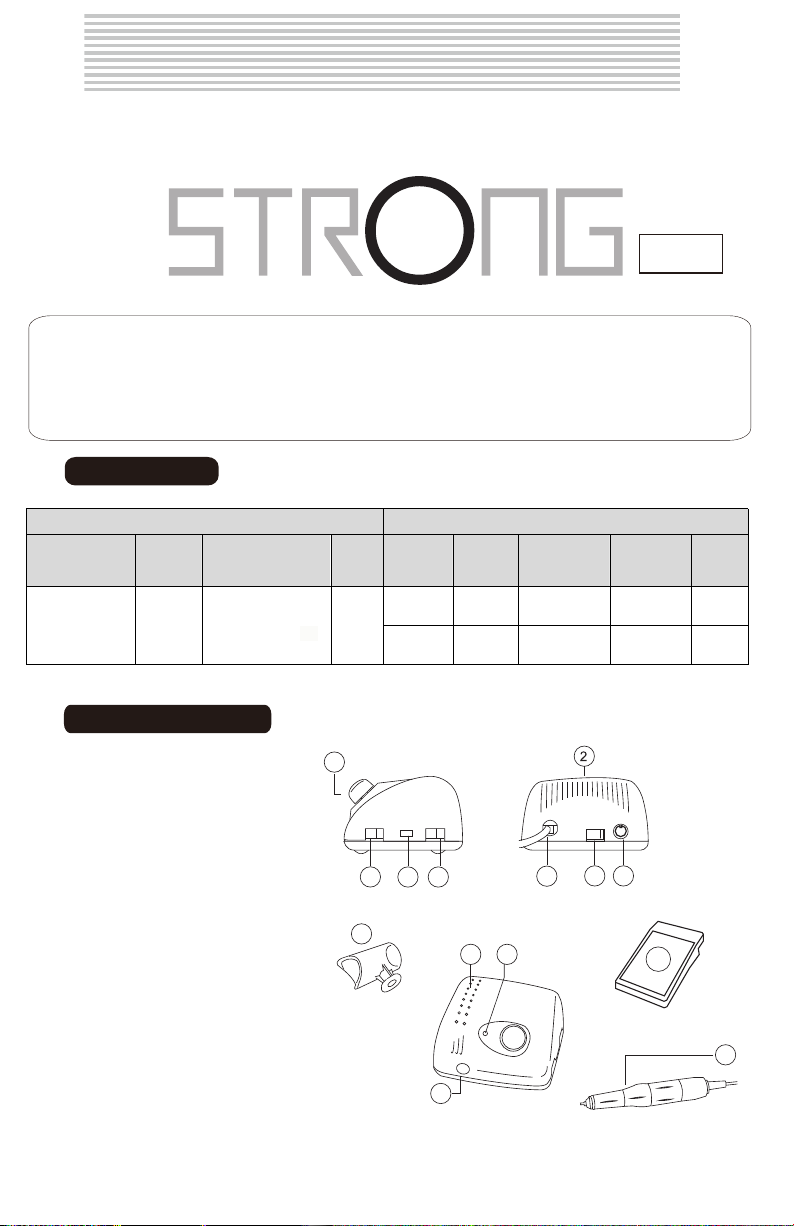
7. Turn on the machine by moving the switch (5) on the right side of the machine to the "ON"
position.
8. Use the speed adjuster (1) on the front of the unit to smoothly adjust the bit rotation
speed (making sure that the switch (7) is set to HAND mode).
If you would like to control the handpiece with the foot pedal, place the machine in
FOOT mode, set the speed adjuster to the desired value and press the foot pedal to
engage the handpiece.
9. To change the direction of rotation, move the switch (3) on the right panel
from "FWD" (right) to "REV" (left) or vice versa.
Change the direction of rotation only when the speed is zero.
Otherwise, the machine can fail quickly.
10. When you have finished working, turn the machine off by moving the switch (7) to
the "OFF" position.
WARRANTY
Saeshin warrants this unit for 1 year from the date of purchase. The warranty covers faults caused
by the manufacturer, e.g. defects in material or workmanship.
The warranty does not cover malfunctions caused by improper use, improper installation, improper
maintenance and repair, or normal wear and tear of consumable parts such as bearings, spindle
housing assembly, armature, etc.
To verify the warranty, you must provide information about the extent of wear and tear and
conditions of use. You must also provide the product serial number and a copy of the store invoice.
It is at the manufacturer's discretion and based on a review of product usage to decide whether to
repair or replace the warranty product.
The manufacturer's warranty is void in the following cases:
-Improper use or handling by the user;
-Use with incorrect input voltage;
-Falling or dropping during installation, handling or use;
-Use of consumable parts or accessories not recommended by the manufacturer;
-Malfunction after repair at unauthorized facilities;
-Normal wear and tear of consumable parts (ball bearings, carbon brushes, collet chuck,
armature, etc.)
-Damage due to natural disasters.
1. If there is a problem with the handpiece, make sure the problem has been fixed before using.
2. Do not turn on the handpiece with the collet chuck open or without a bit installed (this may
cause the handpiece to malfunction).
3. To avoid unexpected injury from unintentional activation, check that the speed knob is in the "0"
position before plugging in the power cord
4. Change the bit only when the machine is off (the power button is in the
"OFF" position).
5. Store the handpiece with the bit or supplied rod clamped in place.
6. Do not put the handpiece down until the motor has come to a complete stop.
7. Change the direction of rotation only after the motor has come to a complete stop with the
speed knob in the "0" position.
8. Use balanced bits with a rounded shaft end and a shank diameter of 2.35mm. Never use bits
that are out of alignment, rusted or damaged.
9. Use only the handpieces and foot pedals designed for this machine.
10. Use the rotation speed recommended by the bit manufacturer.
11. Use an alcohol-based solution to remove dust from the outside of the machine and avoid getting
moisture inside.
CAUTION:
* Do not leave the device unattended near children.
* Do not touch the device with wet hands.
* Use the device only with the proper electrical voltage.
*Do not use the device with a defective handpiece, damaged cord, or after dropping the unit
or coming in direct contact with water.
*Do not place the unit and handpiece in a humid environment.
*Avoid contact with fire, gas, or incandescent objects.
*Do not lubricate or wash the unit or handpiece.
*Do not drop or bump the unit.
2 3
SET-UP AND USE:
1. Check that the power button (5) on the right side of the machine is in the "OFF"
position.
2. Plug the power cord into an electrical outlet.
3. Carefully plug the handpiece connector into the socket (12) on the front panel.
4. Insert the pedal connector into the socket (8) on the back of the unit. Select the
appropriate FOOT mode using the switch (7) on the rear panel to put the unit in
pedal mode.
5. Turn the ring located in the middle of the handpiece to the left until it clicks to open
the bit clamping mechanism. Remove the rod, insert the bit into the slot and click
the handle ring into place by turning the ring to the right until it clicks.
The distance between the collet chuck and the
bit head must be at least 2 mm.
mm