Strymon ZUMA R300 User manual


WELCOME TO ZUMA R300 ULTRA-LOW NOISE WORLD TOUR READY
Strymon power supplies are the highest horsepower, most
technologically advanced effects pedal power supplies of
their kind. Zuma R300 delivers clean, rock-steady power
for your 9V, 12V and 18V effect pedals in a pedalboard
friendly, expandable package, giving you room to grow.
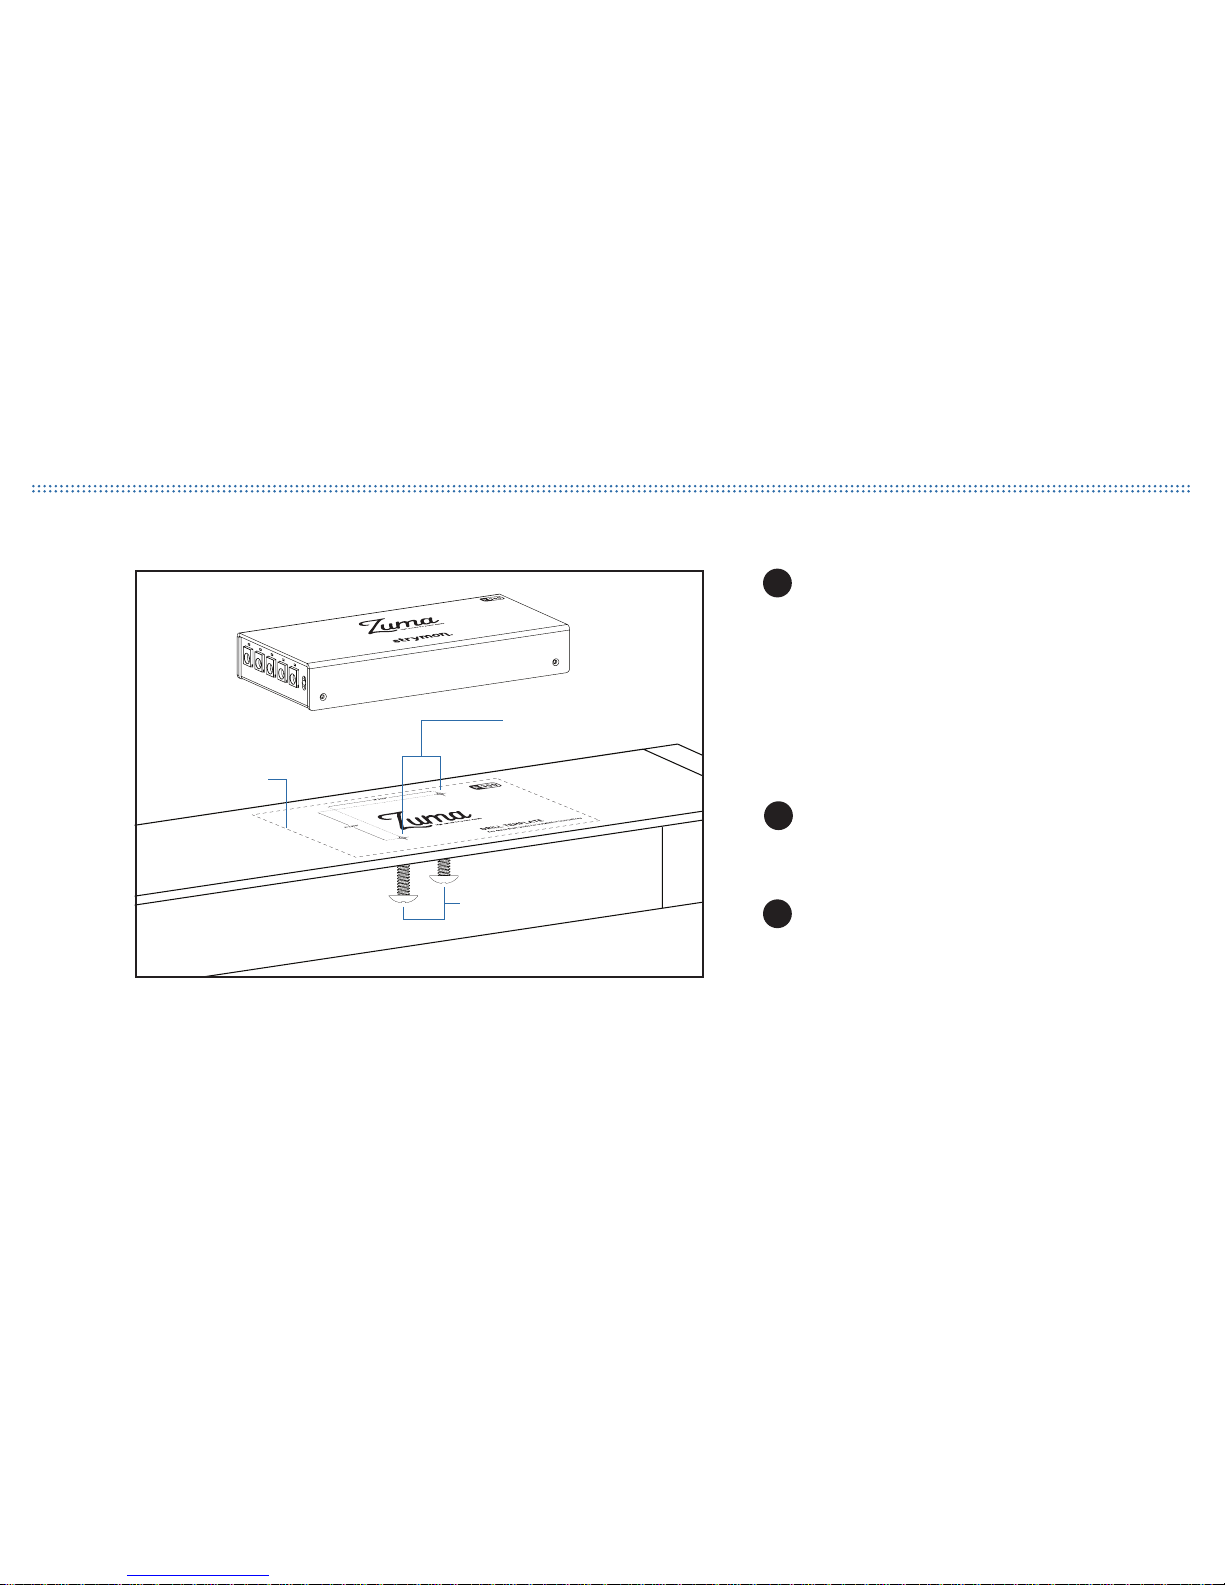
Zuma R300’s ultra-low profile design means that it can fit
under just about any pedalboard. The enclosure features
built-in threaded hardware and screws are included for
easy pedalboard mounting without the need for additional
mounting brackets.
Zuma R300’s dual-stage topology, pre-regulated outputs,
optically isolated feedback, and advanced multistage
filtering allow your pedals to achieve their highest
possible dynamic range.
Your new Zuma R300 power supply went through the
same rigorous audio tests that all Strymon pedals go
through. With Zuma R300, your pedals will sound the way
they were designed to sound.
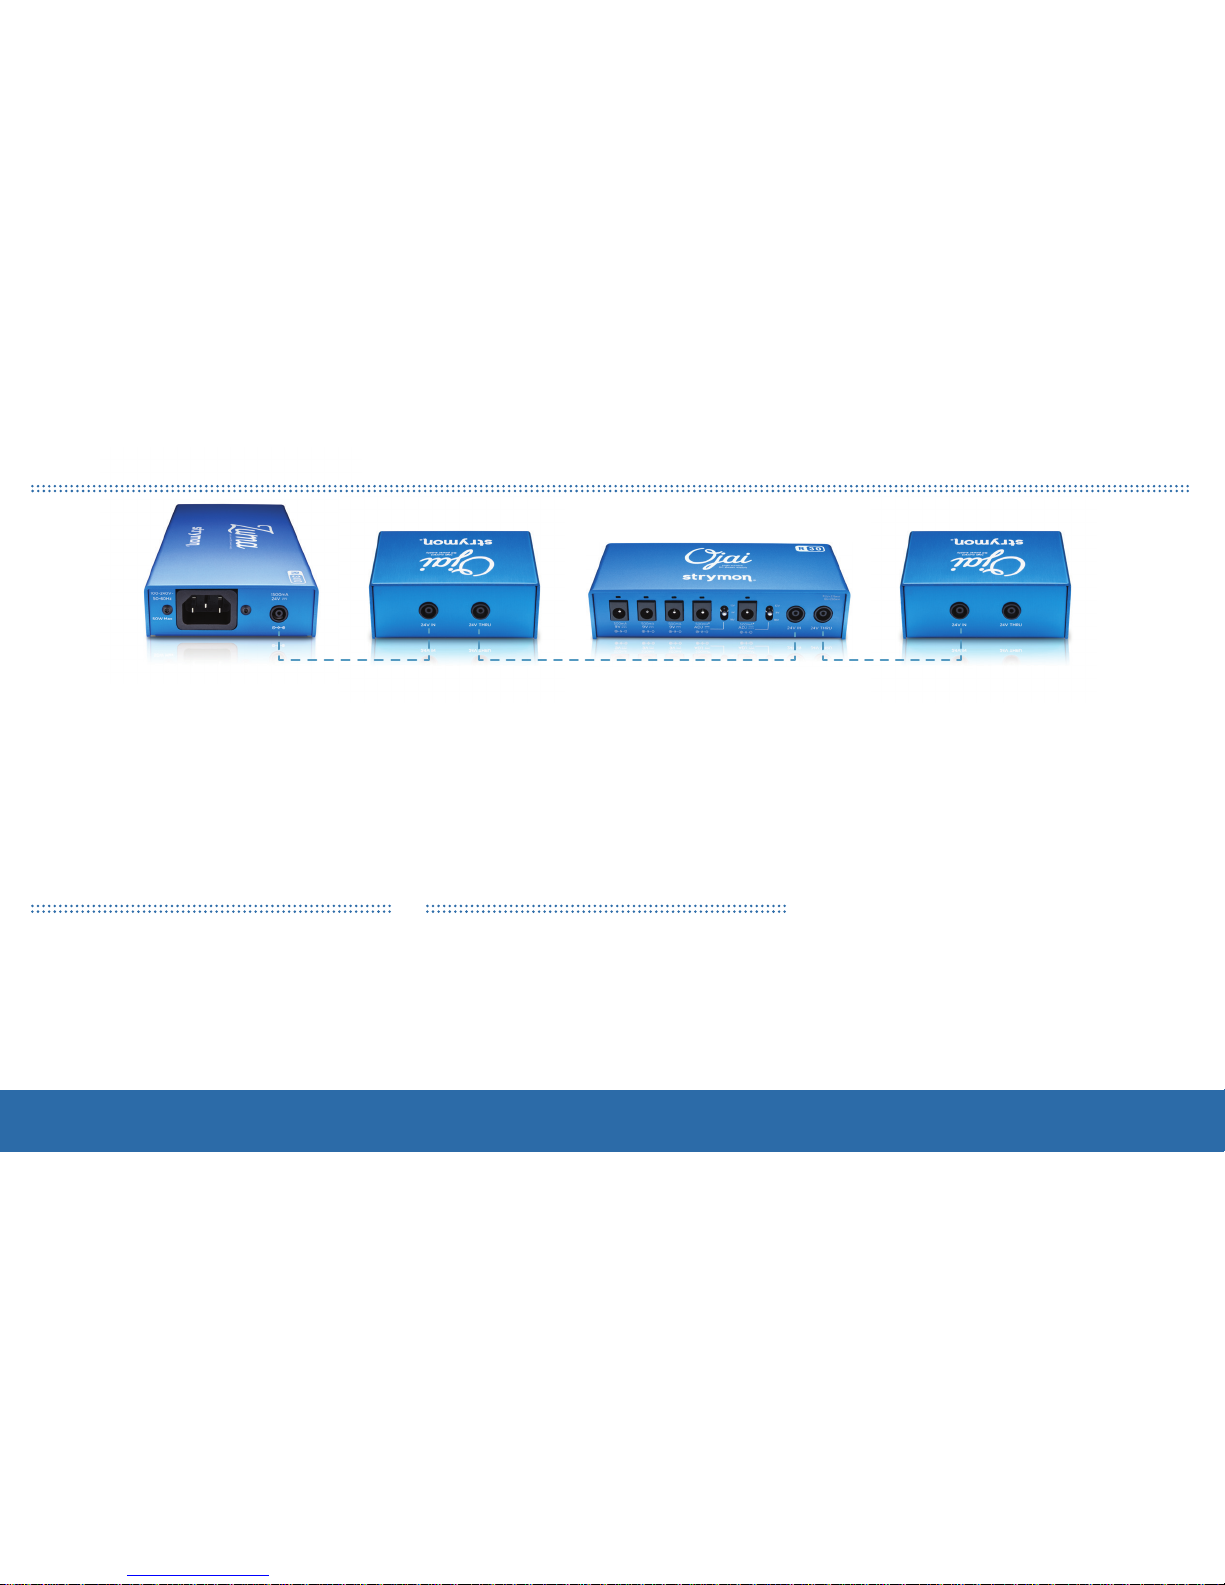
Playing gigs all around the world? No need to purchase
separate power supplies for your international tour.
Zuma R300 has automatic worldwide power
compatibility built-in (when connected with the
appropriate IEC cable). Whether you’re on 100V, 120V,
240V, or any variation in between, Zuma R300 delivers
clean, reliable power to all of your pedals.
SAFETY INFORMATION
• Read, follow, and keep these instructions.
• Heed all warnings.
• Do not expose this unit to liquids or moisture.
• Clean only with a dry cloth.
• Use in a ventilated, non-enclosed area.
• Do not install near any heat sources.
• Do not exceed 36W of total output power.
• Do not defeat the safety purpose of the polarized or grounding-type plug.
• Protect the power cord and pedal cables from being walked on or pinched.
• Use only attachments and/or accessories specified by Strymon.
• Unplug during lighting storms or when unused for long periods of time.
• Do not attempt to service this unit yourself, as opening or removing cover may expose you to
dangerous voltage or other hazards. Refer all servicing to qualified Strymon service personnel.
• Servicing is required when the unit has been damaged in any way, such as a power cord or plug is
damaged, liquid has been spilled or objects have fallen into the unit, the unit has been exposed to
rain or moisture, does not operate normally, or has been dropped.
• Never push any object into the slots or openings on your unit enclosure.
• When connected to a power outlet, power is always flowing into your unit. To totally disconnect
power, unplug the power cord.
BEFORE USING ZUMA R300, PLEASE BE SURE TO READ ALL OPERATING INSTRUCTIONS CAREFULLY.
TO REDUCE THE RISK ELECTRIC SHOCK DO NOT REMOVE COVER (OR BACK).
NO USERSERVICEABLE PARTS INSIDE. REFER SERVICING TO QUALIFIED SERVICE
PERSONNEL. DO NOT EXPOSE THIS PRODUCT TO RAIN OR MOISTURE.
The lightning flash, with an
arrowhead symbol, within an
equilateral triangle, is intended to
alert the user to the presence of
uninsulated “dangerous voltage”
within the product’s enclosure, that
may be of sufficient magnitude to
constitute a risk of electric shock.
The exclamation point within
an equilateral triangle is
intended to alert the user to the
presence of important operating
and maintenance (servicing)
instruction in the literature
accompanying the appliance.

CONNECT YOUR PEDALS
9V OUTPUTS
Four outputs provide 500mA of available current
at 9V and have center negative polarity.
ADJUSTABLE OUTPUT
One output provides selectable 9V, 12V, or 18V
DC, each with center negative polarity. This
output provides 500mA of available current at
9V, 375mA at 12V, and 250mA at 18V. Make sure
this output is set to 9V before connecting your
Strymon pedals.
LED INDICATOR
Each output features an LED indicator.
LED illuminates green when a pedal cable
is plugged in. LED will turn off if cable is
unplugged, or the current draw on the output
exceeds the maximum amount available.
PEDAL OUTPUTS: Connect up to five DC pedals with
the included 5.5mm x 2.1mm pedal cables. Each
output is dual-isolated for noise-free operation.
Check with each pedal manufacturer for
recommended voltage, polarity, and required
current. If a pedal requires more than 500mA
of current, or voltages other than 9, 12 or 18,
please find details on those configurations here:
strymon.net/support/zuma-r300
Use non-adjustable outputs first to power your
Strymon pedals. If using adjustable outputs with
Strymon pedals, make sure these outputs are set
to 9V.

ZUMA R300 IS EXPANDABLE
WHAT’S IN THE BOX SPECIFICATIONS
• Zuma R300 high-current DC power supply
• One (1) IEC cable (region-specific)
• Five (5) 2.1mm x 5.5mm pedal cables (18” long, straight to right
angle connectors)
• Two (2) #4 (3/8”) wide pan head screws for mounting Zuma
R300 to your pedalboard
• Quick Start Guide
• Drill Template & Strymon sticker
• Five (5) isolated custom transformers deliver clean, consistent power
- Four (4) 9V DC, 500mA, center-negative outputs
- One (1) selectable DC center-negative output offers 9V (500mA),
12V (375mA), or 18V (250mA) options
• Zuma R300 delivers a maximum of 36W
• Worldwide power compatibility ensures no-hassle international touring
• Energy efficient, compact design
• Lightweight anodized midnight blue aluminum chassis
• Designed and built in the USA
Zuma R300 provides a huge amount of power. You can link together as
many as 5 Ojai units powered from one Zuma R300, powering up to 25
additional effects pedals (depending on the total current requirements for
the pedals). While it’s unlikely that anyone would go to such extremes, we
wanted to ensure that the Strymon power supply family delivers maximum
flexibility and expandability. A much more likely scenario would be to link 1
or 2 Ojai units to your Zuma, powering a combination of up to 15 high and
low current draw pedals.
TO CONNECT OJAI UNITS TO YOUR ZUMA R300:
1. Power your Zuma R300 with the included IEC
cable (plugged into the wall).
2. Connect the 24V OUT on your Zuma R300
to the 24V IN on an Ojai using its included
EIAJ-05 cable.
3. Link additional Ojai units in the same manner.
PEDALBOARD MOUNTING:
Zuma R300 features built in threaded
hardware for easy mounting to the top or
bottom of most pedalboards. Refer to the
Mounting Instructions on the back of this
manual and included Drill Template. The Drill
Template can also be downloaded from here:
strymon.net/support/zuma-r300.
>> Have any questions? strymon.net/support/zuma-r300 <<
IS YOUR PEDALBOARD GROWING?
Zuma R300 is part of a truly expandable, modular
power distribution system that can grow with
your pedalboard. Gain more outputs by linking
Ojai units (sold separately) to the 1500mA 24V
jack.
Learn more about linking Ojai units to your Zuma
R300: strymon.net/support/zuma-r300

ZUMA R300 MOUNTING INSTRUCTIONS
>> Have any installation questions? strymon.net/support/zuma-r300 << REV B
1
2
3
CHOOSE YOUR MOUNTING LOCATION
Tape the Drill Template (included in this box) logo
side up in the location you want to install your
Zuma R300.
This illustration shows mounting to the top of your
pedalboard. To mount Zuma R300 to the bottom of
your pedalboard, turn the pedalboard over before
placing the Drill Template logo side up in the
location you want to install your Zuma R300.
DRILL HOLES
Drill through the two marked hole locations with a
1/8” (3mm) bit.
ATTACH ZUMA R300
Place the Zuma R300 over the holes. Install from
the reverse side of your pedalboard using the
provided #4 screws (3/8”).
DRILL TEMPLATE
HOLE LOCATIONS
#4 SCREWS
Other manuals for ZUMA R300
1
Table of contents
Other Strymon Power Supply manuals