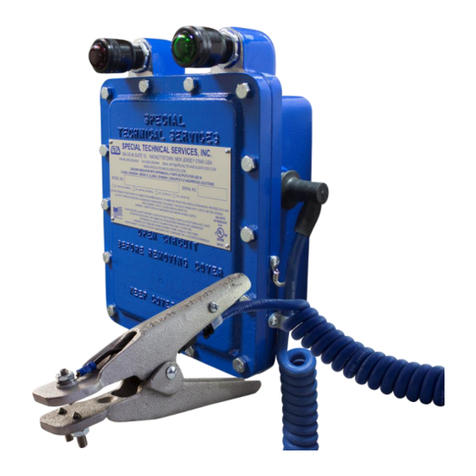
STS VJ-628D User manual

VJ-628D
Quick Start Guide
• Unauthorized copying or duplication of the whole or part of the contents of this manual is prohibited.
•Every care has been taken in writing the contents of this manual, but please contact STS or the dealer you purchased the
product from if you find any unclear, erroneous or otherwise unsatisfactory content in the manual.
•Please be aware that STS will not be liable in any way for failures or accidents that result from handling or operating the
printer according to any procedures other than those set forth in this manual.
•Company names and product names that appear in this manual areregistered trademarks of the respective companies.

For Users in Europe
For Users in the United States
This equipment has been tested and found to comply with the limits for a Class A digital device, pursuant toPart 15of the
FCCRules. These limits are designed to provide reasonable protection against harmful interference when the equipment is
operated in a commercial environment.
This equipment generates, uses, and can radiate radio frequency energy and, if not installed and used in accordance with the
instruction manual, may cause harmful interference to radio communications. Operation of thisequipment in a residential
area is likely to cause harmful interference in which case the user will be required to correct the interference athis own
expense.
Warranty Limitations
•STS Inks warrants part repair or replacement as a sole measure only if a failure is found in the system or in the materials
and workmanship of the product the seller produced. However, if the cause of failure is uncertain, decide the action after
due mutual consultation.
•The warranty shall not apply to anydirect or indirect loss, or compensation for the loss due to the product that has been
subject to misuse, neglect, or improper alternation.
The CE marking is a mandatory European marking for certain product groups to indicate conformity
with the essential health and safety requirements set out in European Directives.
By affixing the CE marking, the manufacturer, his authorized representative, or the person placing the
product on the market or putting it into service ensures that the item meets all the essential
requirements of all applicable EU directives and that the applicable conformity assessment procedures
have been applied.

3
1Introduction
Name of each part
Printer’s main body
Operation panel
STS VJ-628D
Network connector
Connect an Ethernet cable.
Voltage selector switch
Scroller receivers
Mount a roll media
Cartridge slots
Install an ink cartridge or
cleaning cartridge.
Operation panel
⇒Operation panel
Platen
Media is printed on here.
There are an adsorption fan
and a heater inside.
Media pressure arm
Hold media to the platen. It
links with the media fixing
knob.
Front cover
Open when mounting media
or during maintenance.
Media fixing knob
Turn when mounting and
removing media.
Waste liquid tube
Waste ink is drained from the
tube.
Paper guides
When attached on both
edges of media, a curvature
of media can be controlled to
some extent.
Carriage
A print head and cutter are
built-in.
Power connector
Error LED
Red light or flashing displays
errors or warnings.
Power button
It lights ON in blue when the
power is ON.
Operation key
Used for various functions in different situations.
Printing:
(Short press) Pause/Restart printing
(Long press) Cancel printing (data deletion)
Waiting for printing:
(Long press) Cut media
When linked with MSM and waiting to be
confirmed: (Short press) Confirm
While Warming up:
(Short press) Force starting printing
During forwarding/rewinding media:
(Short press/Long press) Stop forwarding/
rewinding
During error:
(Short press) Stop the buzzer
Data LED
Green flashing indicates
receiving and analyzing state
of printing data.

MSM Setup / Initial
Registration
Upon the initial launch of MSM (formerly VSM) you will be faced with the following
screen.
1. Click Start to commence, and untick the ValueJet Club
Service.
4

3. If you did not previously register a printer you may do so now
2. Click Save
5

4. Click Add+
5. Click Search
Printer
6

6. Enter a printer name, select the printer and then
click Enter
7. Click Yes to
register
8. Click OK to complete the
registration
7

9. Click End to finish
the setup
MSM will now open.
8

9
Roll media can be used in this product.
•Please use recommended film.Contact STS sales for recommended film.
•Be cautious of expansion and contraction of media from temperature and humidity.
After opening an unopened media,leave the media for approximately 30 minutes to adjust to environments.
•Do not use media with folds, scratches, tears, curvatures, winding curl and weaving.
•Do not leave a roll media set in this product for a long time. The media can be curled becoming unsuitable for printing.
When not using for a long time, remove a roll mediaand store in its original package box.
Conditions of usable media
Usable size
Maximum
width
630mm (If paper tube > media width, then
paper tube width)
Maximum
thickness
Head height when Low 0.3mm
Head height when High 1.3mm
Roll outer
diameter
150mm
Paper tube
diameter
2 or 3 inches
Weight 9 kg or less
Cautions when handling film

10
It is recommended to use this product once a week. When left unused for a long time, the print head nozzles can get
clogged causing damage.
This product requires daily maintenance.
• Check the nozzle before and after printing.
If nozzle clog is found, conduct a head cleaning.
• Clean the cleaning wiper once a week.
• When this product is not used for a long time (a week or more), conduct a head cleaning once a week.
• Clean its exterior and inside once a month.
• Drain waste ink in the waste liquid tank periodically.
In this product, there are some parts required to be replaced after a long-term use.
• Parts required to be replaced by users: absorption material for the flushing box, cutter
• Parts required to be replaced by service personnel: Various motors, print head
Cautions in using this product
Please use this product periodically
Conduct periodic maintenance
Some parts need to be replaced periodically

11
1PoweringON/OFF
Turning the power ON
[1] Close the front cover.
[2] Press the power button of this product to turn the power ON.
• The blue light becomes ON.
• This product starts its initialization operations.
Turning the power OFF
[1] Make sure printing is finished.
[2] Press the power button of this product to turn the power OFF.
• The blue light becomes OFF.
• This product starts its powering off operations.
[3] Turn the media fixing knob to release the lock.
Note
When not using this product, release the lock of the media fixing knob
regardless of power being OFF.
Powering ON/OFF
Press!
Press!

12
1Printing
Setting up media
[1] Remove the 3 inches adaptor and media stopper (movable) from the
scroller.
Note
When using a roll media with 3 inches paper tube diameter, leave the 3 inches
adaptor on.
[2] Attach a roll media to the scroller.
Note
• Attach the media in the rolling direction to be the same with the figure.
• Push in the roll media so that there is no space with the media stopper
(fixed).
[3] Push in the media stopper (movable) until there is no space with the
roll media.
[4] Attach the scroller to the scroller receivers.
Note
Attach the media stopper (movable) to face to the right, when this product is
looked from its back.
[5] Turn the media fixing knob to release the lock.
Printing

12
[6] Let the roll media pass through the paper feed slot.
[7] • Open the front cover.
• Pull out the media roller from the front side of the product.
Note
If the media gets loose, rewind the scroller to correct the looseness.
[8] Turn the media fixing knob to lock.
[9] Set the paper guides to media.
• Slide from both sides of platen and set.
[10] Close the front cover.

13
Before starting everyday operation, please check the nozzle. If nozzle clog is found, conduct cleaning.
Nozzle check and cleaning
1. Nozzle check steps
[1] Display the Printing Preferences screen of printer driver.
[2] Click [Nozzle Check] in the [Utility] tab under the [Utility] tab.
• The “MUTOH VJ-628” window opens.
Note
The same can bealso done withthe remote panel of
MSM.
[3] Click [OK].
• A pattern is printed.
[4] Check the pattern.
No nozzle clog Nozzle clogged

14
2. Cleaning steps
[1] Click [Cleaning] in the [Utility] tab under the [Utility] tab.
• The [Head Cleaning] window opens.
Note
The same can be also done with the remote panel of
MSM.
[2] Select [Normal] and click [Start].
•Acleaningstarts.
[3] Conduct a nozzle check, again.
• If there is still nozzle clog, repeat [Normal] cleaning.

15
In this section, a method to print from the printer driver is explained.
Starting printing
[1] Open printing data from application software to execute printing.
[2] Open the print setup screen of the VJ-628 printer driver from the application software.
[3] Conduct print setup.
• Set [Paper Size], [Orientation] and [Print Quality].
[4] Click [OK].
[5] Printing is executed.
[6] Cut the media.

16
Pausing/Restarting printing
During printing, short press the operation key on the operation panel.
• The printing pauses.
• Press the operation key again to restart the printing.
Note
• In this operation, printing data sent to the product are not deleted.
• Please see the followings when canceling printing and deleting data.
Canceling printing
Canceling printing from the operation panel
Press and hold the operation key on the operation panel for 2 seconds
or more during printing.
• The printing is canceled (it cannot be restarted).
• The printing data sent to the product are deleted.
Canceling printing from printer driver/MSM
[1] Display the Printing Preferences screen of printer driver during printing.
[2] Click [Cancel Printing] in the [Utility] tab under the [Utility] tab.
• The remote panel of MSM
launches.
•The [Confirmation] window opens.
Note
•MSM can belaunched directlyr
[3] Click [Yes].
• The printing is canceled.
Press!
Press!

17
1 Cutting media
Cutting from the operation panel
[1] Check printing is done.
[2] Press and hold the operation key on the operation panel for 2 seconds
or more.
• The built-in cutter in the product cuts the media.
Cutting from printer driver/MSM
[1] Check printing is done.
[2] Display the Printing Preferences screen of printer driver.
[3] Click [Media Cut] in the [Utility] tab under the [Utility] tab.
• The remote panel of MSM
launches.
•The [Confirmation] window opens.
Note
•MSM canbelaunched directly.
[4] Click [Yes].
• The built-in cutter in the product cuts the media.
Cutting media
Press!

18
For media that cannot be cut with the built-in cutter in the product, please cut following the next steps.
Cutting by hand
[1] Check printing is done.
[2] Feed the media to a position where printing results can be cut.
[3] Open the front cover, and cut the media with a commercial available cutter.
• Cut along the media cut groove.
[4] Close the front cover.
Media cut groove

Table of contents
Other STS Measuring Instrument manuals
Popular Measuring Instrument manuals by other brands
Badger Meter
Badger Meter Data Industrial 3000 Series user manual

Siemens
Siemens SITRANS SL Safety manual

Observator Instruments
Observator Instruments ANALITE NEP160 user manual

Tractel
Tractel dynafor Expert 0.5 Installation, operating and maintenance manual

Omron
Omron K3NC manual

Triplett
Triplett MS245 user manual