5
DRIVE (Overdrive Mode)
Engaging the overdrive circuit opens up a whole new world of possibilities. At the heart
of the overdrive circuit is the cascading gain stage, which introduces an additional gain
stage to the circuit.
•At lower settings, (1 - 2) Hedgehog produces a subtle break-up effect with great
punch and sustain - that works equally well in all pickup positions. These settings
are ideal for gritty Country, Blues, or Classic Rock rhythm tones.
•At medium settings, (3 - 7) Hedgehog yields tight lows with increased saturation
and focus in the upper mid and treble regions. Use these settings to achieve
authoritative Rock and Blues tones that works equally well with single-coil and
humbucking pickups.
•At higher settings (8 - 10), Hedgehog delivers a variety of Classic and Hard
Rock tones that are thick and clearly dened - even at the highest settings.
NOTE: In Overdrive mode the Volume control cascades into the overdrive circuit. We
nd that a setting between 5-6 is the "sweet spot" to achieve the widest gain options
between both modes.
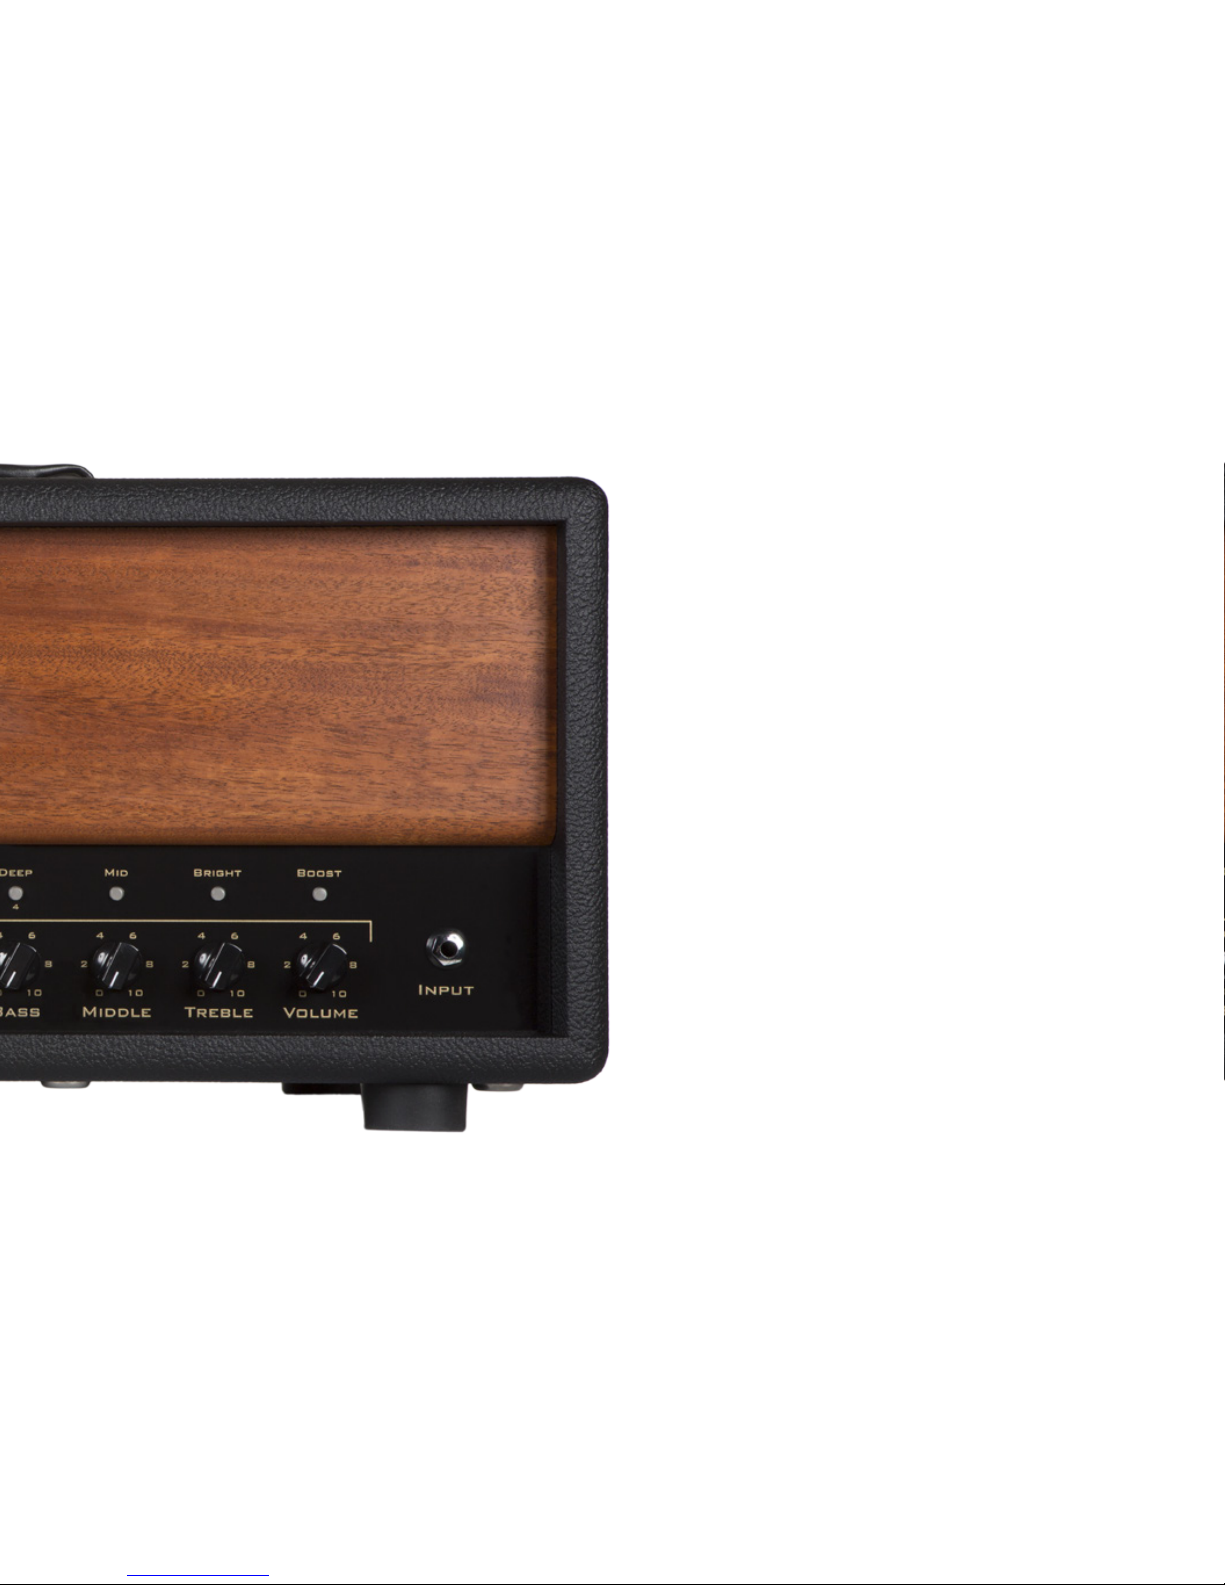
LEVEL
Adjusts the overall Master output level of the Hedgehog’s Overdrive Mode.
PRESENCE
Adjusts the amount of upper-mid frequencies added to Hedgehog’s power section.
Turning it clockwise will add more cut and sparkle. Turning it counterclockwise
decreases it’s emphasis, making your tone warmer.
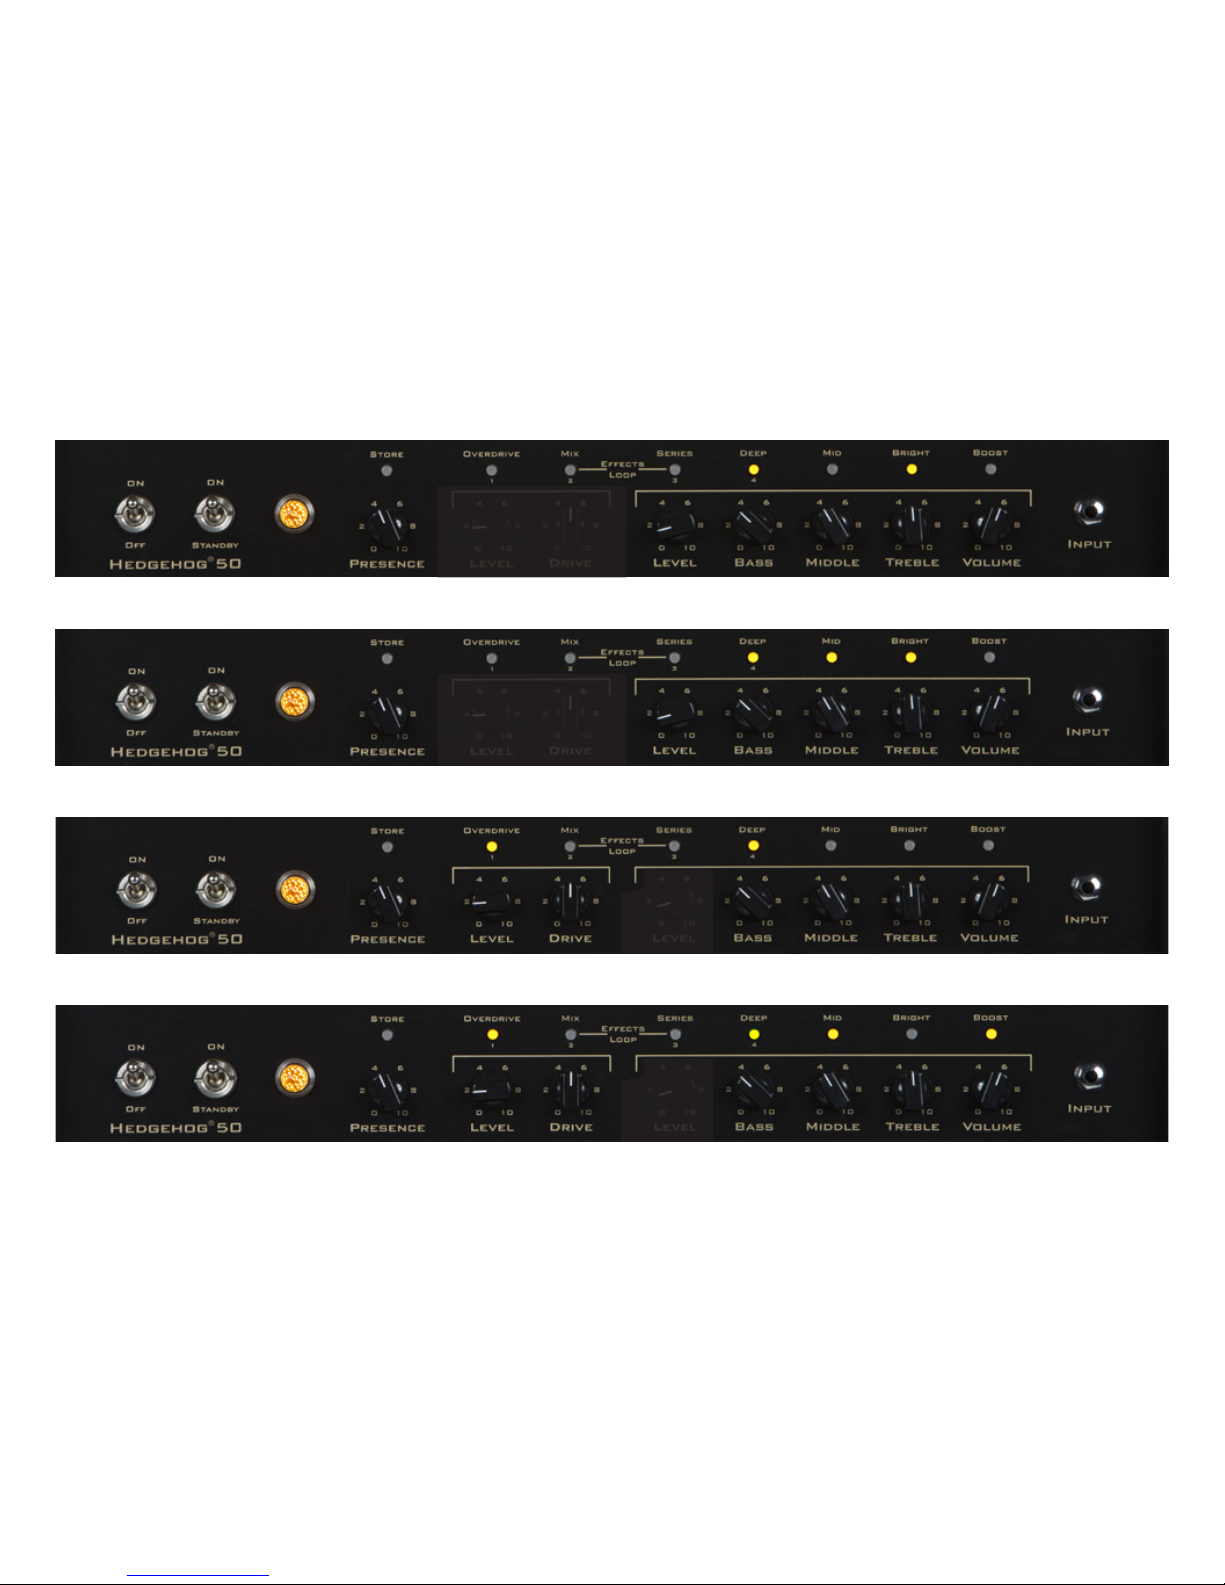
VOICE SWITCHES (Programmable)
BRIGHT
Adds sparkle and clarity to Hedgehog’s two modes (Standard and Overdrive).
NOTE: The switch interacts with the Hedgehog’s Volume control and has less emphasis
at lower volume settings.
BOOST
Produces a modest gain boost that has a full and open sounding character.
MID
Produces a Mid boost with an emphasis centered around the 800Hz frequency region.
Use this to add sweetness and focus to your single-coils or humbuckers.
DEEP
Is a dual-mode bass boost (located in the power section) centered around the 135Hz
frequency region. Use this to add low-end punch to Jazzy cleans, or bottom-end chunk
to Hard Rock tones - without losing clarity or denition.
MODES:
GREEN - In this mode, the Deep switch offers a modest bass boost.
YELLOW - In the mode, the Deep switch offers a deeper more pronounced boost in
the bottom-end.
EFFECTS LOOP (Programmable)
SERIES/MIX
Selects between Series or Mix(parallel). For a detailed description please refer to the
Effects Loop Modes section located on the following page.
STORE
Stores a preset to the desired location via the front panel buttons (1-4) located under
the overdrive, effects loop, and deep buttons, or via the included footswitch.
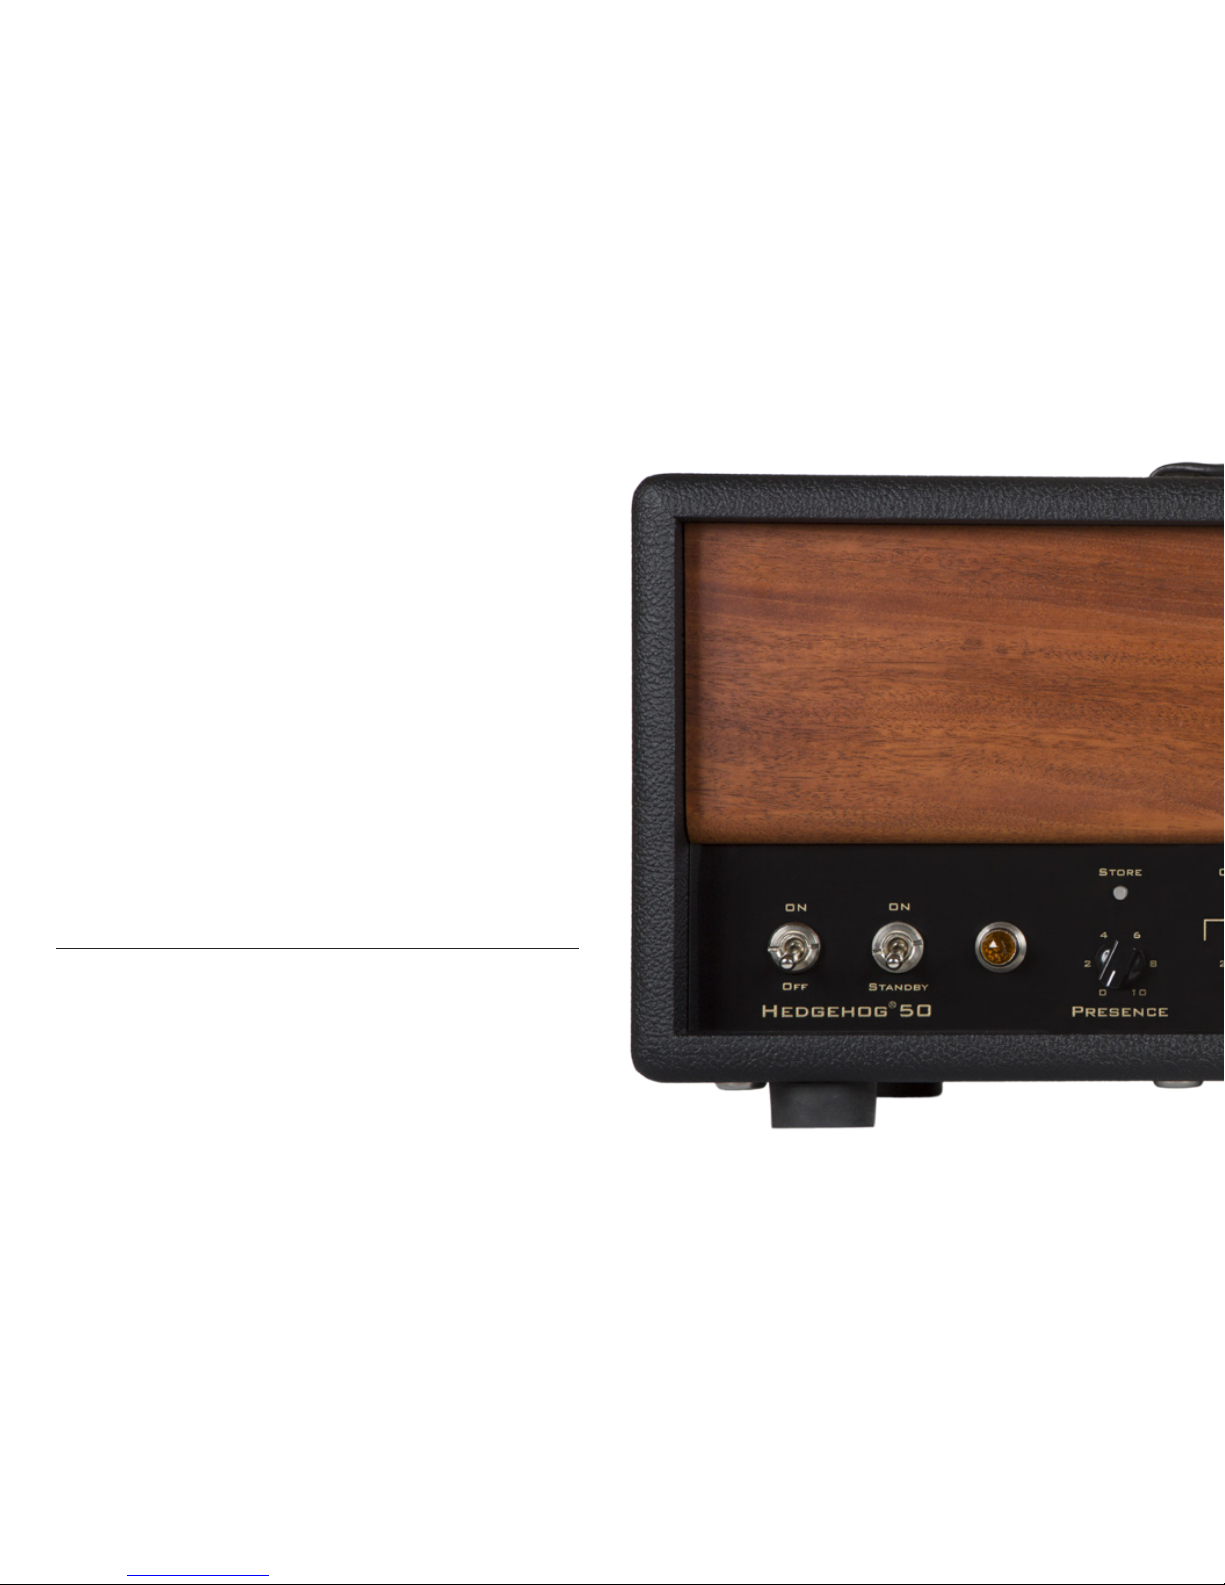
POWERING INSTRUCTIONS
With the Power Select and Standby Switches in the Off position, ip the Power Select
Switch to the On position. Wait sixty seconds and then ip the Standby Switch to the
On position.
To power down, simply ip the Standby Switch to the Off position and then ip Power
Select Switch to the Off position.
POWER SELECT SWITCH
ON: Power is switched On
OFF: Power is switched Off
STANDBY SWITCH
ON: Power is switched On
OFF: Standby is switched Off