Sukup 909 User manual

DATES REVISIONS PAGES
03/18/2020 – Added reference to Manual L25025 for installing conveyor for bin unloading -------------------------- 21
07/03/2019 – Updated warranty ------------------------------------------------------------------------------------------------------- 4
Updated torque values table --------------------------------------------------------------------------------------- 11
Added notice & updated drawings showing torque arm rod attachment -------------------------------- 34
Added note on tensioning chain under load -------------------------------------------------------------------- 40
Updated sprocket replacement instructions -------------------------------------------------------------------- 43
Updated Dodge speed reducer installation instructions ------------------------------------------------- 48-55
Updated Dodge Imperial & ISAF bearing lubrication instructions ----------------------------------------- 57
Updated head bearing guards table ------------------------------------------------------------------------------ 59
Added kit numbers for leg extensions --------------------------------------------------------------------------- 66
DRAG CONVEYOR
Assembly and Owner’s Manual
Manual L2502 ©Sukup Manufacturing Co.
03/18/2020
Sukup Manufacturing Co.
1555 255th Street, Box 677
Sheffield, Iowa, USA 50475-0677
Phone: 641-892-4222
Fax: 641-892-4629
Website: www.sukup.com
E-mail: [email protected]

Table of Contents
2
TABLE OF CONTENTS
Introduction, Receiving & Inspection, Equipment Information ...................................................... 3
Limited Warranty ......................................................................................................................... 4
Safety ......................................................................................................................................... 5
Torque Values .......................................................................................................................... 11
Component Identification .......................................................................................................... 12
Dimensions ............................................................................................................................... 13
Drive-Over Bypass Hopper Pit .................................................................................................. 18
Specifications ............................................................................................................................ 19
Pre-Installation Information ....................................................................................................... 20
Installing Conveyor as Bin Unload System ................................................................................ 21
Trough Installation .................................................................................................................... 22
Head Installation ....................................................................................................................... 23
Bypass Inlet Installation ............................................................................................................ 25
Tail Installation .......................................................................................................................... 26
Intermediate Gate Assemblies .................................................................................................. 27
Chain Installation ...................................................................................................................... 28
Slack Chain Detector ................................................................................................................ 31
Carry-Back Cups....................................................................................................................... 32
Cover Installation ...................................................................................................................... 32
Inlet Installation ......................................................................................................................... 33
Drive Assembly ......................................................................................................................... 34
Motor Mount Heights ................................................................................................................. 36
Filling Reducer with Oil ............................................................................................................. 37
Adjusting V-Belt Tension ........................................................................................................... 38
Plug Relief Door & Limit Switch ................................................................................................. 39
Final Check ............................................................................................................................... 40
Conveyor Operation .................................................................................................................. 40
Maintenance ............................................................................................................................. 41
Extended Shutdowns ................................................................................................................ 41
Chain & Sprocket Inspection ..................................................................................................... 42
Replacing Sprocket ................................................................................................................... 43
Troubleshooting ........................................................................................................................ 44
Dodge Torque Arm II Speed Reducers pages ........................................................................... 48
Dodge Bearing Lubrication Instructions ..................................................................................... 56
Parts Assemblies ...................................................................................................................... 58
Contact Information ................................................................................................................... 68

Introduction
3
Introduction
This conveyor was carefully designed to give years of dependable service and was manufactured with
the finest materials available. This manual includes information relating to safety, installation,
maintenance and troubleshooting, and should be thoroughly read prior to installation of conveyor. Due
to the wide variety of factors possible, this manual cannot cover all aspects of installation. Instructions
provided are to be used as general guidelines only. Qualified contractors should be used for site
design, layout and construction of conveyor. Reliability, safety and good service life of conveyor depend
to a very large extent on care taken in installing and preparing this equipment for its intended use.
Receiving and Inspection
Carefully inspect shipment for damage as soon as it is received. Verify that quantities of parts and
packages received correspond to quantities shown on packing slip. Report any damage or shortage to
delivering carrier as soon as possible. Sukup Manufacturing’s responsibility for damage to equipment
ended with acceptance by delivering carrier. Refer to bill of lading. Save all paperwork and
documentation furnished with conveyor components.
Equipment Information
Record conveyor information in space provided below and keep it on file. This information will help
identify your equipment should you need to contact your dealer with any questions.
Model number _____________________________
Serial number _____________________________
Inlet to outlet length _____________________________
RPM _____________________________
Grain type(s) _____________________________
Horsepower _____________________________
Dealer _____________________________
Date purchased _____________________________
Serial number plate is located on head assembly.

Limited Warranty
4
Limited Warranty

Safety
5
On safety decals, this symbol and the
signal words Danger, Warning, Caution
and Notice draw your attention to
important instructions regarding safety.
They indicate potential hazards and levels of intensity.
RED - DANGER indicates an
imminently hazardous
situation which, if not avoided, will result in death or
serious injury.
ORANGE - WARNING
indicates a potentially
hazardous situation which, if not avoided, could result
in death or serious injury.
YELLOW - CAUTION
indicates a potentially
hazardous situation which, if not avoided, may result
in minor or moderate injury.
BLUE - NOTICE alerts you to
practices unrelated to personal
injury, such as messages related to property damage.
IMPORTANT: To prevent serious injury or death to
you or your family, it is essential that safety decals
are clearly visible, in good condition, and applied to
the appropriate equipment.
FOLLOW MANUAL & SAFETY DECAL MESSAGES
Carefully read this manual and
all safety decals on your
equipment. Safety decals must
be kept in good condition. Replace
missing or damaged safety decals
by contacting Sukup
Manufacturing Co. via mail at PO
Box 677, Sheffield, Iowa USA, 50475; by phone at
641-892-4222; or by e-mail at [email protected].
It is the responsibility of the owner/operator to know
what specific requirements, precautions, and work
hazards exist. It is also the responsibility of the
owner/operator to inform anyone operating or
working in the area of this equipment of hazards and
safety precautions that need to be taken to avoid
personal injury or death. Always keep children away
from bins and vehicles with flowing grain.
Make no unauthorized modifications to machine.
Modifications may endanger function and/or safety of
unit. Keep unit in good working condition. Keep shields
in place. Replace worn or missing shields free of
charge by contacting Sukup Manufacturing Co.
GRAIN BIN SAFETY
Owners/operators are responsible for developing
site-specific confined space entry procedures.
OSHA’s confined space entry procedures (29CFR
1910.146) can be found at www.osha.gov.
If you must enter bin for repair or maintenance:
Use a safety harness, safety line and respirator
Station another person outside of bin
Avoid the center of the bin
Wear appropriate personal protective equipment
Keep clear of all augers and moving parts
DANGER: Never enter bin unless all power
is locked out and another person is present.
Rotating augers
can kill or
dismember!
NEVER enter bin when augers are running!
When bin is nearly empty, sweep auger will travel at an
increasingly fast speed. Keep away from sweep and
sump augers to avoid entanglement.
Failure to follow precautions above will result in death
or serious injury.
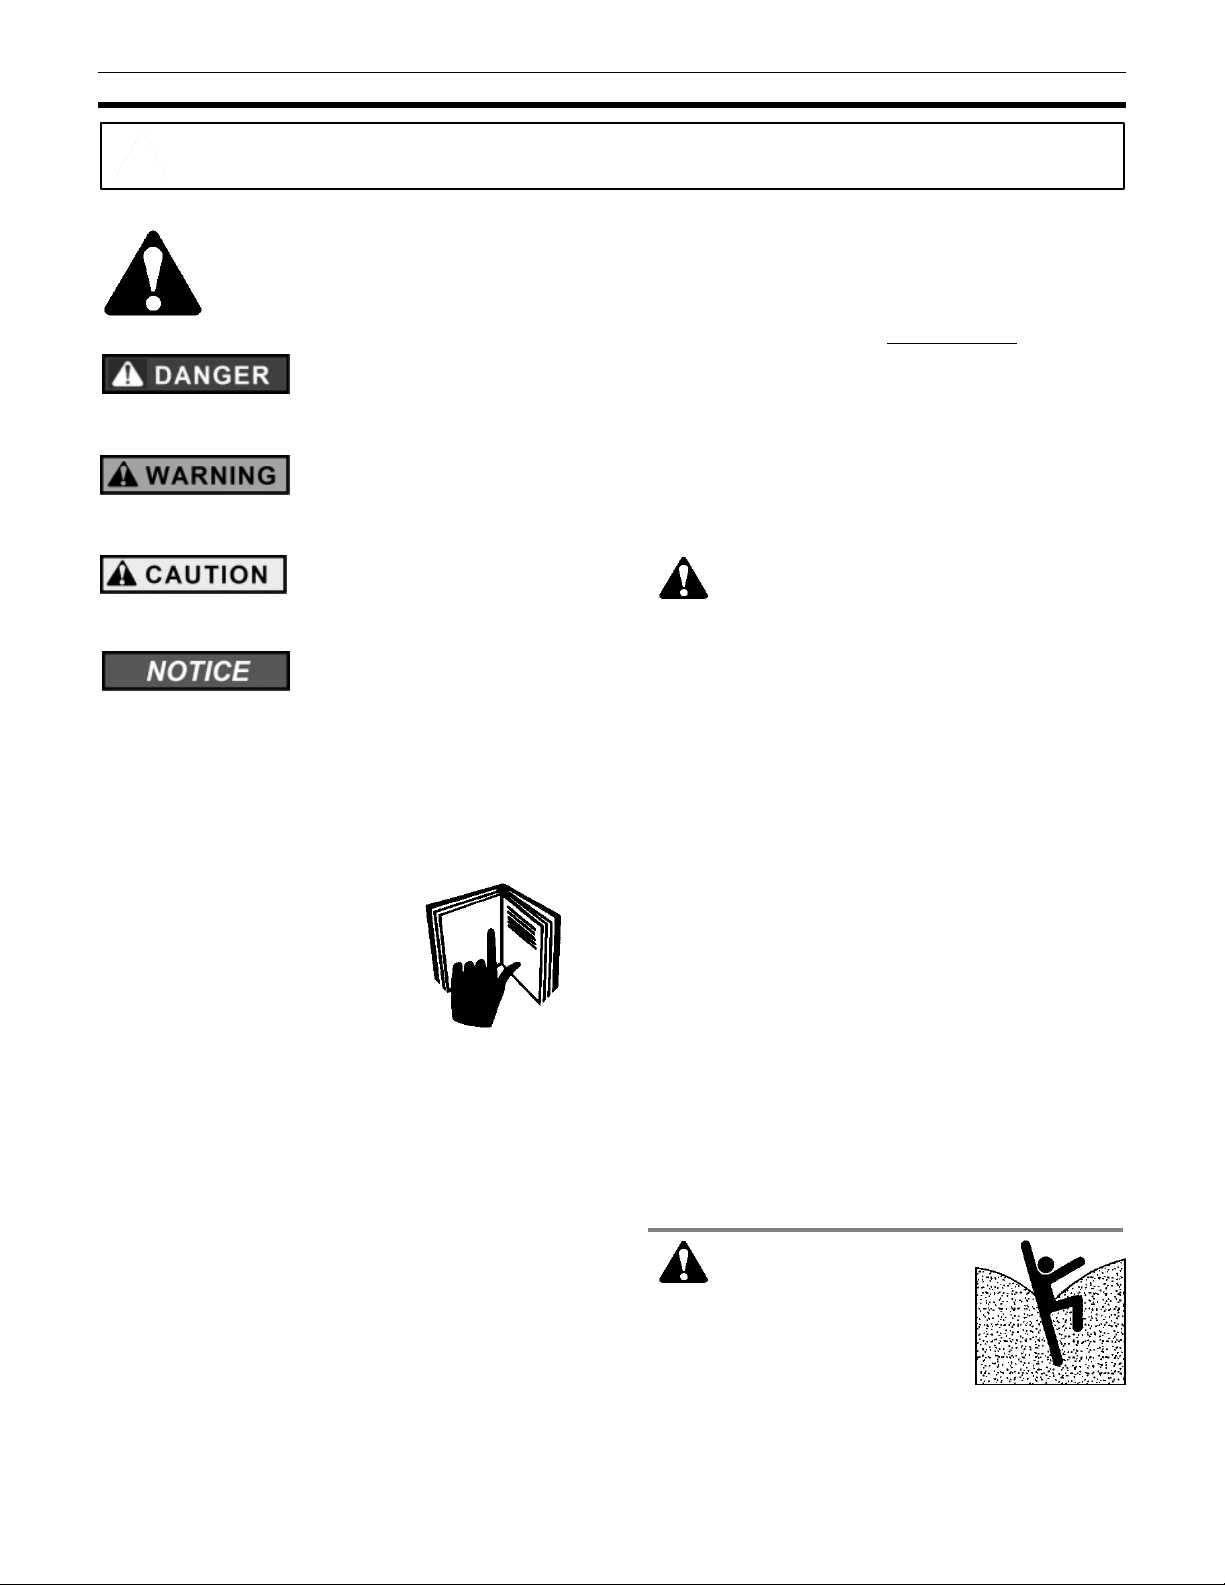
DANGER: Flowing grain
may trap and suffocate. If
you enter a bin of flowing grain you
can be completely submerged in
grain in about 8 seconds.
Failure to heed this warning will
result in death or serious injury.
Read manual before installing or using product. Failure to follow instructions and safety precautions in
manual can result in death or serious injury. Keep manual in a safe location for future reference.

Safety
6
Refer to OSHA 1910.132
(Personal Prot. Equip.)
To avoid electric shock or electrocution, all
equipment must be properly wired and grounded
according to electrical codes. Have unit wired by
qualified electrician.
Have an electrician install a main power disconnect
switch capable of being locked only in OFF position.
Mark disconnect
clearly as to
equipment it
operates.
Always lock out
main power
disconnect switch
whenever
equipment is not
in use.
WARNING: When servicing equipment, never
enter bin unless all power is locked out and
another person is present. Always LOCK OUT
all power and always check with voltage meter before
servicing.
Failure to do so could result in death or serious injury.
Owners/operators are responsible for developing
site-specific Lockout/Tagout procedures based on
equipment at their work site. See OSHA’s typical
minimal lockout procedures (29CFR 1910.147 App A)
at www.osha.gov.
WARNING: KEEP CLEAR OF ALL MOVING
PARTS.
Keep people (ESPECIALLY YOUTH) away from
equipment, particularly during operation.
Keep away from all moving parts.
Keep all shields in place. SHUT
OFF AND LOCK OUT all power
before servicing.
Failure to follow precautions above
could result in death or serious
injury.
WARNING: Metal is slippery when wet. To
avoid falls, never carry items if climbing on
bin. Maintain secure hand and foothold if climbing on
bin. Failure to do so could result in death or serious
injury.
CAUTION: Metal edges are sharp. To avoid
injury, wear protective clothing and handle
equipment and parts with care.
Failure to do so may result in minor or moderate injury.
PERSONAL PROTECTIVE EQUIPMENT
Owners/Operators are
responsible for developing
site-specific personal
protective equipment
standards. OSHA’s
personal protective
equipment standards
(29CFR 1910.132) can be
found at www.osha.gov.
EMERGENCIES – KNOW WHAT TO DO
Have emergency numbers and written directions to
work site readily available in case of emergency. An
area for emergency phone numbers to be recorded is
provided below and at end of this manual.
Ambulance • Fire • Police: 9-1-1
Bin rescue team: _______________________
Emergency medical squad: ______________
Address of work site: ___________________
Directions to work site:__________________

Safety
7
Do not enter a grain bin if grain has bridged or stopped flowing normally. Grain can collapse without
warning and can trap, bury and cause suffocation. See Fig. 1.
Fig. 1 – Obstructed-flow, bridged grain, collapsed bridge of grain in bin
Basic safety rules
1. Be certain that all covers, grates and guards are in place and securely fastened.
2. Never step or walk on conveyor covers, grates or guards.
3. Lock out all power before removing covers, grates or guards. Before working on any part of
conveyor, secure all chains and belts to prevent movement.
4. Do not modify or redesign conveyor without first obtaining written approval from Sukup
Manufacturing Co. Unauthorized modifications to components may impair function and/or
safety and affect machine life.
FOLLOW A PROPER LOCKOUT PROCEDURE
This suggested procedure must be performed EVERY TIME conveyor is to be
worked on. Following these steps will assist in preventing accidents.
Each worker must have his/her own lock and the only key to that lock.
Make sure conveyor is not operating before turning off power.
Notify all affected employees that conveyor will be locked out for service.
Authorized employee shall refer to the facility procedure referencing the power source for the
conveyor.
Shut down conveyor in a normal manner.
All energy sources that could activate conveyor must be deactivated.
Each person who will be working on conveyor must put a lock on each energy source that could
provide any power to conveyor.
Confirm that power has been deactivated by trying to re-start conveyor.
Turn all controls for conveyor to “Off” position.
NO ONE is to return power to conveyor until all work on it has been completed and all locks have been
removed.
Facility management needs to proactively train employees to ensure use of proper lockout procedures
while working on conveyor. Management also needs to inspect unit for any covers or guards not in their
proper place. It is everyone’s responsibility to report any missing grates, guards, equipment failures or
failures of others to lock out.
SAFETY QUESTIONS OR CONCERNS
Please contact Sukup Manufacturing Co. with any specific safety concerns about conveyor or its use.

Safety
8
Electrical Wire Clearances
Your local electric utility may be able to provide assistance in planning a safe environment for working
around grain bins. State codes may vary regarding specific clearances for electrical lines around grain
bins. Be certain your local electric utility is in accordance with your state's regulations. To prevent
overhead safety issues, bury electrical lines.
American National Standards Institute (ANSI) provides clearance envelopes, shown in Fig. 2, for grain
bins filled by permanently installed augers, conveyors or elevators in (ANSI) C2 2007 "National Electrical
Safety Code," Rule 234, page 120.
NOTE: An electric utility may refuse to provide electrical service to any grain bin built near an existing
electric line that does not provide clearance required by ANSI and the National Electrical Safety Code.
Fig. 2 – Electrical wire clearances

Safety
9
Drag Conveyor Safety Decals
It is essential that safety decals below be mounted on drag conveyor to warn and remind of potential
hazards. Decals are factory-mounted, but may need to be replaced if damaged or worn. Order
replacement safety decals or shields free of charge by contacting Sukup Manufacturing Co. by mail at
PO Box 677, Sheffield, Iowa 50475; by phone at 641-892-4222; or by e-mail at [email protected].
Please specify decal identification number. See Fig. 3 for locations of decals.
1. Decal L0113 – WARNING: Falling from
heights may cause serious injury or death.
2. Decal L01132 – WARNING: Do NOT walk
or stand on covers or guards!
3. Decal L0114 - WARNING: Exposed
buckets or flights may cause serious injury
or death.
4. Decal L0271 – DANGER: Shield missing, do
not operate!
5. Decal L0281 - WARNING: To avoid
serious injury or death:
6. Decal L0284 - WARNING: Keep away from
all moving parts

Safety
10
Safety Decal Placement
Check that all safety decals are in place as shown in Fig. 3 and are legible when conveyor is installed.
If decal replacement is necessary, use locations below. Make sure location for decal is free from
grease, oil and dirt. Remove backing from decal and place in proper position.
IMPORTANT: If suggested location is not clearly visible, place safety decal in a more suitable area.
Never cover up an existing safety decal.
* Used on both sides of conveyor
L0114 – EXPOSED
BUCKETS/FLIGHTS
* L0284
MOVING PARTS
L0114 – EXPOSED
BUCKETS/FLIGHTS
L0114 – EXPOSED
BUCKETS/FLIGHTS
* L0114 – EXPOSED
BUCKETS/FLIGHTS
* L0284
MOVING PARTS
* L0281 – GENERAL
SAFETY INSTRUCTION
L0113 – FALLING
FROM HEIGHTS
L0113 – FALLING
FROM HEIGHTS
L0113 – FALLING
FROM HEIGHTS
L0271 -
SHIELD
MISSING
(LOCATED ON
LIP OF SIDES,
UNDERNEATH
COVER)
L01132
COVERS/
GUARDS
* L03171
* L03171
Fig. 3 – Drag conveyor decal placement

Bolt Identification and Torque Ratings
11
Fig. 4 & Table 1 – Torque values

Component Identification
12
Component Identification
Fig. 5 identifies major components of a Sukup Drag Conveyor.
Fig. 5 – Drag conveyor components

Dimensions
13
Dimensions
Use drawings and tables below and on following pages to determine dimensions of conveyor
components.
Fig. 7 & Table 2 – Drag conveyor dimensions in inches
MODEL
A
B
C
D
H*
J
K*
L*
M
P
Q
909
9-1/2
9
12
15
33
26
24
45
14-1/2
61-1/2
37-1/2
913
9-1/2
13
12
15
41
26
24
53
14-1/2
61-1/2
37-1/2
1209
12-1/2
9
15-1/2
15
33
26
24
45
14-1/2
61-1/2
37-1/2
1213
12-1/2
13
15-1/2
15
41
26
24
53
14-1/2
61-1/2
37-1/2
1217
12-1/2
17
15-1/2
19
50
26
24
62
14-1/2
61-1/2
37-1/2
1609
16-1/2
9
19-1/2
15
33
26
24
45
14-1/2
61-1/2
37-1/2
1613
16-1/2
13
19-1/2
15
41
26
24
53
14-1/2
61-1/2
37-1/2
1617
16-1/2
17
19-1/2
19
50
26
24
62
14-1/2
61-1/2
37-1/2
1621
16-1/2
21
19-1/2
23
68
36
24
80
19-1/2
71-1/2
43
2109
21
9
24
15
33
26
24
45
14-1/2
61-1/2
37-1/2
2113
21
13
24
15
41
26
24
53
14-1/2
61-1/2
37-1/2
2117
21
17
24
19
50
26
24
62
14-1/2
61-1/2
37-1/2
2121
21
21
24
23
68
36
24
80
19-1/2
71-1/2
43
2717
27
17
30
19
50-1/2
26
27
64
14-1/2
61-1/2
37-1/2
2721
27
21
30
23
67-1/2
36
27
81
19-1/2
71-1/2
43
3321
33
21
36
23
68
36
30
83
19-1/2
71-1/2
43
* Dimensions based on standard inlet
NOTE: All 9” conveyors have tapered head sections
Fig. 6 – Drag conveyor
head section
OVERALL LENGTH
HEAD SECTION
DISCHARGE
STANDARD INTERMEDIATE SECTION 9’ 9”
TAIL SECTION
INLET
INTERMEDIATE
CROSS SECTION
10-1/2”
APPROX.
INLET TO OUTLET LENGTH
(CENTER TO CENTER)
4” *
Q
J
P

Dimensions
14
Transition Inlet
Drag Conveyor Sumps
A
B
C
D
909
15
9-3/8
7
13-3/16
1209
18
12-3/8
10
16-3/16
1609
22
16-3/8
14
20-3/16
2109
26
20-7/8
18-1/2
24-5/8
Fig. 9– Center sump dimensions
Fig. 10 – Intermediate sump dimensions
Fig. 11 – Rack and pinion opener dimensions
Table 3 – Sump,
opener dimensions
in inches
Fig. 8 – Transition inlet dimensions
SEE DIMENSION “H”
ON PAGE 13

Dimensions
15
Head Discharge Gate
Take care to position head discharge transition so 55° angle faces intermediate section.
Intermediate Discharge Gate
MODEL
A
B*
C
D
E
F
G
H
J
K
909-913
26
60
5-1/2
30
68
5-1/2
10
11-15/16
11-1/16
14
1209-1213
26
60
5-1/2
30
68
5-1/2
10-1/4
11-15/16
11
14
1217
26
60
5-1/2
38
85
5-1/2
10-1/4
11-15/16
15-1/8
14
1609-1613
26
60
5-1/2
30
68
5-1/2
10-1/4
11-15/16
11
14
1617
26
60
5-1/2
38
85
5-1/2
10-1/4
11-15/16
14-1/4
16
1621
26
81
5-1/2
38
85
5-1/2
14-13/16
16-1/4
14-1/4
16
2109-2113
26
60
5-1/2
30
68
5-1/2
7-3/4
12-5/16
9-1/8
18
2117
26
60
5-1/2
38
85
5-1/2
7-3/4
12-5/16
13-7/16
18
2121
36
81
5-1/2
38
85
5-1/2
12-15/16
16-5/8
13-7/16
18
2717
26
60
5-1/2
38
85
5-1/2
13-11/16
16-3/8
12-15/16
18
2721
36
81
5-1/2
38
85
5-1/2
12-9/16
16-9/16
12-7/16
20
3321
36
81
5-1/2
38
85
5-1/2
12-15/16
16-1/2
12-7/16
20
*Estimated
Fig. 14 – Intermediate discharge gate (inline)
Fig. 15 – Intermediate transition
Fig. 12 – Head discharge gate (inline)
Fig. 13 – Head discharge transition
TO INTERMEDIATE SECTION
Table 4 – Gate
and transition
dimensions in
inches

Dimensions
16
Bypass Inlets
Fig. 16 – Bypass inlet dimensions
Drive-Over Bypass Hoppers
Fig. 17 – Drive-over bypass hopper dimensions
MODEL
A
B
C
D
E
F
G
H
J
K
909
9-1/2
9
50
55-3/4
42-7/16
3-3/8
45-15/16
38
44-7/16
25-7/8
913
9-1/2
13
50
55-3/4
42-7/16
3-3/8
45-15/16
38
44-7/16
25-7/8
1209
12-1/2
9
50
55-3/4
42-7/16
3-3/8
45-15/16
38
44-7/16
25-7/8
1213
12-1/2
13
50
55-3/4
42-7/16
3-3/8
45-15/16
38
44-7/16
25-7/8
1217
12-1/2
17
50
55-3/4
42-7/16
3-3/8
45-15/16
38
44-7/16
25-7/8
1609
16-1/2
9
50
55-3/4
42-7/16
3-3/8
45-15/16
38
44-7/16
25-7/8
1613
16-1/2
13
50
55-3/4
42-7/16
3-3/8
45-15/16
38
44-7/16
25-7/8
1617
16-1/2
17
50
55-3/4
42-7/16
3-3/8
45-15/16
38
44-7/16
25-7/8
1621
16-1/2
21
50
55-3/4
42-7/16
3-3/8
45-15/16
38
44-7/16
32-3/8
2109
21
9
50
55-3/4
42-7/16
3-3/8
45-15/16
38
44-7/16
25-7/8
2113
21
13
50
55-3/4
42-7/16
3-3/8
45-15/16
38
44-7/16
25-7/8
2117
21
17
50
55-3/4
42-7/16
3-3/8
45-15/16
38
44-7/16
32-3/8
2121
21
21
50
55-3/4
42-7/16
3-3/8
45-15/16
38
44-7/16
37
2717
27
17
50
55-3/4
42-7/16
3-3/8
45-15/16
38
44-7/16
32-3/8
2721
27
21
50
55-3/4
42-7/16
3-3/8
45-15/16
38
44-7/16
38-7/8
3321
33
21
62
67-3/4
54-9/16
3-3/8
57-15/16
50
56-7/16
40-3/8
Table 5 – Drive-over bypass hopper dimensions, in inches

Dimensions
17
Low-Profile Bypass Hopper Dimensions
Fig. 18 & Table 6 – Low-profile bypass hopper dimensions, in inches
MODEL
A
B
C
D
E
F
G
909
44-5/16"
36-7/16"
17-9/16"
4-15/16"
12-1/2"
9-1/2"
9"
913
50-5/16"
42-7/16"
21-1/8"
5-5/16"
12-1/2"
9-1/2"
13"
1209
50-5/16"
42-7/16"
18-5/8"
4-15/16"
15-1/2"
12-1/2"
9"
1213
56-7/16"
48-7/16"
22-5/8"
5-15/16"
15-1/2"
12-1/2"
13"
1217
58-15/16"
50-15/16"
26-7/8"
8-15/16"
15-1/2"
12-1/2"
17"
1609
59-1/8"
50-15/16"
20-7/8"
4-15/16"
19-1/2"
16-1/2"
9"
1613
64-15/16"
56-15/16"
24-7/8"
5-15/16"
19-1/2"
16-1/2"
13"
1617
66-15/16"
58-15/16"
28-7/8"
8-15/16"
19-1/2"
16-1/2"
17"
1621
75-3/16"
66-15/16
32-7/8"
8-15/16"
19-1/2"
16-1/2"
21"
2109
68-1/16"
59-15/16"
23-1/8"
4-15/16"
24"
21"
9"
2113
73-15/16"
65-15/16"
27-1/8"
5-15/16"
24"
21"
13"
2117
75-3/4"
67-15/16"
31-1/8"
8-15/16"
24"
21"
17"
2121
83-15/16"
75-15/16"
35-1/8"
8-15/16"
24"
21"
21"
2717
87-13/16"
79-15/16"
34-1/8"
8-15/16"
30"
27"
17"
2721
95-15/16"
87-15/16"
38-1/16"
8-7/8"
30"
27"
21"
3321
107-13/16"
99-15/16"
41-1/8"
8-15/16"
36"
33"
21"

Dimensions
18
Drive-Over Bypass Hopper Pit
MODEL
A
B
C
D
E
909
56-1/4
50-1/4
42-5/8
46
3-3/8
913
56-1/4
50-1/4
42-5/8
46
3-3/8
1209
56-1/4
50-1/4
42-5/8
46
3-3/8
1213
56-1/4
50-1/4
42-5/8
46
3-3/8
1217
56-1/4
50-1/4
42-5/8
46
3-3/8
1609
56-1/4
50-1/4
42-5/8
46
3-3/8
1613
56-1/4
50-1/4
42-5/8
46
3-3/8
1617
56-1/4
50-1/4
42-5/8
46
3-3/8
1621
56-1/4
50-1/4
42-5/8
46
3-3/8
2109
56-1/4
50-1/4
42-5/8
46
3-3/8
2113
56-1/4
50-1/4
42-5/8
46
3-3/8
2117
56-1/4
50-1/4
42-5/8
46
3-3/8
2121
56-1/4
50-1/4
42-5/8
46
3-3/8
2717
56-1/4
50-1/4
42-5/8
46
3-3/8
2721
56-1/4
50-1/4
42-5/8
46
3-3/8
3321
68-1/4
62-1/4
54-5/8
58
3-3/8
Table 7 -- Drive-over bypass pit dimensions, in inches
NOTE: Grating must overlap angle iron by at least 1” for standard drive-over bypass hopper pit.
Bin Trench Dimensions
See Engineering Section of Material Handling Catalog for bin pad trench dimensions depending on
conveyor height and, if applicable, floor support height.
Fig. 19 – Dimensions of
straight drag conveyor
hopper pit

Specifications
19
Specifications
Table 8 shows capacities in bushels per hour and chain speeds in feet per minute.
CAPACITY
BPH
909
913
1209
1213
1217
1609
1613
1617
1621
2109
2113
2117
2121
2717
2721
3321
1500
105
2000
139
105
2500
174
99
131
99
3000
119
158
119
3500
139
184
105
139
109
4000
159
210
120
158
124
4500
179
135
178
102
140
5000
150
104
113
155
5500
165
114
124
171
6000
180
124
136
186
106
6500
135
147
101
115
7000
145
158
109
124
7500
155
169
117
133
8000
166
181
125
142
8500
176
133
100
150
104
9000
186
140
106
159
110
10000
156
118
177
122
11000
172
130
134
102
104
12000
187
142
147
111
114
13000
153
159
120
123
14000
165
171
129
133
100
15000
177
183
139
142
108
16000
148
152
115
17000
157
161
122
99
18000
166
171
129
105
19000
176
180
136
111
20000
185
143
117
21000
151
123
22000
158
129
23000
165
135
24000
172
140
25000
179
146
26000
152
27000
158
28000
164
29000
170
30000
176
31000
32000
33000
34000
35000
36000
37000
Table 8 – Capacities and chain speeds

Pre-Installation Information
20
Pre-Installation Information
A drag conveyor is not meant to be a self-supporting structure or part of a truss system.
Conveyor must be supported every 10’ (at every connection). Owner and/or contractor are responsible
for providing adequate support for conveyor. Drawings in Figs. 20 and 21 show typical installations.
Do not weld supports to conveyor. Overhead clearance and maintenance accessibility should be
considered.
Conveyor has not been designed to support other equipment such as cleaners, distributors, spouting,
etc. Separate structures must be provided to support any accessory equipment.
Sukup Manufacturing Co. has supplied conveyor and certain optional accessories, but does not
assume responsibility for installation.
Installation recommendations in this manual are general guidelines only. User and/or installer are
responsible for consulting a civil or structural engineer regarding installation, including but not limited to
construction, supervision, foundation and bracing.
IMPORTANT: Retain a licensed engineer to plan installation and a qualified millwright or contractor to
erect conveyor and accompanying equipment and structures.
Fig. 20 – Views of drag conveyors
mounted on support structure & on legs
PROVIDE SUPPORT AT EACH JOINT.
SWDC0143
06/04/2019 AMZ
This manual suits for next models
15
Table of contents
Other Sukup Farm Equipment manuals
Popular Farm Equipment manuals by other brands

Metalcraft
Metalcraft TFA11 quick start guide

Avantco
Avantco A21646 Operator's manual for Attachment

Avantco
Avantco A21385 Operator's manual for Attachment

Blue Diamond
Blue Diamond PICKUP BROOM 2 Series Operation and maintenance manual

Blue Diamond
Blue Diamond Heavy Duty Root Grapple Operation and maintenance manual

Ohio Steel
Ohio Steel 48CP manual