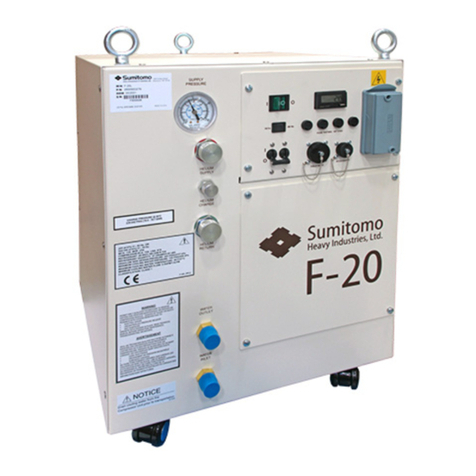
Sumitomo F-70H User manual

F-70H and F-70L Helium
Compressors
Service Manual
Sumitomo (SHI) Cryogenics of America, Inc.
1833 Vultee Street
Allentown, PA 18103-4783
U.S.A.
Revision C: March 2012 267056A


TABLE of CONTENTS
i
Page
SAFETY.......................................................................................................................... 1
SERVICE ........................................................................................................................ 5
INTRODUCTION .......................................................................................................... 7
Helium Compressors, Models F-70H and F-70L................................................. 7
PRINCIPLES of OPERATION ........................................................................................ 9
DESCRIPTION ............................................................................................................ 11
Components .................................................................................................... 11
MAINTENANCE .................................................................................................................. 13
Connect and Remove the Water Lines ...................................................................... 13
Adsorber Replacement............................................................................................... 14
Adsorber Removal .............................................................................................. 14
Adsorber Installation ........................................................................................... 15
Register New Adsorber ...................................................................................... 15
Used Adsorber Venting and Disposal ................................................................ 16
Charging or Venting .................................................................................................. 16
Charging Procedure ........................................................................................... 17
Venting Procedure to Adjust the Equalization Pressure ..................................... 18
Gas Cleanup ............................................................................................................. 18
Cold Head Gas Cleanup .......................................................................................... 20
Leak Check................................................................................................................ 20
Leak Repair .............................................................................................................. 21
Self Sealing Couplings ............................................................................................... 21
Replace the Gasket Seal ..................................................................................... 21
Replace a Nylon Slide Rail......................................................................................... 22
Replace the Front Locator Plate................................................................................. 22
Remove or Replace a Caster..................................................................................... 22
Replace a Lifting Eyebolt............................................................................................ 23
TROUBLESHOOTING ........................................................................................................ 25
Compressor Capsule ................................................................................................ 25
Winding Continuity, Grounding and Resistance Checks..................................... 25
Replace Fuses............................................................................................................ 26
Replace the Electrical Chassis................................................................................... 27
Replace the Supply Gas High Temperature Thermistor............................................ 28
Replace the Water High Temperature Thermistors (Thermistor Cable Assembly)... 29
Automatic Restarting After a Helium High Temperature Shutdown Error ................. 30
System Status Display................................................................................................ 30
Error Conditions ................................................................................................... 30
Clearing Error Conditions..................................................................................... 31
Restarting After an Error Condition...................................................................... 32
RS232 Terminal Communication Interface ................................................................ 32
Troubleshooting Guide ............................................................................................... 33
Compressor Reset Functions..................................................................................... 35

TABLE of CONTENTS
(Continued)
ii
Page
PARTS ......................................................................................................................... 40
Ordering .................................................................................................................... 40
F-70H Compressor Parts ........................................................................................... 40
F-70L Compressor Parts ............................................................................................ 40
F-70H/F-70L Compressor Parts ................................................................................. 41
Service Tools.............................................................................................................. 41
ILLUSTRATIONS LIST
Figure 1 Compressor Flow Diagram ................................................................. 9
Figure 2 Connect and Remove the Water Lines ............................................. 14
Figure 3 Electrical Chassis ............................................................................. 27
Figure 4 F-70H Compressor Wiring Diagram ................................................. 36
Figure 5F-70H Compressor Wiring Schematic............................................... 37
Figure 6 F-70L Compressor Wiring Diagram................................................... 38
Figure 7 F-70L Compressor Wiring Schematic ............................................... 39
SJM P/N 267056A

SAFETY
1
GENERAL
SHI equipment is designed to operate safely when the installation, operation and servicing are
performed in accordance with the instructions in this technical manual. For Service Center
locations, see the Service section of this manual.
SPECIAL NOTICES
Three types of special notices -- WARNINGS, CAUTIONS and NOTES are used in this
technical manual.
WARNINGS call attention to actions or conditions that can result in serious injury or death.
CAUTIONS call attention to actions or conditions that can result in damage to the equipment or
in abnormal performance.
NOTE
NOTES give important, additional information, explanations or recommendations related to the
appropriate topic or procedure.
WARNINGS and CAUTIONS, like other safety instructions, appear within rectangles in the text
where they are applicable. Because of their importance, they are summarized in this Safety
section and in the General Technical Manual, and should be read first.
NOTE
Changes to this manual since the previous issue are identified by parallel
lines (||) in the right margins.

Safety
2
WARNINGS
AVOID ELECTRIC SHOCK. This equipment must only be connected to a supply mains switch
with protective earth. All electrical supply equipment must meet applicable codes and be
installed by qualified personnel.
If this equipment is modified, appropriate inspection and testing must be conducted to ensure
safe use of equipment.
Disconnect the power to the compressor before troubleshooting the electrical components.
Permit only qualified electrical technicians to open electrical enclosures, to perform electrical
checks or to perform tests with the power supply connected and wiring exposed. Failure to
observe this warning can result in serious injury or death.
AVOID INJURY. Never use compressed helium gas from a cylinder without a proper regulator.
Overpressure can cause serious injury if the system equipment ruptures.
During operation, some surfaces under the compressor’s cover become hot. Allow the
compressor to cool for 1/2 hour after shutdown before removing the cover for maintenance.
Always wear eye protection when handling pressurized gas lines and other pressurized
equipment. Never apply heat to a pressurized gas line or other pressurized components.
Disconnect gas lines only when the compressor is stopped. Disconnecting the cold head while
it is cold can create excessively high internal pressure as the gas warms. Material failure and
uncontrolled pressure release can cause serious injury.
Use two wrenches when disconnecting a gas line coupling to avoid loosening the cold head or
compressor coupling. Gas pressure can project the coupling with enough force to cause
serious injury.
The compressor is charged with helium gas. Except when disconnecting the adsorber or the
gas lines, vent both supply and return Aeroquip couplings to atmospheric pressure before
disassembly. Uncontrolled pressure release can cause serious injury.
Always vent a gas-charged component before beginning to disassemble its couplings. Gas
pressure can launch a loose coupling with enough force to cause serious injury.
The adsorber is charged with helium gas. Follow the used adsorber venting procedure for safe
disposal of the used adsorber.
CAUTIONS
PRESERVE YOUR WARRANTY. Modification to equipment without the consent of the
manufacturer will void the warranty.
Specifications require the use of 99.999% pure helium gas. Using a lesser quality of helium can
damage the system and void the warranty.

Safety
3
CAUTIONS (continued)
AVOID GAS LEAKS. Check the condition of the gasket face seal on the male half of each
Aeroquip coupling. Be sure the gasket face seal is in place and the sealing surfaces on both
the male and female halves are clean before connecting. Replace the gasket face seal if it is
damaged or missing.
Keep the gas line couplings aligned when making or breaking a coupling connection. Leaks can
occur due to the weight of the gas line or due to a sharp bend near the connection.
CAUTIONS (continued)
AVOID CONTAMINATION. When checking the compressor for shipping damage, do not
connect the gas lines and the cold head. The components may become contaminated with
compressor oil.
Follow the charging or venting procedures to prevent reversed flow of system gas. Do not
charge through the supply coupling. Do not vent through the return coupling. Reversed flow
can contaminate the system with compressor oil.
A leaking coupling on an adsorber should not be repaired in the field. Consult a Service Center.
Venting the adsorber will introduce contaminants to the system, which cannot be removed in the
field.
PREVENT EQUIPMENT DAMAGE. Damage to gas lines can result from crimping by repeated
bending and repositioning.
Always thoroughly drain the coolant from the cooling circuit if the compressor is to be shipped or
stored.
If the compressor is wired for 380/415 (±10%) V3~ electrical service, connecting to a higher
voltage may damage the control circuit. Similarly, if it is wired for 480 V3~, 60 Hz, it can be
damaged by connecting to 380/415 V3~.
Never pull a vacuum on the compressor or on the cold head. The motors will short circuit if
started.
After starting the system for the first time, to be certain that the water lines are properly
connected, check that the outlet water temperature is warmer than the inlet water.
For an installation using a water chiller or other circulating cooling system:
Use pure ethylene glycol with water for the coolant antifreeze solution. Do not use commercial
ethylene glycol sold for automotive cooling systems, which usually contains a fine grit material
that can damage the cooling system.
AVOID A MALFUNCTION. Repeatedly charging the system with helium gas rather than
locating and repairing gas leaks can cause a malfunction. Impurities are introduced at an
abnormal rate and can freeze in the cold head.
Do not allow air to get into the helium gas refrigerant of the system. Moisture from the
atmosphere can seriously degrade cold head performance.
AVOID EQUIPMENT FAILURE, CONTAMINATION OR A NUISANCE SHUTDOWN. Do not
tip the compressor greater than 5 degrees from horizontal, to avoid flowing oil into unwanted
places.

4
(This page is intentionally blank.)

SERVICE
5
HEADQUARTERS
Sumitomo (SHI) Cryogenics of America, Inc.
1833 Vultee Street
Allentown, PA 18103-4783
Sales and Parts
TEL: (800) 525-3072
or
(610) 791-6700
FAX: (610) 791-0440
Service
TEL: (800) 525-3071
or
TEL: (610) 791-6750
SERVICE CENTERS
Eastern
U.S.A
Sumitomo (SHI) Cryogenics of America, Inc.
1833 Vultee Street
Allentown, PA 18103-4783
TEL: (800) 525-3071
or
(610) 791-6750
FAX: (610) 791-3904
Western
U.S.A.
Sumitomo (SHI) Cryogenics of America, Inc.
456 Oakmead Parkway
Sunnyvale, CA 94085
TEL: (408) 736-4406/4407
FAX: (408) 736-7325
Europe
Sumitomo (SHI) Cryogenics of Europe, Ltd.
3 Hamilton Close
Houndmills Industrial Estate
Basingstoke
Hampshire RG21 6YT
United Kingdom
TEL: +44 1256 853333
FAX: +44 1256 471507
Sumitomo (SHI) Cryogenics of Europe, GmbH
Daimlerweg 5a
D-64293 Darmstadt
Germany
TEL: +49 6151 860 610
FAX: +49 6151 800 252
Asia
Sumitomo Heavy Industries, Ltd.
Service Section
Cryogenics Division
2-1-1 Yato-Cho Nishitokyo-City
Tokyo 188-8585
Japan
TEL: +81 424 68 4265
FAX: +81 424 68 4462
Sumitomo (SHI) Cryogenics Korea, Co., Ltd.
Room 619-620, Venture Valley
#958 Goseck-Dong, Kwonsun-Gu
Suwon-City, Gyeonggi-Do
South Korea
TEL: +82 31 278 3050
FAX: +82 31 278 3053
Sumitomo Heavy Industries (Shanghai) Ltd.
Room 105, Xingdi Business Building
No. 1698 Yishan Road
Shanghai 201103
People’s Republic of China
TEL: +86 21-3462-7660
FAX: +86 21-3462-7661

6
(This page is intentionally blank.)

INTRODUCTION
7
Helium Compressors, Models F-70H and F-70L
The compressors are designed to deliver high-pressure, oil-free, helium gas to cryogenic
refrigerators. Cold head cables are used with the compressor to supply electrical power to cold
heads. Self-sealing gas couplings allow for easy connection to and disconnection from the rest
of the closed-cycle cryogenic refrigeration system.
The information in this manual pertains only to the F-70H (high voltage model) and the F-70L
(low voltage model) Compressors. Other components used to form an operating system are
described in separate technical manuals.
Pressures are stated as gauge, not absolute. Pressure units are bar and pounds per square
inch (psig). For reference:
1 bar = 14.5 psig.
1 MPa = 10 bar
Definition of Symbols used in this manual and on equipment
Reference: F-70H and F-70L Helium Compressors Operating Manual, P/N 267055A.

8
(This page is intentionally blank.)

PRINCIPLES of OPERATION
9
Figure 1 Compressor Flow Diagram
Key
TSG Gas temperature thermistor
TSWi Water-in temperature thermistor
TSWo Water-out temperature thermistor
ARV Atmospheric relief valve
IRV Internal relief valve
SV Solenoid valve
PT Pressure transducer
PG Pressure gauge
The compressor continuously draws low-pressure helium from the system’s helium low pressure
(return) line. It compresses, cools and cleans the gas, then delivers it through the system’s
helium high pressure (supply) line to the cold head. See Figure 1.

10
(This page is intentionally blank.)

DESCRIPTION
11
Components
Adsorber - The adsorber removes any oil and moisture the gas is carrying which did not drop
out in the separator. The adsorber has a finite life and must be replaced every 30,000 operating
hours.
Atmosphere Relief Valve [ARV] – The pressure relief valve prevents the compressor from
operating at an unsafe pressure by venting to the atmosphere.
Bulk Oil Separator - Removes much of the entrained oil from the gas stream. This unit needs
no servicing or replacement.
Cold Head Power Receptacle - Mounted on the front panel for connecting a cable to supply
electrical power from the compressor to the cold head.
Compressor Capsule - Helium, scroll compressor with a hermetically sealed motor.
Compressor High Temperature Motor Protector Switch - Located inside the compressor
motor, the switch senses compressor motor temperature and stops the motor if the temperature
is too high. The switch resets after cool down.
Electrical Chassis - The electrical box contains electrical components and connections and
distributes power to all system circuits.
Final Oil Separator - Removes most of the remaining entrained oil from the gas stream. This
unit needs no servicing or replacement.
Fuses – Three (3) time delay, class CC fuses, located inside the electrical chassis box, protect
the transformer. Three (3) time delay, 5x20 mm, IEC Type T fuses, located on the printed
circuit board inside the electrical chassis box, protect the cold head supply circuit.
Heat Exchanger - Uses water to cool the high-pressure helium refrigerant and the
compressor’s lubricating oil.
Helium Charge - A size 4, male (4M), Aeroquip coupling located on the front of the compressor
is used for charging or venting helium gas refrigerant.
Helium Supply and Helium Return Pressure Couplings – Both supply (high pressure) and
return (low pressure) are self-sealing, size 8, male (8M), Aeroquip, bulkhead couplings and are
the points of connection on the front panel for the gas lines.
Internal Relief Valve [IRV] - The internal relief valve opens to allow the compressor to be
operated in the stand-alone mode or when the system gas lines are disconnected, to avoid
overloading the motor.
Mains Power Switch - Mounted on the front panel, it provides a means to disconnect power
and it protects the compressor from electrical overload. This device is labeled Main Power.
Oil Capillary - The capillary returns oil collected in the oil separator sump to the compressor for
recycling.
Oil Filter - Filters in the oil lines protect the oil return capillary and the orifices.

Description
12
Oil Injection Orifices - These orifices are installed in the oil return lines and control the flow
rate of oil returned to the compressor.
Pressure Gauge - Indicates gas pressure in the supply line. When the compressor is not
running, the gauge located on the compressor’s front panel shows the equalization pressure.
Supply Gas High Temperature Thermistor - Senses discharge gas temperature. It causes
the compressor to shut down if the temperature of the high-pressure helium from the
compressor is too high.
Water High Temperature Thermistors - Sense water temperature. One each is located in the
“water in” line and in the “water out” line. They provide a warning if the inlet or the outlet water
temperature is too high. High outlet water temperature indicates low water flow.
Water In and Out Fittings – F-70H is fitted with two (2) ½" MNPT and F-70L is fitted with two
(2) ½” Serto elbows mounted on the front panel.

MAINTENANCE
13
AVOID EXPOSURE. People with pacemakers, defibrillators or ferrous implants
should avoid exposure to strong magnetic fields. The long-term effects of high
magnetic fields are not well understood. Keep personal exposure to a minimum.
AVOID INJURY. When released in a high magnetic field, ferrous tools and parts
can become hazardous projectiles.
PREVENT DEGRADED PERFORMANCE. Failure to replace the adsorber can
result in oil carryover to the cold head, degraded performance and difficult oil
cleanup.
AVOID CONTAMINATION. A leaking coupling on an adsorber should not be
repaired in the field. Consult a Service Center. Venting the adsorber will
introduce contaminants to the system that cannot be removed in the field.
PRESERVE YOUR WARRANTY. Modification to equipment without the consent
of the manufacturer will void the warranty.
Specifications require the use of 99.999% pure helium gas. Using a lesser quality
of helium can damage the system and void the warranty.
Connect and Remove the Water Lines
Tools required: Open-end wrench, 15/16”
Open-end wrench to suit customer’s water lines fittings
1. Using two wrenches, connect coolant supply and return lines to the water in and water out
fittings on the front of the compressor. See Figure 2. Ensure that the Water In connection is
connected to the supply line from the user’s cooling water or coolant supply. Turn on the
coolant and check the water lines for leaks. Tighten the fittings if necessary.
See Specifications in the F-70 Operating Manual for cooling requirements.

Maintenance
14
Figure 2 Connect and Remove the Water Lines
Adsorber Replacement
Part required: Adsorber, P/N F300138A
Tools required: #2 Phillips screwdriver
Open-end wrenches, 1", 1 1/8", 1 3/16"
Snoop®
AVOID EQUIPMENT FAILURE OR CONTAMINATION. Use SHIG adsorber P/N F300138A
only. Use of non-SHIG spare parts will void the warranty.
The compressor’s adsorber should be replaced every 30,000 operating hours (40 months).
The used adsorber has no salvage or repair value. Venting the compressor is not required
when replacing the adsorber because the gas couplings are self-sealing.
Adsorber Removal
1. Stop the compressor and disconnect the power to the compressor.
2. Disconnect the high pressure (supply) gas line from the helium high pressure coupling on
the compressor. Screw a dust plug into the disconnected gas line. Use two wrenches.
NOTE
Always hold the stationary nut on the gas line coupling with one wrench while
turning the moveable coupling with the other wrench.
3. Remove the compressor’s cover panel.
4. Disconnect the self-sealing coupling on the inlet side of the adsorber. Use two wrenches.
Hold jam nut with one wrench
Turn water line coupling with
the other wrench

Maintenance
15
5. Use a Phillips screwdriver to remove the two screws holding the adsorber to the base.
6. Remove the locknut on the Aeroquip supply coupling on the front panel.
7. Pull the adsorber back until the supply coupling clears the front panel. Remove the
adsorber. Remove the lockwasher from the Aeroquip supply coupling. Retain all hardware
to reuse with the new adsorber.
AVOID INJURY. The adsorber is charged with helium gas. Follow the used
adsorber venting procedure for safe disposal of the used adsorber.
Adsorber Installation
1. Remove the caps from the gas lines of the new adsorber. Do not vent the new adsorber.
2. Install the lock washer on to the supply coupling of the new adsorber. Insert the supply
coupling through the front panel and position the adsorber.
3. Insert and tighten the screws to secure the new adsorber to the base.
4. Install the Nylon washer and the locknut on the supply coupling. Torque the locknut to 54
Nm (40-ft. lbs.).
5. Connect the adsorber’s self-sealing coupling on its inlet side to the oil separator’s outlet
coupling. With two wrenches, torque the Aeroquip coupling to 47 ± 7 Nm (35 ± 5 ft. lbs.).
6. Reconnect the supply (red) gas line to the supply coupling on the compressor. Torque the
coupling to 47 ± 7 Nm (35 ± 5-ft. lbs.).
7. Using Snoop®, leak check all Aeroquip couplings just completed. Wipe off the Snoop®to
prevent rusting. See the Leak Check procedure in Maintenance in this manual.
8. Check the equalization pressure. See Specifications in the Operating Manual.
9. Reinstall the compressor’s cover panel.
This completes the procedure for replacing an adsorber.
Register New Adsorber (30,000 hour life) (for firmware versions 1.7 or later)
When a new adsorber is installed, the adsorber timer must be reset to 30,000 hours so that the
correct remaining adsorber life will be displayed on the LCD.
The timer can be reset either through the front panel control buttons or through the RS232
terminal interface.
Through the front panel control buttons:
1. With the Main Power switch turned off, press and hold all four control buttons below the
LCD window.
2. Keep these buttons held and turn the Main Power Switch ON to enter “Service Level”
mode. Release the buttons.
3. Scroll using the arrow control buttons until display shows “NEW ADS? ON=Yes.”

Maintenance
16
4. Press the ON control button. Display will show “SAVE? Y-ON N-OFF.”
5. Press the ON control button again to complete. (Press the OFF control button to back
out of the function.) When ON is pressed, display will show: “Saving New ADS”. When
function is complete, display will again show “NEW ADS? ON=Yes.”
6. Turn the main power switch to OFF to leave Service Level.
Through the RS232 Terminal Communication Interface
1. Turn the compressor main power switch ON.
2. Connect the terminal interface computer to the compressor serial port .
3. Send a “g” to the compressor to register a new adsorber (or, alternately, send an “m” to
the compressor to return the menu of available functions and then send a “g”).
4. Compressor will return “Are you sure? Y/N” Send a “Y” to complete the function. (“N”
will back out of the function with compressor returning “Aborted”.)
5. When the function is complete, the compressor will return “Adsorber change registered.”
6. Turn the compressor main power switch OFF, if desired.
Used Adsorber Venting and Disposal
For safe disposal of the used adsorber:
1. A venting adapter fitting is included with the new adsorber. Attach it to one of the self-
sealing couplings on the used adsorber. Vent the used adsorber to atmospheric pressure.
2. Discard the used adsorber with the venting adapter fitting connected.
Charging or Venting
Tools required: Charge and vent tool with valve, #4Fx¼” Swagelok, P/N 267191A.
Bleed adapter, P/N 267192A
Open-end wrenches, 5/8", 3/4"
Helium gas cylinder with pressure regulator and charge line
Charging or venting is required whenever the equalization pressure of the system is outside the
range as stated in the Specifications. See Specifications in the F-70 Operating Manual.
Venting a component to atmospheric pressure is required if the component needs to be
disassembled for repairs or maintenance, including repairs to its self-sealing couplings.
AVOID INJURY. Never use compressed helium gas from a cylinder without a
proper regulator. Overpressure can cause serious injury if the system
equipment ruptures.
This manual suits for next models
1
Table of contents
Other Sumitomo Air Compressor manuals

