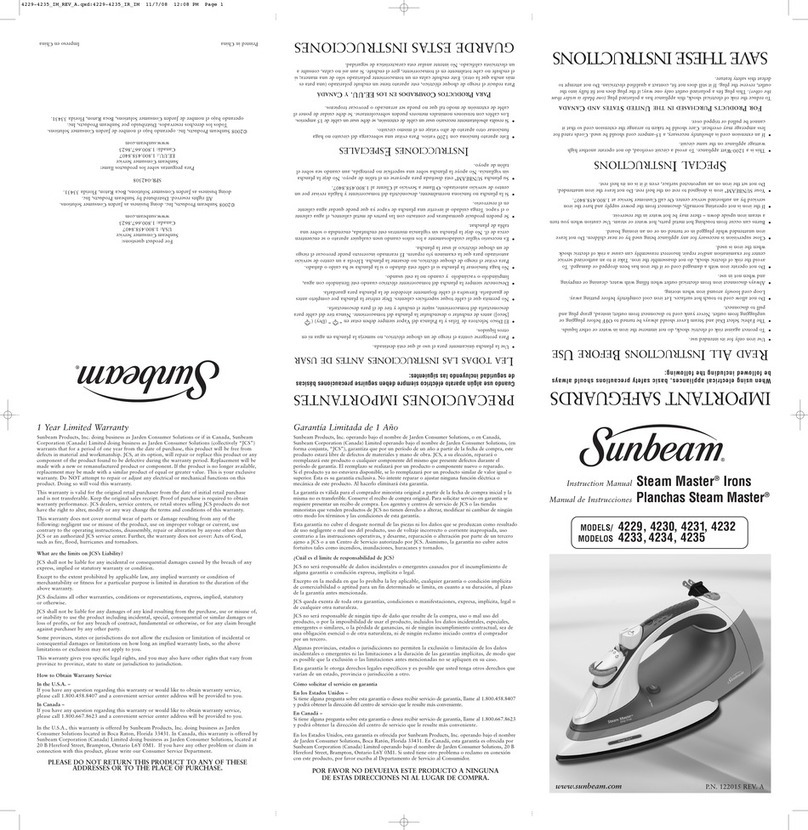
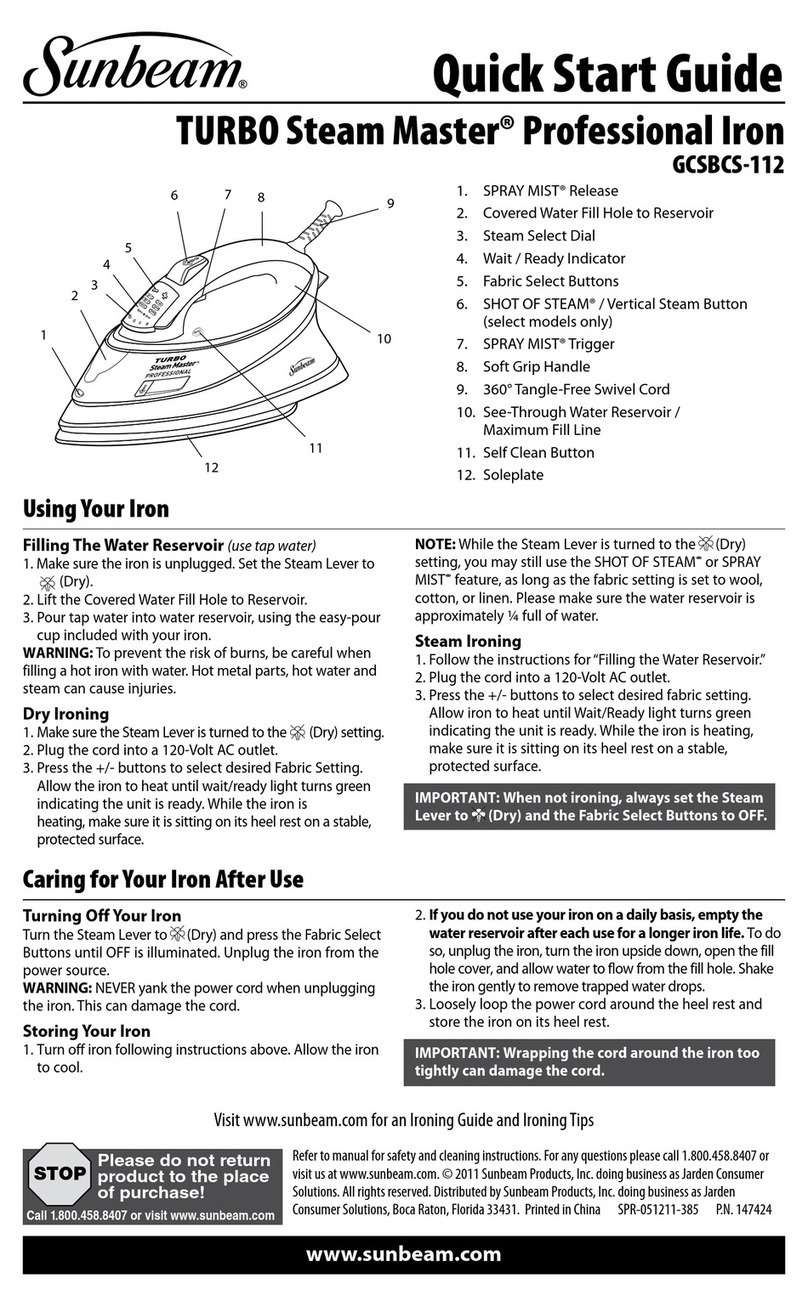
featuRes of YouR pRofessIonal IRon
1.SprayMist®Release
2.CoveredWaterFillHole
3.BacklitDigitalElectronicDisplay
4.Auto-OffIndicator/Wait/Ready/
Light
5.SPRAYMIST®Button
6.SteamSelectionSlide
7.SHOTOFSTEAM®Button/
VerticalSteamButton
8.FabricSelectButtons
9.SoftGripHandle
10.360°Tangle-Free
SwivelCord
11.See-ThroughWaterReservoir
12.Self-CleanButton
13.MicroGlide™Soleplate
(Model 4265-33 only)
StainlessSteelSoleplate
(Model 4267-33 only)
14.MaximumFillLine
15.StorageStrip®Indicator
(Model 4265-33 only)
caRactéRIstIques du feR pRofessIonnel
1.Orificed’atomisationSprayMistMD
2.Orificederemplissageàvolet
3.Afficheurélectroniquerétroéclairé
4.Indicateurd’arrêtautomatique/
voyantWait/Ready(attendre/prêt)
5.Boutond’atomisationSPRAY
MISTMD
6.Curseurdedébitdevapeur
7.BoutonjetdevapeurSHOTOF
STEAMMDetvaporisationverticale
8.Touchedesélectiondestextiles
9.Poignéeàprisedouce
10.Cordonarticulé360°,nonemmêlant
11.Réservoirtranslucide
12.Boutond’autonettoyage
13.SemelleMicroGlideMC
(modèle 4265-33 seulement)
Semelleenacierinoxydable
(Modéle 4267-33 seulement)
14.Repèremaximalderemplissage
15. IndicateurderangementStorageStripMD
(modèle 4265-33 seulement)
WARNING: NEVERyankthepowercordwhenunpluggingtheiron.
Thiscandamagethecord.
WaIt/ReadY lIght
Indicateswhenyourironreachesthedesiredtemperature.WhenafabricsettinghasbeenselectedtheredWaitlight
illuminates.Oncetheironheatsuptothedesiredfabricselection,thelightwillchangefromred(Wait)togreen
(Ready).Thisoccurseachtimethefabricsettingischanged.Itwillalsooccurwhentheironhasbeenresetafterthe
Auto-Offisdeactivated.
antI-calcIum sYstem
TheAnti-CalciumSystemisapermanentsystemlocatedinsidethewaterreservoir.Thissystemremovescalcium
fromthewaterandreducescalciumbuild-uponthesoleplate.
mIcRoglIde™ soleplate (model 4265-33 onlY)
ProvidessuperiorglideoverNon-stickandStainlessSteelforquickandeasierironing.
dRIp-fRee
Producessteamwithoutanydripping,spitting,orleakingthroughthesoleplate,
evenatlowtemperatures.
stoRage stRIp
®
IndIcatoR (model 4265-33 only)
TheSTORAGESTRIP
®
indicatorisaneasywaytoseewhentheironiscoolenoughtostore
.
touse the stoRage stRIp
®
IndIcatoR:
Turnironon.Inapproximately2minutes,theSTORAGESTRIP
®
indicatorwillturnfromblacktored,indicating
thattheironistoohottostore.Whentheironisturnedoff,itwilltaketheironapproximately30-40minutesforthe
STORAGESTRIP
®
indicatortoturnfromredtoblack,indicatingthattheironiscoolenoughtostore.
Caution: TheSTORAGESTRIP
®
indicatorshouldonlybeusedasaguideline.Theironshould
alwaysbehandledand
storedwithcare.
caRIng foR YouR IRon afteR use
tuRnIng off YouR IRon
1. Unplugtheironfromthepowersource.
WARNING: NEVERyankthepowercordwhenunpluggingtheiron.Thiscandamagethecord.
stoRIng YouR IRon
1. Allowtheirontocool.(Model4265-33only:WaitfortheStorageStrip®indicatortoreturntoits
originalblackcolor,indicatingthattheironiscoolenoughtostore.)
2. Ifyoudonotuseyourirononadailybasis,emptythewaterreservoiraftereachuseforalongerironlife.To
doso,unplugtheiron,turntheironupsidedown,openthefillholecover,andallowwatertoflowfromthefill
hole.Shaketheirongentlytoremovetrappedwaterdrops.
3. Looselyloopthepowercordaroundtheheelrestandstoretheirononitsheelrest.
Important: Wrappingthecordaroundtheirontootightlycandamagethecord.
Tip: Whennotironing,alwayssettheSteamSelectionSlidetoOFF(Dry).
maIntaInIng YouR pRofessIonal IRon
cleanIng the soleplate
Cleanthesoleplateifstarchorotherresidueaccumulate.
toclean the soleplate:
1. Unplugtheiron.Allowtheirontocoolandthenwipeitwithasoft,dampcloth.
WARNING: DONOTuseabrasivecleansers,scouringpadsorvinegartocleanthesoleplate.Thiswilldamagethefinish.
2. Runtheironoveranall-cottonclothtoremoveanyresidue.
usIng the self-cleanIng featuRe
YoushouldusetheSelf-Cleaningfeatureonceamonthtomaintaintheoptimalperformanceofyouriron.
touse the self-cleanIng featuRe:
1. Unplugtheiron.MovetheSteamSelectionSlidebackandforthseveraltimestoremovedebrisandminerals
fromtheSteamValve.Thiskeepswaterflowingintothesteamchamber.
2. FillthewaterreservoirwithtapwatertotheMAXline.
3. PlugintheironandpressFabricSelectbuttontoLinen,andallowtheirontoheatuntiltheWaitlightturnsGREEN.
4. Unplugtheiron.
5. Holdtheironoverasinkinahorizontalposition.
WARNING: Becarefulnottotouchtheiron’shotsurfaces.
6. PresstheSelf-Cleanbuttonandhold.Waterwillbegindrippingfromthesteamvents.Slowlyrocktheironside
tosideandfronttobackfor30seconds.Whenrockingtheiron,dipthenoseoftheironslightlybelowtherear
oftheirontomakecertainthewatercirculatescompletely.
7.
Turntheironupsidedownandallowtheremainingwatertoflowoutofthefillhole.
8. Drythesoleplatewithatowel.
9. PlugintheironandpresstheFabricSelectbuttontoLinen.LettheironheatuntiltheWaitlightturnsGREEN
anddryouttheironcompletely.
10. PresstheFabricSelectbuttontoOFF.Thelightswillgoout,indicatingthattheironhasturneditselfoff.
Unplugtheironandallowittocool.
cleanIng the antI-calcIum sYstem
Theprofessionalironhousesananti-calciumfilterinthereservoir,whicheliminatesimpuritiesfromthewater.
topRolong the effIcIencY of thIs fIlteR:
1. Unplugtheironandallowittocool.
2. Locatethewatercupthataccompaniedtheironandfillitwithwater.Add1teaspoonofsalttothewaterand
fillthewaterreservoirwiththissolution.
3. Leavethesolutioninthewaterreservoirfor15minutes,thenemptyit.
4. Fillthewaterreservoirasecondtimewiththesaltwatersolutionandemptyitagainafter15minutes.
5. Fillthetankwithfreshwatertorinseandempty.
TheAnti-CalciumSystemshouldbecleanedapproximatelyonceamonth.
tofIll the WateR ReseRvoIR
1. Makesuretheironisunplugged.SettheSteamSelectionSlidetoOFF(Dry).
2. SlideopentheWaterFillHoleCover.
3. Fillwatercupwithwater.Pourwaterintoironwaterreservoir.Donotfillwaterreservoirbeyondmaximum
fillline.
Warning: Topreventtheriskofburns,becarefulwhenfillingahotironwithwater.Hotmetalparts,hotwaterand
steamcancauseinjuries.
selectIng faBRIc settIngs
Toselectafabricsetting, (Figure A)pressthe (
- + ) FabricSelectbuttonuntilthedesiredfabricishighlighted.The
Waitlightwillglowredwhiletheironheatsup.
Thelightwillthenchangetogreen(Ready)whentheironisreadytouse.
dRY IRonIng
1. MakesuretheSteamSelectionSlideisturnedtotheOFF(Dry)setting.
2. Plugthecordintoa120-VoltACoutlet.
3. SelectFabricSetting.
Note: WhiletheSteamSelectionSlideisturnedtotheOFF(Dry)setting,youmaystillusetheSHOTOFSTEAM®
featureorSPRAYMIST®feature.Pleasemakesurethewaterreservoirisatleast1/4fullofwater.
Tip: RefertotheIroningGuidefortherecommendedsettingforyourfabric.
steam IRonIng
1. Followtheinstructionsfor“ToFilltheWaterReservoir”.
2. Plugthecordintoa120-VoltACoutlet.
3. SelectFabricSetting.
4. Allowtheirontoheatfor2minutes,andthenturntheSteamSelectionSlide
totheappropriatesetting.
Tip: RefertotheIroningGuidefortherecommendedsettingforyourfabric.
Important: Whennotironing,alwayssettheSteamSelectionSlidetoOFF(Dry).
usIng the IRon’sspecIal featuRes
spRaY mIst®featuRe
TheSprayMist®featureisapowerfulwaterspraymistthatdampensthefabric
toaidinremovingwrinklesfromheavyfabricsandforsettingcreases.
touse the spRaY mIst®featuRe:
PresstheSprayMist®buttonfirmly.Ironoverthefabrictodry.
shot of steam®featuRe
TheShotofSteam®featureprovidesanextraburstofsteamfordeeppenetrationofstubbornwrinkles.Youcanuse
thisfeaturewhileDryorSteamironing,butthewaterreservoirmustbeatleast1/4fullofwater.
touse the shot of steam®featuRe:
PlacetheironontopofthewrinkleandpresstheShotofSteam®buttoneachtimeyouwouldlikeanextraburstof
steam.TheShotofSteam®featuremaybeusedcontinuouslywithjustashort3secondpausebetweenshots.
veRtIcal steam
Theverticalsteamfeatureallowsyourirontofunctionasagarmentsteamer.
Tip: Whenusingtheverticalsteamonclothing,hangtheclothingonaclotheshangerforbestresults.Hanging
curtainsanddrapesmayalsobesteamed.
touse veRtIcal steam:
1.Makesurethattheironhasheatedup(2minutes).
2.Holdtheironinaverticalposition,withtheironclosetobutnottouchingthefabricyouwanttosteam.
3.Withyourotherhand,pullthefabrictight.
4.PresstheShotofSteam®buttonforapproximately3-secondintervalsasyoumovetheironacrossthewrinkled
area.
WARNING:Topreventtheriskofburns,keepyourhandawayfromtheareabeingsteamed.
WARNING: DONOTsteamgarmentswhilewearingthem;thismayresultininjuries.
3-WaY motIon smaRt™auto-off featuRe
WhentheironispluggedinandtheAuto-Offisactivated,theOFFselectiononthedigitaldisplayandtheredWait
lightwillblink,indicatingthattheironhasstoppedheating.TheAuto-Offisactivatedifnotmovedafter30seconds
intheironingpositionandonitsside,andafter15minutesintheuprightposition.Five(5)minutesaftertheAuto-
Offhasbeenactivated,inanyposition,theirondisplayandalllightswillturntotallyOFF.
If you leave the iron:
• Inahorizontalpositionwithoutmovingit,oraccidentallytiptheironover,itwillautomaticallystopheating
after30seconds.TheOFFselectiononthedigitaldisplayandtheredWaitlightblinktoletyouknowthatthe
ironhasstoppedheating.
• Inaverticalposition(onitsheelrest)withoutmovingit,theironwillautomaticallyturnoffafter15minutes.
TheOFFselectiononthedigitaldisplayandtheredWaitlightblinktoletyouknowthattheironhasstopped
heating.
Important:TheOFFselectiononthedigitaldisplayandtheredWaitlightwillcontinuetoblinkfor5minutes,then
turntotallyOFF.
To reset the iron:
• Movetheironbackandforth.TheOFFselectiononthedigitaldisplayandtheredWaitlightwillstop
blinkingandtheironwillstartheatingagain(allowittoreheatfor2minutes);thedesiredfabricsettingwillbe
highlighted.
• Pressthe(
- + )FabricSelectbutton,thedigitaldisplayandredWaitlightwillilluminate,indicatingpowerhas
beenrestoredtotheiron(the desired fabric setting will still be selected).WaitforthelighttoturnGREENbefore
ironing.
WARNING: TheMOTIONSMART
™
Auto-Offisasafetyfeature,notarecommendedmeansforturningyouriron
off.See“CaringforYourIronAfterUse”forinformationonturningoffyourironandstoringitsafelybetweenuse.
voYant WaIt/ReadY (attendRe/pRêt)
Signalequandleferaatteintlatempératuresélectionnée.LevoyantWait(attendre)brillerougeauchoixdu
textile.Unefoisleferàlatempératurepréconiséepourletissuchoisi,levoyantpassedurouge(Wait/attendre)au
vert(Ready/prêt).Ceciseproduitàchaquefoisquevouschangezletextileetàchaquefoisqueleferestrelancé
aprèssonarrêtautomatique.
sYstème antI-taRtRe
Lesystèmeanti-tartreestunsystèmepermanent,incorporédansleréservoir.Ilretirelecalcairedel’eauetréduit
l’entartrage(l’accumulationdeminéraux)delasemelle
.
semelle mIcRoglIdemc (modèle 4265-33 seulement)
Glissantencoremieuxqu’unesemelleantiadhésiveoud’acierinoxydable,cettesemellefaciliteetaccélèrele
repassage.
antI-gouttes
Leferproduitdelavapeursansdégoutter,cracheroufuirparlasemelle,etceci,mêmelorsquevousrepassezà
bassetempérature.
IndIcateuR de Rangement stoRage stRIpmd
(modèle 4265-33 seulement)
L’indicateurderangementSTORAGESTRIP
md
vousmontred’unsimplecoupd’œilsileferasuffisammentrefroidipour
quevouslerangiez
.
Utilisation de l’indicateur de rangement Storage StripMD:
Quandvousmettezlefersoustension,environ2minutesplustardl’indicateurderangementSTORAGESTRIP
md
passedunoiraurouge,indiquantqueleferesttropchaudpourêtrerangé.Aprèslamisehorstensiondufer,ilfaut
compterde30à40minutespourquel’indicateurderangementSTORAGESTRIP
md
passedurougeaunoir–lenoir
signalantqueleferarefroidietpeutêtrerangé.
attentIon: L’indicateurderangementSTORAGESTRIP
md
n’est,commesonnomlelaisseentendre,qu’un
indicateur.Rangezetmanipuleztoujoursleferavecgrandsoin
.
soIns àappoRteR au feR en fIn d’utIlIsatIon
mIse hoRs tensIon du feR
1. Débranchezleferauniveaudelasourced’alimentation.
AVERTISSEMENT: NEdonnezJAMAISuncoupsecsurlecordonpourdébancherlefer,vousl’abîmeriez.
Rangement du feR
1.
Laissezrefroidirlefer
.(Pourmodèle4265-33,
Attendezquel’indicateurderangementSTORAGESTRIP
md
soitrevenu
àsacouleurnoireoriginale-cequisignifiequ’ilestassezfroidpourêtrerangé
).
2.
Videzleferenfind’utilisations’ilnesertpastouslesjours,ceciprolongerasaduréedeservice.Pourceci,
débranchez-le,mettez-lepointeenbaspuisouvrezlevoletdel’orificederemplissageafinquel’eaupuisses’écouler.
Secouezdoucementleferpourlibérerlesdernièresgouttes
.
3.
Enroulezlecordonautourdutalon,sansletendre,puisrangezlefersursontalond’appui
.
ImpoRtant:
Enroulerlecordond’alimentationenletendantrisquedel’abîmer
.
tRuc:
Entreutilisations,assurez-vousquelecurseurdedébitdevapeursoitrégléà
OFF(sec).
entRetIen du feR pRofessIonnel
nettoYage de la semelle
Nettoyezlasemellesidel’amidonoud’autresrésidusyadhèrent
.
Pour nettoyer la semelle:
1. Débranchezlefer.
Laissez-lerefroidirpuisfrottezlasemelleavecunlingedouxethumide
.
AVERTISSEMENT:
N’employezNIpoudres,NItamponsàrécurer,NIvinaigrepournettoyerlasemelle,vous
abîmeriezlefini
.
2.
Donnezquelquescoupsdefersurunlingepurcotonpouréliminerlesrésidus
.
utIlIsatIon de l’autonettoYage
Nousconseillonsvivementsonutilisationunefoisparmoispouroptimiserlerendementdufer
.
Pour utiliser l’autonettoyage:
1. Débranchezlefer.
Déplacezlecurseurdedébitdevapeurd’avantenarrièreàplusieursreprisespouréliminerles
débrisetletartreayantpus’accumulerdanslasoupapeàvapeur.Enagissantainsi,l’eaucontinueàcoulerdansla
chambreàvapeur
.
2. Remplissezleréservoird’eaudurobinetjusqu’aurepèreMAX.
3. BranchezleferetréglezlatouchedesélectiondestextilesàLinen(Lin).Laissezchaufferleferjusqu’àceque
levoyantrougeWait(attendre)tourneauVERT.
4. Débranchezlefer.
5. Tenezleferhorizontalementau-dessusd’unévier.
AVERTISSEMENT: Netouchezsurtoutpasauxsurfaceschaudesdufer!
6. Appuyez,sanslerelâcher,surleboutond’autonettoyage.L’eaucommenceraàdégoutterdeséventsà
vapeur.Inclinezlentementleferd’uncôtéetdel’autreetd’avantenarrièrependant30secondes,touten
penchantlapointeavantunpeuplusbasqueletalonafinquel’eaucirculepartout.
7.
Mettezleferlapointeenbasetlaissezécoulerl’eaurestanteparl’orificederemplissage
.
8. Essuyezlasemelleavecuneserviettedetoilettedouce.
9. Branchezlefer,réglezlatouchedesélectiondestextilesàLinen(Lin)etlaissez-lechaufferjusqu’àcequele
voyantWait(attendre)tourneauVERT.Asséchezcomplètementlefer.
10. PressezlatouchedesélectiondestextilespourlarégleràOFF(arrêt).Lesvoyantslumineuxs’éteindront,
signequelefers’estmishorstension.Débranchezleferetlaissez-lerefroidir.
nettoYage du sYstème antI-taRtRe
Leréservoirdesfersprofessionnelsincorporeunsystèmeanti-tartreàfiltrequiretirelesimpuretésquecontientl’eau,
réduisantainsil’entartrage
.
Pour prolonger l’efficacité du filtre:
1.
Débranchezleferetlaissez-lerefroidir
.
2.
Prenezlegodetquiestfourniavecleferàrepasseretremplissez-led’eau
.
Ajoutez5mL(1cuilleréeàthé)deselà
l’eaupuisversezlasolutionsalinedansleréservoirdufer
.
3.
Laissezreposerlasolutiondansleréservoirpendant15minutespuisvidezleréservoir
.
4.
Remplissezànouveauleréservoird’eausalineetvidezleréservoiraprès15minutes
.
5.
Remplissezleréservoird’eauclairepourlerincer;videzleréservoir
.
Lesystèmeanti-tartredevraitêtrenettoyéenvironunefoisparmois
.
RemplIssage du RéseRvoIR
1.
Assurez-vousquelefersoitdébranché.Réglezlecurseurdedébitdevapeurà
OFF(sec).
2. Faitesglisserlevoletdel’orificederemplissagepourouvrirl’orifice.
3.
Remplissezlegodetd’eaupuisversezl’eaudansleréservoirdufer.Neremplissezpasleréservoirau-delàdurepère
maximalderemplissage
.
AVERTISSEMENT:
Remplissezprudemmentleréservoird’unferchaud.Lespiècesmétalliqueschaudes,l’eauchaude
etlavapeurpeuventprovoquerdesbrûlures
.
sélectIon du textIle voulu
Pourchoisiruntissu (figure A),appuyezsurlatouchedesélectiondestextiles (
- + )
jusqu’àcequeletissudésirésoiten
évidence
.LevoyantWait(attendre)brillera
rougedurantlechauffagepuislalumièrepasseraauvert(Ready/prêt)une
foisleferprêtàl’emploi.
Repassage àsec
1. Assurez-vousque
lecurseurdedébitdevapeursoitrégléà
OFF(sec).
2.
Branchezlefersurcourantalternatifde120volts
.
3.
Choisissezletextilerequis
.
RemaRque: Quandle
curseurdedébitdevapeurà
régléàOFF(sec),
vouspouvezutiliserlejetdevapeur
SHOT
OFSTEAMMD
oul’atomisation
SPRAYMISTMD.Veillezàcequeleréservoirsoitaumoinsauquartpleind’eau.
tRuc:
Leguidederepassageindiquelesréglagesconseillésselonlestissus,consultez-le
.
Repassage àla vapeuR
1.
Observezlesinstructionsfourniessous«Remplissageduréservoir»
.
2.
Branchezlefersurcourantalternatifde120volts
.
3.
Choisissezletextilerequis
.
4.
Laissezchaufferlefer2minutespuisréglezlecurseurdedébitdevapeurauréglagevoulu
.
tRuc:
Leguidederepassageindiquelesréglagesconseillésselonlestissus,consultez-le
.
ImpoRtant: Entreutilisationsdufer,régleztoujourslecurseurdedébitdevapeuràOFF(sec).
tIRez paRtI des attRIButs du feR
atomIsatIon spRaY mIstMD
L’atomisationSPRAYMISTMD
produitunepuissantepulvérisationd’eauquihumecteletissupouraideràeffacerles
fauxplistenacesouàmarquerdavantagelesplissés
.
Pour utiliser l’atomisation spRaY mIstMD:
Appuyezfermementsurleboutond’atomisation
SPRAYMISTMD.Asséchezletissuaufer.
Jet de vapeuR shot of steamMD
LejetdevapeurSHOTOFSTEAMMD
procureunsurcroîtdevapeurquiimprègnelesfauxplistenaces.Cettefonction
peutêtreutiliséelorsdurepassageàsecouàlavapeur,àconditiontoutefoisqueleréservoirsoitaumoinsauquartplein
d’eau
.
Pour utiliser le jet de vapeur SHOT OF STEAMMD:
Tenezleferau-dessusdesfauxplispuisappuyezsurleboutondujetdevapeur
SHOTOFSTEAMMD
àchaquefoisque
vousdésirezunsupplémentdevapeur.Cettefonctionpeut
s’employerdefaçoncontinue,enlaissantécouler3secondesentrelespressions
.
défRoIssage paR pRoJectIon veRtIcale de vapeuR
Ledéfroissageverticalpermetdeseservirduferàrepassercommed’undéfripeur
.
tRuc:
Placezlesvêtementsàdéfripersurdescintrespourobtenirlesrésultatslesplussatisfaisants.Cettefonctionserévèle
aussitrèspratiquepourdéfroisserlesrideauxettentures
.
Pour utiliser le défroissage vertical:
1.
Attendezqueleferaitchauffé(2minutes)
.
2.
Tenezleferàlaverticaleprèsdutissuàdéfriper–maissansletoucheroulefrôler.
3.
Tendezletissudel’autremain
.
4.
Appuyezsurleboutondujetdevapeur
SHOTOFSTEAMMDenviron
toutesles3secondestandisquevous
balayezlapartiefroisséeaveclefer
.
AVERTISSEMENT: Éloignezvotremaindelatrajectoiredelavapeurpourévitertoutebrûlure.
AVERTISSEMENT: NEdéfroissezPASdevêtementsendossés,vousvousbrûleriezsûrement.
coupuRe motIon smaRtMC IntellIgente 3 façons
Quandlafonctiond’arrêtautomatiqueestactivée,alorsqueleferestbranché,l’indicationOFF(arrêt)estmiseen
évidenceàl’afficheuretlevoyantlumineuxrougeWait(attendre)clignote,signequeleferacessédechauffer.L’arrêt
automatiqueestmisenfonctionsileferreste30secondesenpositionderepassage(àplat)ousursoncôté,ous’il
reste15minutesenpositionverticale.Cinq(5)minutesaprèslamiseenfonctiondel’arrêtautomatique–quelleque
soitlapositiondufer–l’afficheurainsiquelesvoyantslumineuxS’ÉTEIGNENT.
Si vous laissez le fer…
•
àl’horizontale(àplat)sansledéplacer,oubiensivouslerenversezaccidentellement,lefers’arrêteautomatiquement
dechaufferaprès30secondes
.L’indicationOFF(arrêt)àl’afficheuretlevoyantrougeWait(attendre)clignotent
poursignalerqueleferacessédechauffer;
• àlaverticale(sursontalon)sansledéplacer,
lefers’arrêteautomatiquementauboutde
15minutes
.L’indicationOFF(arrêt)àl’afficheuretlevoyantrougeWait(attendre)clignotentpoursignalerque
leferacessédechauffer.
ImpoRtant:L’indicationOFF(arrêt)àl’afficheuretlevoyantrougeWait(attendre)clignotentpendant5minutes
avantdeS’ÉTEINDRE.
Pour relancer le fer…
• Déplacezleferd’avantenarrière.L’indicationOFF(arrêt)àl’afficheuretlevoyantrougeWait(attendre)
s’arrêterontdeclignoteretleferrecommenceraàchauffer(laissez-lechaufferpendant2minutes);leréglagedu
textilequiavaitétésélectionnéseramisenévidence.
• Appuyezsurleboutondesélectiondestextiles(
- + ),l’afficheurainsiquelevoyantrougeWait(attendre)
s’allument,indiquantqueleferfonctionnedenouveau(le textile qui avait été sélectionné est mis en évidence).
AttendezquelevoyantpasseauVERTpourrepasser.
AVERTISSEMENT: LacoupureMotionSmartMCintelligentee
stunecaractéristiquedesécuritéetnonuneméthode
demisehorstensiondufer.Voyez«Soinsàapporterauferenfind’utilisation»pourtousrenseignementsconcernantla
misehorstensionetlerangementdufer
.
AVERTISSEMENT: NEdonnezJAMAISuncoupsecsurlecordonpourdébancherlefer,vousl’abîmeriez.
10
13
14
15
11
12
56
3
4
2
1
IRonIng tIps
• Alwaysreadgarmentlabelsandfollowthemanufacturer’sironinginstructions.
• Sortthearticlestobeironedaccordingtothetypeoffabric.
• Youshouldfirstirongarmentsrequiringlowtemperature (e.g., silks and synthetics)
toavoiddamagingthemwithanironthatistoohot.
• Ifyouareunsureofthefabriccontentofthegarment,testasmallarea,suchasaseam
orfacing,beforeironingavisiblearea.Startwithalowtemperatureandgradually
increasetheheattofindthebestsetting.
• Whenchangingthetemperaturefromahighsettingtoalowsetting,
allowapproximately5minutesforthelowertemperaturetobereached.
• Whensteamironing,uselong,slowpassesoverthefabric.Thiswillallowthesteam
topenetratethefabricwhileallowingtheheatofthesoleplatetodryoutthemoisture.
• Toironlinens,turngarmentinsideout.Becarefulnottouseanironthatistoohot
becausetheliningmaymeltorsticktothesoleplate.
• Toironzippers,useanironingclothormakesurethezipperisclosedandironover
theflap.Neverirondirectlyoveranunprotectedzipper.
• UsetheIroningGuidetoselectthebestsettingandmethodforthefabric
youplantoiron.
