sunjoe SJGC7 User manual

If you have any questions or comments,
please call the Snow Joe®+ Sun Joe®customer service department at:
Si tiene preguntas o comentarios, comuníquese con el centro de servicio
al cliente de Snow Joe®+ Sun Joe®llamando al:
Si vous avez des questions ou des commentaires, veuillez appeler
le service clientèle Snow Joe®+ Sun Joe®au :
1-866-SNOWJOE (1-866-766-9563)
© 2015 by Snow Joe®, LLC
All rights reserved. Original instructions.
SAVE THESE INSTRUCTIONS
© 2015 by Snow Joe®, LLC
Derechos reservados. Instrucciones originales.
GUARDE ESTAS INSTRUCCIONES
© 2015 by Snow Joe®, LLC
Tous droits réservés. Instructions d’origine.
CONSERVER CES INSTRUCTIONS
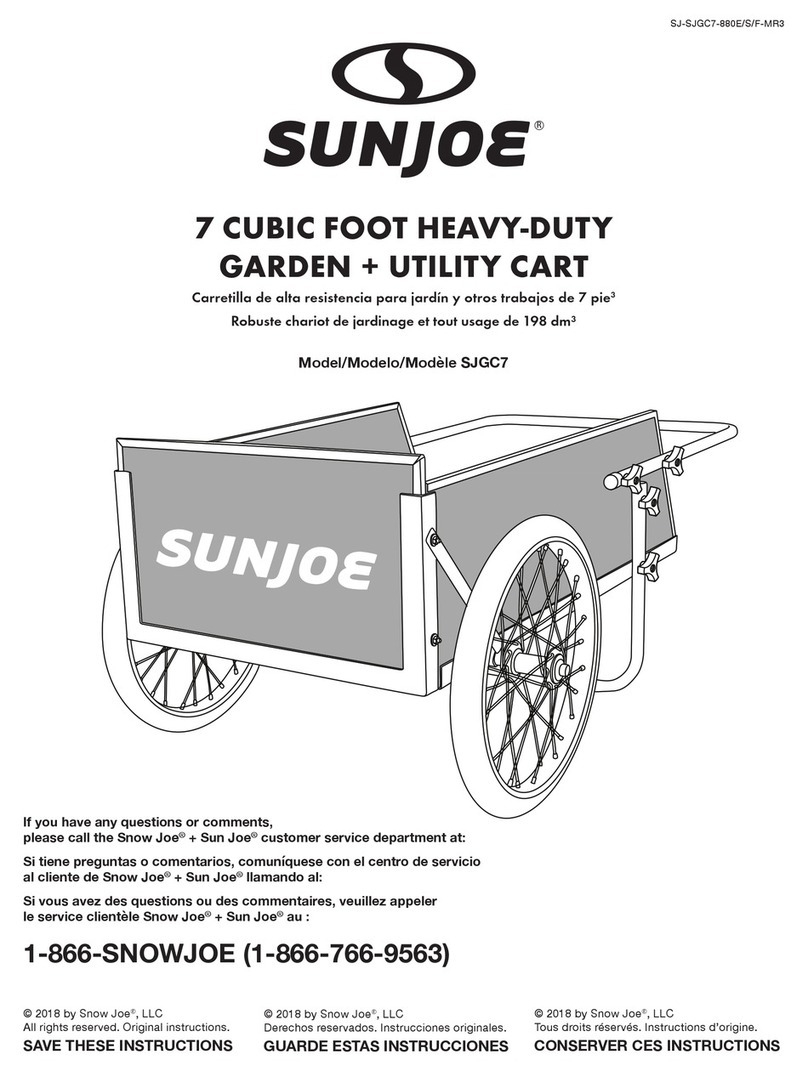
Model/Modelo/Modèle SJGC7
SJ-SJGC7-880E/S/F-MR1
7 CUBIC FOOT HEAVY UTILITY
GARDEN + UTILITY CART
Carretilla para jardín y labores de gran resistencia 7 pies cúbicos
Gros chariot de jardinage et tout usage de 198 dm³
R

IMPORTANT!
Safety Instructions
All Operators Must Read These
Instructions Before Use
Always follow these safety guidelines. Failure to do so may
result in serious bodily injury or property damage.
Intended Use
This garden + utility cart is designed to haul light yard and
garden materials and equipment. It is ideal for clippings,
potting soil, fertilizer, and garden tools.
mWARNING! Never exceed the rated load capacity of
300 lbs (136 kg) when operating the cart.
General Safety
mWARNING! The warnings, cautions, and instructions
outlined in this manual cannot cover all possible conditions
or situations that may occur. It must be understood by the
operator that common sense and caution are factors which
cannot be built into this product and must be supplied by the
operator.
mWARNING! This product contains chemicals known to
the state of California to cause cancer, birth defects, or other
reproductive harm.
1. Do not at any time carry passengers (sitting or standing) in
the cart.
2. Do not allow children to play on, stand upon, or climb in
the cart.
3. Always inspect the cart before using to assure the cart is
in good working condition.
4. Replace or repair damaged or worn parts immediately.
5. Always check and tighten hardware and assembled parts
before operation.
6. Do not exceed equipment maximum load capacity of
300 lbs (136 kg).
7. Avoid large holes and ditches when transporting loads.
8. Be careful when operating on steep grades (i.e. hills); the
cart could tip over.
9. Always use caution when loading and unloading the cart
to avoid tipping.
10. Never tow the cart with a motorized vehicle.
11. Always keep hands and feet clear from moving parts while
operating the equipment.
12. Always keep the work area clean and clear.
13. Always wear safety gear (e.g. eye protection, gloves,
works boots) when loading and unloading the cart.
mWARNING! Some dust and debris created by the
use of the tool could contain chemicals known to the State
of California to cause cancer and birth defects or other
reproductive harm. Some examples of these chemicals are:
• Chemicals in fertilizers
• Compounds in insecticides, herbicides, and pesticides
• Arsenic and chromium from chemically treated lumber
Your risk from exposure to these chemicals varies, and
depends on how often you do this type of work. To reduce
your exposure, work in a well-ventilated area and with
approved safety equipment, such as dust masks that are
specially designed to lter out microscopic particles.
mWARNING! California Proposition 65:
This product contains chemicals known to the State
of California to cause cancer, birth defects, or other
reproductive harm.
2
EN

Know Your Garden + Utility Cart
1
2
3
4
8
5
6
910
7
1. Removable front panel
2. Handle tube
3. Side panel (2)
4. Side angle clamp (2)
5. Supporting tube
6. Axle
7. Wheel (2)
8. Supporting strap (2)
9. Front angle clamp
10. Bottom panel
11. M6 x 50 screw (8)
12. M6 x 30 screw (4)
13. M6 x 25 screw (15)
14. Cotter pin (4)
15. Handle knob (8)
16. M6 hex nuts (19)
17. Flat washer (23)
18. Lock washer (4)
19. Large at washer (4)
20. Axle clamp (2)
21. Wrench
Technical Data
Heaping Load Capacity 7 cubic foot
Weight Capacity 300 lbs (136 kg)
Cart material Plywood + steel
Wheels 20 in. (50.8 cm) bicycle wheels
Removable Front Panel Yes
Weight 55 lbs (25 kg)
3
11
12 13
14 15
16 17 18 20
19
21

Assembly
Your garden + utility cart requires assembly. Account for all
parts and hardware before beginning assembly. If any parts
are missing or damaged, or if you have any questions or need
additional instructions, Please call the Snow Joe®+ Sun Joe®
customer service center at 1-866-SNOWJOE
(1-866-766-9563).
NOTE: When assembling your cart, place the heads of all
screws to the inside and hex nuts with at washers to the
outside.
NOTE: The wheels may be sent in an under-inated condition.
Use a standard bicycle pump to inate as needed.
Tools needed:
• Wrench (included)
• Screwdriver (not included)
1. Lay the front angle clamp down (at) on oor and stand
the bottom panel on the front angle clamp. Align the three
holes in the bottom panel with the three holes in the front
angle clamp (Fig. 1).
2. Push three M6 x 25 screws through the bottom panel and
the front angle clamp. Secure the screws with at washers
and hex nuts, and tighten (Fig. 2).
3. Turn the front angle clamp and bottom panel upside
down, and lay the side angle clamps on the bottom panel
(Fig. 3).
4. Secure the axle clamps to the side angle clamps and
the bottom panel by using four M6 x 30 screws, lock
washers and hex nuts. Do not tighten until the axle is fully
assembled (Fig. 4).
5. Secure the side angle clamps and bottom panel together
with four M6 x 25 screws, at washers, and hex nuts.
Tighten the four nuts (Fig. 5).
Fig. 1
Bottom panel
Front angle clamp
Fig. 2
M6 x 25
screws
Flat washer
Hex nut
Fig. 3
Side angle
clamp
Front angle
clamp
Side angle
clamp Bottom
panel
Fig. 4
Axle clamp Lock washers
Hex nuts
Axle clamp Lock
washers
Hex nuts
M6 x 30
screws
Fig. 5
M6 x 25
screws
Flat
washer
Hex nut
Hex nut
Flat
washer
4

6. Stand the cart on end with the front angle clamp down on
the oor. Temporarily place the four large at washers on
the inside of the front angle clamp (Fig. 6).
7. Lay the front panel down onto the front angle clamp, on
top of the four large washers (Fig. 7).
NOTE: The washers are used here as shims (spacers) and not
for assembly. They will be removed and used for wheel and
axle assembly.
8. Position a side panel against a side angle clamp, resting
on top of the front panel (Fig. 8).
9. Secure a supporting strap on the side angle clamp and
the front angle clamp by two M6 x 25 screws, 2 at
washer, and 2 hex nuts (Fig. 9).
10. Secure the side panel with the side angle clamp by a
M6 x 25 screw, a at washer, and a hex nut (Fig. 10).
11. Secure the side panel with the front angle clamp by a
M6 x 25 screw, a at washer, and a hex nut (Fig. 11).
Fig. 6
Large washers
Fig. 7
Front panel
Fig. 8
Side angle
clamp
Front panel
Side panel
Bottom
panel
M6 x 25
screw
Fig. 9
Supporting
strap
Flat
washers
Hex nuts
Side panel
Front
panel
Front angle
clamp
Side angle
clamp
Flat washer
Fig. 10
Side
panel
Side angle
clamp
M6 x 25
screw
Hex nut
Front
panel
Bottom
panel
5

12. Repeat steps 8 – 11 to assemble the other side panel.
13. Lay the cart box in the upright position. Remove the front
panel by sliding it up and remove the four large washers
used as shims (Fig. 12).
14. Assemble the supporting tube using four M6 x 50 screws
through the side panels and the supporting tube. Secure
with at washers and handle knobs (Fig. 13).
15. Place the handle tube over the side panels and line up the
four holes. Assemble using four M6 x 50 screws through
the side panels and handle tube. Secure with at washers
and handle knobs (Fig. 14).
16. Lay the cart upside down. Slide the axle through the axle
clamps (Fig. 15).
Fig. 11
Side panel
Front angle
clamp
M6 x 25
screw
Flat washer
Hex nut
Fig. 12
Front
panel
Large
washers
Fig. 13
Supporting
tube
Handle
knobs
Flat washer
Flat washer
M6 x 50
screws
Fig. 14 Handle
tube
Handle
knobs
Flat washer
Flat washer
M6 x 50
screws
6

17. Insert a cotter pin into the inner hole on the axle, and bend
each tip of the cotter pin outward and backward around
the axle to secure it (Fig. 16).
18. Then place a large washer, an inated wheel, and another
large washer onto the axle (Fig. 17).
19. Secure the wheel with another cotter pin on the outer hole
at the end of the axle (Fig. 18).
20. Repeat steps 17 – 19 to assemble the other wheel.
21. Tighten the two nuts on the axle clamps on both sides
(Fig. 18).
22. Turn cart right side up so the cart rests on its wheels. Slide
the front panel in to complete assembly (Fig. 19).
Fig. 15
Axle
Axle clamps
Fig. 16
Cotter pin
Cotter pin tips
Wheel
Fig. 17
Large washer
Large
washer
Fig. 18
Cotter
pin
Nuts
Front
panel
Fig. 19
7

Maintenance + Storage
1. Before operating, grease or oil wheel bearings, use
automotive bearing grease or heavy weight oil.
2. Periodically tighten all screws to make sure everything is
secured before operating.
3. Before operating make sure the tire pressure is within
15 – 20 PSI.
4. After each use, clean the cart thoroughly.
5. Annually, apply a light coat of varnish to all wood surfaces.
6. Use a glossy black enamel spray paint to touch up
scratched or worn painted metal surfaces.
7. Never exceed load capacity rating of 300 lbs (136 kg). It
will damage the cart.
8. Store indoors during severe weather and winter months.
NOTE: If a part needs replacement, only use parts that meet
the manufacturer’s specications. Replacement parts that do
not meet specications may result in a safety hazard or poor
performance.
Service + Support
If your Sun Joe®SJGC7 garden cart requires service or
maintenance, please call Snow Joe®+ Sun Joe®customer
service at 1-866-SNOWJOE (1-866-766-9563) for assistance.
Model + Serial Numbers
When contacting the company or arranging service from an
authorized dealer, you will need to provide the model and serial
numbers, which can be found on the decal located on the cart.
Copy these numbers into the space provided below.
Model #:
Serial #:
S J G C 7
8

9
SNOW JOE®+ SUN JOE®CUSTOMER PROMISE
GENERAL CONDITIONS:
Snow Joe®+ Sun Joe®operating under Snow Joe®, LLC warrants
this new product to the original purchaser for two years against
defects in material or workmanship when used for normal
residential purposes. If a replacement part or product is needed,
it will be sent free of charge to the original purchaser except as
noted below.
The duration of this warranty applies only if the product is put
to personal use around the household. If the product is put to
any business, commercial or industrial use or is rented or leased,
then the duration of this warranty is 90 days from the date of
original purchase. It is the owner’s responsibility to correctly
perform all maintenance and minor adjustments explained in
the owner’s manual.
HOW TO OBTAIN YOUR REPLACEMENT PART OR PRODUCT:
To obtain a replacement part or product, please visit
instructions. Please be sure to register your unit beforehand to
speed up this process. Failure to register your product purchase
will not diminish you warranty rights. Certain products may require
a serial number, typically found on the decal axed to the housing
or guard of your product. All products require a valid proof
of purchase.
EXCLUSIONS:
• Wearing parts like belts, augers, chains and tines are
not covered under this warranty. Wearing parts can be
purchased at snowjoe.com or by calling 1-866-SNOWJOE
(1-866-766-9563).
• Batteries are covered in full for 90-days from the date of
purchase.
Snow Joe®+ Sun Joe®may from time to time change the design
of its products. Nothing contained in this warranty shall be
construed as obligating Snow Joe®+ Sun Joe®to incorporate
such design changes into previously manufactured products, nor
shall such changes be construed as an admission that previous
designs were defective.
This warranty is intended to cover product defects only.
Snow Joe®, LLC is not liable for indirect, incidental or
consequential damages in connection with the use or misuse of
the Snow Joe®+ Sun Joe®products covered by this warranty.
This warranty does not cover any cost or expense incurred
by the purchaser in providing substitute equipment or service
during reasonable periods of malfunction or non-use of this
product while waiting for a replacement part or unit under this
warranty. Some states do not allow exclusions of incidental or
consequential damages so the above exclusions may not apply
in all states. This warranty may give you specic legal rights in
your state.
HOW TO REACH US:
We’re here to help Monday through Friday from 9AM to 6PM EST.
You can reach us at 1-866-SNOWJOE (1-866-766-9563), online
@snowjoe.
EXPORTS:
Customers who have purchased Snow Joe®+ Sun Joe®
products exported from the United States and Canada should
contact their Snow Joe®+ Sun Joe®distributor (dealer) to obtain
information applicable to your country, province or state. If for
any reason, you are not satised with the distributor’s service,
or if you have diculty obtaining warranty information, contact
your Snow Joe®+ Sun Joe® seller. If in the event your eorts are
unsatisfactory, please reach out to us directly.
ABOVE ALL ELSE, Snow Joe®+ Sun Joe®are dedicated to you, our customer. We strive to make your experience as pleasant
as possible. Unfortunately, there are times when a product does not work or breaks under normal operating conditions. We
think it’s important that you know what you can expect from us. That’s why we created the Snow Joe®+ Sun Joe®promise.
OUR PROMISE: Snow Joe®+ Sun Joe®warrant new products for two years from the date of purchase. If your product does
not work, or there’s an issue with a specic part, we will x this by either sending you a free replacement part or by sending
you a new or comparable product at no charge. How cool is that! Before you know it, you’ll be back in action cutting,
sawing, mowing, washing and…?

10
¡IMPORTANTE!
Instrucciones de seguridad
Todos los operadores deberán leer
estas instrucciones antes del uso
Siga siempre estas normas de seguridad. No hacerlo
podría resultar en lesiones corporales severas o daños a la
propiedad.
Uso indicado
Esta carretilla para labores de jardinería y domésticas está
diseñada para cargar materiales y equipos ligeros de patio
y jardín. Es ideal para cargar césped, tierra de macetas,
fertilizantes y herramientas de jardinería.
m¡ADVERTENCIA! Al operar la carretilla, nunca exceda
la capacidad máxima de 300 lb (136 kg).
Seguridad general
m¡ADVERTENCIA! Las advertencias, precauciones e
instrucciones descritas en este manual pueden no cubrir todas
las posibles condiciones o situaciones que puedan darse. El
operador debe entender que el sentido común y la precaución
son factores los cuales no pueden ser incorporados en este
producto, y deben ser suministrados por el operador.
m¡ADVERTENCIA! Este producto contiene productos
químicos, que de acuerdo con el Estado de California
producen cáncer, defectos de nacimiento u otros daños
reproductivos.
1. No intente en ningún momento llevar pasajeros (sentados
o de pie) sobre la carretilla.
2. No permita que los niños jueguen sobre, se paren encima
de, o trepen a la carretilla.
3. Inspeccione siempre la carretilla antes de usarla para
comprobar que esté en buenas condiciones de trabajo.
4. Reemplace o repare partes dañadas o gastadas
inmediatamente.
5. Antes de la operación, verique y ajuste los accesorios de
montaje y partes ensambladas.
6. No exceda la capacidad máxima de carga del equipo de
300 lb (136 kg).
7. Evite huecos grandes y zanjas al transportar las cargas.
8. Tenga cuidado al operar en pendientes inclinadas (p. ej.,
colinas). La carretilla puede volcarse.
9. Tenga siempre cuidado al cargar y descargar la carretilla
para evitar su volcadura.
10. Nunca remolque la carretilla con un vehículo motorizado.
11. Mantenga siempre las manos y pies alejados de las partes
móviles durante la operación del equipo.
12. Mantenga siempre el área de trabajo limpia y despejada.
13. Use siempre equipos de protección (p. ej., protección
ocular, guantes, botas para trabajo) al cargar y descargar
la carretilla.
m ¡ADVERTENCIA! Ciertos polvos y residuos creados
por el uso de la herramienta pueden contener productos
químicos que, de acuerdo con el Estado de California,
producen cáncer, defectos de nacimiento u otros daños
reproductivos. Algunos ejemplos de estos materiales son:
• Compuestos químicos en fertilizantes;
• Compuestos en insecticidas, herbicidas y pesticidas; y
• Arsénico y cromo de madera tratada químicamente.
Su nivel de riesgo por exposición a estos químicos varía, y
depende de la frecuencia en que usted realiza este tipo de
trabajo. Para reducir su exposición, trabaje en un área bien
ventilada y utilice equipos de seguridad aprobados, tales
como máscaras contra polvo diseñadas especialmente para
ltrar partículas microscópicas.
m ¡ADVERTENCIA! Proposición 65 de California:
este producto contiene productos químicos que, de acuerdo
con el Estado de California producen cáncer, defectos de
nacimiento u otros daños a la reproducción.
ES

11
Conozca su carretilla para labores de jardinería y
domésticas
1
2
3
4
8
5
6
910
7
1. Panel frontal desmontable
2. Tubo de agarradera
3. Panel lateral (x2)
4. Abrazadera lateral en ángulo (x2)
5. Tubo de apoyo
6. Eje
7. Rueda (x2)
8. Brida de sujeción (x2)
9. Abrazadera frontal en ángulo
10. Panel inferior
11. Tornillo M6 x 50 (x8)
12. Tornillo M6 x 30 (x4)
13. Tornillo M6 x 25 (x15)
14. Pasador (x4)
15. Tuerca de mariposa (x8)
16. Tuercas hexagonales M6 (x19)
17. Arandela plana (x23)
18. Arandela de presión (x4)
19. Arandela plana grande (x4)
20. Sujetador de eje (x2)
21. Llave
Datos técnicos
Capacidad de volumen de carga 7 pie3
Capacidad de peso 300 lb (136 kg)
Materiales de carretilla Madera contrachapada y
acero
Ruedas Ruedas de bicicleta de
20 plg (50.8 cm)
Panel frontal desmontable Sí
Peso 25 kg (55 lb)
11
12 13
14 15
16 17 18 20
19
21

Ensamblado
Su carretilla labores de jardinería y domésticas requiere
ensamblado. Verique que todas las partes y hardware estén
presentes antes de empezar a ensamblarla. Si alguna parte
está perdida o dañada, o si usted tiene preguntas o necesita
instrucciones adicionales, llame a la central de servicio al
cliente Snow Joe®+ Sun Joe®al 1-866-SNOWJOE
(1-866-766-9563).
Nota:al ensamblar su carretilla, coloque los cabezales de
todos los tornillos al interior, y las tuercas hexagonales con
arandelas planas al exterior.
Nota:las ruedas pueden llegar desinadas. Use una bomba
para neumáticos de bicicleta para inarlas según se requiera.
Herramientas necesarias:
• llave (incluida)
• destornillador (no incluido)
1. Sobre una supercie plana, recueste la abrazadera frontal
en ángulo, y coloque de forma vertical el panel inferior
sobre la abrazadera frontal en ángulo. Alinee los tres
oricios en el panel inferior con los tres oricios en la
abrazadera frontal en ángulo (Fig. 1).
2. Empuje tres tornillos M6 x 25 a través del panel inferior y
la abrazadera frontal en ángulo. Asegure los tornillos con
las arandelas planas y tuercas hexagonales, y apriete
(Fig. 2).
3. Gire la abrazadera frontal en ángulo y panel inferior al
revés, y coloque las abrazaderas laterales en el panel
inferior (Fig. 3).
4. Asegure los sujetadores de eje a las abrazaderas laterales
en ángulo y al panel inferior usando cuatro tornillos
M6 x 30, contratuercas y tuercas hexagonales. No apriete
hasta que el eje esté completamente ensamblado (Fig. 4).
5. Asegure las abrazaderas laterales en ángulo con el panel
inferior usando los cuatro tornillos M6 x 25, arandelas
planas y tuercas hexagonales. Ajuste las cuatro tuercas
hexagonales (Fig. 5).
Fig. 1
Panel inferior
Abrazadera frontal
en ángulo
Fig. 2
Tornillos
M6 x 25
Arandela
plana
Tuerca
hexagonal
Fig. 3
Abrazadera
lateral en
ángulo
Abrazadera
frontal en
ángulo
Abrazadera
lateral en
ángulo
Panel
inferior
Fig. 4
Sujetador
de eje
Arandelas de presión
Tuercas
hexagonales
Sujetador
de eje
Arandelas
de presión
Tuercas
hexagonales
Tornillos
M6 x 30
Fig. 5
Tornillos
M6 x 25
Arandela
plana
Tuerca
hexagonal
Tuerca
hexagonal
Arandela
plana
12

6. Coloque la carretilla sobre su extremo, con la abrazadera
frontal en ángulo sobre el piso. Coloque temporalmente
las cuatro arandelas planas grandes en el lado interno de
la abrazadera frontal en ángulo (Fig. 6).
7. Pose el panel frontal sobre la abrazadera frontal en
ángulo, encima de las cuatro arandelas grandes (Fig. 7).
Nota: las arandelas grandes son usadas aquí como calzas
(espaciadores) y no se ensamblarán. Serán retiradas y usadas
para el ensamblado de las ruedas y eje.
8. Posicione un panel lateral contra una abrazadera lateral
en ángulo, posándolo verticalmente sobre el panel frontal
(Fig. 8).
9. Asegure una brida de sujeción entre la abrazadera lateral
en ángulo y la abrazadera frontal en ángulo mediante dos
tornillos M6 x 25, dos arandelas planas y dos tuercas
hexagonales (Fig. 9).
10. Asegure el panel lateral con la abrazadera lateral en
ángulo mediante un tornillo M6 x 25, una arandela plana y
una tuerca hexagonal (Fig. 10).
Fig. 6
Arandelas grandes
Fig. 7
Panel frontal
Fig. 8
Abrazadera
lateral en
ángulo
Panel frontal
Panel lateral
Panel
inferior
Tornillo
M6 x 25
Fig. 9
Brida de
sujeción
Arandela
plana
Tuerca
hexagonal
Panel lateral
Panel
frontal
Abrazadera
frontal en
ángulo
Abrazadera
lateral en
ángulo
13

11. Asegure el panel lateral con la abrazadera frontal en
ángulo mediante un tornillo M6 x 25, una arandela plana y
una tuerca hexagonal (Fig. 11).
12. Repita los pasos 8, 9, 10 y 11 para ensamblar el otro
lateral.
13. Coloque el cajón de la carretilla en posición recta. Retire
el panel frontal deslizándolo hacia arriba, y retire las
cuatro arandelas grandes usadas como cuñas (Fig. 12).
14. Ensamble el tubo de apoyo usando cuatro tornillos
M6 x 50 a través de los paneles laterales y el tubo de
apoyo. Asegúrelo con arandelas planas y tuercas de
mariposa (Fig. 13).
15. Coloque el tubo de agarradera por sobre los paneles
laterales y alinee los cuatro oricios. Instálelo usando
cuatro tornillos M6 x 50 a través de los paneles laterales
y tubo de agarradera. Asegúrelo con arandelas planas y
tuercas de mariposa (Fig. 14).
Fig. 10
Panel
lateral
Abrazadera
lateral en
ángulo
Tornillo
M6 x 25
Tuerca
hexagonal
Panel
frontal
Panel
inferior
Arandela
plana
Fig. 11
Panel
lateral
Abrazadera
frontal en
ángulo
Tornillo
M6 x 25
Arandela plana
Tuerca
hexagonal
Fig. 12
Panel
frontal
Arandelas
grandes
Fig. 13
Tubo de
apoyo
Tuercas de
mariposa
Arandela
plana
Arandela
plana
Tornillos
M6 x 50
14

16. Voltee la carretilla al revés. Deslice el eje a través de los
sujetadores de eje (Fig. 15).
17. Inserte un pasador dentro del oricio interno del eje,
y doble cada punta del pasador hacia afuera y atrás,
alrededor del eje, para asegurarlo (Fig. 16).
18. Luego coloque una arandela grande, una llanta inada, y
otra arandela grande dentro del eje (Fig. 17).
19. Asegure la rueda con otro pasador en el oricio exterior
en el extremo del eje (Fig. 18).
20. Repita los pasos 17, 18 y 19 para ensamblar la otra rueda.
21. Apriete las dos tuercas en cada sujetador de eje (Fig. 18).
Fig. 14 Tubo de
agarradera
Tuercas de
mariposa
Arandela
plana
Arandela
plana
Tornillos
M6 x 50
Fig. 15
Eje
Sujetadores de eje
Fig. 16
Pasador
Puntas de pasador
Rueda
Fig. 17
Arandela
grande Arandela
grande
Fig. 18
Pasador
Tuercas
15

22. Dé vuelta la carretilla y apóyela sobre sus ruedas. Deslice
el panel frontal para completar el ensamblado (Fig. 19).
Mantenimiento y
almacenamiento
1. Antes de operar la carretilla, engrase o aceite los
rodamientos de la ruedas. Use grasa para rodamientos o
aceite espeso para autos.
2. Antes de operar la carretilla, apriete periódicamente todos
los tornillos para que todo esté asegurado.
3. Antes de operar la carretilla, asegúrese de que la presión
de las llantas esté entre 15 PSI y 20 PSI.
4. Luego de cada uso, limpie a fondo la carretilla.
5. Anualmente, aplique una ligera capa de barniz a todas las
supercies de madera.
6. Use pintura negra en aerosol de esmalte brillante para
retocar las supercies de metal rasguñadas o con la
pintura gastada.
7. Nunca exceda la máxima capacidad de carga de
300 lb (136 lb). La carretilla se dañará.
8. Guárdela en interiores durante climas extremos y los
meses de invierno.
Nota: si una parte necesita reemplazo, use solo partes que
cumplan con las especicaciones del fabricante. Las partes
de repuesto que no cumplan con las especicaciones del
fabricante pueden resultar en un peligro para la seguridad o
bajo rendimiento.
Servicio y soporte
Si su carretilla para jardín Sun Joe®SJGC7 requiere servicio
o mantenimiento, comuníquese con la central de servicio al
cliente Snow Joe®+ Sun Joe®llamando al 1-866-SNOWJOE
(1-866-766-9563) para asistencia.
Modelo y número de serie
Al contactar a la empresa o programar una reparación en un
centro autorizado, usted necesitará proporcionar el modelo
y número de serie, los cuales se encuentran en la etiqueta
ubicada en la carcasa de la unidad. Copie estos números en el
espacio proporcionado a continuación.
Nº de modelo:
Nº de serie:
S J G C 7
Fig. 19
Panel frontal
16

17
CONDICIONES GENERALES:
Snow Joe®+ Sun Joe®, operando bajo el nombre de
Snow Joe®, LLC, garantizan al comprador original de este
producto por dos (2) años contra defectos en materiales o mano
de obra cuando se utilice para propósitos residenciales normales.
Si se necesita una parte de repuesto o producto, será enviado al
comprador original sin costo alguno, excepto tal como se indica
a continuación.
La duración de esta garantía es aplicable solo si el producto se
utiliza para uso personal en la vivienda. Si el producto se utiliza
para cualquier uso empresarial, comercial o industrial, o si es
rentado o alquilado con opción de compra, entonces la duración
de esta garantía es de noventa (90) días a partir de la fecha de la
compra original. Es responsabilidad del propietario llevar a cabo
de forma correcta todos los trabajos de mantenimiento y ajustes
menores que se explican en el manual del propietario.
CÓMO OBTENER SU PARTE DE REPUESTO O PRODUCTO:
Para obtener un producto o pieza de repuesto, visite snowjoe.
instrucciones. Asegúrese de registrar su unidad de antemano para
acelerar este proceso. Sus derechos de garantía no disminuirán
si usted deja de registrar su máquina. Algunos productos pueden
requerir un número de serie, que se encuentra usualmente en la
calcomanía jada en la carcasa o guarda de su producto. Para
todos los productos se requiere un comprobante de compra
válido.
EXCLUSIONES:
• Partes gastadas como correas, barrenas, cadenas y cuchillas
no están cubiertas bajo esta garantía. Las partes que se
desgasten pueden ser reemplazadas comprando sus
repuestos en snowjoe.com o llamando al 1-866-SNOWJOE
(1-866-766-9563).
• Las baterías están cubiertas totalmente por la garantía durante
los noventa (90) días posteriores a la fecha de compra.
Ocasionalmente, Snow Joe®+ Sun Joe®pueden cambiar el
diseño de sus productos. Ninguna armación contenida en
esta garantía se interpretará como si se obligara a Snow Joe®
+ Sun Joe®a incorporar tales cambios de diseño en productos
previamente fabricados, ni se considerará que tales cambios sean
considerados como una admisión de que los diseños anteriores
fueran defectuosos.
Esta garantía tiene por objeto solo cubrir defectos del producto.
Snow Joe®, LLC no se responsabiliza por daños y perjuicios
indirectos, incidentales o consecuenciales en relación con el uso
de los productos de Snow Joe®+ Sun Joe®cubiertos por esta
garantía. Esta garantía no cubre ningún costo o gasto incurrido
por el comprador al proporcionar equipos sustitutos o servicio
durante períodos razonables de avería o no utilización de este
producto, mientras espera por una parte de repuesto o producto
bajo esta garantía. Algunos estados no permiten las exclusiones
de los daños y perjuicios incidentales o consecuenciales, de
modo que es posible que las exclusiones antes señaladas no
sean aplicables en todos los estados. Esta garantía le puede
otorgar derechos legales especícos en su estado.
CÓMO CONTACTARNOS:
Estamos para atenderle de lunes a viernes de 9 AM a 6 PM, Hora
del Este de los EE.UU. Puede llamarnos al 1-866-SNOWJOE
(1-866-766-9563), visitar nuestro sitio Web en snowjoe.com,
EXPORTACIONES:
Los clientes que hayan adquirido productos Snow Joe®+
Sun Joe®exportados de Estados Unidos y Canadá deberán
contactar a su distribuidor (concesionario) de Snow Joe®+
Sun Joe®para obtener información relativa a su país, estado
o localidad. Si, por cualquier motivo, usted no está satisfecho
con el servicio del distribuidor o tiene dicultades para obtener
información sobre la garantía, contacte a su vendedor autorizado
Snow Joe®+ Sun Joe®. En caso de que esfuerzos sean
insatisfactorios, contáctenos directamente.
LA PROMESA DE SNOW JOE®+ SUN JOE®AL CLIENTE
POR SOBRE TODO, en Snow Joe®+ Sun Joe®estamos dedicados a usted, nuestro cliente. Nos esforzamos por hacer que
su experiencia sea tan placentera como sea posible. Desafortunadamente, hay ocasiones en que un producto no funciona
o se avería bajo condiciones normales de operación. Creemos que es importante que usted sepa qué puede esperar de
nosotros. Es por eso que hemos creado la promesa Snow Joe®+ Sun Joe®.
NUESTRA PROMESA: Snow Joe®+ Sun Joe®garantiza sus nuevos productos por dos (2) años luego de la fecha de
compra. Si su producto no funciona, o hay un problema con una parte especíca, resolveremos este inconveniente
enviándole una pieza de repuesto gratis o un producto nuevo o comparable sin cargo alguno. ¡Un excelente soporte!
Sin que se de cuenta, usted ya estará de vuelta podando, serrando, cortando, lavando, etc.

FR
IMPORTANT!
Consignes de sécurité
Tous les utilisateurs doivent lire
ces instructions avant d’utiliser
l’outil
Suivez toujours ces consignes de sécurité. Ne pas s’y
conformer peut entraîner de graves blessures ou des dégâts
matériels.
Utilisation prévue
Ce chariot de jardinage et tout usage est conçu pour
transporter des matériaux et du matériel légers de jardinage. Il
est idéal pour l’herbe coupée, le terreau, l’engrais et les outils
de jardinage
mAVERTISSEMENT! Ne jamais dépasser la charge
nominale de 136 kg (300 lb) lors de l’utilisation du chariot.
Sécurité générale
mAVERTISSEMENT! Les avertissements, mises
en garde et consignes décrits dans ce manuel ne peuvent
pas couvrir toutes les conditions et situations pouvant se
matérialiser. L’utilisateur doit comprendre que le bon sens et la
prudence sont des facteurs qui ne peuvent pas être intégrés à
ce produit; c’est à lui de se comporter en conséquence.
mAVERTISSEMENT! Ce produit contient des produits
chimiques reconnus par l’État de Californie comme étant
cause de cancer, d’anomalies congénitales ou d’autres eets
néfastes sur la fonction de reproduction.
1. Ne jamais transporter de personnes (assises ou debout)
dans le chariot.
2. Ne pas laisser les enfants jouer dans le chariot, se mettre
debout ou grimper dessus.
3. Toujours inspecter le chariot avant de l’utiliser pour
s’assurer qu’il est en bon état de fonctionnement.
4. Remplacer ou réparer immédiatement les pièces
endommagées ou usées.
5. Avant toute utilisation, vérier la visserie et les pièces
assemblées et serrer au besoin.
6. Ne pas dépasser la charge nominale maximale de
136 kg (300 lb) du chariot.
7. Éviter les gros trous et les fossés pendant le transport de
toute charge.
8. Faire preuve de vigilance quand le chariot est utilisé sur
des pentes escarpées (par exemple, des monticules) : il
pourrait se renverser.
9. Pour éviter qu’il se renverse, toujours faire preuve de
prudence lors du chargement ou du déchargement du
chariot.
10. Ne jamais remorquer le chariot à l’aide d’un véhicule
motorisé.
11. Pendant l’utilisation du chariot, toujours maintenir les
mains et les pieds éloignés des pièces mobiles.
12. Toujours maintenir la zone de travail propre et nette.
13. Toujours porter un équipement de sécurité (p. ex, une
protection oculaire, des gants, des bottines de travail) lors
du chargement ou du déchargement du chariot.
mAVERTISSEMENT! De la poussière et des débris
créés par l’utilisation de cet outil pourraient contenir des
produits chimiques reconnus par l’État de Californie comme
étant cause de cancer, d’anomalies congénitales ou d’autres
eets néfastes sur la fonction de reproduction. Voici quelques
exemples de ces produits chimiques :
• produits chimiques utilisés dans les engrais;
• composés présents dans les insecticides, désherbants et
pesticides;
• arsenic et chrome dans le bois de sciage traité
chimiquement.
Les risques que vous courez en vous exposant à ces produits
chimiques varient et sont fonction de la fréquence à laquelle
vous faites ce type de travaux. Pour réduire votre exposition,
travaillez dans un endroit bien ventilé et portez un équipement
de sécurité homologué, par exemple un masque protecteur
contre la poussière spécialement conçu pour ltrer les
particules microscopiques.
mAVERTISSEMENT! Proposition 65 de l’État de
Californie :
Ce produit contient des produits chimiques reconnus par
l’État de Californie comme étant cause de cancer, d’anomalies
congénitales ou d’autres eets néfastes sur la fonction de
reproduction.
18

Apprenez à mieux connaître votre chariot
de jardinage et tout usage
1
2
3
4
8
5
6
910
7
1. Panneau avant amovible
2. Guidon tubulaire
3. Panneau latéral (2)
4. Support de xation latéral (2)
5. Support tubulaire
6. Axe
7. Roue (2)
8. Barre de soutien (2)
9. Support de xation avant en U
10. Panneau inférieur
11. Vis M6 x 50 (8)
12. Vis M6 x 30 (4)
13. Vis M6 x 25 (15)
14. Goupille fendue (4)
15. Bouton de guidon (8)
16. Écrou hexagonal M6 (19)
17. Rondelle plate (23)
18. Rondelle de blocage (4)
19. Grande rondelle plate (4)
20. Patte de xation d’axe (2)
21. Clé
Données techniques
Capacité 198 dm³ (7 pi³)
Charge nominale 136 kg (300 lb)
Matériaux utilisés Contreplaqué et acier
Roues Roues de bicyclette de
50,8 cm (20 po)
Panneau avant amovible Oui
Poids 25 kg (55 lb)
19
11
12 13
14 15
16 17 18 20
19
21

Assemblage
Ce chariot de jardinage et tout usage nécessite d’être
assemblé. Avant de commencer l’assemblage, vériez
que vous avez bien toutes les pièces et la quincaillerie en
les comptant. Si une pièce quelconque manque ou est
endommagée, si vous avez la moindre question ou si vous
avez besoin d’instructions supplémentaires, n’hésitez pas
à appeler le service clientèle Snow Joe®+ Sun Joe®au
1-866-SNOWJOE (1-866-766-9563).
Remarque : lors de l’assemblage du chariot, placez les têtes
de toutes les vis vers l’intérieur et les écrous hexagonaux et
leur rondelle plate vers l’extérieur.
Remarque : il se peut que les pneus des roues aient été
expédiés en étant insusamment gonés. Au besoin, utilisez
une pompe à vélo pour les goner.
Outils nécessaires :
• clé (fournie)
• tournevis (non fourni)
1. Posez à plat sur le sol le support de xation avant en U
et mettez debout le panneau inférieur en le plaçant sur le
support de xation avant en U. Alignez les trois trous dans
le panneau inférieur à l’aide des trois trous dans le support
de xation avant en U (Fig. 1).
2. Enfoncez trois vis M6 x 25 à travers le panneau inférieur
et le support de xation avant en U. Attachez les vis avec
les rondelles plates et les écrous hexagonaux et serrez
(Fig. 2).
3. Retournez sur eux-mêmes le support de xation avant en
U et le panneau inférieur et posez les supports de xation
latéraux sur le panneau intérieur (Fig. 3).
4. Attachez les pattes de xation d’axe aux supports de
xation latéraux et au panneau inférieur en utilisant
les vis M6 x 30, les rondelles de blocage et les écrous
hexagonaux. Ne pas serrer tant que l’axe n’est pas
entièrement assemblé (Fig. 4).
Fig. 1
Panneau inférieur
Supportdexation
avant en U
Fig. 2
Vis M6 x 25
Rondelle
plate
Écrou
hexagonal
Fig. 3
Support
dexation
latéral
Support
dexation
avant en U
Support de
xationlatéral Panneau
inférieur
Fig. 4
Patte de
xation
d’axe
Rondelles de blocage
Écrous hexagonaux
Patte de
xation
d’axe
Rondelles
de blocage
Écrous hexagonaux
Vis M6 x 30
20
Other manuals for SJGC7
1
Table of contents
Languages:
Other sunjoe Outdoor Cart manuals