manuals.online logo
Brands
  1. Home
  2. •
  3. Brands
  4. •
  5. SUNVILLA
  6. •
  7. Outdoor Fireplace
  8. •
  9. SUNVILLA FHWA10359H Quickspecs

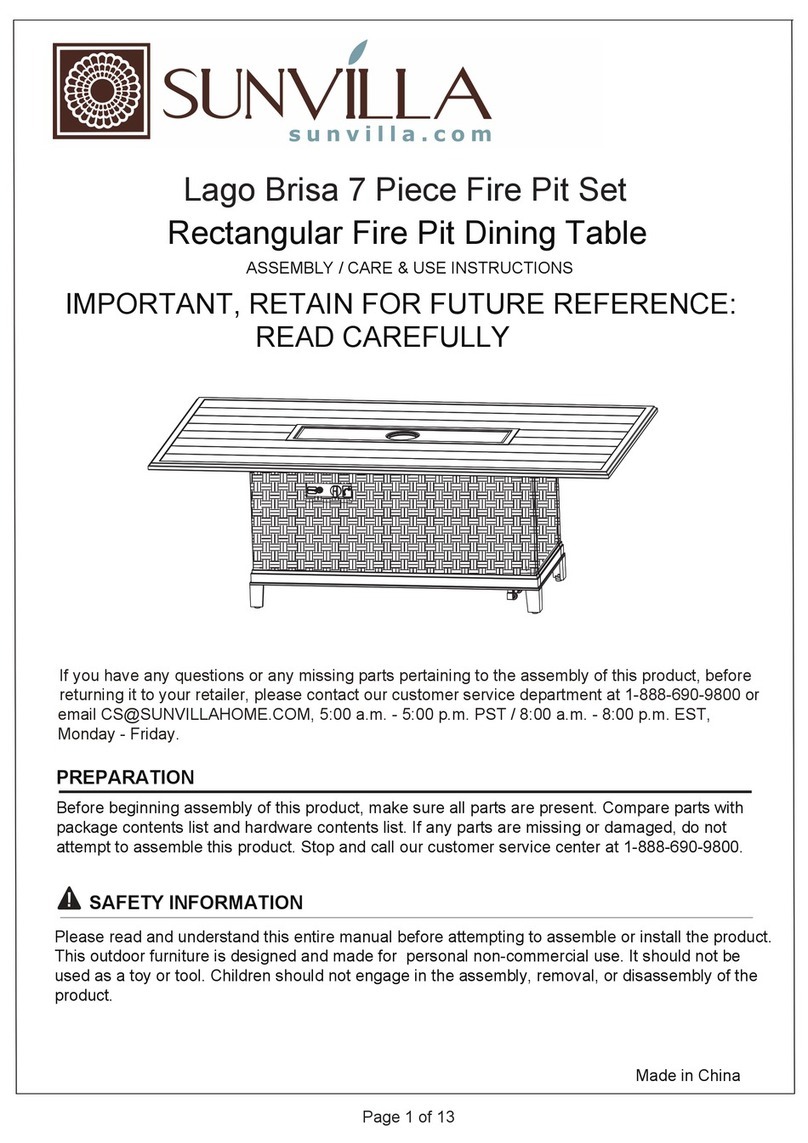
SUNVILLA FHWA10359H Quickspecs

Made in China
INFORMATION SAFETY
Please read and understand this entire manual before attempting to assemble or install the product.
This outdoor furniture is designed and made for personal non-commercial use. It should not be
used as a toy or tool. Children should not engage in the assembly, removal, or disassembly, of the
product.
PAGE 1 OF 16
ASSEMBLY / CARE & USE INSTRUCTIONS
IMPORTANT, RETAIN FOR FUTURE REFERENCE:
READ CAREFULLY
Firepit Table
If you have any questions or any missing parts pertaining to the assembly of this product, before
returning it to your retailer, please contact our customer service department at 1-888-690-9800
or email [email protected], 8:00 a.m. - 5:00 p.m. PT , Monday - Friday.
PREPARATION
Before beginning assembly of this product, make sure all parts are present. Compare parts with
package contents list and hardware contents list. If any parts are missing or damaged, do not
attempt to assemble this product. Stop and call our customer service center at 1-888-690-9800.
ITEM# FHWA10359H
Aluminum Fire Pit Table
1
1
1
1
1
9
PAGE 2 OF 16
D
E1
1
Cover
Decorative Glass Beads
M8*40 Bolt
Wrench
Table Top
Table Base
Table Base
Natural Gas Orifice
AAA Battery (Included)
F
20 LB Propane Tank
(Not Included with Product)
20 LB Propane Tank
(Not Included with Product)
Propane Hose with Regulator
DD
EE
1
1
1
PAGE 3 OF 16
A
BC
9X BB CC
Step 1:
Assembly
Place the table base (B) and table base (C)
onto the fire pit table top (A).
Step 2:
Line up the bolt holes on the table base (B) and table base (C)
with the corresponding bolt holes on the table top (A).
Screw the M8*35 bolts (BB) with the Wrench (CC) as shown.
(* Reminder - The foot cap can be adjusted as shown.)
PAGE 4 OF 16
Step 3:
E
Step 4:
Assembly
Spread the Decorative Glass Beads (E) out evenly
over the burner area. Use all the glass beads provided
for best effect. Keep the glass beads clear of spark
igniter to avoid accidental blockage.
*NOTES:
Glass beads are designed for the high temperature of the fire table.
It is normal from them to crack or split, and some may arrive this way
or split over time.
DO NOT IGNITE OR USE FIRE
TABLE WITHOUT GLASS BEADS
IN THE BURNER.
Open access door
Place 20 LPG (Liquefied Petroleum Gas) tank (not included) into
the table base.
Secure the LPG tank to the table by turning locking knob
clockwise until it stops.
Note: When the regulator is
disconnected from the LPG tank,
hang it on the clamp.
Step 5: Connect Regulator Hose to LPG tank by turning knob clockwise until it stops.
PAGE 5 OF 16
Step 7
Assembly
Open the propane tank valve by rotating the valve
counterclockwise. To ignite slightly push in the knob
and rotate it to the “ ” position as shown while
press the ignitor button.
Battery Installation
Make sure the control Knob is in the “ ” position.
Unscrew the push button cap on the ignition module
located on the control panel to access the battery
compartment. The ignition module requires one AAA
size battery (Included).
AA
Step 6
PAGE 6 OF 16
Step 8:
Assembly
Close the propane tank value after use by rotating
clockwise. Make sure the knob valve is shut
completely off by placing it in the “ ” position.
Step 9:
Wait until the decorative glass beads cool down before placing
the Cover (D) over the burner and onto the fire pit table top (A).
D
Storage of the fire pit table indoors is permissible
only if the 20 LB Propane Tank (DD) is disconnected and
removed from the table.
* Note:
PAGE 7 OF 16
WARNING
HOT! DO NOT TOUCH.
SEVERE BURNS MAY RESULT.
CLOTHING IGNITION MAY RESULT.
Glass and other surfaces are hot
during operation and cool-down
Young children should be carefully supervised when
when they are in the area of the appliance.
Children and adults should be alerted to the hazards
of high surface temperatures and should stay away
to avoid burns or clothing ignition.
Clothing or other flammable materials should not be
hung from the appliance or placed on or near the
appliance.
CAUTION: Hot while in operation. Do not touch keep
burner area clean.
WARNING: For outdoor use only.
Installer: Leave this manual with appliance.
Consumer: Retain this manual for future reference.
Installation and service must be performed by a
qualified installer, service agency, or the gas supplier.
WARNING
Do not store or use gasoline, or other flammable vapors
and liquids, in the vicinity of this or any other appliance.
An LP-cylinder not connected for use shall not be stored
in the vicinity of this or any other appliance.
DANGER
If you smell gas:
Shut off gas to the appliance.
Extinguish any open flame.
If odor continues, leave the area immediately
California Proposition 65: Combustion by-products
produced when using this product contain chemicals
known to the State of California to cause cancer, birth
defects, and other reproductive harm.
California Proposition 65: Wash your hands after
handling this product.
California Proposition 65: Handling the brass material
on this product exposes you to lead, a chemical known
to the State of California to cause cancer, birth defects,
or other reproductive harm.
WARNING
After leaving the area, call your gas supplier or
fire department.
Failure to follow these instructions could result in fire
or explosion, which could cause property damage,
personal injury, or death.
US
C
DANGER CARBON MONOXIDE HAZARD
This appliance can produce carbon monoxide,
which has no odor.
Using it in an enclosed space can kill you.
Never use this appliance in an enclosed
space such as a camper, car or home.
CAUTION
DO NOT DISCARD THIS MANUAL
Important operating and
maintenance instructions
included.
Read, understand, and follow
these instructions for safe
installation and operation.
WARNING
Improper installation, adjustment,
alteration, service, or maintenance
can cause injury or property
damage. Read the installation and
maintenance instructions
thoroughly before installing or
servicing this equipment.
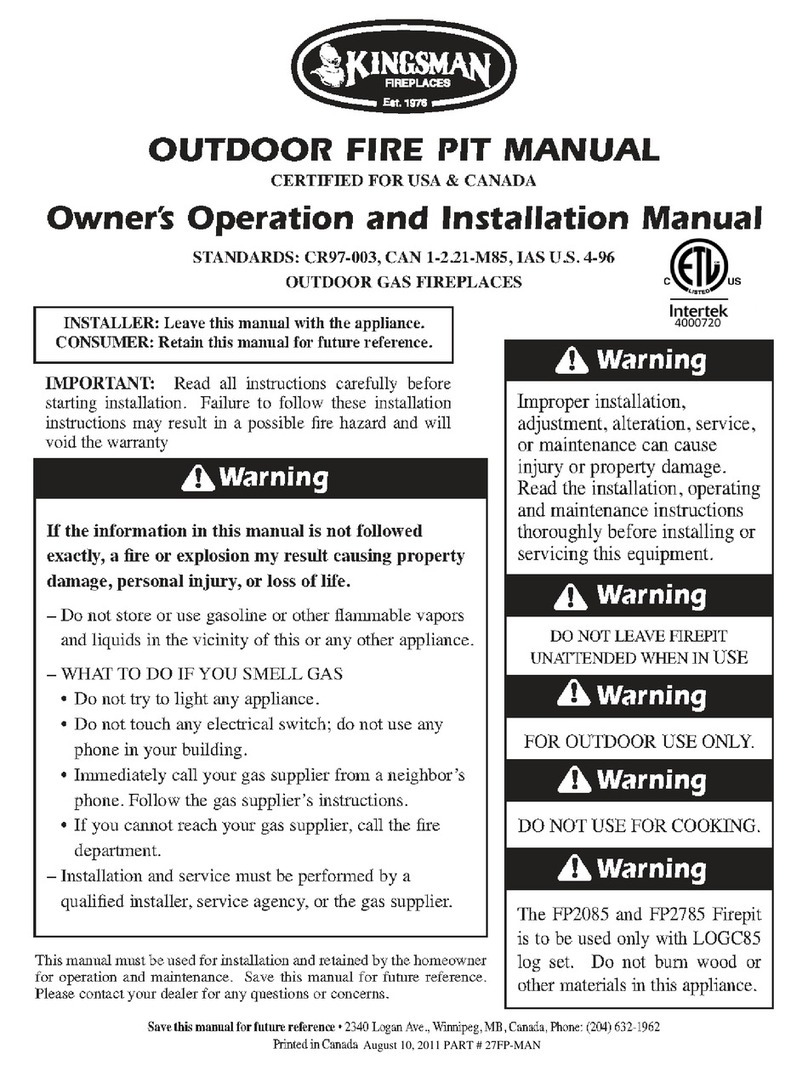
WARNING: If the information in this manual is not followed
exactly, a fire or explosion may result causing property damage,
personal injury, or loss of life.
PAGE 8 OF 16
Installer: Leave these instructions with consumer
Consumer: Keep these instructions for future reference.
This appliance is a Decorative Gas Appliance for OUTDOOR
USE ONLY and MUST NOT be used for cooking.
Gas
Place the Fire Pit on a flat and stable surface in an
outdoor location adjacent to the gas supply line or
LP gas supply cylinder. DO NOT locate the appliance
where it will get excessively wet or submerged in water.
A. Design and Installation Considerations
Safety Glasses
Gloves
Wrench
Before beginning the installation, be sure that the
following tools and supplies are at hand.
B. Tools and Supplies Required
C. Inspect the Appliance and Components
Inspect appliance and components for damage.
Damaged parts may impair safe operation.
DO NOT install damaged, incomplete, or
substitute components.
Report damaged parts to your dealer.
WARNING
Carefully remove all burner
components from packaging.
Read all instructions before beginning
installation. Follow these instructions
carefully during installation to ensure
maximum safety and benefit.
Asphyxiation Risk
This gas appliance is for outdoor
use in a well-ventilated space.
This unit must not be installed
inside an enclosed structure or
unvented area.
WARNING
Never leave Fire Pit unattended for
any amount of time.
Never sit on the Fire Pit.
Never use Fire Pit as a storage unit.
WARNING
The warranty will be voided by the
following actions:
Installation and use of any damaged
components.
Modification of the burner assembly.
Installation other than as instructed
by the factory.
Any such action may cause a fire hazard.
WARNING
dei f i lauq a evaH . retawrednu neeb sah t i fo t rap yna f i ecnai lppa siht esu T ON oD
service technician inspect the appliance and replace any part of the control system and
any gas control which has been underwater. Do not burn solid fuels in this gas
appliance.
WARNING
1. Glass media may have sharp edges. Wear safety glasses and gloves when handling.
2. Pour the glass media evenly in to the burner area (with the exception of the screen-if applicable).
The glass should be 1/2 - 1” above the burner.
3. Keep away from the unit for the first 20 minutes after igniting your unit for the first time, as glass
beads could pop out and cause injury. Should any rocks pop out, discard them.
WARNING
Never dispose battery BATTERY WARNING:
directly into trash and do not throw into fire.
PAGE 9 OF 16
3.5 in w.c. 25 psi
250 psi
PAGE 1 OF 16
Installation and repair should be done by a qualified service person. The appliance should be inspected before use and
at least annually by a qualified service person. More frequent cleaning may be required as necessary. It is imperative
that the control compartment, burners and circulating air passageways of the appliance are kept clean.
*Do not use this fire pit for cooking.
*Do not burn any other materials then are supplied with and intended for use in this fire pit.
*Do not pour water into the fire pit.
*The installation of this product must conform with local codes. In the absence of local codes, use the National Fuel
Gas Code, ANSI Z 223.1/NFPA54. Reference to Natural Gas and Propane Installation code CSA b149.1 or Propane
Storage and Handling code B149.2.
*Do not use this fire pit if any part has been under water.
*Do not store a spare or disconnected liquid propane cylinder under or near this fire pit.
*After a period of storage, and/or non use, the propane fire pit should be checked for gas leaks and burner obstructions before use.
*Do not operate the propane fire pit if there is gas leak present.
*Never use a flame to check for gas leaks.
*Combustible materials should never be within 61” (155 cm) of the top 48” (122 cm) from back or sides of your propane fire pit.
*Do not put any other fire pit cover or anything flammable on, or beneath the fire pit.
*The propane fire pit should never be used by children. Children must be supervised when they are anywhere near the appliance.
*Users should be alerted to the hazards of high surface temperatures and keep a safe distance to avoid burning or clothing ignition.
*Pay attention when operating the fire pit. It is hot in use and should never be left unattended. Do not transit fire pit
while in operation.
*Should the fire go out while burning, turn the gas valve off. Follow the instruction and wait five minutes before attempting to relight.
*Never use charcoal or any other solid fuel in the fire pit. Never parch clothing or other flammable materials on or near the fire pit.
*Never lean over the open fire pit or place hands or fingers on the upper portion of an operational unit.
*Keep ventilation openings in cylinder enclosure ( FIRE PIT BODY ) free and clear of debris.
Always remove protective cover or lid before operating.
*Please take out the battery when not using the fire pit for an extended length of time.
*Do not enlarge valve orifices or burner ports when cleaning the valve or burner. Cylinder supply system must be arranged for
vapor withdrawal.
*LP Tank used must include a collar to protect the cylinder valve. *Never fill the cylinder beyond 80% full.
*The conversion or attempted use of natural gas in a liquid propane unit or liquid propane gas in a natural gas unit is dangerous.
*Do not use this fire pit on vehicles or boats. Always operate the appliance on the flat ground outdoors.
*Keep any electrical supply cord and the fuel supply hose away from any heated surfaces.
*Do not use this fire pit unless all parts are in place.
*Keep the appliance area clear and free from combustible materials, gasoline, and other flammable vapors and li quids.
*Prior to each fire table operation, check the hose for evidence of excessive abrasion or wear by looking through the visual
check hole. If the hose is damaged, cracked or cut, it must be replaced before using the gas fire table. The hose assembly
can only be replaced with a hose assembly specified by the manufacturer. Please call 1-888-690-9800.
*Locate the hose out of pathways where people may trip over it or in areas where the hose may be subject to accidental damage.
Before each use, remove the lava rock or glass beads. Examine the burner and its components. If dirty, clean with a soft brush
and soapy water solution. Also examine the area around the burner. Any dirt or foreign material, such as spider webs or nests in
this area should be removed. If it is evident that the burner is damaged,the fire table must not be used. The burner assembly
can not be replaced. Please call 1-888-690-9800.
*For LP-gas, only a 20 lb supply cylinder is be used and must be:
1) constructed and marked in accordance with the U.S. Department of Transportation (D.O.T.)
Specifications for LP-Gas Cylinders, or the Standard for Cylinders, Spheres and Tubes for Transportation of Dangerous Goods
and Commission, CAN/CSA-B339, as applicable;
2) provided with a listed overfilling prevention device;
3) provided with a cylinder connection device compatible with the connection to the appliance.
PAGE 1 OF 16
Make sure there is a clicking sound when you
press the igniter button. If no clicking sound,
make sure you installed the battery correctly,
with the negative side going to battery
compartment first. Still not working, replace
with a brand new AAA 1.5V battery. If unit still
does not operate, it may require cleaning or
replacement, call our USA Customer Service
Hotline at 1-888-690-9800 for assistance.
Before returning to your retailer, call our USA Customer Service Department at 1-888-690-9800 or email us at
[email protected] 8:00 a.m. - 5:00 p.m. PT / 11:00 a.m. - 8:00 p.m. ET, Monday - Friday. English and Spanish.
Before Storing
CAUTION: NEVER place cover on hot outdoor fireplace.
PAGE 1 OF 16
PAGE 1 OF 16
Screen
DO NOT PLACE GLASS BEADS
ON THE SCREEN. KEEP
SCREEN CLEAR.
PAGE 14 OF 16
Checking for leaks
1.Make 2-3 oz of leak detection solution by mixing one part liquid
dishwashing soap with three parts water.
2.Make sure control knobs are in the “ o ” position (Figure 1)
3.Connect LP gas tank ;
4.Turn LP gas tank valve to “open”;
5.Spoon several drops of solution or use a squirt bottle, at all “X”
locations;
a. If any bubbles appear, turn LP gas tank valve to “CLOSED”,
reconnect and re-rest;
b. If you continue to see bubbles after several attempts turn LP gas
tank valve to “CLOSED” and disconnect LP gas tank, per
“Disconnecting LP Gas Tank" Contact 888-690-9800 for
assistance.
c.
If no bubbles appear after one minute, turn LP gas tank valve to
”CLOSED”, wipe away solution.
LIGHTING
1. Make sure all labels, packaging and protective films have been removed from the outdoor fireplace.
2. Remove cover and lid from outdoor fireplace before lighting.
3. Check for obstructions of airflow to the burner. Spiders, insects and webs can clog the burner/venturi
tube. A clogged burner tube can lead to a fire.
4. Control knob must be in the “ O” position (Figure 1).
5. Clear small area of glass rocks away from the igniter cover.
6. Connect LP gas tank per “Installing LP Gas Tank” section.
7. Turn LP gas tank valve to “OPEN”.
8. Push and hold the electronic igniter to create sparks within the electrode, continue to hold.
9. Push in the control knob and turn to the “ ” position, Keep holding down the control knob to allow gas
to flow for 20 seconds.
10. After 20 seconds, release and turn control knob counterclockwise to adjust flame to desired height.
11. If ignition does not occur in 20 seconds turn burner control knob to “ O” wait 5 minutes, fan with a
newspaper or magazine, and repeat lighting procedure.
12. If igniter does not light burner : (Figure 2)
a. Wearing heat-resistant gloves, position a long lit match or long lit butane lighter near the pilot housing.
b. Push and turn control knob to on.
c. Remove match/lighter once burner is lit.
CAUTION: After lighting, using a fireplace tool and heat-resistant gloves, carefully move the glass
beads back to their proper, position, being careful to avoid the flame.
13. After lighting, observe the burner flame making sure all ports are lit and flame height matches
illustration (Figure 3).
Figure 1 Figure 3
Figure 2
TURNING OFF
1. Turn LP gas tank valve to “ CLOSED”.
2. Turn control knob to the “ O” position. Note: A “poof” sound is normal as the last of the LP gas is burned.
3. Disconnect LP gas tank per “Disconnecting LP Gas Tank” section.
CARE AND MAINTENANCE
Periodic Maintenance For Your Porcelain Stone Tile Table Top
PAGE 5 OF 6
Your stone tabletop is coated at the factory with a protective stone sealan t. The sealer provides
resistance from stains and moisture and helps maintain the stone’s natural color. For optimum
protection, stone tops should be resealed every 6 to 12 months after it has been thoroughly
cleaned of all dirt and debris. Stone sealer is available at most club and hardware stores. Use of
place mats, table runners, and beverage coasters will help in the prevention of scratches, stains,
and will catch potential spills. Use an outdoor furniture cover to protect your investment when
not in use.
Cleaning Your Porcelain Stone Tile Table Top
Maintain the new look of your stone top by removing dust and dirt with plain water periodically.
Occasionally rinse off your table top to prevent debris from settling in and to prevent stains or
discolorations. You can also use a mild detergent mixed with water and scrub the table top with a
soft, clean cloth or sponge. Immediately dry your table top after cleaning to prevent moisture
penetration and water spots. Spills should be cleaned up immediately as they may begin to
penetrate the sealant. For more thorough cleaning of the table top use a water-based
biodegradable cleaner. Avoid ammonia-based cleaners, which can break down the sealant and
possibly damage or discolor the stone. You should never use scouring creams, abrasive cleansers,
vinegar cleaners, acid based products or any alkaline-based products such as ammonia, baking
soda or borax.
Cold Climates
We recommend that your stone top be stored in a dry area in cold climates or be covered with
a suitable outdoor furniture cover. Make a tent with the cover so that it is not touching any part
of the tabletop, this will promote airflow and allow moisture to escape. It is possible that prolonged
contact with snow can cause moisture to penetrate the sealant on the tabletop. Stone is porous,
and if moisture were to enter the stone a nd freeze, the stone may crack. Always sea l the
tabletop before each winter for added protection.
Hot Climates
The porous nature of stone leaves it susceptible to heat retention. Care and caution should be
used when handling a stone top that has been subjected to lengthy sun exposure. It is
recommended that you use this product under a protective shade canopy.
CARE AND MAINTENANCE
Wash with mild soap. Rinse with water and let air dry.
LIMITED WARRANTY
This warranty is extended to the original purchaser and applies to defects in materials and
workmanship of your patio furniture provided your furniture is maintained with care and used only
for personal, residential purposes.
Frames are warranted to be free from defects in material or workmanship.
Straps and/or Wicker Weaves are covered against defects in material or workmanship.
Exclusions: Items used for commercial, contract or other non-residential purposes; display models;
items purchased "as is;" or items damaged due to acts of nature, vandalism, misuse or improper
assembly are not covered. Discoloration or fading of the finish or fabrics as a result of exposure to
the elements, chemicals or spills is not covered. Tabletop breakage, corrosion or rusting of hardware
and damage to frames or welds caused by improper assembly, misuse or natural causes are not
covered.
If within the stated warranty period a product is found to be defective in material or workmanship,
the purchaser must contact the manufacturer's customer service department at 1-888-690-9800.
The manufacturer, at its option, will repair or replace the defective parts.
Warranty is to the original purchaser and is non-transferable. Any replacement of warranted items
will be in the original style and color or a similar style and color if the original is unavailable or has
been discontinued. As some states do not allow exclusions or limitations on an implied warranty,
the above exclusions and limitations may not apply. This warranty gives you specific rights, and you
may also have other rights which vary from state to state.
Sunbrella® fabric is covered for a period of five (5) year against defects in material or workmanship.
Questions, problems, missing parts? Before returni ng to your retailer, call our customer service
department at 1-888-690-9800, 8:00a.m.– 5:00p.m. PST / 11:00a.m. - 8:00p.m., EST, Monday-Friday.
IMPORTANT, RETAIN FOR FUTURE
REFERENCE: READ CAREFULLY
The product will be used for domestic.
Sunvilla Corporation Customer Service Center
14345 Pipeline Ave Chino, CA 91710, USA PAGE 16 OF 16

Other SUNVILLA Outdoor Fireplace manuals

SUNVILLA Carnigie Quickspecs

SUNVILLA

SUNVILLA Carnigie Quickspecs

SUNVILLA Lago Brisa Quickspecs

SUNVILLA

SUNVILLA Lago Brisa Quickspecs

SUNVILLA PAULA DEEN Home 18008327 User manual

SUNVILLA

SUNVILLA PAULA DEEN Home 18008327 User manual

Popular Outdoor Fireplace manuals by other brands

ELEMENTI Bristol owner's manual

ELEMENTI

ELEMENTI Bristol owner's manual

ELEMENTI Fiery Rock OFG147NG owner's manual

ELEMENTI

ELEMENTI Fiery Rock OFG147NG owner's manual

Camp Chef FP40 Warning & instruction booklet

Camp Chef

Camp Chef FP40 Warning & instruction booklet

Patio Glow WT17IL Assembly instructions

Patio Glow

Patio Glow WT17IL Assembly instructions

PEAKTOP HF36501AA Use and care guide

PEAKTOP

PEAKTOP HF36501AA Use and care guide

Backyard Creations OFW871H-M Assembly instructions

Backyard Creations

Backyard Creations OFW871H-M Assembly instructions

Camplux FT30IB Instructions for installation and use

Camplux

Camplux FT30IB Instructions for installation and use

Elements LUME-29R manual

Elements

Elements LUME-29R manual

Flash Furniture YL-230-GG Assembly instructions

Flash Furniture

Flash Furniture YL-230-GG Assembly instructions

Beacon FP0121-P Assembly and care instructions

Beacon

Beacon FP0121-P Assembly and care instructions

for Living Augusta Assembly instructions

for Living

for Living Augusta Assembly instructions

Outdoor GreatRoom Company Providence Fire Pit installation instructions

Outdoor GreatRoom Company

Outdoor GreatRoom Company Providence Fire Pit installation instructions

Signature Design by Ashley P042-776 user guide

Signature Design by Ashley

Signature Design by Ashley P042-776 user guide

Restoration Hardware 26100040 Assembly instructions

Restoration Hardware

Restoration Hardware 26100040 Assembly instructions

Endless Summer GAD15258SP owner's manual

Endless Summer

Endless Summer GAD15258SP owner's manual

Sunnydaze Decor BKI-145 Assembly instructions

Sunnydaze Decor

Sunnydaze Decor BKI-145 Assembly instructions

ELEMENTI OFM101LP owner's manual

ELEMENTI

ELEMENTI OFM101LP owner's manual

CAMBRIDGE Fully Assembled Outdoor Fireplace instruction manual

CAMBRIDGE

CAMBRIDGE Fully Assembled Outdoor Fireplace instruction manual

manuals.online logo
manuals.online logoBrands
  • About & Mission
  • Contact us
  • Privacy Policy
  • Terms and Conditions

Copyright 2025 Manuals.Online. All Rights Reserved.