1. General Safety Instructions
Carefully read all safety warnings, instructions, illustrations and specifications provided with this battery pack.
Failure to follow all instructions listed below may result in electric shock, fire and/or serious injury. The term
"battery pack" in the warnings refers to your mains operated device which is a major part of an energy
storage system.
Please save all warnings and instructions for future reference.
Lithium batteries are classified as Class 9 hazardous material UN3480, a power source with high energy density and dangerous
materials in a closed metal case! All the recommendations contained in this document must be strictly applied in order to ensure
a safe and optimal use of the battery.
1) Misuse of the battery may lead it to overheat or ignite and cause serious injury. Make sure to follow the safety rules listed
below:
a) Never short circuit the battery terminals
b) Do not open the battery
c) Do not reverse the polarity
d) Do not overcharge or over-discharge
e) Always comply with the voltage range given on the battery label
f) Do not disassemble the battery
g) Do not use the battery without its electronic management system
h) Do not subject the battery to excessive mechanical stresses
i) Do not expose the battery to water or condensation
2) Do not place the battery on or near fires, or other high temperature locations (> 70°C). Doing so may cause the battery to
overheat or ignite. Using the battery in this manner may also result in a loss of performance and a shortened life
expectancy.
3) Immediately disconnect the battery if, during operation, battery emits an unusual smell, feels hot, changes shape, or
appears abnormal in any other way.
Dangers involved in case of fire:
1) Danger of dust particle explosions:
a) Decomposition through fire or heat under development of toxic and cauterizing gases
b) Combustion gasses which strongly irritate eyes and respiratory organs
c) General actions to be taken by the driver if these dangers occur:
2) Recommended handling process:
a) Put a warning signal on the road to warn others
b) Inform others about the danger and direct them to stand away from the wind direction
c) Call police and fire fighters immediately and notify them that lithium batteries (UN3480) is onboard
3) Instruction for fire extinguishing:
a) Extinguish with water, if possible cover battery completely in water
b) Extinguishing with water will produce fluoride, phosphate, fluoride-oxide and carbon-oxide.
c) Alternatively extinguish with a CO2 extinguisher.
Important note: when put to storage the battery must be fully charged and must be charged again every 6 months.
2
Warning message will be displayed within the box colored in yellow.
Warning!
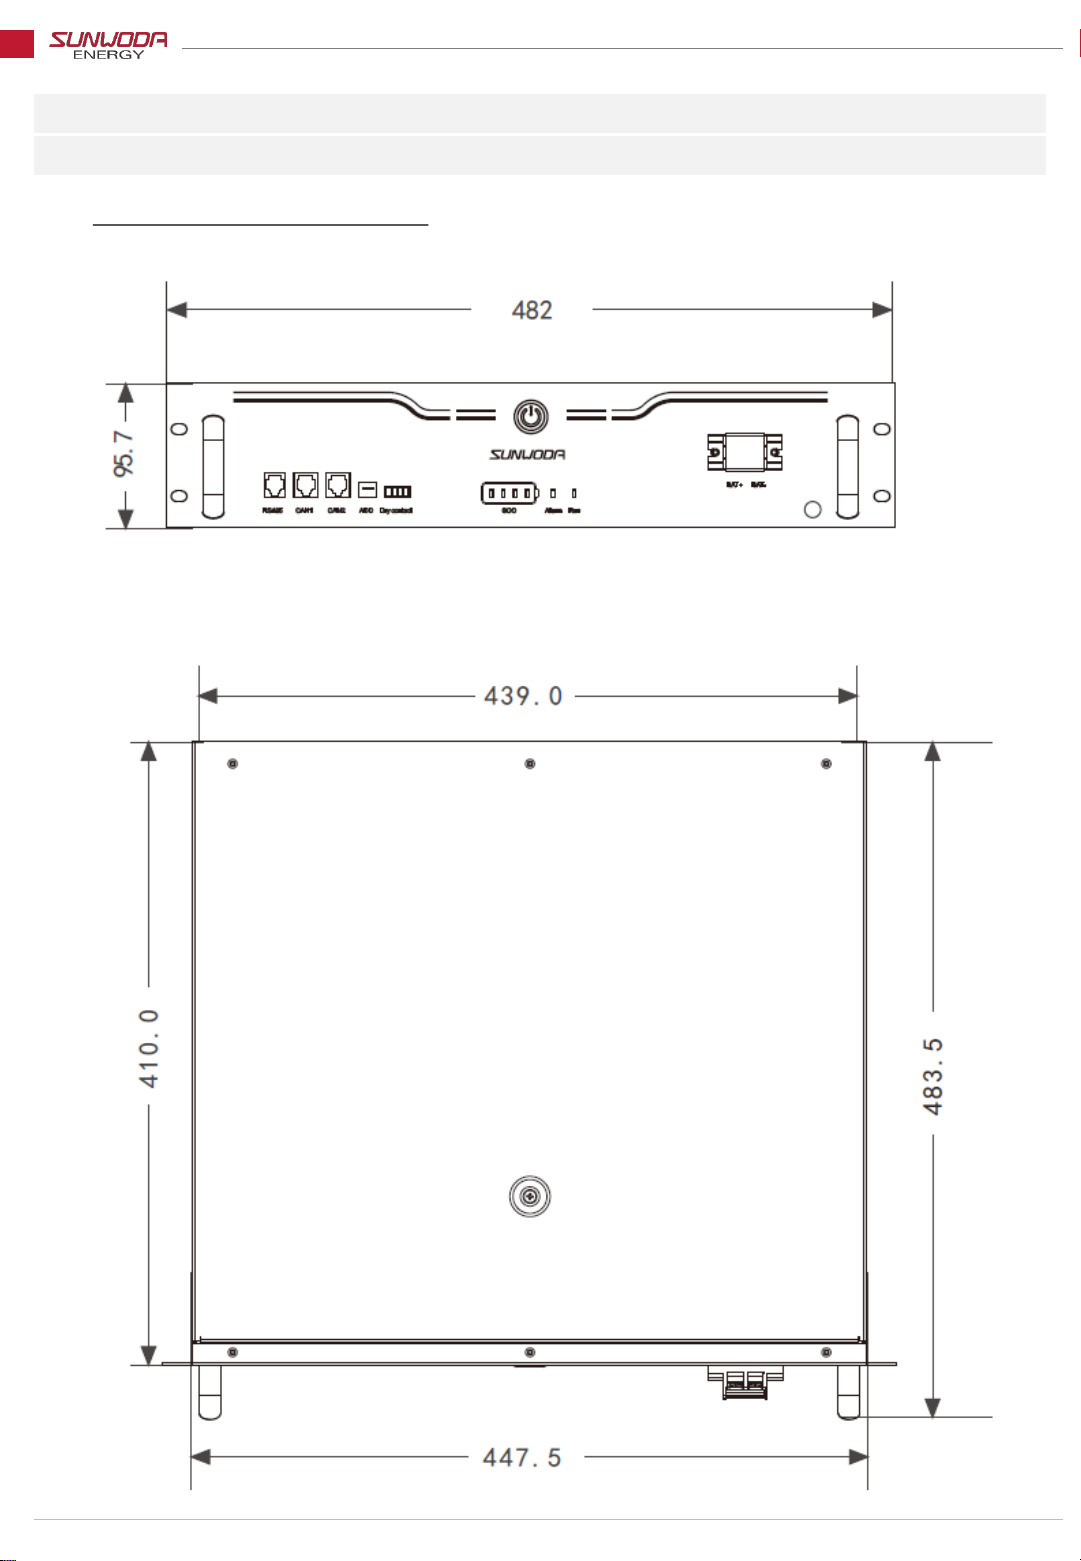
- Instruction Manual for NEO pro B4180 Module -